Getting The Most Out Of A Low-End Laptop
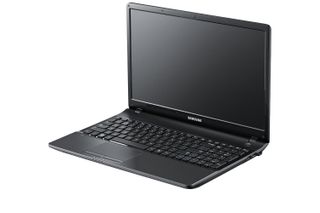
If you are used to trying to get by with a budget laptop, then you know that gaming on these systems can be an unpleasant experience. Although that system will never compete with a true gaming laptop, there are a few ways in which you can improve your gaming performance and make that low-end system into a budget gaming notebook.
The laptop market is one of the most diverse segments of the computer industry, ranging from ultra low-power compact devices with ARM, MIPS or Via processors up to ultra high performance systems with AMD and Intel quad-core CPUs and discrete graphics.
Some of the most powerful systems are targeted as full gaming desktop replacements, featuring robust graphics cards and high definition displays, but those systems can be quite expensive, typically costing over $1,000. Most people shopping for a laptop will instead choose something capable of handling a typical, everyday work load. They want a system with a decent amount of power but priced more conservatively, between $300 and $800. These systems serve that purpose well, but trying to get used to one of these systems for gaming can be difficult. However, there are a few ways you can maximize your system to milk enough performance out of it to get yourself a de facto budget gaming notebook.
Choosing The Right Starting System And Upgrading Hardware
If you are looking to buy a budget gaming laptop, the first thing you need to do is choose a system with decent hardware, and you want to focus on the GPU and display more than anything else. This is not to say that the CPU, RAM, storage, and other aspects of the system aren't important, but these components are typically upgradable nowadays (even the CPU, but more on that in a bit), whereas the GPU and display are not.
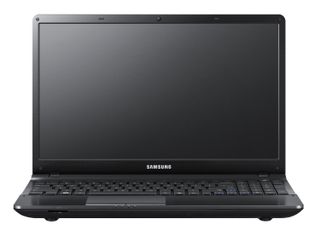
As a tech enthusiast, after purchasing my laptop a while back, I wanted to maximize my experience by applying whatever improvements I could to the system. When searching the Internet for some easy ways to do this, I found next to no information on improving laptop performance. What relevant search results I did find typically frowned on changing the CPU and on overclocking. Upgrading the RAM and storage device were the only changes commonly performed. Not satisfied with these answers, I set out to test the limits to which I could push my system. Although the methods I found to improve my laptop may not work for everyone, many users should be able to apply at least some of the changes I made to their own system.
At the time I started piecing together my budget gaming laptop, it was late 2013 and I was still in college, and I mostly wanted the system for doing work on the go, but I knew I also wanted to play some games, too. I also had to stay under $400. After days of searching, I ended up finding an excellent starting system, a used Samsung NP300E5C-S07TR for just $319 with these initial specs:
| Samsung NP300E5C-S07TR | |
|---|---|
| CPU | Intel Core i5-3210M Dual-Core Hyperthreaded 2.5 GHz (3.1 GHz Max Turbo) |
| GPU | Nvidia GeForce GT 620M 625 MHz w/ 1 GB DDR3 900 MHz |
| RAM | Samsung DDR3 1600 MHz 11-11-11-28-2T 1.65v |
| Storage | Samsung Spinpoint M8 ST1000LM024 1 TB 5,400 RPM 8 MB Cache |
| Display | 1366x768 60 Hz |
I noticed some initial lag while using the laptop, which I suspected was caused by the hard drive and the RAM. Because these parts are easy to access, have little chance of causing compatibility issues, and had potential to resolve my problems, I opted to replace them first.
Stay on the Cutting Edge
Join the experts who read Tom's Hardware for the inside track on enthusiast PC tech news — and have for over 25 years. We'll send breaking news and in-depth reviews of CPUs, GPUs, AI, maker hardware and more straight to your inbox.
As I still had $81 left in my budget to work with, I started by upgrading the RAM. I acquired some higher performance DDR3L on Newegg for $45 during a sale, and then sold the old RAM on Ebay for $60. With the remaining budget, I spent $90 on a Seagate 2.5" Seagate SSHD. (Although an SSD would have provided more performance and an even smoother operating experience, I also needed to be able to keep a great deal of files stored on the system, so the SSHD option gave me a nice balance of performance and capacity.)
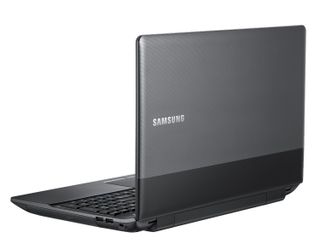
These two upgrades didn't exceed my budget, but they gave my system a noticeable improvement in performance.
I kept the system like this for approximately six months, but the itch to upgrade is hard to ignore for long. Eventually, I saved up some additional funds and decided to upgrade the processor, the last practical component that could be upgraded, and one that many recommend against.
A New CPU
Upgrading the CPU inside of a laptop requires a great deal more consideration than upgrading the RAM or HDD, and in truth, it can be dangerous to the system. Because of the confined space and the limited cooling capacity, laptops can only handle so much heat and supply so much power to the internal hardware. So, when choosing a faster CPU, it is best to stay close to the thermal and power levels of your current CPU.
In my case, the i5-3210M was one of the lowest-performing 35 W TDP processors in the Ivy Bridge mobile lineup, so I limited my selection to other 35 W TDP processors. Even with this limitation, there were still plenty of upgrade options available that offered significantly more performance. For a mixture of performance and price reasons, I opted to buy a refurbished Intel Core i7-3632QM on eBay for $130.
It should be noted that laptops that rely on integrated graphics will see a larger performance increase from upgrading the processor. Because AMD and Intel put their iGPUs, well, inside of their CPUs, upgrading the processor often means upgrading the GPU, too. For AMD's mobile APUs, higher-end models always carry more stream processors, and sometimes higher clock speeds, which can significantly boost performance. With Intel, upgrading the CPU may not always carry with it an increase in EUs inside of the iGPU, but the clock speed inside of the graphics processor is almost always higher, resulting in a mild performance increase.
After selling my old processor for $50, I was left with a total system cost of $474 and the following specs:
| Modified Samsung NP300E5C-S07TR | |
|---|---|
| CPU | Intel Core i7-3632QM Quad-Core Hyperthreaded 2.2 GHz (3.2 GHz Max Turbo) |
| GPU | Nvidia GeForce GT 620M 625 MHz w/ 1 GB DDR3 900 MHz |
| RAM | Samsung DDR3 1600 MHz 9-9-9-28-2T 1.35v |
| Storage | Seagate SSHD 1 TB/8 GB SSD 64 MB Cache |
| Display | 1366x768 60 Hz |
Overclocking
Just like with desktop computers, overclocking can help to push performance higher, but the thermal constraints of a laptop often limit the overall performance. There are ways to help overcome this thermal threshold, but we will discuss that later. For now, let's focus on overclocking.
As we are focusing on non-gaming laptops, your system, like mine, will almost certainly lack the ability to overclock the CPU. But even if you can, you probably don't want to if your goal is higher gaming performance. To achieve the most performance out of a gaming computer, you need to carefully balance the performance of the CPU against the GPU.
Although overclocking the CPU might help some systems, if you upgraded the processor, then you have probably increased performance more than enough in that area. Ideally, you would want to overclock both the CPU and GPU, but if you do that, then you increase the chances of experiencing thermal throttling. So, because the GPU can almost never be replaced in laptops, but the CPU can, it is best to focus overclocking efforts on the GPU.
Although the GPU can't be replaced, you can help improve the overclocking performance a little by installing better thermal paste on the CPU and GPU. As a rule, parts overclock better the cooler they are kept. In my system, I opted to use Liquid Metal Pro on both components, but there are several TIMs that will work well.
I couldn't accurately compare my CPU temperatures after applying the better thermal paste, as I changed the processor at the same time, but the GPU dropped about 4 degrees Celsius at full load. Given the limited cooling solution in use, that is a considerable improvement.
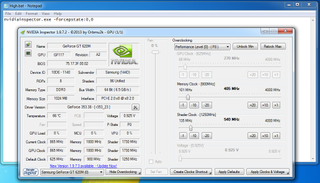
To achieve this, there are numerous programs that you can use, such as MSI Afterburner, Asus GPU Tweaker, and Nvidia Inspector, to name a few. If you have an Nvidia GPU, Nvidia Inspector offers a few extra abilities that you may find useful, which is why I used it for these tests. Initially, as I was more familiar with it, I tried to use MSI Afterburner to overclock the GPU, but I was experiencing an issue where my GPU never wanted to go to the turbo boost clock speeds. As those were the only ones I could adjust, I had to find a way around it.
With Nvidia Inspector, you can use batch files to force the GPU into different power states (or P# States). There are several different types of commands you can program into the batch files, but there are only really three that you will need.
| Nvidia Inspector Batch Commands | ||
|---|---|---|
| Action | Command | Purpose |
| Force Low-Power Idle Mode | nvidiainspector.exe -forcepstate:8,8 | Conserve power, low power gaming |
| Force High-Power Turbo Boost Mode | nvidiainspector.exe -forcepstate:0,0 | High performance gaming |
| Force Default Power Range | nvidiainspector.exe -forcepstate:0,8 | Default; Auto adjust between P states |
To create these into batch files, simply open a notepad and copy in the "Command" portion. Then hit "Save As," give it a name, and change the file from "Name.txt" to "Name.bat." Keep it in the same fold as Nvidia Inspector, and by double-clicking it, it will adjust the program accordingly.
If you want to get the most gaming performance, forcing the system to run in the high-power mode regardless of thermal conditions can help avoid FPS drops by keeping the GPU clock maxed out at all times. If you have issues getting your GPU to go to the higher performance turbo mode, it will also resolve that issue.
After running this batch file, Nvidia Inspector can also be used to overclock the GPU, and it can push Nvidia graphics cards harder than other programs. With MSI Afterburner's extended overclocking mode, I was limited to a max GPU clock speed of 788 MHz, but Nvidia Inspector allowed me to push as high as 4000 MHz (not that you would ever get that far).
The GPU in my laptop ended up topping out at 865 MHz core, and 1085 MHz on the vRAM.
Undervolting
Undervolting probably seems counter-intuitive to increasing performance, but because more power leads to more heat, and heat can lead to thermal throttling, undervolting can increase performance in some scenarios. We may not be able to do this in the BIOS, but there are easy ways we can do this in Windows.
First, for the GPU, using a batch file to force the idle power mode, I was able to lock the dedicated GPU to stay at its lowest performance state. In this mode, it will use the absolute least amount of power. Although this won't help to increase gaming performance, it can be helpful when you are traveling long distances without the ability to charge your laptop and you want to play games.
Gaming in this mode drops performance considerably, making it significantly slower than the integrated graphics chip, but it results in longer battery life compared to gaming with iGPU. This is because we cannot limit the iGPU to run at a slower speed, and at full power the Intel HD 4000 Graphics inside of the CPU consumes more power than the idling Nvidia GPU. This won't be a helpful trick for all users, and it will vary based on what integrated GPU and dedicated GPU you have, but it is worth testing on your system if you need to game on battery for extended periods of time.
| BioShock Infinite In Game Benchmark - Very Low Settings, 768p, CPU Power Full | ||
|---|---|---|
| Graphics Chip | Intel HD 4000 Graphics | Nvidia GT 620M (Forced Idle) |
| Average FPS | 37.66 | 20.26 |
Another counter-intuitive trick you can do is to tell Windows to limit CPU usage. This has the effect of extending battery life even more, but because the CPU won't be running at full power, it also reduces the heat inside of the system. Naturally, this results in lower CPU performance, but if your GPU has been throttling because of excess heat, this can help correct the problem and ultimately achieve greater performance in games. You will need to test to see how much to limit your CPU, however, as limiting it too much can decrease performance overall.
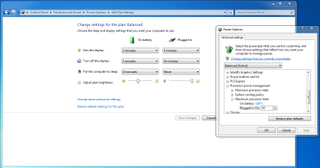
To limit the CPU usage on Windows 7, 8 or 8.1, click the battery icon, and then click Change Plan Settings. Under the advanced power settings menu, there will be an option to set the maximum CPU usage as a percent. My system tends to perform best in games when set to 85 percent.
When I need to conserve power for extremely long periods of time, such as a 13-hour flight, I've set this limit as low as 20 percent. Using a 78 Wh battery and keeping the brightness low on my system, it is capable of running for 6 hours in this state. If I throttle the CPU and GPU, then the system is capable of playing games on battery for roughly 2.5 to 3 hours.
Let The Games Begin

All benchmarks were run on a 1080p display connected to the laptop. This was done to enable 1080p resolutions during one of the tests. The system hardware and software was otherwise unchanged, except for the various modifications listed above.
| BioShock Infinite - Low Settings, 768p, Nvidia GT 620M | ||||
|---|---|---|---|---|
| CPU Limit\GPU Clock | Core 625 MHz - vRAM 900 MHz | Core 625 MHz - vRAM 1085 MHz | Core 788 MHz - vRAM 1085 MHz | Core 865 MHz - vRAM 1085 MHz |
| 100% | 28.26 FPS (100.0%) | 29.32 FPS (103.8%) | 35.63 FPS (126.1%) | 37.29 FPS (132.0%) |
| 90% | 28.74 FPS (101.7%) | 29.23 FPS (103.4%) | 35.65 FPS (126.2%) | 37.26 FPS (132.0%) |
| 85% | 28.41 FPS (100.5%) | 29.19 FPS (103.3%) | 36.26 FPS (128.3%) | 38.70 FPS (137.0%) |
| 80% | 28.98 FPS (102.5%) | 29.23 FPS (103.4%) | 35.73 FPS (126.4%) | 37.95 FPS (134.3%) |
As you can see, limiting the CPU doesn't always result in higher performance. Dropping the CPU to 90 percent of its clock speed typically offered little to no increase in gaming performance. Likely, at this point, the heat from the CPU didn't decline enough to avoid thermally throttling the GPU. Performance also didn't substantially decrease at this point either, though, and my system's total power consumption and heat production levels decreased.
With CPU performance capped at 80-85 percent, most tests showed increased performance. This became even more noticeable when I forced the GPU into turbo mode and started overclocking, as the GPU began producing more heat, and thermal throttling became a more severe issue. Using this technique, I was able to achieve at most a 5 percent increase in FPS, while also reducing overall system power consumption.
| Shogun II: Total War (In Game Benchmark) - DX11 720p Balanced Settings, Nvidia GT 620M | ||||
|---|---|---|---|---|
| CPU Limit\GPU Clock | Core 625 MHz - vRAM 900 MHz | Core 625 MHz - vRAM 1085 MHz | Core 788 MHz - vRAM 1085 MHz | Core 865 MHz - vRAM 1085 MHz |
| 100% | 16.225 FPS (100.0%) | 16.5375 FPS (101.9%) | 19.95 FPS (123.0%) | 21.4875 FPS (132.4%) |
| 90% | 16.225 FPS (100.0%) | 16.5375 FPS (101.9%) | 19.925 FPS (122.8%) | 21.5625 FPS (132.9%) |
| 85% | 16.225 FPS (100.0%) | 16.5375 FPS (101.9%) | 20.1625 FPS (124.3%) | 21.925 FPS (135.1%) |
| 80% | 16.2375 FPS (100.1%) | 16.5375 FPS (101.9%) | 19.975 FPS (123.1%) | 21.625 FPS (133.3%) |
Although BioShock Infinite showed at best a 5 percent increase from throttling the CPU, Shogun II: Total War shows only a 2.7 percent increase at best. It is also interesting to note that in my system, throttling the CPU has next to no effect on the non-overclocked GPU. BioShock Infinite showed slight improvement in this area when limiting the CPU, while Shogun II: Total War essentially delivered an identical score in this area regardless of the CPU limit. This tells me that thermal throttling isn't an issue with my GPU until I overclock it.

Playing the game at these settings would still be rather unpleasant, so I tweaking the settings manually and ran a few more benchmarks.
| Shogun II: Total War (In Game Benchmark) - DX11 1080p Custom Settings, Nvidia GT 620M | ||
|---|---|---|
| CPU Limit\GPU Clock | Core 625 MHz - vRAM 900 MHz | Core 865 MHz - vRAM 1085 MHz |
| 100% | 31.475 FPS (100.0%) | 41.1125 FPS (130.6%) |
| 85% | 31.5 FPS (100.0%) | 41.4375 FPS (131.7%) |
Our Journey Comes To An End
I set out to push the limits of this system and get the most performance out of it as I could. After numerous changes, I feel like those limits have been reached, as I have upgraded nearly every component I could, pushed up clock speeds, and found ways to conserve power. The system in its beginning state was barely able to play the games that I tested, but now it can play them with relative ease. Although the performance still lags behind true gaming laptops, you can see that with a little effort, even budget notebooks can be upgraded and run games at reasonable frame rates.
Follow Michael Justin Allen Sexton @EmperorSunLao. Follow us @tomshardware, on Facebook and on Google+.
-
epobirs For a turnkey solution, a cheap gaming laptop is one of the very few places AMD still does well. An A8 or A10 laptop has a very strong GPU for the price and the quad-core CPU portion is adequate.Reply
The one place such machines come up short is the rarity of higher resolution screens offered. 720p-ish displays are pretty much the rule for these products. Though I did find yesterday that my old A6 laptop does just fine driving a 1080p HDTV through its HDMI Out port. Despite having it for nearly four years, I'd never had a reason to connect a monitor before. I needed to demonstrate Windows 10 to a group of people and there was a 50" screen handy... -
SteelCity1981 so basically you are trying to polish a turd, but in the end its still going to be a turd.Reply -
wkwilley2 ReplyFor a turnkey solution, a cheap gaming laptop is one of the very few places AMD still does well. An A8 or A10 laptop has a very strong GPU for the price and the quad-core CPU portion is adequate.
The one place such machines come up short is the rarity of higher resolution screens offered. 720p-ish displays are pretty much the rule for these products. Though I did find yesterday that my old A6 laptop does just fine driving a 1080p HDTV through its HDMI Out port. Despite having it for nearly four years, I'd never had a reason to connect a monitor before. I needed to demonstrate Windows 10 to a group of people and there was a 50" screen handy...
This is actually what I did, I purchased a Lenovo Z50 earlier this year, has an A10 7300 in it and works very nicely. I don't play any AAA titles so it does what I want very well. The most intensive game I played on it was TERA and it would run 20-30 fps in most cases with medium settings at 720p. 90% of the steam games I play with it run flawlessly and video playback is great. -
IInuyasha74 ReplyWhy not replace the lcd screen with a 1080p IPS panel? They are easy enough to find, cost around $100, and you can probably sell the old one for $75-80. I did this on my HP ENVY laptop and don't regret it for a second.
I actually considered doing this and spent considerable amount of time researching into it. The reason I didn't go through with it is that I couldn't find a panel that was a perfect fit for this system. It seems Samsung doesn't sell a 1080p for another laptop of the exact same size. Although I could find others that were close, just a few millimeters off in size, I didn't want to risk it. -
Durandul ReplyFor a turnkey solution, a cheap gaming laptop is one of the very few places AMD still does well. An A8 or A10 laptop has a very strong GPU for the price and the quad-core CPU portion is adequate.
The one place such machines come up short is the rarity of higher resolution screens offered. 720p-ish displays are pretty much the rule for these products. Though I did find yesterday that my old A6 laptop does just fine driving a 1080p HDTV through its HDMI Out port. Despite having it for nearly four years, I'd never had a reason to connect a monitor before. I needed to demonstrate Windows 10 to a group of people and there was a 50" screen handy...
If you think about it, you could probably buy a laptop display designed for a higher end sku of the same model, and just buy it off ebay. You could probably get a 1080p panel for less than $100. That'd be a pretty solid upgrade. I'd have to do my research first though. -
Arbie The single most effective thing you can do for usability (won't speed up your games) is install Process Lasso from Bitsum.com. I have the Home Bundle installed on multiple machines ranging from circa 2010 netbooks to a fast gaming PC. In ALL cases I saw a marked increase in GUI responsiveness.Reply
The netbooks of course improved the most - it's like night and day. They now support regular use of MS Word and Excel, whereas I wouldn't even want to use them without PL.
Bitsum has a free version of Process Lasso which anyone with less than a top-end machine should at least try. I can't say enough good things about the product or its support. This is one of those "labor of love" utilities that just gets better month after month. -
zodiacfml Get a Broadwell CPU with decent GPU. I have a cheap laptop with an i5-5200u and 1366x768 display and decently runs older games. I prefer an integrated GPU as discrete graphics just kills the laptop in a few years. Yeah the graphics is not modern and might lag often times but still allows gaming.Reply -
10tacle I did this with my three year old $350 17" HP G7 with a 900p screen. It came with an i3 2310M and 4GB Samsung 1066 RAM (single stick). I upgraded to an i7 2620 CPU ($145 new OEM), 8GB 1600 memory ($45), and dropped in a $65 128GB SSD OS drive and moved the stock 500GB HDD to the CD bay as the data drive. I even bought a new keyboard for $15. I sold the CPU and RAM for $75 together.Reply
So for a net outlay of $205 I got essentially a new and more powerful laptop that outperforms anything else that can be bought for ~$520 in the total cost of this ($350 + $145 + $45 + $65 + $15 - $75) and will be a great performer for years to come. The battery life is down of course, but mostly this thing stays plugged into the wall. -
Valantar An interesting read, although parts of it seems a bit out of touch with current hardware trends - like soldered-on CPUs, which have unfortunately become the norm in nearly all PCs today. The entire U-line of CPUs from Intel is available only in BGA (soldered-on) form, and is thus not replaceable.Reply -
IInuyasha74 Reply16698138 said:An interesting read, although parts of it seems a bit out of touch with current hardware trends - like soldered-on CPUs, which have unfortunately become the norm in nearly all PCs today. The entire U-line of CPUs from Intel is available only in BGA (soldered-on) form, and is thus not replaceable.
Not sure about the U processors, but Haswell M and QM processors are often in sockets. Intel and its OEMs fluctuate back and forth between how much they solder. It is hard to say for Skylake systems, but for Sandy Bridge, Ivy Bridge, Haswell, and AMD's CPUs there are still a lot of systems which the CPU can be changed.
Most Popular


