Installing RAID 0 Later: Any Time!, Continued
In the last step, a dialog window pops up, allowing you to choose a hard drive:
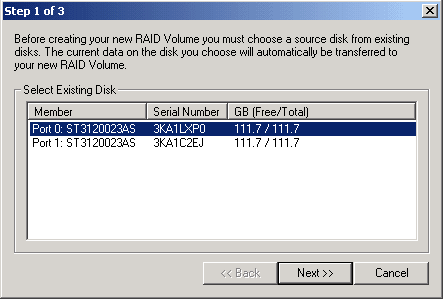
In our case, the first hard drive contains the operating system.
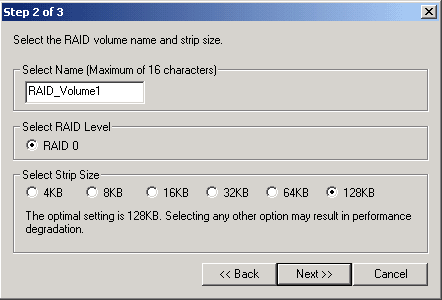
In the third window, the name of the array, the desired RAID level (currently only striping is possible) and the size of the block can be selected. As a rule, the maximum setting is in fact the best choice.
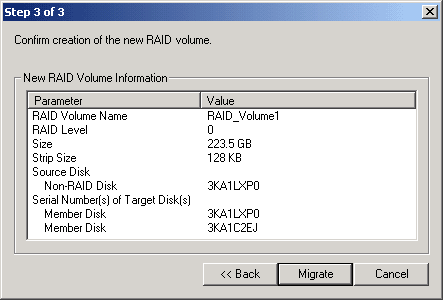
The last window shows a summary of the information. Now you can go ahead and change to RAID array. Sensibly enough, the Application Accelerator warns you that this process can last a long time. In fact, this program only took one hour and 24 minutes to complete the process. During this time, you can even work on the system quite normally, although we'd advise against doing this.
In the end, the status of the Serial ATA controller shows RAID 0 during bootup, which is what we chose.