Making Digital Home Movies, Part 2
Editing

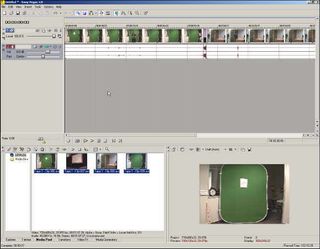
Sony Vegas - Put all your clips into the timeline
With a video editing program, you can take your mass of video clips and actually produce a movie that makes sense. You can use any type of program from Vegas to Movie Maker. The only differences are the options and feel. Movie Maker is free, but limited to the number of effects you can add and the number of tracks that you can edit. Movie Maker cannot output to Divx, QuickTime or RealPlayer.
Video editing is mostly connecting video clips that you want and cutting clips that you don't want. This is done by dragging files into the timeline and then splitting off the videos that you don't want. The most common effect to add is a cross fade between clips. In Vegas, you can do this by simply dragging one clip to slightly overlap another.

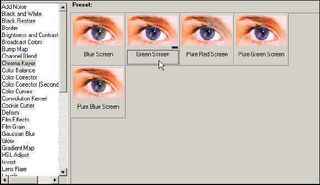
Sony Vegas - Selecting the Green Screen feature

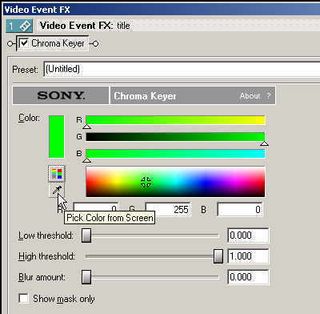
Sony Vegas - Using the eye dropper tool to make a color transparent
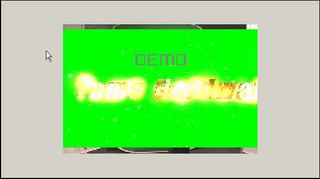
Remember the title we made? Lets composite this title over some existing video clip. We want to make the green transparent. First click on your title video and then select the green screen special effect. Then use the eye dropper tool and click on the green color in your title. This tells Vegas to make that shade of green transparent. You can see the results in a downloadable video at the end of this article.

Sony Vegas - Before Chroma Keying
Stay on the Cutting Edge
Join the experts who read Tom's Hardware for the inside track on enthusiast PC tech news — and have for over 25 years. We'll send breaking news and in-depth reviews of CPUs, GPUs, AI, maker hardware and more straight to your inbox.

Sony Vegas - After Chroma Keying
Rendering And Codecs
After everything has been edited, you will need to render the finished video. Rendering will put all the special effects and clips together and make a single video file out of it. It will also compress the resulting file with a codec.
Your raw video files are huge. As I said earlier, Mini-DV video files takes up about two GB for just 10 minutes of footage. Obviously it would be difficult to email this to someone or have them download it from a website. This is where codecs come into play. Codecs are video formats that try to compress the video, while keeping the same quality. Some codecs, like Huffy use lossless compression, meaning that no original data is lost. Others codecs like Windows Media or Divx use lossy compression.
Rendering can be the most time consuming part of the movie production process. Make sure you have bought the fastest computer that you can afford. You might even buy another computer to be solely used for rendering.
Make sure you defragment your hard-drive before you start rendering. Also don't render to the same drive as your source video files. If your source files are on drive 1, then render to drive 2.
Conclusion
Producing your own home digital movies can be a fun and rewarding experience. Armed with the tools that you bought from Part 1 , and with the knowledge from this article, it should also be easy.
Making the special effects was child's play, since we had the right tools. We learned how easy it is to add particle effects with ParticleIllusion. The inexpensive Bluff Titler easily made great looking titles. Finally, Ultra took all the guesswork out of Chroma Keying. THG will have more detailed reviews of some of the software tools that were used in this article. Stay tuned!
Here are the downloadable videos of some of the special effects. You will need Divx to play them.
Most Popular

