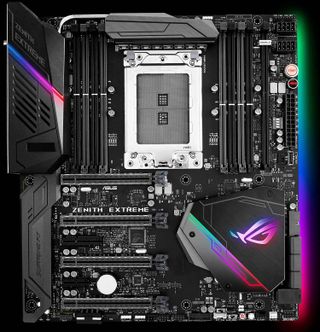
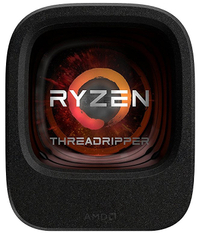
MSI Video Outlines Threadripper Installation Procedure In X399's TR4 Socket
MSI released a video outlining the mounting procedure for AMD's 16-core/32-thread Threadripper processors that find a home in AMD's new TR4 socket on X399 motherboards. Cramming 16 cores into a single processor is quite the feat, but it also creates a very large chip. That means AMD had to design a massive new socket for Threadripper, but ensuring a snug fit for reliable communication between the processor and the motherboard presents engineering challenges. We recently posted exclusive schematics of the socket and how it will work with existing cooling solutions, but MSI's video brings a few more details to light.
AMD's new Socket TR4 (SP3r2) for consumer motherboards boasts 4,094 pins, which is why it's so much larger than Intel's 2,066-pin LGA2066 socket found on X299 chipset-equipped motherboards. That's a heaping ration of gold pins that result in a comparatively more complex design than Intel's socket. In fact, AMD's socket spans nearly the entire length of the DIMM slots that flank it on either side. Those factors might result in fairly expensive X399 motherboards, but we'll dive into that in more depth in the pending Threadripper review.
The TR4 socket marks AMD's transition from the PGA (Pin Grid Array) socket found on its AM4 motherboards to an LGA (Land Grid Array) interface. There are advantages and disadvantages to both designs, which again, we'll dive into in the review.
AMD's TR4 socket uses three Torx screws to keep Threadripper snug in its new home, which stands in contrast to the normal latching feature found on consumer motherboards from both Intel and AMD. In fact, it's similar to the technique Intel uses on its enterprise Purley processors that leverage the LGA 3467 Socket P, which features a comparably-beastly 3,647 pins. In contrast, Intel's mounting scheme employs Torx fasteners that mount through the heatsink and into the socket housing, whereas AMD's mounting scheme employs Torx screws that slot in directly through the flip-up socket housing. Head over to our Purley review for a look at the Intel mounting procedure, which requires you first to snap the processor into the heatsink then install the assembly onto the socket.
For Threadripper, first, you remove the three screws and swing open the retention mechanism, under which there is another assembly that you also swing open. You remove an internal plastic cover and then slide the processor—which is contained in an orange plastic shroud—into the carriage. It's important to leave the black cover over the socket until you install the processor in the flip-up housing—those pins are fragile.
After you slide the processor into its housing, you remove the cover and swing it down into the socket. Then you swing down the mounting mechanism and tighten the fasteners, after which you are ready to slather on a generous helping of TIM (necessitated by the large integrated heat spreader). Heatsink installation requires four additional fasteners. As we noted in our schematic piece, the heatsink mounting fasteners aren't aligned symmetrically.

Plug in the fan, and you're ready to rock. Threadripper is almost among us. AMD tells us that shipping begins in early August. As you can imagine, our preparatory testing has already begun.
Stay on the Cutting Edge
Join the experts who read Tom's Hardware for the inside track on enthusiast PC tech news — and have for over 25 years. We'll send breaking news and in-depth reviews of CPUs, GPUs, AI, maker hardware and more straight to your inbox.
Update, 7/28/17, 6:40pm PT: Corrected AMD core count

Paul Alcorn is the Managing Editor: News and Emerging Tech for Tom's Hardware US. He also writes news and reviews on CPUs, storage, and enterprise hardware.
-
alextheblue I like it, very straightforward, no room for error (unless you can't count to 3). Also, thank you MSI for the 80's porn music. A 16 core Threadripper is nerd porn, after all...Reply -
arakisb easiest cpu and heatsink installation process i have seen in many years of building, and to think it is for such a massive cpuReply
TR rocks -
-Fran- Man... And here I was thinking it would require a Bulldozer for positioning and a Piledriver for pushing the HSF down.Reply
Cheers! :P -
InvalidError >> Cramming 18 cores into a single processor is quite the featReply
Too much Intel coverage lately? ThreadRipper is 16 cores max, unless AMD decides to enable more cores on the quad-die package (based on deBauer's TR de-lidding video) in future models.
Update: deBauer has temporarily taken down his TR de-lid video per AMD's request and posted an update saying that according to AMD, two of the "dies" are actually spacers to prevent warping. -
the nerd 389 Hurray! We're about to get the first truly viable HEDT platform of 2017!Reply
Well, hopefully. They'd have to seriously drop the ball to end up with a worse product than the i9 series, but Intel has already demonstrated that these things happen. -
Sarreq Teryx o0 So, is that jump-cut an absolute mandatory part of the installation? Or can I skip it?Reply -
Rookie_MIB I like the secondary flip-up retainer which holds the CPU. No more trying to get our fingers down in there or having the cpu bounce back up and/or around when 'dropping' it into the socket.Reply
Now you slide the CPU into the secondary retainer, lower down nicely onto the socket, then put the primary retainer on and screw it in. Easy as pie.
Most Popular


