How to Build Your Own 3D Printed Raspberry Pi Robot (Updated)
Learn the skills you need to design, build and code your own Raspberry Pi powered robot.
Writing the project code
The board at the heart of our robot is the Pimoroni Explorer HAT. The Explorer HAT has been around since 2015 and it has been proven to be a reliable and easy to use platform for robotics. This is in part due to the Python 3 library and its corresponding documentation. The Explorer HAT Python 3 module provides several helper functions that we will use in our project.
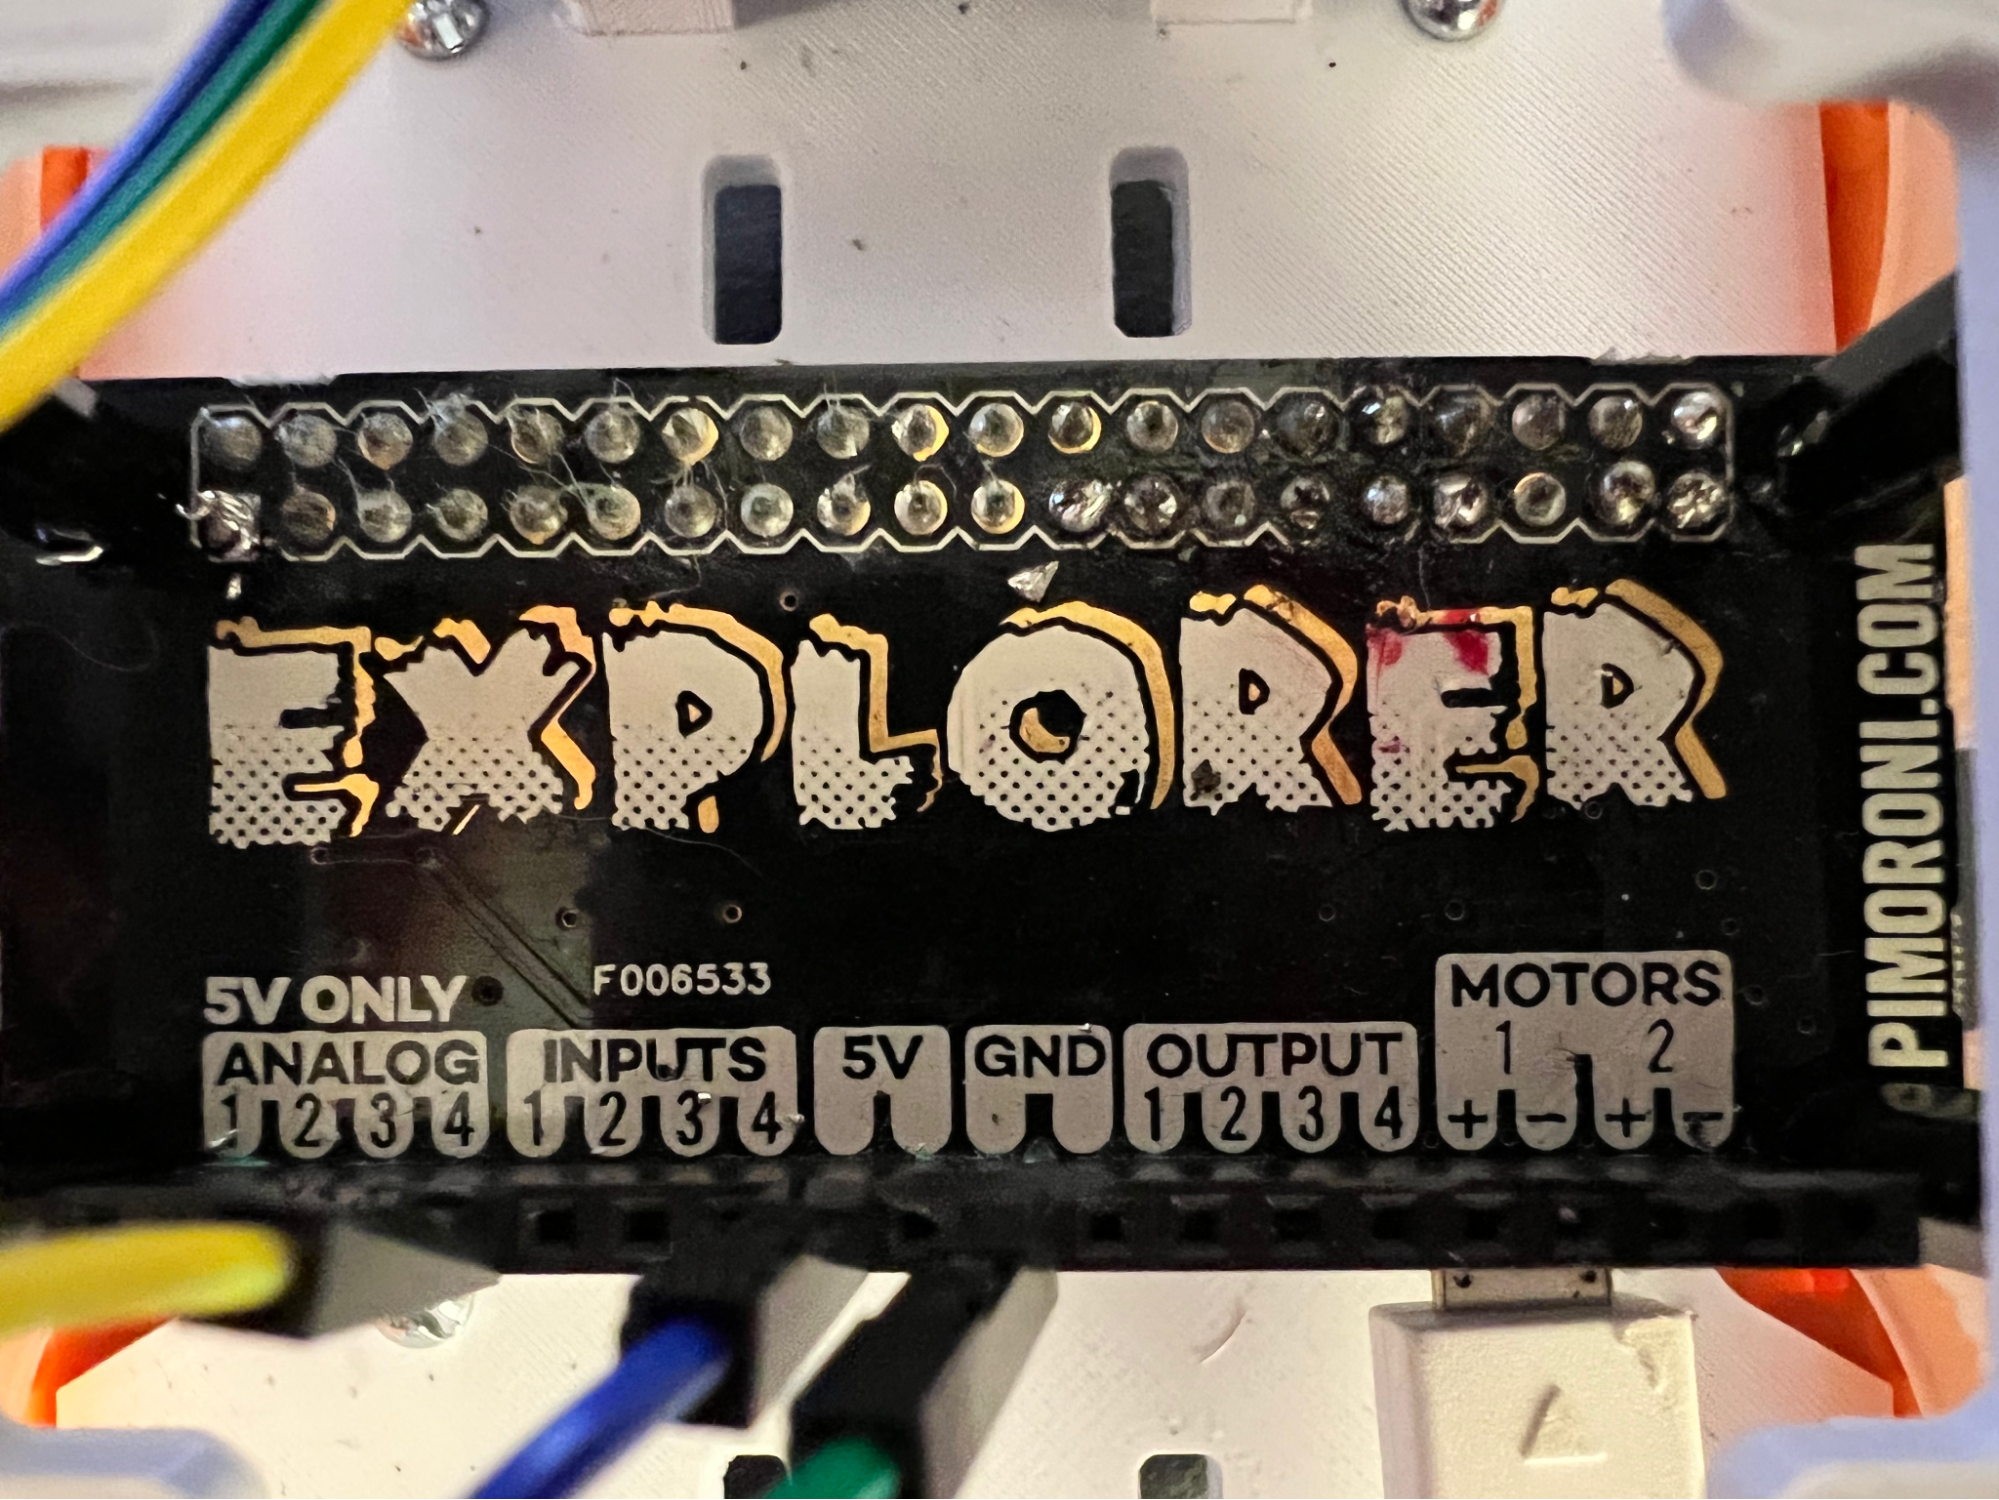
Explorer pHAT has a series of connections broken out along one side of the board. There are two physical motor connectors,each with a positive and negative connection. There are also four input pins and four output pins,and four analog inputs. Two 5 Volt outputs (labeled 5V) and two Ground connections (labeled GND) are there to provide power to components.
These pins are all referred to in the Explorer HAT Python 3 module as:
Motors
explorerhat.motor.one
explorerhat.motor.two

Inputs
explorerhat.input.one
explorerhat.input.two
explorerhat.input.three
explorerhat.input.four

Outputs
explorerhat.output.one
explorerhat.output.two
explorerhat.output.three
explorerhat.output.four
Motor functions
The Explorer HAT Python 3 module has several motor functions that we can call from within our code. The Documentation describes these as:
- invert() - Reverses the direction of forwards & backwards for this motor
- forwards(speed) - Turns the motor forwards at speed (default speed is 100%)
- backwards(speed) - Turns the motor backwards speed (default speed is 100%)
- speed(-100 to 100) - Turns the motor at the speed you specify, with -100 being full backwards to 100 being full forwards
- stop() - Stops the motor by setting the speed to 0
Detecting objects
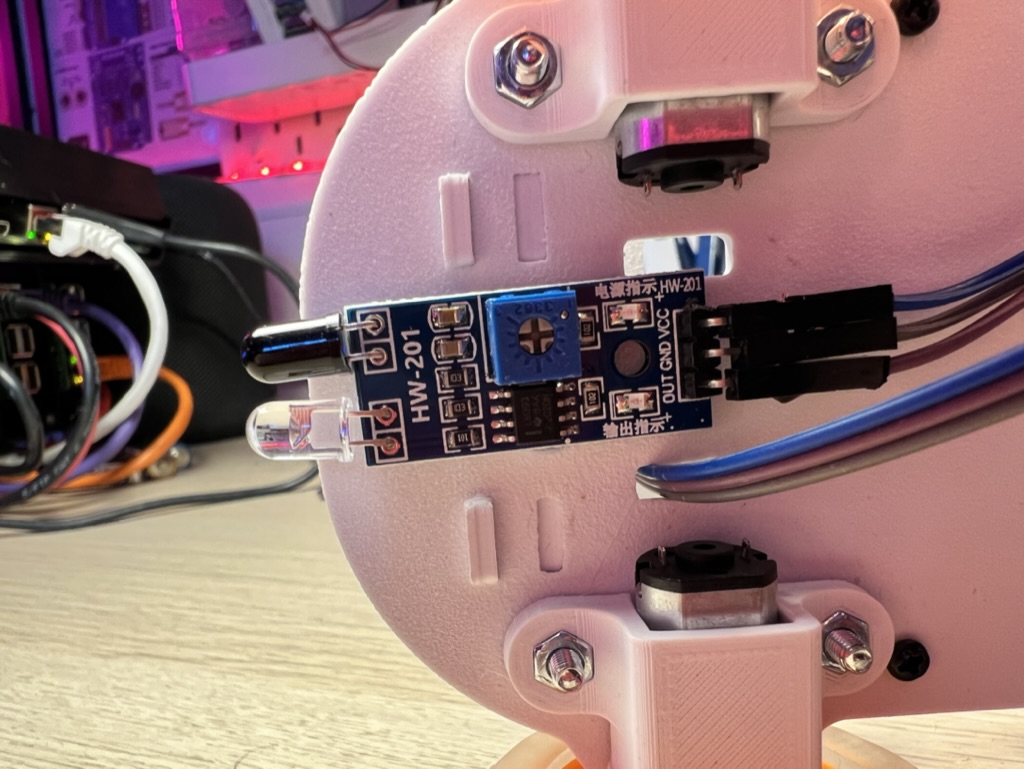
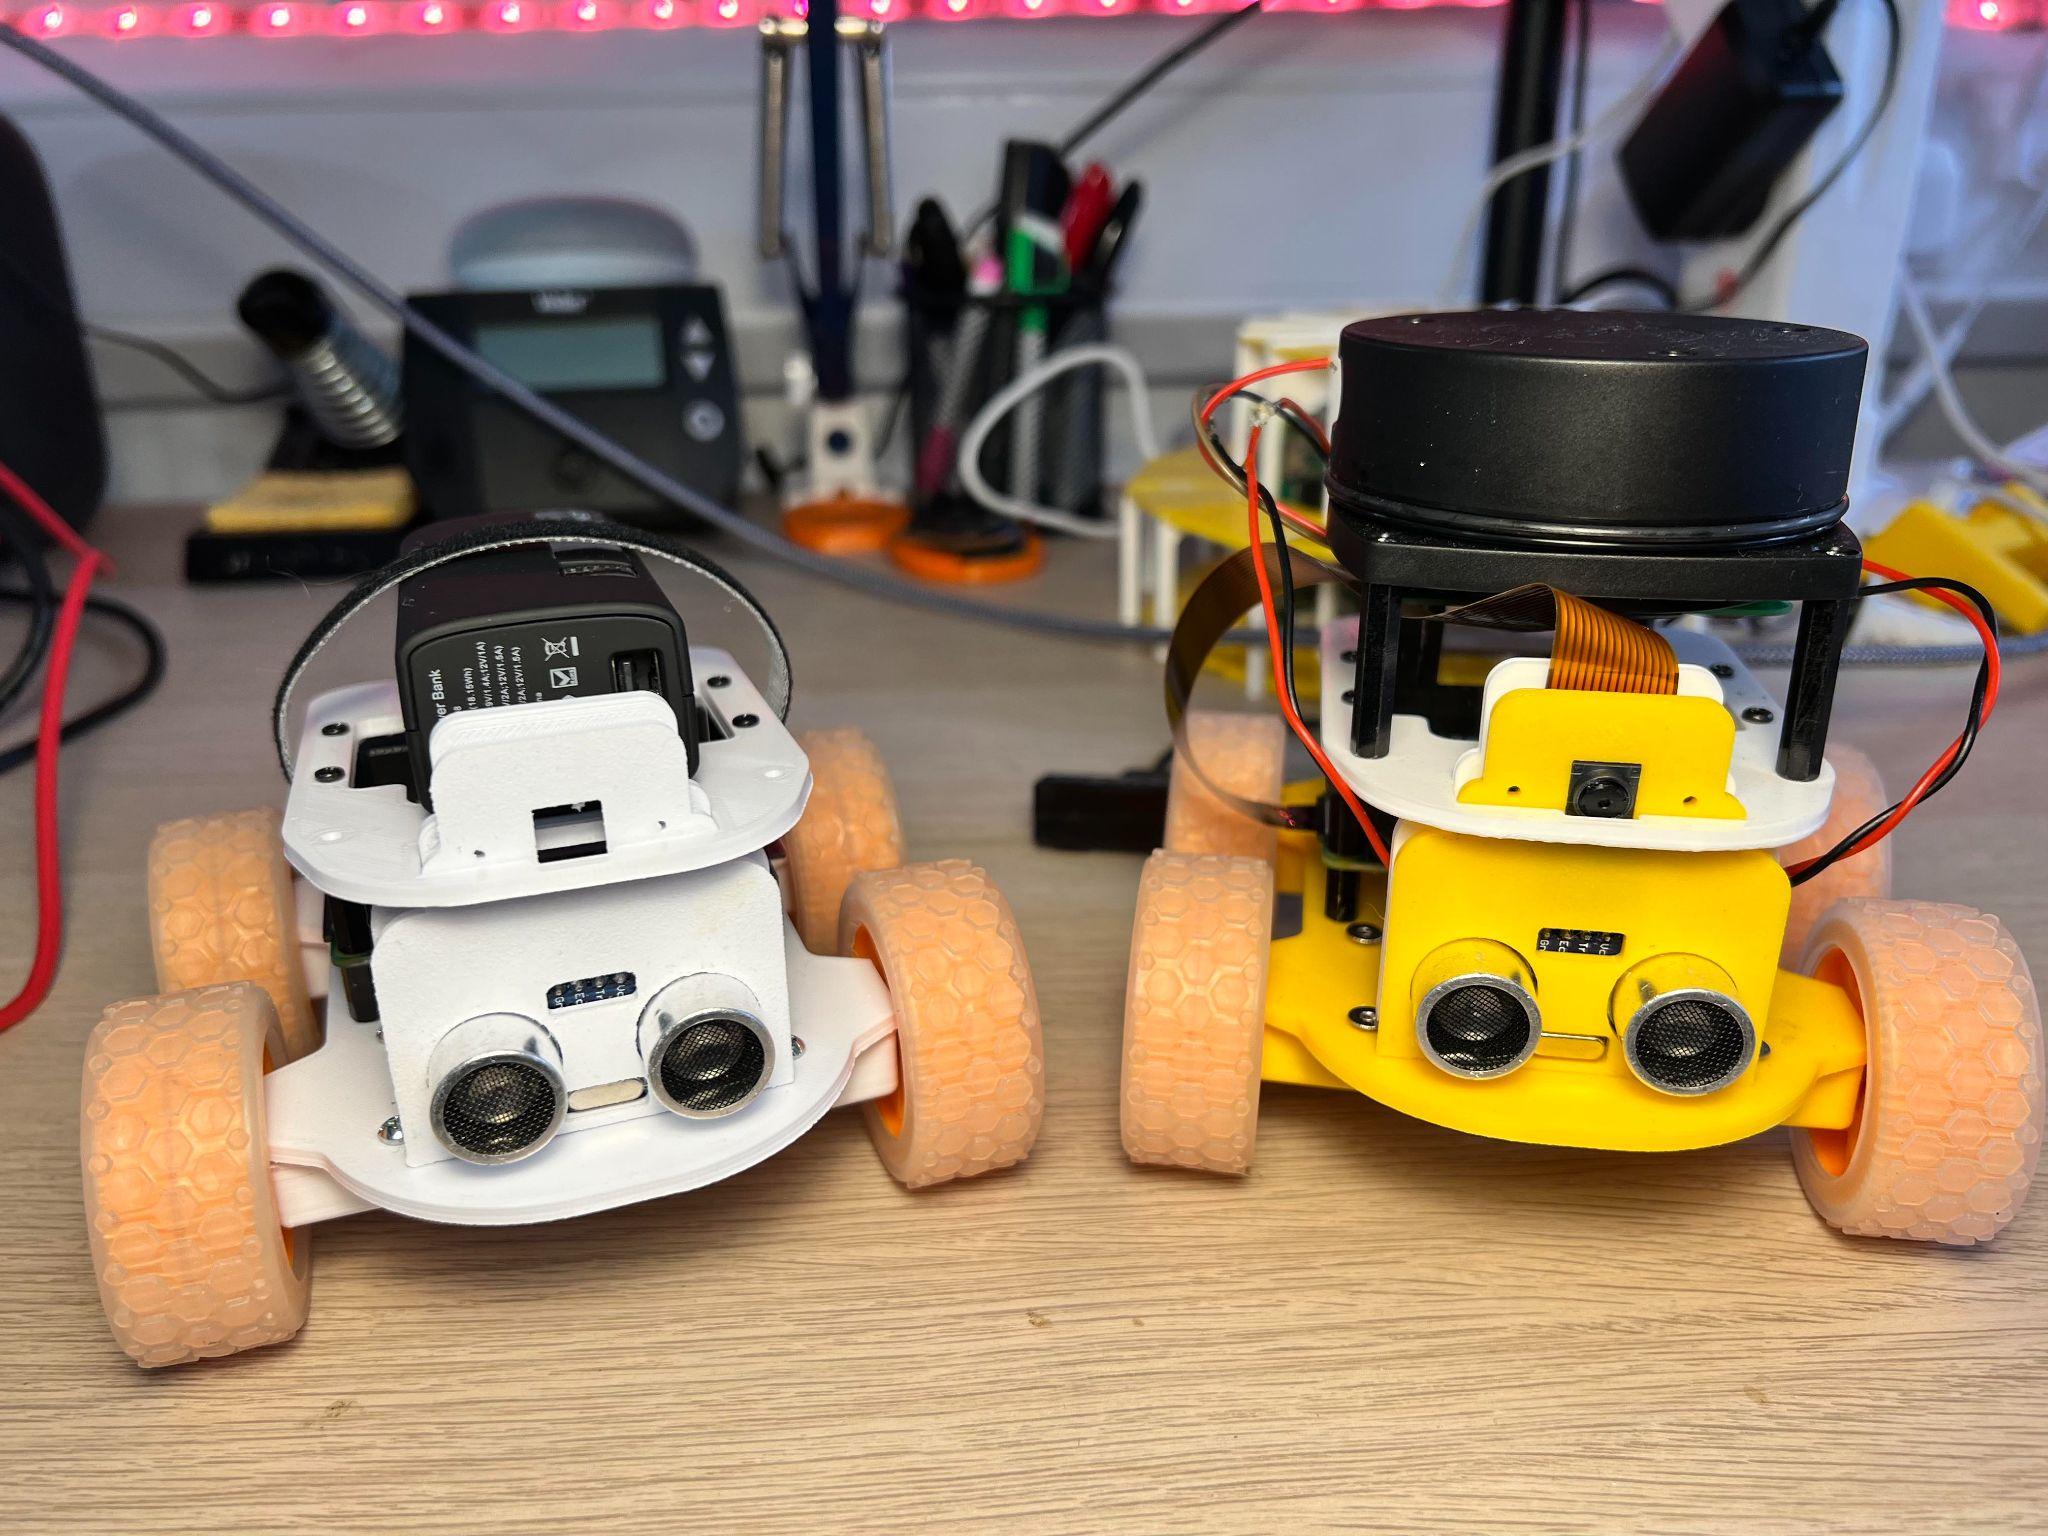
Our robot uses a passive infrared (PIR) obstacle sensor module to detect objects. The sensor module has 3 pins:
- VCC
- Ground (GND)
- Signal
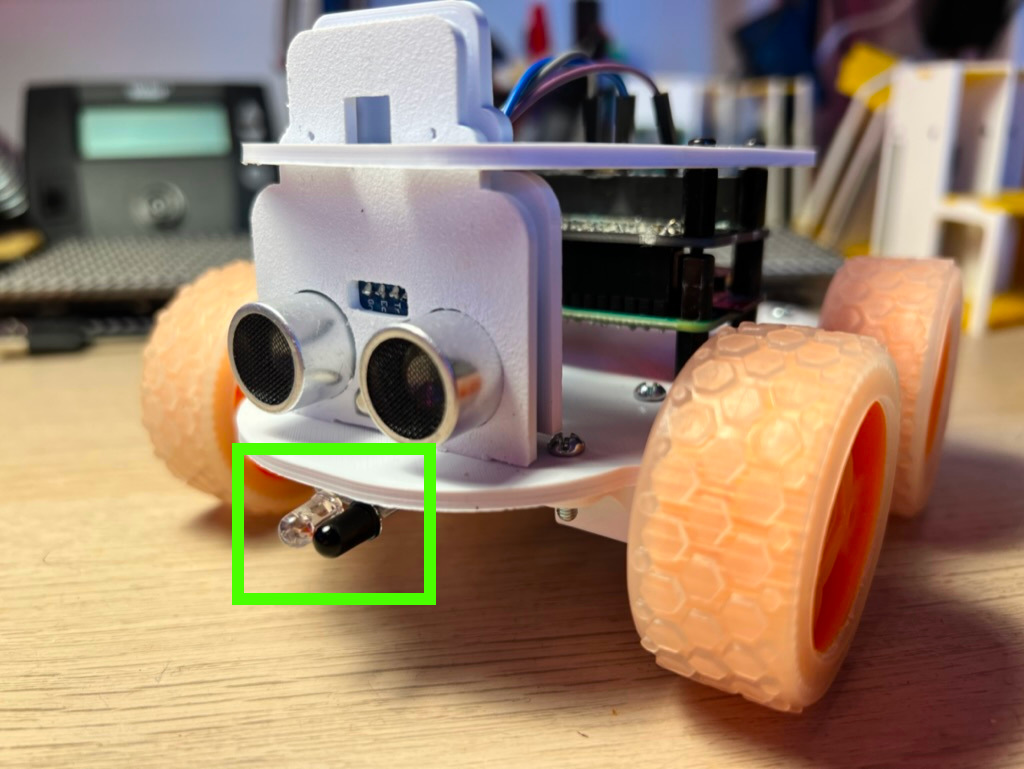
The PIR module attaches to the front, underside section of the robot, and only costs around $3. It works by firing invisible infrared light and using it to detect obstacles. When an obstacle is detected, the signal pin changes state from low to high, and this change is used as a trigger in our code.. The range of the sensor can be tweaked using the potentiometer and can be set from 2 to 30 Centimeters.
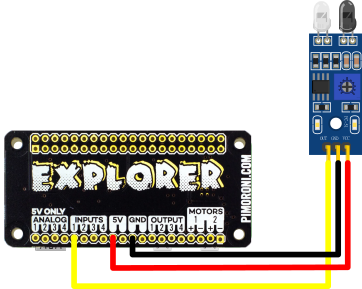
The PIR sensor attaches to the Explorer pHAT as follows
Get Tom's Hardware's best news and in-depth reviews, straight to your inbox.
| Explorer pHAT | PIR Sensor | Wire Color |
|---|---|---|
| 5V | VCC | Red |
| Input 1 | Signal | Yellow |
| GND | GND | Black |
Controlling the Robot
Our robot has the sensor to “see” the world around it, but now we need to give it the intelligence to use that data as a means to navigate the world. Luckily this is made quite simple thanks to Explorer HAT’s abstracted Python 3 library.
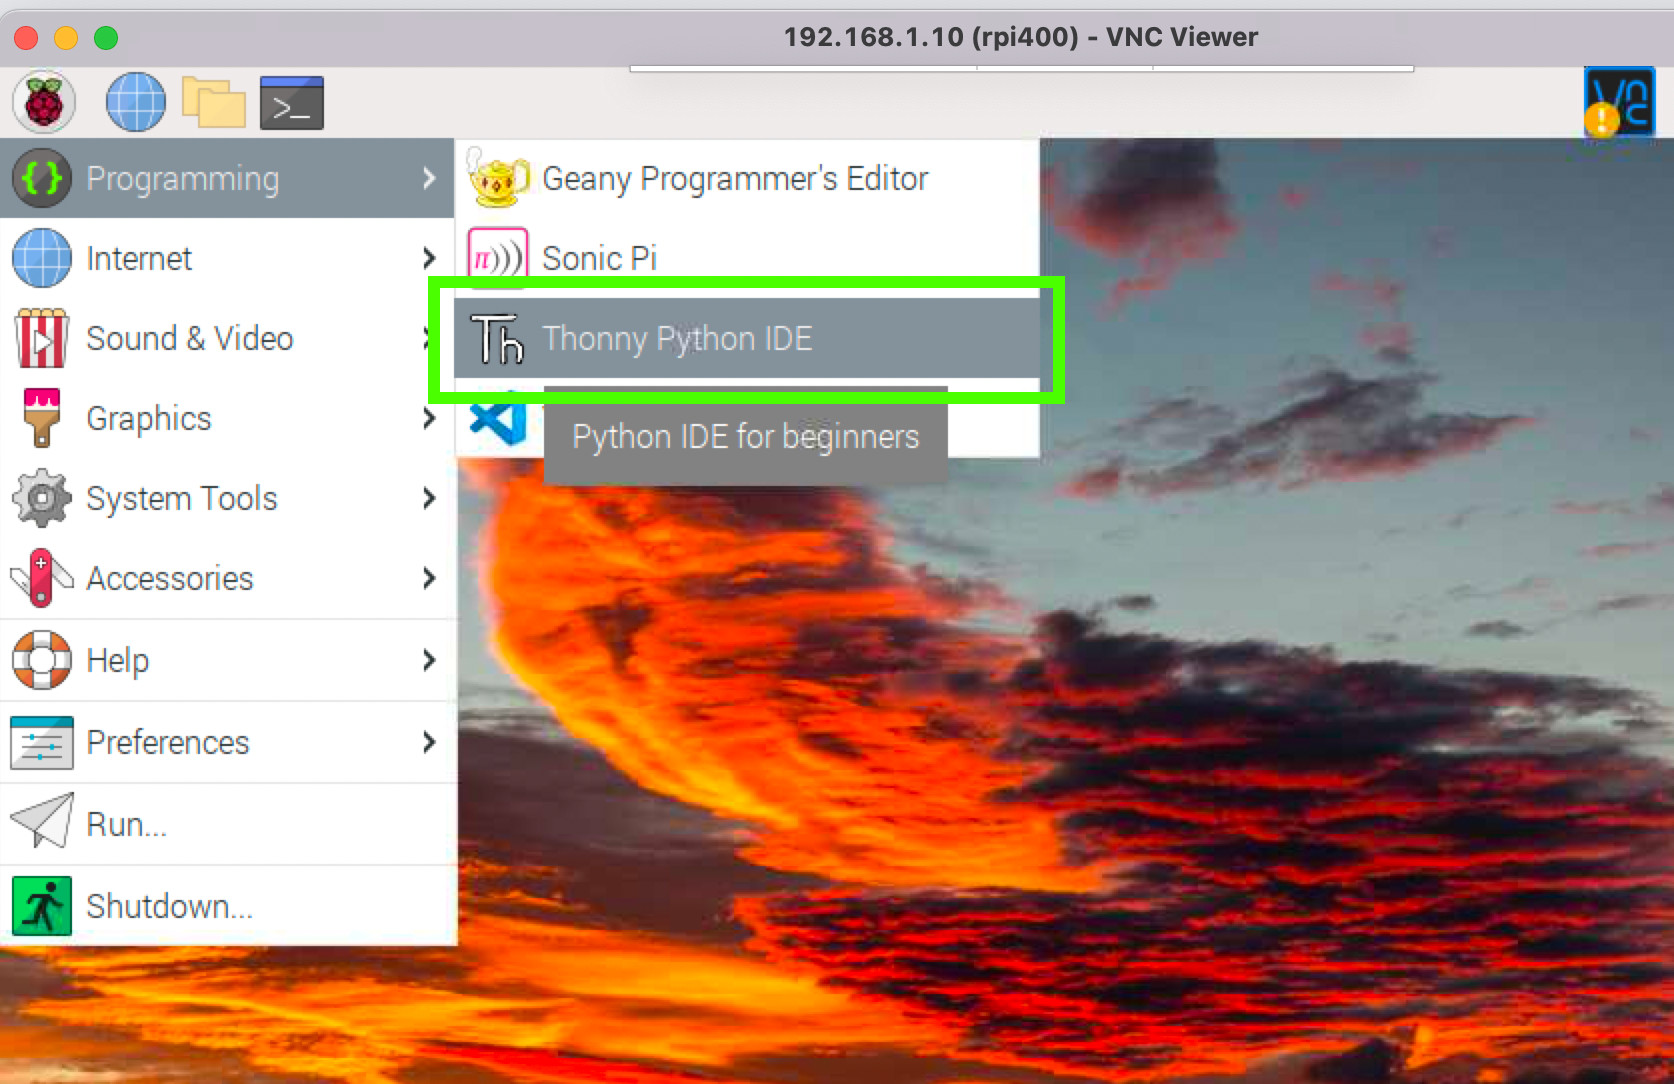
1. Go to the main Raspberry Pi OS menu and select Programming >> Thonny. Thonny is the default Python editor for Raspberry Pi OS.
2. Create a new file and import the Explorer HAT Python 3 module as eh. By doing this we shorten the reference to the module and reduce the risk of a typo.
import explorerhat as eh3. Import the sleep function from the time module. We will use this to control the duration of our motors.
from time import sleep4. Create a new function to move the robot forward which takes one argument, the speed at which the motors should spin.. Functions are reusable blocks of code we can call from within our program. Functions take parameters, such as ‘speed’, that allow us to change values within our function’s code. In this example, the speed parameter will change the speed the motors spin when moving our robot forward. A speed of 0 will stop our robot.
def forwards(speed):5. Print a message to the Python shell for debug purposes. This will print “Forward” to the shell, enabling us to debug any motor issues.
print(“Forward”)6. Set the motor connected to motor one to move forwards, motor two to backwards. Motor two is on the other side of the robot, and so to make the motor move in the same direction as motor one, we need to spin it backward.
  eh.motor.one.forwards(speed)
  eh.motor.two.backwards(speed)
7. Create a new function to move the robot backward. This is essentially the same as forwards, but we reverse the motor directions.
def backwards(speed):
   print("Backward")
   explorer_hat.motor.one.backwards(speed)
   explorer_hat.motor.two.forwards(speed)
8. Create a new function to spin the robot to the left. By moving both motors in the same direction it will spin the robot.
def turn_left(speed):
   print("Left")
   eh.motor.one.forwards(speed)
   eh.motor.two.forwards(speed)
9. Create a new function to spin the robot to the right. We spin the motors in the opposite direction to the left, causing the robot to spin on the spot.
def turn_right(speed):
   print("Right")
   eh.motor.one.backwards(speed)
   eh.motor.two.backwards(speed)
def stop():
print("Stop")
eh.motor.one.stop()
eh.motor.two.stop()10. Create a loop that will continually run the robot code. We need this loop so that the code within the loop is continually checked.
while True:11. Create a conditional statement that will check the obstacle sensor output by reading the state of input 1. When the sensor detects an obstacle, its state changes from 0 (low) to 1 (high). Our if condition trigger will activate when the sensor sends 1.
if eh.input.one.read() == 1:12. Stop the robot, then turn left at 100% speed. This will force the robot to stop moving, then spin to the left, searching for a path around an obstacle.
stop()
turn_left(100)13. Pause for half a second then stop spinning and add an additional half second sleep. The extra sleep will slow the code looping back to the start of the conditional test. If there were no sleep, the code would loop far too quickly, and our robot would become unpredictable.
sleep(0.5)
stop()
sleep(0.5)14. Add an else condition, which will move the robot forwards at full speed for five seconds. If there is no obstacle, en.input.one.read() will return 0 (low) and our robot will move forwards for five seconds before the loop repeats.
else:
forwards(100)
sleep(5)15. Save the code and click Run (green arrow on toolbar) to start the code. The robot will attempt to navigate the world. It is worth elevating your robot so that its wheels are lifted off of the ground. That way you are not chasing your robot around the room while debugging any issues.
Complete Code Listing
import explorerhat as eh
from time import sleep
def forwards(speed):
print("Forward")
eh.motor.one.forwards(speed)
eh.motor.two.backwards(speed)
def backwards(speed):
print("Backward")
eh.motor.one.backwards(speed)
eh.motor.two.forwards(speed)
def turn_left(speed):
print("Left")
eh.motor.one.forwards(speed)
eh.motor.two.forwards(speed)
def turn_right(speed):
print("Right")
eh.motor.one.backwards(speed)
eh.motor.two.backwards(speed)
def stop():
   print("Stop")
   eh.motor.one.stop()
   eh.motor.two.stop()
while True:
if eh.input.one.read() == 1:
       stop()
       turn_left(100)
sleep(0.5)
stop()
   else:
       forwards(100)
sleep(5)Checklist: What Have We Achieved?
Congratulations you’ve created a robot that can detect and avoid objects.
- How to download, slice and print the Explora 3D printable files.
- How to build and assemble all the parts.
- How to solder wires onto the motors.
- How to prepare the Raspberry Pi OS and install the Explorer Hat Python module.
- You’ve learned how to use the Pimoroni Explorer HAT Python module.
- You have created a control system that senses the real world and feeds this back to our program, steering the robot away from obstacles in its path.
Automating the code
To set the Python 3 robot code to run when the Raspberry Pi boots, all we need to do is follow our guide on running Python code at boot, and your robot will be truly autonomous.
