How to Build a Raspberry Pi Hand Washing Timer
Motion-activated Raspberry Pi can make sure you’re washing your hands for 20 seconds.
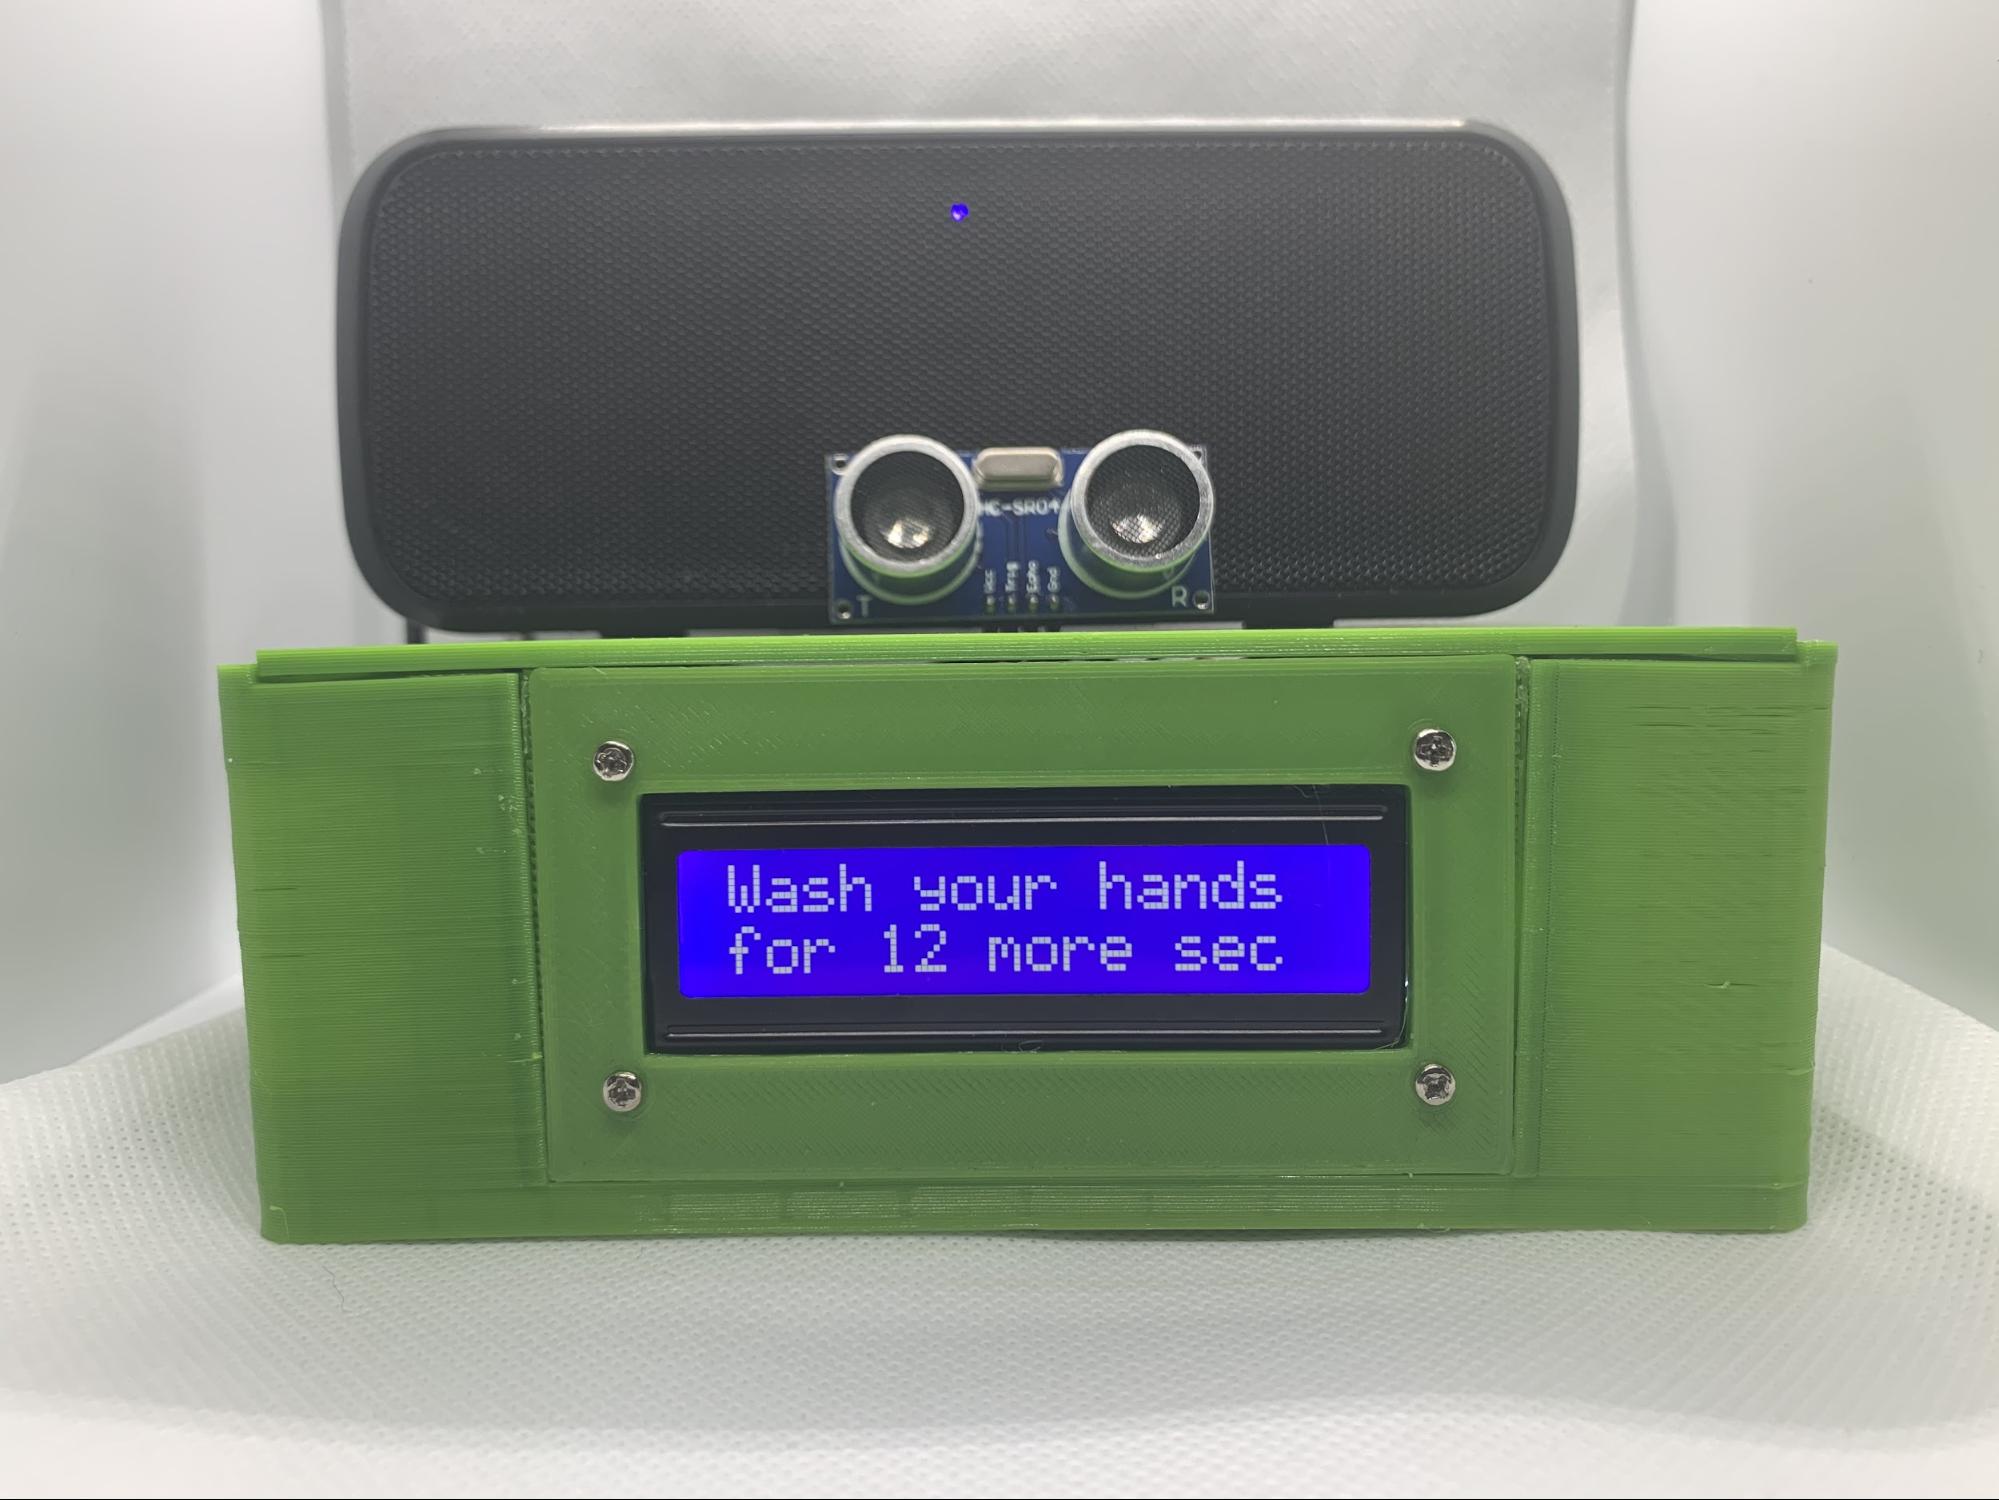
Due to the global pandemic, I’ve seen both useful and funny COVID-19 hacks everywhere. I thought I would make my own COVID life hack with a hand washing timer that is motion triggered and plays a 20-second music clip. Why 20 seconds? Health officials are recommending that we wash our hands often and for at least 20 seconds each time. When I reach for my soap, I trigger this hand washing timer to play a music clip and the display will countdown for 20-seconds.
This is a four part tutorial. In Part 1, you’ll learn how to connect your Raspberry Pi to an external speaker and play music clips via VLC through a Python script. Part 2 is all about adding a 16X2 LCD screen and adjusting contrast. In Part 3, we add the ultrasonic sensor and learn how to measure distance. In Part 4, we pull it all together by triggering the music and the countdown display with the ultrasonic sensor.
What You’ll Need to Build a Hand Washing Timer
- Raspberry Pi 3B or newer (3B+,3A+, or 4)
- Power supply/Keyboard/Mouse/Monitor/HDMI Cable (for your Raspberry Pi)
- Ultrasonic Sensor
- 16x2 LCD screen with I2C backpack
- Small screwdriver to adjust contrast of the LCD screen
- 3.5mm male-to-male audio cable
- Portable speaker with 3.5mm Aux Audio Jack
- Breadboard
- Set of jumper wires (M-to-F, M-to-M, and F-to-F)
- 2 resistors (330 ohm & 470 ohm)
Optional: 3D print a case for your hand washing timer
This design also requires 4 - M2.5 screws and corresponding nuts to attach the LCD screen + 4 short M2.5 screws to attach the Raspberry Pi to the base.
Part 1: Playing Music on Raspberry Pi Hand Washing Timer
Connect your speaker to the Raspberry Pi’s 3.5mm jack. If it charges via USB, you can power it from one of the Pi’s ports.
1. Boot your Raspberry Pi. If you don’t already have a microSD card see our article on how to set up a Raspberry Pi for the first time or how to do a headless Raspberry Pi install.
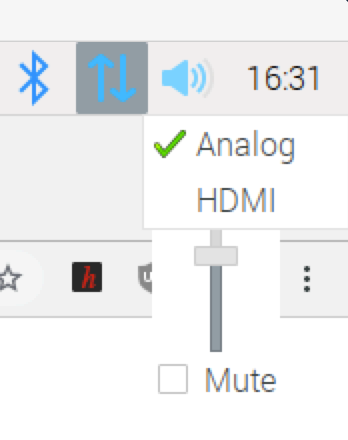
2. Right click on the speaker icon to select ‘Analog’ input. You’ll find it in the upper right corner of the screen. After setting ‘Analog’ input, left click the same speaker icon to set the volume to the middle (or your desired level).
Get Tom's Hardware's best news and in-depth reviews, straight to your inbox.
4. Open a Terminal
5. Install VLC for Python by entering
sudo pip install python-vlc6. Clone this repository
git clone https://github.com/carolinedunn/Handwashing_Timer_Display7. Navigate to the directory you just created
cd Handwashing_Timer_Display8. Test your setup by entering in the Terminal
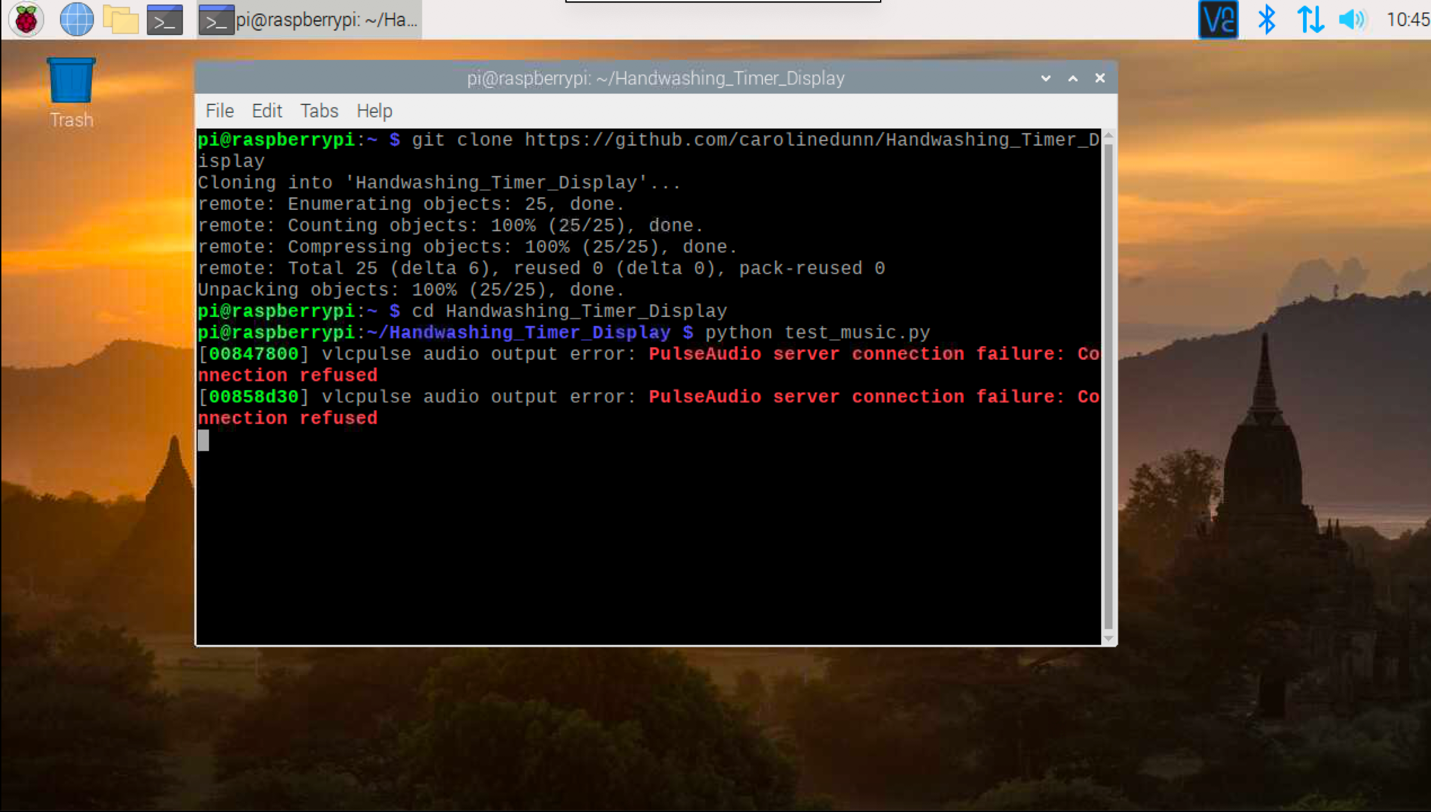
python test_music.pyIf music plays, then go to the next step, if not then go back and troubleshoot.
Note: Music should play (20 second clips) followed by a 5 second pause between each song.
Bonus: You can replace the music with your own music by replacing the music files but please keep the naming convention of 1.mp3, 2.mp3, etc. so that you don’t have to rewrite the code. I used Audacity to cut the music down to 20 second clips. The music included in this tutorial is royalty free music.
You’ll need Shutdown your Raspberry Pi and unplug the power for the next part.
Part 2: LCD display for Raspberry Pi Hand Washing Timer
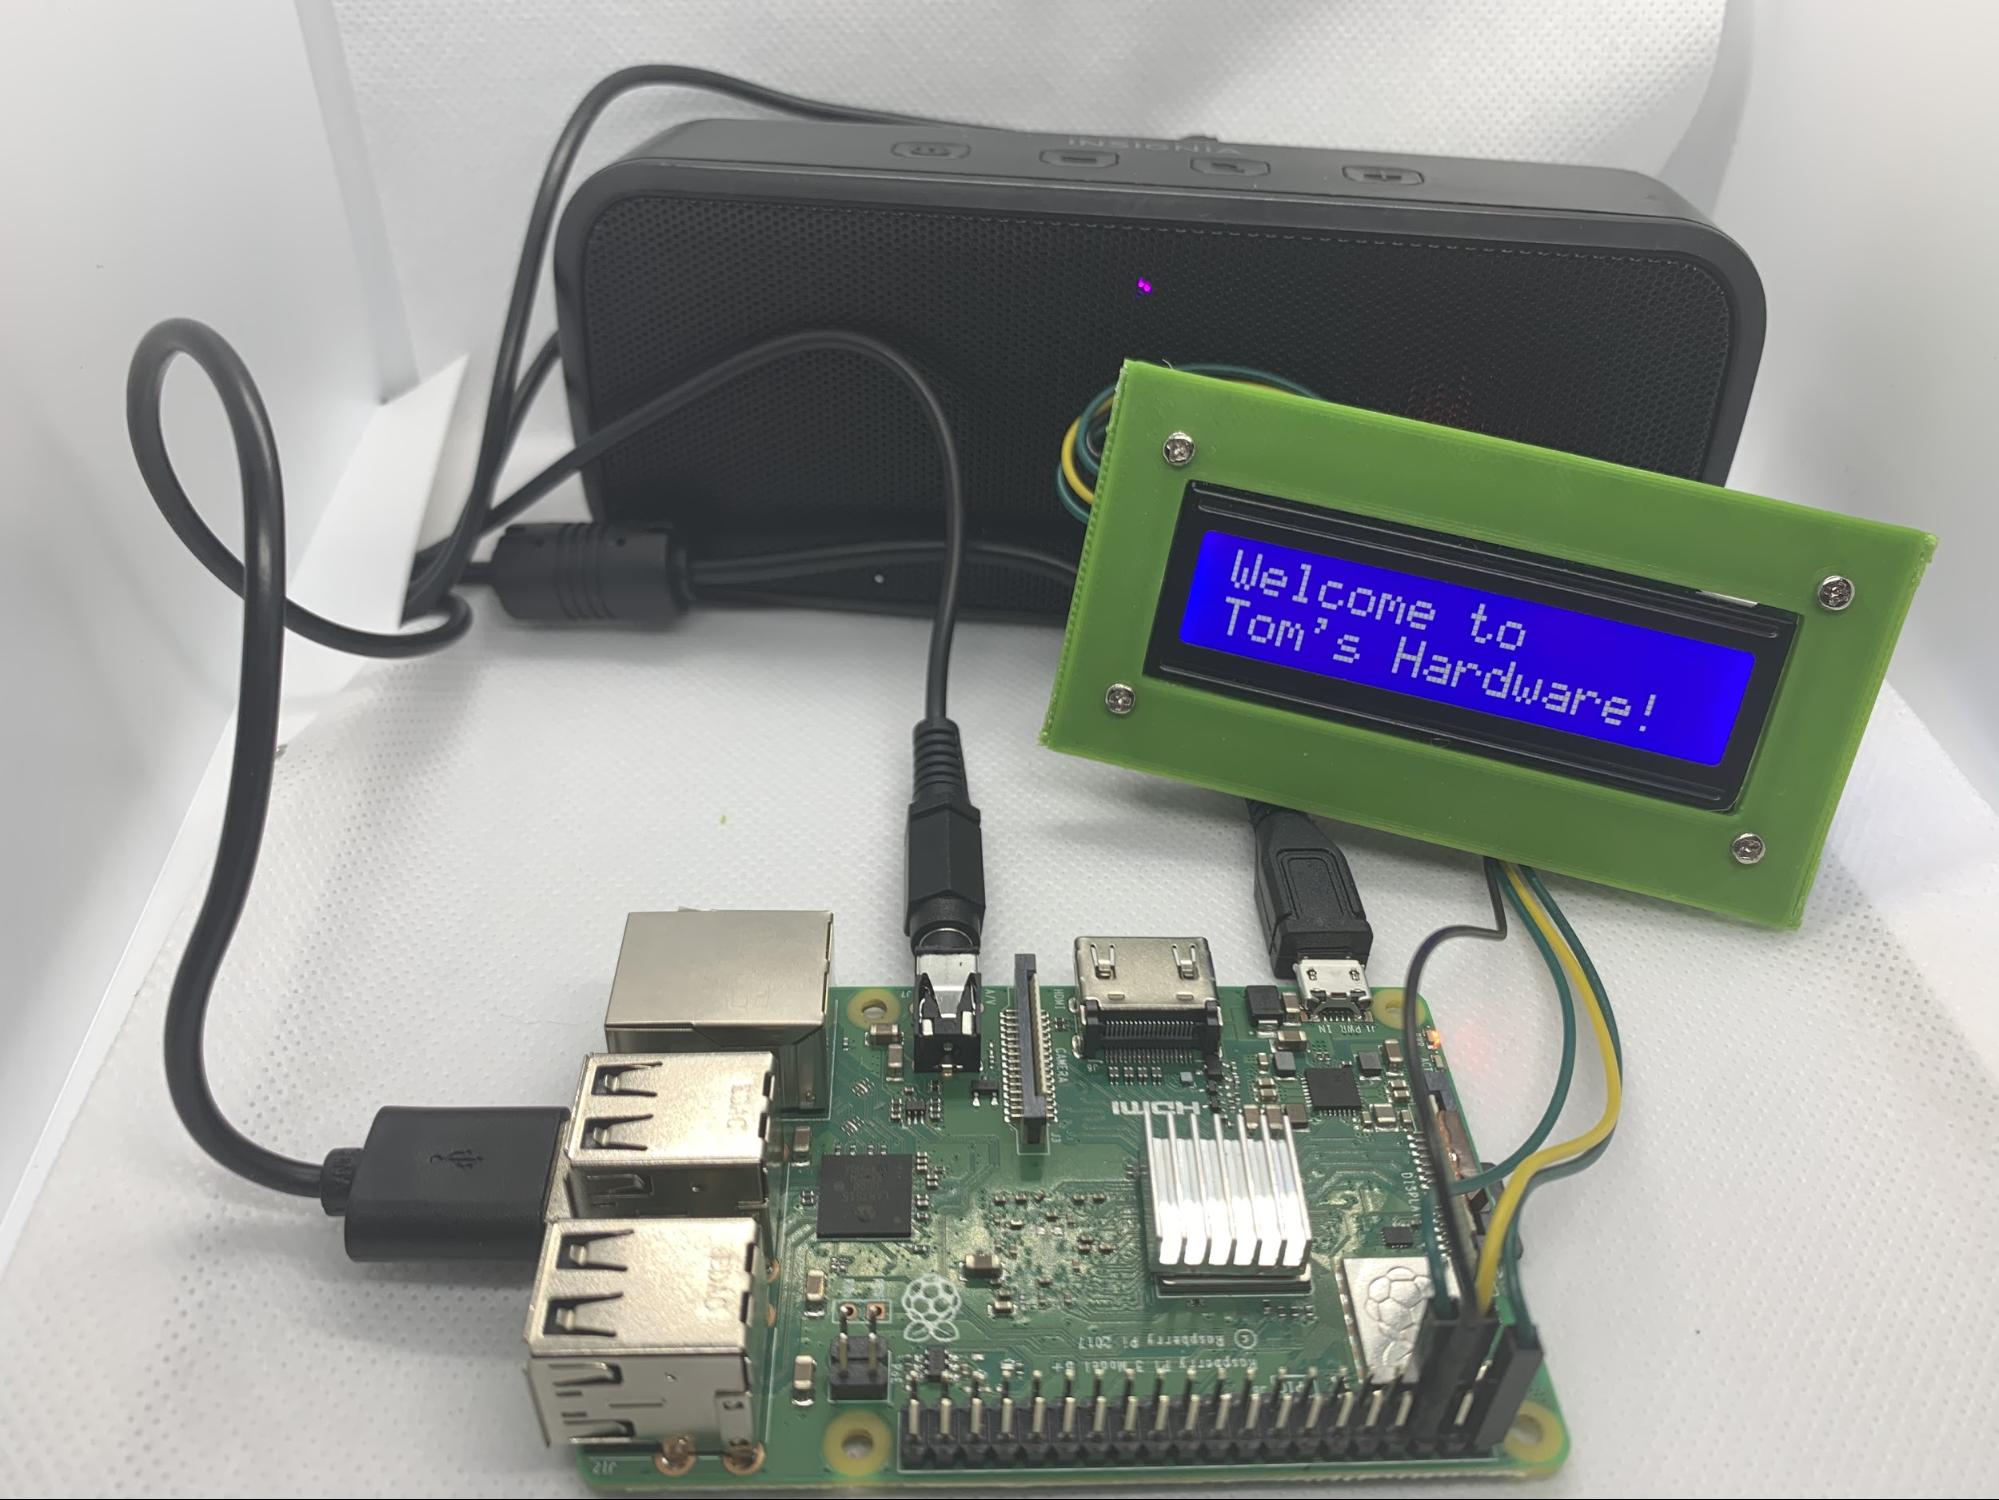
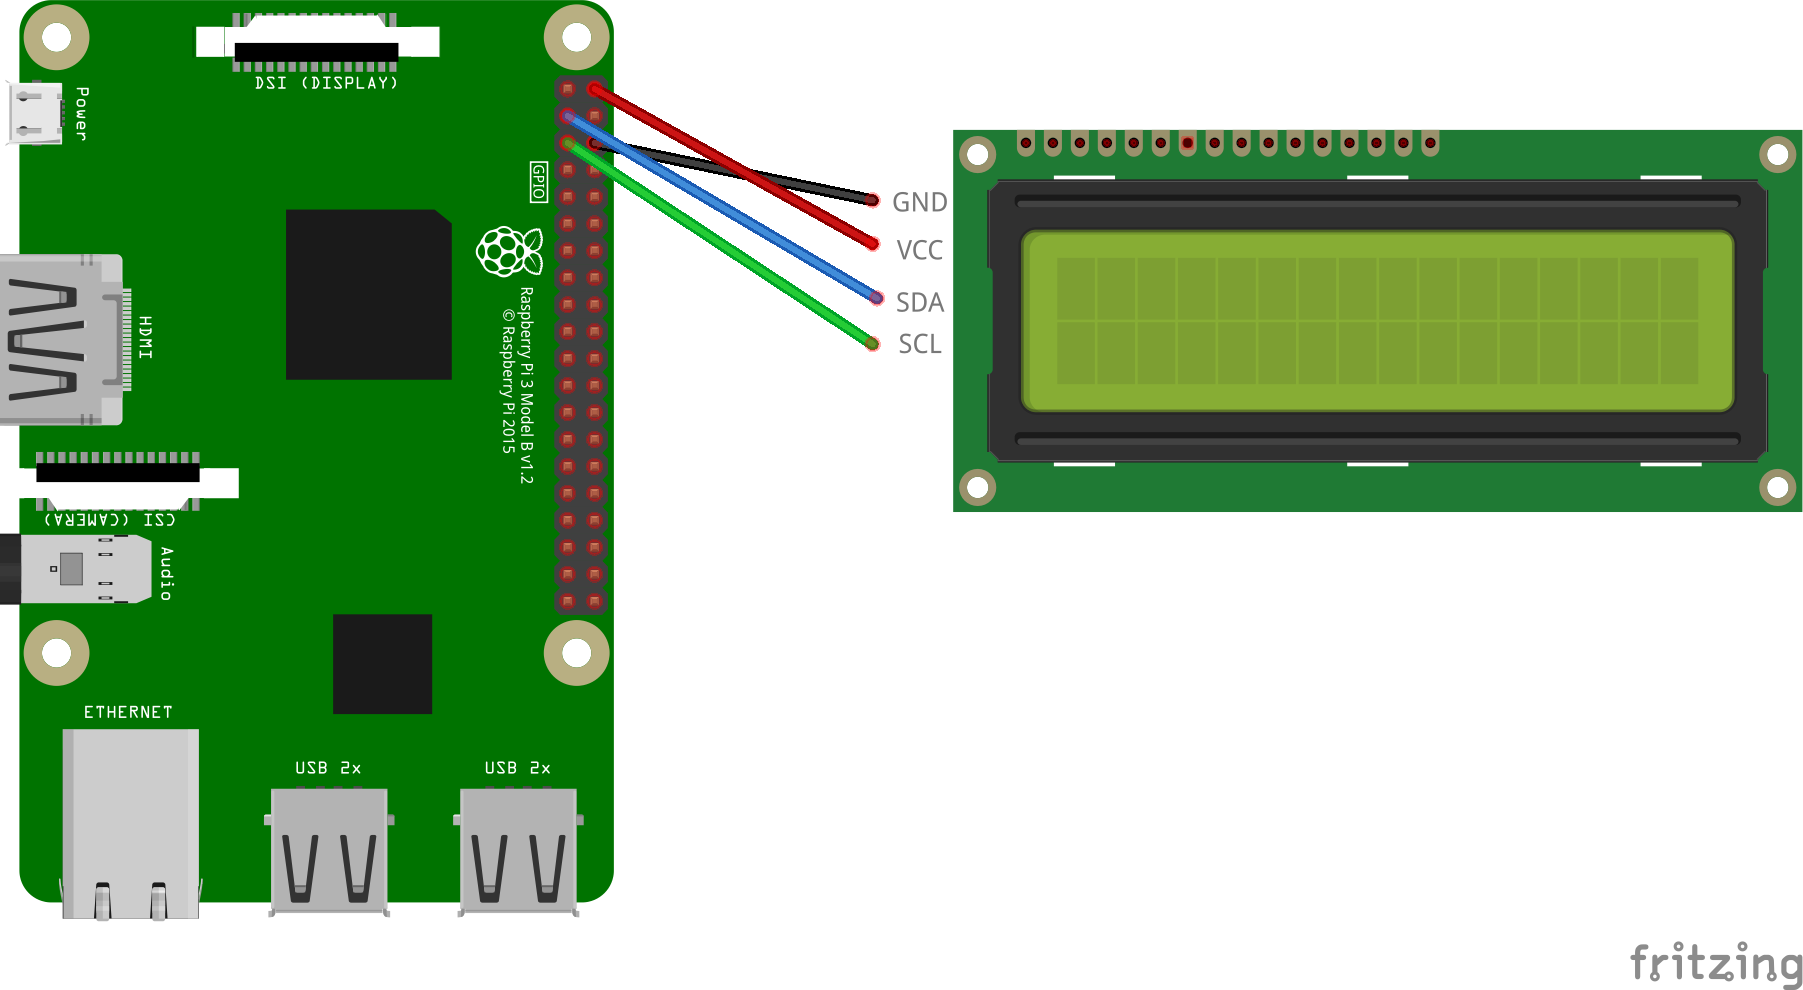
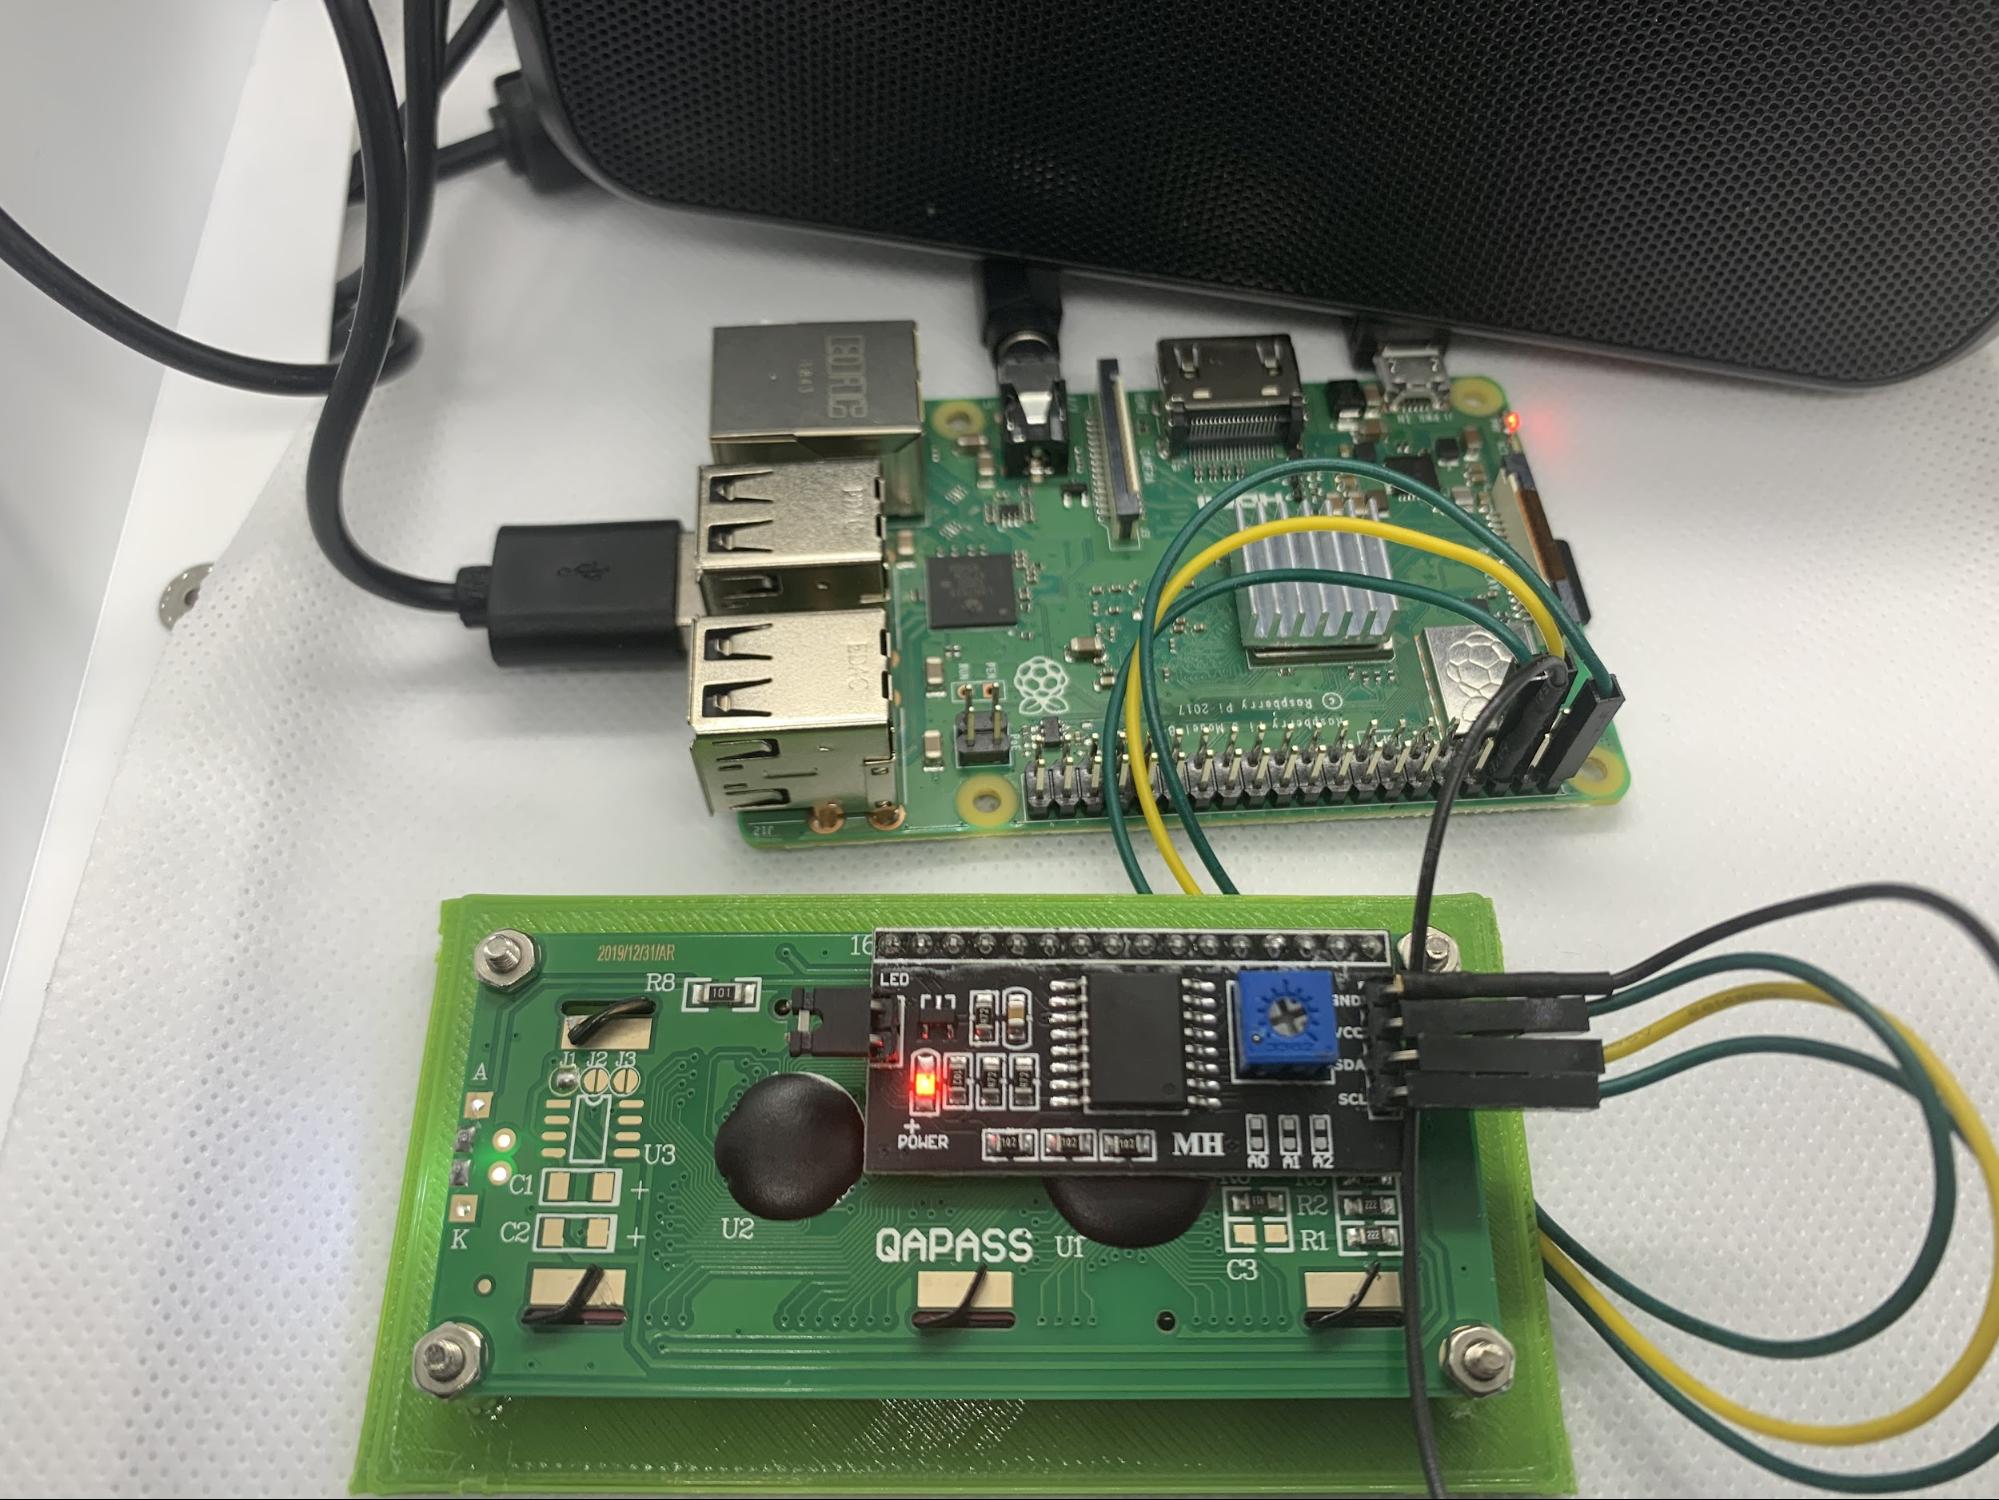
From the I2C backpack on the LCD screen (using 4 female-to-female jumper wires):
1. Connect GND to a ground pin on the Raspberry Pi.
2. Connect VCC to 5V (pin 2) on the Raspberry Pi.
3. Connect the SDA to pin 3 on the Raspberry Pi.
4. Connect the SCL to pin 5 on the Raspberry Pi.
5. Boot your Raspberry Pi
6. Open the Raspberry Pi Configuration tool from the Preferences menu in the Raspbery Pi OS GUI.
7. Enable ‘I2C’ on the Interfaces tab.
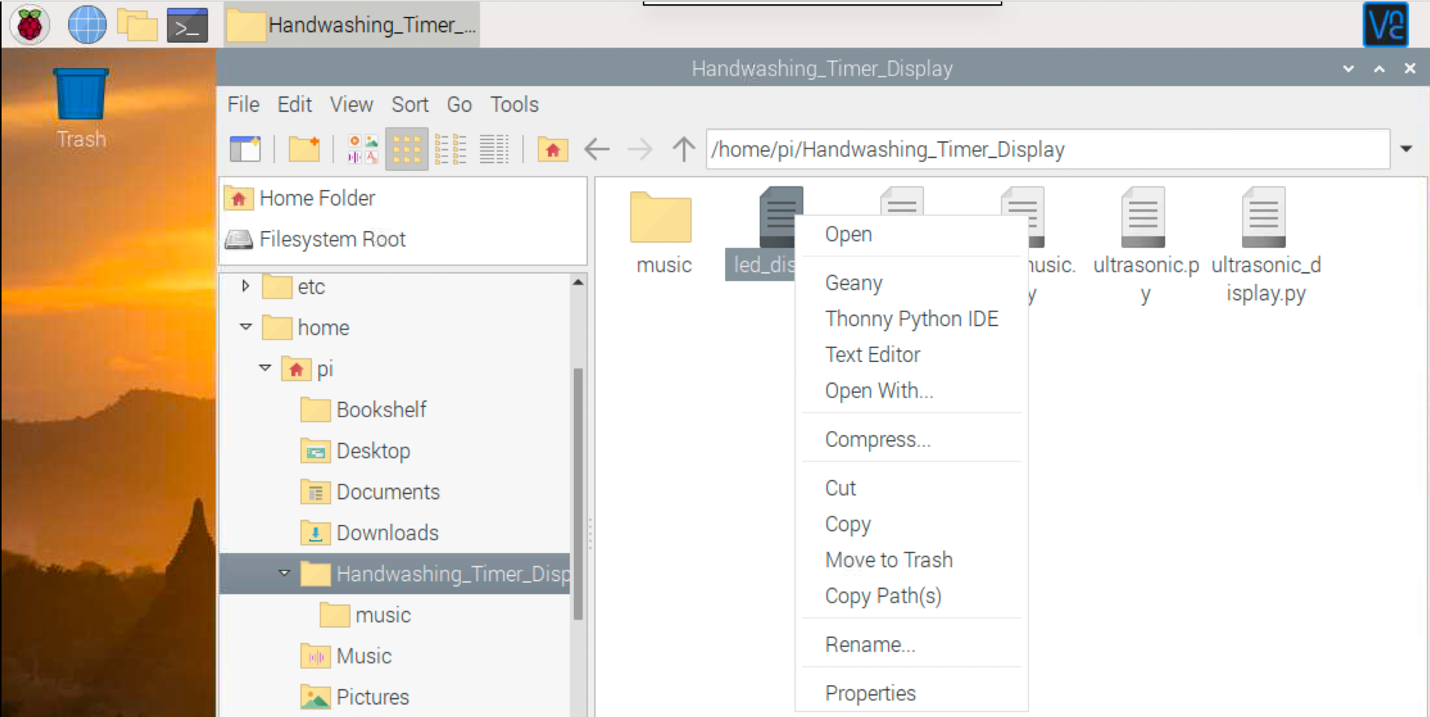
8. Open lcd_disp.py from the Handwashing_Timer_Display folder in Geany. The easiest way is to use file manager to navigate to the folder, right click on the file and select Geany as your editor. y.
9. Run lcd_disp.py by clicking the paper airplane icon in Geany.
You should now see text across the LCD screen.
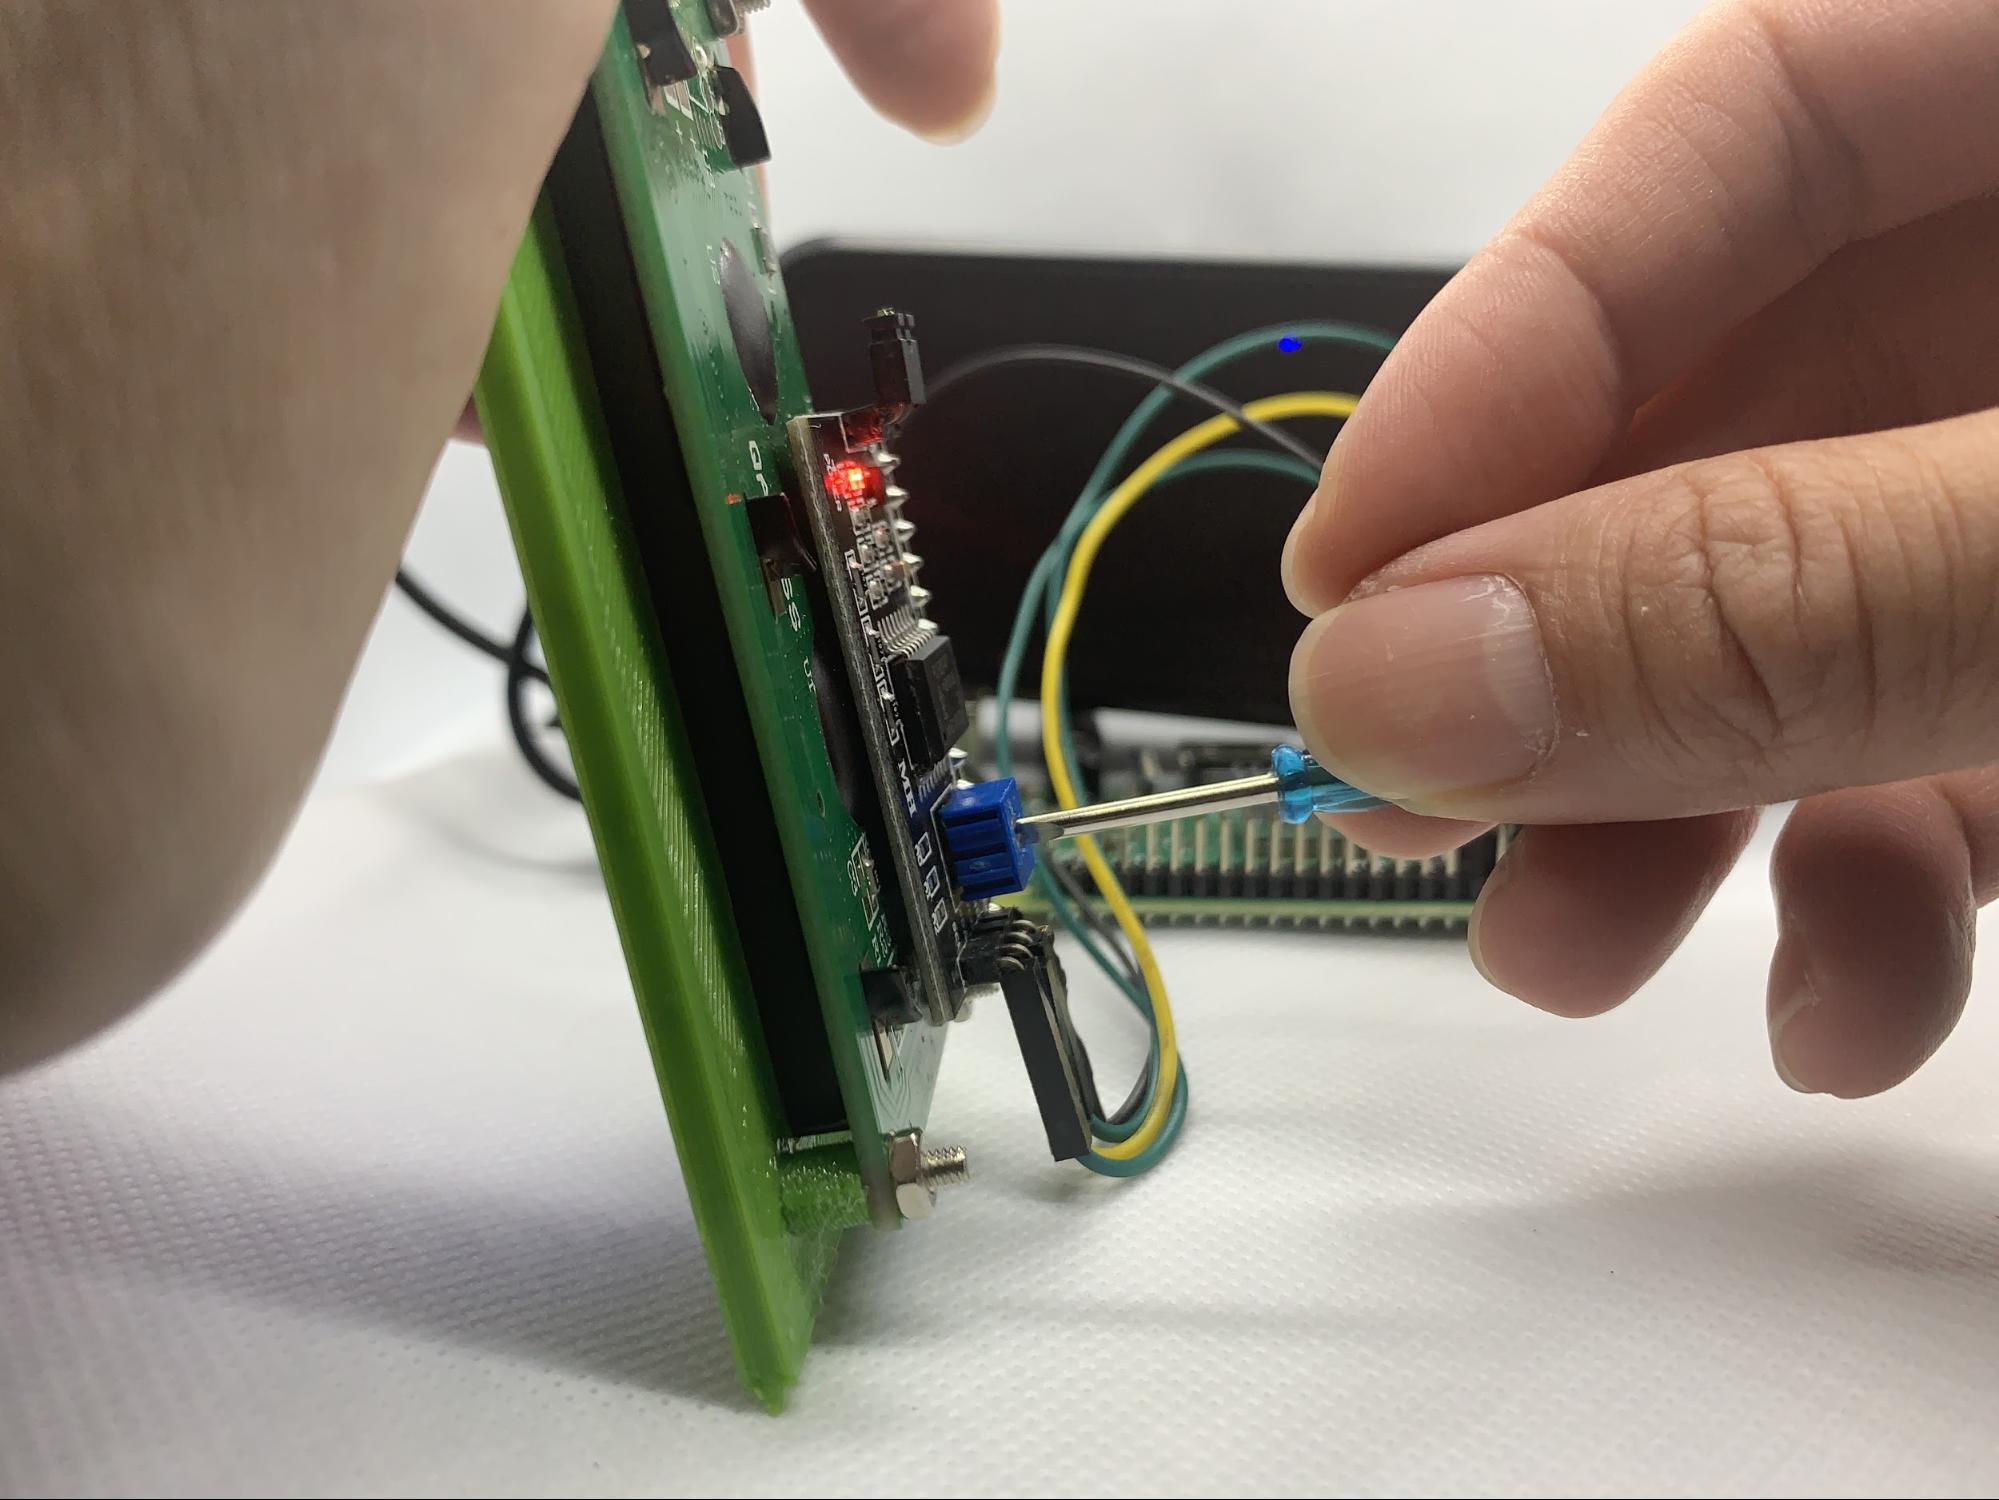
10. Adjust the contrast dial on the back of the screen using a screw driver, until you’re comfortable with the output.
Shutdown your Raspberry Pi and unplug the power for the next step.
Part 3: Ultrasonic Sensor on Raspberry Pi Hand Washing
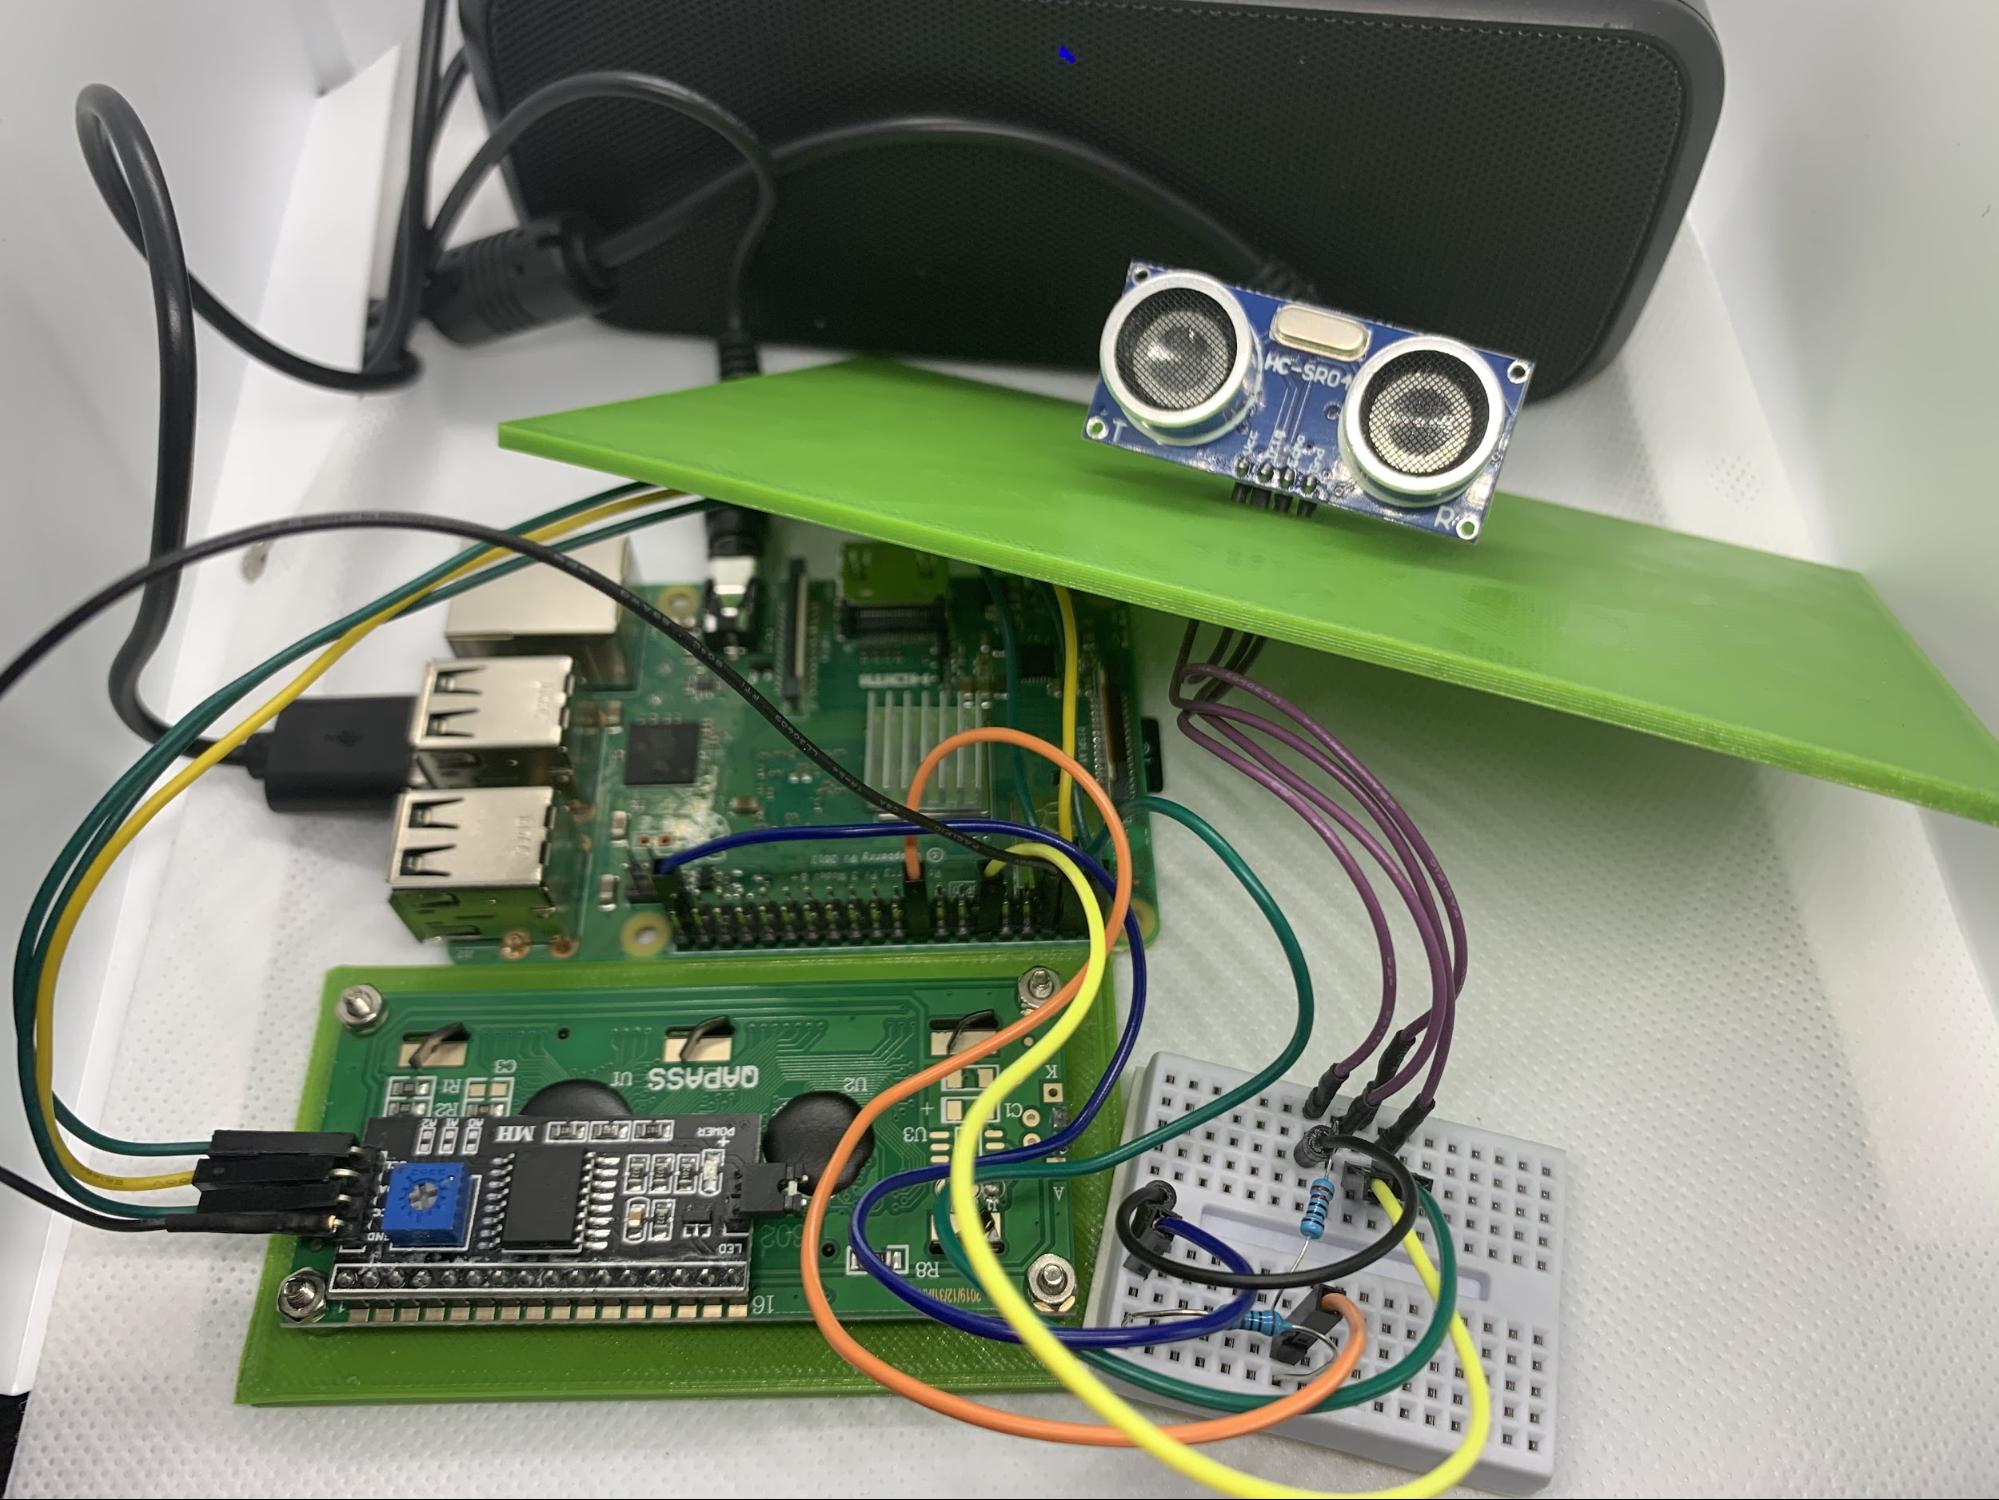
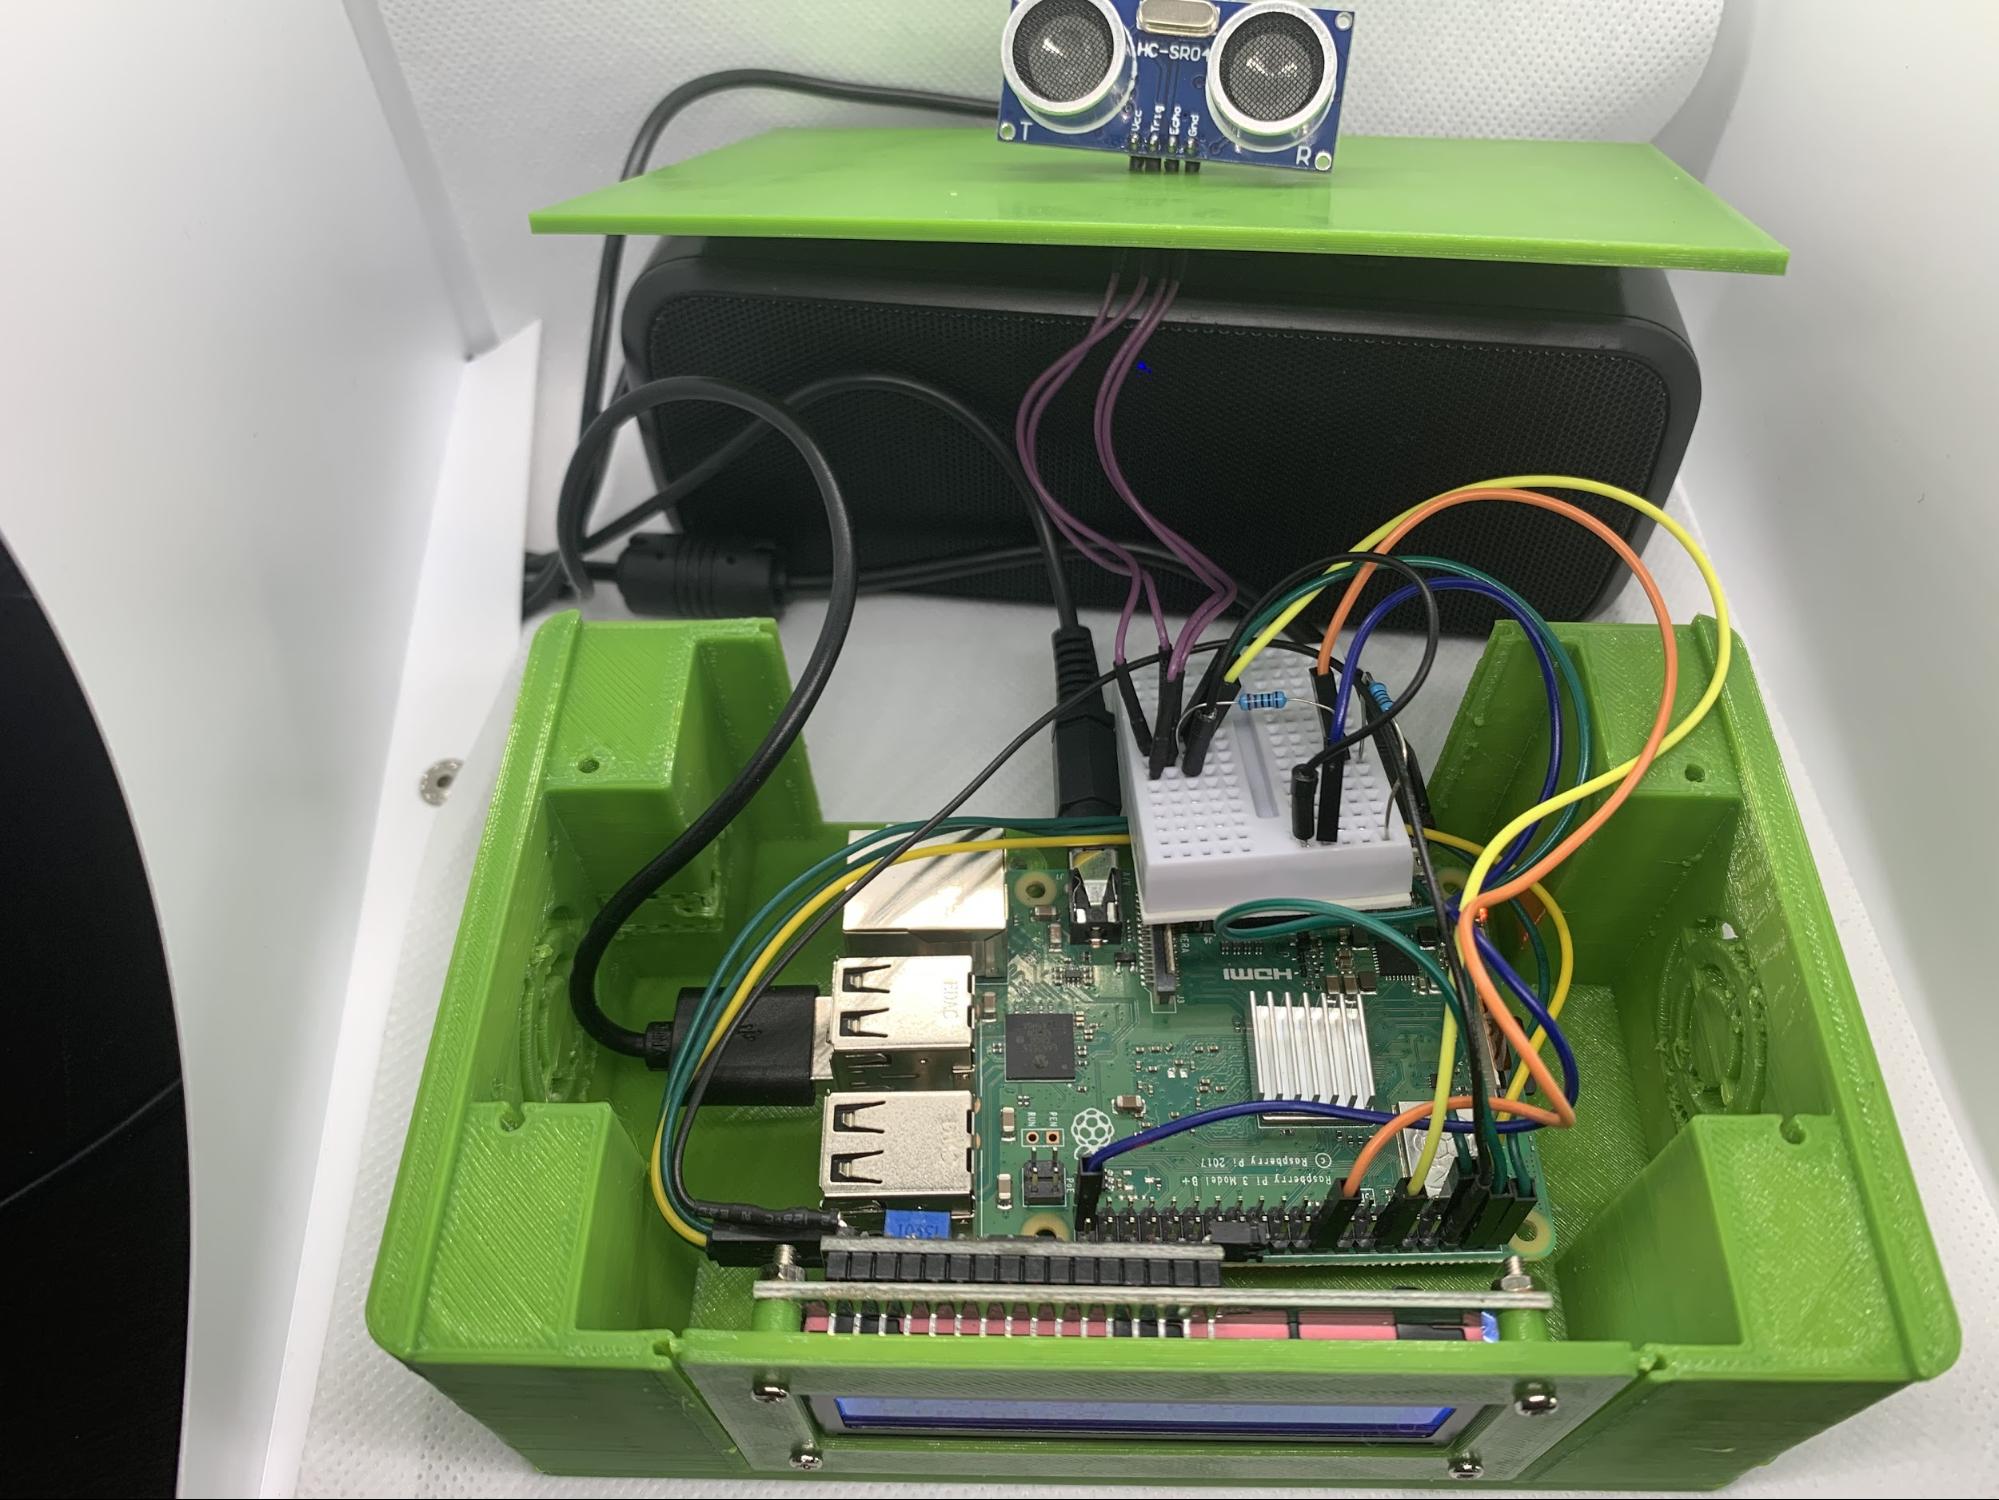
1. Attach a female to male jumper wire to each lead from the ultrasonic sensor.
2. Insert the male-end of the jumper wires to the breadboard in sequential order.
3. Connect the VCC pin of the ultrasonic sensor to pin 4 of your Raspberry Pi for 5V power.
4. Connect TRIG to GPIO 18 of your raspberry pi.
5. Connect ECHO to a 330 ohm resistor.
6. Connect the other end of the resistor to GPIO 24 of your raspberry pi.
7. Connect a 470 ohm resistor from the 330 ohm resistor to the GND rail.
8. Connect GNC pin from the sensor to the GND rail.
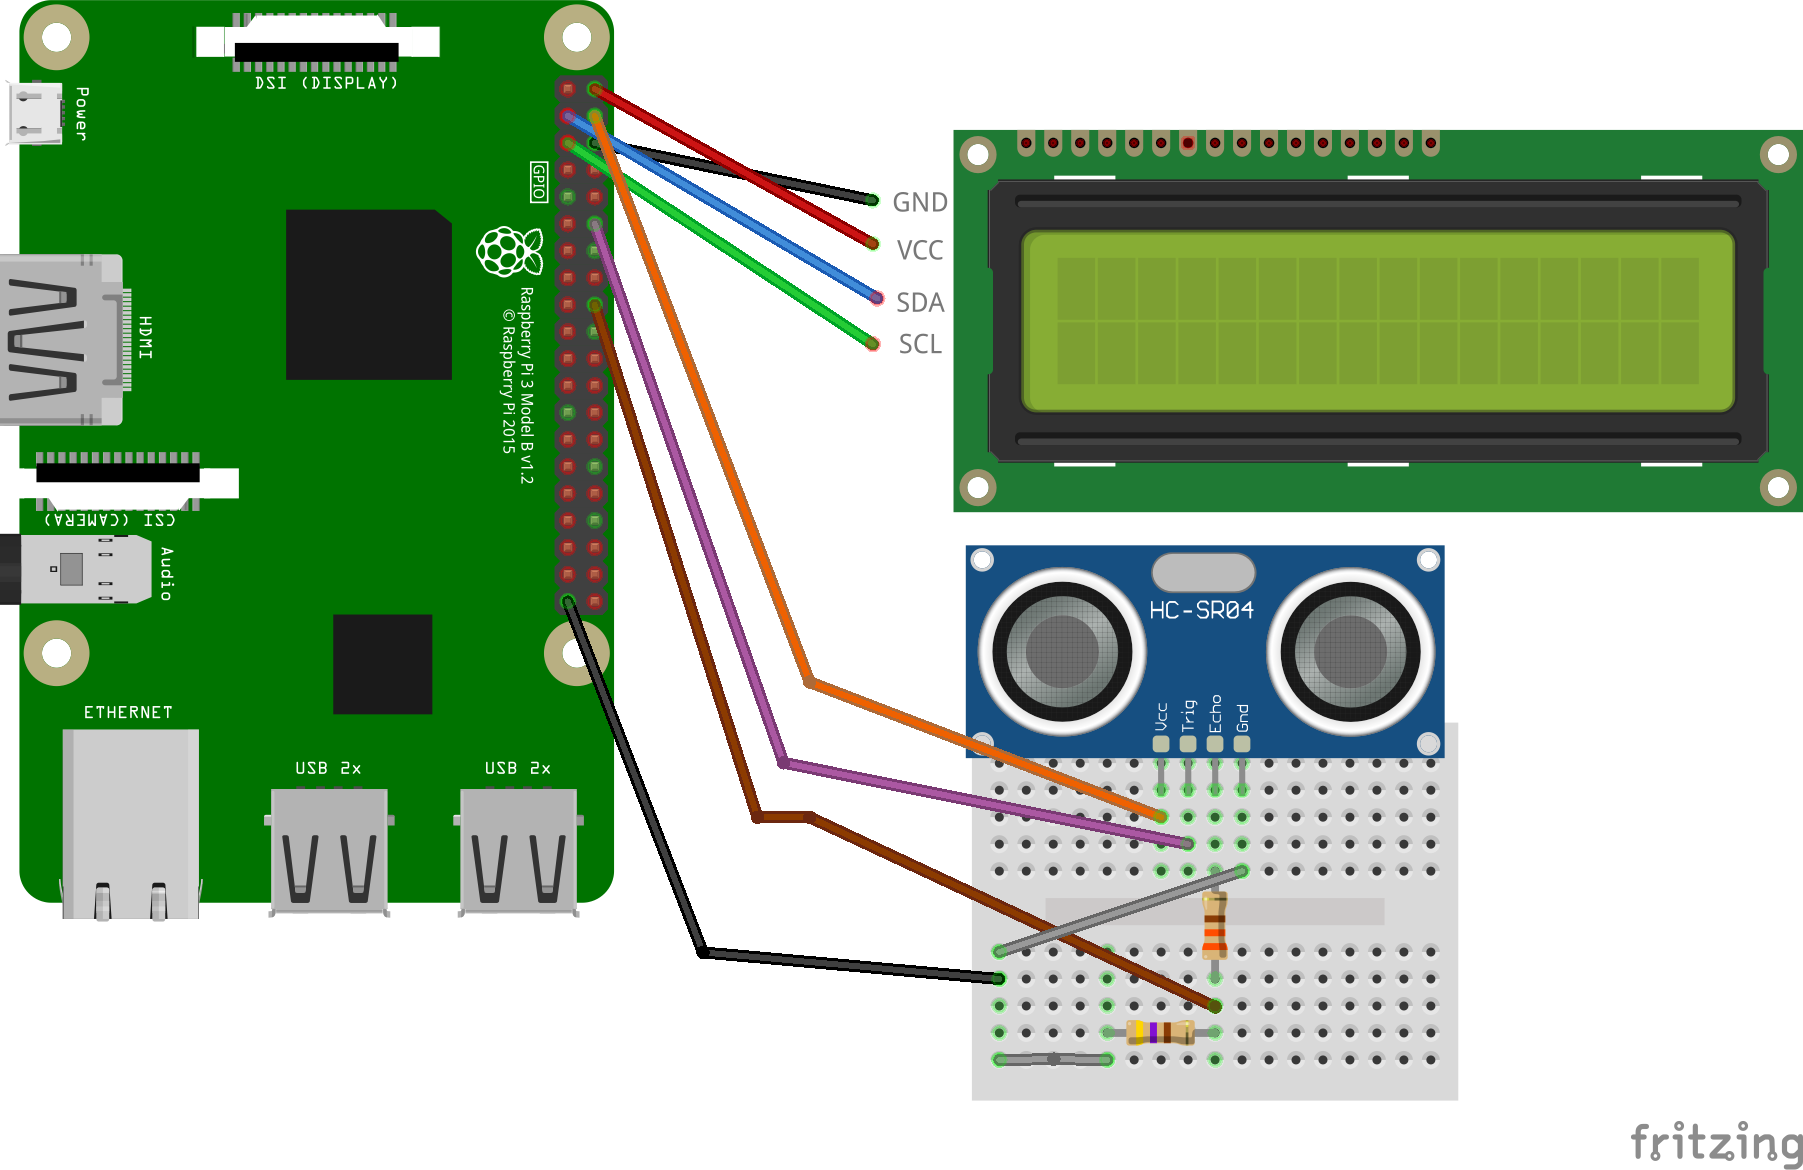
Side Note: For testing, I found it was easiest to insert the 4 pins of the ultrasonic sensor directly into the breadboard and connect from there. In practice (actual hand washing), adding 4 female-to-male jumper wires between the ultrasonic sensor and the breadboard allowed me to be able to position the sensor for optimal usage.
9. Boot your Raspberry Pi
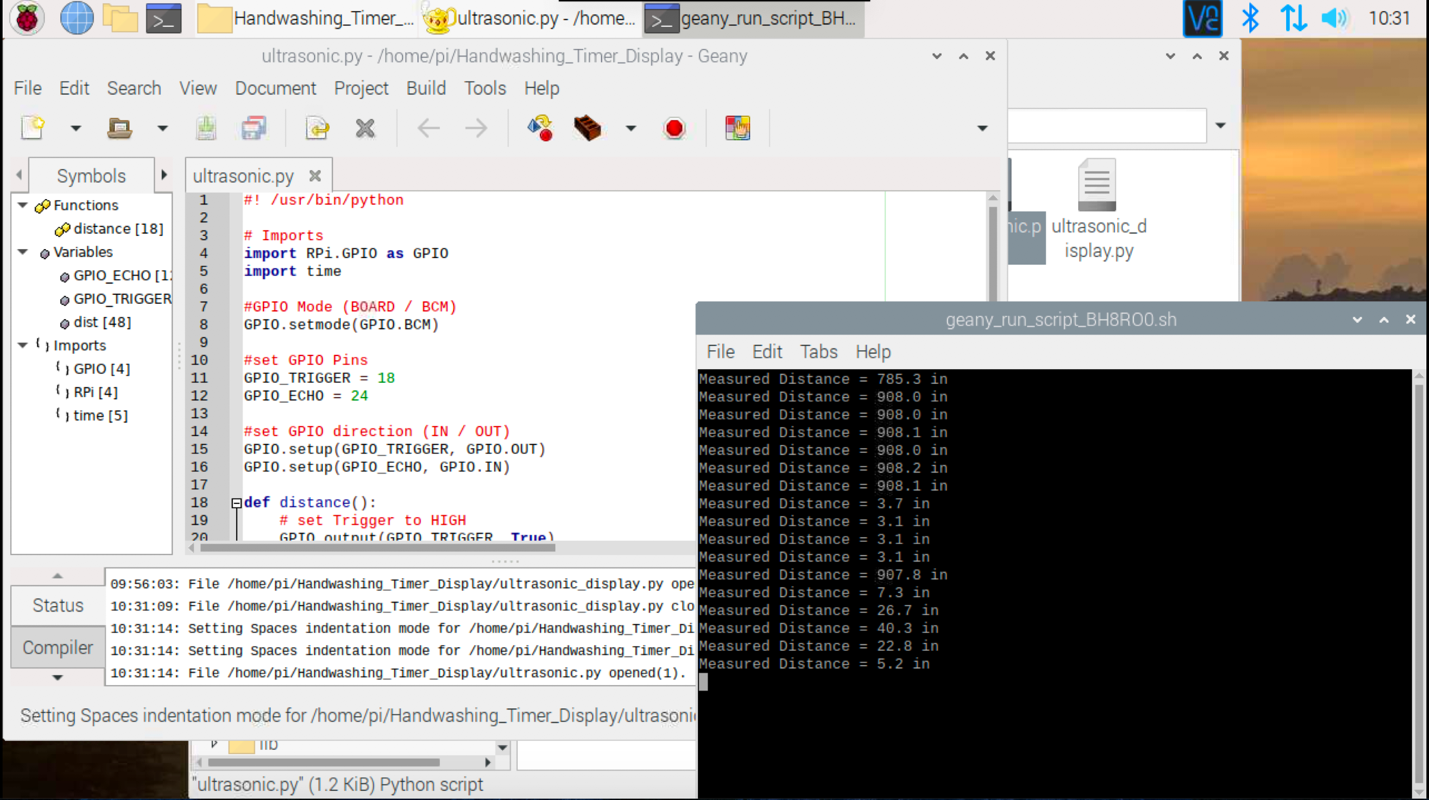
10. Open ultrasonic.py for editing using Geany.
11. Run ultrasonic.py by clicking the paper airplane icon in Geany.
As you hold your hand over the ultrasonic sensor, the distance between the sensor and your hand should be measured and shown in the terminal.
12. Press Ctrl-C to exit the program.
Part 4: Pull It All Together
1. Measure / estimate the distance between your hand and the ultrasonic sensor to determine the distance you wish to set to trigger the sensor.
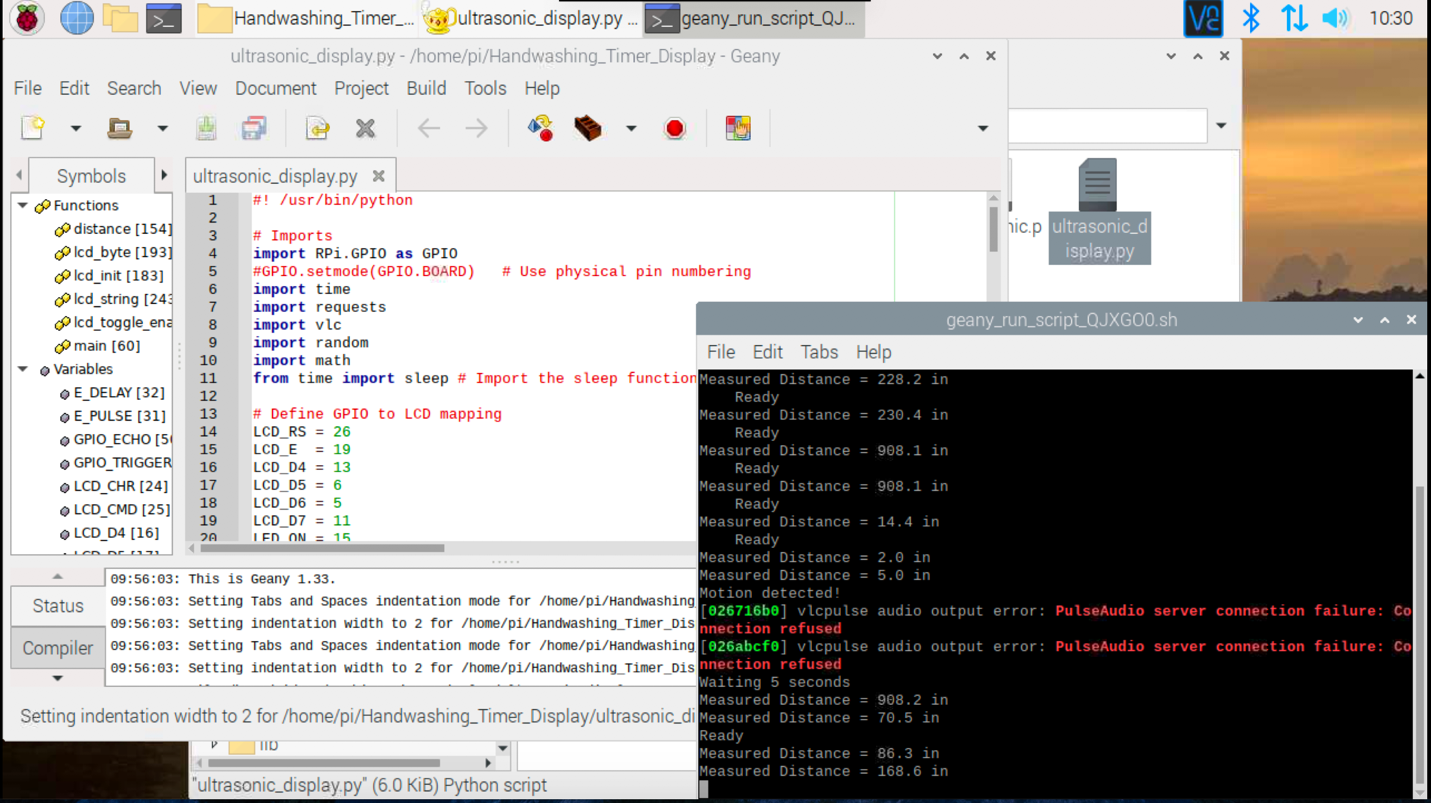
2. Open ultrasonic_display.py for editing in Geany
3. Adjust the dist_trig on line 51 to the distance you determined (in inches) to trigger the sensor. Default is 7 inches.
4. Save your changes.
5. Run ultrasonic_display.py
6. Wave your hand over the ultrasonic sensor until you reach the distance you set to trigger the hand washing timer. Once you have moved your hand closer than the distance that you set on line 51, the music should start playing and the display should count down.
After the song ends, the display should read:
“Great Job!
All Clean”
The display should pause for at least 5 seconds before going back into “Ready for Motion” status. This prevents the hand washing timer from triggering too often.
When the hand washing sensor has reset, you should see “Ready for Motion” on the display.
7. Click the stop icon to stop the hand washing timer.
8. Set ultrasonic_display.py to run every time you boot your Raspberry Pi if you want it to work every time you power the computer on. We have instructions here on how to set a script to boot on Raspberry Pi.
Side Note: Parts 2 & 3 all seemed to work with both default Python apps in Raspberry Pi OS (Thonny and Geany). The python code test_music.py and ultrasonic_display.py did not work with Thonny as Thonny could not invoke VLC to play music files. Please use Geany or run in a terminal command > python ultrasonic_display.py
Optional: When you get your project working you can 3D print a case to enclose your hand washing timer. https://www.thingiverse.com/thing:4559022
Setup your hand washing Timer to run on Boot
This step sets up your Raspberry Pi to always run the ultrasonic_display.py script to run on boot.
1. Open a Terminal
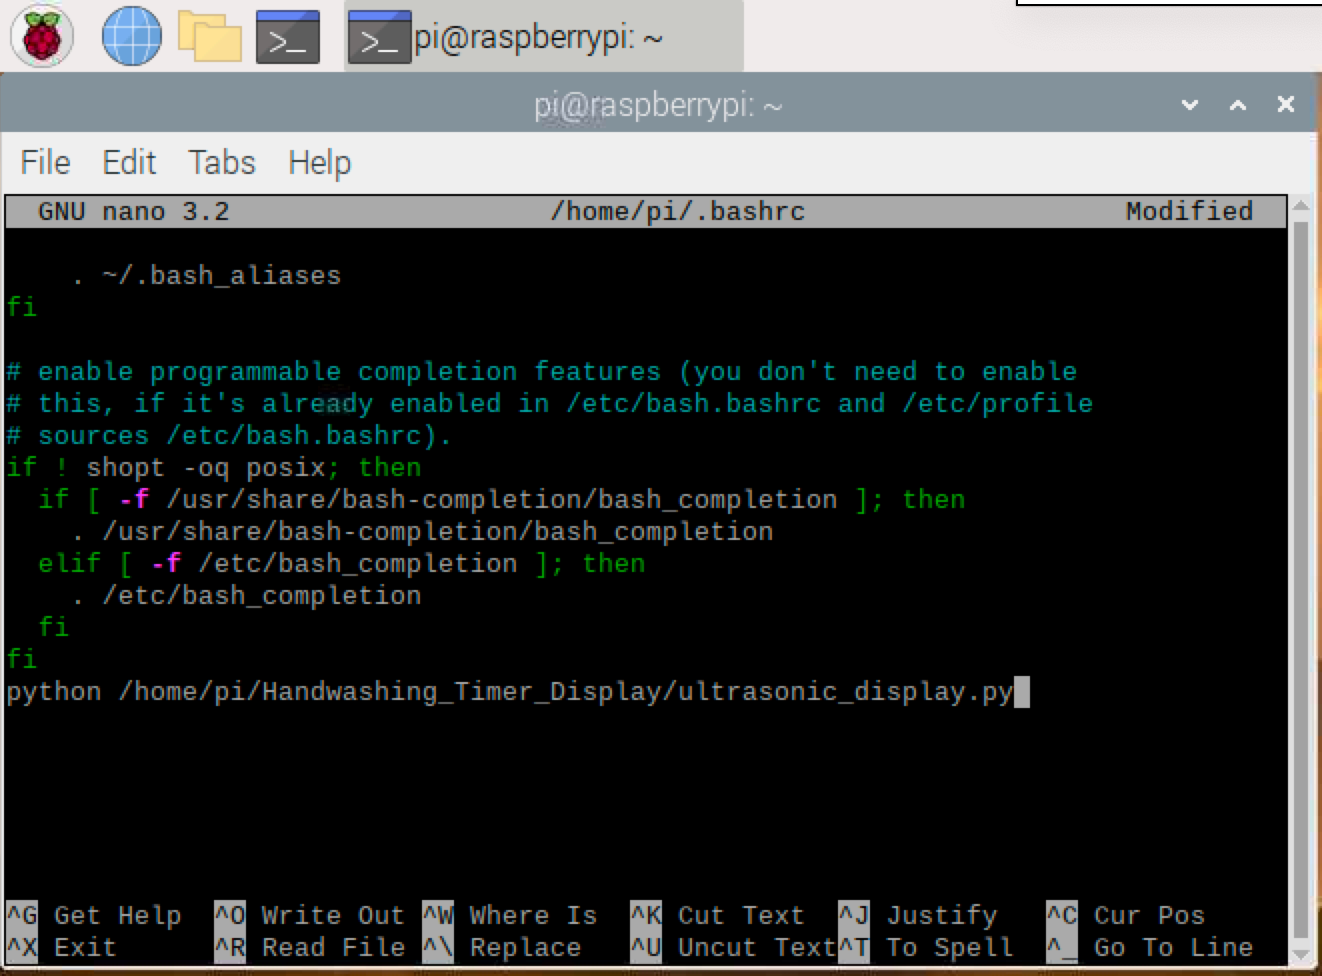
2. Enter sudo nano /home/pi/.bashrc
3. Enter the following text at the bottom of .bashrc
python /home/pi/Handwashing_Timer_Display/ultrasonic_display.py4. Hit Ctrl-X to exit and Y to save.
5. Reboot your Pi. Reboot your Pi.
Once your Pi reboots, it should automatically run ultrasonic_display.py python script every time.
Enjoy your 20-second hand washing timer!
Caroline Dunn is a freelance writer for Tom's Hardware. Her expertise lies in covering Raspberry Pi projects, creating video tutorials, writing guides, and exploring other entertaining tech DIY initiatives.
-
kep55 What a waste of time, money and effort. Just run down to WallyWorld and buy a sand time or cheap digital timer.Reply -
bledd Replykep55 said:What a waste of time, money and effort. Just run down to WallyWorld and buy a sand time or cheap digital timer.
Seems a decent project from a learning perspective.
Could also turn it into a t-rex evasion tool. Plays scary music if you aren't staying still :D -
LordConrad If you can't count to 20, you need more than a timer, you need to repeat Elementary school!Reply -
psj20 What an overkill. its like taking a sledgehammer to crack a nut. This is not Pi territory, hell its not even arduino territory. maybe an arduino with attiny. frankly you can do it even without a microcontroller.Reply
