


You’re at the store and suddenly you remember that you really need to start a script on a remote server. It could be your Raspberry Pi 5 or in my case, back in 2012 it was a misbehaving client project server which forced me to login and restart some services while I was browsing which pizza would be for dinner. I did everything from my smartphone using SSH (Secure Shell) and JuiceSSH, a free SSH client app for Android.
In this how to we’ll install JuiceSSH on our Android smartphone and learn how to make a connection to a Raspberry Pi 5 on our home network.
For this project you will need a device running an SSH server. Typically this is a Linux machine such as a Raspberry Pi. We’re using a Raspberry Pi 5 running the latest version of Raspberry Pi OS. You will also need an Android device.
If you are setting up a Raspberry Pi from scratch, follow this guide to install Raspberry Pi OS with SSH ready to go. If your Raspberry Pi is already running, follow these steps to set up an SSH server.
1. Open a terminal and as sudo, run raspi-config command.
sudo raspi-config2. Using the arrow keys, scroll to Interface Options and press Enter.

3. Select SSH and press Enter.

4. Select Yes and press Enter to enable the SSH server.

5. Select Ok to acknowledge that the SSH server is running.

6. Select Finish and press Enter to exit. Close the terminal when done. You can now move on to the next part of this how to.

Installing and using JuiceSSH on Android

2. Open JuiceSSH.

3. The JuiceSSH interface is broken down into four sections. Section 1 is Quick Connect, and we can use this to make a connection to a device. Section 2 will show a list of the connections that we frequently use. Section 3 is where we can create, update and delete SSH connections. Section 4 is where we can find app settings.

4. Click on Quick Connect and in the next screen ensure that SSH is selected and then enter your username and the IP address / hostname of the device. Click OK to start the connection. Here we are connecting to a Raspberry Pi 5 which we know the IP address of. You can use a hostname if you prefer.

5. Click ACCEPT for the host verification screen.

6. Enter your password and click OK to connect. Optionally you can save the password for a quicker login. Yes it does say Authentication Failure despite us never connecting to this Raspberry Pi via SSH. This is normal as the app will first try to connect without a password.

7. Read the text and click OK - I’ve got it! We are logged in but the app will tell us how to resize terminal text (volume buttons), open the keyboard (press the terminal screen) and how to copy / paste (long press on the item). We can also use the up and down arrow keys to scroll through our command history, just like we were sitting at our desk.

8. Update the software on the remote machine, then install neofetch. Type the command and press Enter to run. Press Y when prompted to confirm. With direct control of our remote system we can issue commands as if we are sitting in front of the machine.
sudo apt update && sudo apt install neofetch
9. Run the neofetch command to confirm that everything has been installed correctly.

10. Press CTRL and D on the terminal keyboard to exit the SSH session. Pressing the CTRL key will hold the key down enabling us to press the D key to exit.

Managing Connections
A useful part of JuiceSSH is the Manage Connection section. Here we can list all of our connections and have them ready to go at a moment's notice. We’re going to use the quick connection that we just created to create a permanent connection in JuiceSSH.
1. Click on Manage Connections.

2. From the list of connections, long press on the one that you would like to use. We’re going to reuse our connection that uses an IP address.

3. From the list select Edit. We can also duplicate and delete connections via this menu.

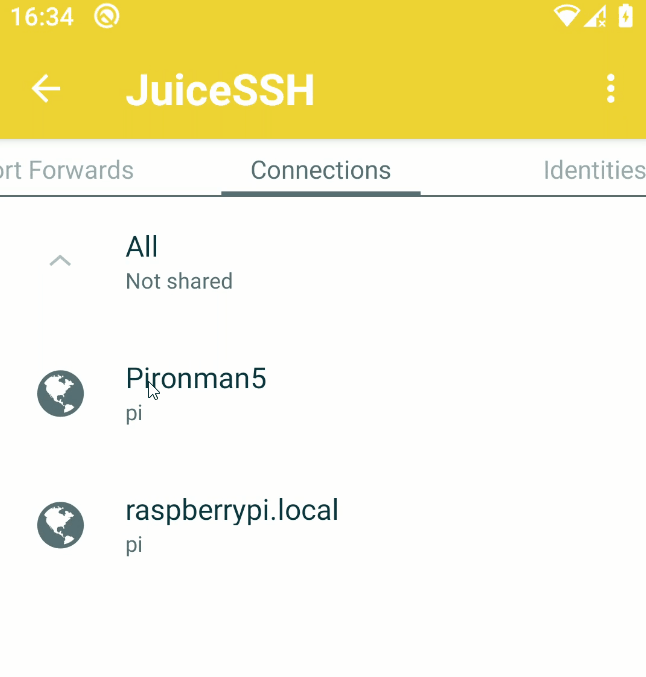
4. Set the nickname to something relevant and memorable and then click on the tick in the top right corner to save. If your device uses an alternative port to 22 (the default for SSH), change that here. We’re using a Raspberry Pi 5 inside of Sunfounder’s Pironman 5 case, hence our nickname.

5. Click on the nickname to start the connection. At the Connections screen we can see that the IP address has been replaced with the nickname.

6. Enter your password and click Remember Password, then press OK. Clicking Remember Password will make the login process much faster for future logins. If you did this earlier, then you will not see this dialog box.

7. Once logged in, press CTRL + D to logout.
8. Log back into the connection, this time you will not be asked for a password.
We now have an SSH client on our Android device, ready for action the next time you need to login to a server or run some code on your Raspberry Pi.
