How to Apply Random Image Effects With Raspberry Pi Camera
Warhol, Pollock, Lichtenstein at the push of a button
Get Tom's Hardware's best news and in-depth reviews, straight to your inbox.
You are now subscribed
Your newsletter sign-up was successful
The Raspberry Pi Camera is great fun to play with. It can be used for silly photos, stop motion animation and for computer vision projects.
To introduce how to use the camera as part of a Bash script we are going to use the camera with a push button that will choose a random filter for the image. Some of these filters enhance the image, some alter it to be a cartoon others create artistic effects.
On a recent episode of The Pi Cast we created a version of this project using Python. Here you can see all of the image effects possible with the official Raspberry Pi Camera.
The Bash terminal is our programming environment and it is a great way to introduce the powerful scripting language which is often overlooked in favor of other languages.
We used the Raspberry Pi 4 for this project, but the project can also be created using any other model of Raspberry Pi running the latest Raspberry Pi OS.
For this project you will need:
- Any Raspberry Pi
- Any Raspberry Pi Camera module (no USB webcams, though)
- The latest Raspberry Pi OS
- A breadboard
- 2x Male to female jumper wires
- A push button
All of the code, and high resolution images for this project are available via a GitHub repository at https://github.com/lesp/LXF269-PiCamera-Bash/archive/master.zip
Get Tom's Hardware's best news and in-depth reviews, straight to your inbox.
Setting up a Raspberry Pi Camera
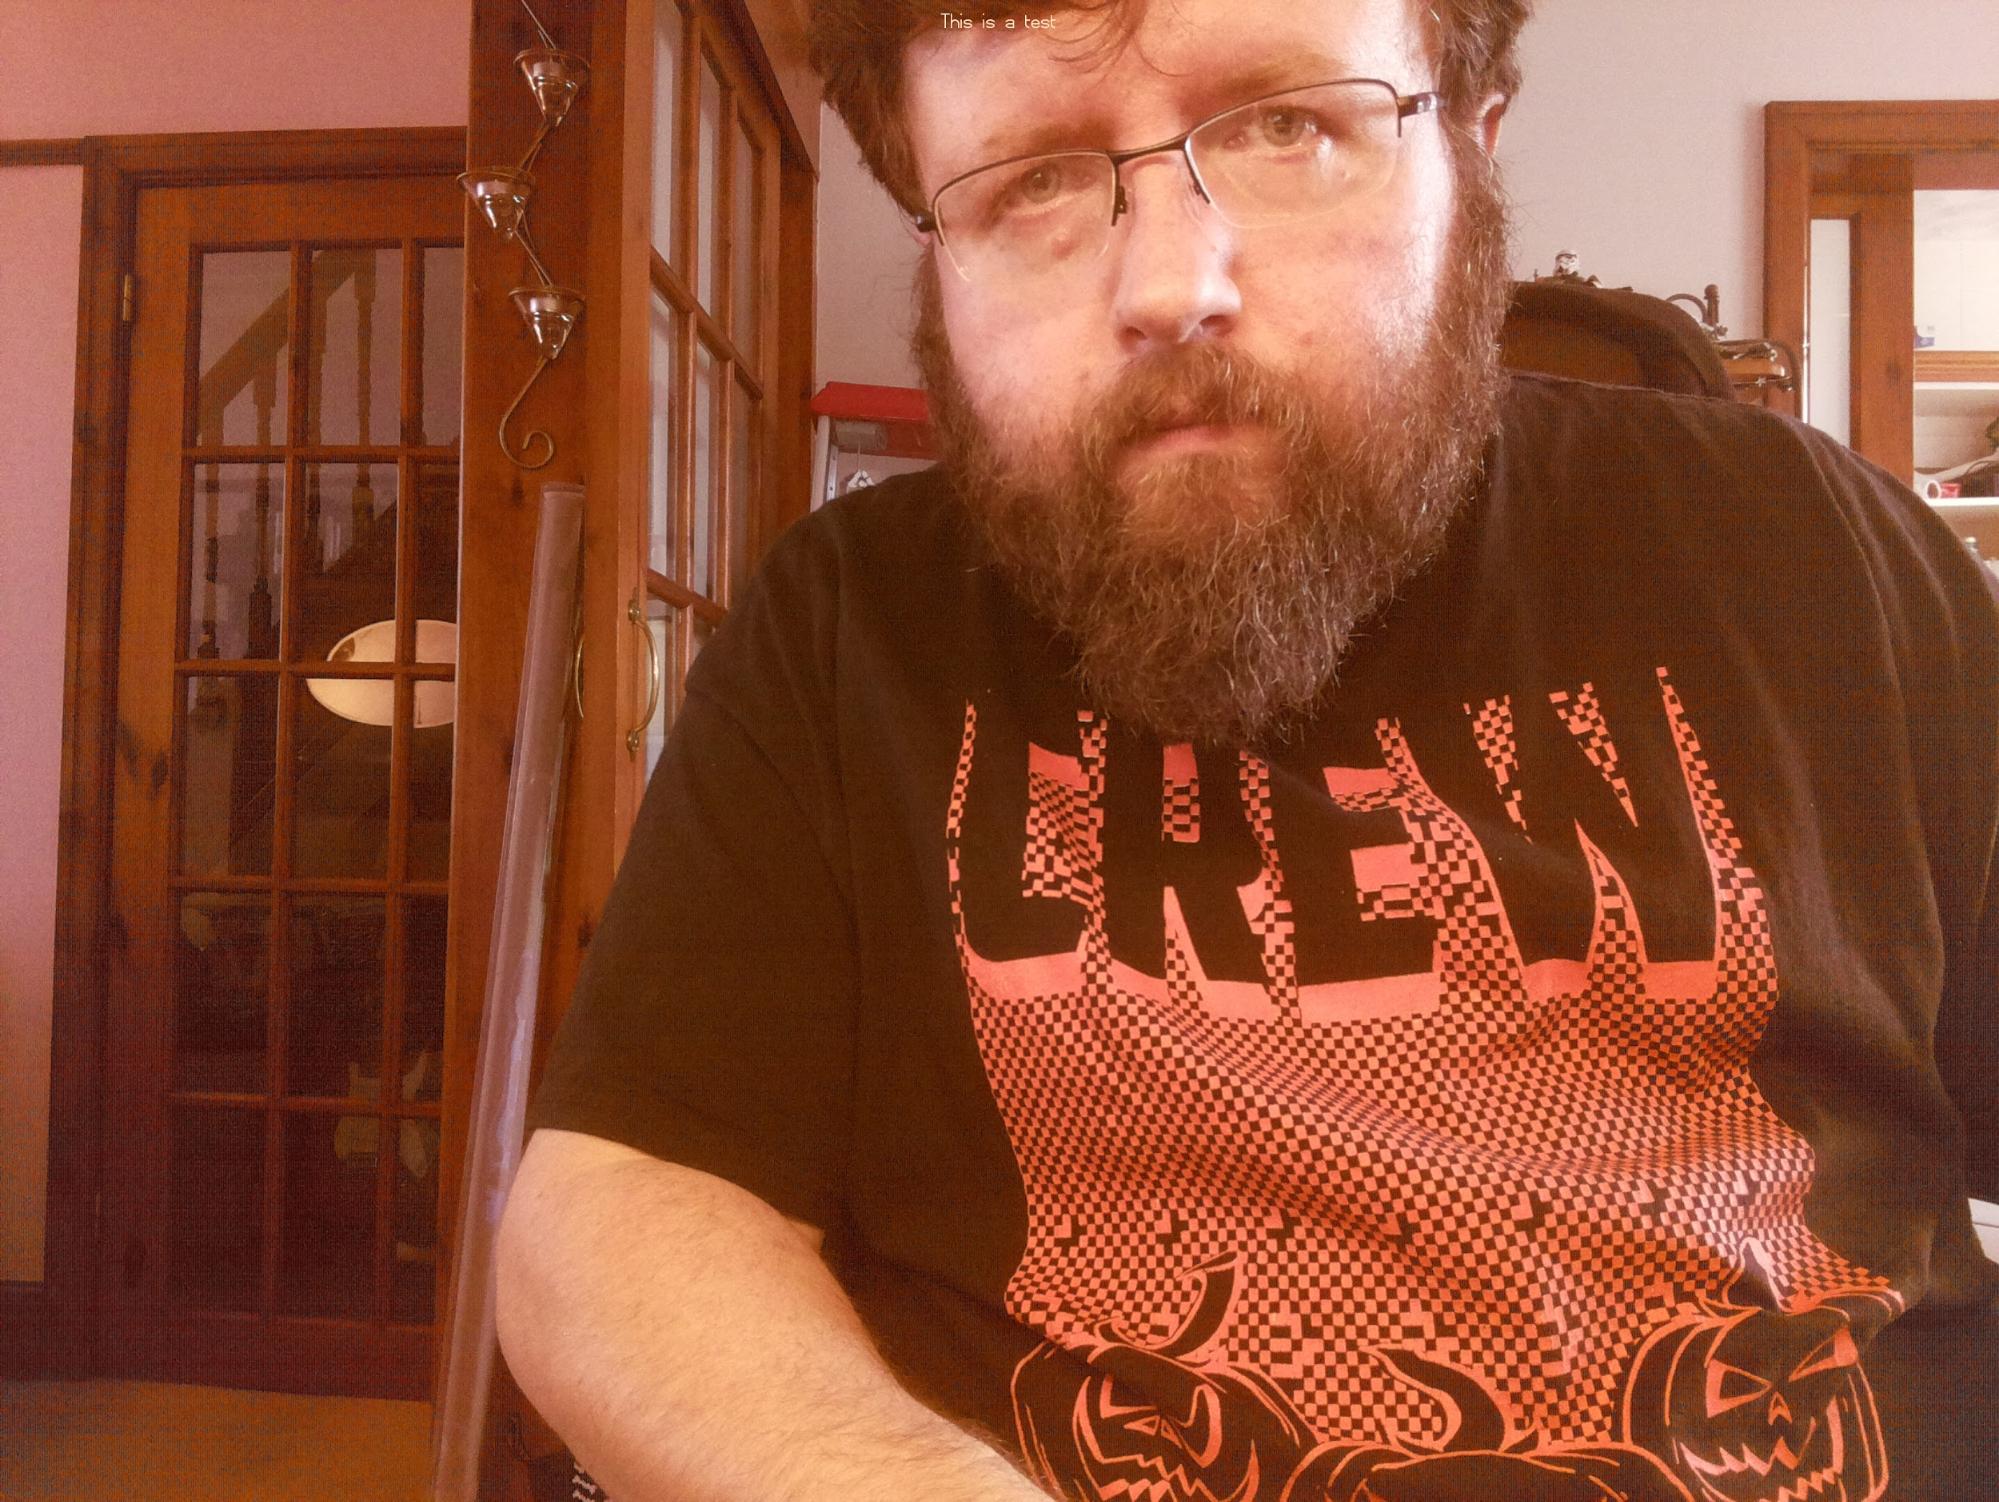
If you're already familiar with how to set up a Pi camera module, you can skip ahead. These steps will work for all Raspberry Pi camera modules (including third-party ones).
With the Raspberry Pi powered off.
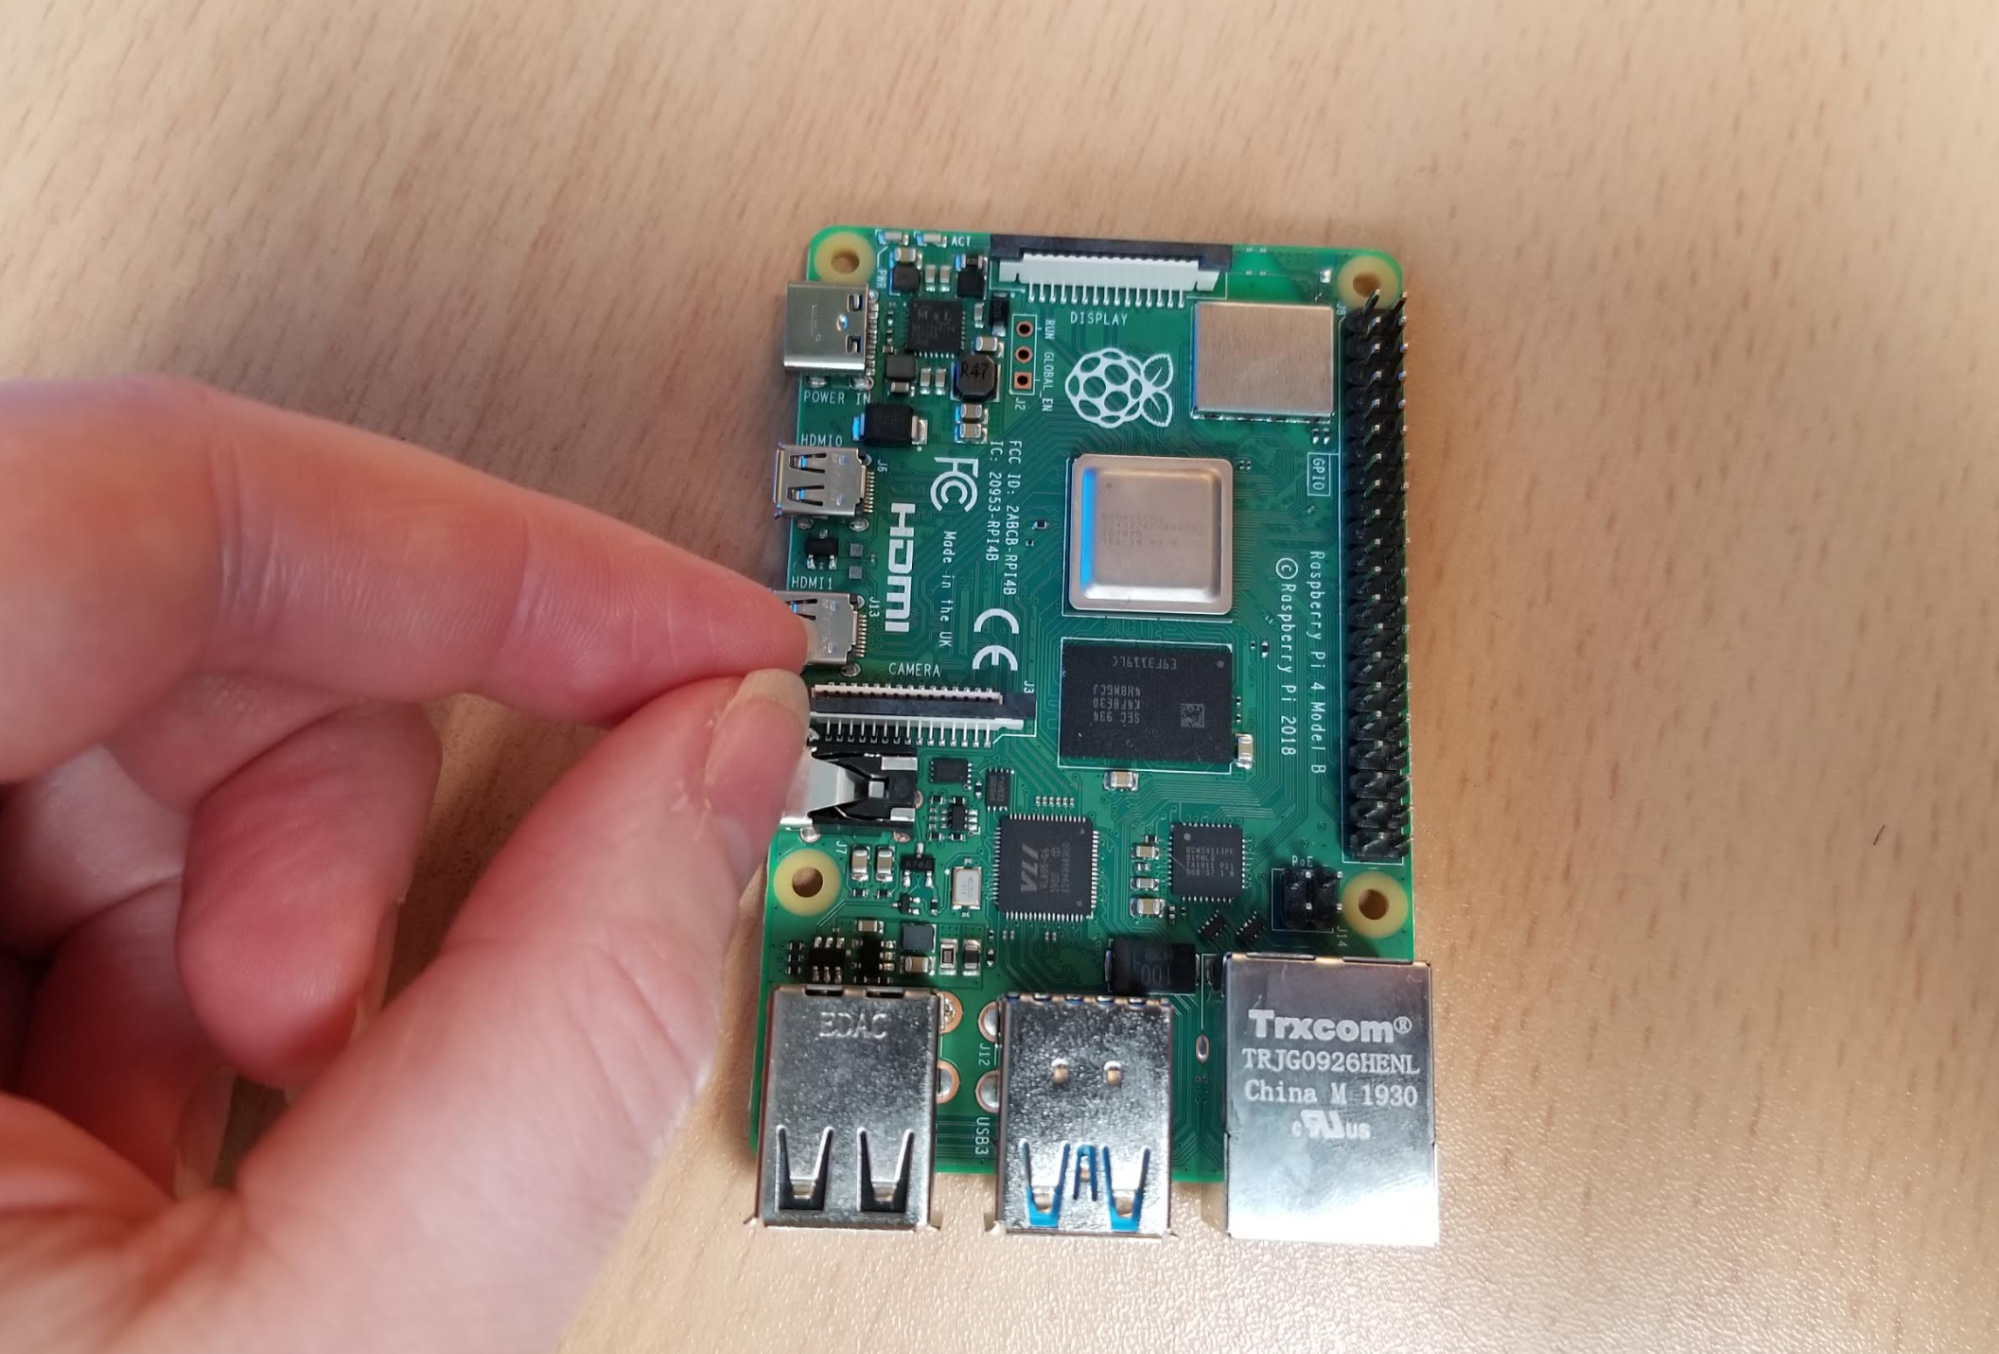
1. Open the camera port by gently lifting the plastic lock upwards.
2. Insert the ribbon connector with the blue tab facing the USB / Ethernet ports.
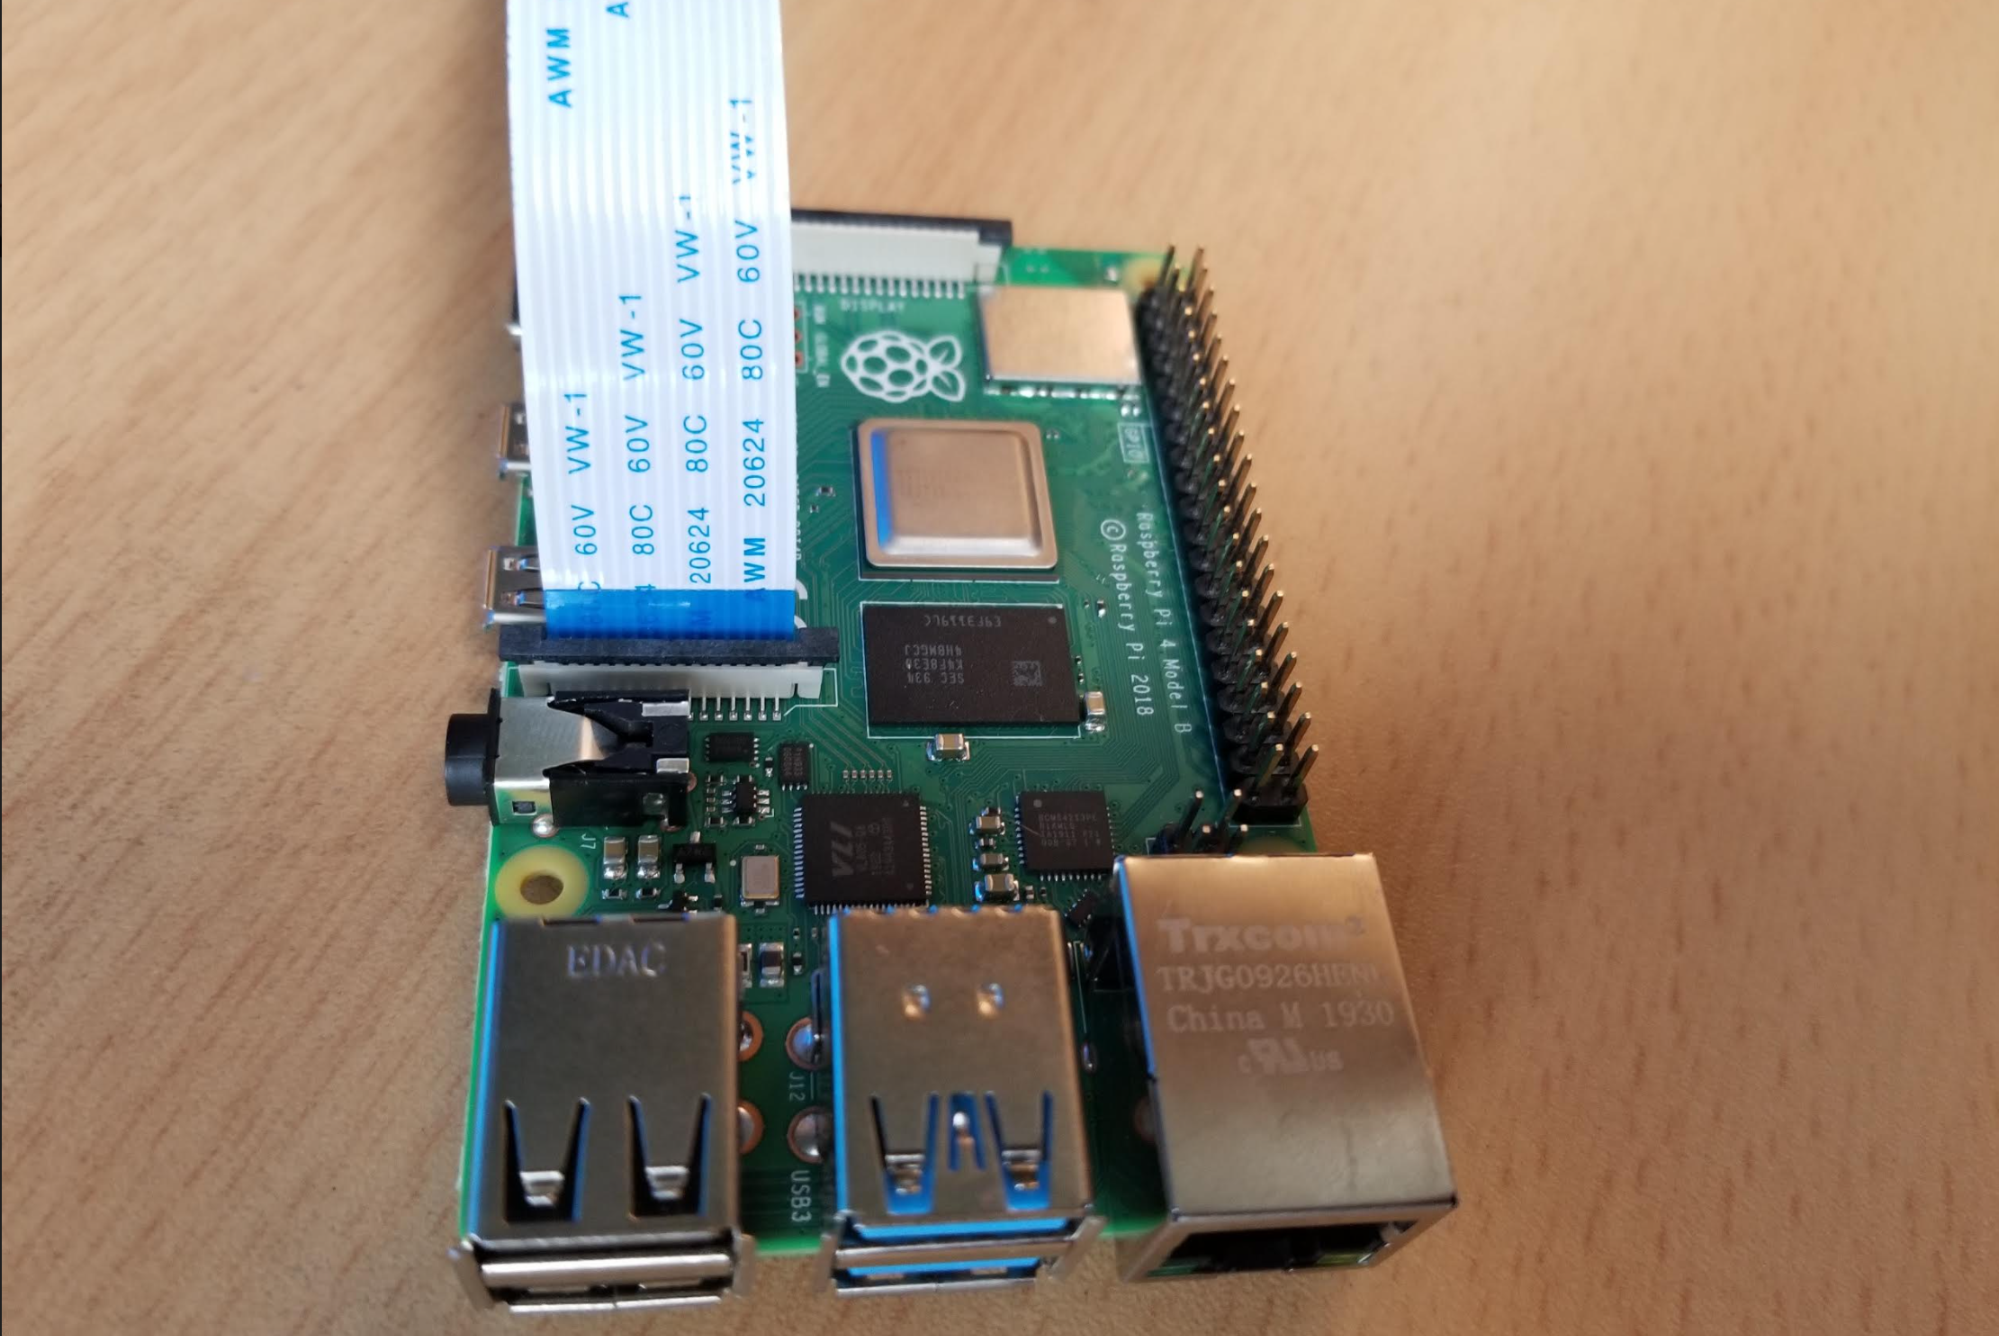
3. Close the lock on the connector and give it a very gentle pull to make sure it is in place.
4. Power up your Raspberry Pi and then go to Preferences >> Raspberry Pi Configuration.
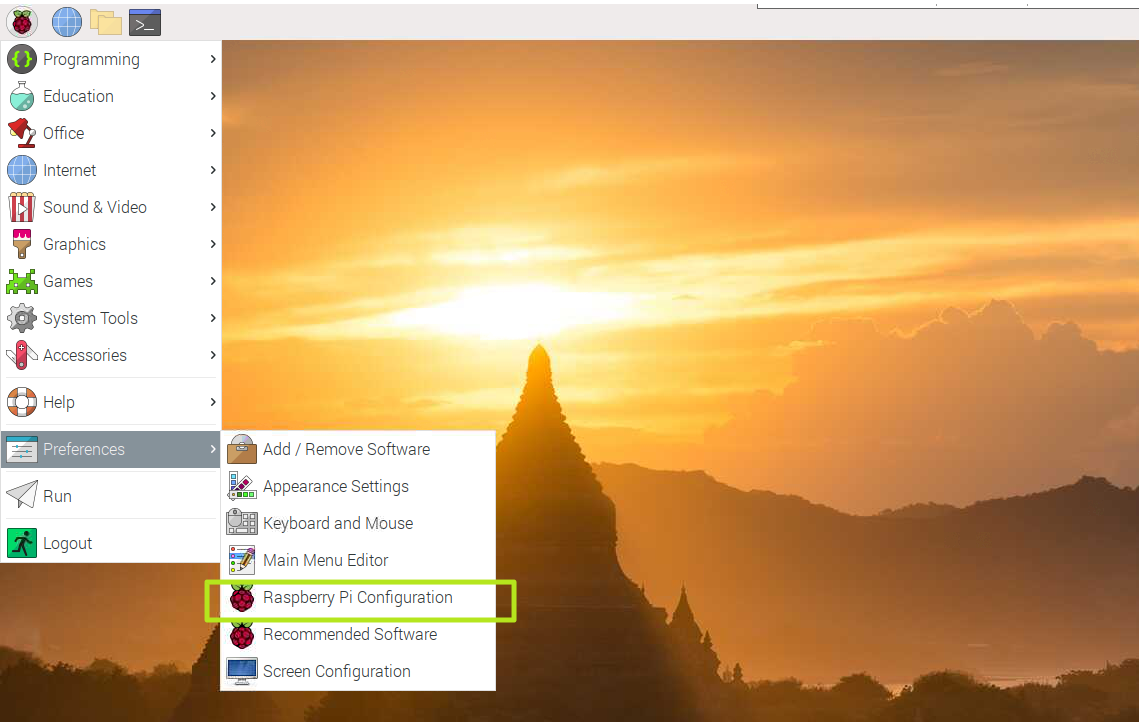
5. Click on the Enable button for the Camera found in the Interfaces tab.
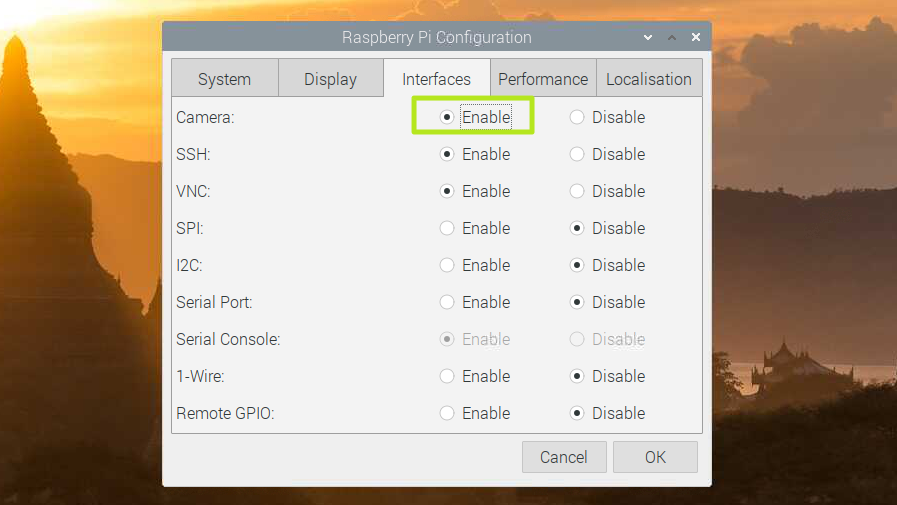
6. Click Ok and reboot the Pi.
7. Open a Terminal and type the following command to take a quick picture to test the camera.
$ raspistill -o test.jpgAfter five seconds has elapsed, an image will be taken and saved as test.jpg. Using the file manager check that the image is correct before moving on.
Wiring up a Button
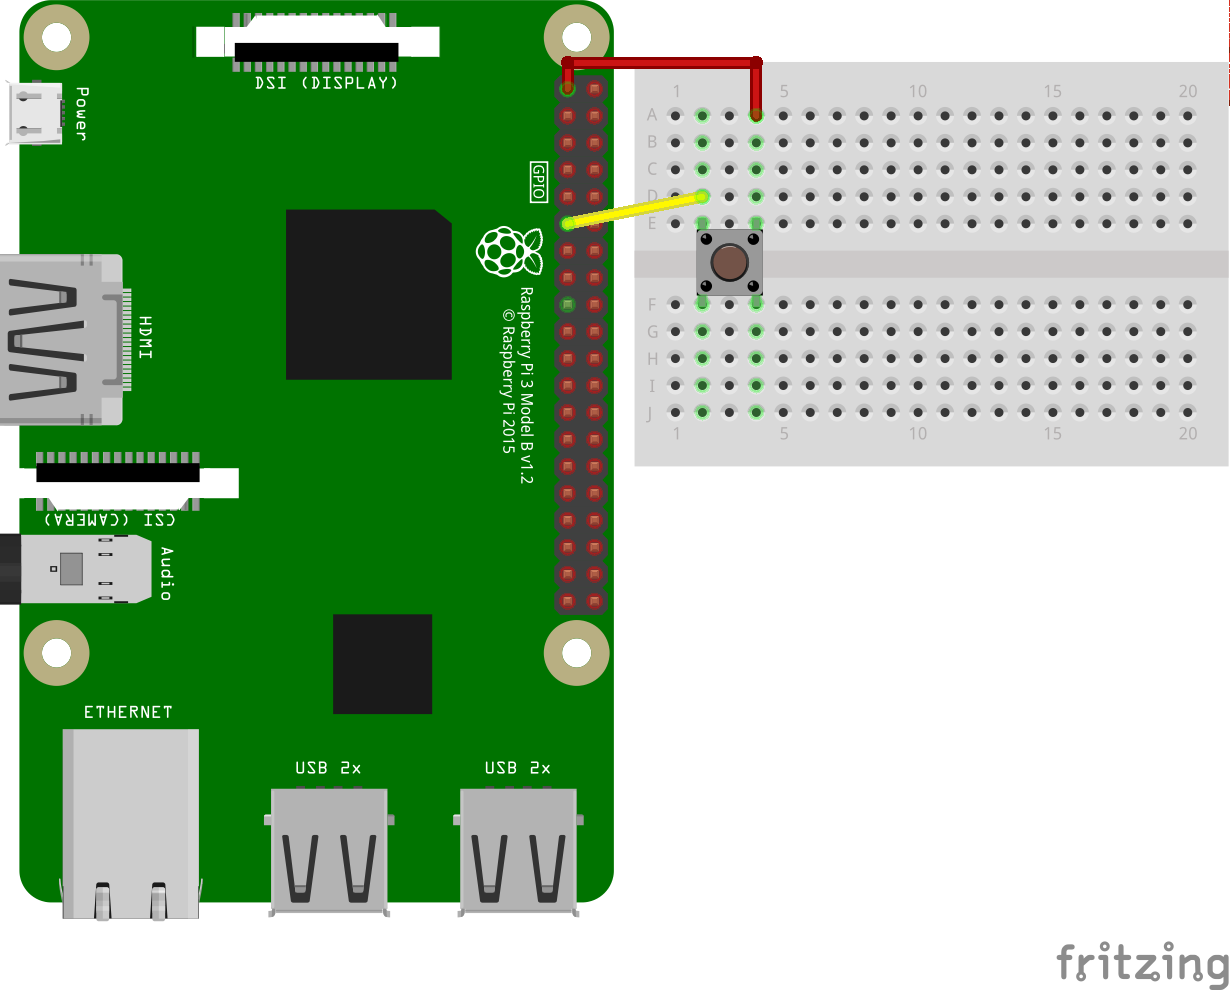
A push button, sometimes called a “momentary switch” will be used to trigger our project to life. To do this we need to connect the button to the GPIO of our Raspberry Pi via a breadboard.
1. Insert the button into the breadboard so that the legs are across the central channel on the breadboard.
2. Place the male end of a male-to-female jumper wire into the same column as the top left leg of the button in the breadboard. Connect the other end to the 3.3V pin of the Raspberry Pi. This is the pin nearest the micro SD card slot.
3. Connect the top right leg of the button to GPIO 17 (six pins down on the left column) of the Raspberry Pi in the same manner as before.
Writing the Code for Raspberry Pi Random Images
Writing Bash code is a great way to script tasks on your computer. Bash is a powerful scripting language that can automate many tasks. With the Raspberry Pi we can also use it to interact with the GPIO.
1. Launch Geany (from the menu) and create a new file called random-art.sh and remember to save often.
2. Enter the first line of code, which will tell the code where to find the Bash interpreter.
#!/bin/bash3. Using the echo command we write a value to two files. The first enables GPIO 17 for use, the second sets GPIO 17 as an input which is turned off (0) by default.
echo "17" > /sys/class/gpio/export
echo "in" > /sys/class/gpio/gpio17/direction
4. Enter an array that is used to store all of the possible image effects in this project. There are 20 effects in total, and each has its own place inside the array, enabling our code to pick a specific effect based on a random number.
array[0]="none"
array[1]="negative"
array[2]="solarise"
array[3]="sketch"
array[4]="denoise"
array[5]="emboss"
array[6]="oilpant"
array[7]="hatch"
array[8]="gpen"
array[9]="pastel"
array[10]="watercolour"
array[11]="film"
array[12]="blur"
array[13]="saturation"
array[14]="colourswap"
array[15]="washedout"
array[16]="posterise"
array[17]="colourpoint"
array[18]="colourbalance"
array[19]="cartoon"
5. Create a variable called size to store the number of effects in the array. This variable will store the output of a command (via {}) which checks the length of the array.
size=${#array[@]}6. Use a while true loop to constantly run the next section of code.
while true; do7. Create another variable, index, which will store a random number between zero and the length of the array, in this case 20.
index=$(($RANDOM % $size))8. Print the randomly chosen image effect for debug purposes.
echo ${array[$index]}9. Check the current state of the button, connected to GPIO 17 and save it to a variable, data. If unpressed it will have a default state of off, 0. When pressed that value changes to on, 1. This is the trigger for our camera project.
data="$(cat /sys/class/gpio/gpio17/value)"10. Use a conditional test to check the value stored inside the data variable. If the value is 1, then the button has been pressed.
if [ ${data} = "1" ]; then11. With the button pressed the next step will create a timestamp and save it to a variable called TIME.
TIME=$(date +"%Y-%m-%d_%H%M%S")12. Take a picture, using the image effect and save the image using the timestamp as the filename.
raspistill -ifx ${array[$index]} -o $TIME.jpg13. Close the conditional loop and then close the while true loop.
 fi
done
Save the code.
Complete Code Listing
#!/bin/bash
echo "17" > /sys/class/gpio/export
echo "in" > /sys/class/gpio/gpio17/direction
array[0]="none"
array[1]="negative"
array[2]="solarise"
array[3]="sketch"
array[4]="denoise"
array[5]="emboss"
array[6]="oilpant"
array[7]="hatch"
array[8]="gpen"
array[9]="pastel"
array[10]="watercolour"
array[11]="film"
array[12]="blur"
array[13]="saturation"
array[14]="colourswap"
array[15]="washedout"
array[16]="posterise"
array[17]="colourpoint"
array[18]="colourbalance"
array[19]="cartoon"
size=${#array[@]}
while true; do
  index=$(($RANDOM % $size))
  echo ${array[$index]}
  data="$(cat /sys/class/gpio/gpio17/value)"
  if [ ${data} = "1" ]; then
    TIME=$(date +"%Y-%m-%d_%H%M%S")
    raspistill -ifx ${array[$index]} -o $TIME.jpg
  fi
done
Run the code

To make the code executable, open a terminal and navigate to the folder containing the code. Type this command.
$ chmod +x random-art.shTo run the command, in the terminal type
./random-art.sh 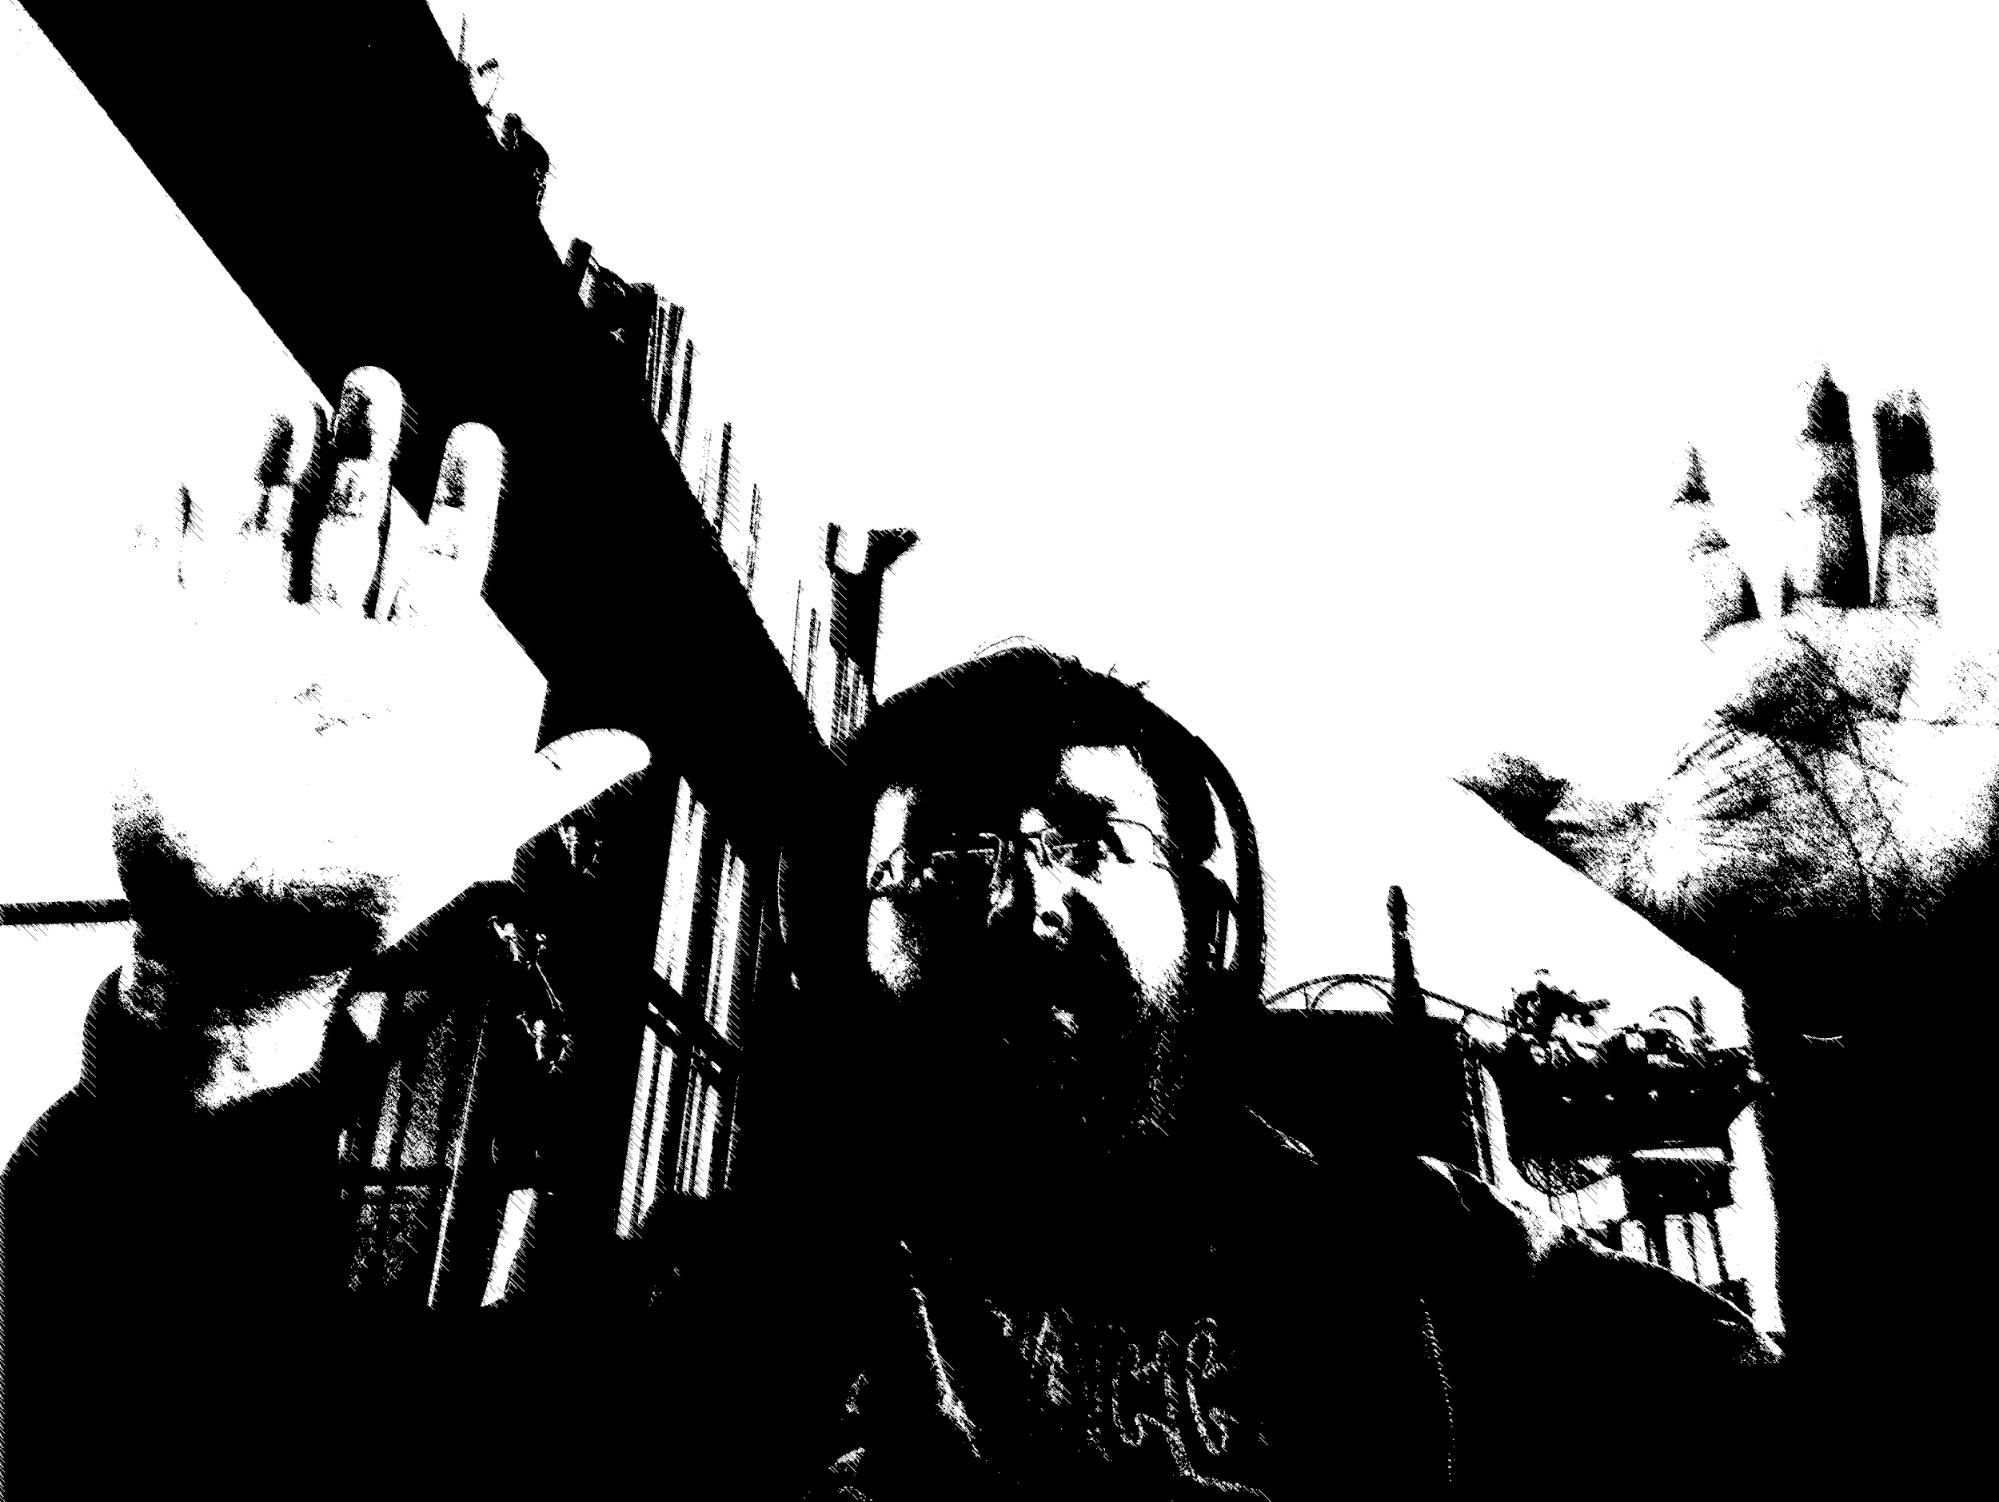
Press the button to trigger the code to select the random image effect and take your selfie!

Les Pounder is an associate editor at Tom's Hardware. He is a creative technologist and for seven years has created projects to educate and inspire minds both young and old. He has worked with the Raspberry Pi Foundation to write and deliver their teacher training program "Picademy".
