How to Build a Raspberry Pi Toilet Paper Reminder
A smart toilet paper holder that reminds you when it needs to be refilled.
We’ve all been there. You’re in the bathroom conducting some “business,” when you realize there’s no toilet paper left. You can tell your family or housemates to keep a careful eye on the stack of spare rolls in the corner, but you know that people forget, raising the possibility that you’ll be left without a square to spare. Fortunately, there’s a way to prevent toilet paper outages using a Raspberry Pi that alerts you when you have no spares left in the bathroom.
In this article, we’ll show you how to build a smart toilet paper holder that uses a Raspberry Pi Zero W and an ultrasonic sensor that measures the level of toilet paper in your holder and sends you an email if it has been empty for over 30 minutes. You can customize the email to specify the bathroom and suggest plans of action.
How does the Raspberry Pi Toilet Paper Reminder work?
The ultrasonic sensor checks the level of toilet paper every 30 minutes. If 2 checks go by and the holder is empty, your Raspberry Pi will send you an email requesting that you refill the holder or purchase more toilet paper.
The Pi will continue to send emails every hour every hour until the holder is refilled. Each email will state when the toilet paper holder was first empty and how many reminders it has sent. Once the holder is refilled, everything resets and the Raspberry Pi will stop sending reminder emails. The code also provides a “Do Not Disturb” option to refrain from sending emails at night; default is set to 10 pm to 8 am, and is also customizable.
What You’ll Need:
- Raspberry Pi Zero W with pre-soldered GPIO headers or you can solder them yourself. We could have used any model but the Raspberry Pi Zero W is small and low-power.
- Power supply/Keyboard/Mouse/Monitor/HDMI Cable (for your Raspberry Pi)
- Ultrasonic Sensor HC-SR04
- Small Breadboard
- Set of jumper wires (M-to-F, M-to-M, and F-to-F)
- 2 resistors (330 ohm & 470 ohm)
- 5” x 5” cardboard
- Small Magnets
- Super glue
- Raspberry Pi case
- Ultrasonic sensor housing
- Toilet paper holder
Part 1: Hardware Assembly of Toilet Paper Reminder
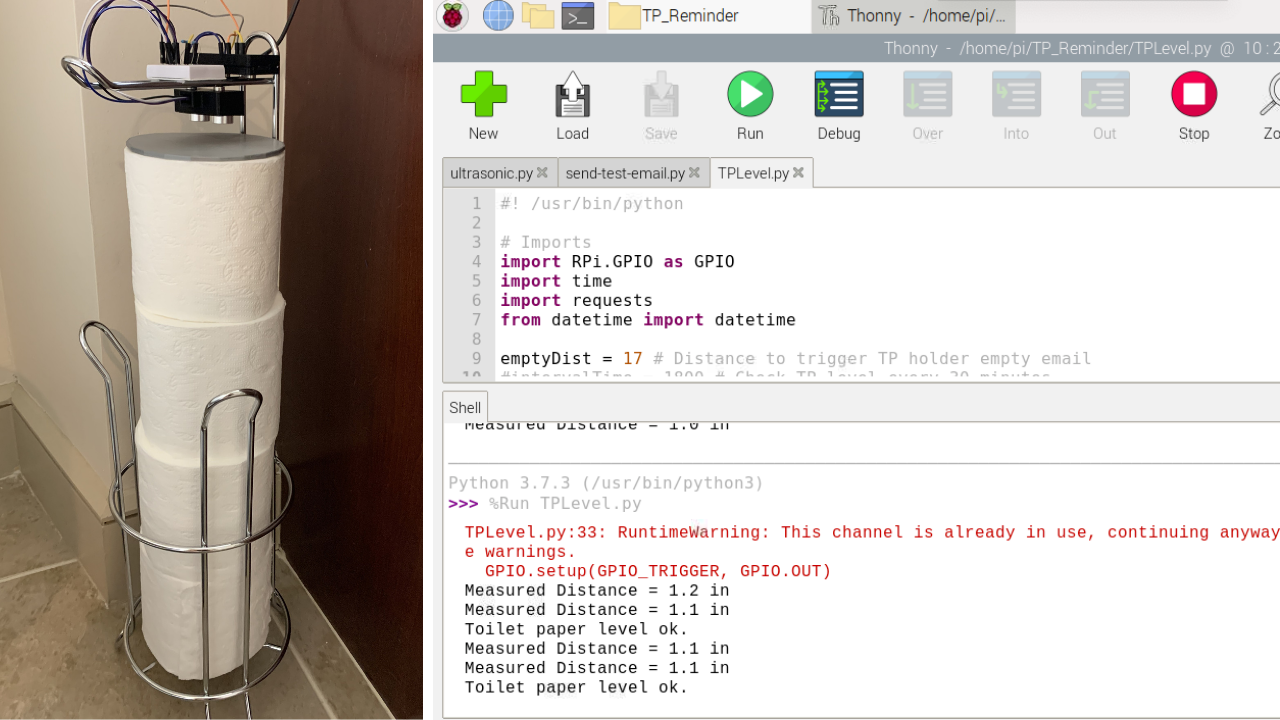
In this step, we will attach the Raspberry Pi, ultrasonic sensor, and small breadboard to the top of the toilet paper holder (where the toilet paper roll would normally be placed). The ultrasonic sensor should face downward, perpendicular to the toilet paper rolls below; the Pi and breadboard should sit evenly on top. We will wire the components together in this section. At the end of this step, you should be ready to power up your Pi.
1. Insert your microSD card formatted with the Raspberry Pi OS into your Raspberry Pi.
2. Superglue 2 small magnets to the back of the housing for the ultrasonic sensor.
Get Tom's Hardware's best news and in-depth reviews, straight to your inbox.
3. Connect 4 female-to-male wires to each prong of the ultrasonic sensor. Insert the ultrasonic sensor into the housing.
4. Attach the ultrasonic sensor with housing to the toilet paper holder so that it faces the top toilet paper roll directly.
5. Wind the 4 wires from the ultrasonic sensor through the toilet paper holder and insert into the breadboard in sequential order.
6. Attach the breadboard and Raspberry Pi to the top of the toilet paper holder. The Pi should be encased so that the board doesn’t directly contact the metal holder and create a short. We glued 2 small magnets to the enclosure to hold the Raspberry Pi in place. The breadboard should be pre-equipped with an adhesive backing that sticks to the holder.
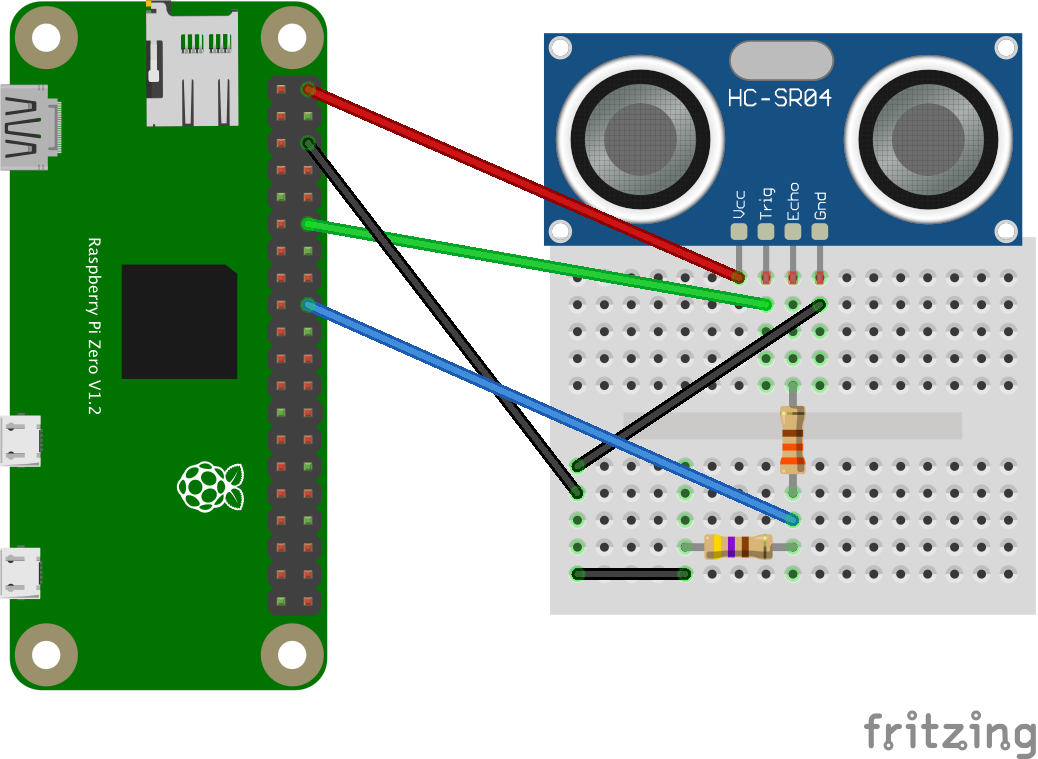
7. Connect the VCC pin of the ultrasonic sensor to pin 2 of your Raspberry Pi for 5V power.
8. Connect TRIG to GPIO 18 of your Raspberry Pi.
9. Connect ECHO to a 330 ohm resistor.
10. Connect the other end of the resistor to GPIO 24 of your Raspberry Pi.
11. Connect a 470 ohm resistor from the 330 ohm resistor to the GND rail.
12. Connect GNC pin from the sensor to the GND rail.
13. Cut out a circle from cardboard the same width as your roll of toilet paper (approximately 5 inches in diameter). You’ll use this in the next step. Alternatively, you can 3D print this STL file.
Part 2: Ultrasonic Sensor for Toilet Paper Reminder
In this section we will set up the ultrasonic sensor on the Raspberry Pi toilet paper reminder, in order to measure the distance from the holder’s base to determine if it’s empty. Note: The ultrasonic sensor works by sending out an inaudible sound and determines the distance from when the sound wave is returned. Toilet paper absorbs ultrasonic sounds and thus, we will use cardboard from the previous step to determine the distance for email triggering.
1. Boot your Raspberry Pi. If you don’t already have a microSD card see our article on how to set up a Raspberry Pi for the first time or how to do a headless Raspberry Pi install.
2. Boot your Raspberry Pi.
3. Open a Terminal. You can do that by pressing CTRL + T.
4. Clone this repository:
git clone https://github.com/carolinedunn/TP_Reminder5. Navigate to the TP_Reminder folder in your file manager.
6. Open ultrasonic.py in Geany or Thonny.
7. Run ultrasonic.py by clicking the paper airplane icon in Geany or PLAY button in Thonny.
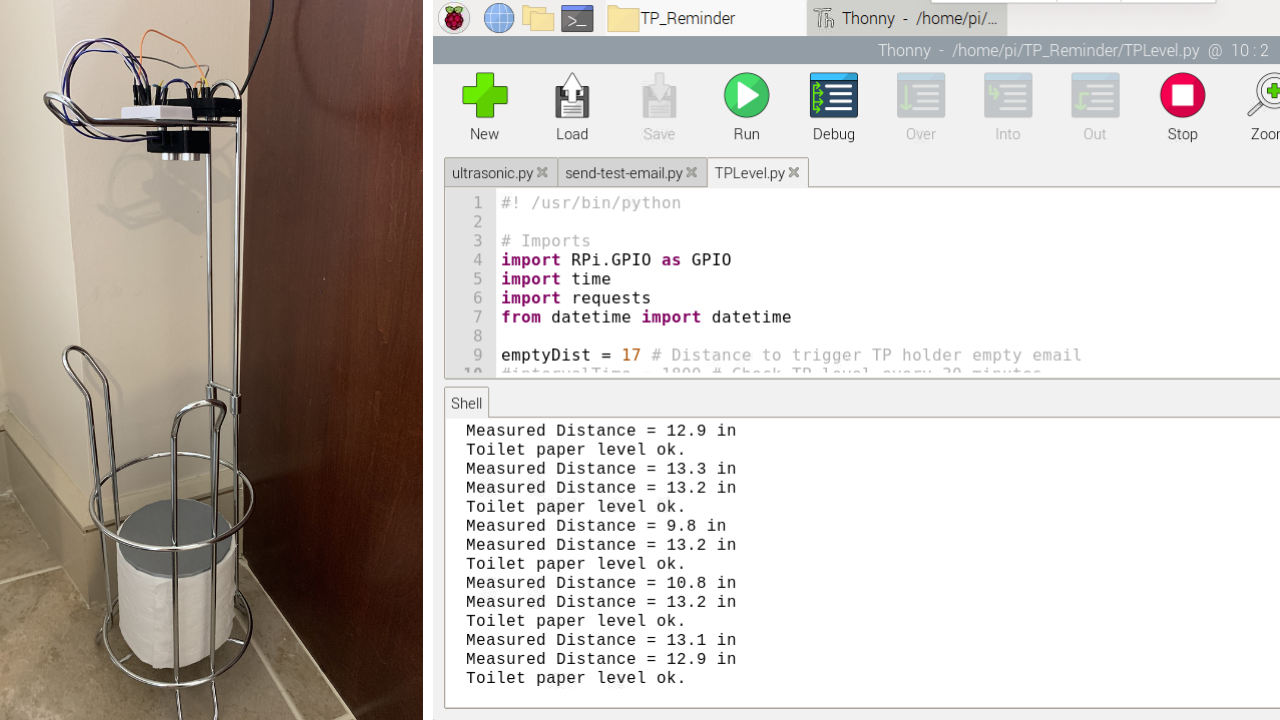
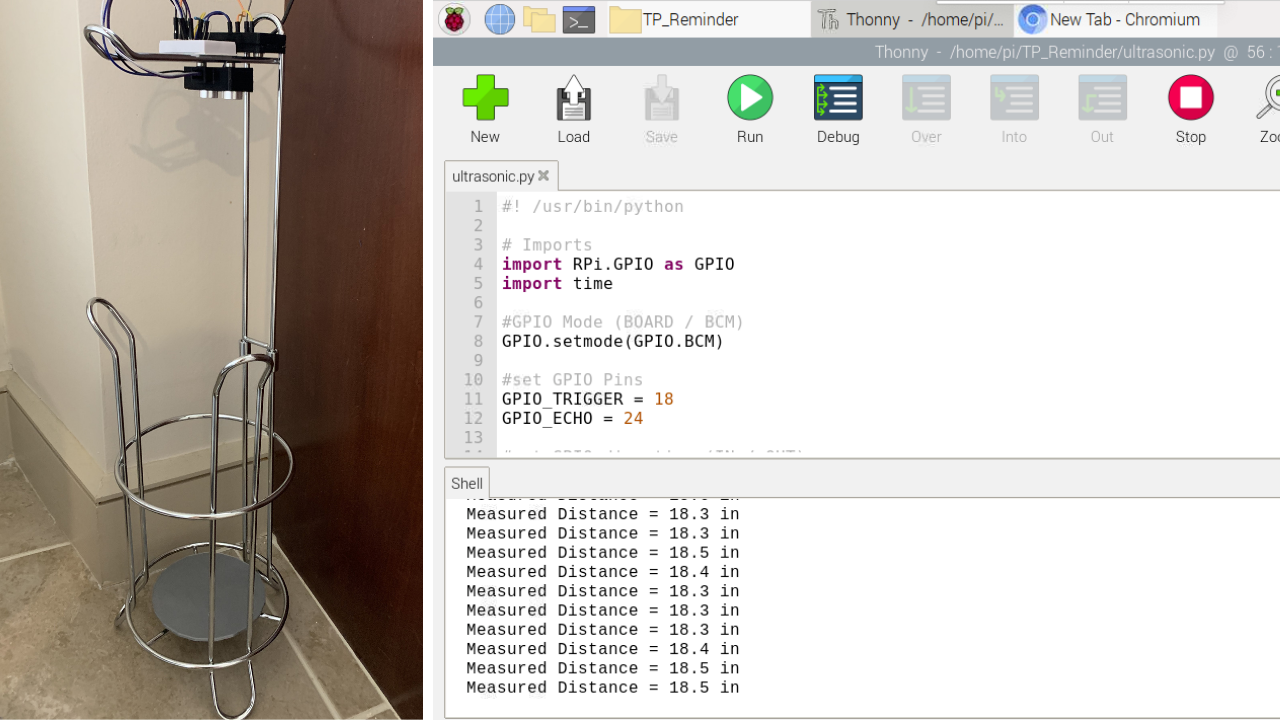
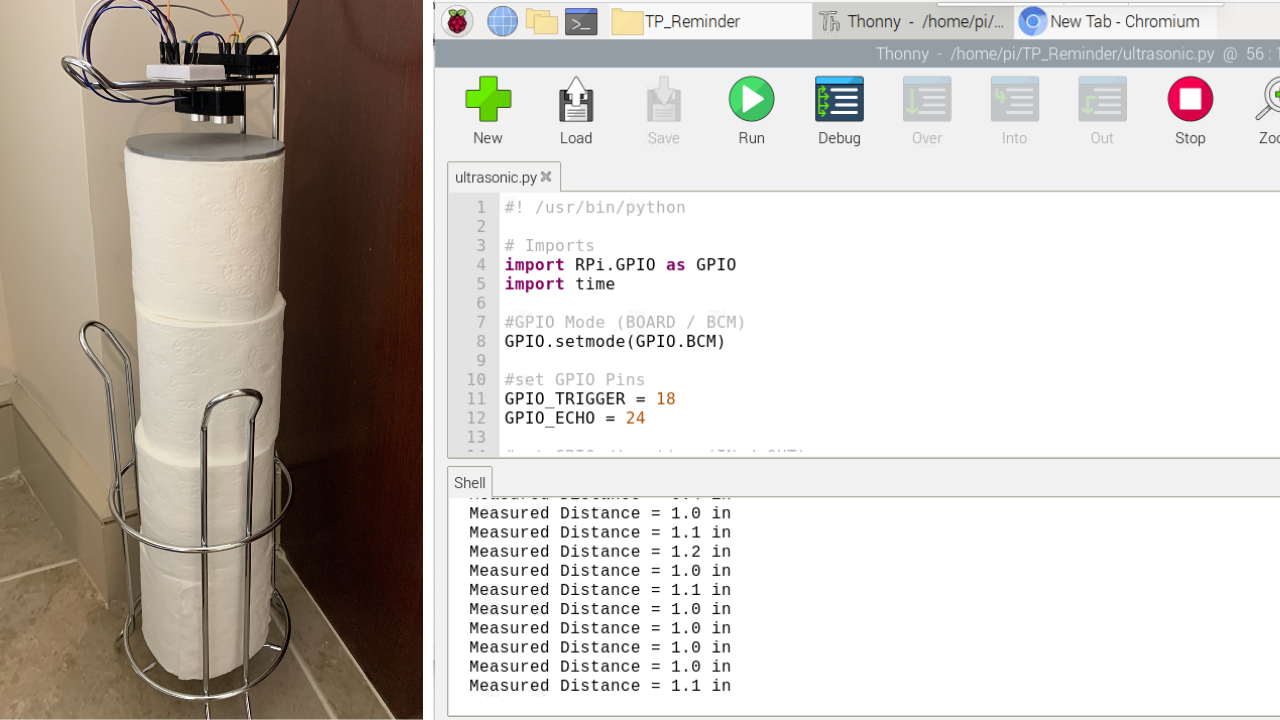
8. Move rolls of toilet paper into and out of the holder, keeping the circular cut-out on top. You should see the distance change as you add and/or replace rolls of toilet paper.
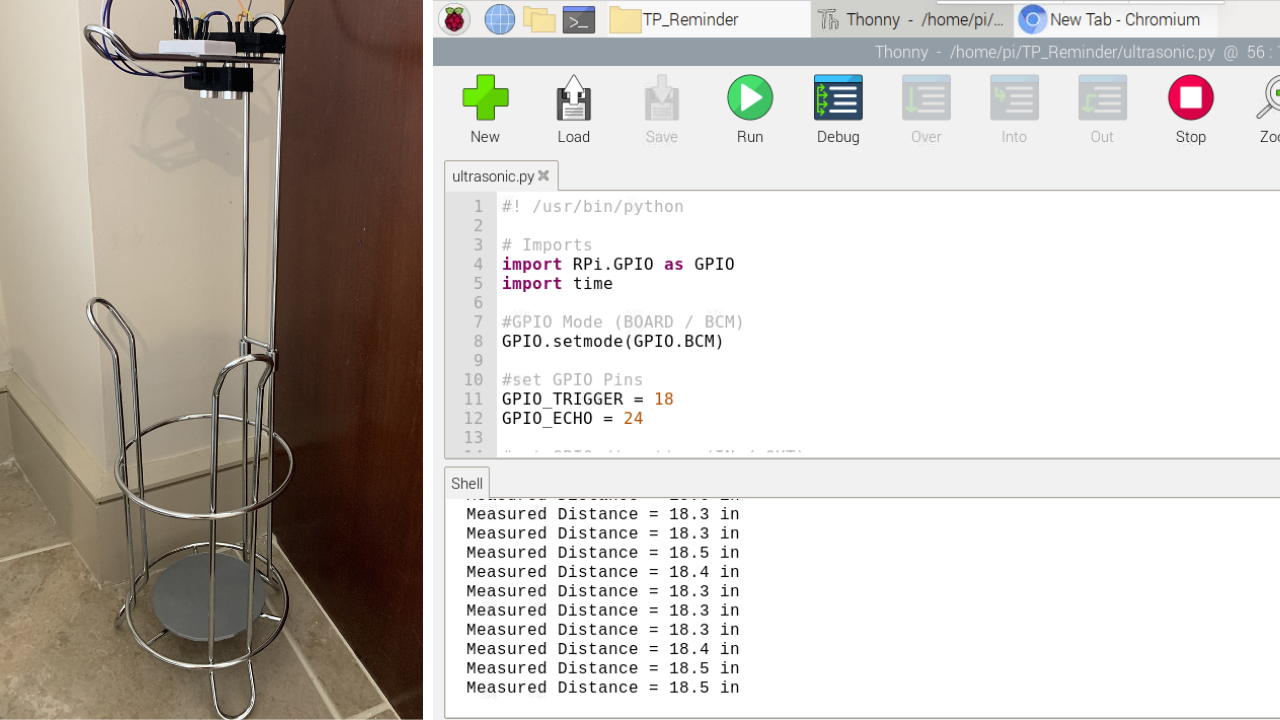
9. Remove all toilet paper from the holder and leave the circular cut-out at the bottom of the holder.
10. Note the distance reading on your screen. Note this distance (write it down if necessary) for Step 4.
11. Press Ctrl-C to exit the program.
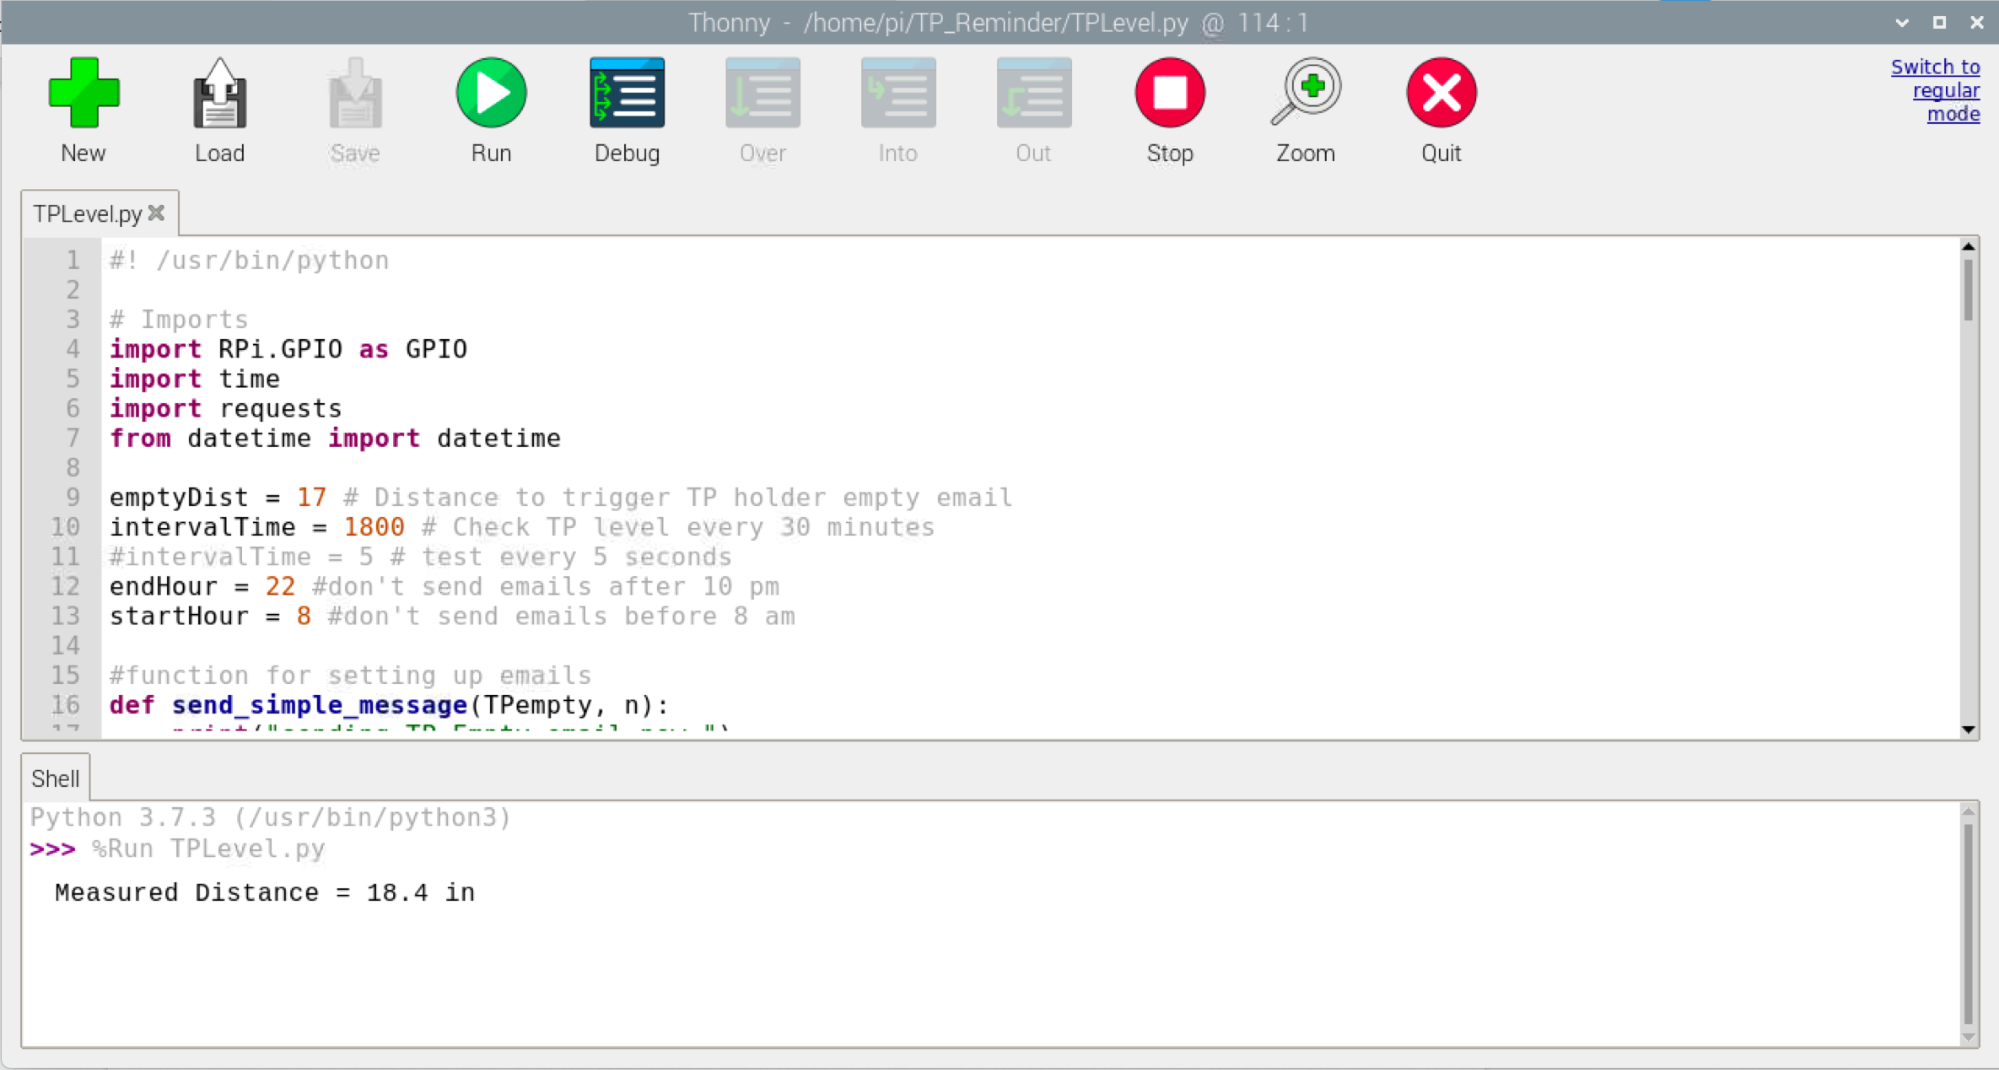
With our toilet paper holder, Full TP Holder reads ~1 in and Empty TP Holder reads > 18 in. Your results may vary and you may also decide to use the measurement number for when one roll is left so you are alerted with a single roll, rather than when the holder is empty.
Part 3: Email Automation of Toilet Paper Reminder
In this step, we will set up an automated email service and send ourselves test emails from the Raspberry Pi toilet paper reminder. This step requires a mail service account. I have selected Mailgun for its simplicity; you are welcome to modify the code with the email service of your choice. Mailgun requires a valid credit card to create an account. For this project, I used the default sandbox domain in Mailgun.
1. Navigate to mailgun.com in your browser.
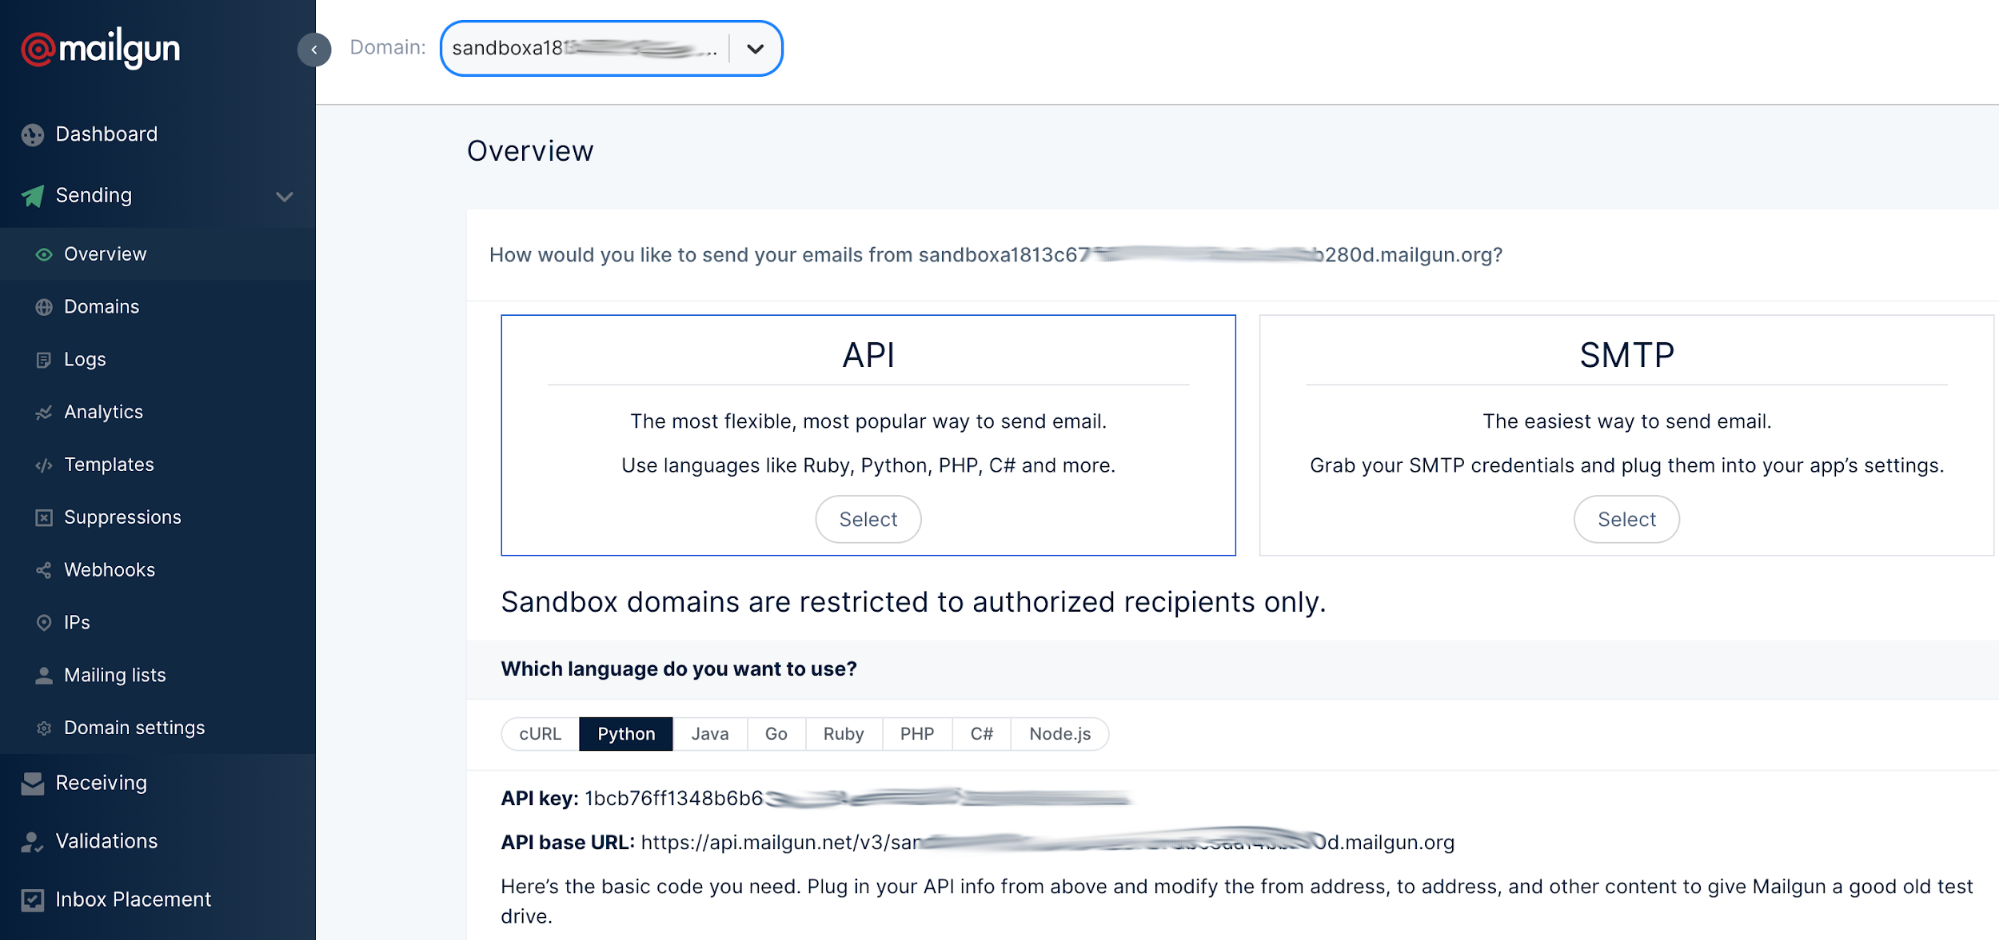
2. Create and/or Login to your Mailgun account. Navigate to your sandbox domain and click API and then Python to reveal your API credentials.
3. Open send-email-test.py in Thonny or Geany from your file manager, in the TP_Reminder directory.
4. On line 9, "https://api.mailgun.net/v3/YOUR_DOMAIN_NAME/messages" replace “YOUR_DOMAIN_NAME” with the correct one
5. On line 10, replace "YOUR_API_KEY" with your API key from Mailgun.
6. On line 12, add your email address from your Mailgun account.
7. Run the code send-email-test.py. If you receive a status code 200 and “Message: Queued” message, check your email.
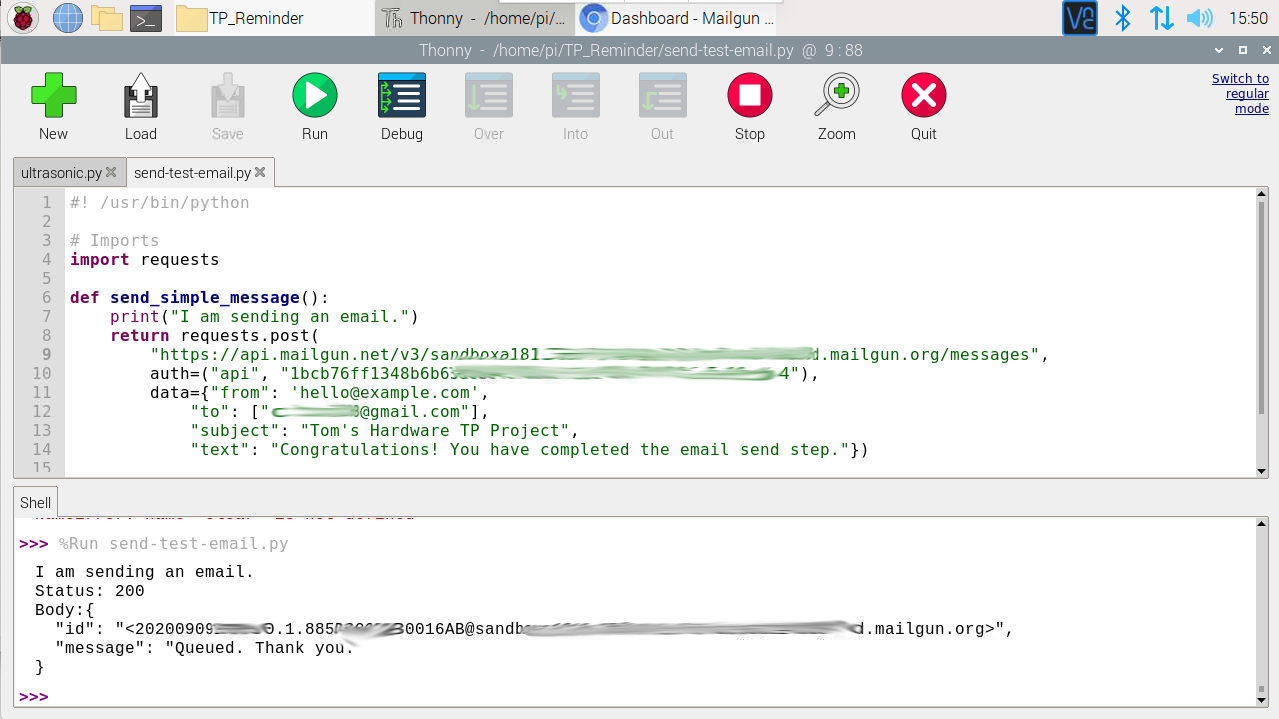
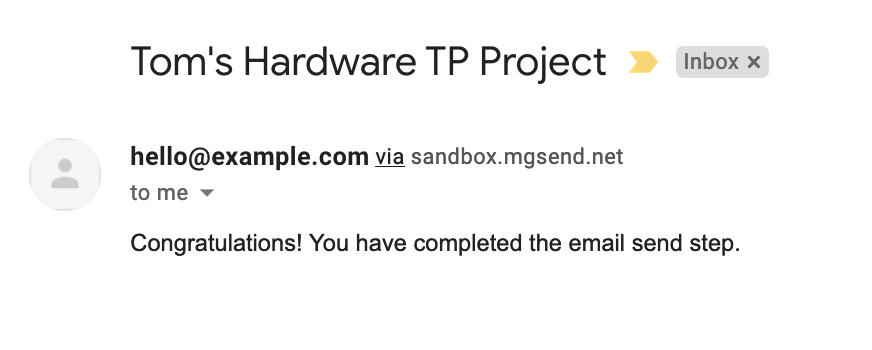
When you complete this step successfully, you should receive the following email. This email may be delivered to your Spam folder.
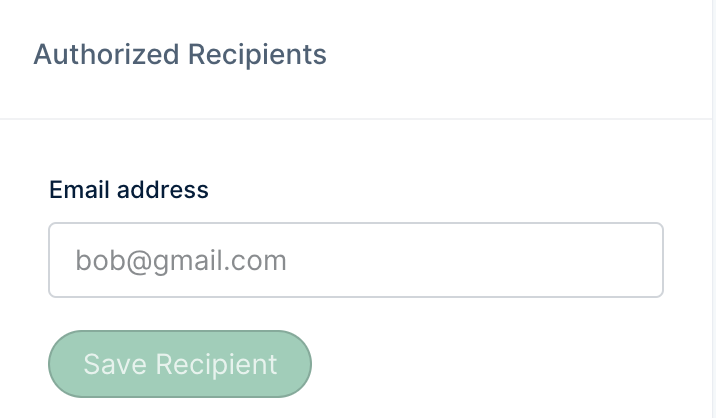
If you wish to email a different email address other than the email address you used to set up your Mailgun account, you can enter it in Mailgun under Authorized Recipients. Don’t forget to verify your additional email address in your inbox.
Part 4: Toilet Paper Level Notifications
In this part, we will combine the distance noted from the ultrasonic sensor in Part 2 with the email sending exercise from Part 3, and set our Raspberry Pi to run the Python code on boot.
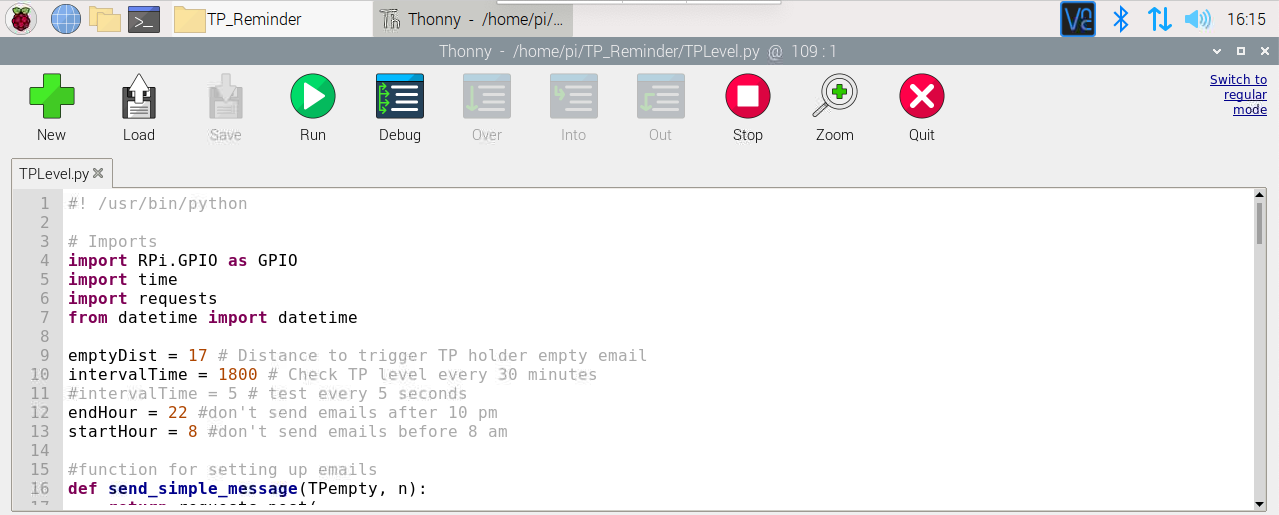
1. Open TPLevel.py in Thonny or Geany from your file manager, in the TP_Reminder directory.
2. Enter your credentials on line 18, 19, and 21 as you did in Part 3.
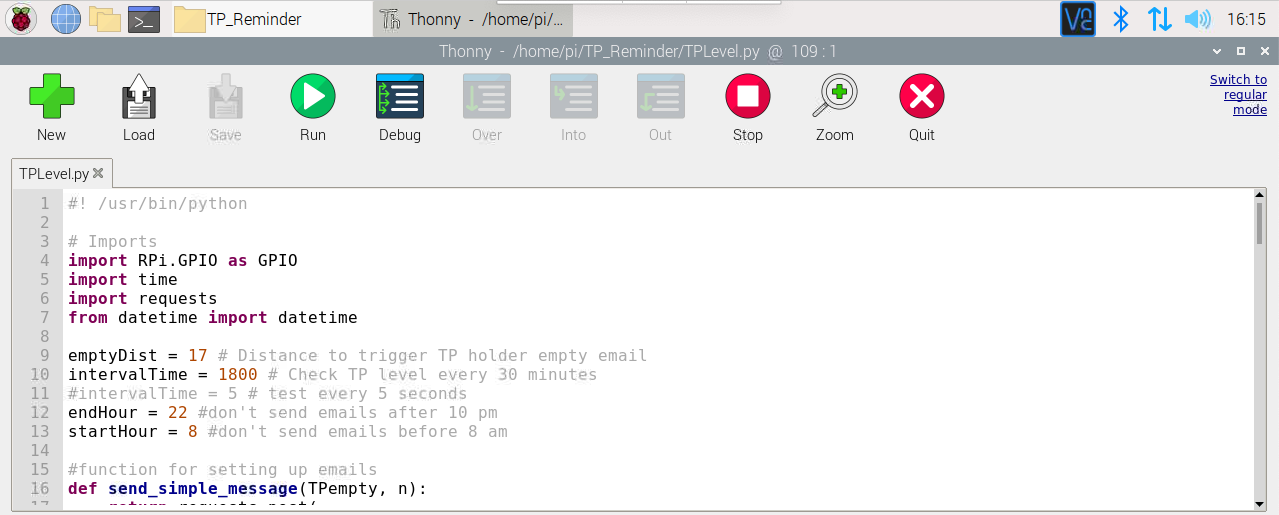
3. Set your emptyDist (line 9) to your measurement from Part 2 minus 2 inches. For example, if your empty toilet paper distance from Part 2 was 19, then set emptyDist = 17. The code checks if the current distance is greater than emptyDist. If you want more advanced warning, use the distance with one roll left.
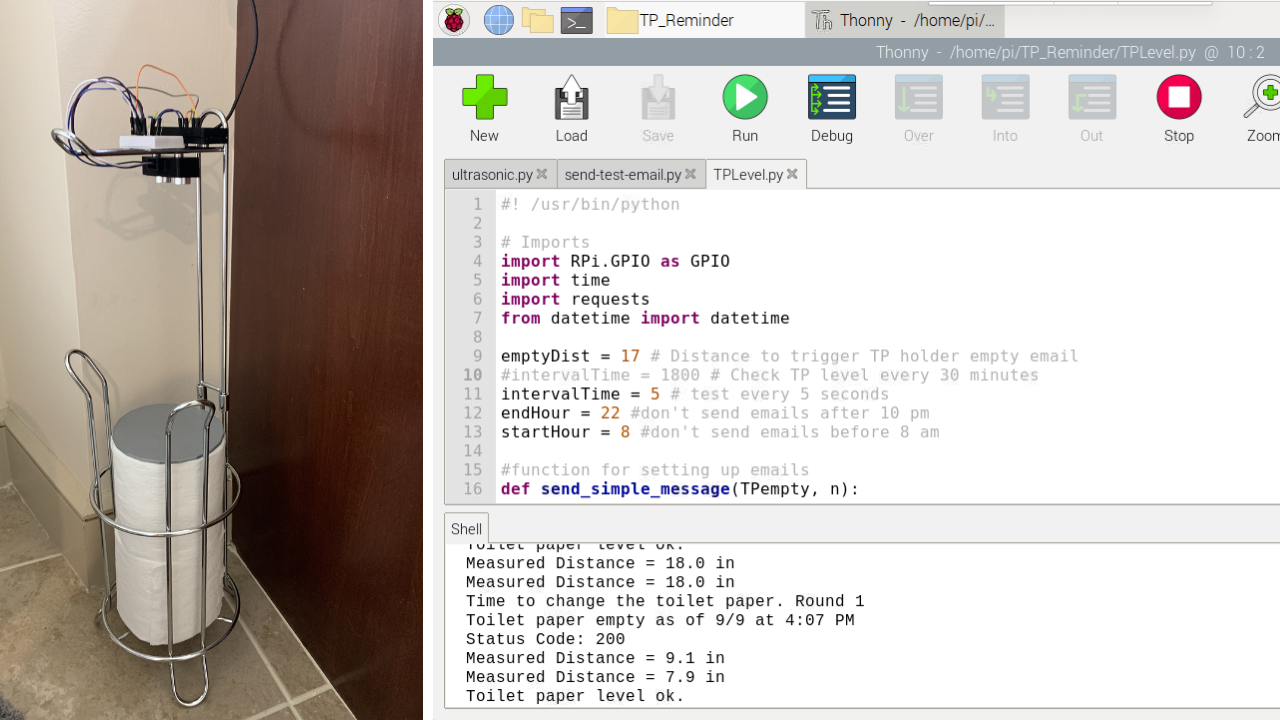
4. Run TPLevel.py and you should see 1 distance reading appear. Notice that one distance is printed on the screen and then nothing happens? That’s right, the code only checks the distance every 30 minutes and only sends an email if the holder is empty after 2 consecutive checks. If you leave the code running (and your holder is empty), you should receive an email after 30 minutes. Press Ctrl-X to stop the code.
5. To speed things up for testing purposes, comment out line 10 (by adding a # to the beginning of the line) and uncomment line 11 (by removing the # before intervalTime). This will check the level every 5 seconds. Run your updated code.
6. Test various scenarios of toilet paper levels with your 5” cardboard. Note if you are working on this project between the hours of 10 pm and 8 am, the default code is set to NOT send emails during those hours. You may need to adjust “endHour = 22” or “startHour = 8” on lines 12 and 13. 22 represents 24-hour military time a.k.a. 10 pm.
Test Scenarios:
a. Full toilet paper holder for 10 seconds. No email.
b. Remove some toilet paper, but leave 1 roll. No email (unless you changed set the level at one roll distance)
c. Remove all toilet paper and put your cardboard at the bottom. After two checks that are five seconds apart, you should receive your first email. After another 10 seconds, you should receive your second email. To stop the emails, go to the next scenario.
d. Add 2 rolls of toilet paper with the cardboard on top. Wait 10 seconds. Emails should stop.
e. Remove toilet paper. Emails should start over.
7. Adjust the position of your ultrasonic sensor to most accurately measure the toilet paper level. There will be some “jitter” which may produce a few inaccurate measurements, but this should settle down. For example, if the sensor is too close to the sides of the holder, distance readings will reflect the sides and not the toilet paper level.
8. Press Ctrl-X to stop the code.
9. At this point, you can update the code to suit your specific needs. For example, you could update the subject or body of the email in lines 22 and 23.
10. Adjust the interval time back to 30 minutes by undoing your work from Step 5 in this section. Comment out line 11 and uncomment line 10.
11. Save your work.
Next, we’ll want to set TPLevel.py to run on boot.
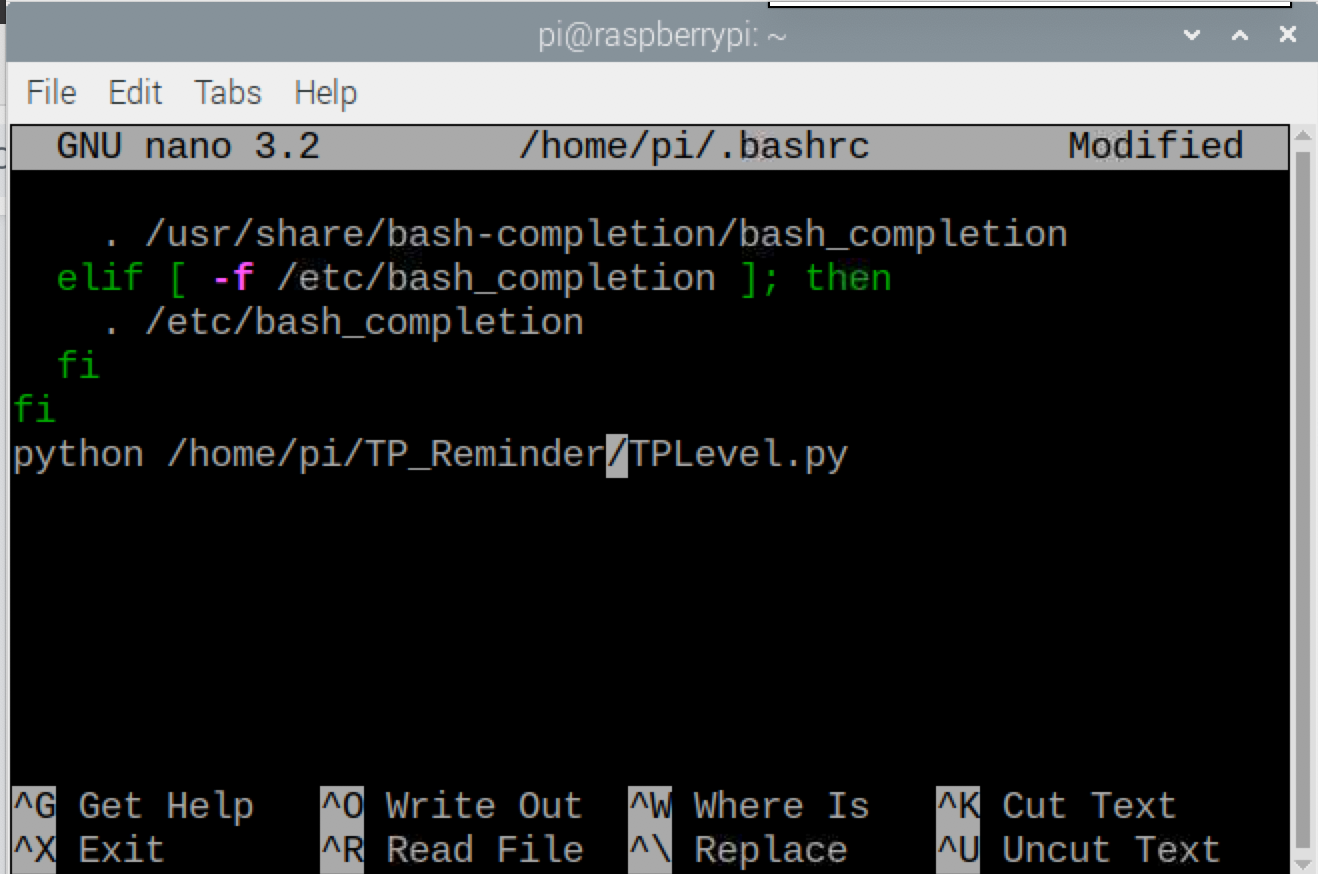
12. Open /home/pi/.bashrc for editing in the terminal.
sudo nano /home/pi/.bashrc
13. Enter the following text at the bottom of .bashrc and save it (by hitting CTRL + X).
python /home/pi/TP_Reminder/TPLevel.py
a. Press Ctrl-X to exit and Y to save.
b. Reboot your Pi.
Once your Pi reboots, it should automatically run TPLevel.py python script every time.
Caroline Dunn is a freelance writer for Tom's Hardware. Her expertise lies in covering Raspberry Pi projects, creating video tutorials, writing guides, and exploring other entertaining tech DIY initiatives.
-
derekullo That GIF is so ...Reply
4 ROLLS APPLY DIRECTLY TO THE FOREHEAD
3 ROLLS APPLY DIRECTLY TO THE FOREHEAD
2 ROLLS APPLY DIRECTLY TO THE FOREHEAD
1 ROLLS APPLY DIRECTLY TO THE FOREHEAD
SEND A NOTIFICATION MAIL AND APPLY DIRECTLY TO THE FOREHEAD -
jkhoward I love how every time there’s a news article about AMD, you post some stupid article so it doesn’t appear on the main page. Whereas the other day, you let the NVIDIA news remain on top, and then you posted the other Raspberry Pi article below without dethroning it. But hey, I guess a toilet paper Raspberry Pi is better then AMD, but a similar Raspberry Pi post isn’t better then NVIDIA. Got it, this is why I block ads on your website.Reply
