How to Use Raspberry Pi as a VPN Gateway
A VPN (Virtual Private Network) protects your privacy by routing all your Internet traffic through an encrypted server that your ISP (or hackers) can’t see. Setting up and using a log-free VPN service from your PC desktop is straightforward enough, but other devices in your home such as your game console and set-top box don’t let you install VPN software.
One solution is to buy a router that can connect directly to a VPN service, protecting all the traffic on your home network a single stroke. But it could be cheaper (and simpler) just to route all your traffic through a Raspberry Pi that remains connected to the VPN at all times.
With just a few fairly simple scripts, you can configure any Raspberry Pi to be a headless VPN gateway. This means that when it is connected to your router, you can send traffic to it from other devices before they connect to the outside world – essentially putting them behind a VPN.
What You Need
To get started, you’ll need a few things:
- A Raspberry Pi (even 1st gen will do) running headless (no keyboard or monitor). See our article on how to create a headless Raspberry Pi for details. You can also use a non-headless Pi, but connecting remotely is more convenient.
- A subscription to a VPN service of your choice. We’re going to use Nord VPN, which is a popular choice among the most demanding privacy advocates, but there are plenty of other good services out there, some of which are faster or cheaper.
- Your provider’s OpenVPN configuration files and encryption certificates. There are usually a lot of these – one for each server you have the option to connect to – so pick a handful that you want to be able to quickly access. We opted for two UK and two US servers, choosing one that supports the UDP protocol and one that supports TCP/IP .You should find these configuration files on your VPN provider’s website (ours are at nordvpn.com/servers). Download them and unzip them into a folder on your desktop.
1. Log into your Pi and navigate to the command prompt. If you’re using a headless Pi, connect via SSH.
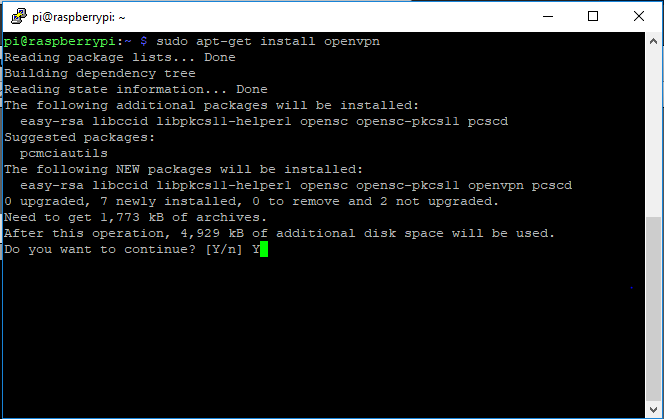
2. Type sudo apt-get install openvpn to install the OpenVPN packages. Type Y and hit Enter if asked to confirm.
3. Navigate to the folder for your OpenVPN configuration files by typing cd /etc/openvpn.
Get Tom's Hardware's best news and in-depth reviews, straight to your inbox.
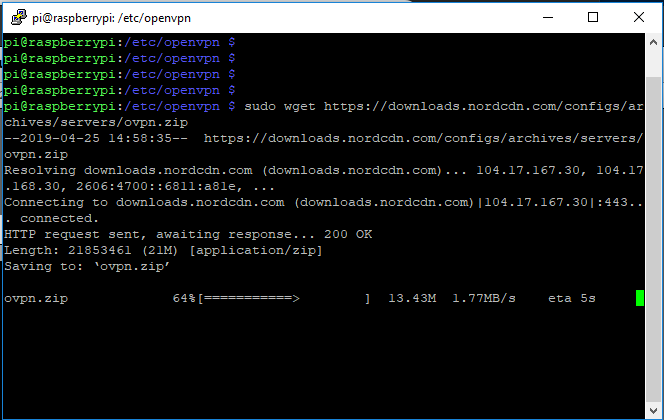
4. Download the configuration files from your VPN provider. In our case we can do this using wget – don’t forget to use sudo as the etc folder isn’t writeable by ordinary users. In our case, the command is sudo wget https://downloads.nordcdn.com/configs/archives/servers/ovpn.zip, followed by sudo unzip ovpn.zip to decompress it.
A quick "ls" command will show if you have been successful. There should be a list of files ending in .ovpn. Note that some VPN providers may have packaged these files with subdirectories, for example for connections encrypted with optional 128bit or 256bit protection. You’ll need to move the files to the etc/openvpn directory using the mv command.
5. Open a connection to any of these servers using the command sudo openvpn example.ovpn –daemon where "example" is the filename of the configuration file. If you try this now, you’ll notice that the script asks for your username and password to authenticate the connection. Do test to see if the connection is working by typing ifconfig. You should see a connection marked "TUN", which is your VPN tunnel.
Stop Entering Passwords
So far we have a slightly cumbersome way of connecting our Pi to a VPN via a terminal which requires you to enter your username and password when you want to connect. Good, but it could be better – we’re going to create a few scripts to automatically create your credentials.
Take a look at the VPN files you downloaded to your desktop and open one of them. You should see that it starts with client and that there’s a list of commands. These include a line that contains "auth-user-pass". We can alter this line to automatically feed a username and password to our config file when it is called.
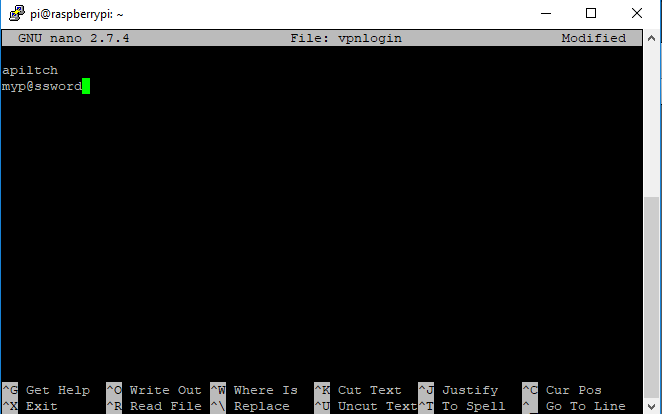
1. Navigate to /etc/openvpn and type sudo nano vpnlogin. This should open up the nano text editor.
2. Create a text document that has nothing except your username for the VPN provider on the first line, and your password on the second.
3. Hit CTRL+O to write the contents to disk, then CTRL+X to quit nano.
4. Pick the VPN connection you think you’ll use the most and edit the config file using sudo nano example.ovpn.
5. Change the line that says "auth-user-pass" to "auth-user-pass vpnlogin".
Now when you start that connection using the "openvpn" command, it should connect directly without the password prompt. (See boxout to change all the config files at once.)
Quick start Commands for Different VPN Servers
So far so good, but we don’t want to have to type a long command every time we need to connect to a VPN. Remember that you took a note of your most likely used servers right back at the start? We’re going to create a quick script that will let you start and switch between those with a simple command.
It begins with an instruction to close any open VPN connections, then starts the OpenVPN daemon filling in the credentials from the text file we just created.
1. Back in your home folder (usually /home/pi), type nano vpn1.sh.
2. Enter the following code in the file, save and exit it:
#!/bin/bashsudo killall openvpnsudo -b openvpn /etc/openvpn/example.ovpn
3. Repeat this step for the three or four VPN connections you think you’ll use the most, adding one to the number in the filename.
Now, you can start or switch your connection by SSHing into the Pi from any computer on the network and typing sudo ./vpn1.sh.
Route Device Traffic Through the Pi
Finally, in order to route traffic via the Pi, you’ll need to go back to your game console, set-top box (or other device) and change the internet settings. Leave everything in its default setting apart from the Gateway and DNS servers.
Change Gateway to the IP address of your Pi, and set the DNS server to 1.1.1.1, 8.1.1.8.
And that’s it. Now you can make your PlayStation or Roku Box magically appear in another country without leaving your lounge.
Start VPN on Pi Boot
Want the VPN to start whenever the Pi boots up? Use this command: sudo systemctl enable openvpn@example.service, where "example" is the name of the .conf file you want to connect to (excluding the file type).
Remember that line in the VPN configuration file for "auth-user-pass"? We need to change that so that credentials file we just created is called automatically. This means changing that line to "auth-user-pass vpnlogin".
You can do that manually for the three or four servers that you think you’ll use the most, and then just set-up scripts to start those servers when you need them. But what if you want to pretend you’re in Sweden for a day, or South Africa? Can you even remember what the VPN password was?
Nord VPN supplies over two thousand different config files, one for each server with both TCP and UDP protocols. To edit all those files at once open up an SSH connection to your Pi and navigate to etc/openvpn again. Now run the following command to use SED for a batch edit of all the .ovpn files.
find . -type f -name \*.ovpn -exec sed -i.bak ‘s|auth-user-pass|auth-user-pass vpnlogin|g’ {} +
This will also create a backup of the existing files, in case you were worried.
This article originally appeared in an issue of Linux Format magazine.


