
We’ve been awash in 360-degree cameras for some time--many of them lower-end, commodity devices--but now we’re beginning to see actual VR cameras emerge. The Vuze VR camera is not just another 360-degree camera; it shoots in 3D, too, which means that you get depth and not just a wraparound image. We got our hands on one to see how well it works and how easy (or difficult) it is to shoot, edit, and share the footage.
It’s important to remember that there are two components to the Vuze camera setup--the camera itself and the accompanying software. It turns out that the latter may actually be more important than the former--an issue we’ll get into shortly--but first let’s meet the camera.
The Thing
The Vuze VR camera is a flattish, squarish device that has eight cameras (two per side). All eight cameras offer FHD resolution with a 180 x 120 FoV, and together they offer full spherical coverage (360 x 180). The Vuze promises 4K video resolution at 30fps with a video recording rate of up to 120 Mbps. It records audio, too--in the AAC format, with 16-bit PCM audio via four MEMS 48Hz mics.
Article continues belowIn addition to capturing 360-degree 3D video, the Vuze can snap 360/3D images (with the app, which we’ll discuss further down the page).
The device measures 12 x 12cm square(ish), and it’s just 3cm tall. For those of you without a metric system converter in your head, it’s about 4.72 inches square by 1.18 inches tall. In other words, it fits in the palm of a large hand, but awkwardly. That’s not much of an issue, though; there’s a screw mount under the camera so you can mount it on a standard tripod (which is definitely the preferred method of shooting), and it also comes with a little folding handle that screws into the mount. Thus, you can shoot simply by grabbing the handle and holding the camera above your head.
The camera weighs 430g (0.94 lbs), which is fairly light, but it’s a bit too heavy and bulky to fit into a pants pocket, which limits its portability a tad. For example, if you want to take the Vuze with you to shoot footage of a national monument, you can’t just stick it in your pocket; you need a purse or a backpack. (Or, if you’re a hipster or a true nerd, a fanny pack would do nicely.)
There’s a hardshell carrying case that you get with the Vuze, and it’s absolutely a crucial accessory. The lenses on the Vuze are not protected, at all. Not only are they in jeopardy of being scratched if you toss it in a bag, you have to also be careful handling the thing, because your grubby fingers can smudge them, and you probably wouldn’t notice until you see your befouled footage.


There’s a little panel on one side of the Vuze that has a rubberized cover. When you pop it off, it remains connected to the camera body so you don’t lose it. Underneath it, you’ll find the microUSB (2.0) port, which you use for both charging and data, the WiFi button, and a microSD card slot. (You’ll need a microSD to capture any footage.) There's a Wi-Fi connection (802.11b/g/n 2.4GHz), but it's only for controlling the camera and previewing your shots through the app.
You also get a tiny pair of VR glasses in the package so you can see what you’ve shot after it’s been processed, and there’s a charger with a microUSB end included as well.
Let’s Argue About Terminology
One could argue about the definition of terms here, but it’s important to separate terms like “360-degree” from “VR.” Primarily, the difference is about depth and dimension. A 360-degree camera simply creates a spherical image. When you strap on an HMD, you can look all around and see the image, but it’s basically like sticking your head inside a bubble that has images mapped such that it makes sense to your eyes and brain. You can’t move around within that bubble, and you don’t get a 3D view. The images are essentially flat (2D); it’s just that they’re wrapped around your head. We would posit that 360-degree cameras are not, then, “virtual reality,” because VR should offer depth. A counterargument would be this question: Well, are 360-degree videos immersive? Yes, they are. If so, perhaps they should be considered “VR.” That’s a fair point, but when you consider what else is (now) available--360-and 180-degree, 3D cameras--the lack of 3D perhaps makes 360-degree-only cameras seem less like VR and more like...something else entirely. In any case, it’s important to know the difference between a 360-degree camera (spherical image) and a 360 / 3D camera (spherical image with depth perception). The Vuze VR camera is the latter.
On top of the Vuze you’ll find two buttons--power and record. Operation, then, is quite simple. You press the power button and wait a few seconds. When the LED indicates that the Vuze is ready, you simply press the record button, which will make another beeping sound (in addition to the red LED) so you know it’s doing its thing.
We noticed, though, that out in the real, loud world, the LEDs are often too dim to see easily. We sometimes ended up with junk footage because we were shooting when we didn’t intend to, or we missed shots because we inadvertently shut the recording off instead of turning it on. This is a minor issue overall, though, and certainly it’s one that HumanEyes should be able to fix in second-gen hardware.
When you’re done shooting, you just press the record button again. That’s it.
You can see a sort-of preview of your content if you dump the raw video files somewhere, but the stitching will have to be done via the software.
HumanEyes has done its best to market the Vuze that way--so easy to use that it’s more of a lifestyle accessory for the VR enthusiast on the go more than a tool that requires special knowledge and expertise--and in truth, the actual operation of the device is fairly idiot proof. (On/off, how hard is that?) In addition to stitching everything without any user input, Vuze also automatically color balances all eight cameras and even chooses focal points.
On that last bit, the Vuze has some rather amazing powers. We’ve been privy to a demo showing that, in software, you can actually alter on what in a scene any of the eight cameras focuses. It’s similar to the ability on higher-end smartphone cameras that let you change the focus after you’ve snapped the picture. On the Vuze, this works because the eight cameras overlap each other quite a bit.
So, if one camera only “saw” a wall, but the camera next to it saw a man walking past the wall, the two cameras would have “chosen” focal points at dissimilar distances. The result is that you’ll get ugliness when the man walks across a stitch line. Because of the overlap, though, you can modify one view so that it matches the other and fix the problem. (More on the Vuze’s surprisingly powerful software in a bit.)
Shooting Best Practices
When you shoot with a VR camera, you have to think of the entire process, top to bottom, in a completely different way than you do with a standard 2D camera. These new best practices apply to the Vuze specifically, but you can apply many of these generally, whether it’s for spherical 2D or 3D content.
We covered many of these in a previous article, so we won’t belabor these points, but we will rehash them in brief, and go into detail about the Vuze in particular where pertinent.
[Note: YouTube shows VR content at a lower resolution by default, so you need to select a higher one on the video. Also, YouTube displays VR content as 360 spherical video by default; to see it in actual 3D, you need a headset and the YouTube app, which we discuss in more detail towards the bottom of this article.]
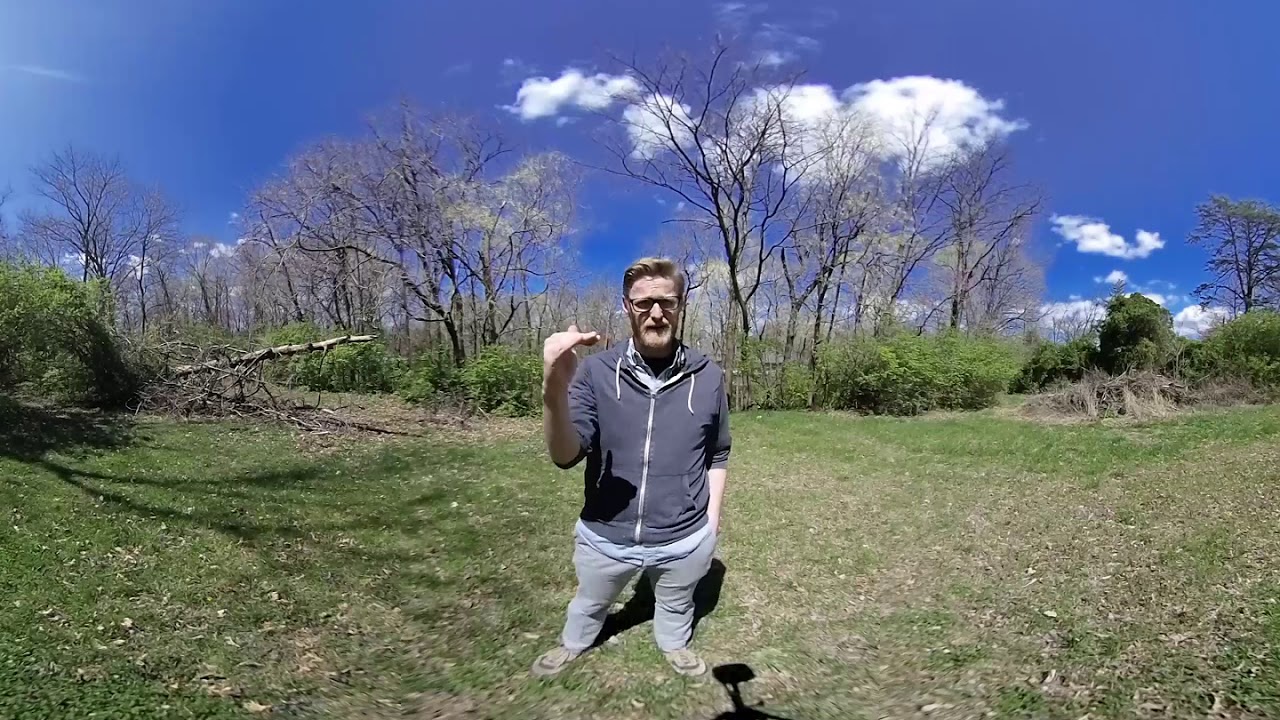
First is the loss of a frame. When a camera like the Vuze is capable of shooting in a full sphere, it kind of doesn’t matter where you aim it; it’s getting everything in view. For journalists like ourselves, this is a huge wrinkle. We’re used to framing our shots, whether it’s snapping pictures of a product, interviewing someone on camera, or recording ourselves talking. With the Vuze, that’s gone, and it introduces some other issues. Most prominent is the fact that if you’re the camera operator, you are most definitely in the shot. There are a couple of ways to avoid this. Primarily, you can just set the thing on a tripod (or other stable surface). You can either hit record and walk away, and edit yourself out later, or you can operate the Vuze with the smartphone app (which we’ll discuss in more detail further down the page). You can also hold the Vuze above your head while shooting. In the HumanEyes editing software, you can actually add a JPEG image to “patch” the tripod, or your head, at the top or bottom of the video image.
If you park the Vuze on a tripod, be wary of any people or animals that may accidentally knock it over while you’re off hiding yourself from the shot.


When you’re shooting in VR, you have to be extremely wary of moving the camera too much. Remember, VR is all about presence, so ideally, viewers will be completely immersed in your video. That means if the camera moves during a shot, the scene moves but the viewer doesn’t; that will upset the viewer’s vestibular system and result in a terribly uncomfortable experience at best and a ride on the vomit comet at worst. In other words, don’t treat the Vuze like an action camera. You’ll get the best results when the camera is static; remember, too, that because this captures 360x180 degrees, the viewer has a lot to look at. They’ll take their time looking all around a scene, and they’ll likely replay the video multiple times to ensure they take everything in.
There’s also the issue of your subjects moving while the camera is static. This isn’t a nausea-inducing problem, but you need to be aware that if a subject moves around the camera, you’re going to see the stitch lines more pronounced. That can torpedo immersion.
You should also be aware of the distances of your subjects. If you’re trying to catch a panorama of a wide open space, the Vuze will capture it in 360 3D just fine, but the effect won’t be significantly more pronounced than something shot in spherical 2D. When subjects are a bit closer, you’ll get more of the magic of 3D. Further, because the resolution of the device you’re using to view the video may do the footage a disservice, trying to hear or clearly see a subject that’s too far away is no fun. HumanEyes recommends shooting subjects at about 50mm.
Shooting height is an oft-overlooked aspect of quality VR content. Those who build rendered VR experiences know this all too well. You have to think of the Vuze as the viewer’s head, and paired cameras as their eyes. When someone watches the footage, they’re viewing it from the Vuze’s perspective.
People are different heights, and some people view content seated or standing, so you have to play games with the camera height sometimes and/or just make some height decisions and live with them. However, let’s say you’re shooting us; we're about 6’2”, so if the camera is aiming down at me, you’re going to feel like a giant when you watch the footage. Conversely, if the camera is too low and is aimed up at, say, a person who’s 5’4”, that short person will seem like a giant. Neither situation is ideal because both wreck immersion--unless you’re going for some kind of funky effect.
[Note: YouTube shows VR content at a lower resolution by default, so you need to select a higher one on the video. Also, YouTube displays VR content as 360 spherical video by default; to see it in actual 3D, you need a headset and the YouTube app, which we discuss in more detail towards the bottom of this article.]
You’ll note that there’s no live view on the camera itself--which actually makes some sense, considering that if you’re looking at a live view LCD display on 360-degree camera, you’re very, very much in the shot. But it’s nevertheless a problem, and HumanEyes has sought to solve it with a smartphone app. Which only sort of works.
The App
Part of shooting with the Vuze is that you have to press the little record button manually to start and stop, so every single clip begins and ends with you doing so. It’s easy enough to top and tail the clips to remove those bits, but if you want to avoid that altogether, you can use the Vuze smartphone app to start/stop recording and snap photos. Using the app, you can even set a short timer delay before the video begins or the photo is shot.
To be frank, that’s about all the app is good for. (We tried out the Android version.) Further, we found it somewhat annoying to stay connected. In order to control the camera with the app, you have to press the tiny little WiFi button on the camera itself, open the app on your phone, and connect to the Vuze’s WiFi network. It’s simple enough, but we had difficulty connecting at all, and then the connection constantly dropped. If you were in the field and needed to capture something quickly, the wonky connection could leave you hanging.
One advantage of using the app, though, is that you get a live view of your shot. Ideally, this is a huge relief, because without any sort of preview, you don’t really have much of an idea of what the camera is actually capturing. We know, we know--the thing shoots in 360 degrees, so it’s not that much of a mystery. But if you want to line up subjects in such a way as to avoid stitch lines, for example, a live preview is a boon. However, all the app gives you is one camera’s view. Just one, not one pair--so you can’t frame anything. It’s like trying to frame a shot with one eye closed.
You can toggle the live view on or off; we recommend leaving it off, because it’s probably a little more trouble than it’s worth. If you don’t need to remotely trigger the camera, you may just want to skip the app altogether.


The Editing Software
When we spoke with HumanEyes last year about all the technology that goes into the Vuze, one comment the company (which we’ve heard from others) that’s stuck with me is (and we're paraphrasing) that the hardware is not the focus here. It’s the software that makes the whole thing rise or fall, or at least it will be soon.
HumanEyes will continue to add to and beef up its software, called HumanEyes Studio, by and by. As the company learns how to extract more from the hardware and can craft new features for the software, be assured that those updates will come to end users. (HumanEyes’ team makes new features when they need them, then they use them internally, and eventually they push them out to end users.)
In these early days, then, HumanEyes Studio has just a modicum of features. However, what’s there works quite well and is more or less sufficient, especially for novices. That also makes it incredibly easy to use. (This is in contrast with, say, Adobe Premiere Pro, which is immensely powerful but difficult to use if you aren’t schooled in all of its features.) One could actually argue that the simplicity of HumanEyes Studio is ideal, because almost everyone who will use it in the near future is new to relatively shooting in VR.


First, though, we should mention what HumanEyes Studio can’t do. You can’t string multiple clips together into one video, which is a huge feature omission even now, and there’s no way to add titles. Thus, the software limits you to publishing one untitled clip at a time.
A far more minor issue is that you can’t stream your footage, so you lost the immediacy of, for example, broadcasting a crowd scene live. However, considering how much data the Vuze produces at once, there’s nary a mobile network available that would make streaming feasible at this time.
HumanEyes demurred a bit when we asked representatives if some of those features are forthcoming. The company knows that it needs to offer the ability to string multiple clips together into one video and that users are going to start demanding the ability to add titles. For now, the company is more focused on software updates that unlock more freedom for users to edit the color balance and adjust the focal points to abate stitching issues. Those are much-needed updates themselves; it’s just about where HumanEyes is putting its resources.
However, there is much you can do with HumanEyes Studio--more than we expected this early in the product’s history, frankly. And it could hardly be easier to do.
For a detailed look at and description of the software and what it can do, check out this article.
In sum, the software lets you:
Import clipsCrop the beginning and end of the clipsFlip the image 180 degreesChoose a “center”Reduce the frame from 360 degrees down to 0 degreesInsert images for the top and bottom capsEdit the color balance, stitching, shadow/highlight levels, and moreRender with a variety of settings.
In future updates, you’ll be able to choose output formats other than H.264, optimize the video bitrate up to 120Mbps, use spatial audio (up to four separate tracks), and more.
Performance Anecdotes
It’s tempting for us to crack open Pandora’s box when it comes to trying to measure the performance of--well, of anything--including PC performance during things like importing video, rendering it, and so on. That’s all beyond the scope of this article, so in lieu of all that, we’ll offer some anecdotal performance notes to give you an idea of what to expect from the Vuze camera and HumanEyes software.
First, we were surprised at how small the file sizes were. Remember, this is eight FHD cameras capturing each and every frame of video. Even so, a ~30-second clip will be be just about 292MB, or just under 1MB per second. Considering we grabbed a 64GB microSD card to stick in the Vuze, we had more than enough storage capacity to shoot tons of footage without having to stop and swap out the card.
Second, we were impressed with how relatively lightweight the HumanEyes software was to run. We had no issues launching the software, importing and editing clips, and even rendering the finished product on a years-old Ultrabook (with an Intel Core i5-5200U [2.2GHz] CPU and 8GB of system memory), even when a multitude of others applications were running.
Note that the minimum required specifications for the camera and its software are at least Windows 8.1, a CPU with AVX support, 4GB RAM, an integrated or discrete GPU with 2GB RAM, DirectX 11, and OpenCL 1.2. Recommended specs are Windows 10, a CPU with AVX support, 8GB RAM or higher, "fast" discrete GPU with 3GB RAM, DirectX 11, and OpenCL 1.2.
The timing of things varied quite a bit, but we found that, with this machine and under those conditions, it took under one second per 10MB to import and over one second per MB to render. Obviously, depending on the storage medium and system, those figures will vary widely, but this is the takeaway: You don’t need any special PC to handle this content. A not-new laptop will serve you well enough.
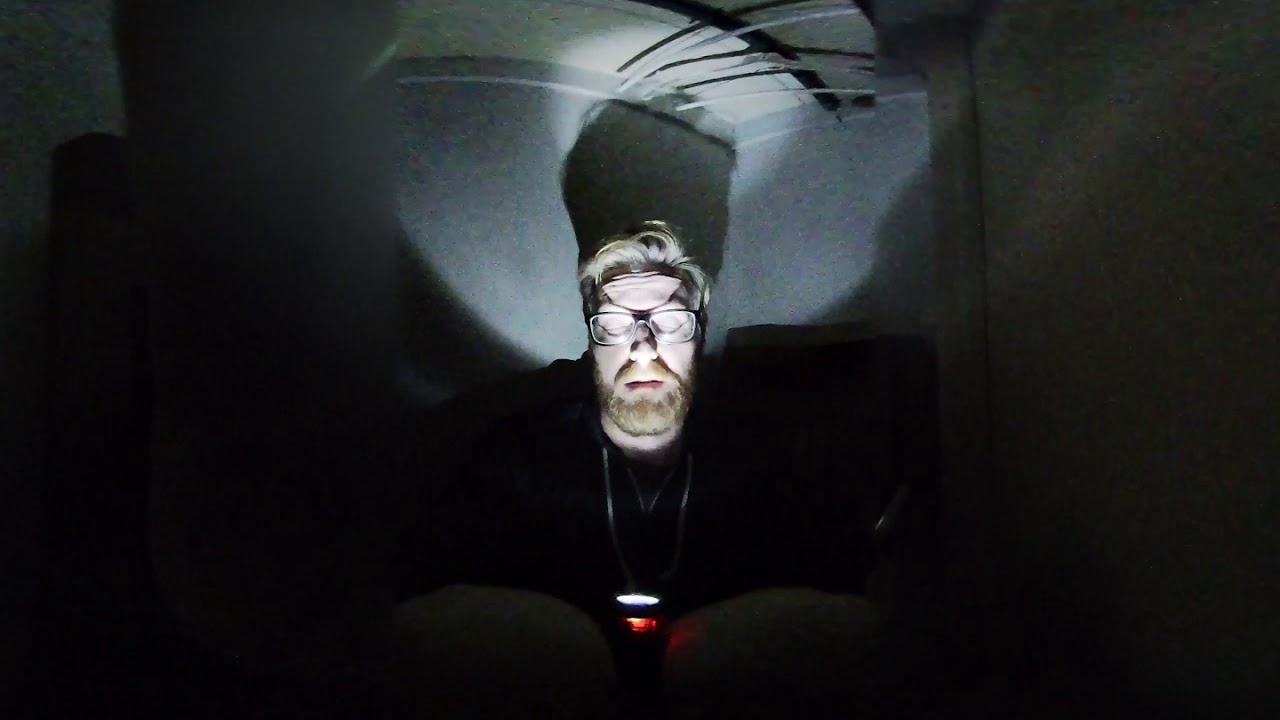
Don’t expect too much in terms of low-light performance. We whipped up a little clip to show what you might expect in dark conditions. We used only a small flashlight to illuminate a subject inside of a dark closet. Note that although you can see the rest of the closet surprisingly well, the video is grainy and blotchy. (Additionally, notice how we cropped this video to 180 degrees in order to better frame the subject; besides, the camera was nearly up against the back wall of the closet, so it wasn’t capturing anything that was at all useful. So we just cut it down in the software.)
Sharing Is Not Easy: How And Where To Upload?
It’s lovely that we have new tools to make VR videos, but the wall we keep smacking into is the sharing problem.
These days, standard 2D video is not just easy to share, it’s ubiquitous. Most of you probably don’t have to even think about sharing a video anymore--it’s nearly automatic. From your phone, you can share a video to myriad online platforms by tapping a few icons. From your PC, it’s hardly more difficult to do the same. Viewing 2D videos online is nothing--in fact, you can’t go more than a few minutes online without seeing a video somewhere.
VR video enjoys none of the above. In fact, sharing 3D 360 content is really another, very frustrating article unto itself (we’re considering writing one in all caps with bad words peppered throughout), and we would avoid the topic altogether here were it not for the fact that we needed a way to show you, the reader/viewer, the 3D 360 videos we created.
First, there are only so many sites that even support immersive video. YouTube and Facebook both support stereoscopic video (that is, 3D), as do LittlStar and Veer. Even so, they don’t support playing that video at its full resolution, so once you upload it, you’ll get a lower-res version (although we've heard that you can get 4K content onto Veer). This is to say nothing of the relative inconvenience of dealing with LittlStar and Veer.
We won’t get too deep into the process for getting a video edited and uploaded, but for what it’s worth anecdotally, here’s how our workflow went:
First of all, when we wanted to preview unedited footage, we immediately ran into the issue of where to put the file so we could view it in an HMD. All we had on hand was a Daydream headset. We uploaded the video clips to Google Drive, then downloaded them onto the Pixel phone. Then we used an app called Skybox to view the footage in the HMD.
Once edited via HumanEyes Studio, we had another problem: Because that software presently doesn’t let you string clips together (and doesn’t let you add titles), and we wanted to show a bunch of shooting examples all together, we had to import all the edited clips into Adobe Premiere Pro. There, putting the clips together was simple.
Adding titles was not quite as graceful a process. To be frank, we’re not thrilled with the end result anyway--the titles in Premiere Pro aren’t built for this type of content--but we found that we had to be careful where to put it and how large to make the font. There was much trial and error.
We opted to upload the finished videos to YouTube. To do so, you first need to inject the correct metadata. Per this support article, you have to download and run the 360 Video Metadata app, then open your video from within that software and save it. Then YouTube will correctly recognize your 360/3D video when you upload it.
Twist: Although you can see the 360-degree (spherical only) video on the web, you need to use the YouTube app and your HMD to view the video in 3D.
Double twist: On the web, the maximum resolution YouTube will display our content is 1440s. On the app, it goes as high as 2160s.
Sharing Is Not Easy: How Do You View The Content?
The accessibility and resolution problems are only compounded by how you view the content.
You can watch 3D video only if you have a VR headset. Sure, there’s always Cardboard, which is the most widely distributed HMD platform, but even that has limitations. You need a phone that supports Cardboard, and of course you need the HMD itself. You can get one for just a few bucks, but even so, they’re not yet a commonplace household item. (Further, Cardboard is not much of a VR viewer. It gets the job done, but not very well.)
All other VR content viewing is limited to those who have Gear VR, Daydream VR, Rift, Vive, OSVR, or one of the other HMDs out there.
Even if you have an HMD, you’re still limited in some cases by the resolution of that display device. Take, for example, the Daydream platform: If you use a Google Pixel phone, the best you’re getting is the resolution of the phone’s display, which is 2560x1440 (total!). Even the highest-res HMDs (strikingly, the new Windows Mixed Reality headsets), are at most 1440 x 1440 per eye (2880 x 1440 total). For consumption purposes, this is a huge problem for these VR cameras. Who cares if the Vuze can produce footage in 4K if there’s no device upon which to view it? (Pimax needs to get rolling ASAP.)
So then, in addition to the lack of sites that even support 3D video content, consumption is limited to those with HMDs, and both the sites and the HMDs reduce the effective viewing resolution of the videos--which, we can say from much frustrating experience, is not all that great. The industry needs to catch up with these cameras.
Therefore, for many people, viewing VR content is a black box that they can’t open yet. Ironically, people who can view VR content because they have an HMD are literally looking into a black box. (Has someone written a sardonic poem about that? If you have, please send it to us.)
Sharing is one kink in the chain of VR content creation/editing/sharing that HumanEyes has not cracked. And it’s not the company’s fault--this is just where the industry is right now.
Final Thoughts
The Vuze VR camera may well leave you wanting something more, something better. The whole “4K” thing looks tantalizing in a spec sheet, but there’s a screen two inches from your face, and because the content is a video and not a carefully rendered game environment, it loses its luster a bit.
It’s also important to keep in mind that although the Vuze VR camera shoots in 3D, this is not volumetric video (or photo) we’re talking about here; you can’t stand up and walk around within the shot like you can in a VR game.
The nature of the camera is also such that you probably don’t want to try and shoot much handheld content (let alone view it) unless you want a guaranteed shortcut to Vomit Town. You want to shoot with the Vuze VR camera on a tripod, on even ground. Fast-moving objects in the shots will look blurry and will be tough to track visually.
Further, the nature of VR video is such that shooting is rife with pitfalls. You can’t have the camera too close to your subjects, and if they’re too far away, you lose the whole value of the depth perception. The camera can’t be positioned too high or too low, or else when you view the video, you’ll feel discombobulated.
And of course, getting some of the coolest shots means risking damage to the camera. For example, it would be really cool to stick this thing on a tripod near a soccer goalie’s box and capture shots on goal--but then there’s a camera on a tripod right in front of the goalie box. So that’s not happening.
Even taking all of the above into consideration, though--and noting that some of those issues are simply inherent in shooting immersive video and are not unique to this camera in particular--the Vuze VR camera is a compelling piece of hardware, and its easy-to-use companion software sells it. You can have one (with the accompanying software) for $800.
Update, 10/23/17, 9:40am PT: Updated information on weight, the Wi-Fi connection (it does not send data, as previously indicated), the nature of the power button, and where the stitching occurs.
