How to Make a Raspberry Pi-Powered Print Server
Make your wired printer wireless with a Raspberry Pi
Get Tom's Hardware's best news and in-depth reviews, straight to your inbox.
You are now subscribed
Your newsletter sign-up was successful
Even an ancient laser or inkjet printer is probably good enough for most people, but if yours lacks Wi-Fi, using it can be a pain the butt. However, it’s easy enough to turn a Raspberry Pi into a wireless print server that will allow you to print to your wired printer from any computer on your network. Here’s how to make a Raspberry Pi print server.
What You Need to Make a Raspberry Pi Print Server
- Raspberry Pi with Wi-Fi. A Pi Zero W is best suited for this project but any Pi with WiFi can be used. We used a spare
- Raspberry Pi OS on an 8GB+ micro SD card. You may want to do a Raspberry Pi headless setup so you can perform this setup without a monitor, keyboard or mouse.
- A USB adapter to connect the Pi to the printer. If this is a Raspberry Pi Zero W, you’ll want a USB OTG (micro USB male to USB Type-A female) wire. , to connect the printer if using a Pi Zero W.
- A printer without network capabilities.
How to Set Up a Raspberry Pi Print Server
1. Open a terminal window on the Raspberry Pi or login via SSH.
2. Update the list of installable software.
sudo apt update3. Install the Common Unix Print System (CUPS) software.
sudo apt install cups4. Add the default user, pi to the group of users which can use printers.
sudo usermod -a -G lpadmin pi5. Create a static IP address so that the Pi can always be located on the network.
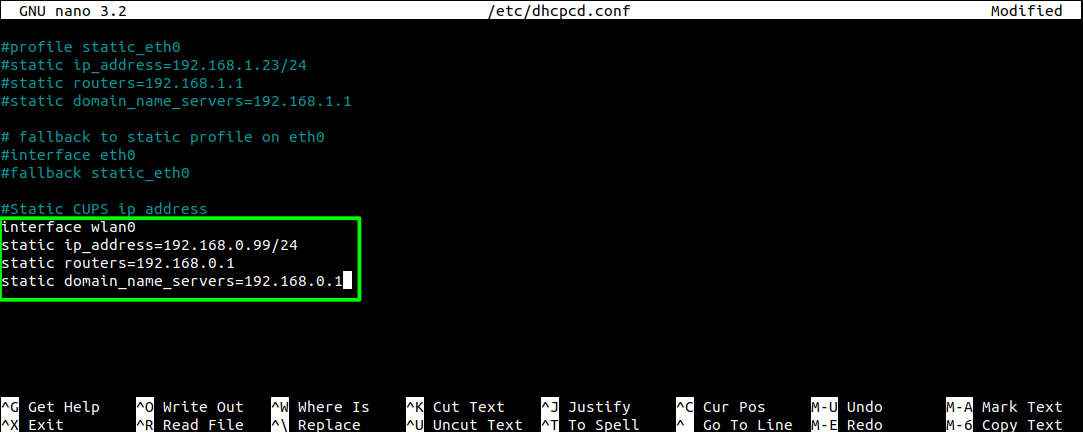
sudo nano /etc/dhcpcd.conf6. Add a static IP address and details of the router, and DNS server to the bottom of the file. These details will be different depending on how your router is configured. When complete press CTRL + X, Y and then Enter to save and exit.
Get Tom's Hardware's best news and in-depth reviews, straight to your inbox.
interface wlan0
static ip_address=192.168.0.99/24
static routers=192.168.0.1
static domain_name_servers=192.168.0.17. Configure CUPS so that it is accessible across the network.
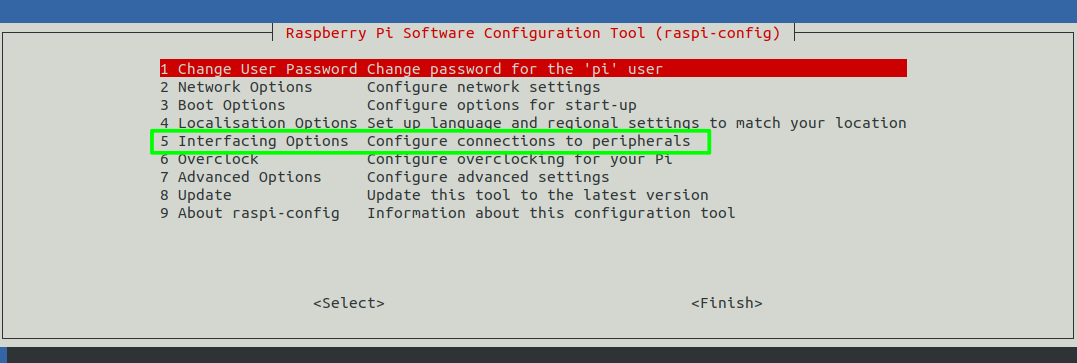
sudo cupsctl --remote-any8. Setup SSH remote access to the Pi if it’s not setup already. You do this by launching raspi-config (sudo raspi-config), enabling SSH under Intefacing Options->SSH, exiting and rebooting.
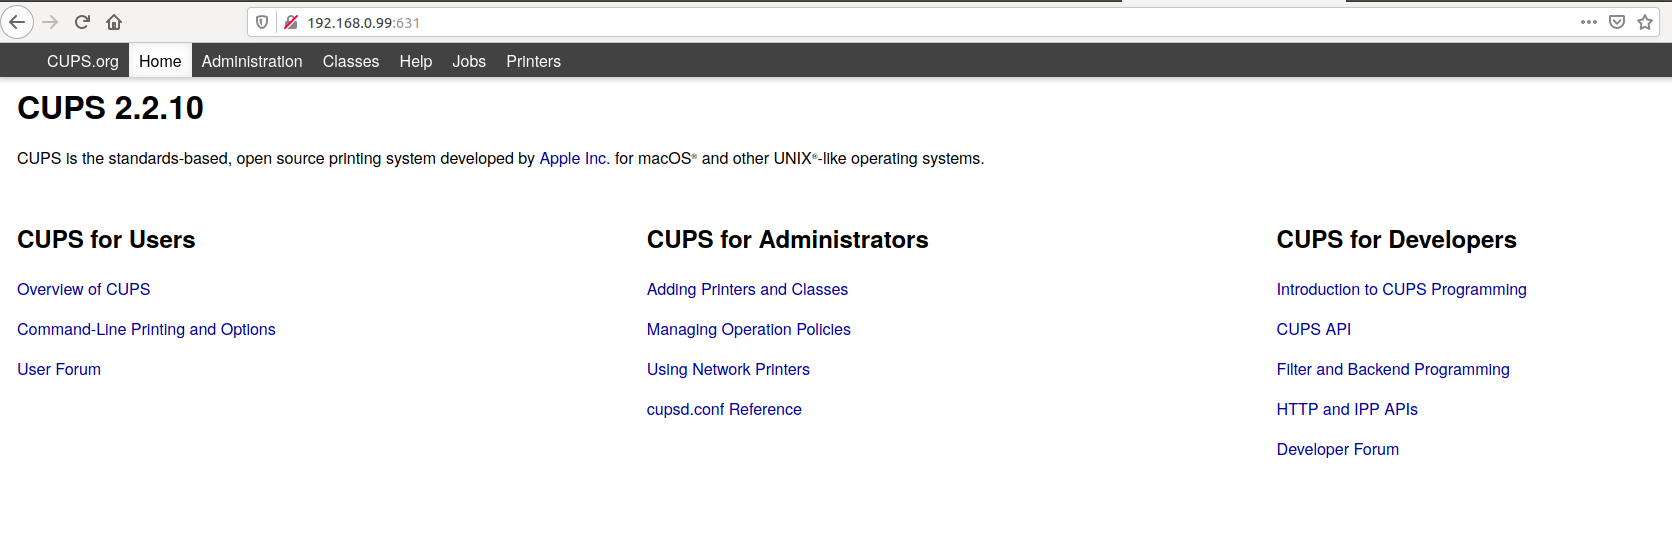
10. Navigate to the IP address of the Pi followed by :631 on another computer’s browser. In our example the IP address is 192.168.0.99.
192.168.0.99:631You’ll see the CUPS web interface and from here we can administrate the printer server.
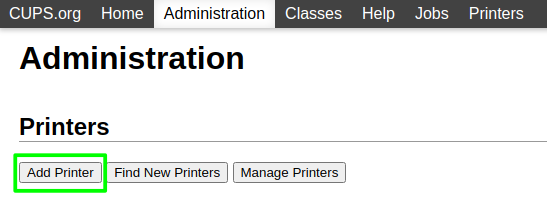
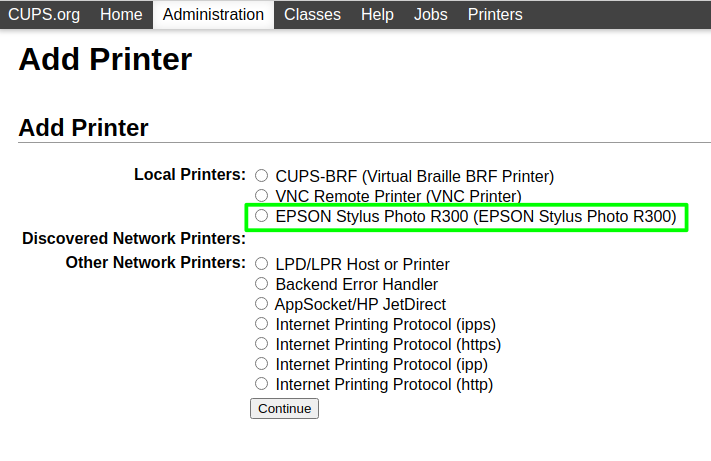
11. Click on the Administration tab and on the next screen click Add Printer.
12. Upgrade CUPs if you get an “Upgrade Requried” warning, followed by a link to download.
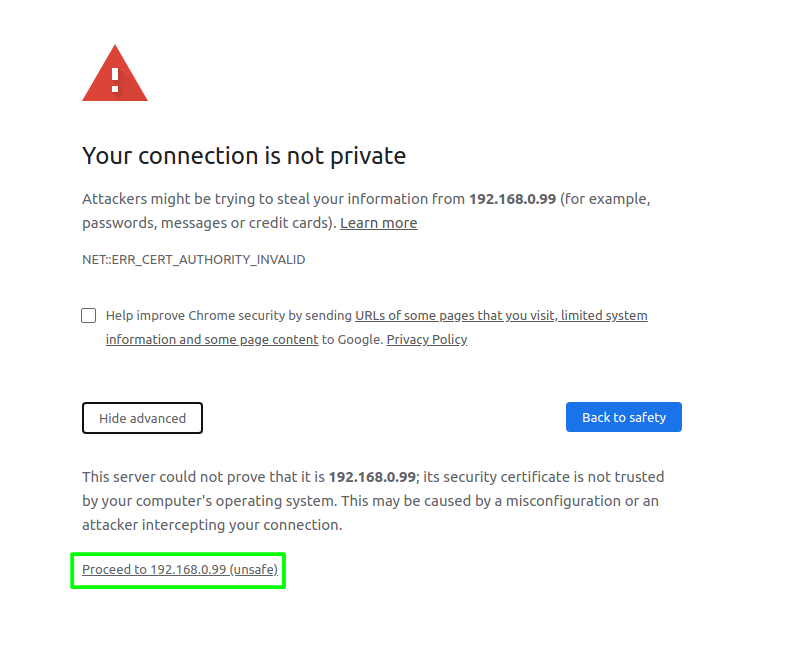
13. Select Advanced then Proceed if you receive a “Your connection is not private” warning.
14. Enter your user name and password, by default these are pi and raspberry.
15. Click on the radio button next to the name of your printer.
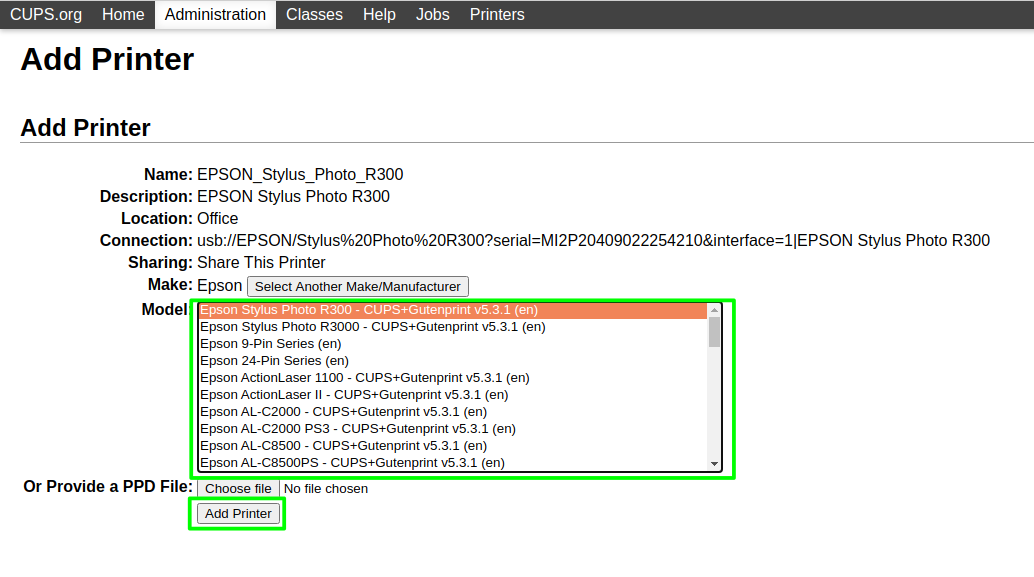
16. Select the model of your printer and then click Add Printer. Typically the first value returned should be correct.
17. Check the configuration of the printer before clicking on Set Default Options.
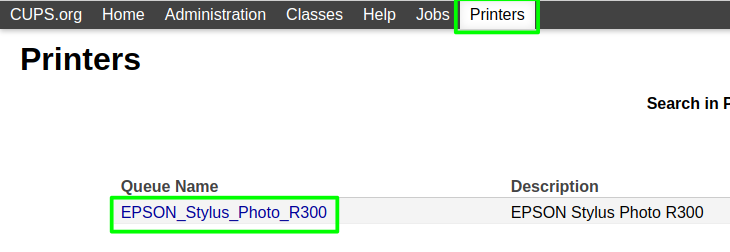
Go to Printers and then click on your printer. To open the configuration screen for that printer.
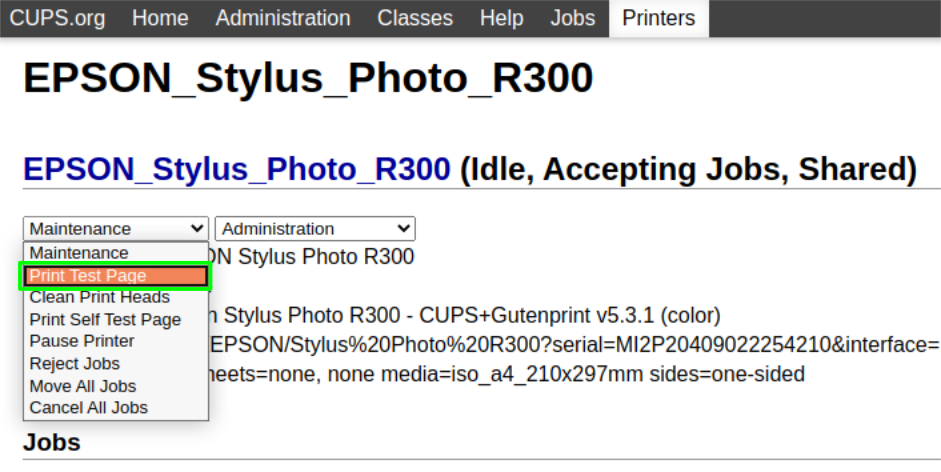
18. Click on Print Test Page, found in the Maintenance menu, to print a test page and to confirm that our printer is working properly.
Using the Raspberry Pi Print Server from a Windows device
Adding the printer to Windows 10 is really simple. Just make sure that your Windows device is on the same network as the print server.
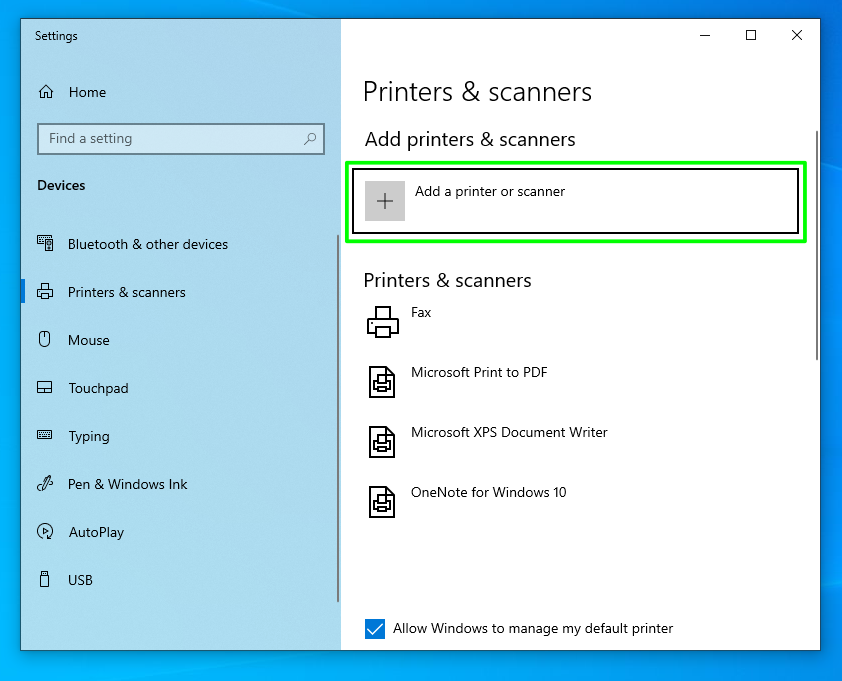
1. From the Start Menu search for Printer, click on Printers & scanners.
2. Click on Add a printer or scanner
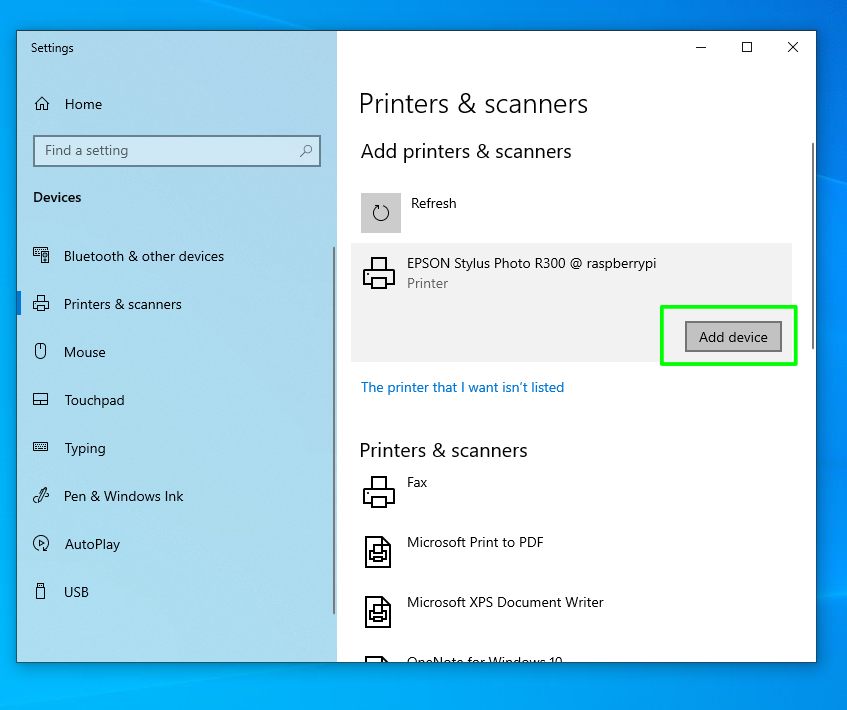
3. Click on the print server.
4. Click on Add Device and Windows will communicate with the print server.
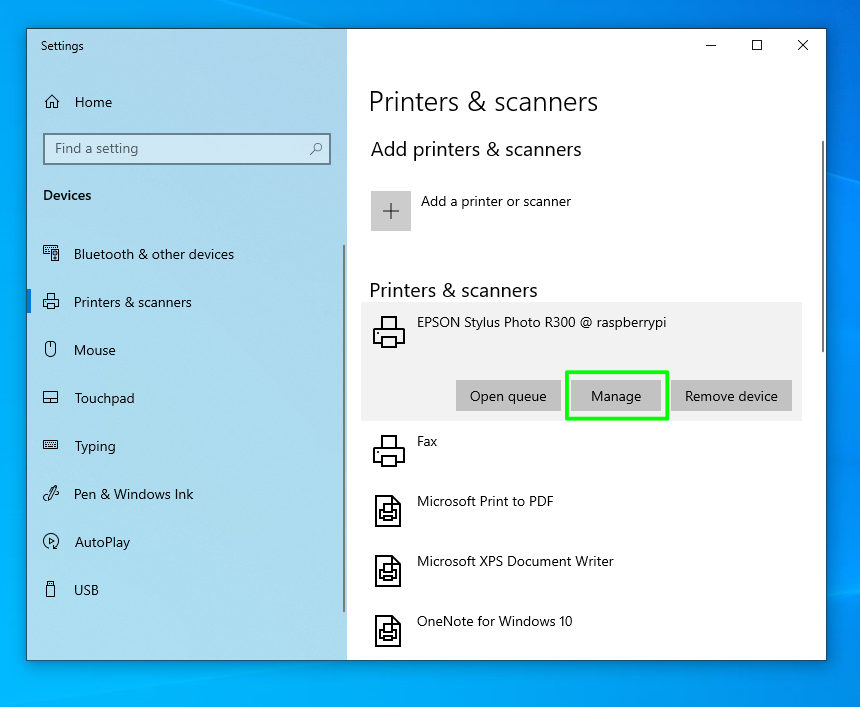
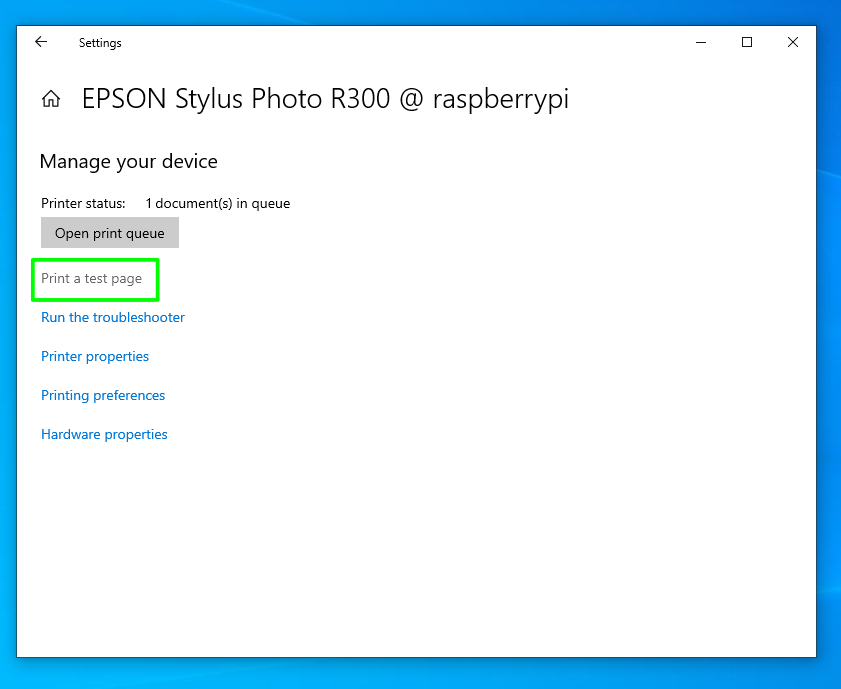
5. Click on Manage to open the printer settings page.
6. Click on Print Test Page to test that Windows can successfully use the print server.

Les Pounder is an associate editor at Tom's Hardware. He is a creative technologist and for seven years has created projects to educate and inspire minds both young and old. He has worked with the Raspberry Pi Foundation to write and deliver their teacher training program "Picademy".
-
wbrells I've set up a Raspberry Pi to act as print server for a Dymo 330 Turbo LabelMaker (I did this some time ago using an article from a Dennis Sutanto Technology Blog, but the approach seems basically the same as in the current article.) This setup has been working beautifully for printing labels from a PC. Now, though, I would also like to print from a Debian-based Linux system (LinuxFX, specifically). I can't seem to get this setup to work, and I'm not sure what the problem may be! Under Printer Properties I have:Reply
Description: DYMO LabelWriter 330 Turbo
Location: Loft
Device URI: http://192.168.2.64:631/printers/DYMO_LabelWriter_330_Turbo ==> this is exactly the same as used when setting up the printer on the PC
Make and Model: DYMO LabelWriter 330 Turbo,driverless,cups-filters 1.27.4
Printer state: Idle
When I try printing to the Dymo, I get a message saying "printer error" and I have to delete the document from the print queue.
I'm not sure if it needed or not, but I put the PPD for this LabelMaker in the /usr/share/cups/model directory and restarted the CUPS server.
Any thoughts on what is wrong would be greatly appreciated! -
wbrells UPDATE: I notice that the printer error message includes the text:Reply
Processing - File "/usr/lib/cups/filter/raster2dymolw" not available: No such file or directory
HOWEVER, this file IS present in the specified location! I guess the problem is not with the printer server after all, but something to do with the DYMO software.... No idea what to try next!
Wayne -
wbrells UPDATE #2 : The DYMO printer works fine when directly connected to the computer via USB, so I guess the problem IS related to the Raspberry Pi print server... Any thoughts/suggestions would be greatly appreciated! WayneReply -
wbrells UPDATE #3: With a fresh install of LinuxFX (based on Ubuntu 20.04) and the latest version of WINE I have been able to install the Dymo LabelMaker software 8.7.3 with (apparently) no errors. The program starts up fine but claims it cannot find the printer even though other programs (including ones running with Wine) can print perfectly well to it.Reply
Does anyone know what is so "special" about Dymo printer requirements? Perhaps some CUPS configuration change is needed, or some special permissions set? Any suggestions at all would be greatly appreciated!
Wayne -
heisdeadjim I am failing on step 14, username and password.Reply
pi and raspberry, are not working. I am using this same pi to run a pihole, THAT login also doesn't work.
Ummmm, help? :) -
heisdeadjim Okay, solved my own problem. I ssh'd into it. It is a Pi 4, 4GB. I have more than one so the device name is simply "raspberrypi41". When I changed the password in raspi-config back to "raspberry" the admin console let me in.Reply
I wonder if this is fixable? The tutorials on installing a pihole mention to NOT have the default login. -
Šebestíček I am installed this for my printer Canon MG5150 Series and all working with CUPS, but I can't print from my PC, it doesn't shows me a printer in a list. I am using Raspberry Pi 3B+ and a Windows 10 PC. Please Help. Thanks.Reply -
inian This guide worked for me for HP Laserjet 1006 with some additions. First i had to download, compile and install foo2xqx driver, because CUPS doesn't have driver for 1006.Reply
Second, the method with automatic windows discovery didn't worked very well. The printer was added but printing garbage.
I used the option "the printer i want isn't listed listed", then "select printer by name" and using this address as name
http://hostname:631/printers/LaserJet1006 (of course changing hostname to IP of my raspberry ) -
jmp57 All good up to step 15. What if you don't have an Epson printer (e.g. I have a Brother). Any suggestion ? ThanksReply
