Tom's Hardware Verdict
$13 isn’t too much to spend on a Raspberry Pi case with passive cooling. It's just that there are better cases available for just a few dollars more. If you truly want to protect your Pi, spend a little more. If you can’t then this isn’t the worst option, but don’t expect the best performance.
Pros
- +
+ Strong, robust case
- +
+ Recessed micro SD card slot
Cons
- -
Sub par cooling performance
- -
Ugly
- -
Lid on a heatsink
Why you can trust Tom's Hardware
As the CPU speed and core count of the Raspberry Pi increased, so did the need for a good quality case and cooling. Sure the Raspberry Pi 4 can happily work without, keeping its cool while we push it to the limit but a decent case will keep fingers away from hot chips. Good cooling will keep those chips cool.
Cyntech has been on the Raspberry Pi scene since the early days. It co-created Pibrella, an early 26 pin GPIO based add on board and has released numerous products over the first decade of Raspberry Pi. Cyntech’s latest product is a combo of case and heatsink for the Raspberry Pi 4. The case retails for $6 and the heatsink for an additional $7, so for $13 how much protection and cooling do we get? Can it compete with the products on our list of best Raspberry Pi cases? The only way to find out is to put them on the bench and see how they perform.
Raspberry Pi 4 Cyntech Case and Heatsink Specifications
| Case | Two part plastic case |
| LED light pipes | |
| Recessed Micro SD slot | |
| GPIO Slot | |
| Exposed ports (USB, Ethernet, HDMI, Power and Composite output) | |
| Optional stackable 10mm spacer | |
| Wall Mount | |
| Heatsink | Cast aluminum |
| Direct contact to the SoC |
Building the Raspberry Pi 4 Cyntech Case and Heatsink
The build is easy, once you get the hang of it. Our first challenge was actually placing the Raspberry Pi 4 inside the case. It was a little tricky and, at times, it felt like we were applying too much force. After a few attempts, we got the Pi inside, but the process was fraught. We received the case and heatsink along with a 10mm spacer.
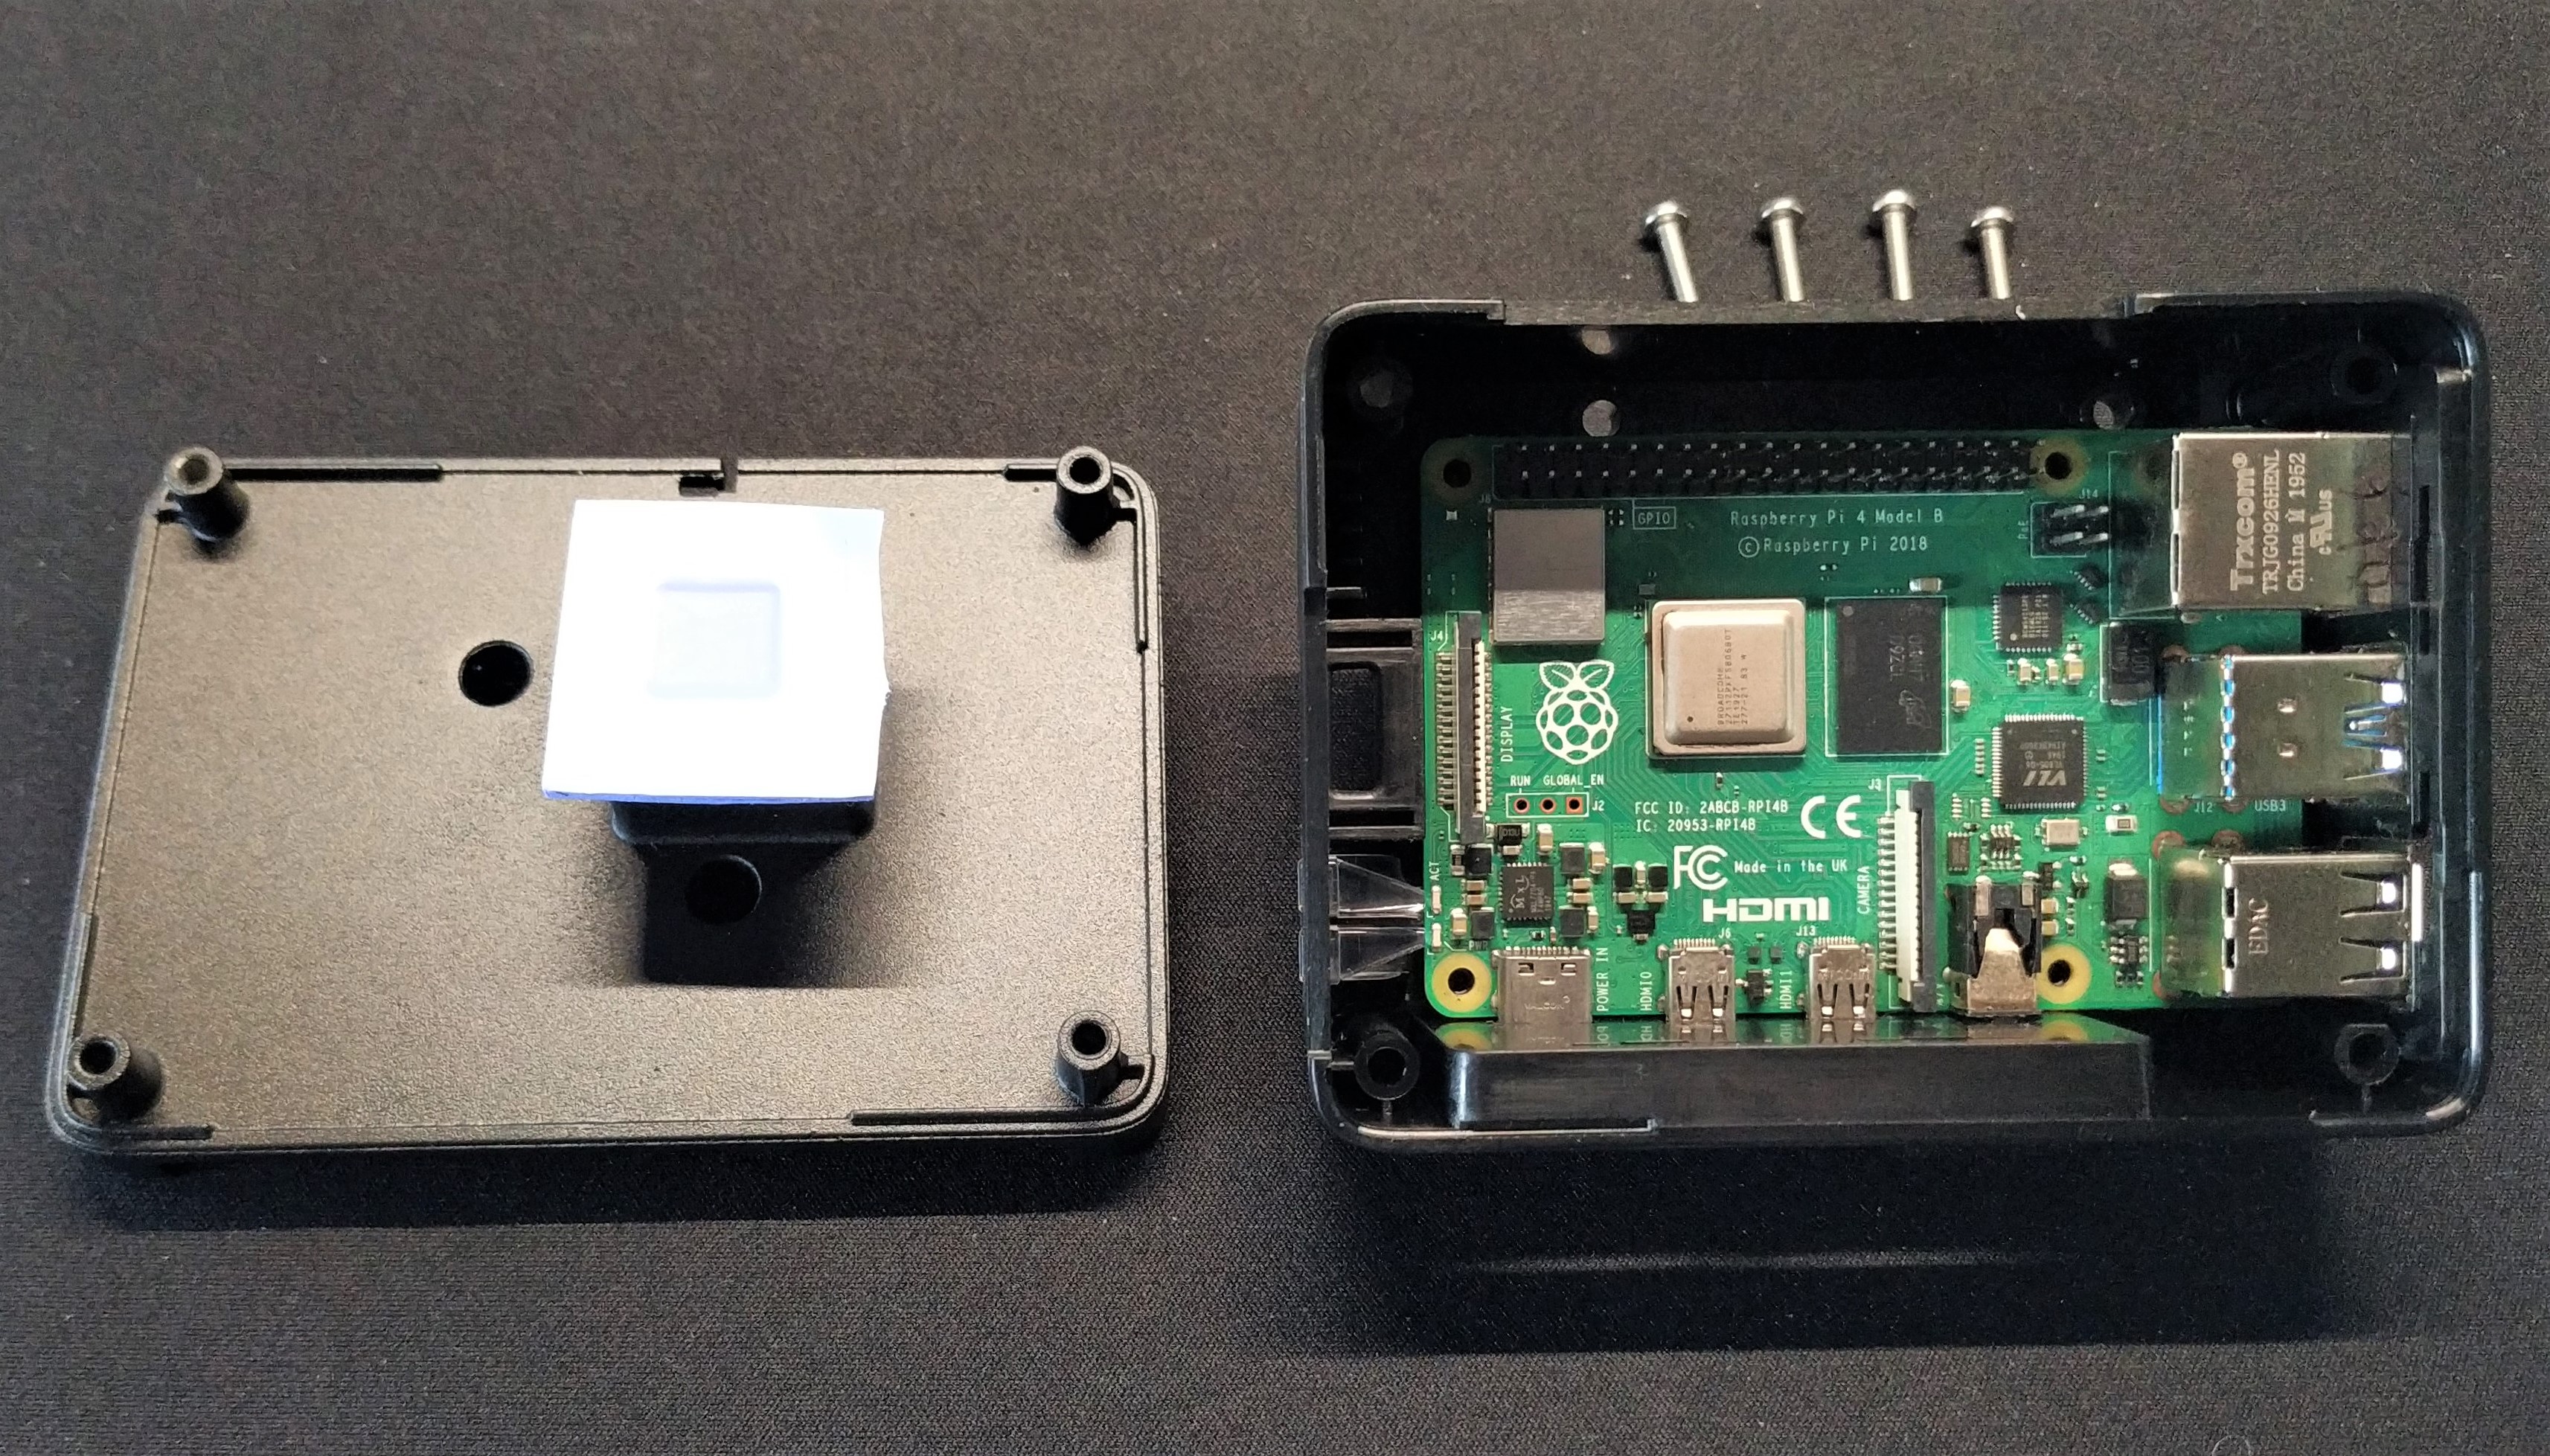
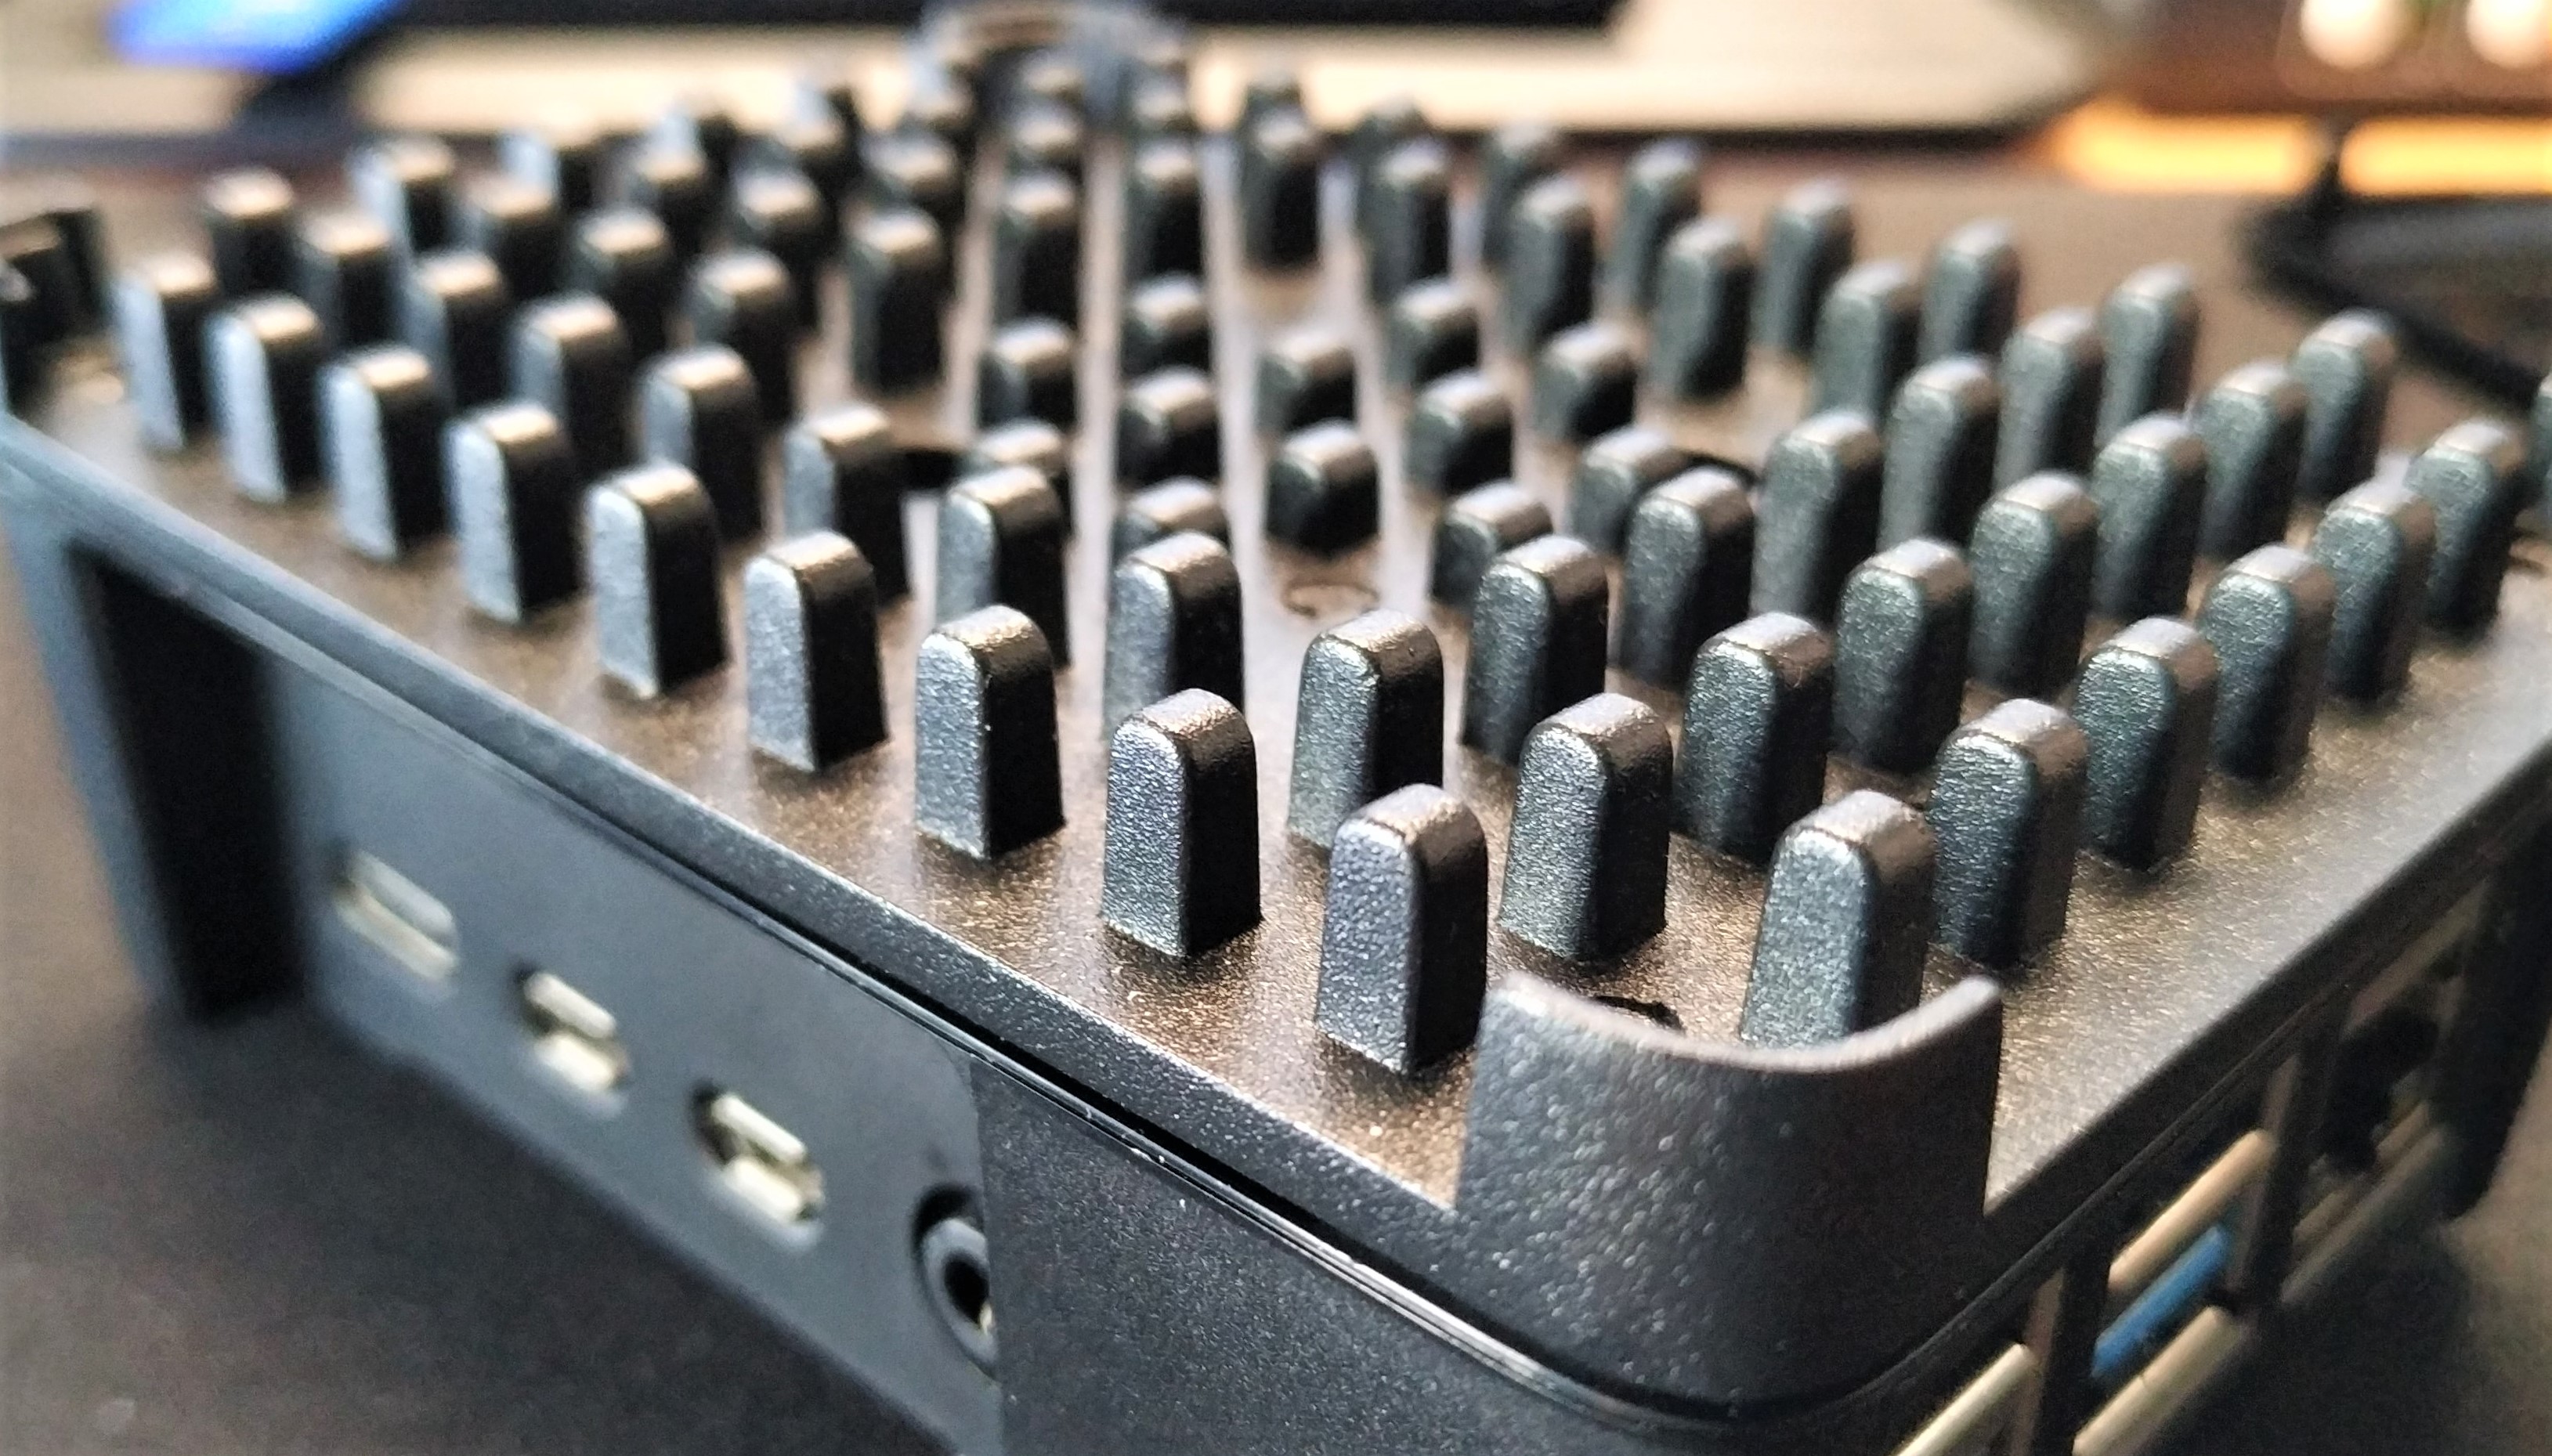
The spacer is used with the case to add space for a HAT or addon inside the case. But adding a HAT is impossible when we are using the heatsink. A few moments of head scratching and we left the spacer out of the build. We then went to attach the heatsink, a single cast piece which bears the scars of the manufacturing process.
Each corner has a screw hole which secures the lower part of the case, through the Pi, through the heatsink to the top part of the case. The included thermal pad covers the SoC package of the Raspberry Pi 4, but the RAM is barely touched by the pad. That said, the RAM isn’t a hotspot, rather the onboard PCIe chip (used for USB 3.0) is the next warmest component. There is no attempt to cool any other part of the Raspberry Pi, only the SoC.
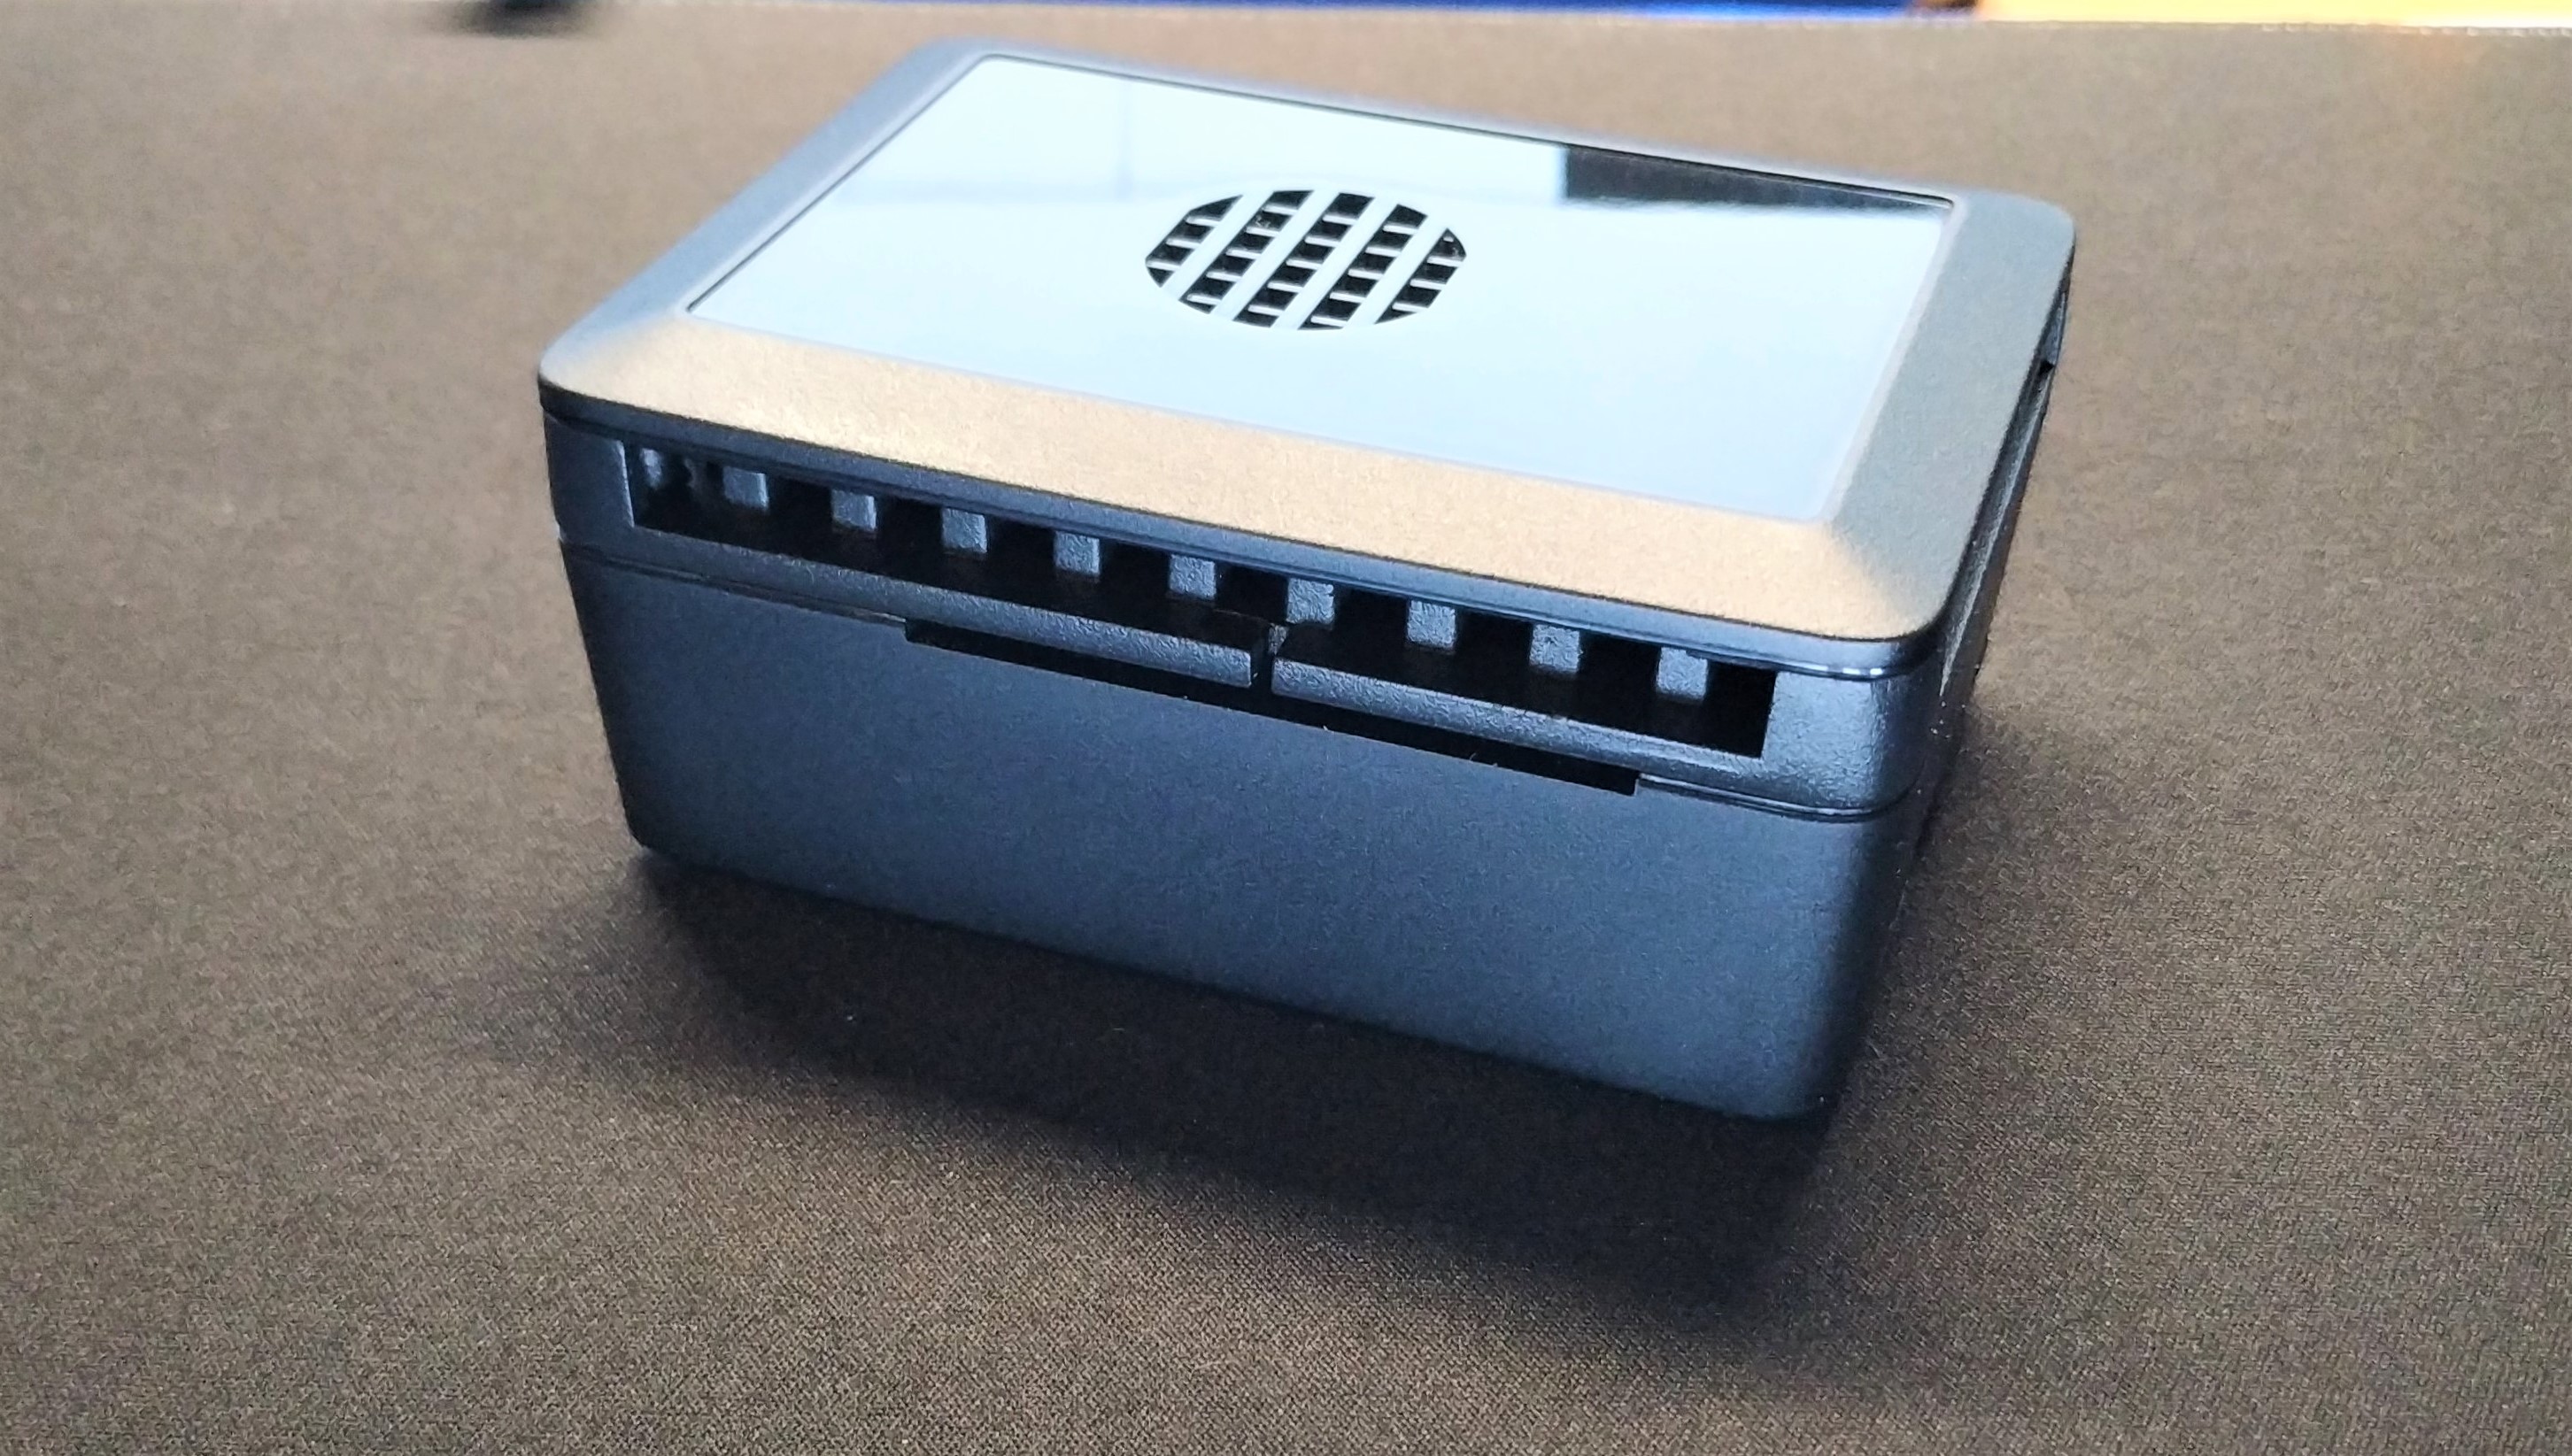
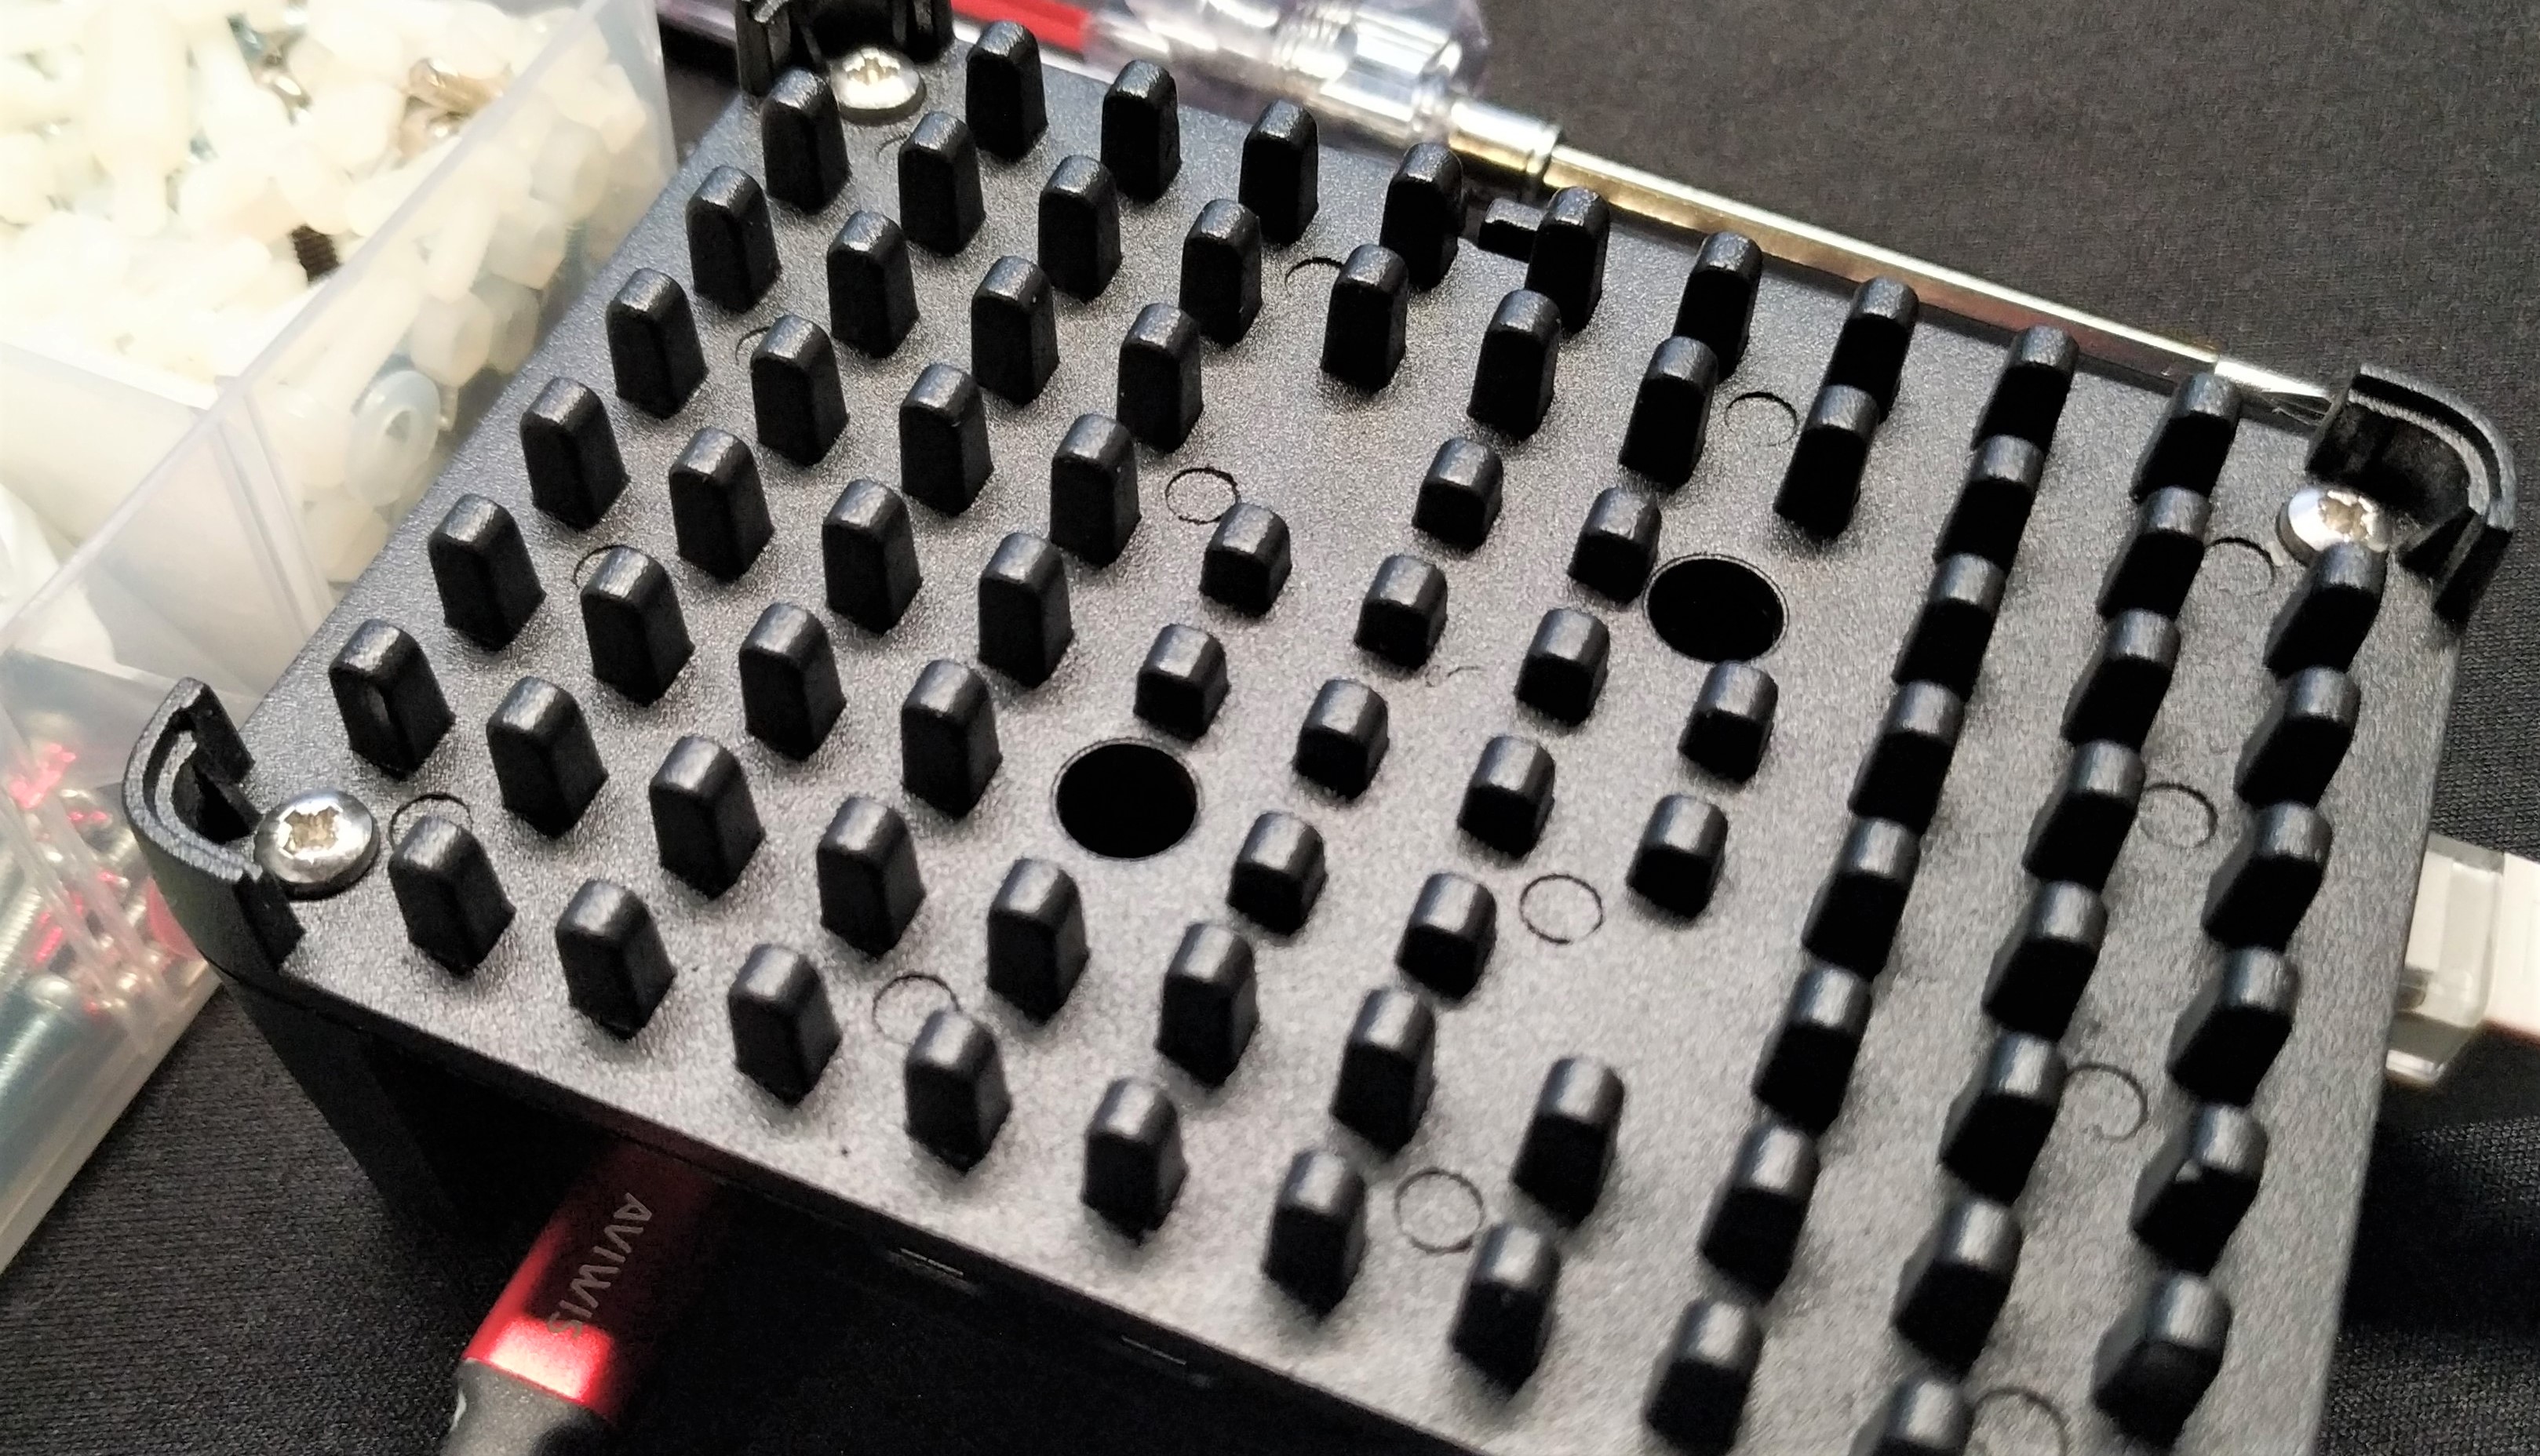
The heatsink will friction fit in place long enough for us to add the plastic lid. The lid has mounting holes around a central exhaust hole for a fan, but none was included. This is where we ask ourselves “Why?" Why is there a lid for an air cooled case? Surely we want the air to circulate around the fins of the heatsink? The lid is where our machine screws screw into, and without them the case is not fully built.
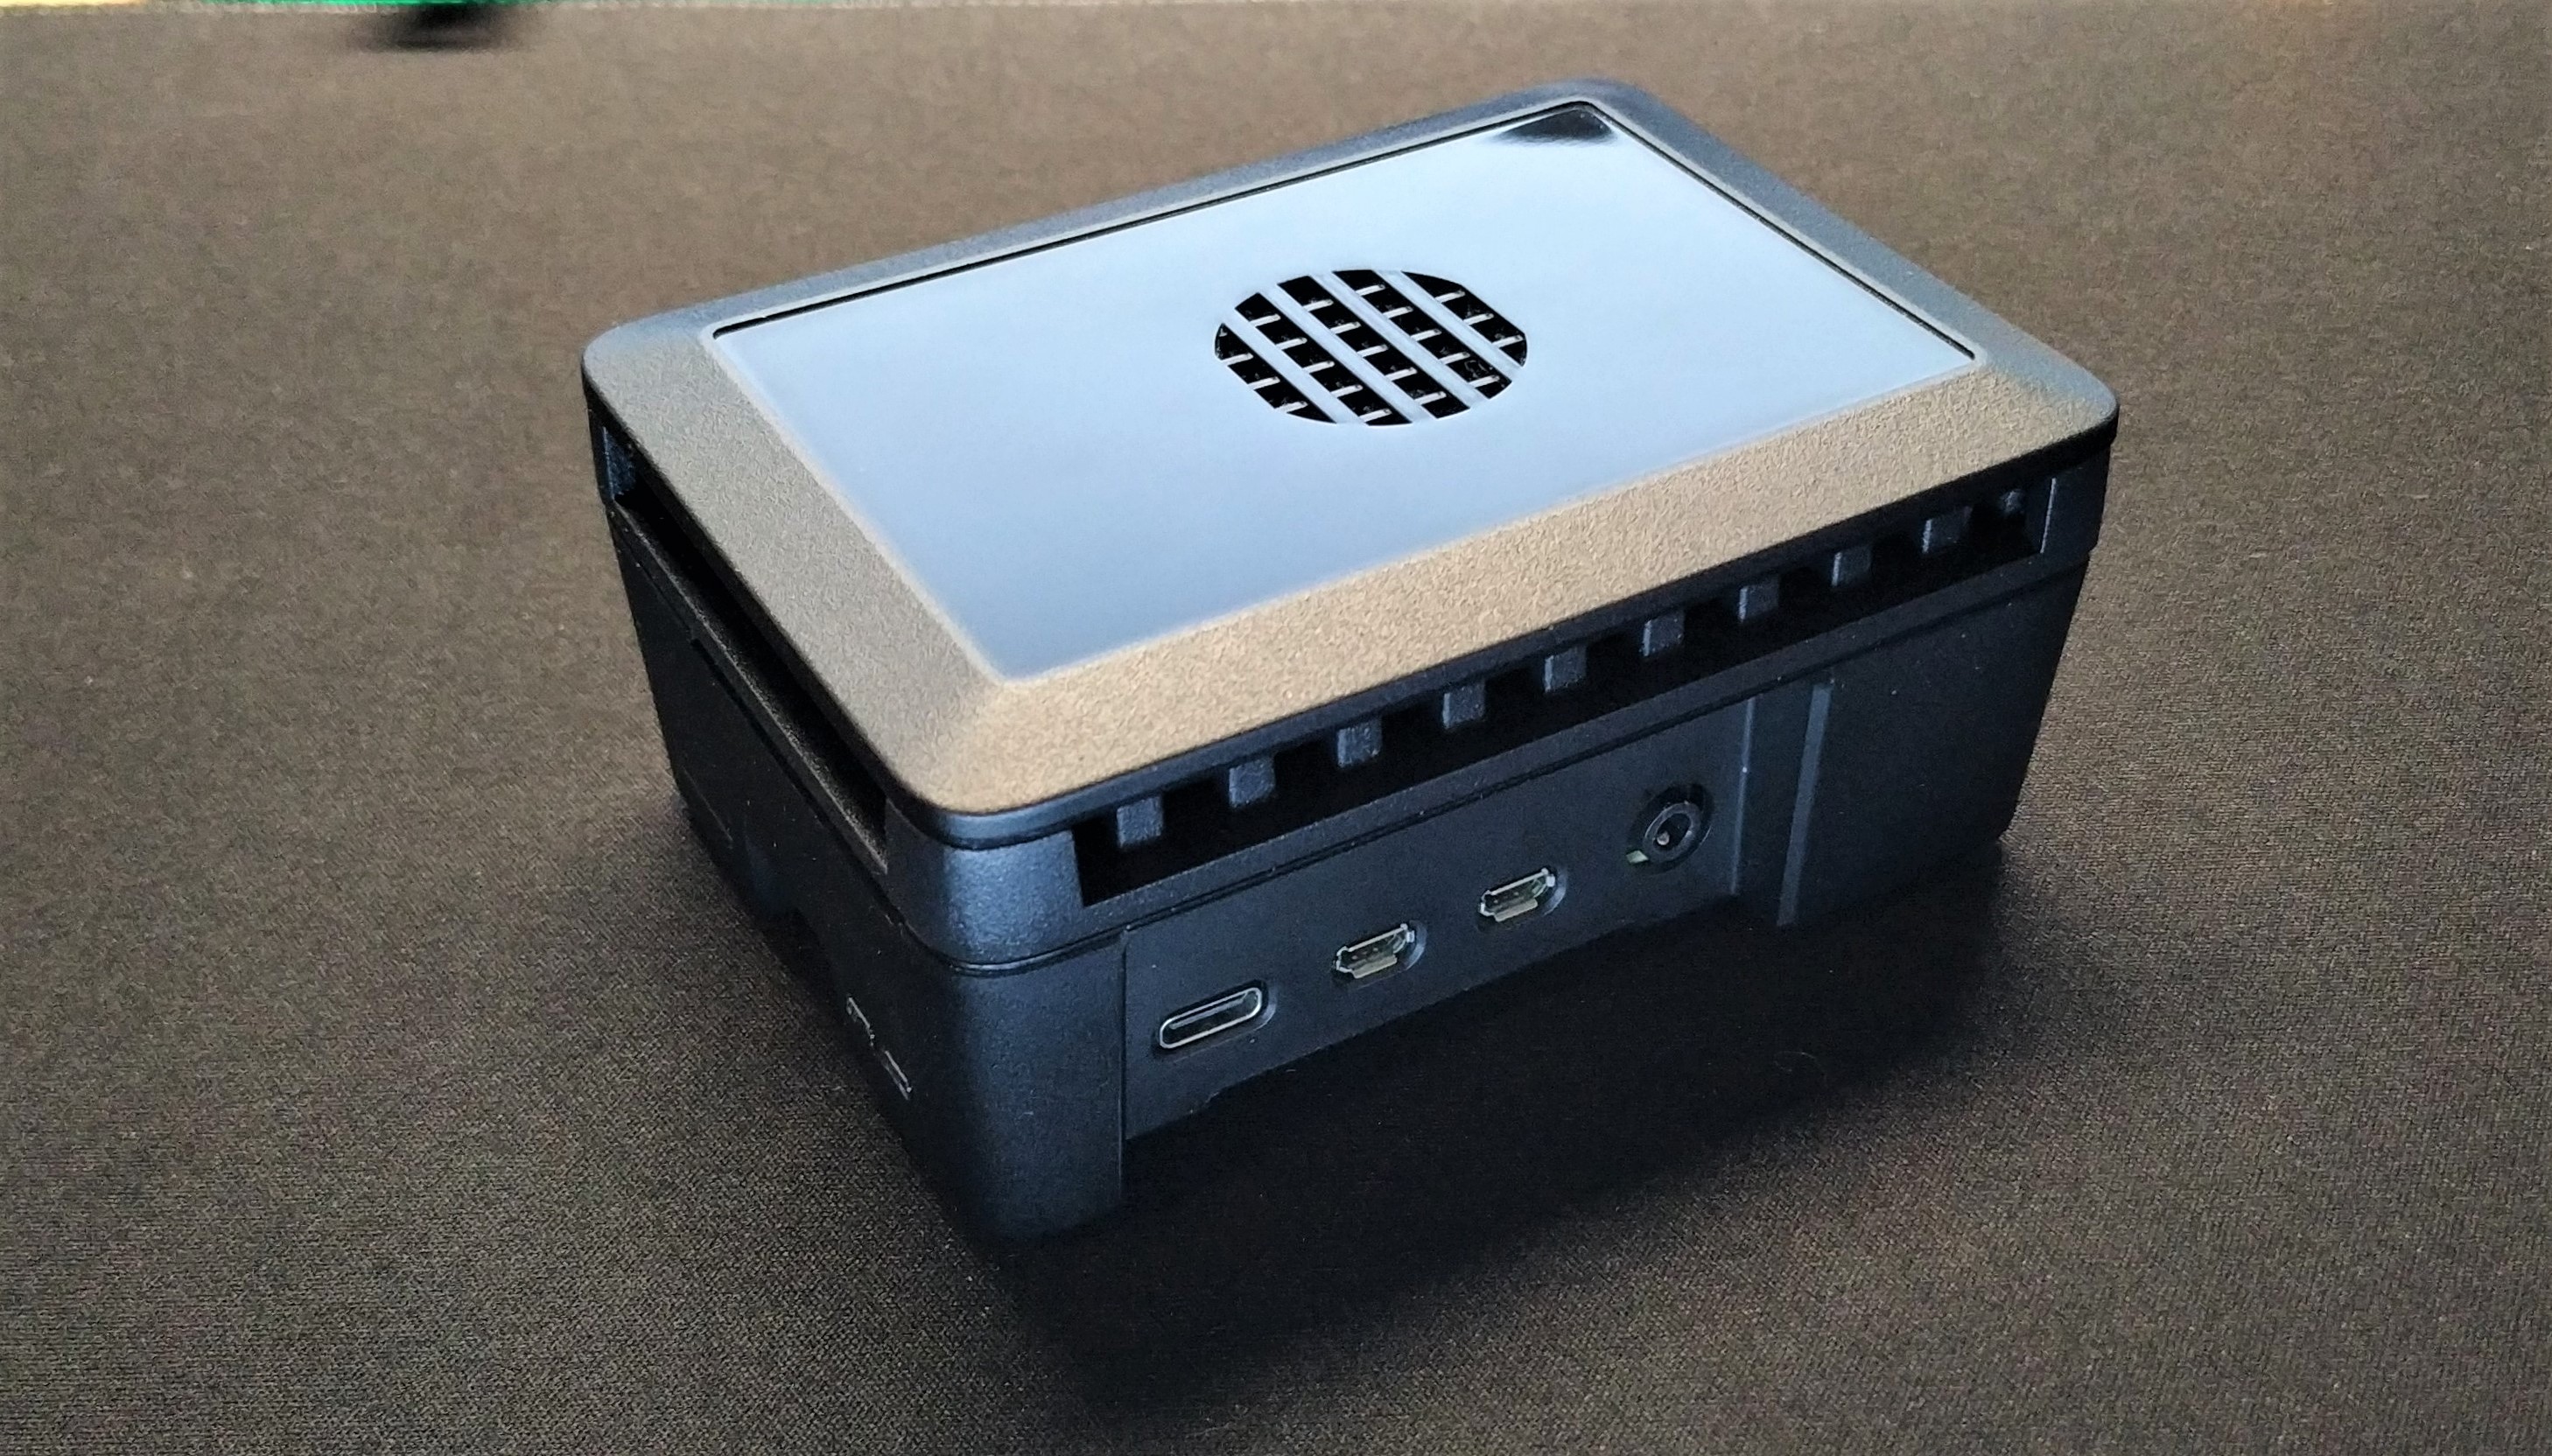
So we built the case as it came and noticed that it resembled the Death Star mouse robot from Star Wars. We have a black plastic brick of a case which is functional but ugly. That said, we do love the recessed microSD card slot, so many cards have been lost due to a drop. The case is robust, the plastic lower part is tough, and the aluminum heatsink offers great protection. The case is built like a tank, so if protection is your priority, this is a decent choice.
Get Tom's Hardware's best news and in-depth reviews, straight to your inbox.
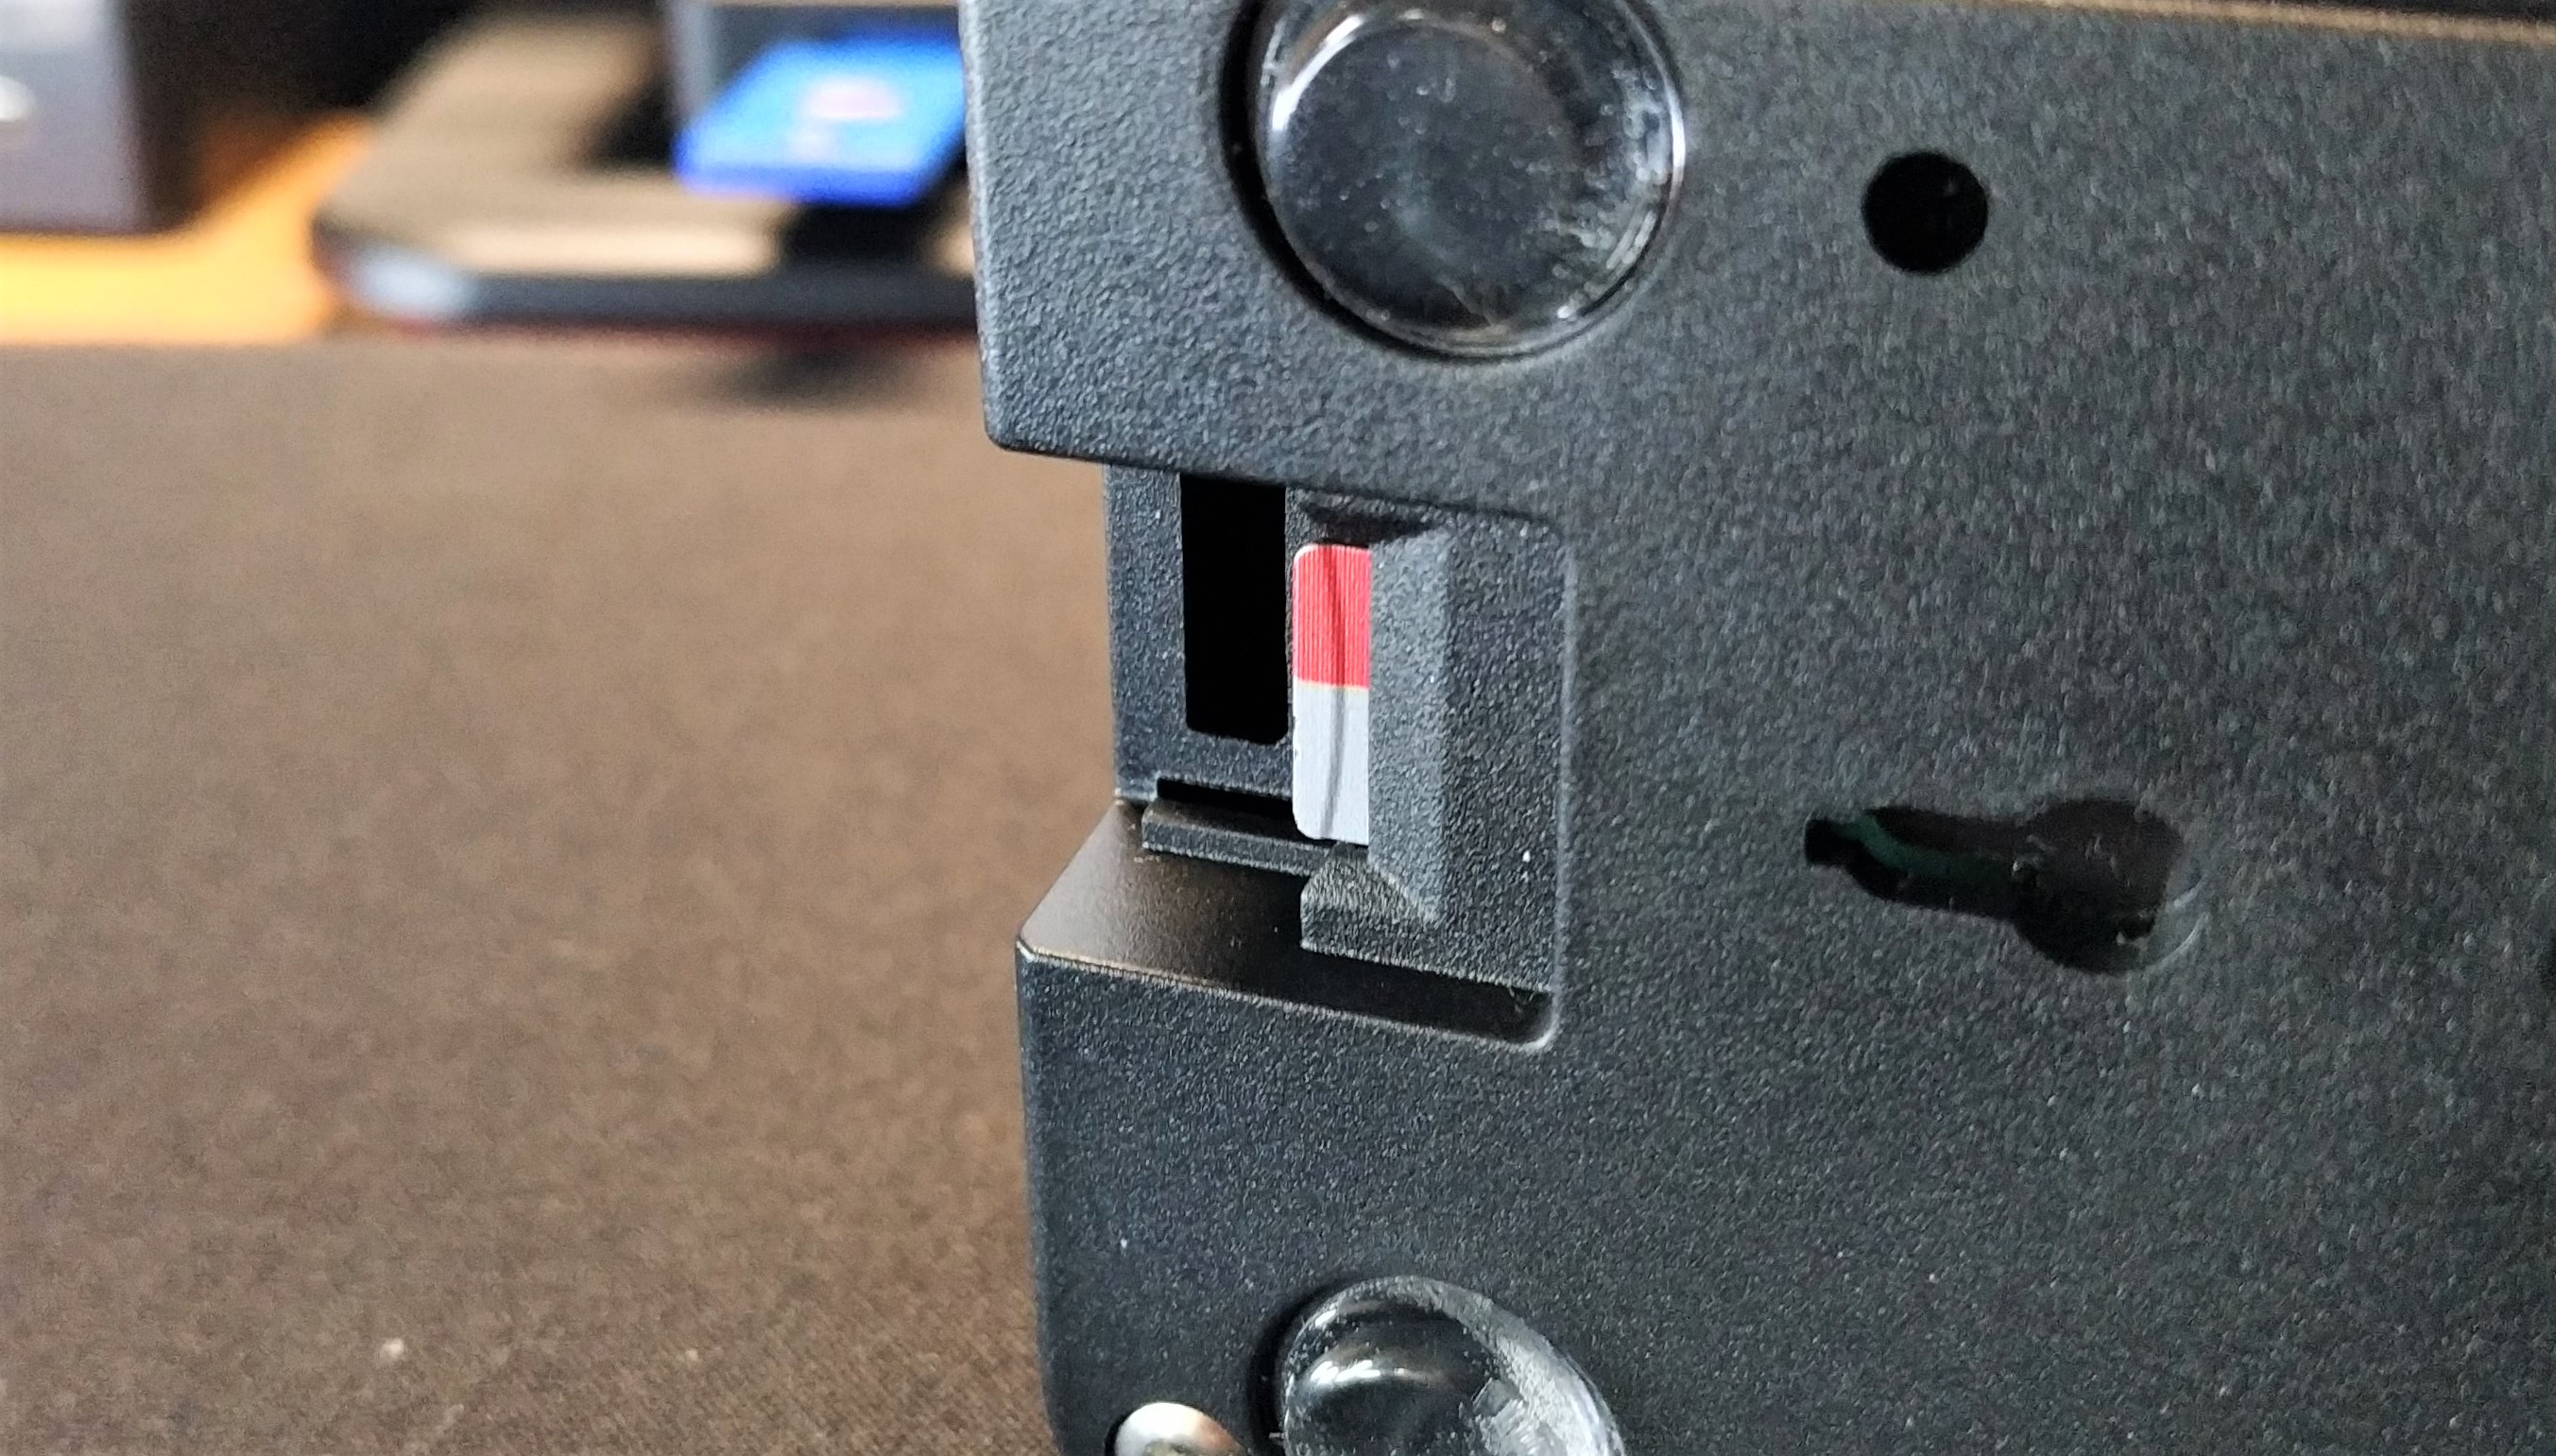
A Raspberry Pi is all about the GPIO and with Cyntech’s case we have a cutout on the rear side for a breakout cable (purchased separately). It is a bit of a tight squeeze, but you can get a cable in there and enjoy your favorite boards. Obviously we can’t directly connect a HAT with the heatsink in the way. For how much thermal mass would be lost, it wouldn’t be too much of an issue to add a cutout and stacked headers to the GPIO (Flirc have achieved this with its cases), but then the lid will get in the way.
The official camera and display ribbon cables can be routed via a slot on the same side as the micro SD card slot. Camera cables will need to be exceptionally long in order to be usable outside of the case.
Cooling Performance of Raspberry Pi 4 Cyntech Case and Heatsink
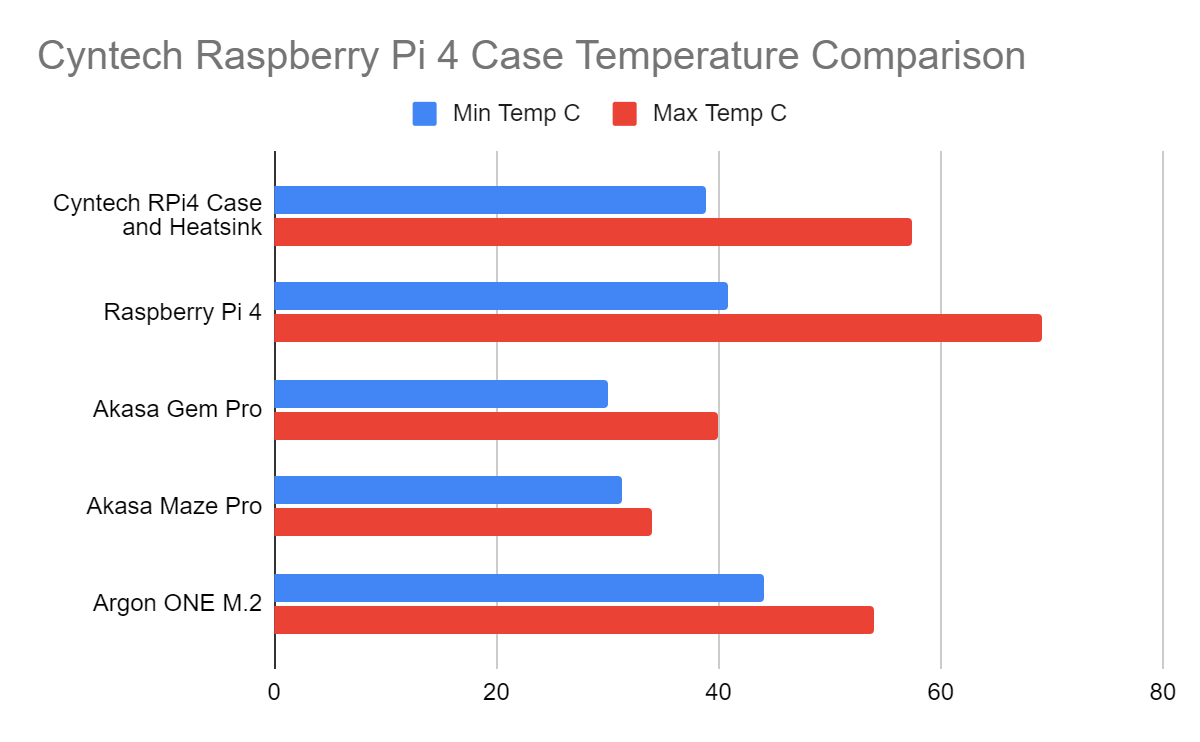
Cyntech’s Raspberry Pi 4 case and heatsink offer some cooling. With an idle temperature of 38.9 Celsius, we are 2 Celsius cooler than a bare Raspberry Pi 4, which is great, right? Well, no.
If we look back to the Akasa Gem Pro and Maze Pro cases, they had idle temperatures of 30 and 34 Celsius respectively. These are lumps of aluminum which enclose the Raspberry Pi 4 and radiate the heat directly to the air. We ran a series of Stressberry synthetic tests and Cyntech’s case hit 57.4 Celsius, compared to a bare Raspberry Pi 4’s 69.1 Celsius. Compare this temp to the Akasa Gem Pro’s 40 Celsius, and we can see that Cyntech’s heatsink and case doesn’t offer much over just a bare board.
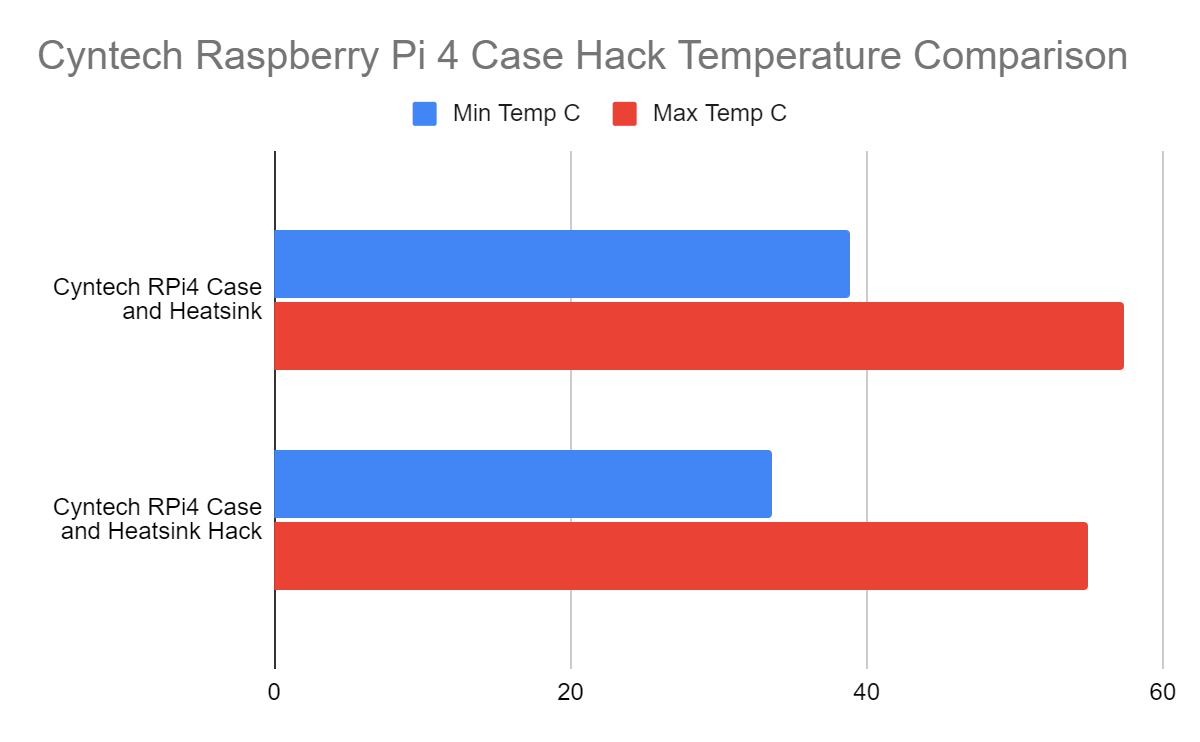
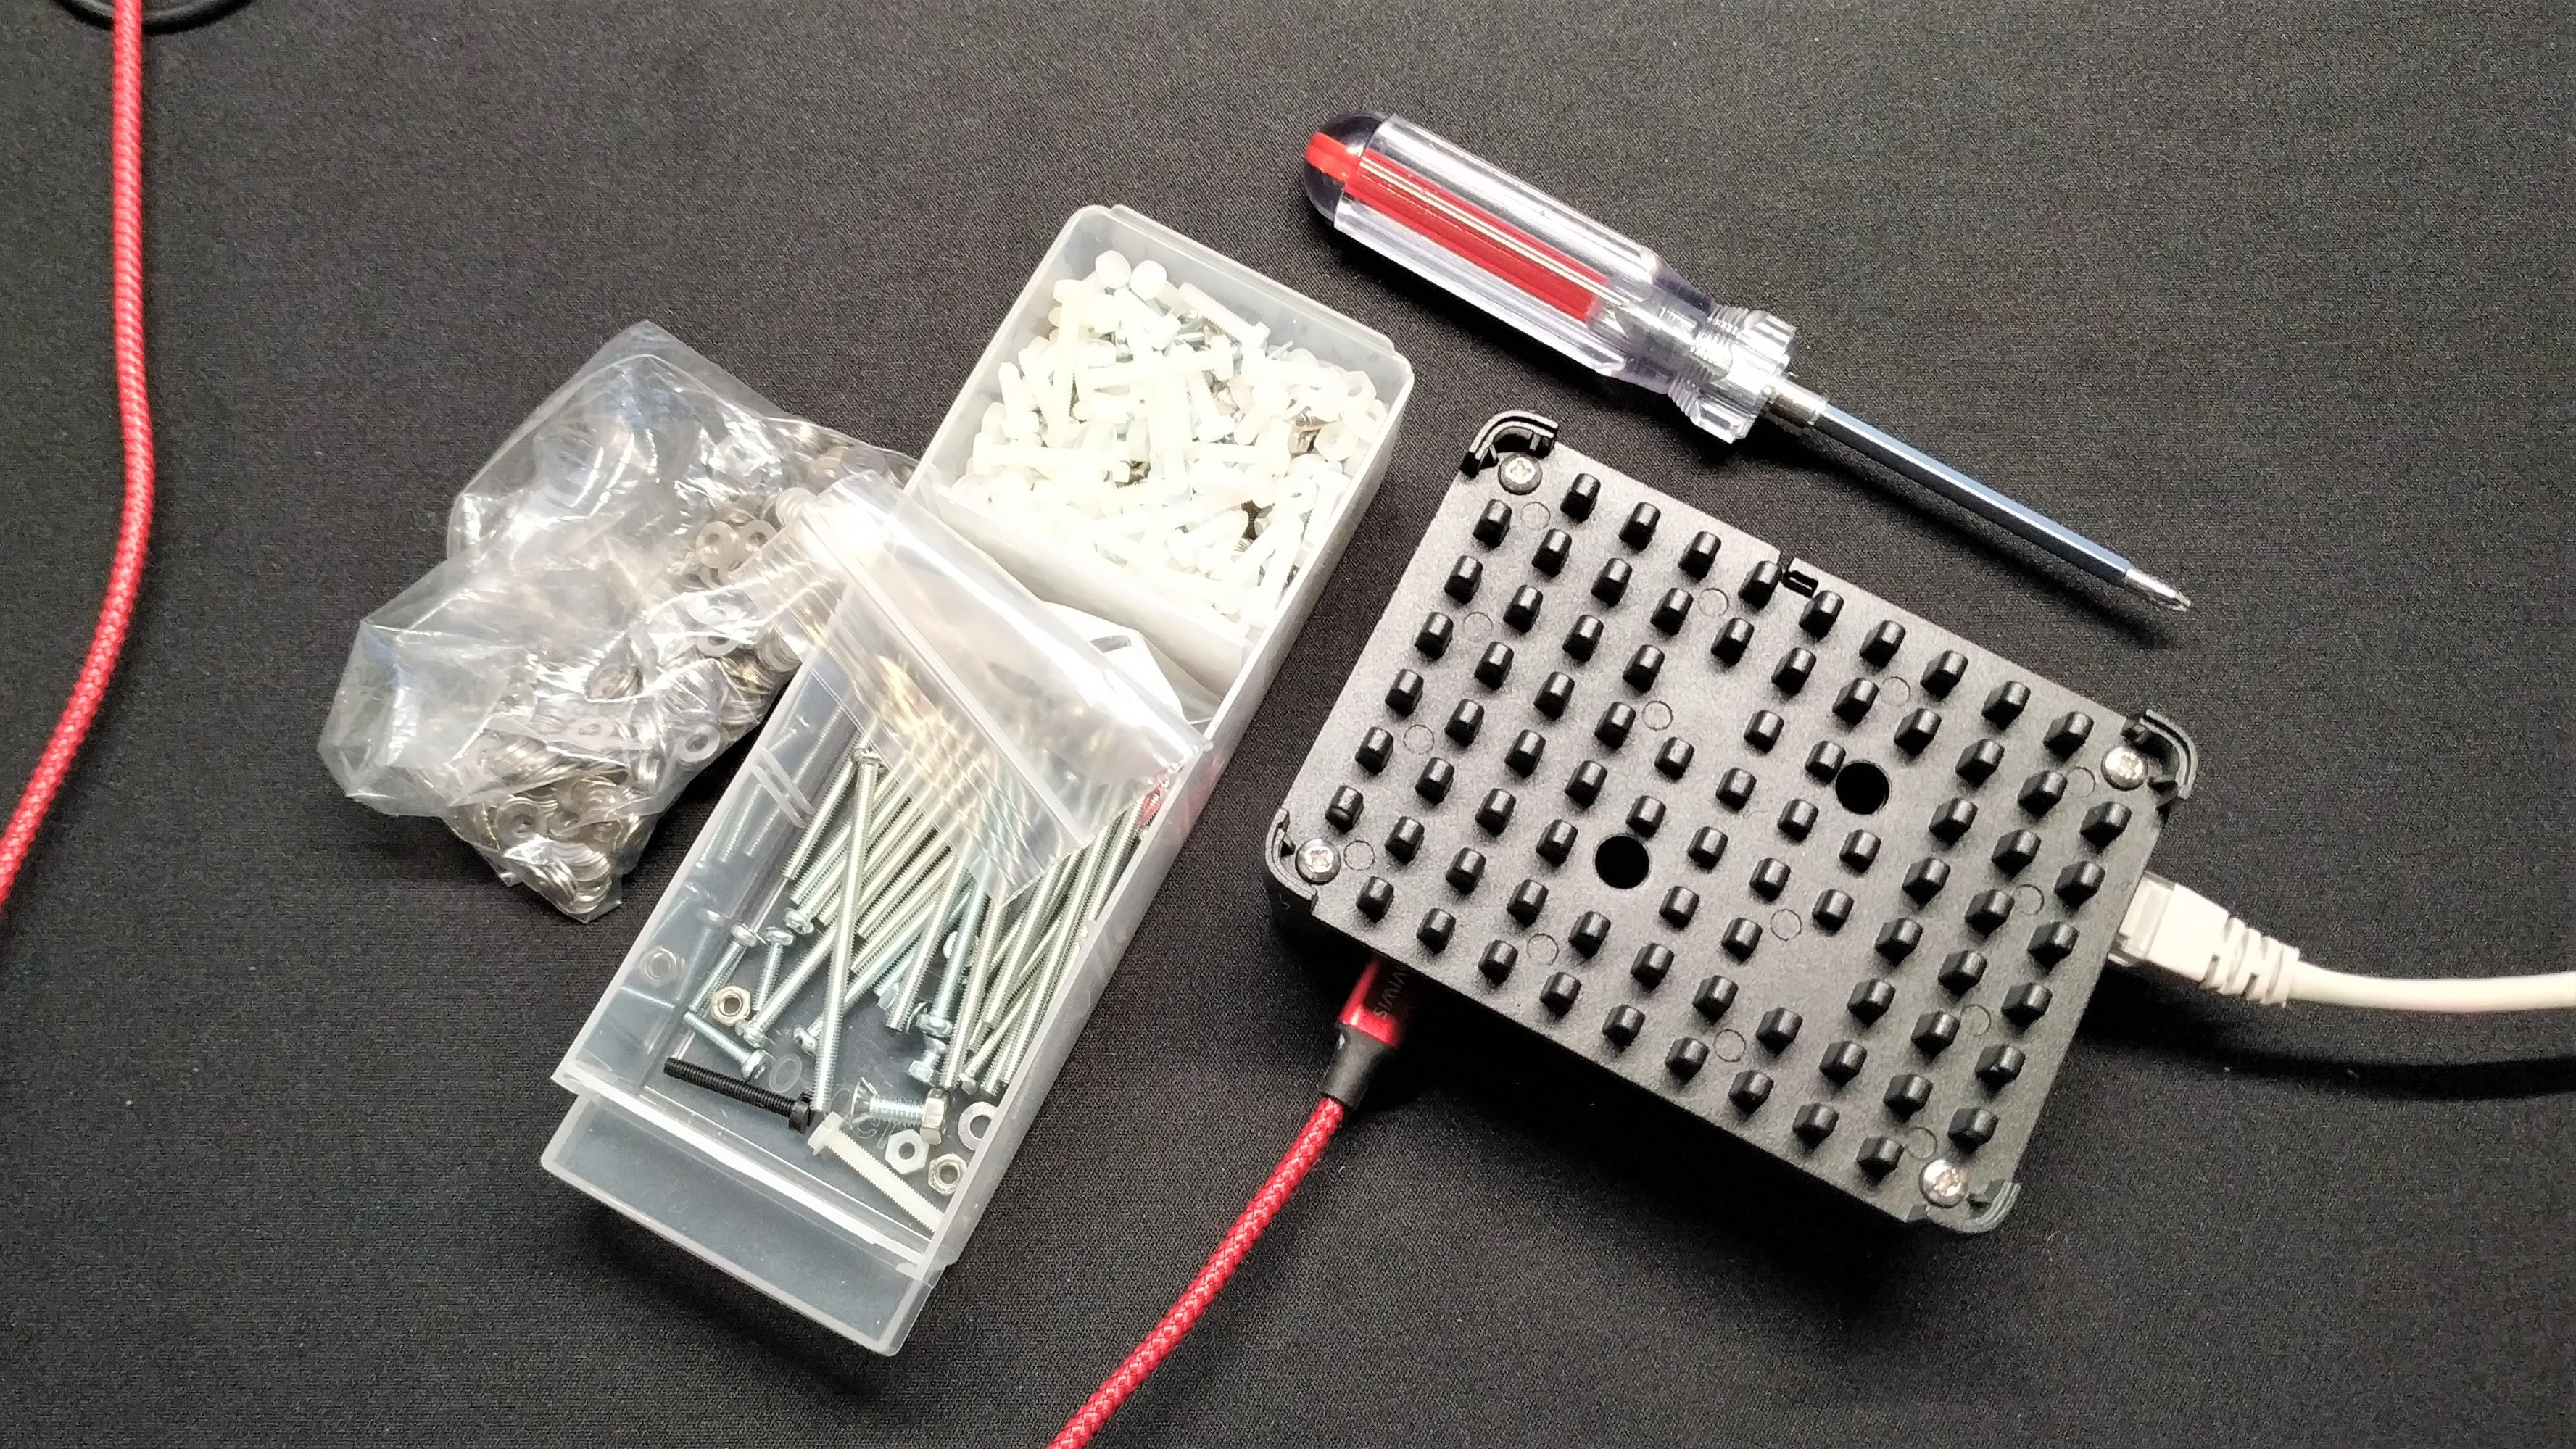
If you really want to use the case, then can we suggest using four M3 nuts along with the M3 screws? Screwing from the top of the case, we can then finger tighten the screws onto the heatsink case, removing the need for the lid.
We tested our hack with another round of Stressberry and the results were better, but still not great. At idle, we saw 33.6 Celsius, versus 38.9 Celsius previously. This was a great result and beat the Akasa Maze Pro, but the Akasa Gem Pro is still the coolest. Under stress, our hacked case reached 55 Celsius, 2.4 Celsius lower than our test with the lid. Not great and no real improvement.
Bottom Line
This isn’t a pretty case. It is utilitarian and does the job, barely. We have access to the GPIO and the camera / display connectors but we will need to add breakout / longer cables to the purchase price. The case and heatsink are not without merits. They both provide great protection for the Raspberry Pi 4, especially the microSD card slot. For $13 this combo is ok, but if you spend a little more money then you can pick up some much better cases.

Les Pounder is an associate editor at Tom's Hardware. He is a creative technologist and for seven years has created projects to educate and inspire minds both young and old. He has worked with the Raspberry Pi Foundation to write and deliver their teacher training program "Picademy".
-
Tarc Novar Ugly is subjective and should not be included as a con in the review. Please be better than that.Reply
