Raspberry Pi Pico Powered RFID Lighting
The $4 Raspberry Pi Pico powers an RFID project guaranteed to light up your life
RFID is a wonderful technology. With it we can wirelessly trigger events using cards and key fobs that need no power, and simply react when placed near a reader. Sew a fob into your jacket and trigger anything to happen!
RFID readers need very little processing power, which means the $4 Raspberry Pi Pico is the ideal way to tinker with this project changing technology. In this project we shall use different RFID cards to trigger effects on a series of NeoPixel LEDs. One card will cause a rainbow color change while another triggers random colors in random positions along the chain of LEDs. All the user has to do is show the card to the reader, and it triggers the event.
For This Project You Will Need
- A Raspberry Pi Pico
- RFID-RC522 RFID Reader
- Compatible RFID cards / fobs for the reader
- Breadboard
- NeoPixels
- 7 x Male to male jumper wires
Wiring up the project
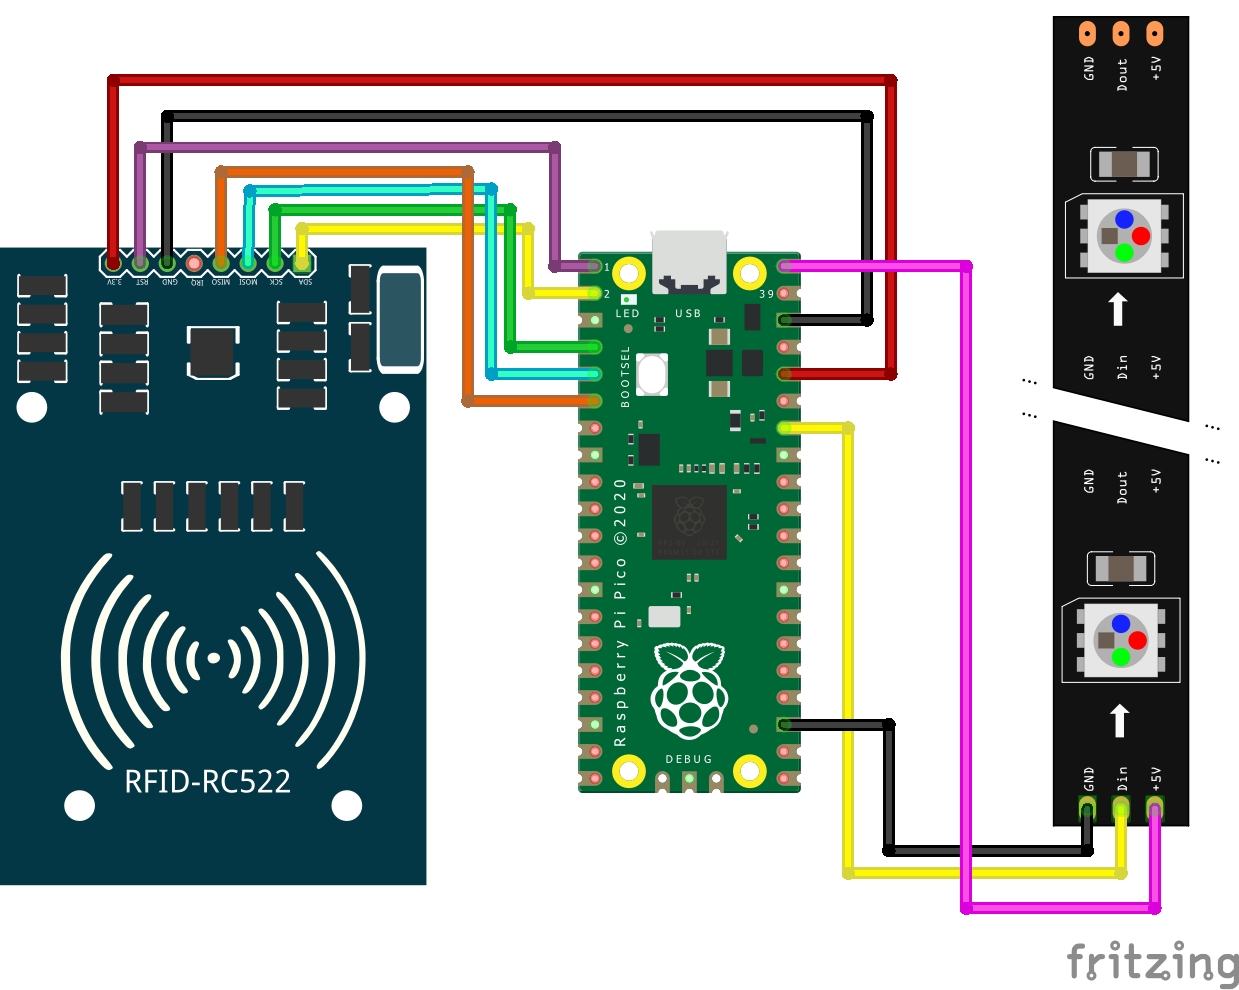
There are two parts to this project. The first is the RFID reader, an RFID-RC522 commonly used with Arduinos. This reader is well supported on the Raspberry Pi Pico and we can interface the reader to a Pico using the GPIO. The reader is powered using the Pico’s 3.3V output, and it has a series of data pins used to communicate with the reader, with both read and write access possible. The second part of the project is the NeoPixels. These are powered via the raw 5V output of the Pico, and they connect to GP28 on the Pico.
RFID-RC522 to Raspberry Pi Pico Connections
- SCK to GP2
- MOSI to GP3
- MISO to GP4
- RST to GP0
- CS / SDA to GP1
- 3.3V to 3V3_OUT (Pin 36)
- GND to any GND
NeoPixel Connections
- VCC to VBUS (Pin 40)
- GND to any GND
- DI (Data In) to GP28
Writing the project code
Before starting this project it would be beneficial to follow our guide to ensure that your Raspberry Pi Pico is running the latest version of MicroPython.
1. Open a browser window and visit Blaž Rolih’s Pi Pico P NeoPixel GitHub repository. Click on Code, and select Download ZIP.
Get Tom's Hardware's best news and in-depth reviews, straight to your inbox.
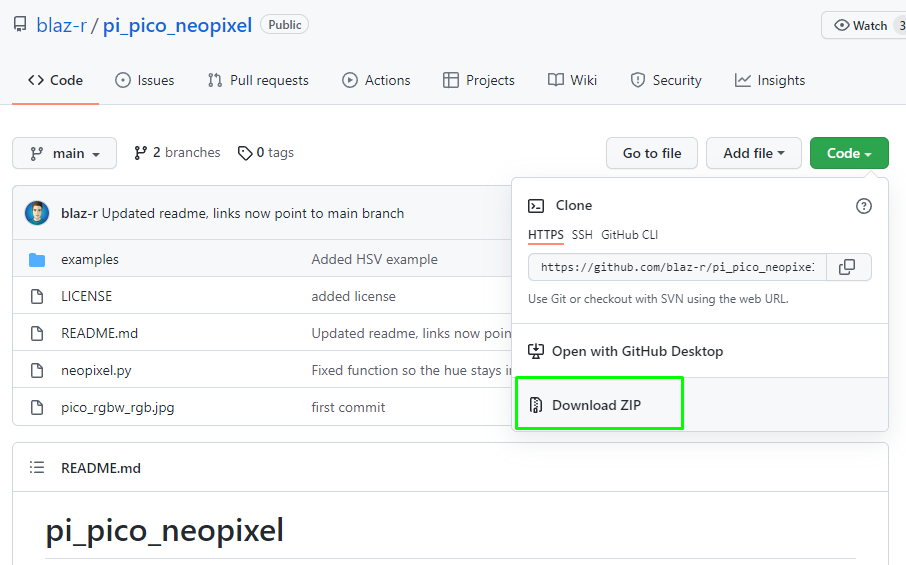
2. Extract the ZIP archive to the Desktop.
3. Open a browser window and visit Daniel Perron’s MicroPython MFRC522
GitHub repository. Click on Code and select Download ZIP.
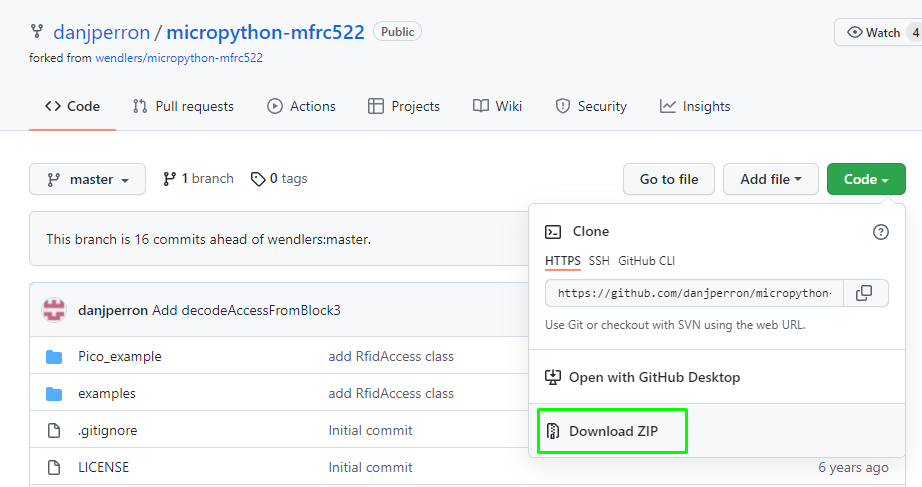
4. Extract the ZIP archive to the Desktop.
5. Connect your Raspberry Pi Pico to the computer.
6. Open Thonny and your Raspberry Pi Pico will automatically connect. If there is no connection, click on the Stop button to force a connection.

7. Open Thonny and click on View >> Files to show the file explorer.
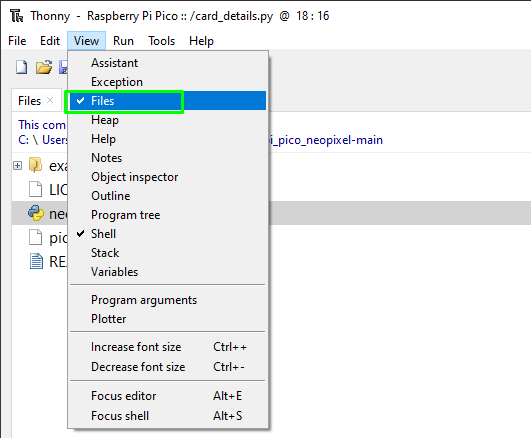
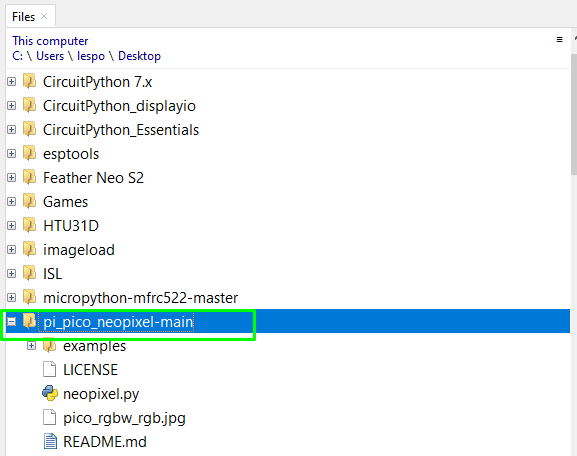
8. In the top window, navigate to the pi_pico_neopixel-main code folder.
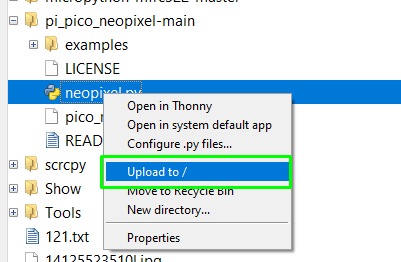
9. Right click on neopixel.py and select Upload to /. This will copy the NeoPixel library to the root of the Raspberry Pi Pico’s storage.
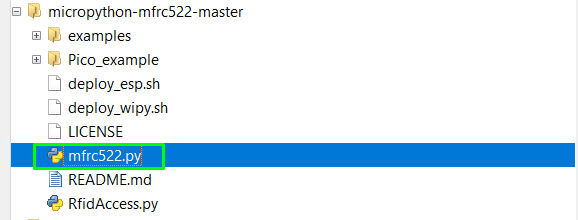
10. In the top window, navigate to the micropython-mfrc522-master folder.
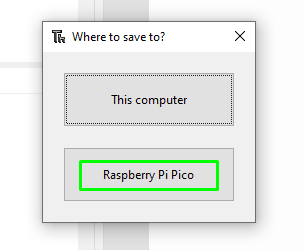
11. Right click on mfrc522.py and select Upload to /. This will copy the MFRC522 library to the root of the Raspberry Pi Pico’s storage.
12. Click on File >> New and Create a new file.
13. Import four Python libraries. The first enables Python to work with the RFID reader. We then import the NeoPixel Library before importing libraries to work with random numbers (integers) and for millisecond level control of our code.
from mfrc522 import MFRC522
from neopixel import Neopixel
from random import randint
import utime
14. Create an object, reader, which will link our code to the RFID reader. We pass arguments when creating the object to tell the code which GPIO pins we are using.
reader = MFRC522(spi_id=0,sck=2,miso=4,mosi=3,cs=1,rst=0)15. Create a new object, numpix and store inside the object the number of NeoPixels that are in your chain. For our example it was 25 in a 5 x 5 matrix.
numpix = 2516. Create an object, pixels, and use the NeoPixel library with arguments to set the number of NeoPixels, which GPIO pin it is connected to (GP28) and the format of the LED, in this case GRB. LEDs can be Red, Green, Blue (RGB) or Green, Red, Blue (GRB). You can determine this from the datasheet / product page where you bought them.
pixels = Neopixel(numpix, 0, 28, "GRB")17. Call the pixels object and pass it an instruction to set all of the LEDs as off (0,0,0), then use “show” to see the results. The LED “color” is set using the RGB value, stored in a tuple. It doesn’t matter if our LEDs are RGB or GRB, we still send the color data as RGB and the library handles the rest.
pixels.fill((0,0,0))
pixels.show()
18. Write a quick instruction to the user. This is printed to the Python shell when the code starts.
print("")
print("To activate, show RFID card to the reader")
print("")
19. Create a loop to run the project code.
while True:20. Start the connection to the RFID reader and request the current status of the reader.
    reader.init()
    (stat, tag_type) = reader.request(reader.REQIDL)
21. Create an if condition test, this checks the value stored in stat, if the reader is ok, the code moves forward.
if stat == reader.OK:22. Create an object, card, that will store the data from an RFID card / tag. Then print the card details to the Python shell. The card details are saved as an integer and by printing the details we can capture the card number for all of our RFID cards / tags.
            card = int.from_bytes(bytes(uid),"little",False)
            print(card)
23. Create an if condition test to check the card number against a known value. The first time you use your reader, you will not know any of the card numbers, but each time you scan a card, it will be printed to the Python shell.
if card == 611994825:24. Print a message to the user. In this case it states that the LEDs will go into disco mode, where the LEDs change color randomly.
print("Disco Mode Activated")25. Create a for loop that will iterate 25 times.
for i in range(25):26. Create four variables, x,r,g,b to store a randomly chosen LED (x) and randomly chosen color values (r,g,b). With this we can randomly set the color of any LED each time the loop iterates.
                    x = randint(0,24)
                    r = randint(0,254)
                    g = randint(0,254)
                    b = randint(0,254)
27. Set the color of the randomly chosen LED, then wait for 1/10 of a second before the loop iterates.
                   pixels.set_pixel(x, (r,g,b))
                    pixels.show()
                    utime.sleep_ms(100)
28. Add an additional one second pause.
utime.sleep_ms(1000)29. Create an elif (else if) condition, which checks for another card number.
elif card == 1595186834:30. Print a message to the user. In our example we used an RFID fob.
print("Fob Mode Activated")31. Create an object, hue, to store the color value.
hue = 032. Create a for loop that iterates 1000 times.
for i in range(1000):33. Using an object, color, set the color of the LEDs using the hue value and set the saturation to 255 and value to 150. We are using HSV values for controlling the LED color, this means we need the hue, saturation and value (brightness).
color = pixels.colorHSV(hue, 255, 150)34. Instruct the LEDs to fill with the currently selected color, stored in “color”. Use show to write the instruction to the LEDs.
                    pixels.fill(color)
                    pixels.show()
35. Update the value stored in hue by 150.
hue += 15036. Create an else condition to handle any unknown cards.
else:37. Print a message to the user. In this case we see “RED CARD” printed to the Python shell.
print("RED CARD")38. Create a for loop that iterates three times.
for i in range(3):39. Instruct the LEDs to turn red and then show the color change before pausing for 100 milliseconds.
                    pixels.fill((128,0,0))
                    pixels.show()
                    utime.sleep_ms(100)
40. Turn off the LEDs and pause for 100 milliseconds.
                    pixels.fill((0,0,0))
                    pixels.show()
                    utime.sleep_ms(100)
41. Add an else condition, which enables the code to keep looping even if there is an issue. This else condition matches the first if condition that we created, effectively ending that conditional test.
        else:
pass
42. Finally add a 50-millisecond pause before the code loops back to the start.
utime.sleep_ms(50) 43. Save the code to the Raspberry Pi Pico as card_details.py.
44. Click on the Run button to start the code. Present a series of RFID cards to the reader and the Python shell will output the card numbers, use these to replace the card numbers used in the if and elif conditional statements.
45. Press Stop to stop the running code and reconnect to the Pico. Save the card number changes and click the Run button to run the code with your card numbers. Present the card to the reader and watch as the NeoPixels react.
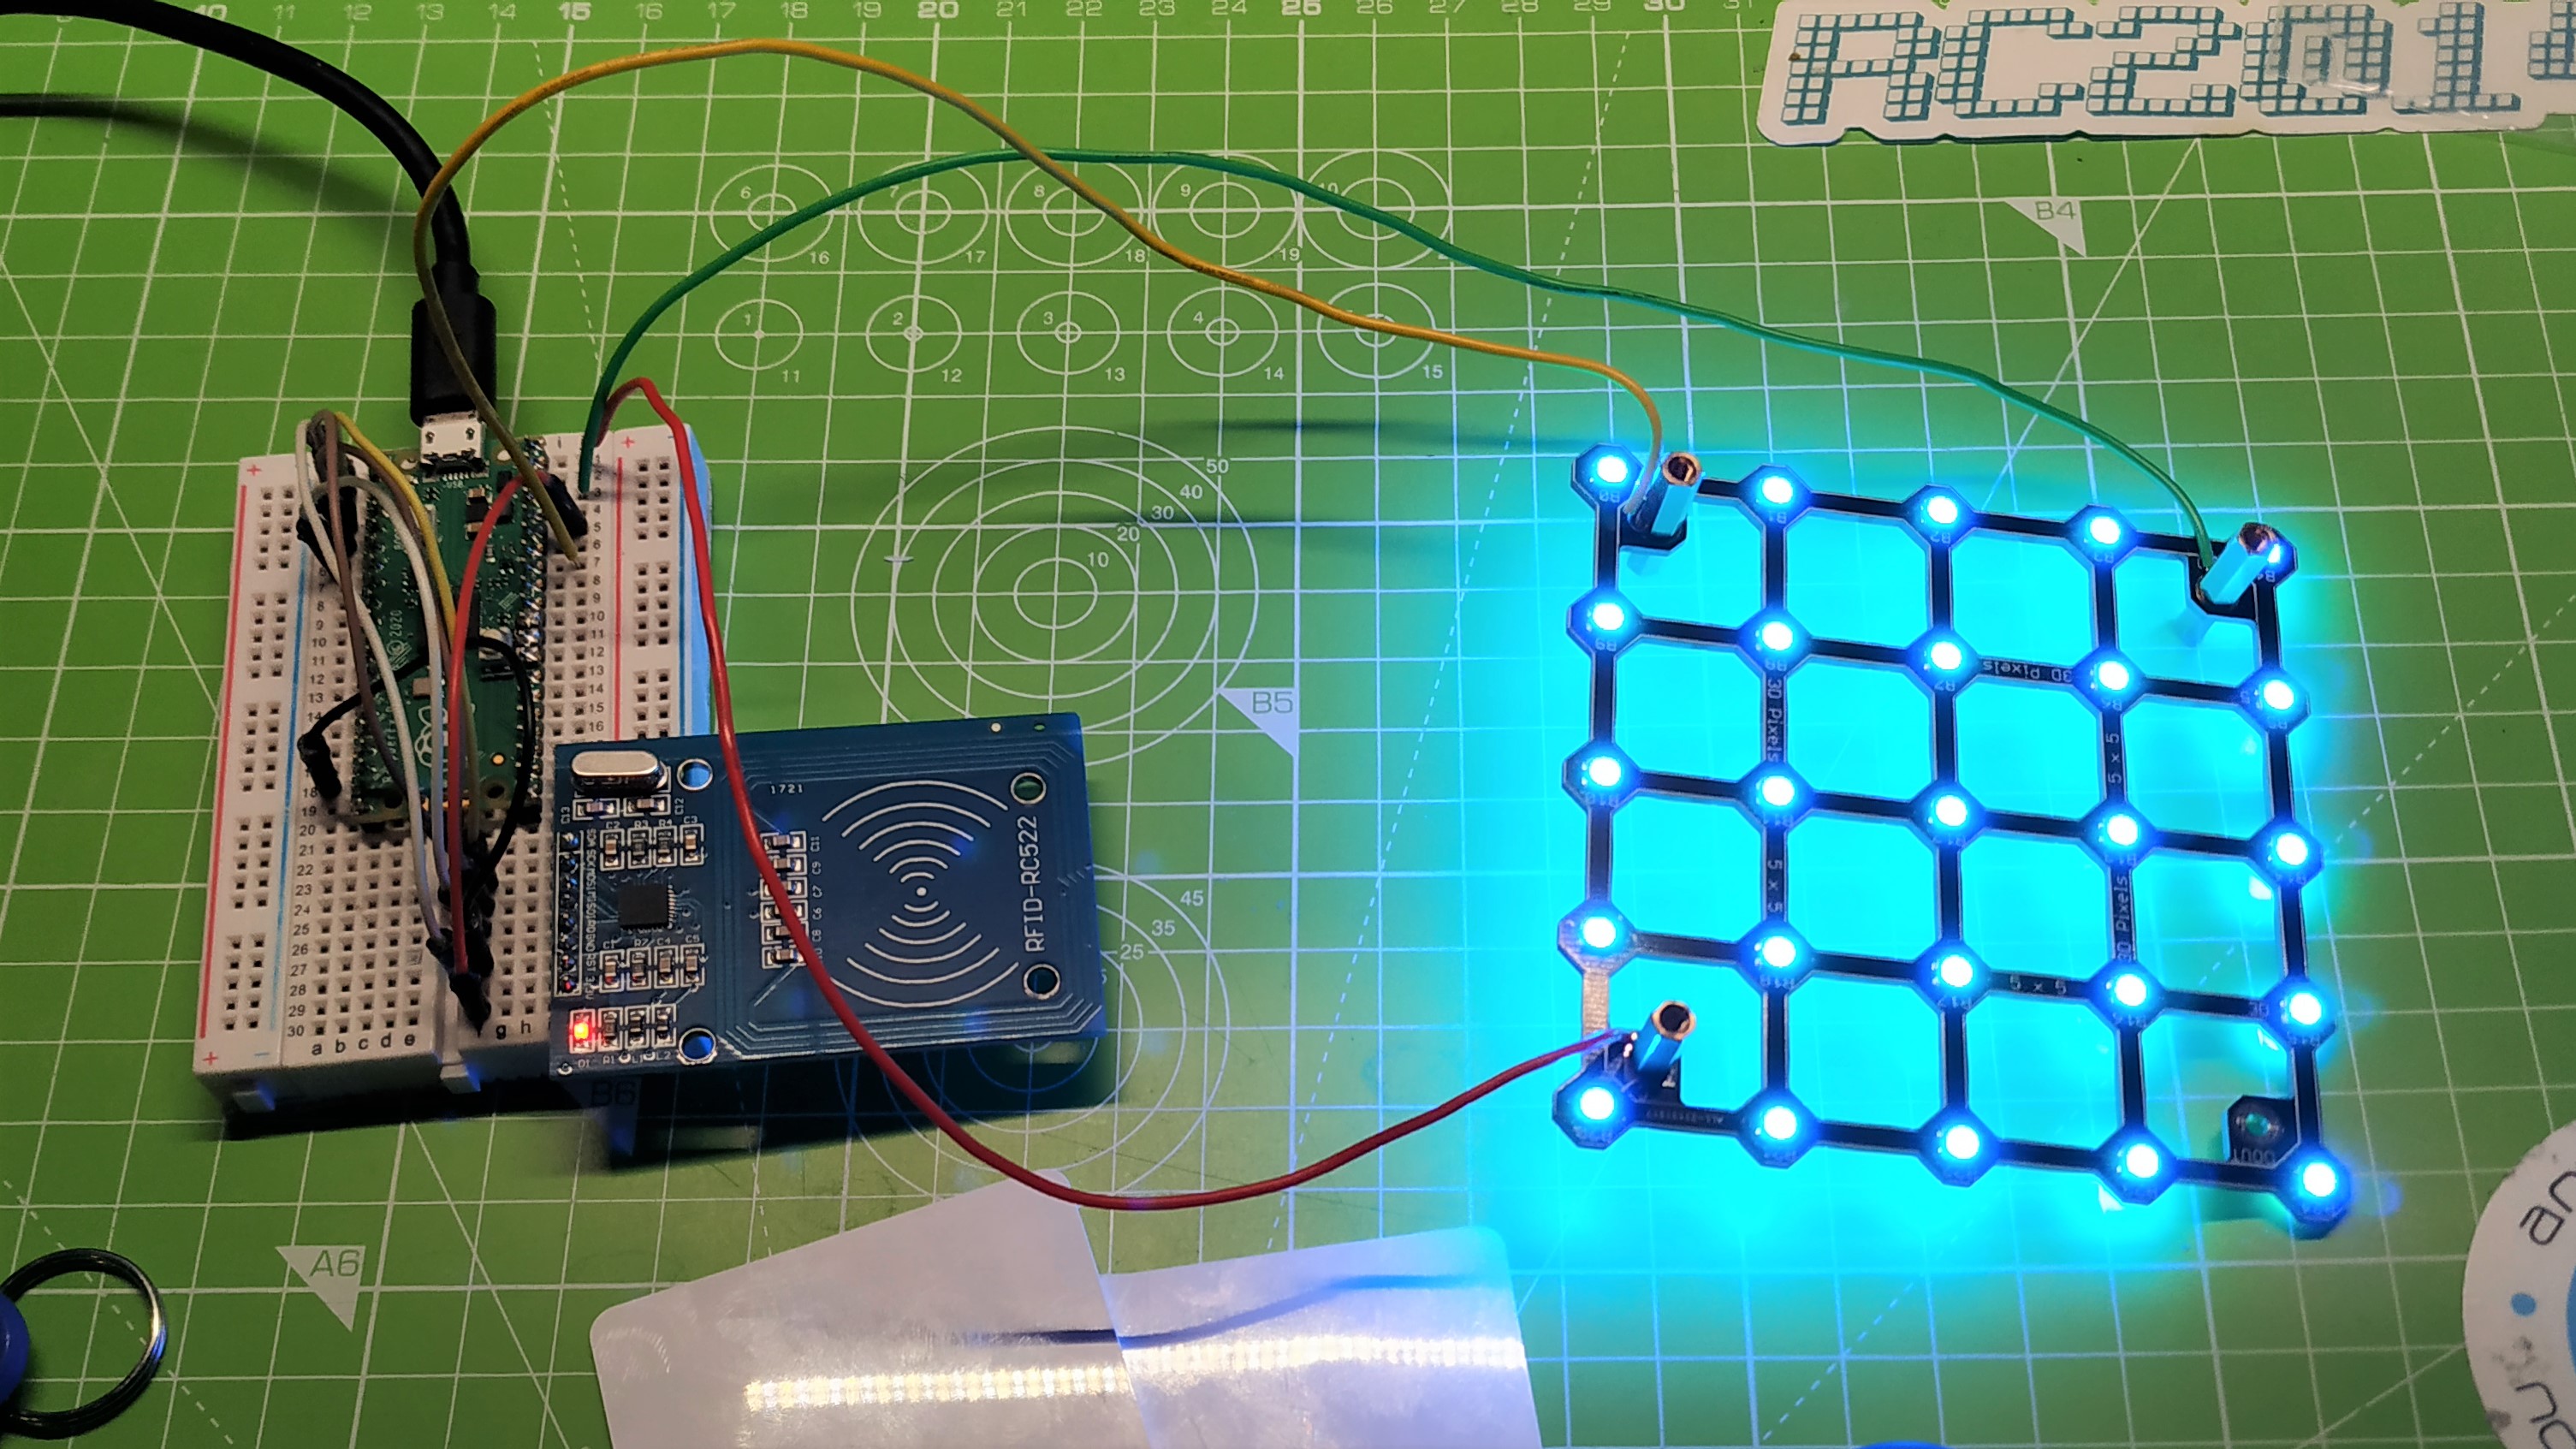
We now have RFID controlled NeoPixels, and the more RFID cards / fobs that you have, the more effects you can add to the project.
Complete Code Listing
from mfrc522 import MFRC522
from neopixel import Neopixel
from random import randint
import utime


reader = MFRC522(spi_id=0,sck=2,miso=4,mosi=3,cs=1,rst=0)
numpix = 25
pixels = Neopixel(numpix, 0, 28, "GRB")
pixels.fill((0,0,0))
pixels.show()

print("")
print("To activate, show RFID card to the reader")
print("")


while True:
    reader.init()
    (stat, tag_type) = reader.request(reader.REQIDL)
    if stat == reader.OK:
        (stat, uid) = reader.SelectTagSN()
        if stat == reader.OK:
            card = int.from_bytes(bytes(uid),"little",False)
            print(card)
            if card == 611994825:
                print("Disco Mode Activated")
                for i in range(25):
                    x = randint(0,24)
                    r = randint(0,254)
                    g = randint(0,254)
                    b = randint(0,254)
                    pixels.set_pixel(x, (r,g,b))
                    pixels.show()
                    utime.sleep_ms(100)
                utime.sleep_ms(1000)
            elif card == 1595186834:
                print("Fob Mode Activated")
                hue = 0
                for i in range(1000):
                    color = pixels.colorHSV(hue, 255, 150)
                    pixels.fill(color)
                    pixels.show()
                    hue += 150
            else:
                print("RED CARD")
                for i in range(3):
                    pixels.fill((128,0,0))
                    pixels.show()
                    utime.sleep_ms(100)
                    pixels.fill((0,0,0))
                    pixels.show()
                    utime.sleep_ms(100)
        else:
            pass
utime.sleep_ms(50) 
Les Pounder is an associate editor at Tom's Hardware. He is a creative technologist and for seven years has created projects to educate and inspire minds both young and old. He has worked with the Raspberry Pi Foundation to write and deliver their teacher training program "Picademy".

