How To Make A Raspberry Pi Pico W Web Server
The smallest Raspberry Pi powering your next website.
Get Tom's Hardware's best news and in-depth reviews, straight to your inbox.
You are now subscribed
Your newsletter sign-up was successful
If you’re not looking to set up a major website on a hosting service, you can easily run a web server in your home. We’ve previously explained how to set up a Raspberry Pi web server using a regular Pi 3, 4 or Zero, but you don’t even need a full Pi to get the job done. With the Raspberry Pi PIco W, a Wi-Fi enabled micro controller that costs just $6, you can do some basic web serving.
The Raspberry Pi Pico W isn’t the most obvious choice, but with a little MicroPython code, and some HTML, we can serve basic, static web pages from a Pico W. There are two parts to this project. The HTML and the MicroPython code. The HTML is what our browser will see, and MicroPython acts as the means to serve the code.
For this project we will host a basic web page from a Raspberry Pi Pico W. We will also demonstrate how to add a little more sparkle to your pages with CSS and JavaScript. Finally we will serve the content to the world by learning how to forward external requests to our Raspberry Pi Pico W.
For this project you will need
HTML for Raspberry Pi Pico W Web Server
HyperText Markup Language (HTML) is the basic building block for the web. The language is a framework for creating web pages, a framework that has since been updated and improved for more modern sites.
The HTML for our Pico W web server can be as simple or complicated as you wish, but there are a couple of caveats to consider. The HTML for the site is loaded into a Python variable, so that means we can’t go too overboard with features as the Pico W only has 264KB of SRAM. Secondly we cannot serve images or reference files (CSS/JavaScript) on the Pico W as again we load the HTML into a Python variable which cannot access the filesystem.
This means that any images or CSS/JavaScript will need to be accessed from a remote site. CSS and JavaScript in the HTML code will work, but we preferr to reference Bootstrap CSS and JavaScript via its CDN.
To create a basic HTML page
Get Tom's Hardware's best news and in-depth reviews, straight to your inbox.
1. Open a text editor of your choice. Notepad is ample, but our preference is Notepad++.
2. Set the document type to HTML and then create an html tag. This tells the browser that the page is written in HTML, and the tag denotes the start of the HTML document.
<!DOCTYPE html>
<html>
3. Create a new tag, <head>, and inside the head use <title> to set the title of the browser window before closing the < The <head> section is where we store metadata for the page. This is data that a web browser will need to understand the page. We are using it to set the title of the page, this is the bare minimum to get a page running.
<head>
<title>Tom's Hardware Pico W Web Server</title>
</head>
4. Create a <body> section. This is the section where the user visible content is displayed.
<body>5. Create a headline using the <h1> tag and give your page a headline / title. This is the largest headline tag.
<h1>Tom's Hardware Pico W Web Server</title>
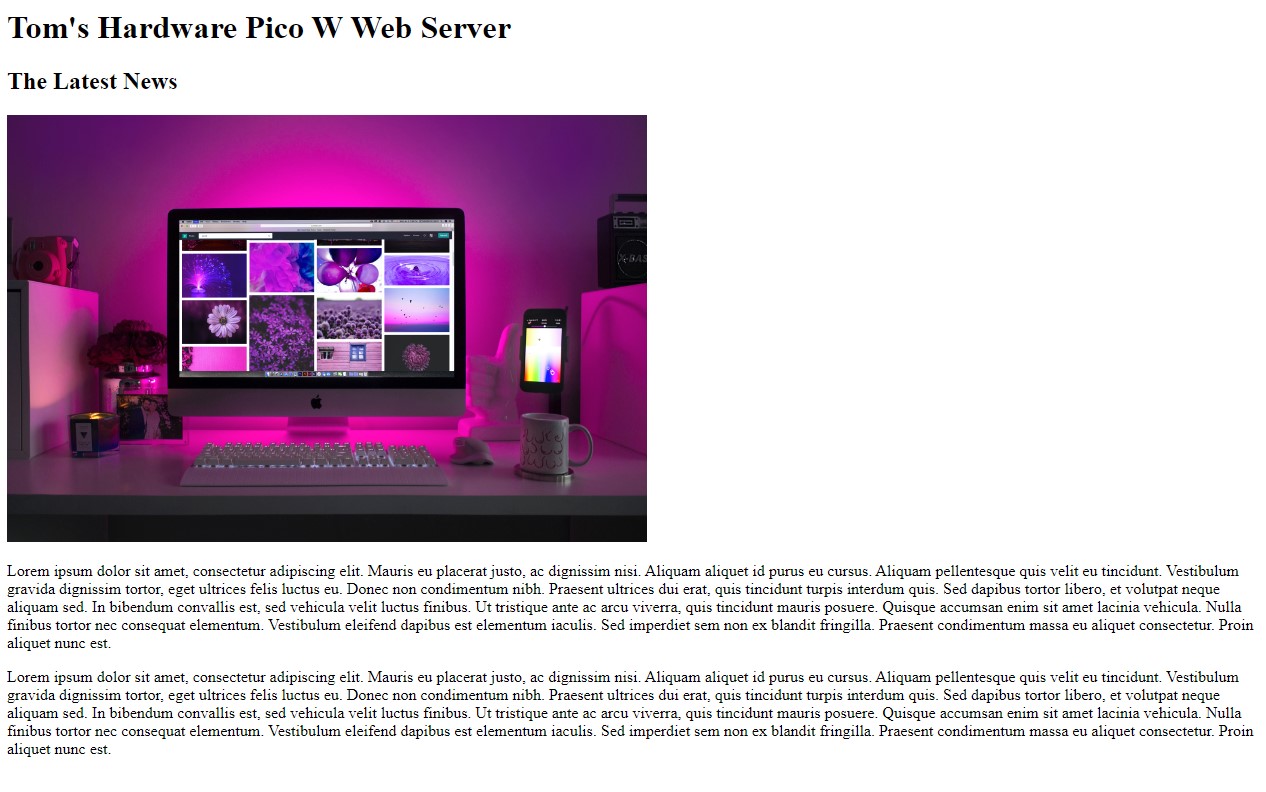
6. Add another headline using <h2> and give the section a name. In our example, it’s “The Latest News.” The <h2> tag is smaller than <h1> but it still emphasizes that this is a new section.
<h2>The Latest News</h2>
7. Insert an image, linked to from a remote CDN, using the <img> tag. We need the full URL for the image that we wish to use, ensuring that we also have permission to use the image. In our example we are using an image from Pexels.com, a free license image service. Images can be resized using the <img> tag. We can specify the size as a percentage of its original size, or we can hard code the size in pixels.
<img src="https://images.pexels.com/photos/1779487/pexels-photo-1779487.jpeg?cs=srgb&dl=pexels-designecologist-1779487.jpg", width=640px height=427px>8. Use the <p> tag to create a paragraph of text. For our demo we used two paragraphs of Lorem Ipsum generated using a Lorem Ipsum generator.
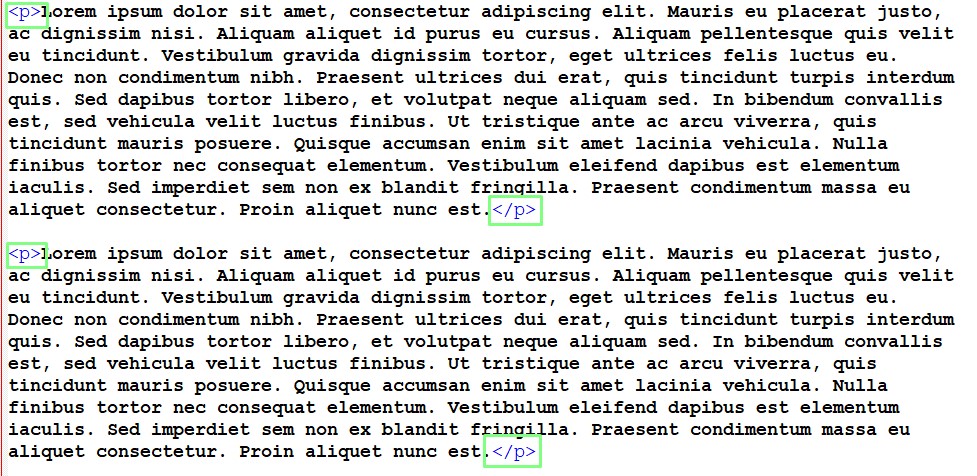
<p>Lorem ipsum dolor sit amet, consectetur adipiscing elit…..</p>
9. Finally close the body and then the HTML document.
</body>
</html>
10. Save the file as index.html.
For now keep the code in this file, we will use it later.
Python Code for Raspberry Pi Pico W Web Server
We have created a page for our eager readers, and now we need to create a means to serve it to them. For this we will create a short MicroPython application that will read the contents of our index.html file and serve it as a web page.
1. Follow this guide to setup your Raspberry Pi Pico W. Follow the steps until “How to blink an LED”.
2. Create a new blank file.
3. Import two modules. The first is socket, a low level networking interface. The second is network, which we shall use to connect to our Wi-Fi access point.
import socket
import network
4. Create an object, page, and use it to reference the HTML file on our Pico W. This will open the file in read only mode.
page = open("index.html", "r")5. Read the contents of the file into a new object, html, then close the file. This will read all of the HTML into the html object.
html = page.read()
page.close()
6. Create an object, wlan, and use it to create a connection from our code to the Wi-Fi chip on the Pico W.
wlan = network.WLAN(network.STA_IF)
7. Turn the Wi-Fi on and then connect to your access point with your password.
wlan.active(True)
wlan.connect("ACCESS POINT","PASSWORD")
8. Create an object, sta_if, which will serve as our interface between the Pico W and the Wi-Fi access point.
sta_if = network.WLAN(network.STA_IF)
9. Print the Pico W’s IP address, make a note of the IP address as we will need this later. The returned data is a list object that contains our IP address, netmask and DHCP server address. The IP address is the first item in the list so using [0] we can return it from the list without any other information.
print(sta_if.ifconfig()[0])
10. Set the Pico W to listen for connections on port 80 from any IP address. We use socket.SO_REUSEADDR to enable the same IP address to be used after a reset. This remedies an issue where the Pico W would need a full power down in order to re-use the IP address.
addr = socket.getaddrinfo('0.0.0.0', 80)[0][-1]
s = socket.socket()
s.setsockopt(socket.SOL_SOCKET, socket.SO_REUSEADDR, 1)
s.bind(addr)
s.listen(1)
11. Create a loop to continually run the next section of code.
while True:
12. Set the Pico W to accept a connection and to create a file that will become our web page.
   cl, addr = s.accept()
   cl_file = cl.makefile('rwb', 0)
13. Create another loop, and inside the loop create an object, line, to read the contents of our web page, line by line.
   while True:
       line = cl_file.readline()
14. Use a conditional statement to stop reading the contents if there are carriage returns or line breaks.
       if not line or line == b'\r\n':
           break
15. Create an object, response, in which we store the HTML for the web page.
response = html 16. Set up a client response that sends the HTTP status code, and content type to the browser, then responds with the HTML to be rendered in their browser. The connection is then disconnected.
   cl.send('HTTP/1.0 200 OK\r\nContent-type: text/html\r\n\r\n')
   cl.send(response)
   cl.close()
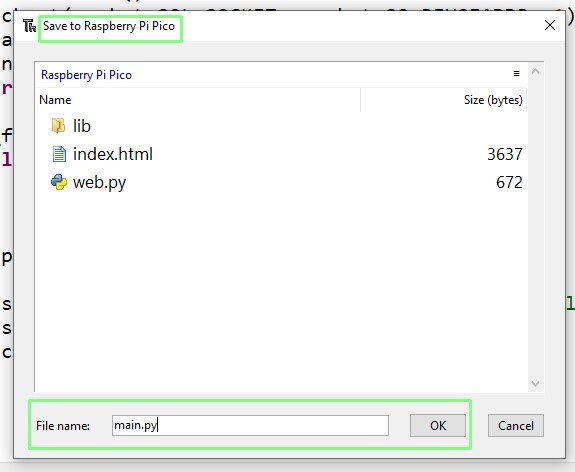
17. Save the file to the Raspberry Pi Pico W as main.py. By doing this the code will autorun when the Pico W boots.
Complete MicroPython Code Listing
import socket
import network

page = open("index.html", "r")
html = page.read()
page.close()

wlan = network.WLAN(network.STA_IF)
wlan.active(True)
wlan.connect("ACCESS POINT","PASSWORD")
sta_if = network.WLAN(network.STA_IF)
print(sta_if.ifconfig()[0])
addr = socket.getaddrinfo('0.0.0.0', 80)[0][-1]
s = socket.socket()
s.setsockopt(socket.SOL_SOCKET, socket.SO_REUSEADDR, 1)
s.bind(addr)
s.listen(1)
while True:
    cl, addr = s.accept()
    cl_file = cl.makefile('rwb', 0)
    while True:
        line = cl_file.readline()
        if not line or line == b'\r\n':
            break
    response = html

    cl.send('HTTP/1.0 200 OK\r\nContent-type: text/html\r\n\r\n')
    cl.send(response)
    cl.close()
Copying index.html to the Raspberry Pi Pico W
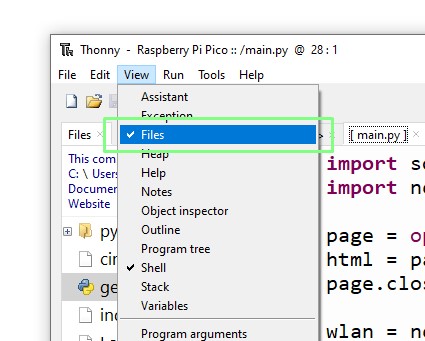
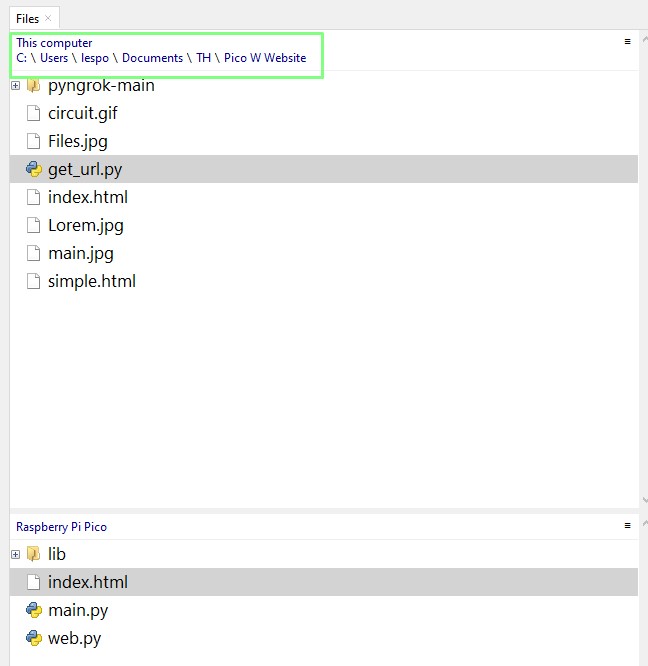
1. In Thonny, click on View >> Files. This will open a file manager. The top window is the source, in this case the main drive of our PC. The bottom window is the target, the Raspberry Pi Pico W.
2. In the top window navigate to the location of your index.html file.
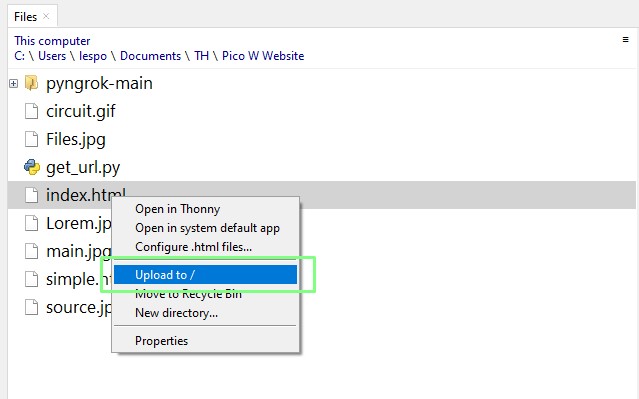
3. Right click on index.html and select “Upload to /” to copy the file to your Pico W.
4. Unplug the Pico W from your computer, then reinsert to reboot the Pico W and start the web server.
5. On your PC, open a new browser window / tab and go to the IP address of your Pico W. After a few moments you will see the page appear in the window.
Improving our HTML
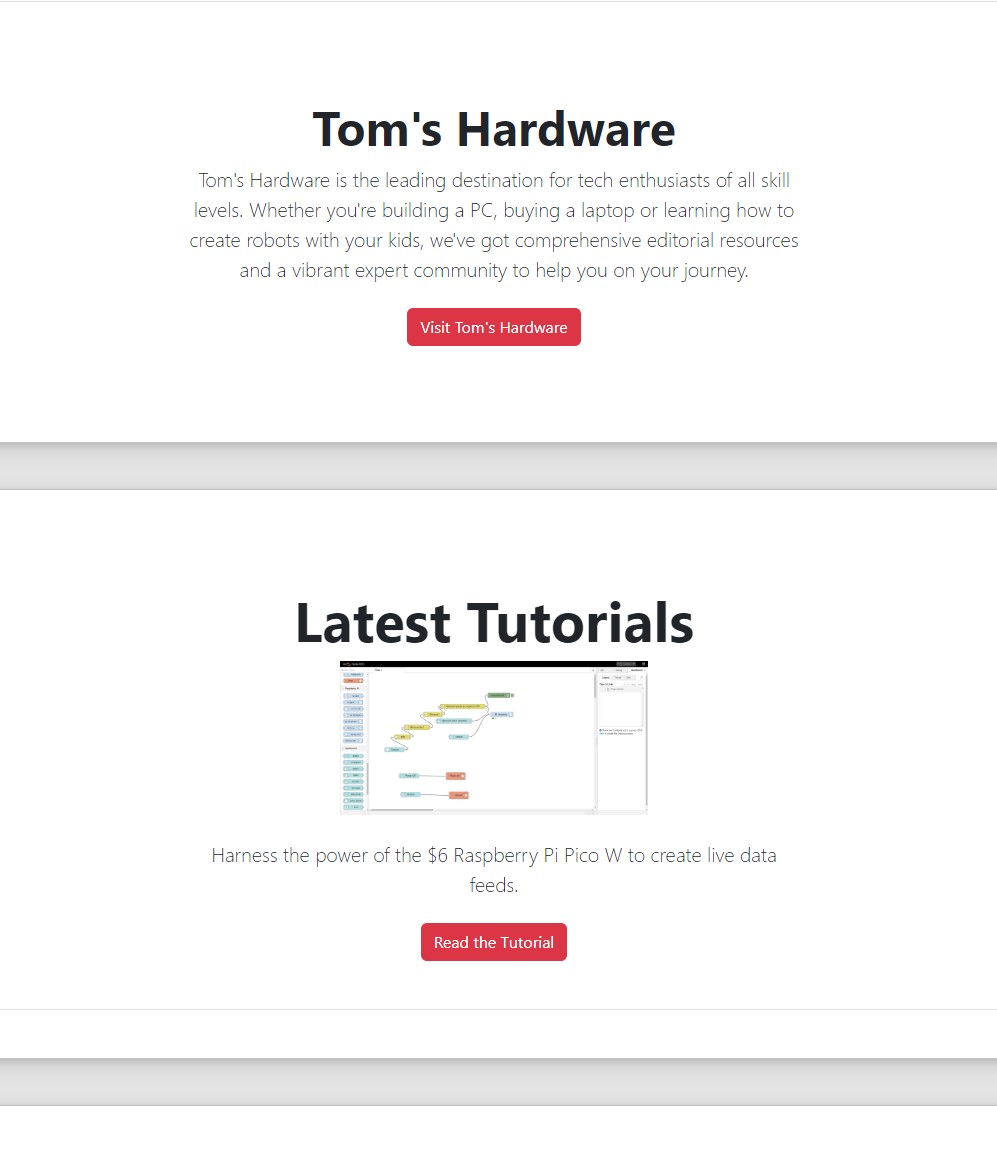
Using Bootstrap and its CDN we created a much more professional looking page. Essentially this uses the same basic <h1>, <p> and <img> elements, but with extra features such as dividers and custom CSS.
Bootstrap is a framework for HTML, CSS and JavaScript that produces professional looking sites quickly. If you want to build a quick demo site for clients, or your own projects, Bootstrap is a good place to start.
We adapted the Heroes template for our demo, replacing the CSS and JavaScript links for BootstrapCDN links.
If you would like to use our code, it can be downloaded from here.
Forwarding Requests to our Raspberry Pi Pico W Web Server
Right now our server is only accessible to devices on the same network. To share our Raspberry Pi Pico W web server with the world we need to ascertain our external IP address and set up port forwarding to send external requests to our Pico W.
Every router has a subtly different means to do these tasks, our steps illustrate how our ISP provided router handles it.
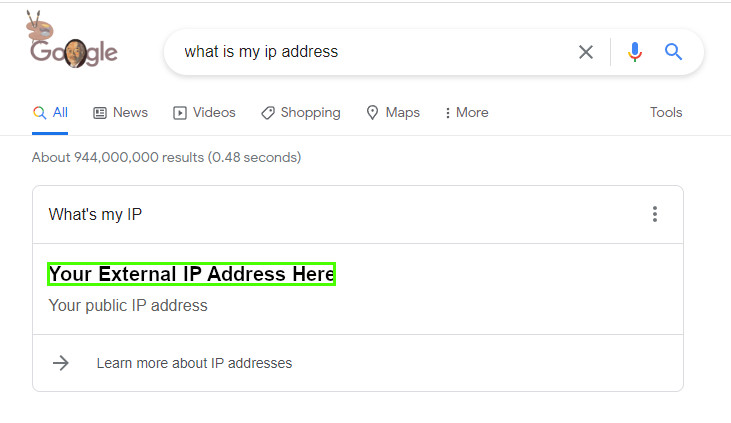
1. Get your external IP address. Using Google’s search engine and search for “What is my IP address?” and make a note of the IP address.
2. Log into your router’s Advanced Settings and select DHCP Reservation. We need to ensure that our Pico W has a static IP address on the LAN, and DHCP reservation is a means to do this.
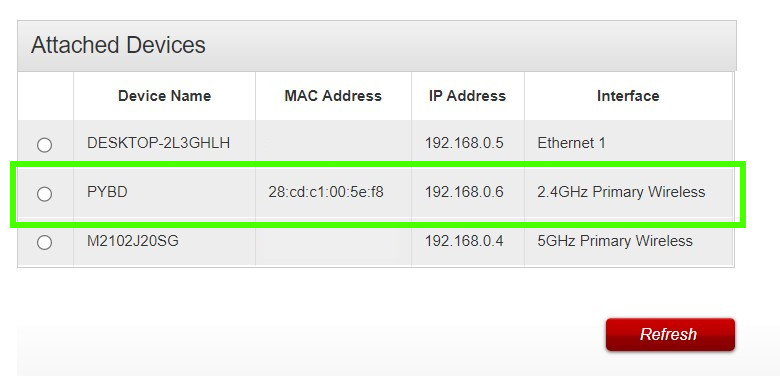
3. Select your Pico W from the list of attached devices.
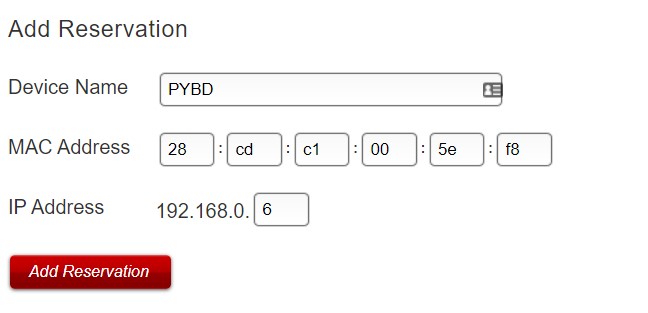
4. Add the reservation to the IP Lease Table, then click Apply. This will guarantee that your Pico W receives the same IP address within your home.
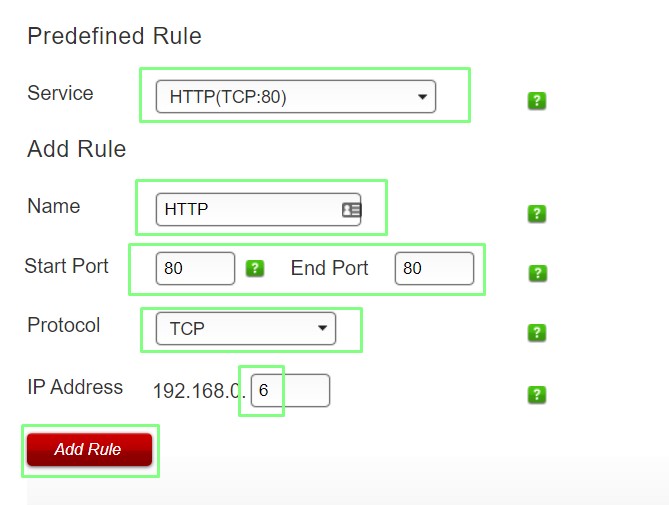
5. Navigate to the Port Forwarding menu on your router. In our case it was under Advanced Settings >> Port Forwarding.
6. Set the service to HTTP (port 80) and create a rule for HTTP traffic. Set the start and end port to 80, protocol to TCP and set the IP address to that of your Pico W. Save then apply the rule.
7. On another device, connected via a different network (cellular) open the browser and go to your external IP address. You will now see the web page served via your Pico W.

Les Pounder is an associate editor at Tom's Hardware. He is a creative technologist and for seven years has created projects to educate and inspire minds both young and old. He has worked with the Raspberry Pi Foundation to write and deliver their teacher training program "Picademy".
-
jonbuder Good proof-of-concept. Might be very handy in conjunction with sensors or other things connected to the Pico.Reply
If ISPs were not so stingy with upload speeds, hosting a website from home would be a lot more feasible. -
kjwkjw You write: 10. Set the Pico W to listen for connections on port 80 from any IP address.Reply
Please delete the "from any IP address" part. The API you use doesn't do that. Saying so is inaccurate. -
kjwkjw Reply
Once a connection has been established, traditionally yes you can get the source IP. However I don't know if micropython supports that. Look up the API calls that work with the connection handle/object.luukbleb said:Hey, would it be possible to get the ip-adress of the divice entering the website?
