How to Remote Control Your Raspberry Pi Camera from the Web
Create and serve a web application to remotely control your Raspberry Pi camera.
Get Tom's Hardware's best news and in-depth reviews, straight to your inbox.
You are now subscribed
Your newsletter sign-up was successful
Your Raspberry Pi works great on your local network and you can even use a Raspberry Pi as a web server there. But what if you want to write a web application that will allow someone to access your Pi’s hardware, its camera for example, from a web browser anywhere on the Internet? It’s pretty easy using Anvil, a Python web service that you can run locally.
Anvil provides a powerful, yet simple way to write full stack web apps in pure Python and it has been with us for a few years as a service that has been online only, requiring the use of Anvil’s servers to create projects. Your project is hosted on their servers and it can talk to a remote machine, for example a Raspberry Pi, using an uplink script on the Pi. However, there’s no need to rely on Anvil’s own servers anymore as the Anvil team recently open-sourced their app server enabling anyone to make their own projects using the Anvil web service and then download and run the same project on their own server.
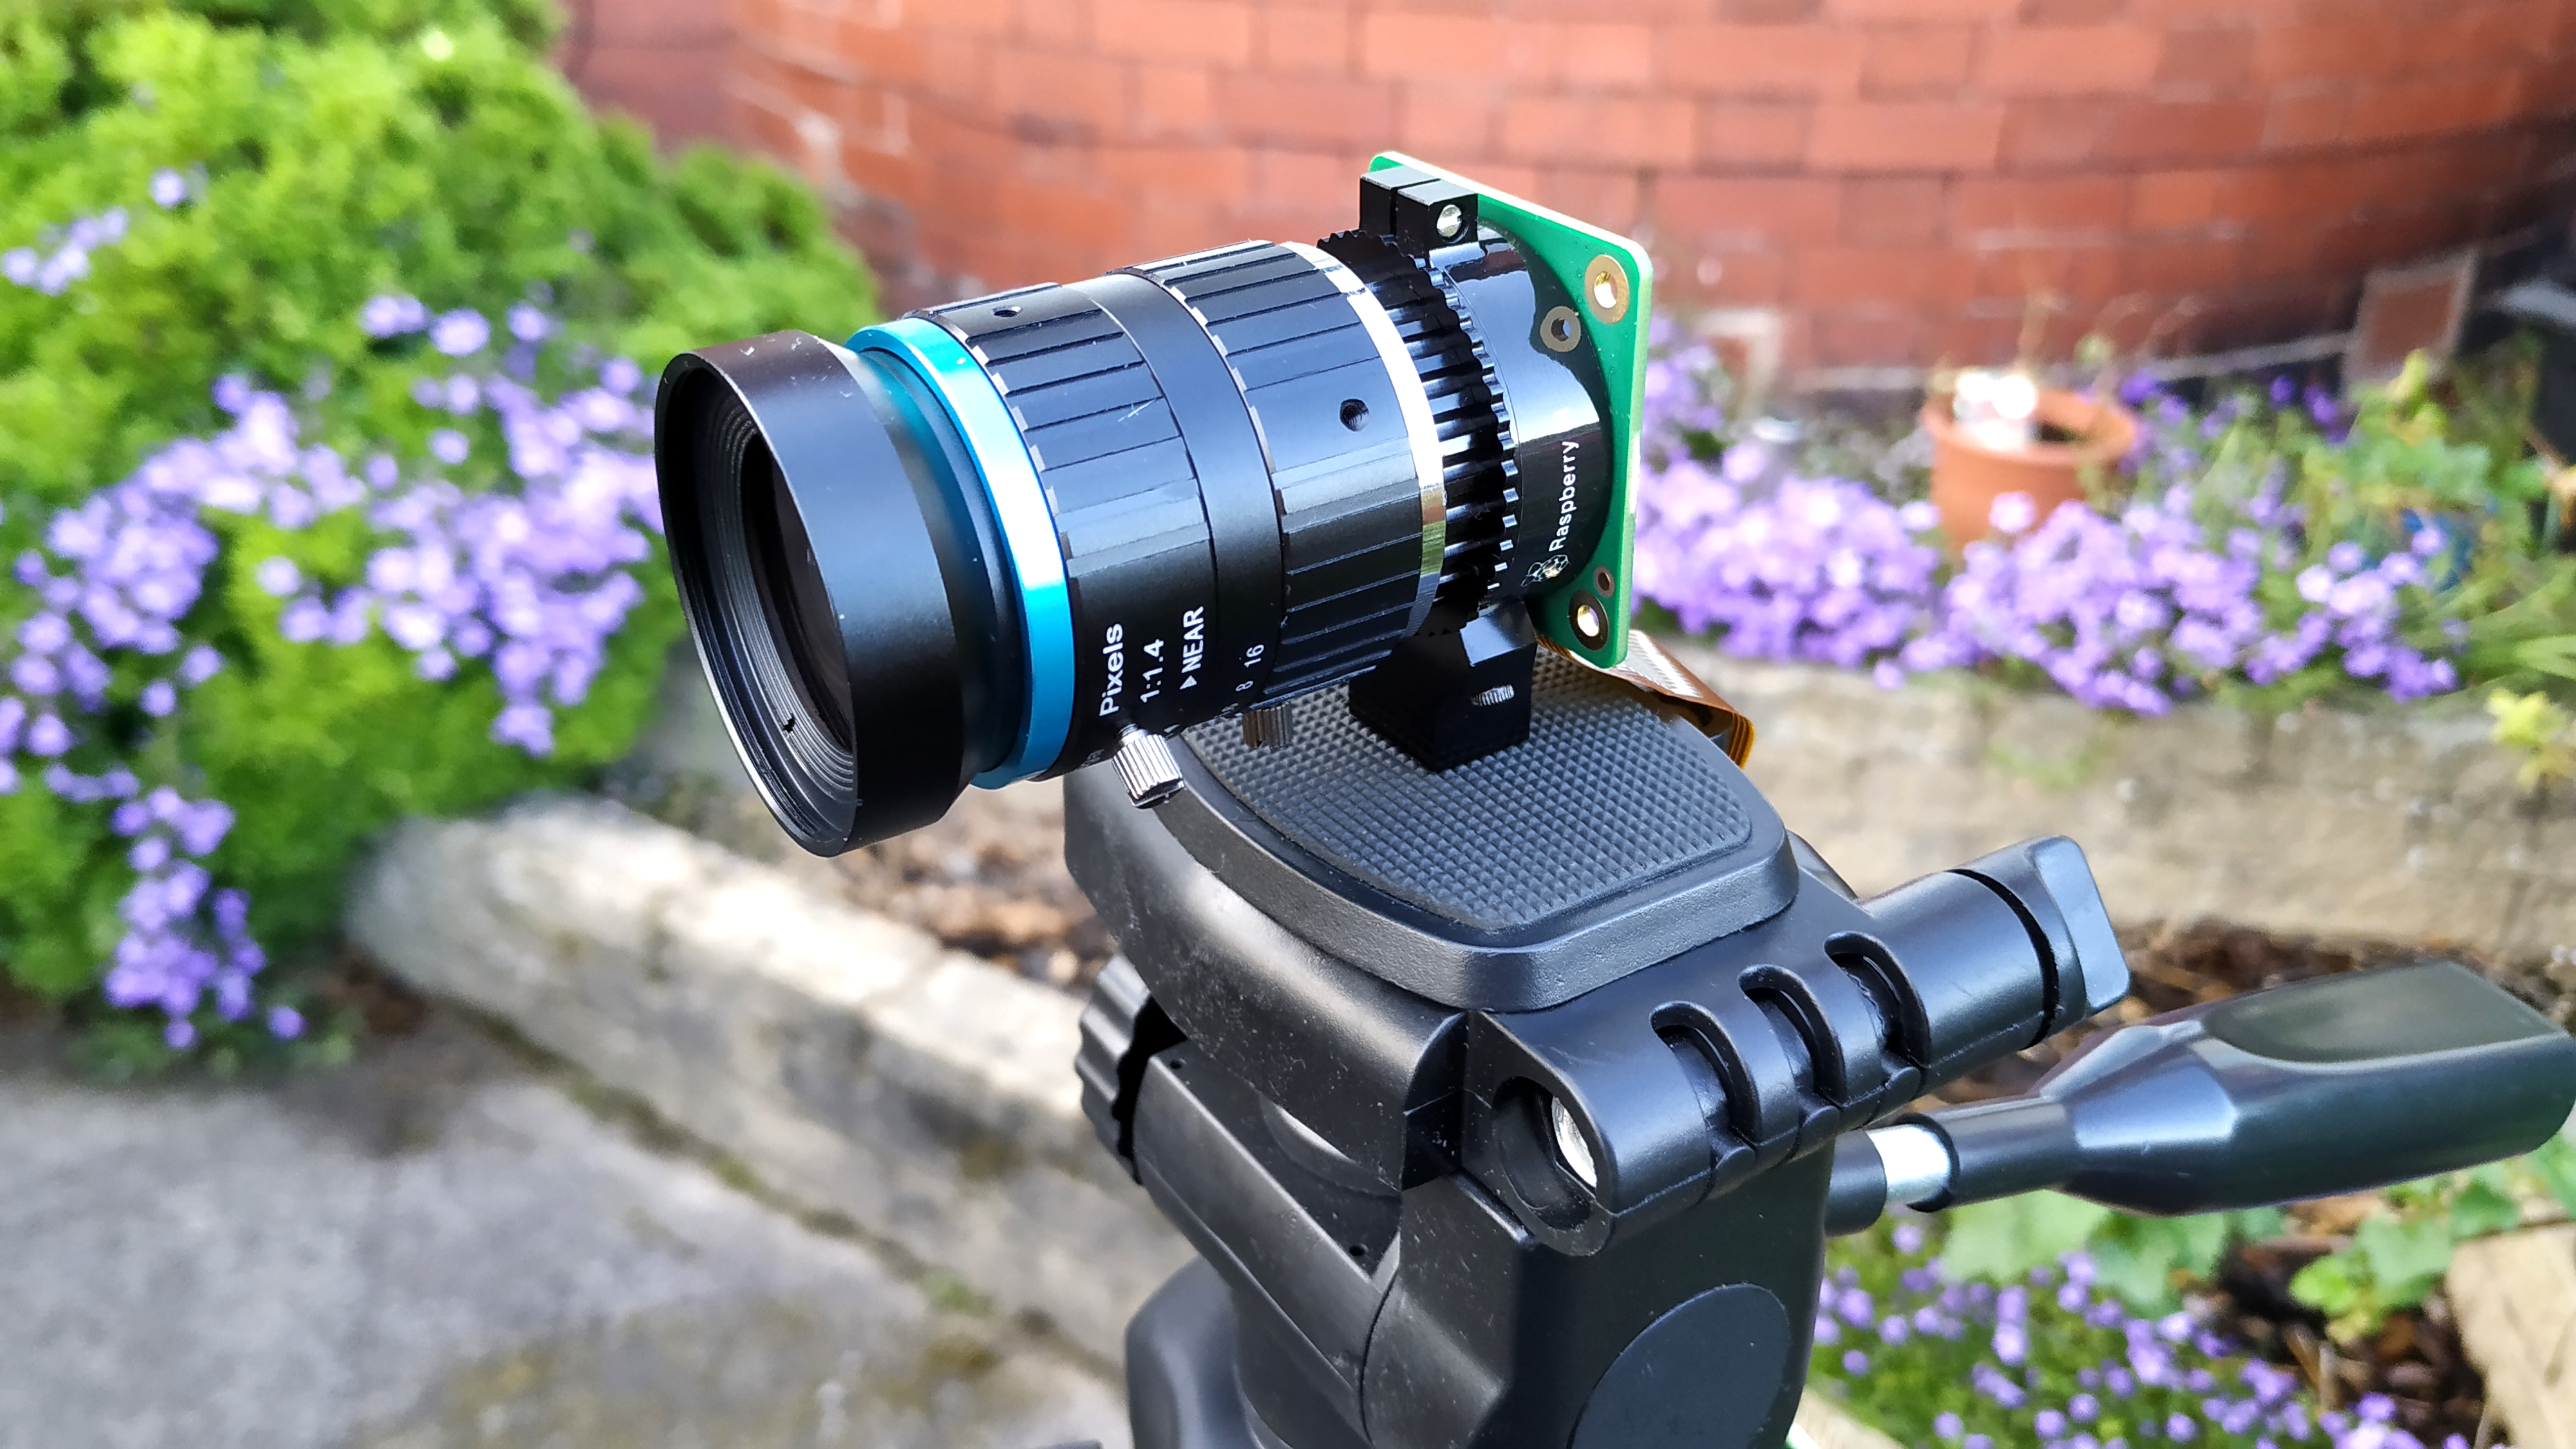
This tutorial shows you how to create a photobooth style application using a Raspberry Pi and a camera module (we recommend using a Raspberry Pi 4 and the new Raspberry Pi High Quality Camera). The application will be accessible remotely using an easy to configure tunnel application which will direct traffic to our Pi, even through a firewall.
What You Need
- Raspberry Pi (preferably a Raspberry Pi 4, but any other model should work also)
- Raspberry Pi Camera (Pi Quality Camera preferred)
- The latest version of Raspbian installed on your microSD card
Connecting the Camera Module
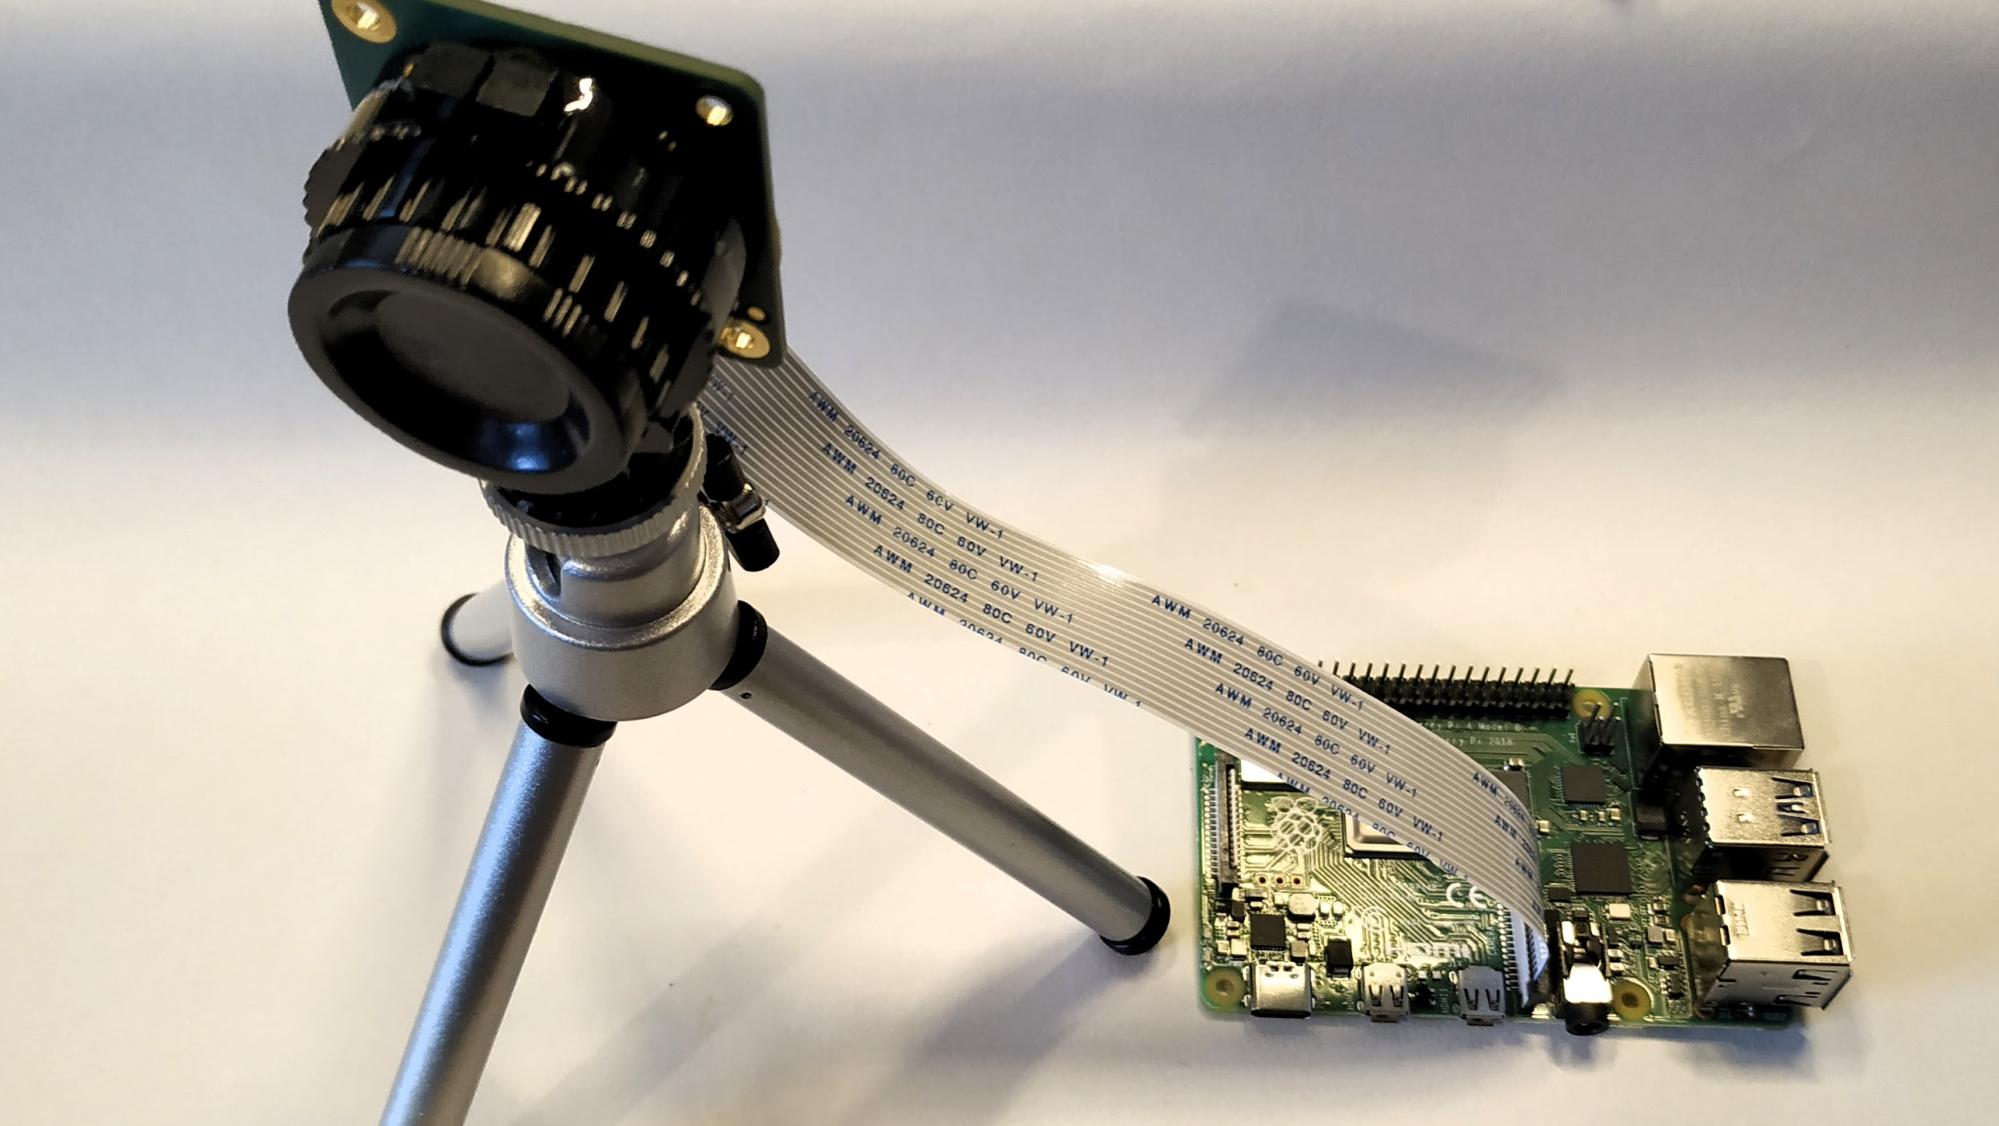
1. Insert the camera connector to the Camera port (CSI) which for model B boards is between the HDMI and composite port. Gently lift the plastic cover and insert the cable with the blue tab facing the Ethernet / USB ports. Push the plastic cover back in place to lock the cable
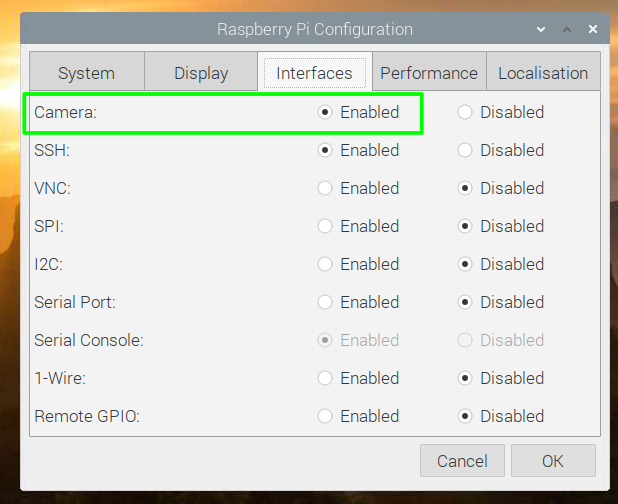
2. Enable the camera interface on your Raspberry Pi. Just launch the Preferences app on y our Pi, go to the Interfaces tab, enable the Camera interface and then reboot the Pi.
Getting Started with Anvil
3. Install the Anvil App Server by typing the following at the command prompt on your Pi.
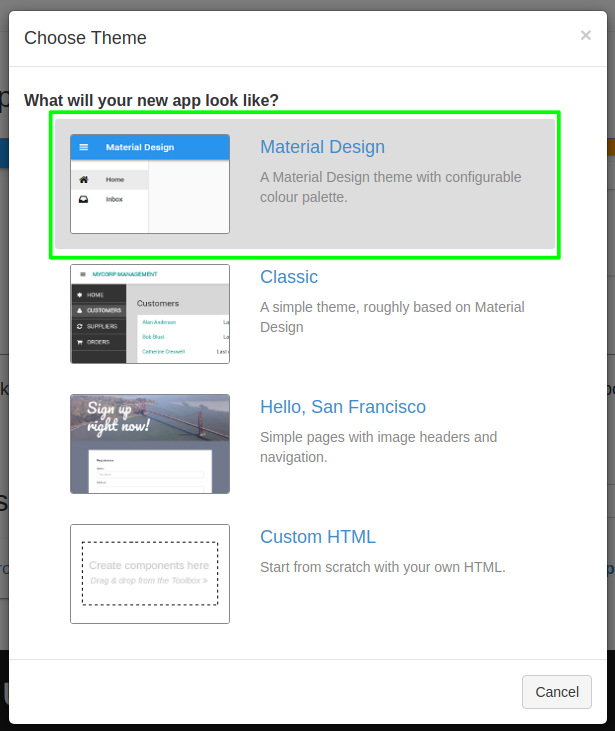
$ sudo pip3 install anvil-app-server4. Create a new blank app at anvil.works. Open a web browser to http://anvil.works and click on “Start Building” to sign up for a free account. Create a new blank app and use the Material Design theme.
Get Tom's Hardware's best news and in-depth reviews, straight to your inbox.
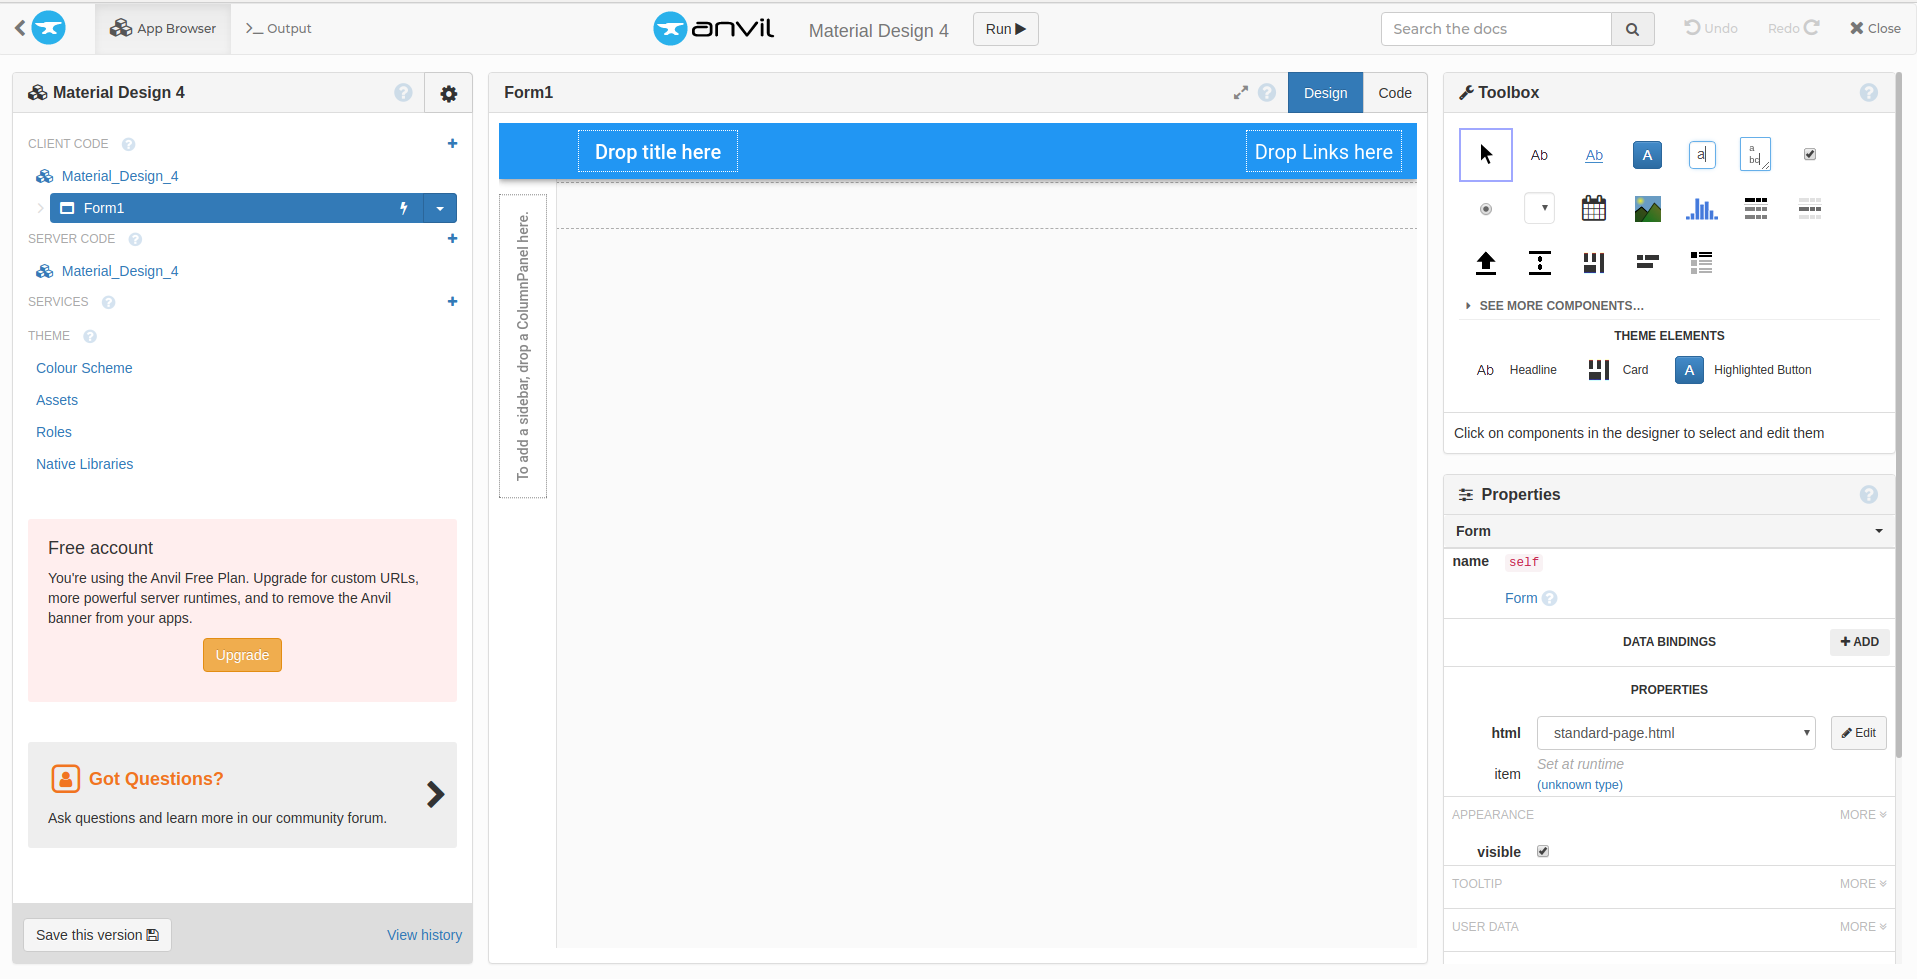
The Anvil editor now opens and in the center of the screen is a form which is where we create our user interface.
Building Your Photo App in Anvil
5. Drag a button from the toolbox into Form1 and place it at the top of the form.
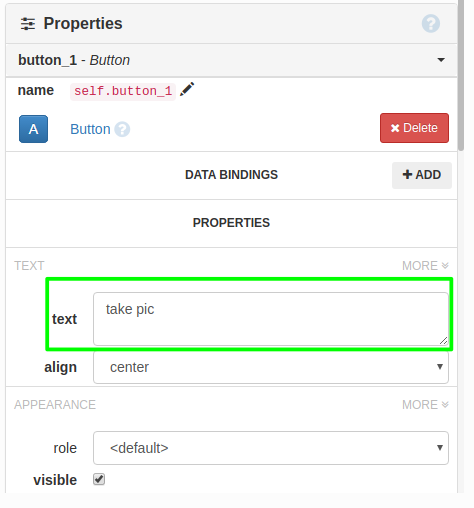
6. Change the text for this button by altering the text field in Properties.
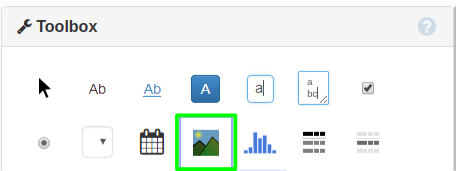
7. Drag an image from the Toolbox and place it under the button. Drag the image area to resize as you require. The image captured by the camera will be shown here and scaled to fit the image area.
8. Double clicking on the button will open the code editor and highlight the section of code for the button.
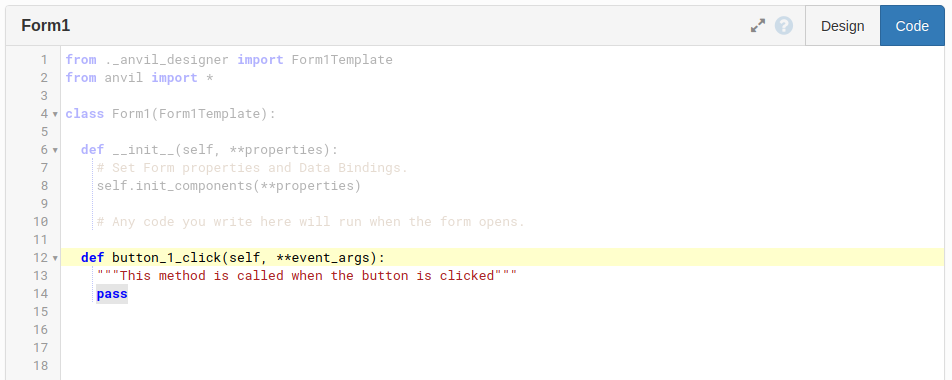
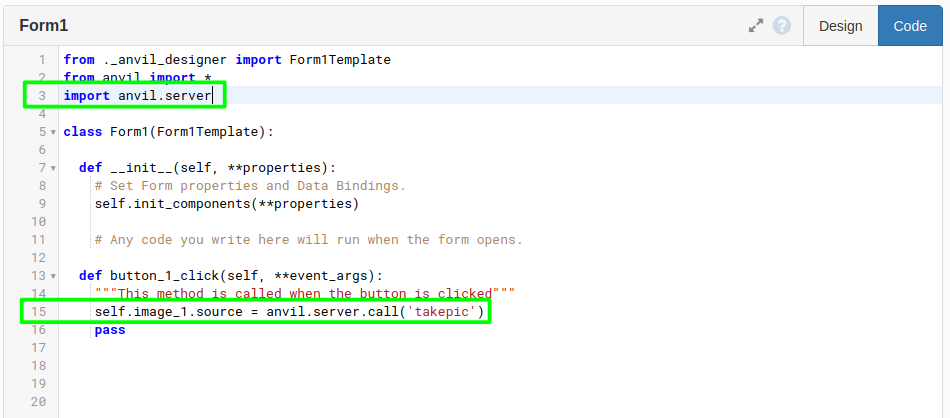
9. Add the following code to line 3 of your app.
import anvil.serverThen on line 15 we will add the following code which will change the image displayed on the app by running code on our app server. This code is a function that we shall create later in the project. Note that this code is automatically indented to show that it belongs inside the function “button_1_click()”
self.image_1.source = anvil.server.call('takepic')10. Navigate to SERVER CODE on the left side of your screen and click Camera_Controller, then click “Add a new Server Module” This will create an area where we can write the code that will trigger the camera to take a picture.
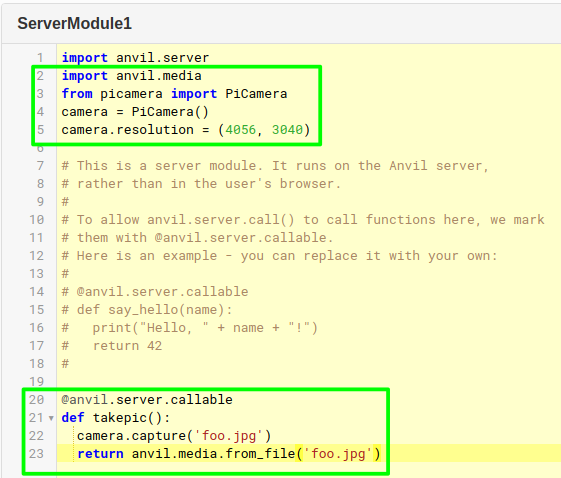
11. Import two modules of Python code on lines 2 and 3. The first will enable Anvil to handle images in our app. The second enables access to the Raspberry Pi camera.
import anvil.media
from picamera import PiCamera
12. Add the camera object. At line 4 we create an object which we can use to control the camera. Line 5 configures the camera to use the maximum resolution for the HQ camera. If you are using an older camera, change this to reflect your needs.
camera = PiCamera()
camera.resolution = (4056, 3040)
13. Create the takepic() function. Line 20 sees a Python decorator used to identify an area of code which can be called by the Anvil server. This code is our “takepic” function, called when the button is clicked. This function will capture an image and save it as ‘foo.jpg’, then on line 23 we return this file as a media object which Anvil can then show in the app.
@anvil.server.callable
def takepic():
  camera.capture('foo.jpg')
return anvil.media.from_file('foo.jpg')Making Anvil Code Run on Your Raspberry Pi
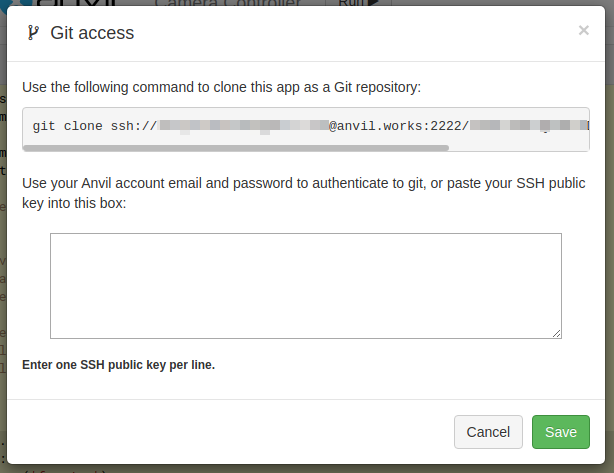
14. Click on the Cog icon, and then select “Share app…” then click on “Clone with Git”. This will download all of the code to our Raspberry Pi.
15. Copy the URL starting “git clone” and paste this into a terminal, then press Enter. You will need your Anvil account email and password to authenticate.
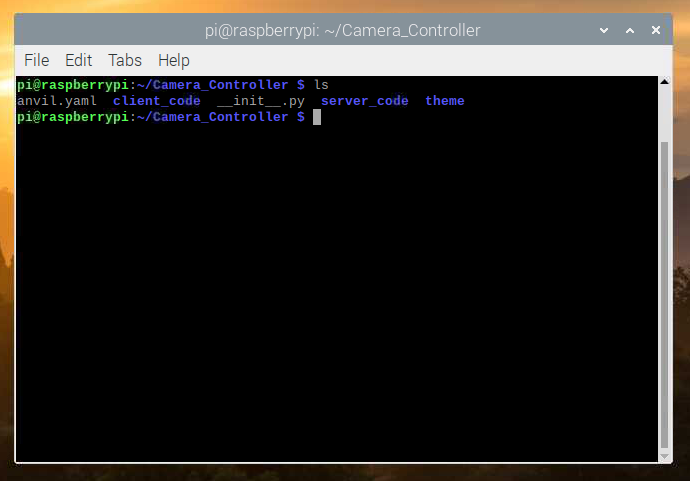
16. Navigate to the directory containing the Anvil code, called Camera_Controller, in your terminal window.
$ cd Camera_Controller17. Type the following to run the Anvil App Server, and load the configuration file for the app. Note that this will take some time, especially at first as it needs to download ~200MB of files
$ anvil-app-server --config-file anvil.yamlOnce we see “Downlink authenticated OK” we know that the Anvil code has been run successfully.
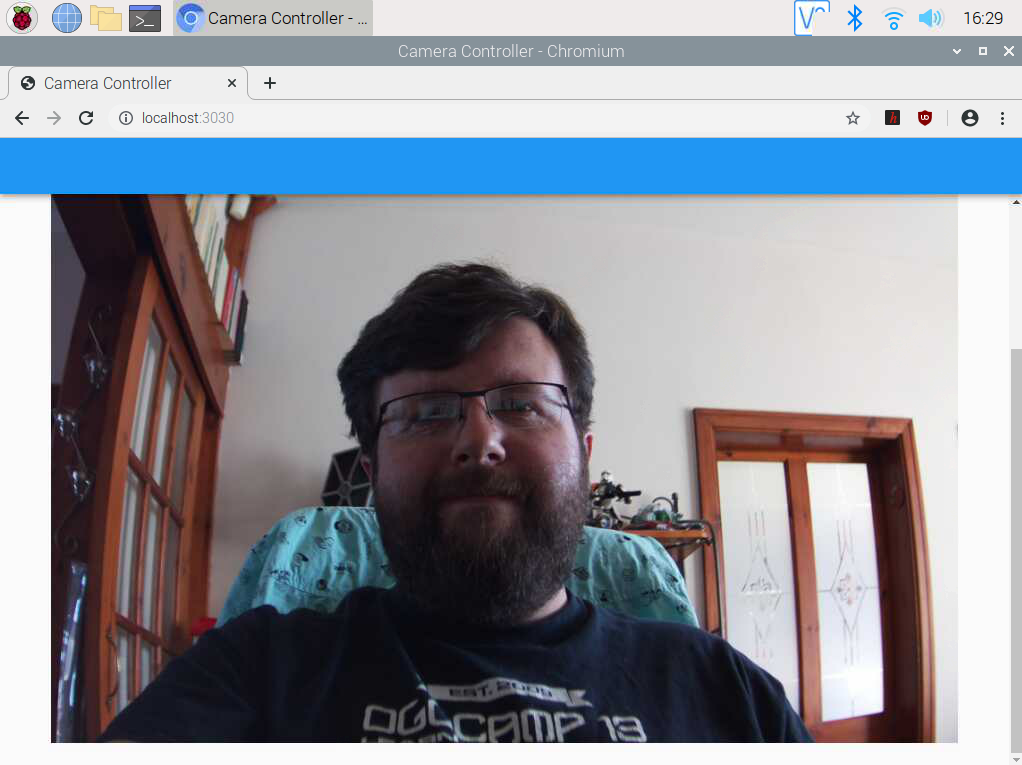
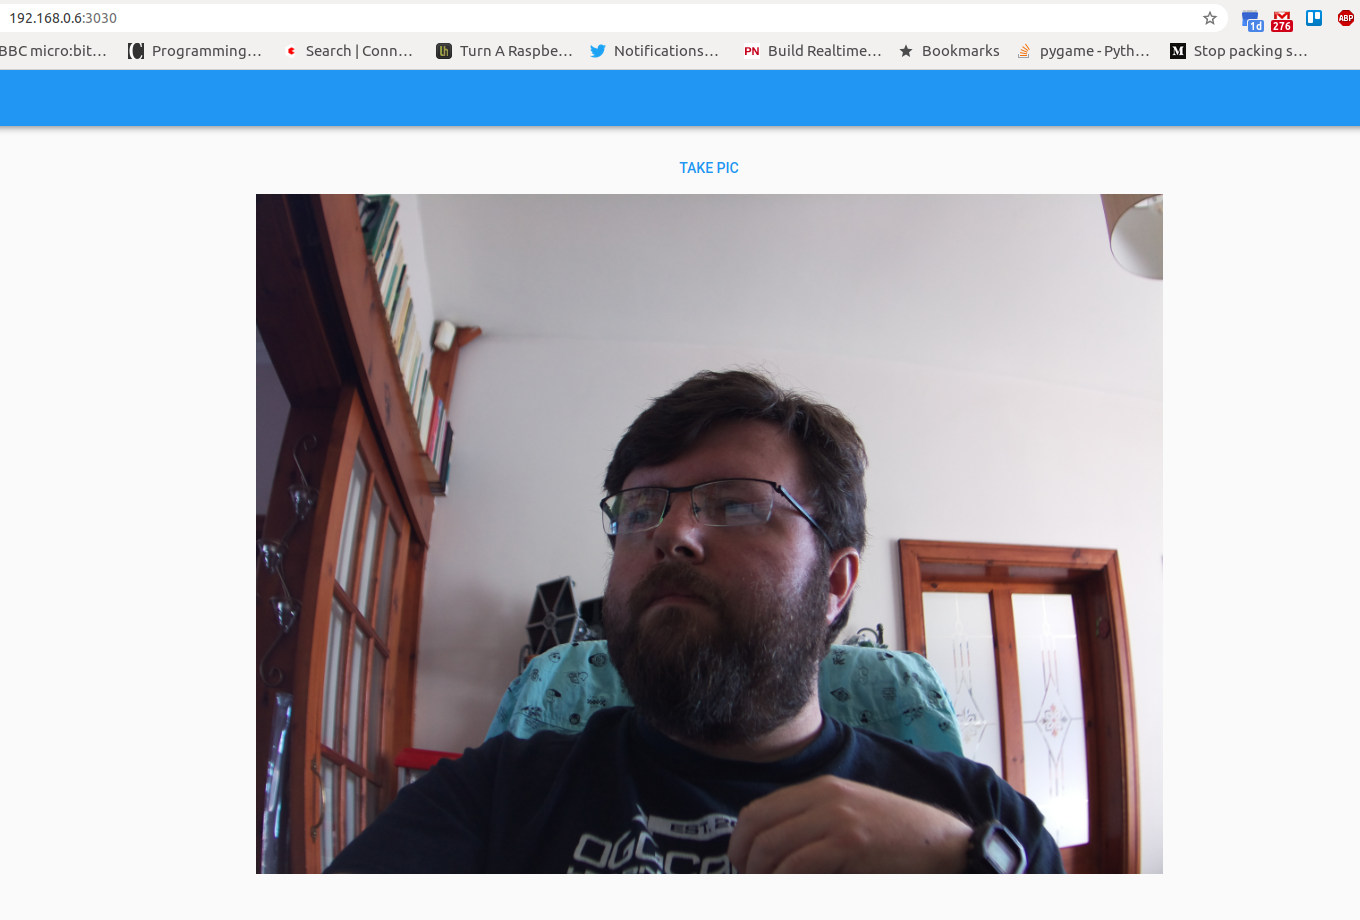
18. Open a browser to localhost:3030 and you will see the app. Click on the TakePic button and after a few seconds the image will appear in the app
Another device on the same network can also control the app we just need to replace “localhost” with the IP address of our Pi. Which can be found by hovering the mouse over the WiFi icon for a pop up to appear with the details.
Adding a Secure Tunnel for Internet Access
Now it’s time to create a secure tunnel to our Raspberry Pi server so we can access it from outside of our network. If you don’t wish to do this, you can skip these steps.
19. Download and install the Linux ARM archive from https://ngrok.com/download.
$ unzip ngrok-stable-linux-arm.zip20. Launch ngrok to start a tunnel that will create a URL directly to our app. Look for the forwarding URL and make a note of it.
$ ./ngrok http 3030 
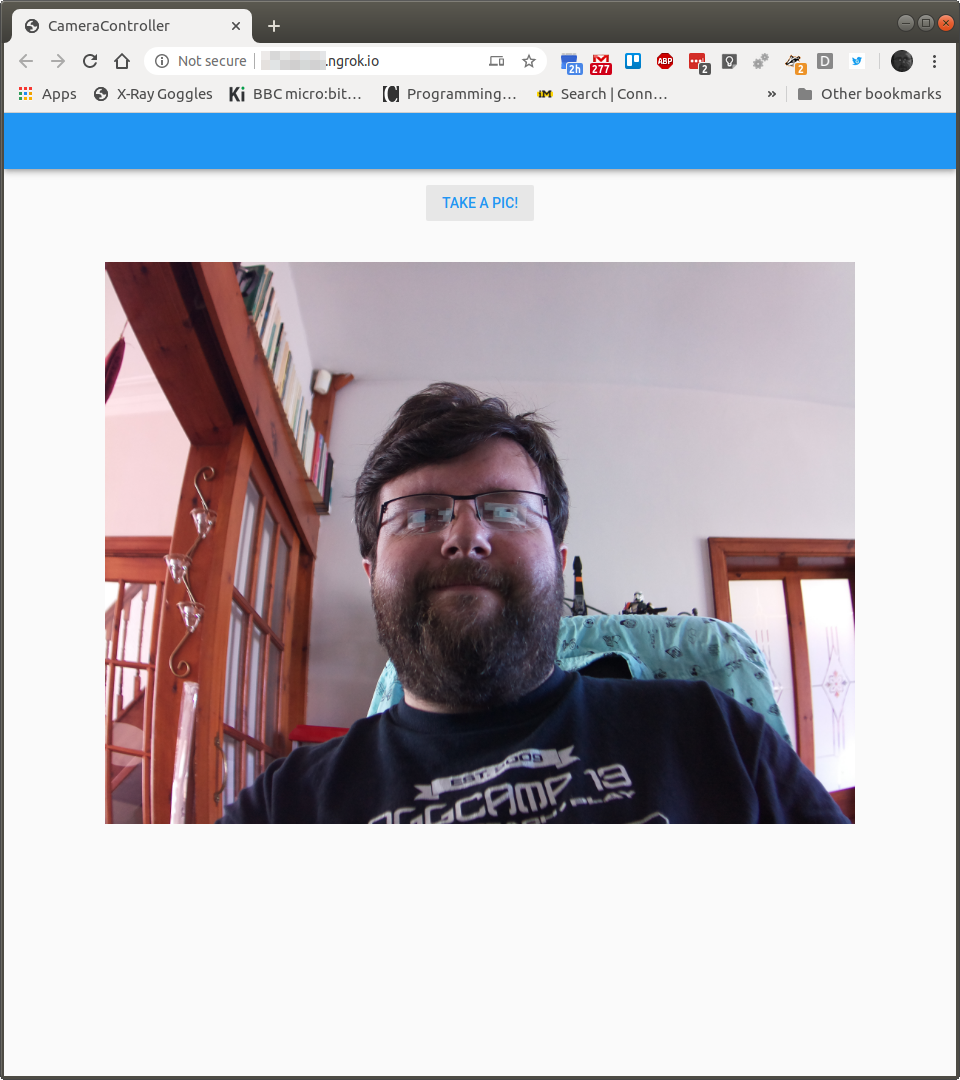
21. Type the URL into a browser on another device (phone, laptop, tablet) and the camera interface is ready for use. From anywhere in the world!

Les Pounder is an associate editor at Tom's Hardware. He is a creative technologist and for seven years has created projects to educate and inspire minds both young and old. He has worked with the Raspberry Pi Foundation to write and deliver their teacher training program "Picademy".
-
misanthropic-gamer Awesome article, thank you! I've been searching the interwebs for weeks, trying to find a coherent method of streaming video or pics. This adds an interesting dimension. Question: have you investigated / come up with a method for using and autofocus and / or auto aperture lens? Thanks again.Reply -
Controlwiz Raspberry Pi 3B+ Server localhost:3030 does not work after install Anvil App Server Jar.Reply
Failed to start built-in Postgres database: java.lang.IllegalStateException: Process failed
More logs are available in .anvil-data/postgres.log.
Some common causes of this problem:
- Are you launching this server as 'root' on a UNIX system?
Postgres will not run as root; try launching the server as an ordinary user.
- Are you running this server on an unusual architecture or OS? (Linux/arm)
tail .anvil-data/postgres.log.
initdb: cannot be run as root
Please log in (using, e.g., "su") as the (unprivileged) user that will
own the server process.
What could be the solution to this? -
lazloPanaflex Reply
Your cloned files are probably owned by root. Try this:Controlwiz said:Raspberry Pi 3B+ Server localhost:3030 does not work after install Anvil App Server Jar.
Failed to start built-in Postgres database: java.lang.IllegalStateException: Process failed
More logs are available in .anvil-data/postgres.log.
Some common causes of this problem:
- Are you launching this server as 'root' on a UNIX system?
Postgres will not run as root; try launching the server as an ordinary user.
- Are you running this server on an unusual architecture or OS? (Linux/arm)
tail .anvil-data/postgres.log.
initdb: cannot be run as root
Please log in (using, e.g., "su") as the (unprivileged) user that will
own the server process.
What could be the solution to this?
1. Check ownership of the files
ls -la /home/pi/cam
If you see root as the owner, move on to the next step
2. Change ownership. I don't think anything needs to be owned by root so you should be safe recursively changing:
chown -R pi: /home/pi/cam
That should do it -
webal ReplyAdmin said:Using the power of the Anvil framework, this tutorial shows you how to make your Raspberry Pi camera available to anyone on the Internet by visiting a web page.
How to Remote Control Your Raspberry Pi Camera from the Web : Read more
camera_ controller does not appear on server code, is there another way -
misanthropic-gamer Great article man. Thanks! Has anyone figured out how to get an autofocus lens to work on RPi and the High-Quality Camera?Reply
