How to Reset a MacBook or Mac Desktop
Whether it's a Pro, an Air or even a Mac desktop, you can easily make macOS like new.
Whether you're looking to sell a MacBook, pass it off to a friend or family member or even recycle it, you'll want to reset your Mac. Doing so will remove any files, log you out of any accounts, clear out your apps and ensure that wherever your MacBook Pro, MacBook Air, Mac Mini, iMac or other macOS device doesn't have traces of your information.
The instructions below are primarily for macOS Ventura and later, but we'll list a few tweaks to how to do this on macOS Montere and some older Macs as well.
Just like if you're going to factory reset a Windows PC, back up your data first, whether it's through iCloud, Time Machine or non-Apple service. You don't want to lose anything when you reset your MacBook.
It may also be a good idea to sign out of iMessage, iCloud and other services, though you'll have the opportunity to do this soon. You may even want to unpair Bluetooth devices.
Here's how to reset your MacBook (or other macOS device):
Erase All Content and Settings
This is a step you can take on Macs running on Apple Silicon chips or Intel processors with Apple's T2 chip.It may be enough if you're handing the laptop down to family.
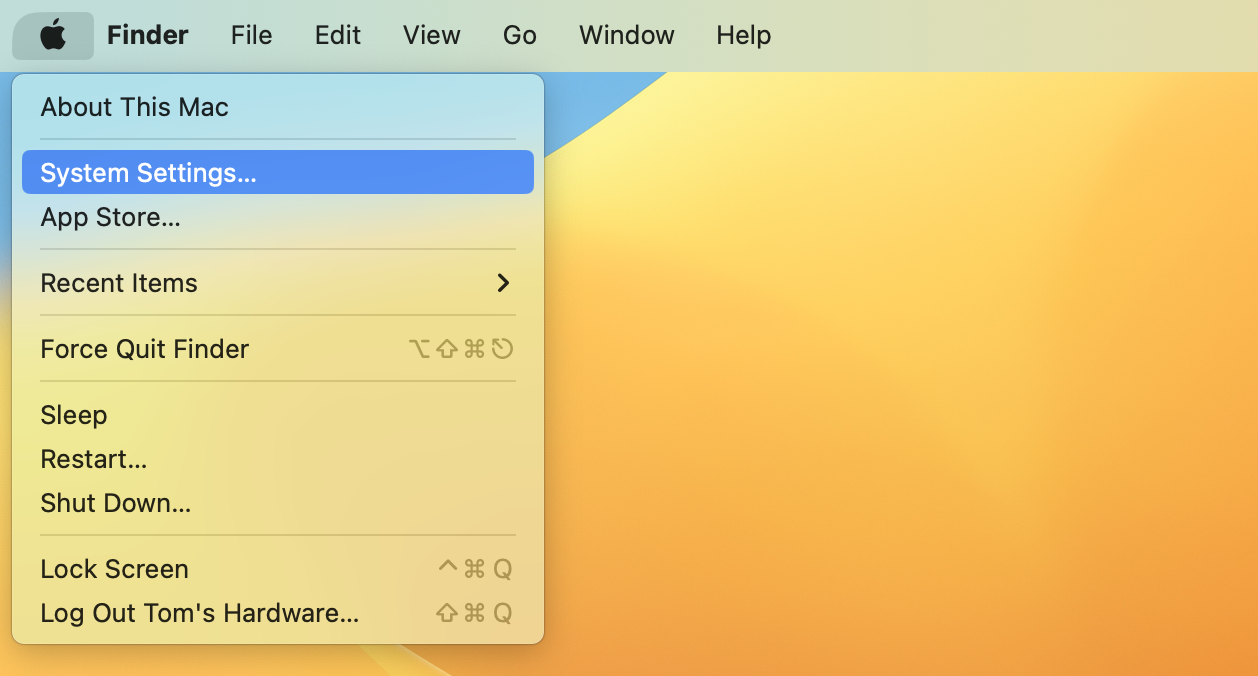
1. On macOS Ventura or later, go to the Apple menu (it's a small Apple logo) in the top-left corner of the screen and click "System Settings."
If you have System Settings in your dock, you can also get there that way.
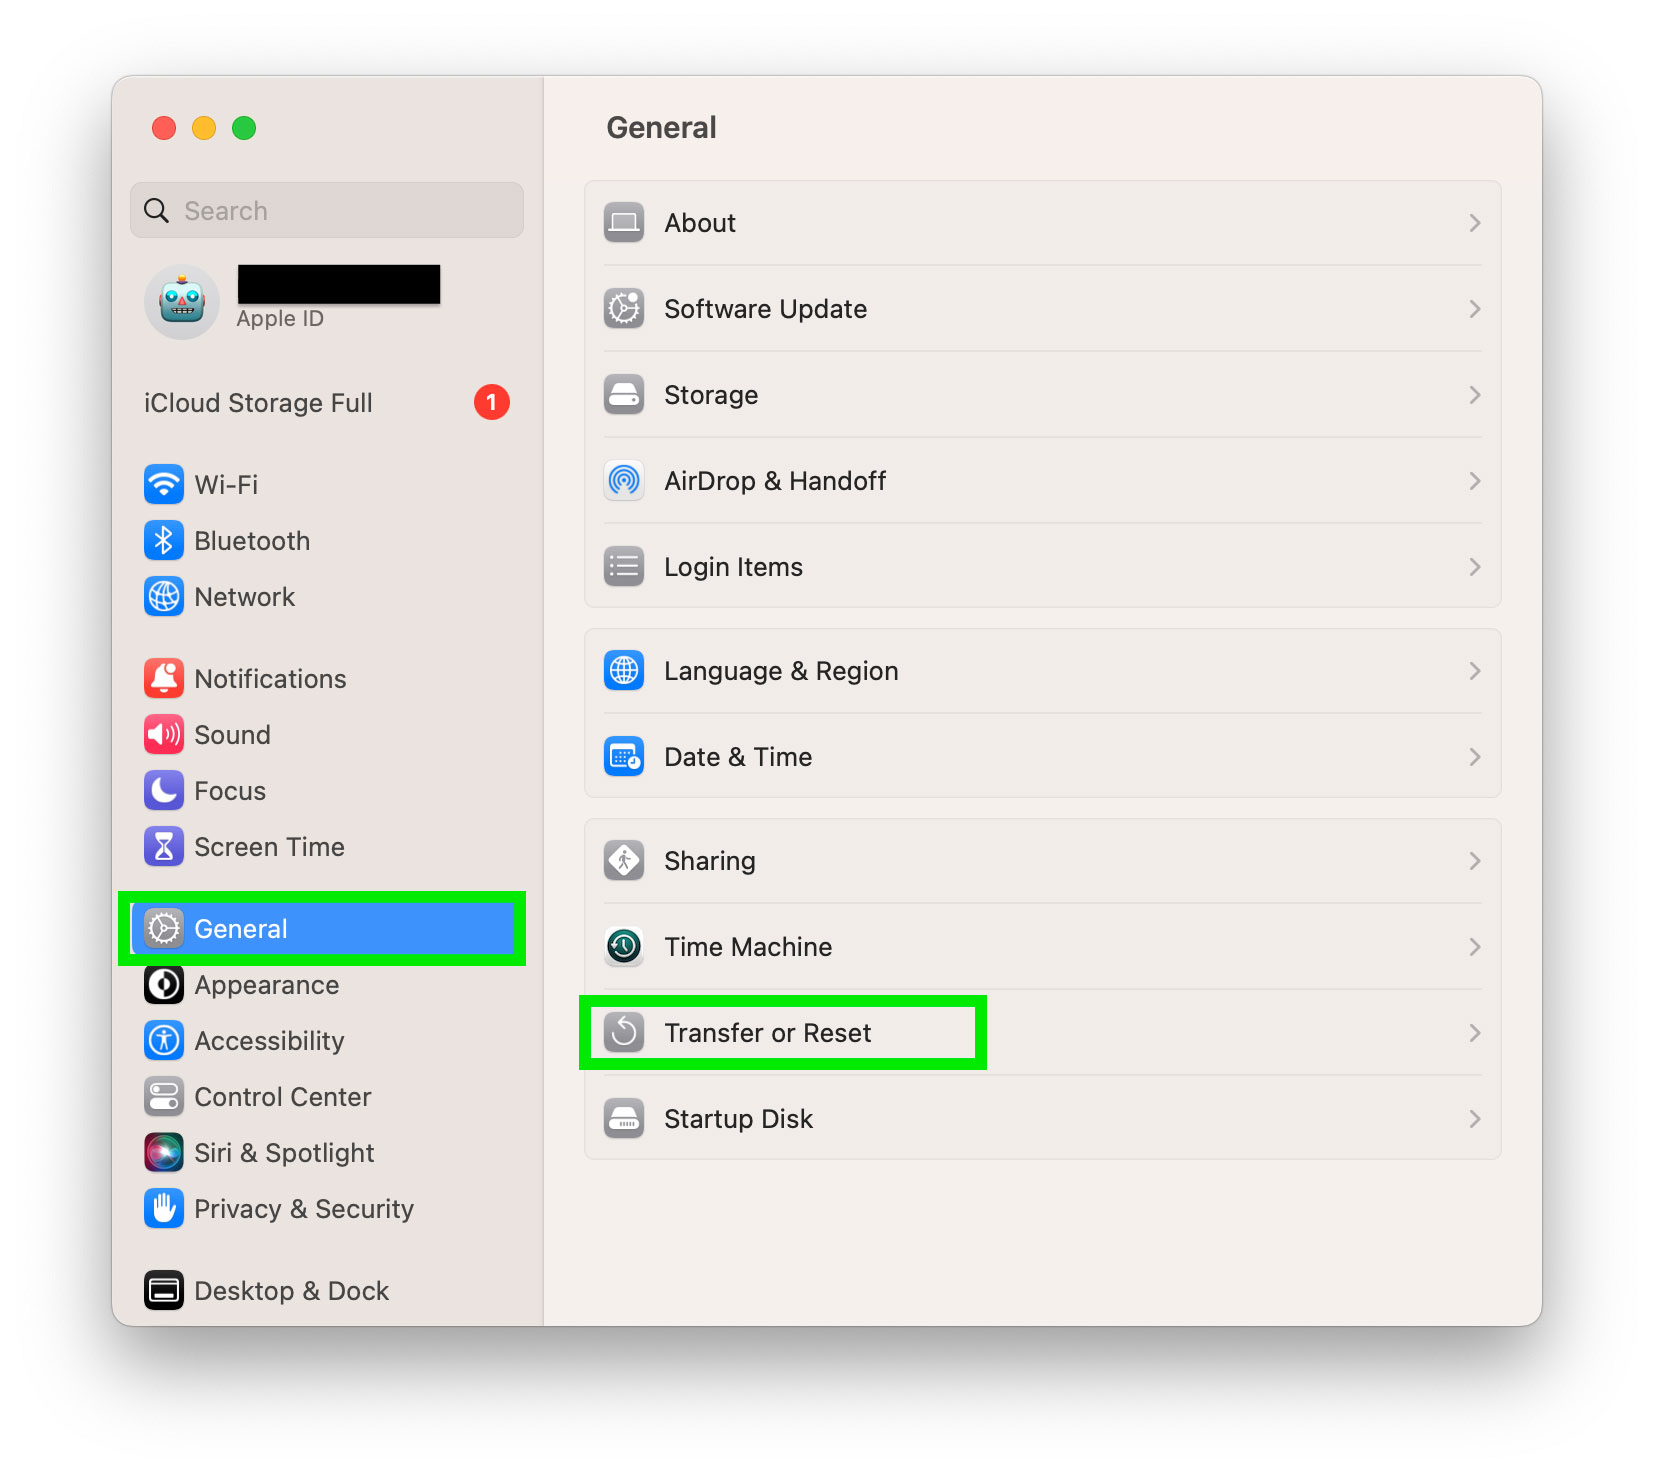
2. Click "General" and choose "Transfer or Reset."
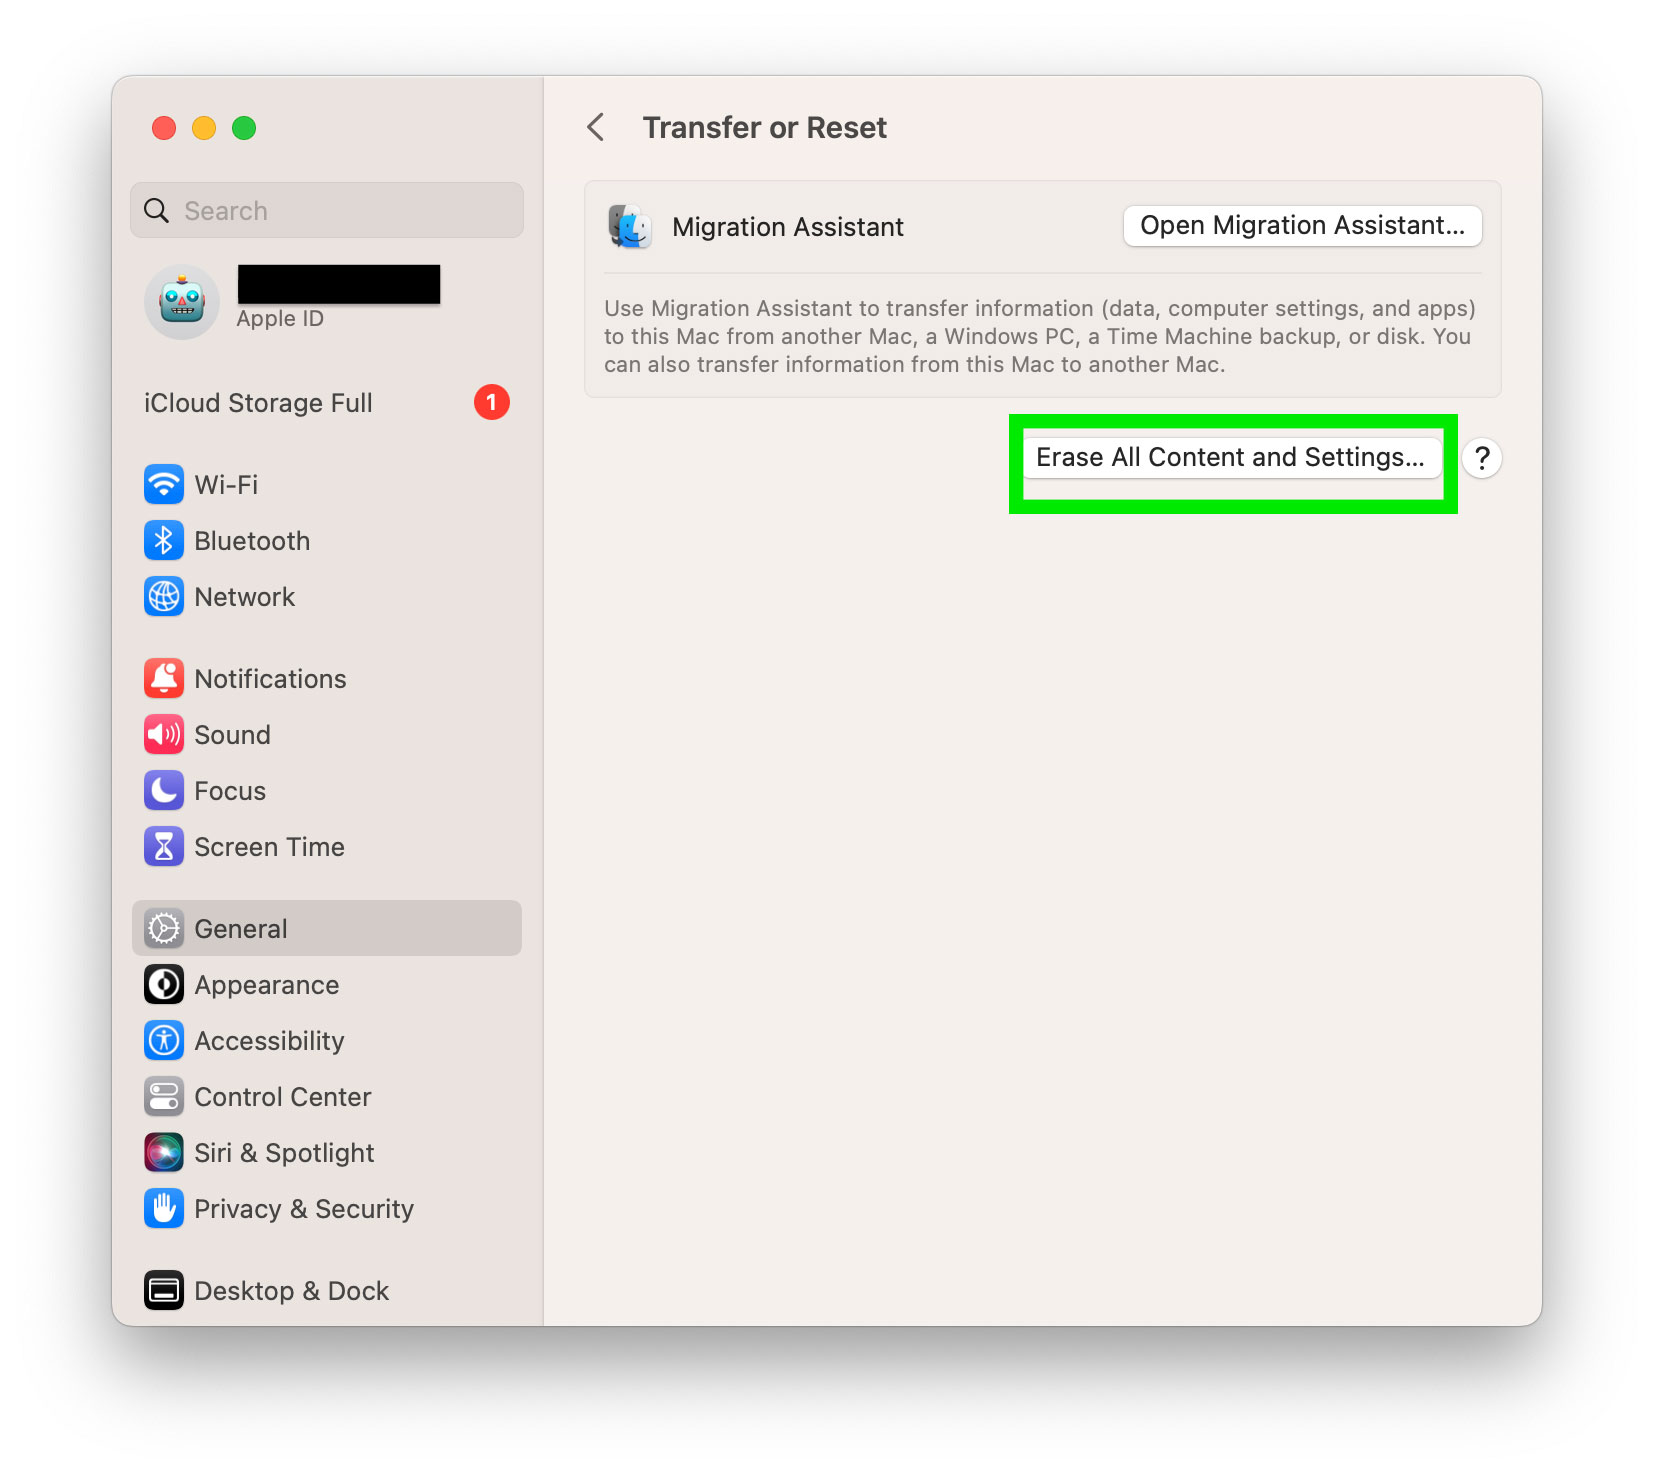
3. Click "Erase All Content and Settings."
On macOS Monterey, you can go to the Apple menu > System Preferences and then "Erase All Content and Settings" to get to the same place. On macOS versions older than Monterey, you'll have to go straight to reinstalling macOS (see below), but you may want to delete what you can by hand.
Get Tom's Hardware's best news and in-depth reviews, straight to your inbox.
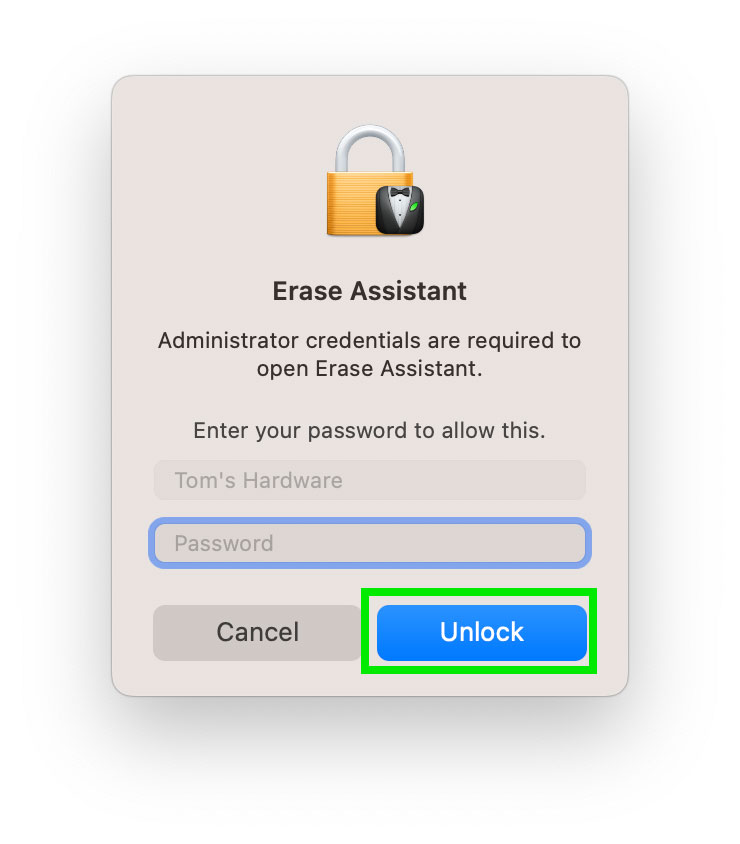
4. Enter your password and click "Unlock" in the erase assistant window. Depending on whether you've used Time Machine or not, you may be prompted to back up your Mac now.
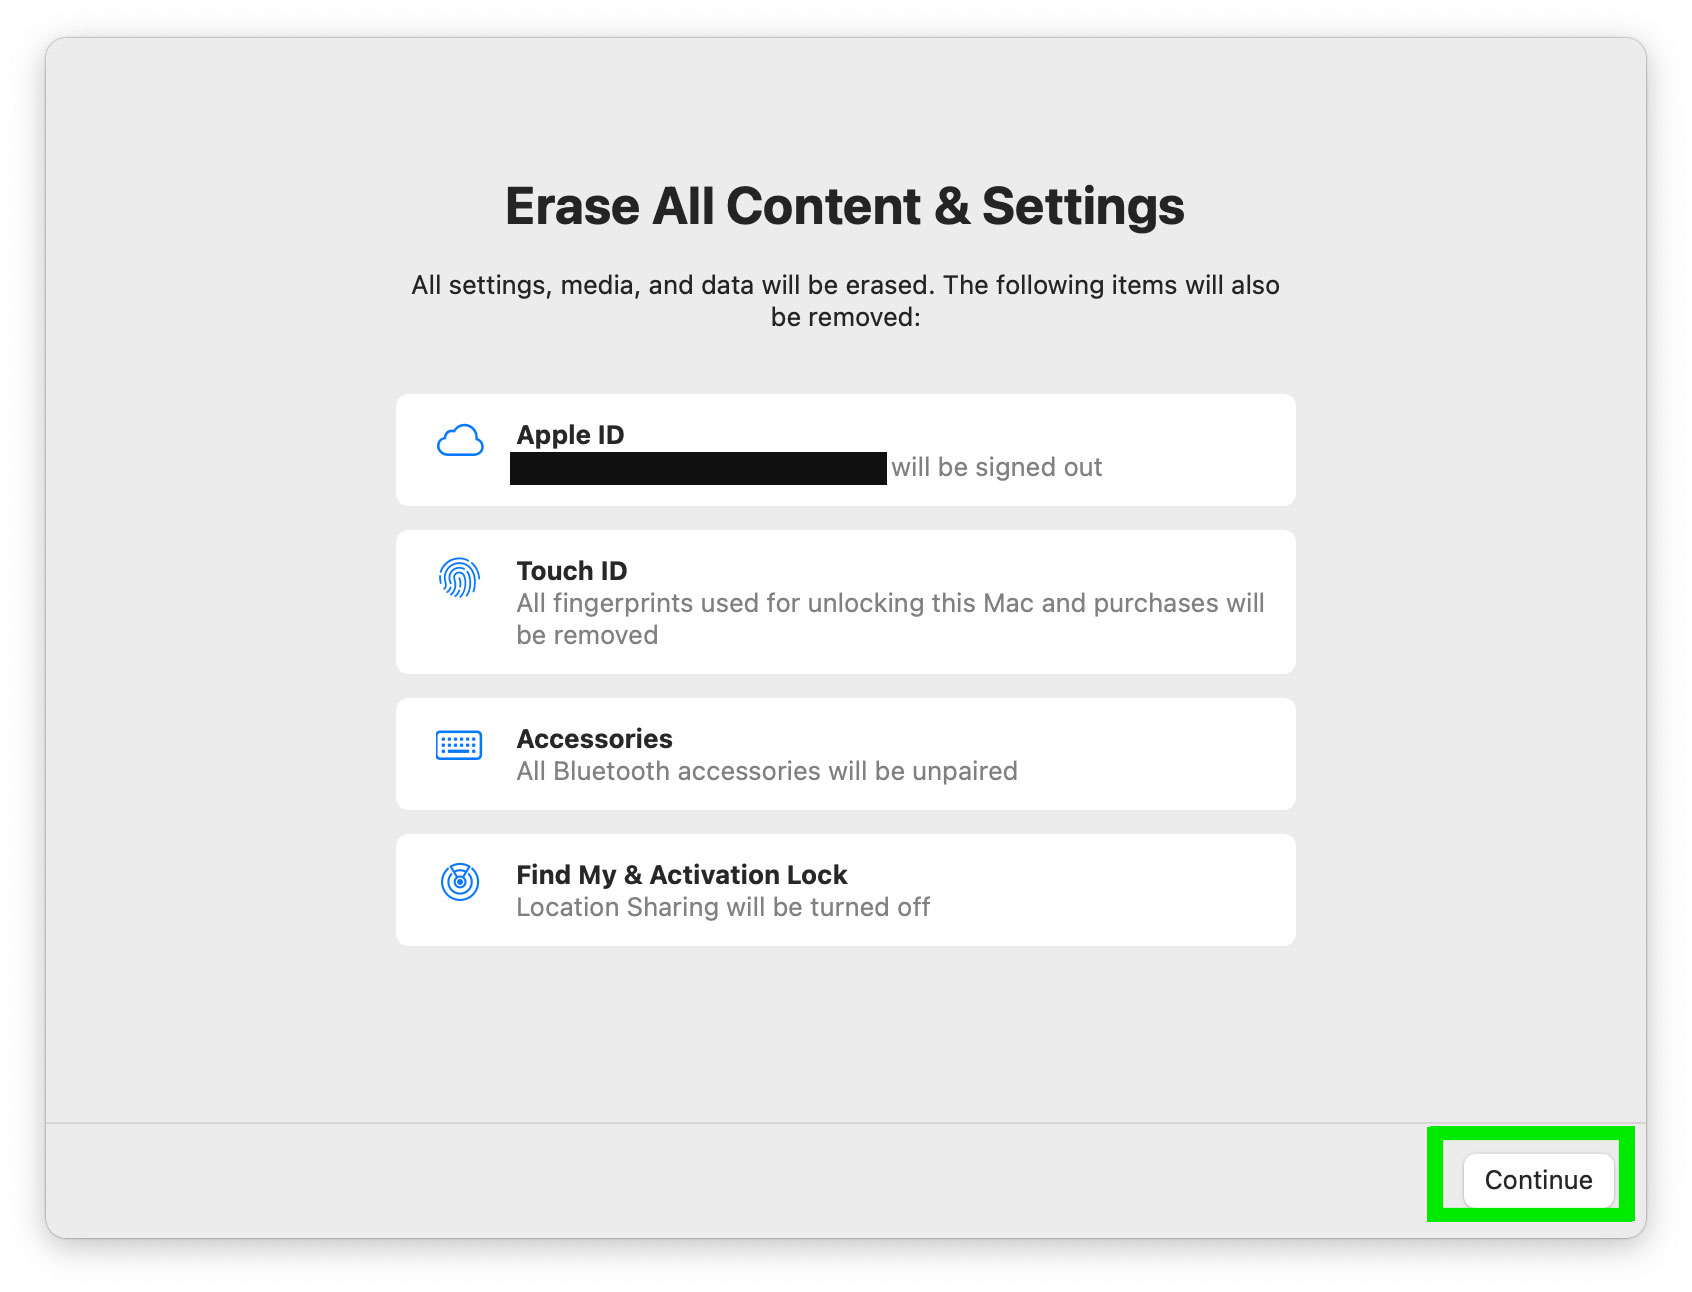
5. Click "Continue" to sign out of your Apple ID, remove fingerprints from TouchID, unpair accessories, turn off location sharing and to remove your settings and data.
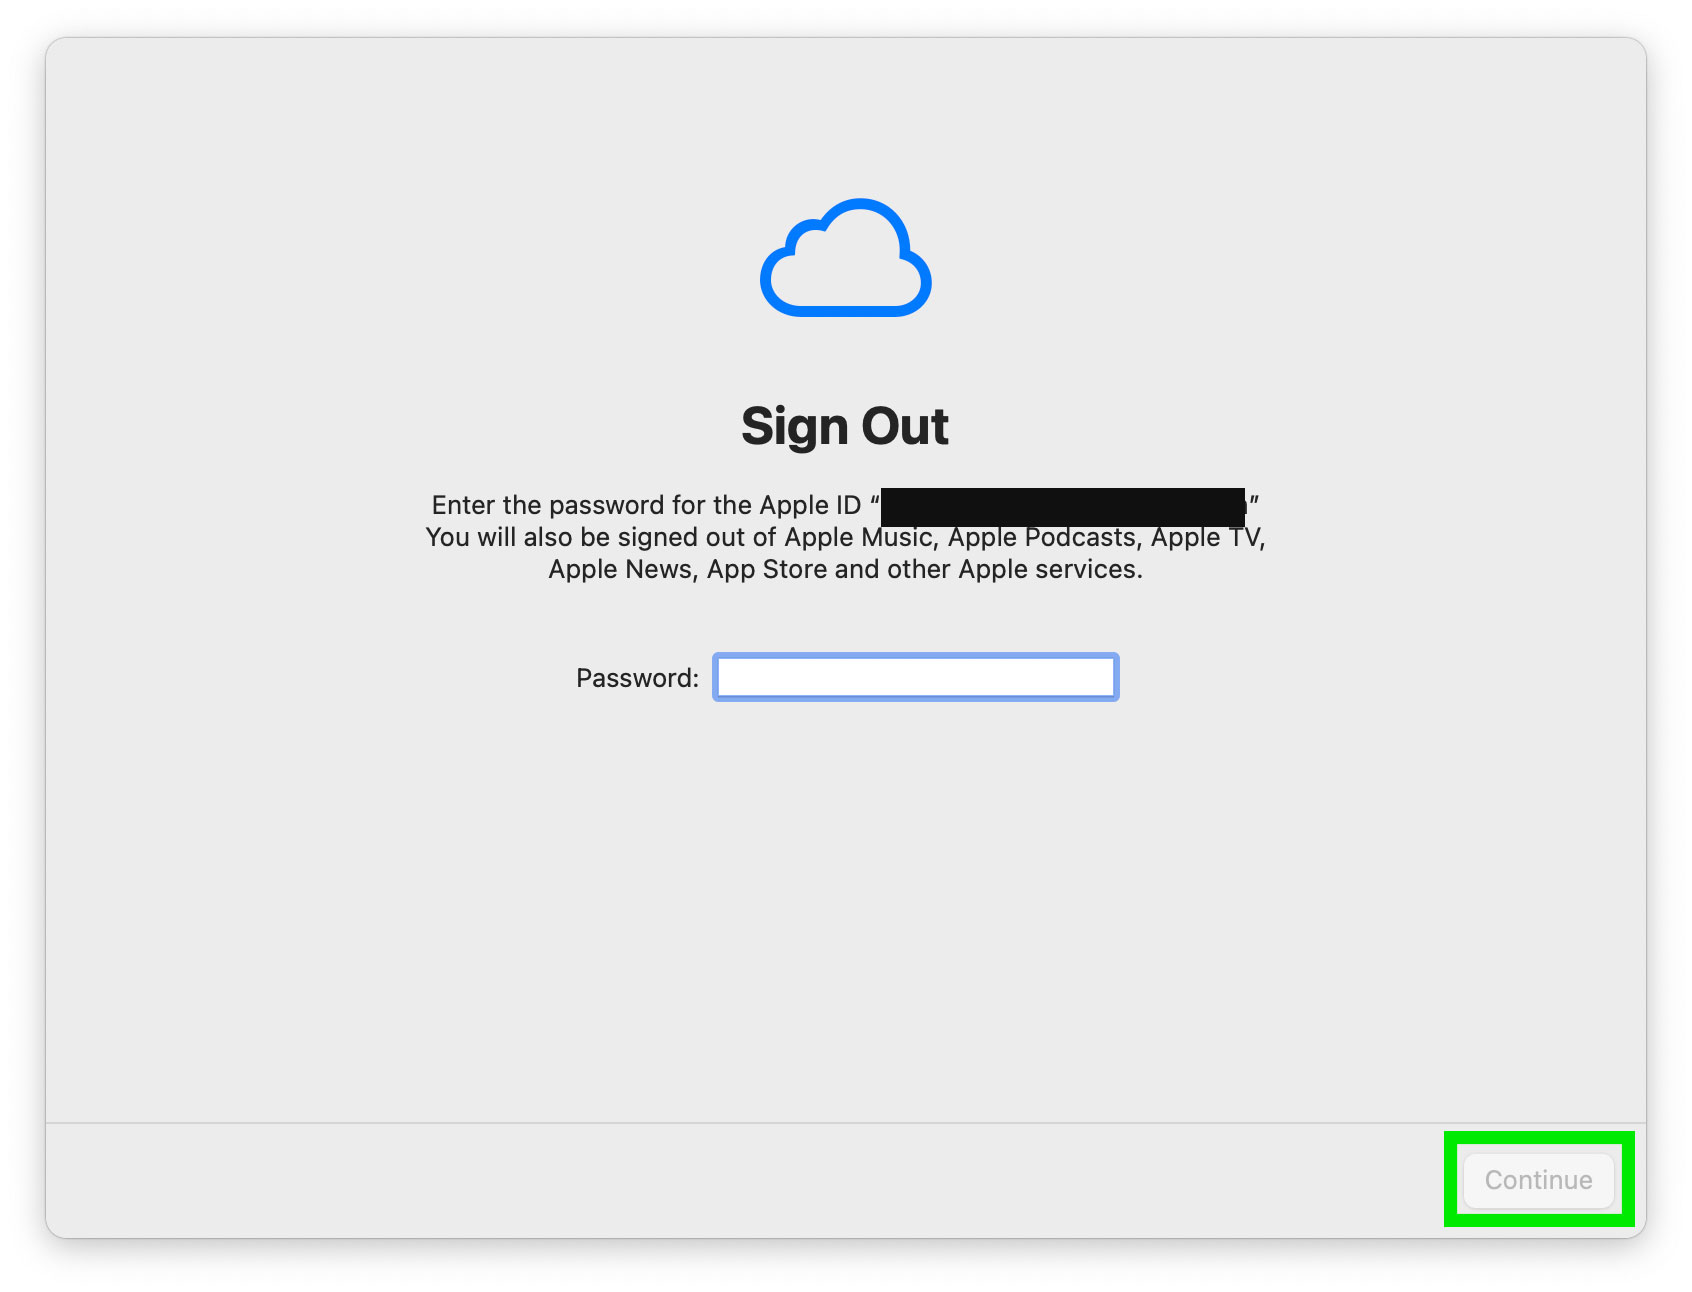
6. If prompted, enter your Apple ID password to sign out of iCloud and other Apple services.
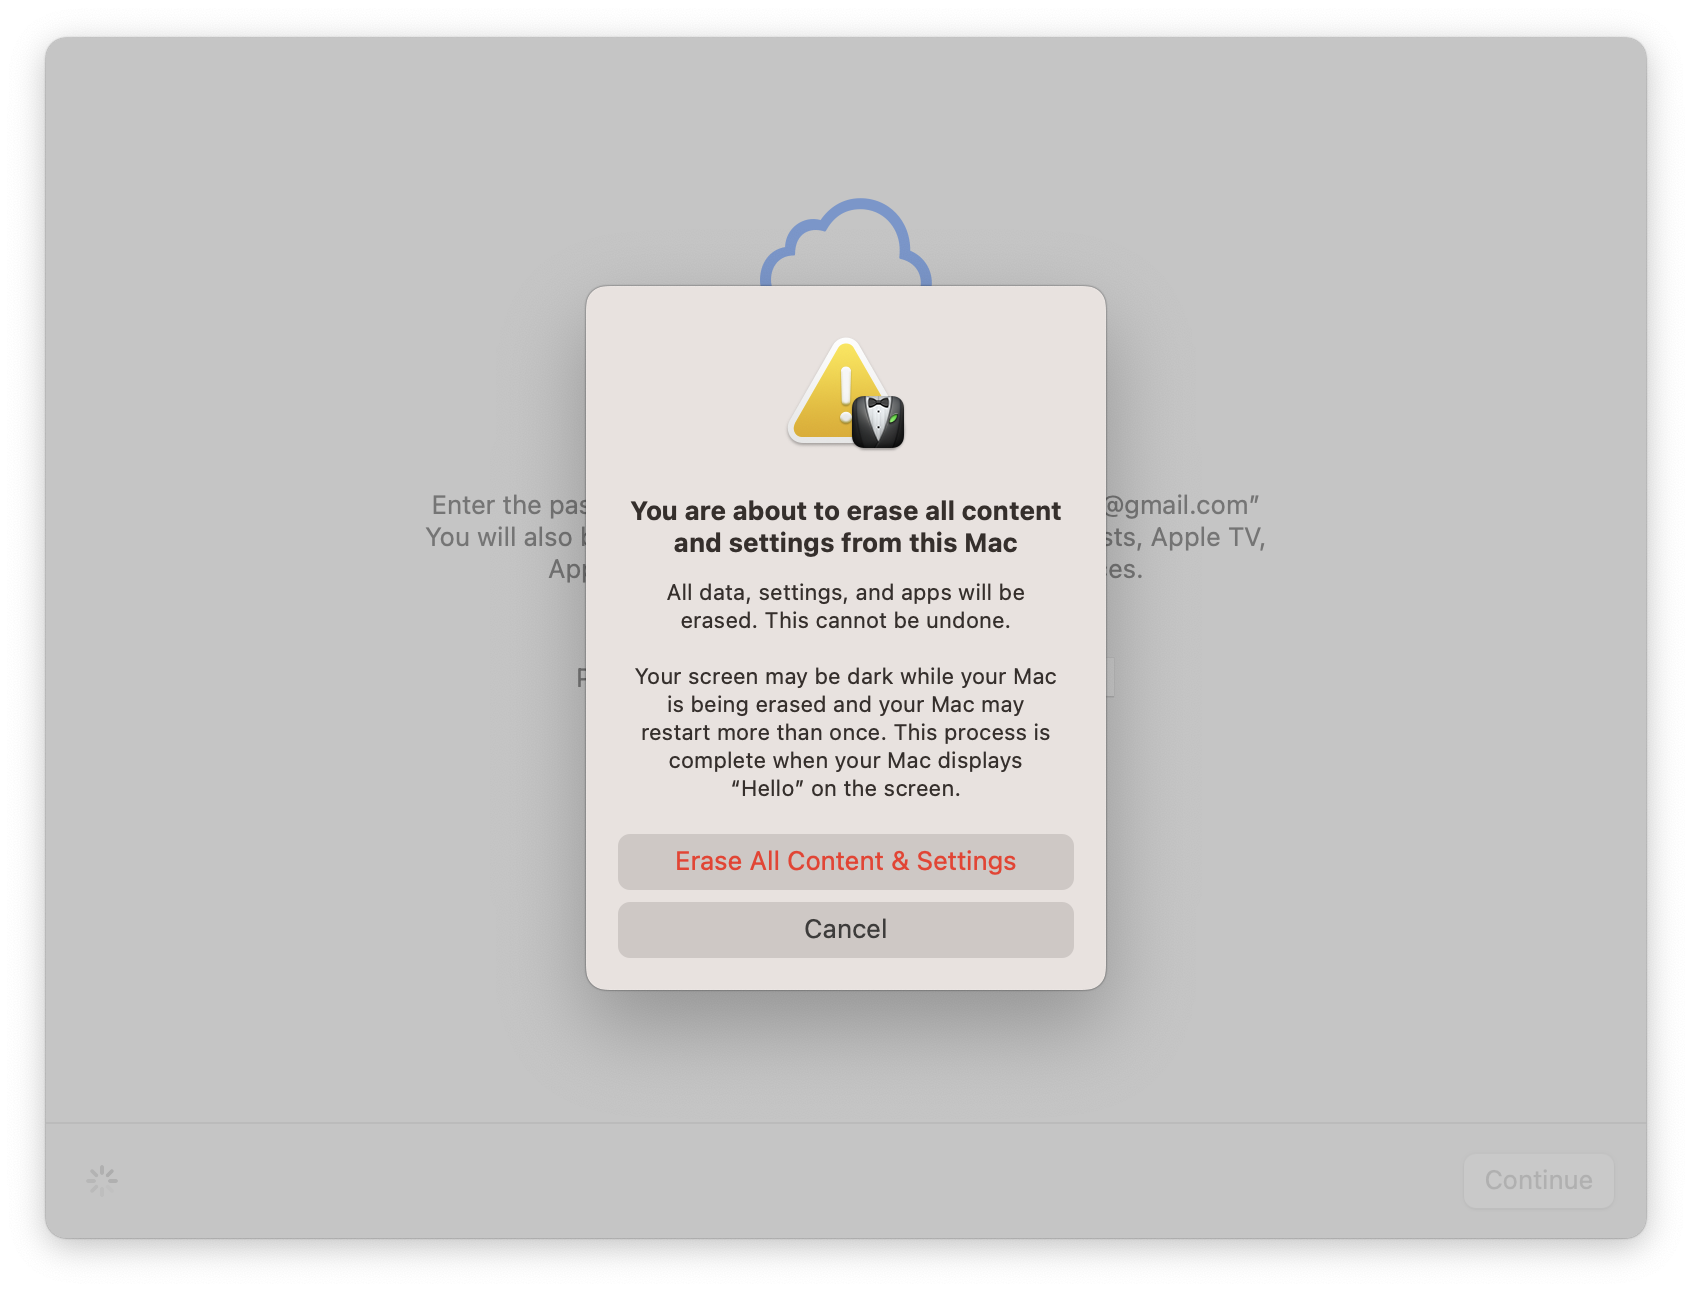
7. Click "Erase All Content & Settings" to start the erasure process. This is irreversible, so be sure you're ready.
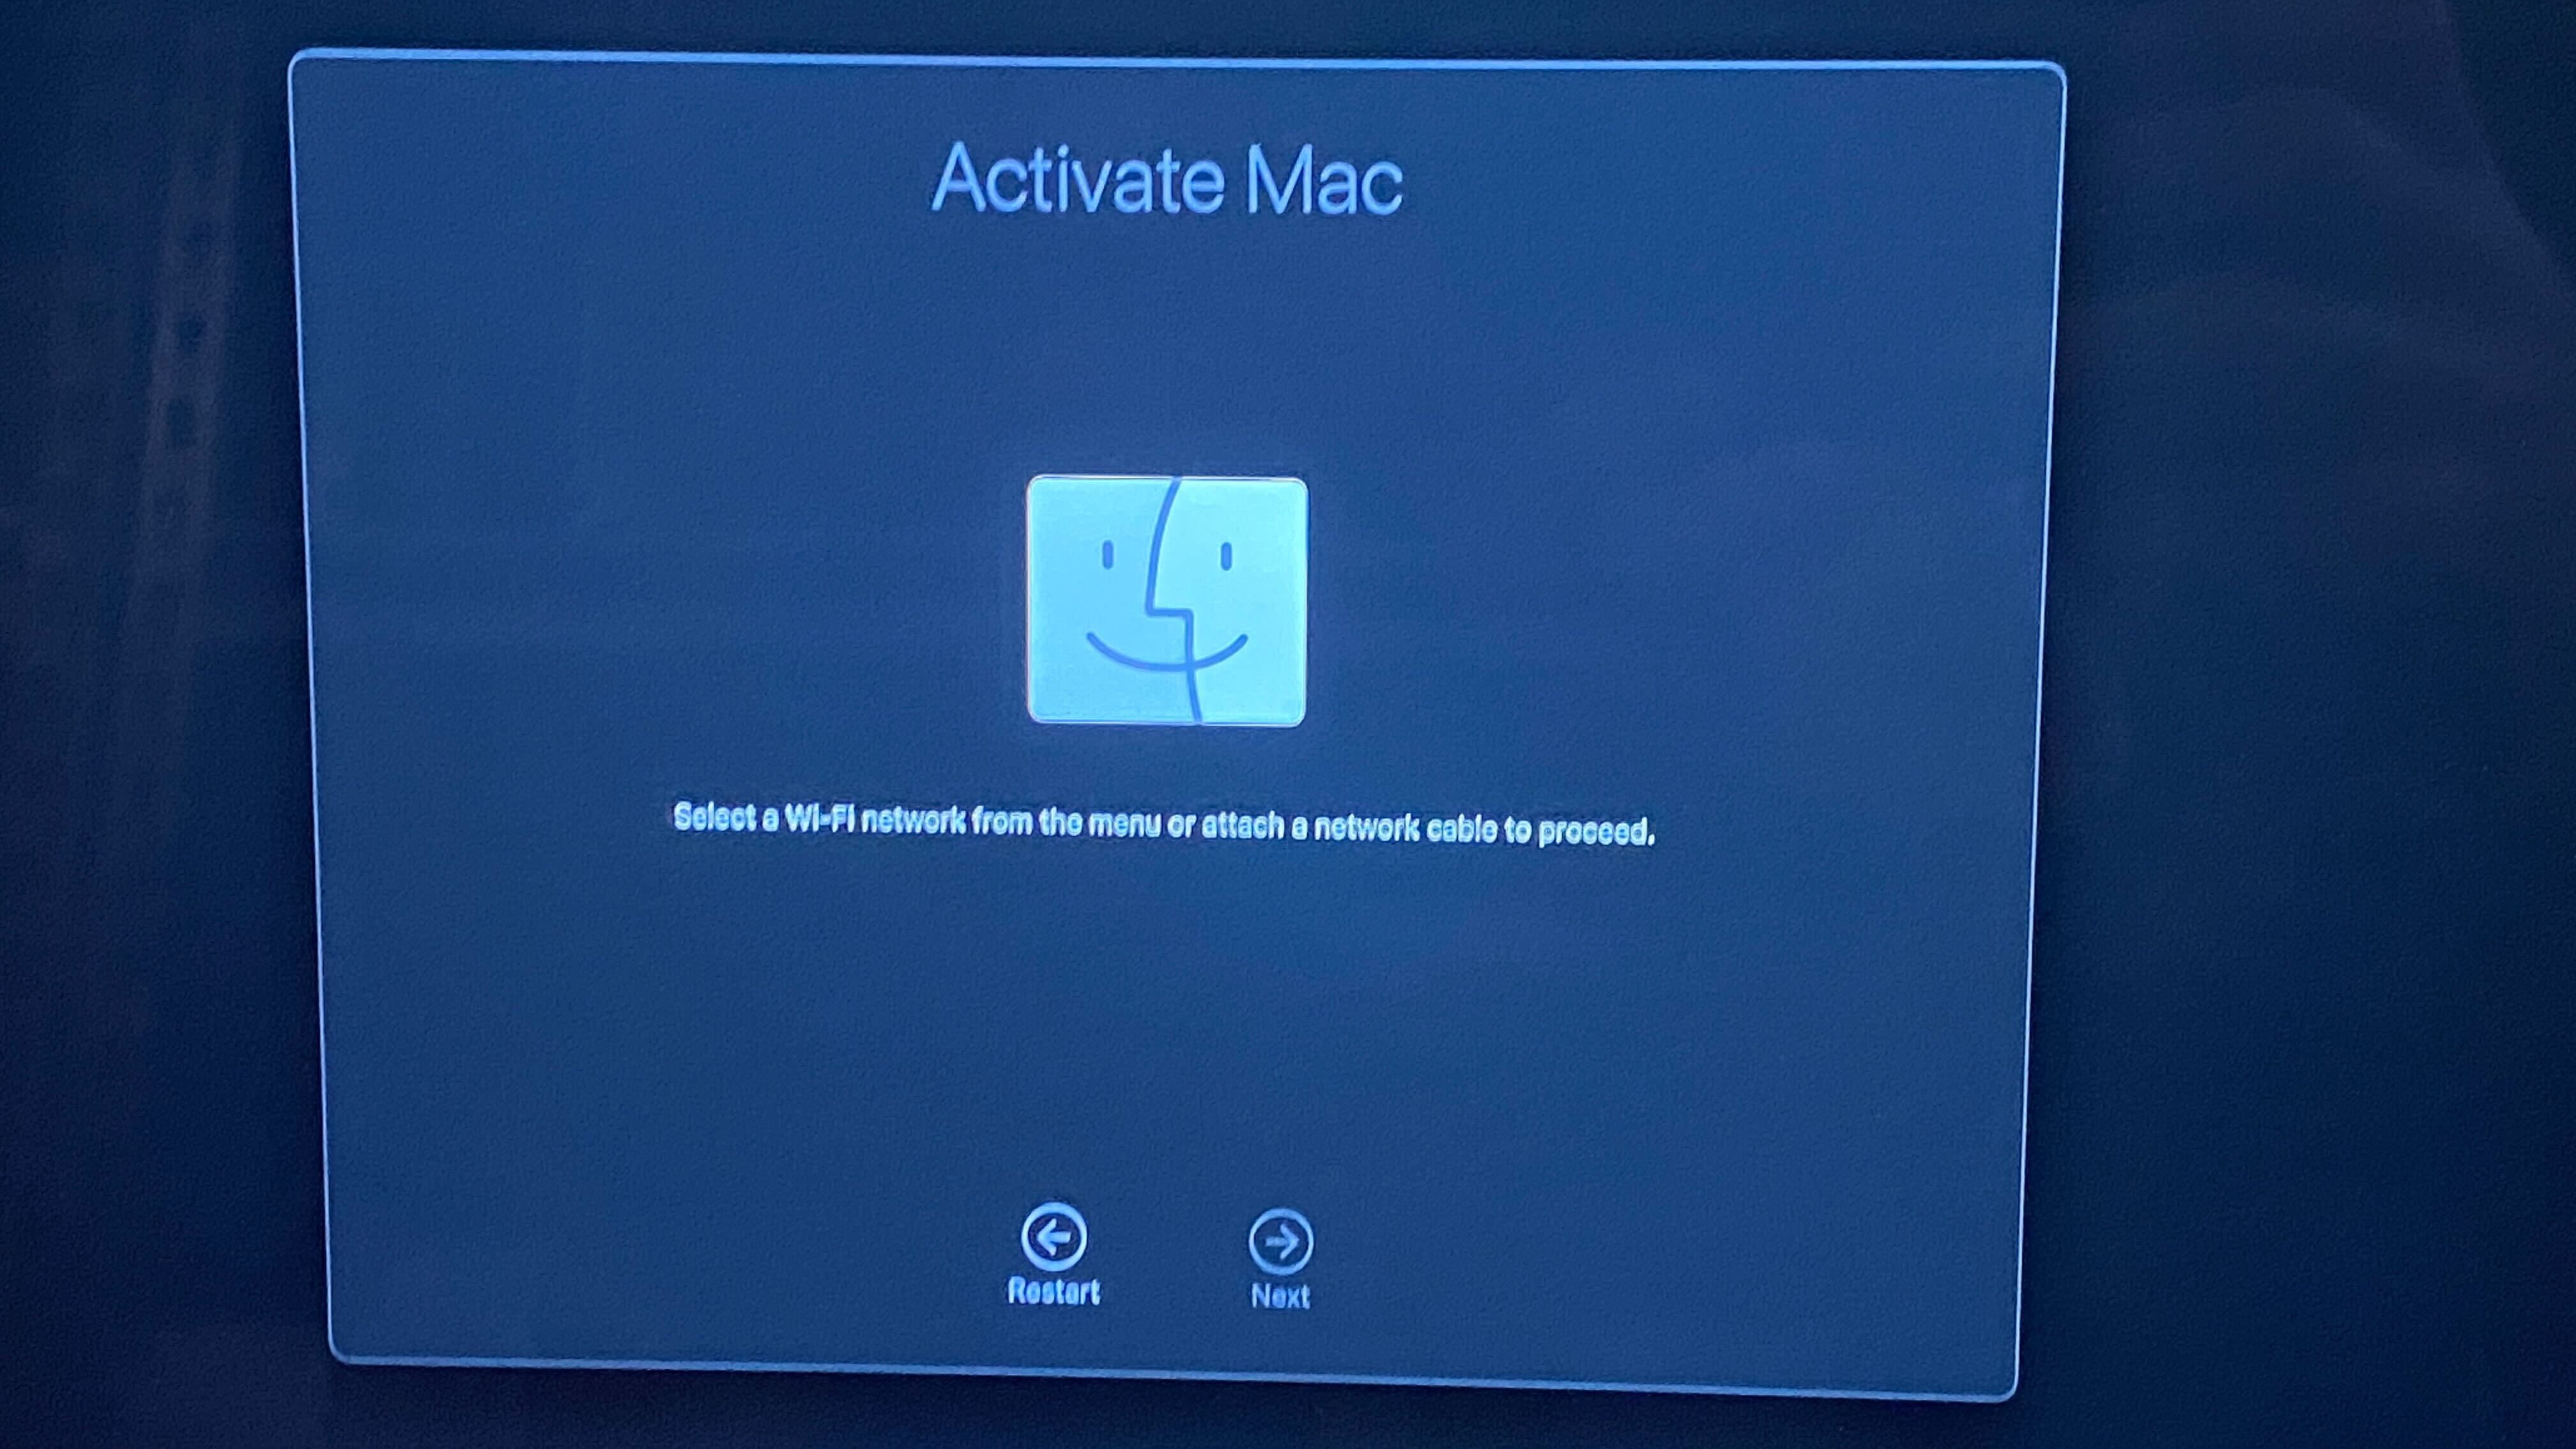
Your Mac will restart, and you'll see the Apple logo with a progress bar. It may restart including making the startup chime. Your Mac will boot up in the recovery assistant.
8. Connect to a Wi-Fi network using the Wi-Fi icon in the top right corner of the screen, then click "Next." If you have an Ethernet adapter, you can also connect to the internet that way.
When this is done, your Mac will activate and restart.
At this point, you'll be able to set up your MacBook like new, as if you were turning it on for the first time. If you're ready to hand it down, sell it, or trade it in, you can just turn it off.
For most people, this will be enough. But if your Mac doesn't have the Erase All Content and Settings Option (particularly if it's not on macOS Monterey or newer, or is an older Intel Mac), you may have to resort to the nuclear option.
Erase Your MacBook, Reinstall macOS
To reset a MacBook without the "Erase All Content and Settings" option, you'll have to take more drastic steps. Since most Apple Silicon Macs can upgrade to Ventura or later, this is primarily for older Intel Macs without either Apple's processors or T2 security chips.
To erase your MacBook this way, you'll need to go into macOS Recovery and proceed from there. Here's how:
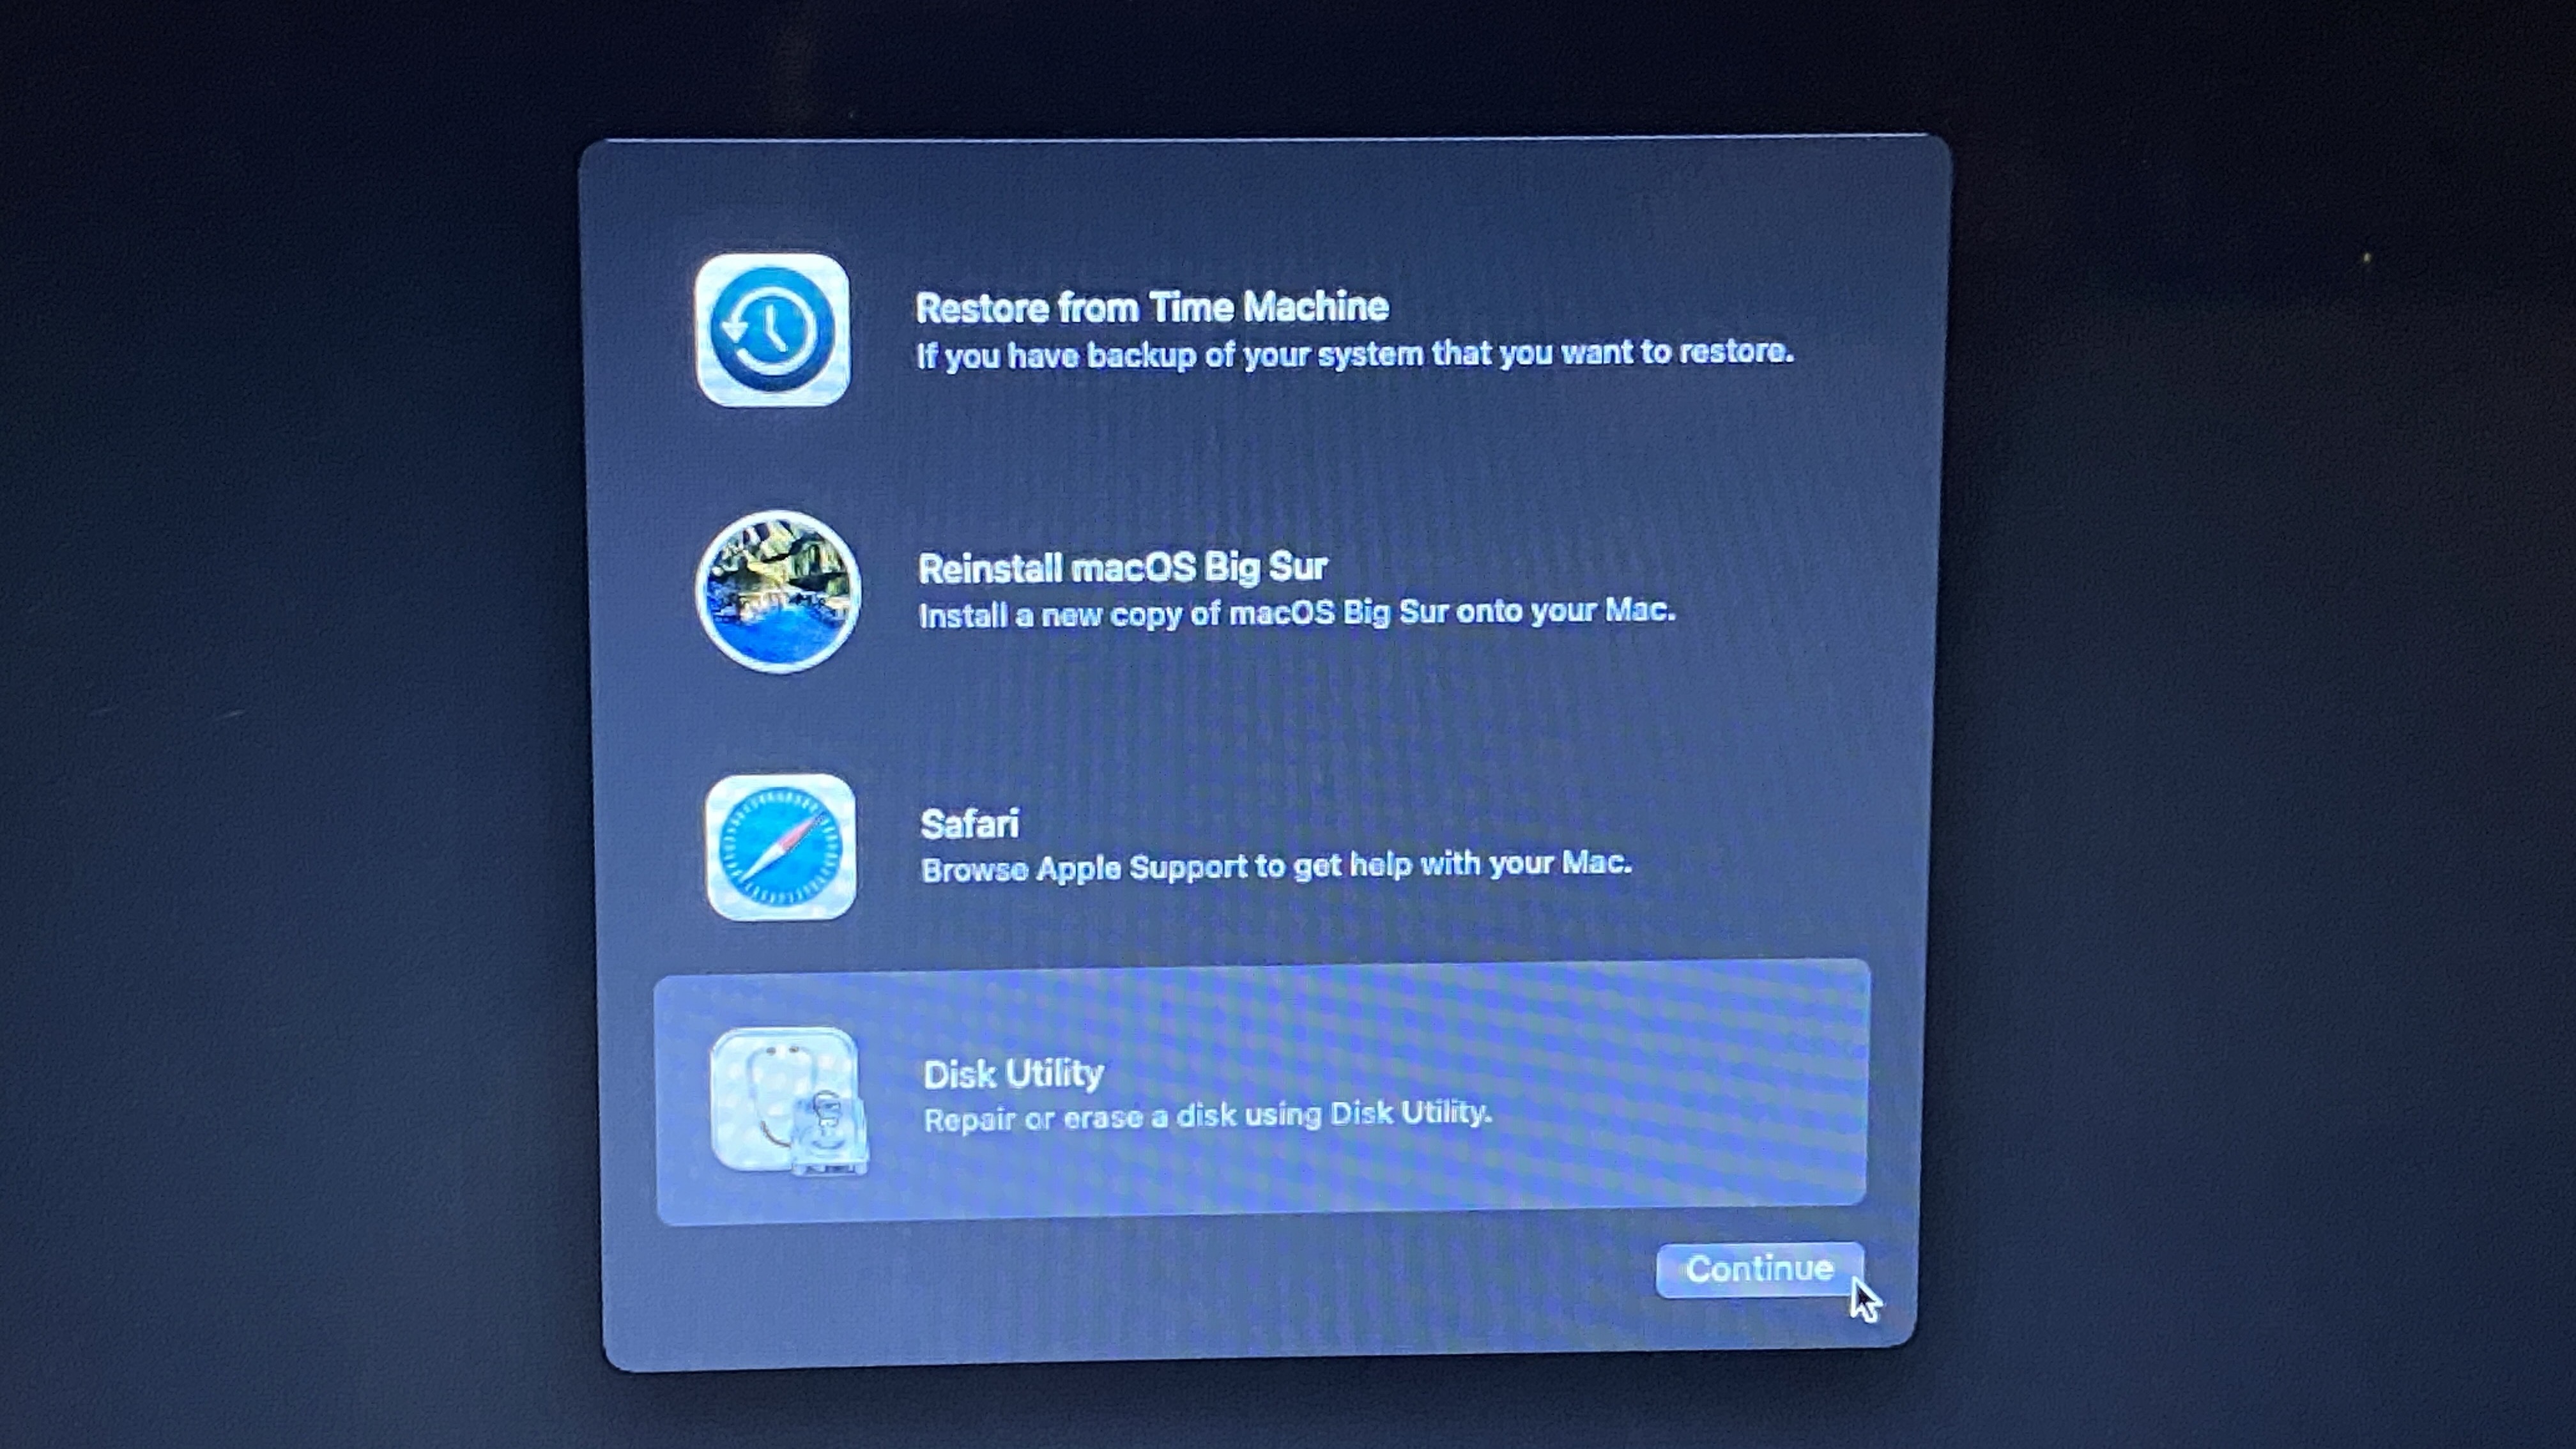
1. Turn on your Mac, and hold Command ⌘ and R until the Apple logo pops up. You may see a progress bar. If you do, it should pass quickly. (If you happen to be doing this on an Apple Silicon machine, instead hold the power button and choose "options" from the menu screen.)
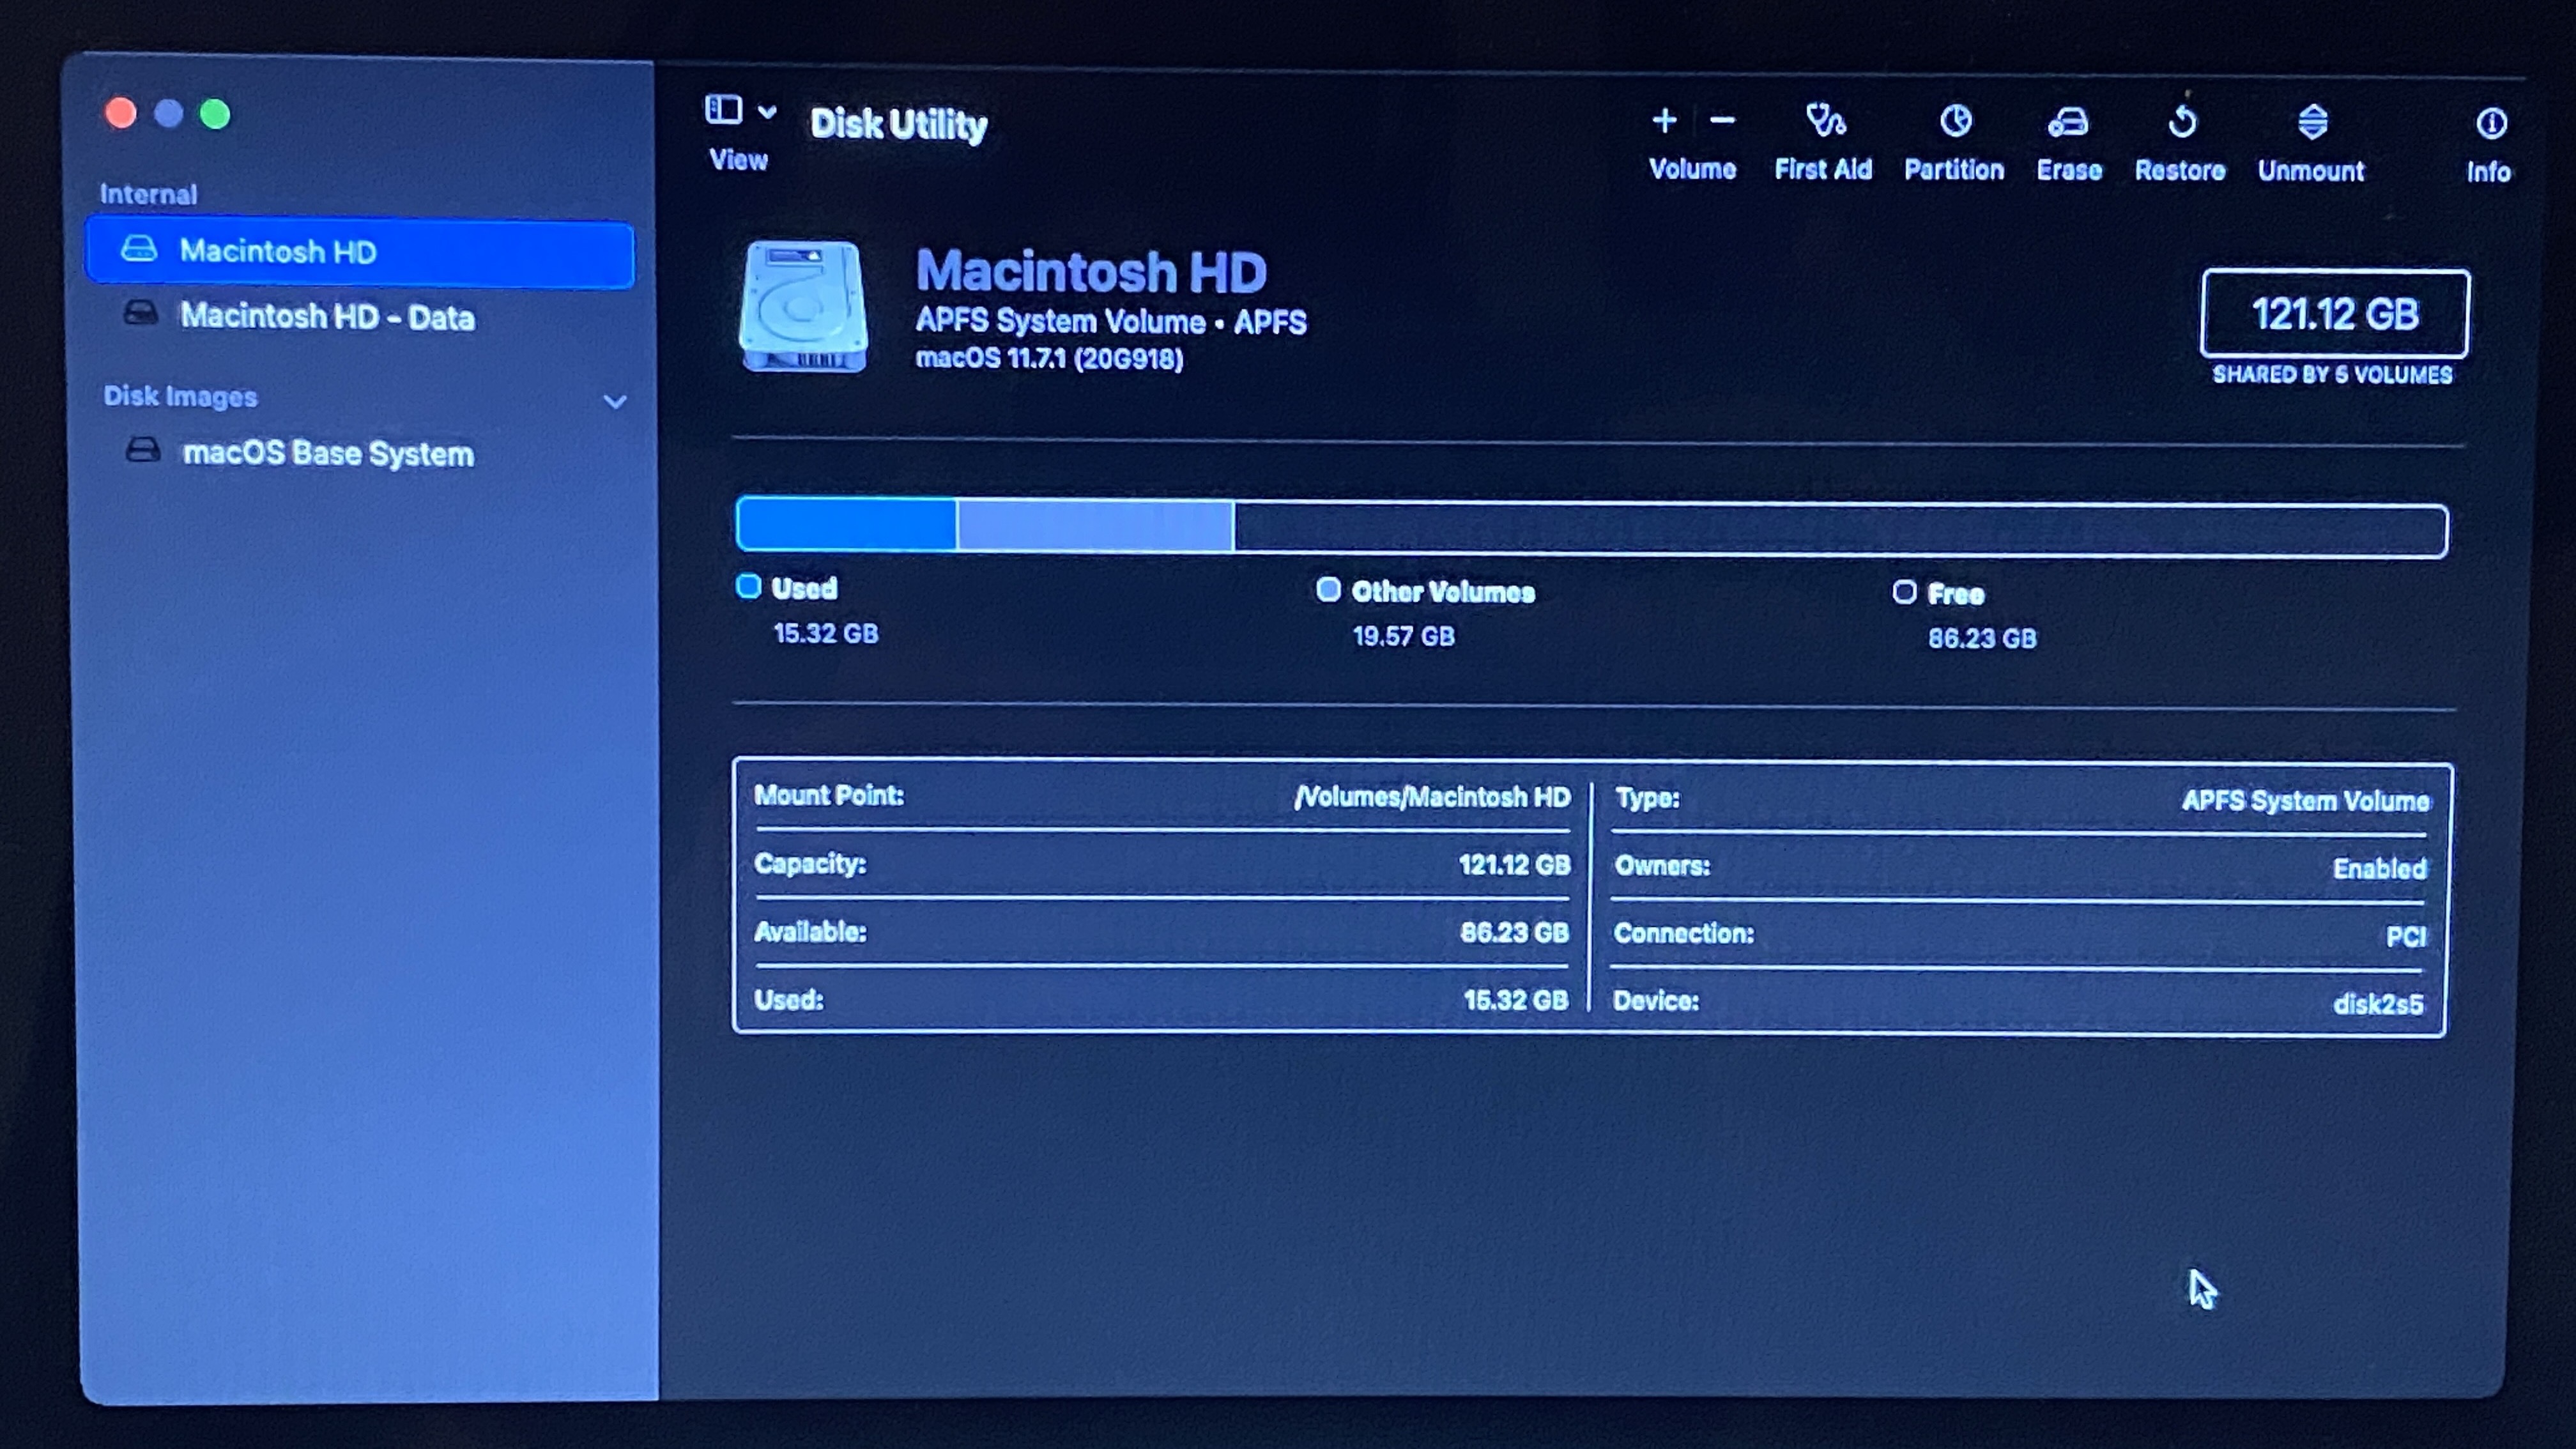
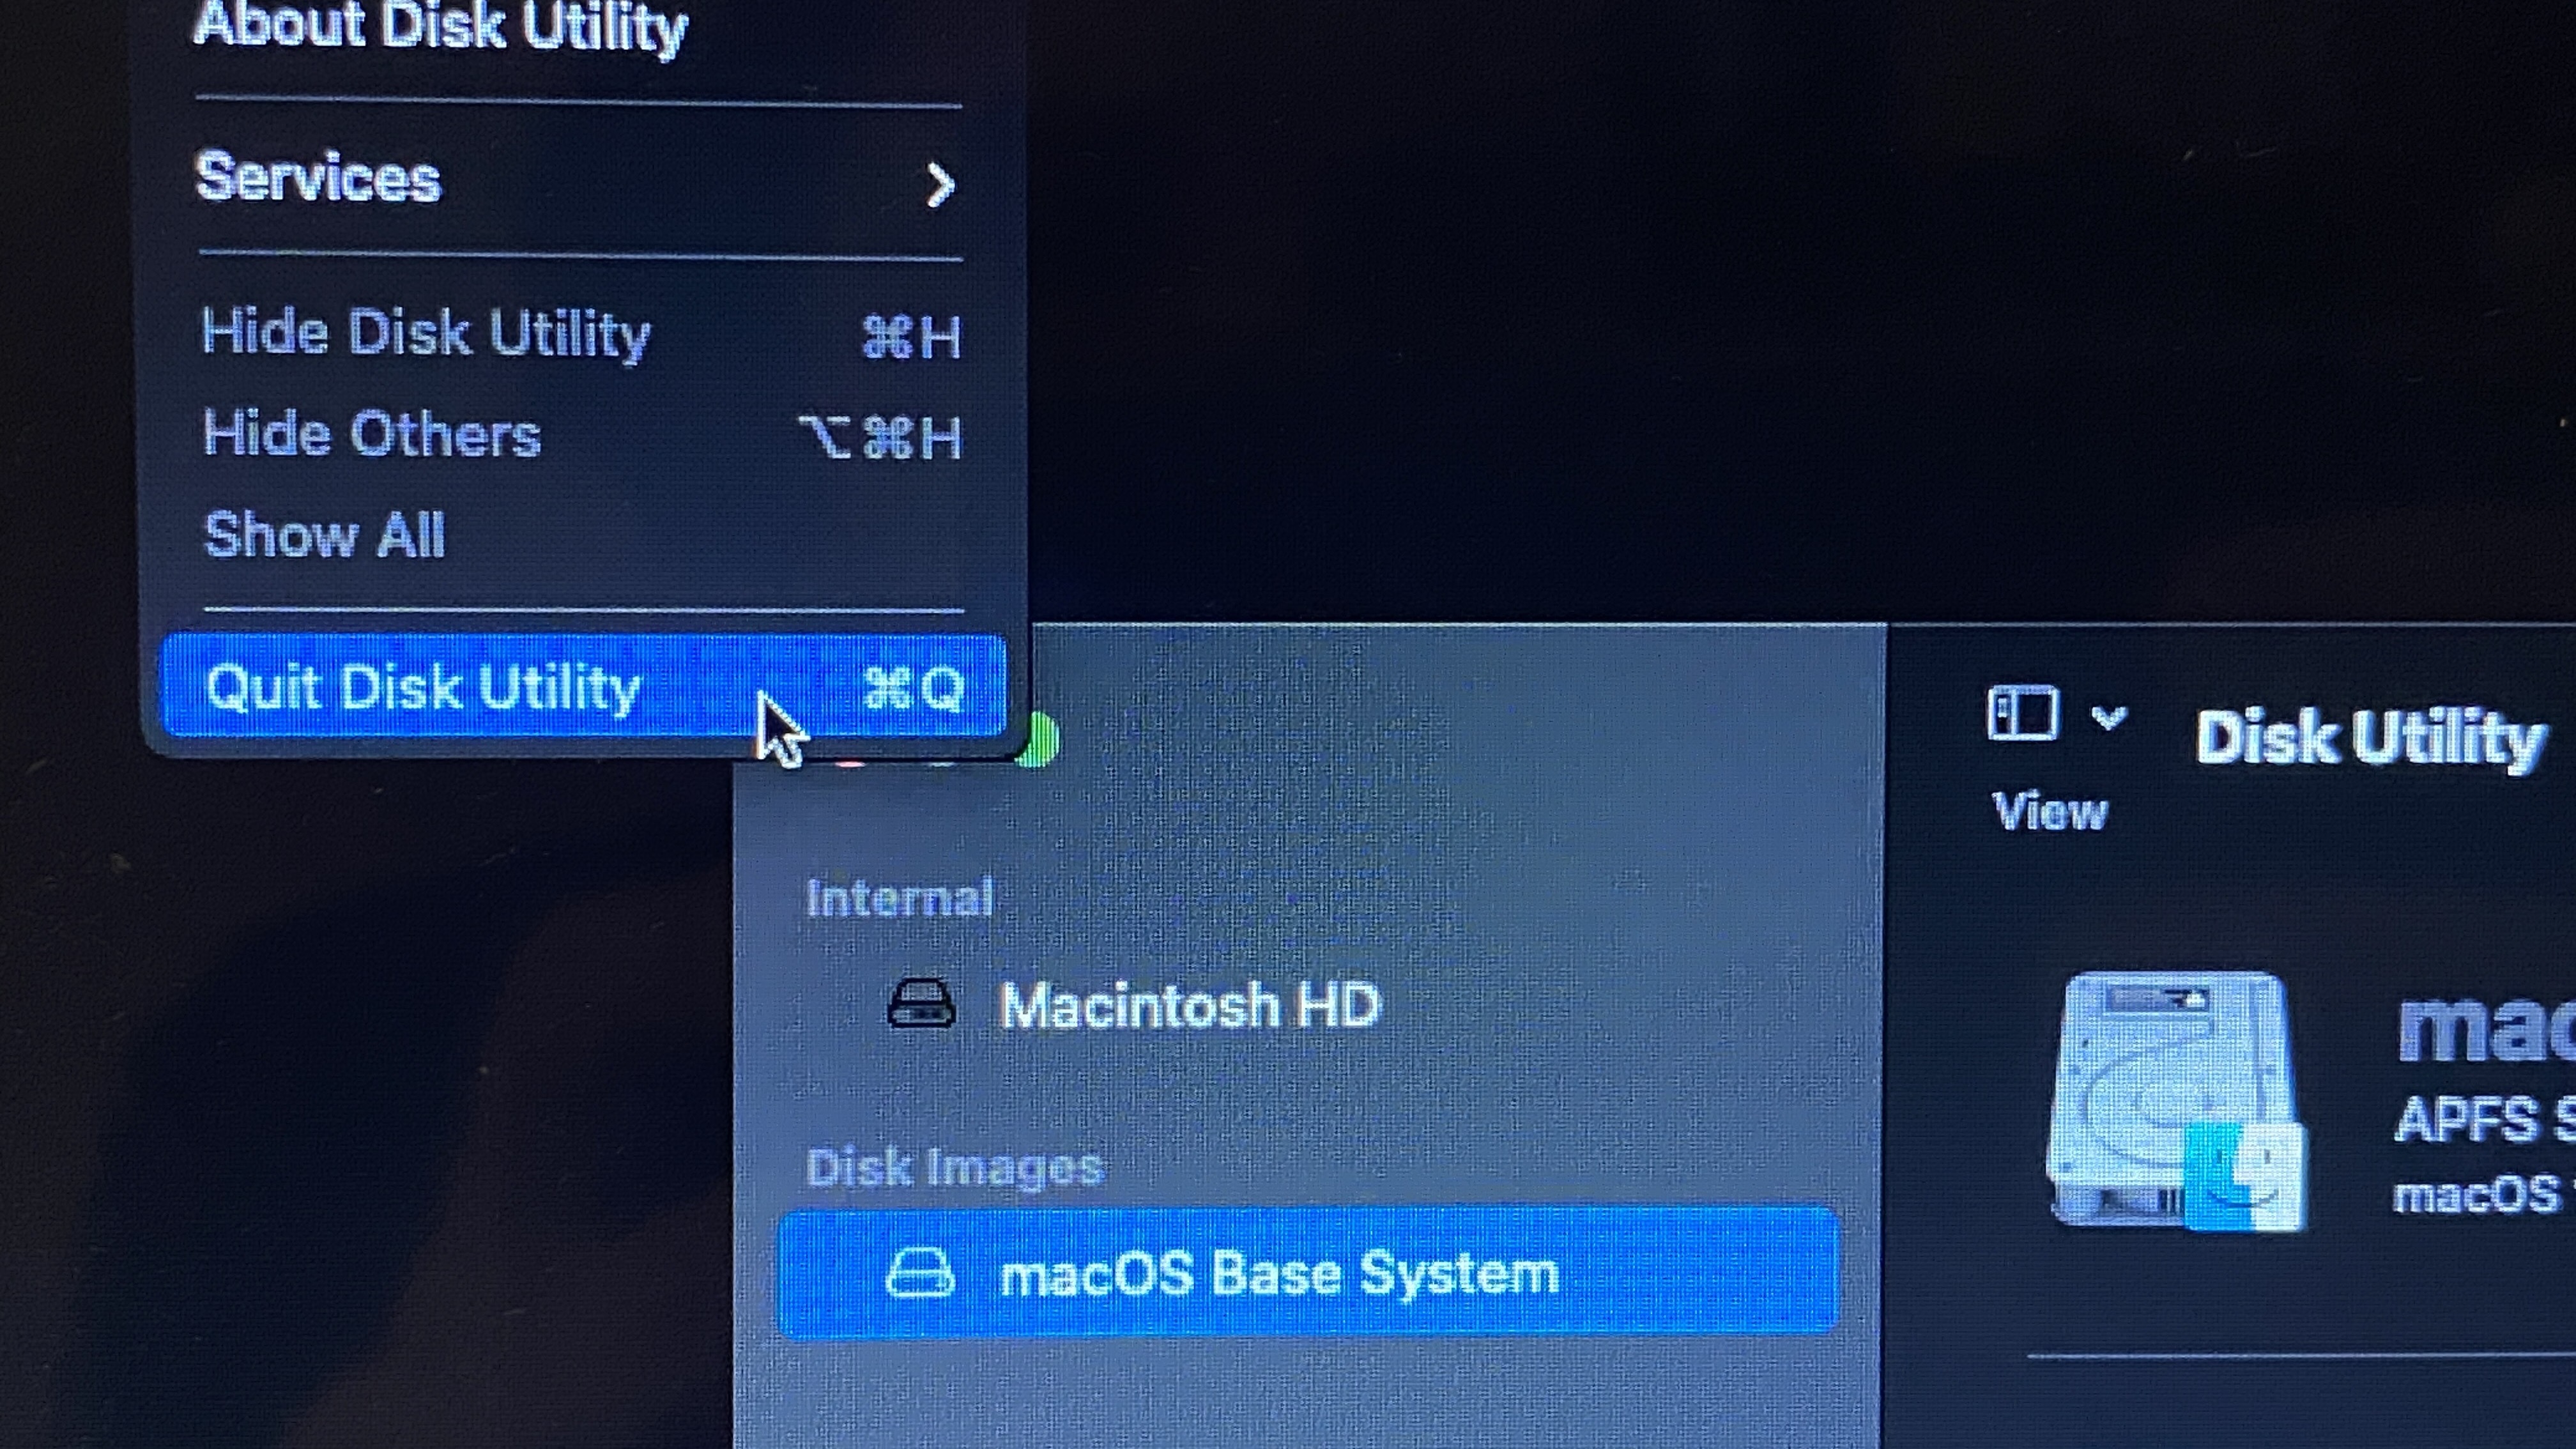
2. Choose "Disk Utility" and click "Continue."
3. In the sidebar, select "Macintosh HD" (unless you've previously changed its name, in which case it will reflect that name).
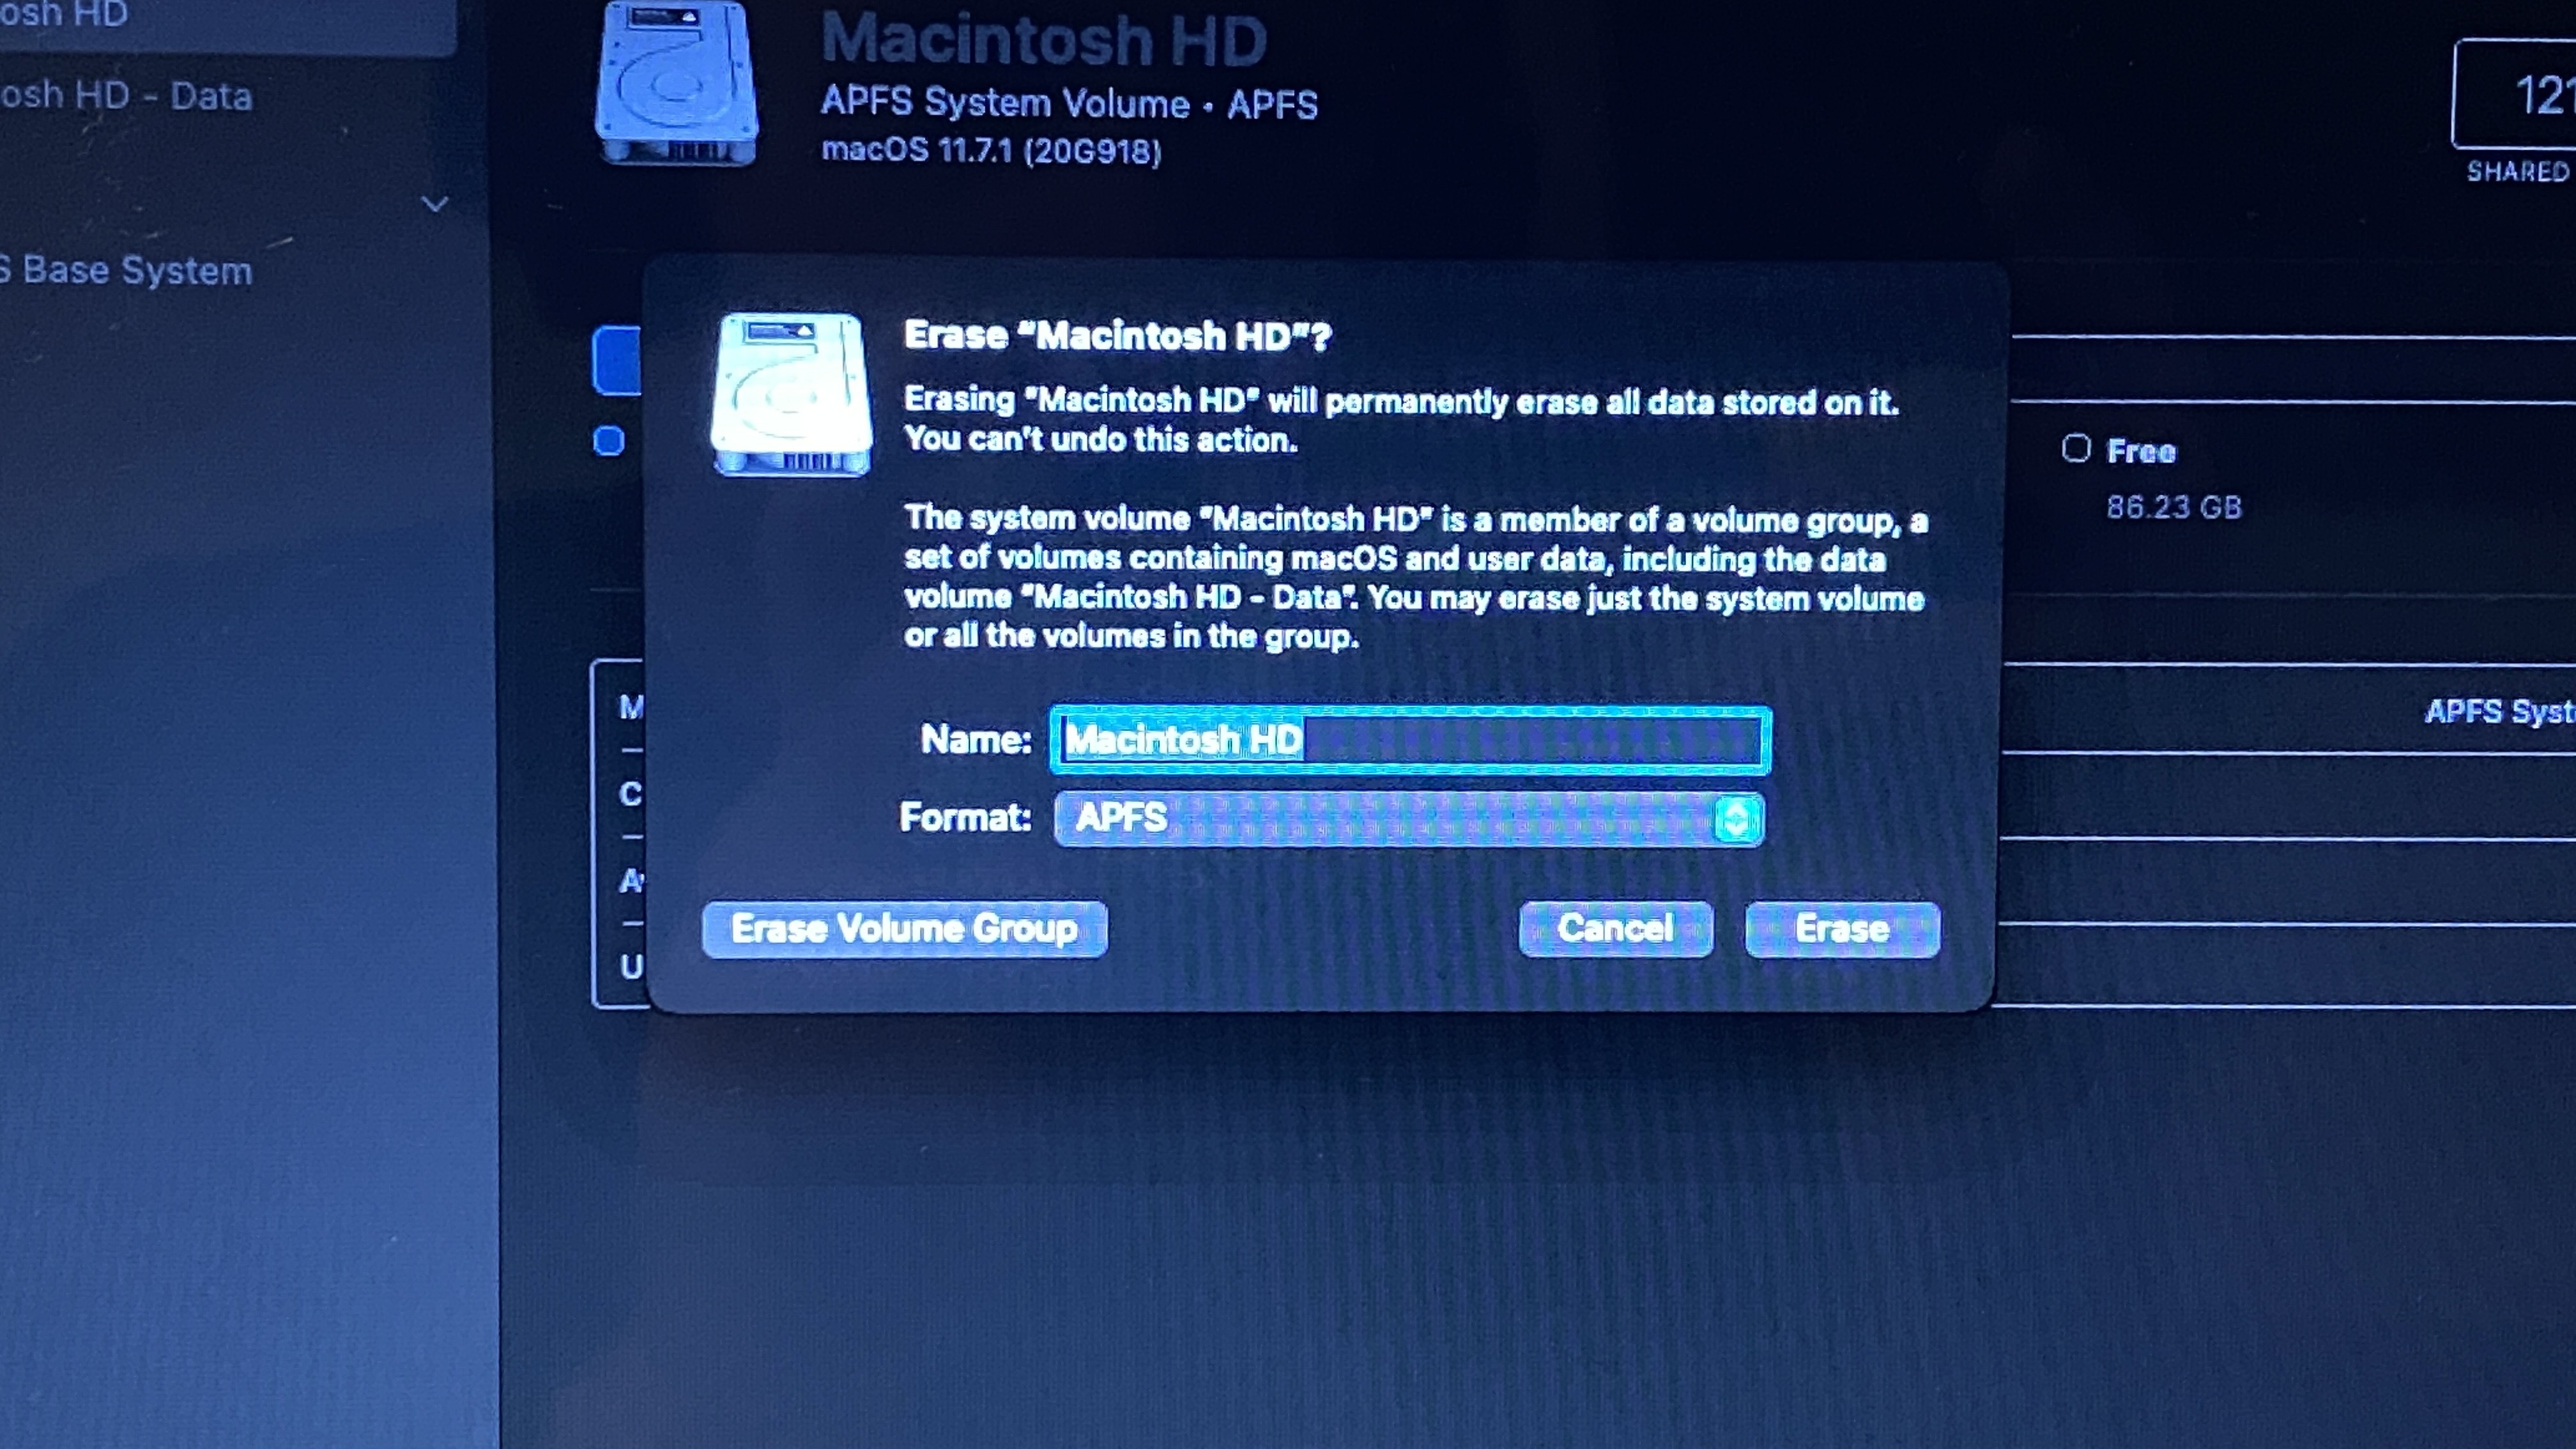
4. Click "Erase" on the top of the window.
5. Name the volume "Macintosh HD" and choose the format "APFS" or "mac OS Extended (Journaled) — whichever the Disk Utility suggests.
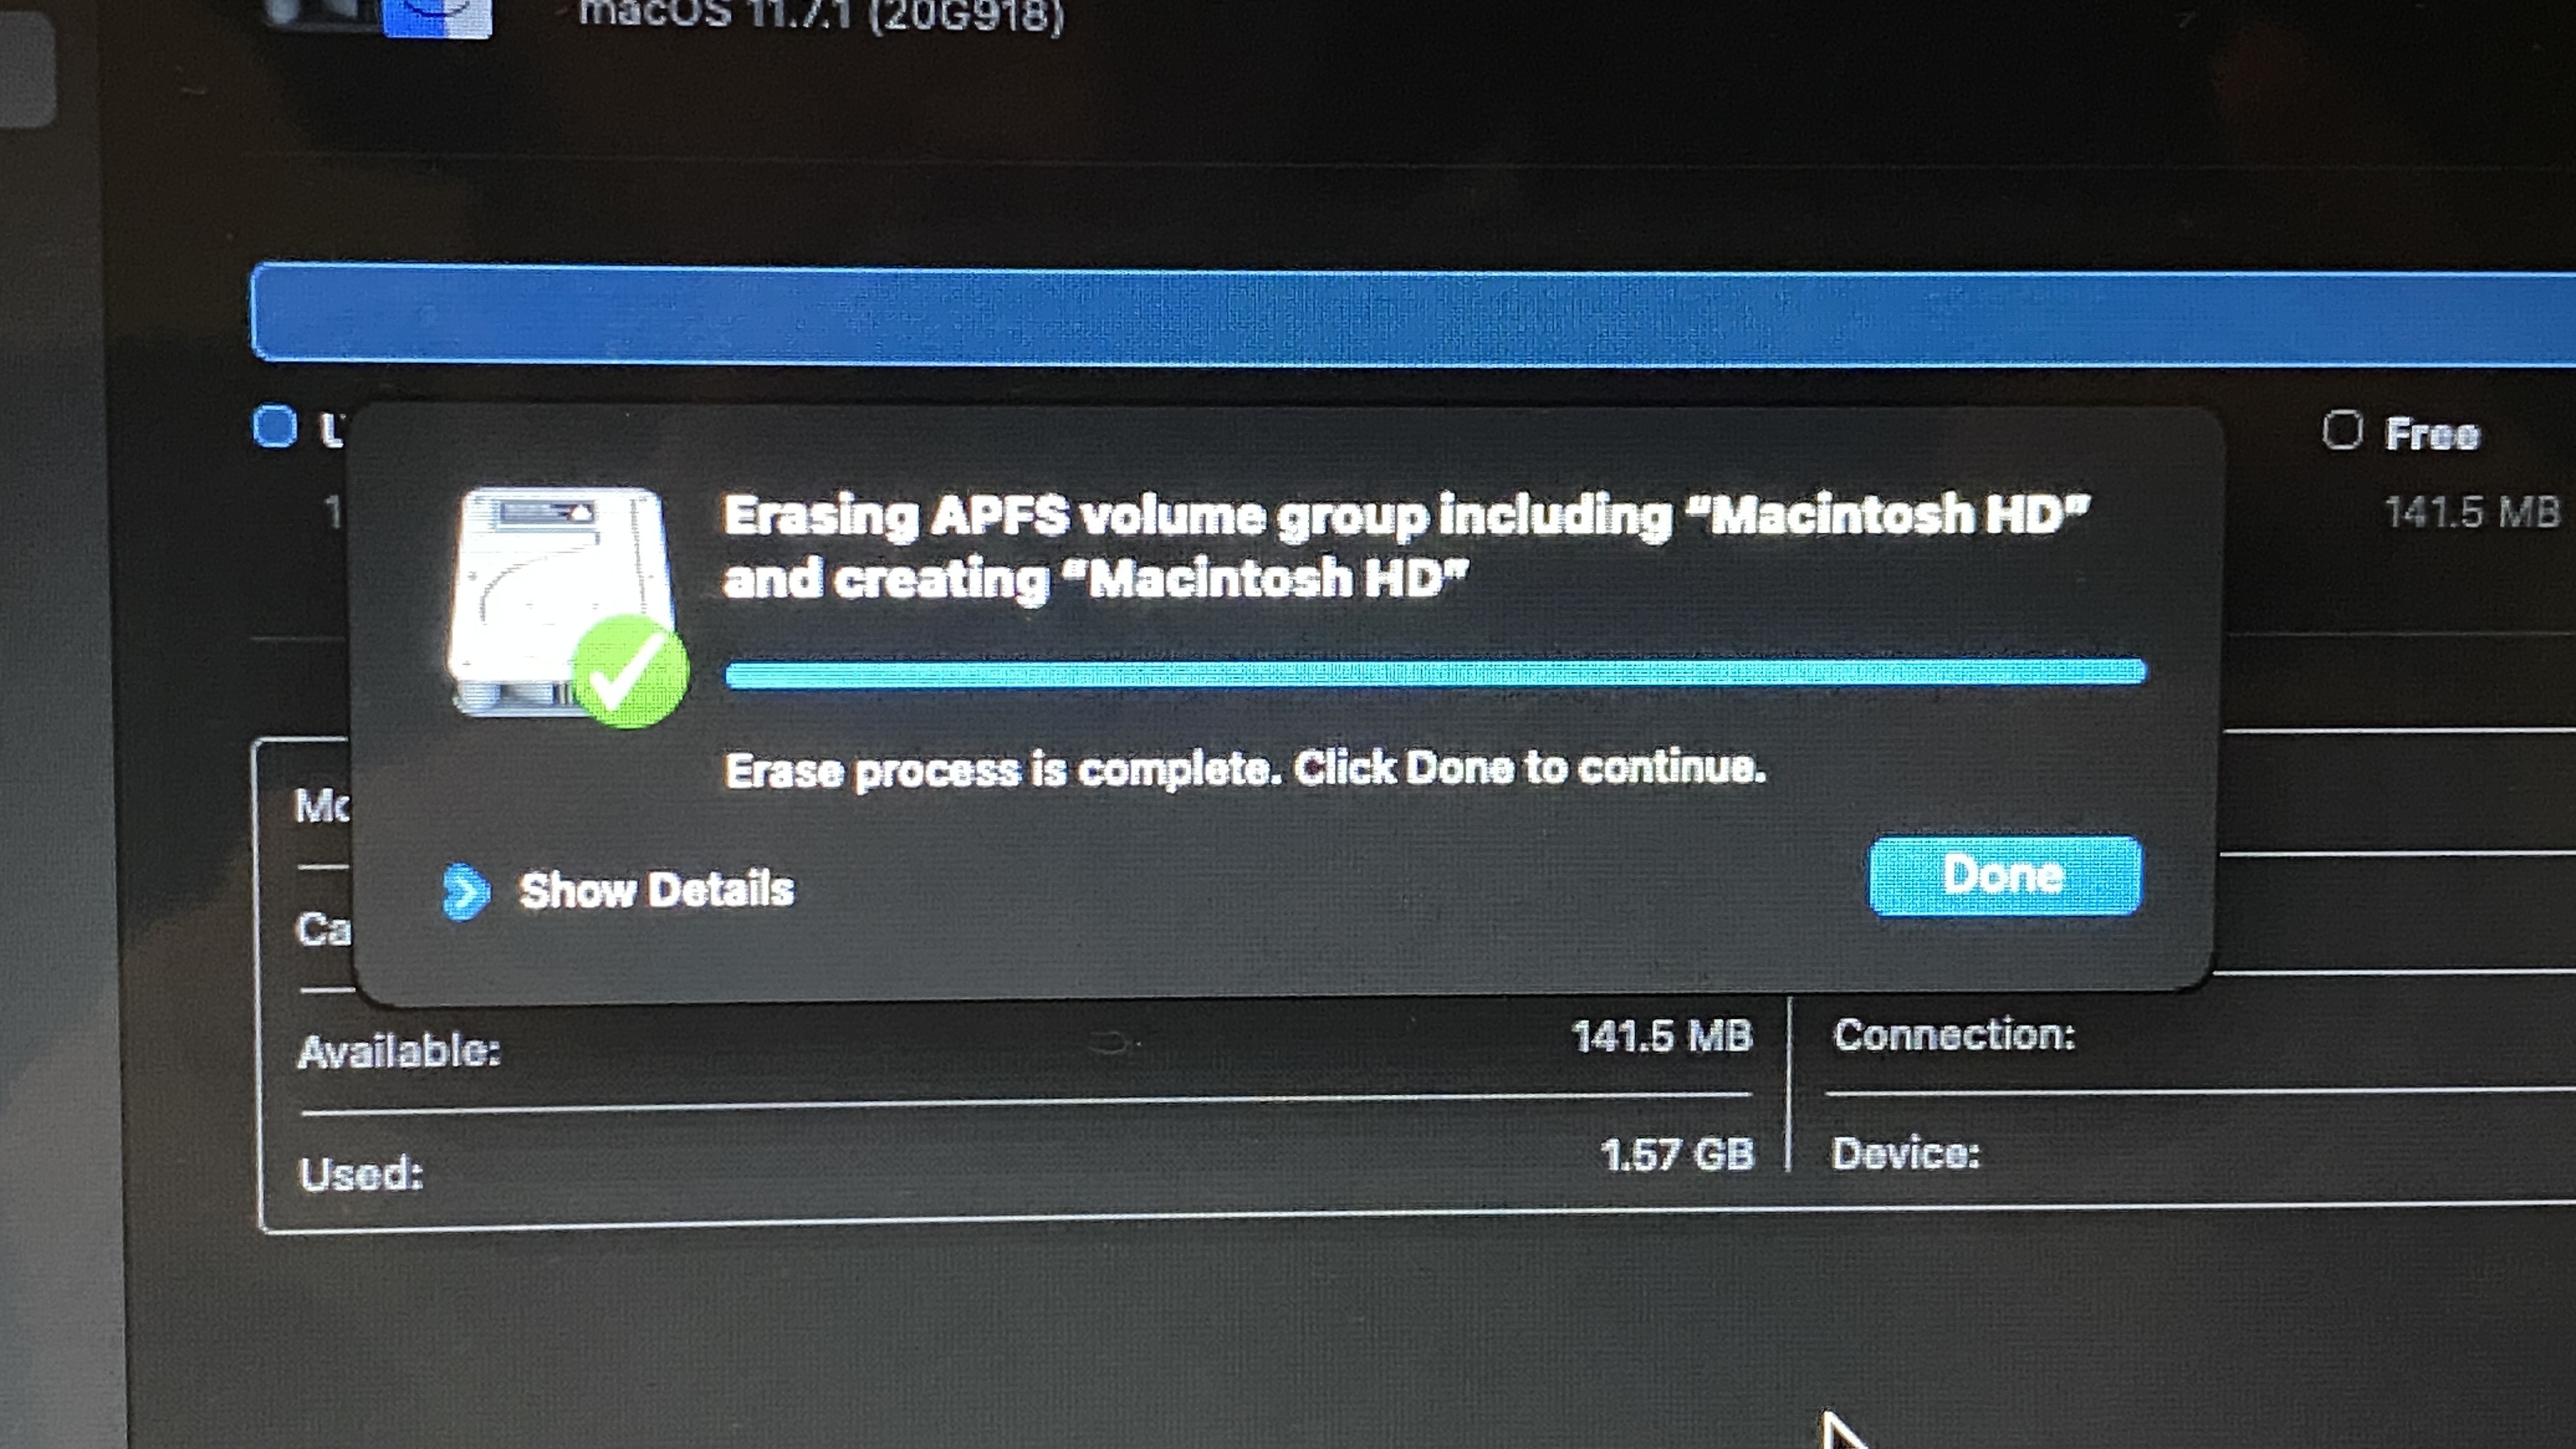
6. Click "Erase Volume Group" (or "Erase" if that is not shown). When the process is done, click "Done."
7. Enter your Apple ID if prompted to do so.
8. Quit Disk Utility, either through the top menu or by hitting Command ⌘ + Q.
Your MacBook is now erased. If you have other drives in your Mac that may need wiping, you can repeat this process.
You'll be back in macOS Recovery. Now, you need to reinstall macOS on your MacBook:
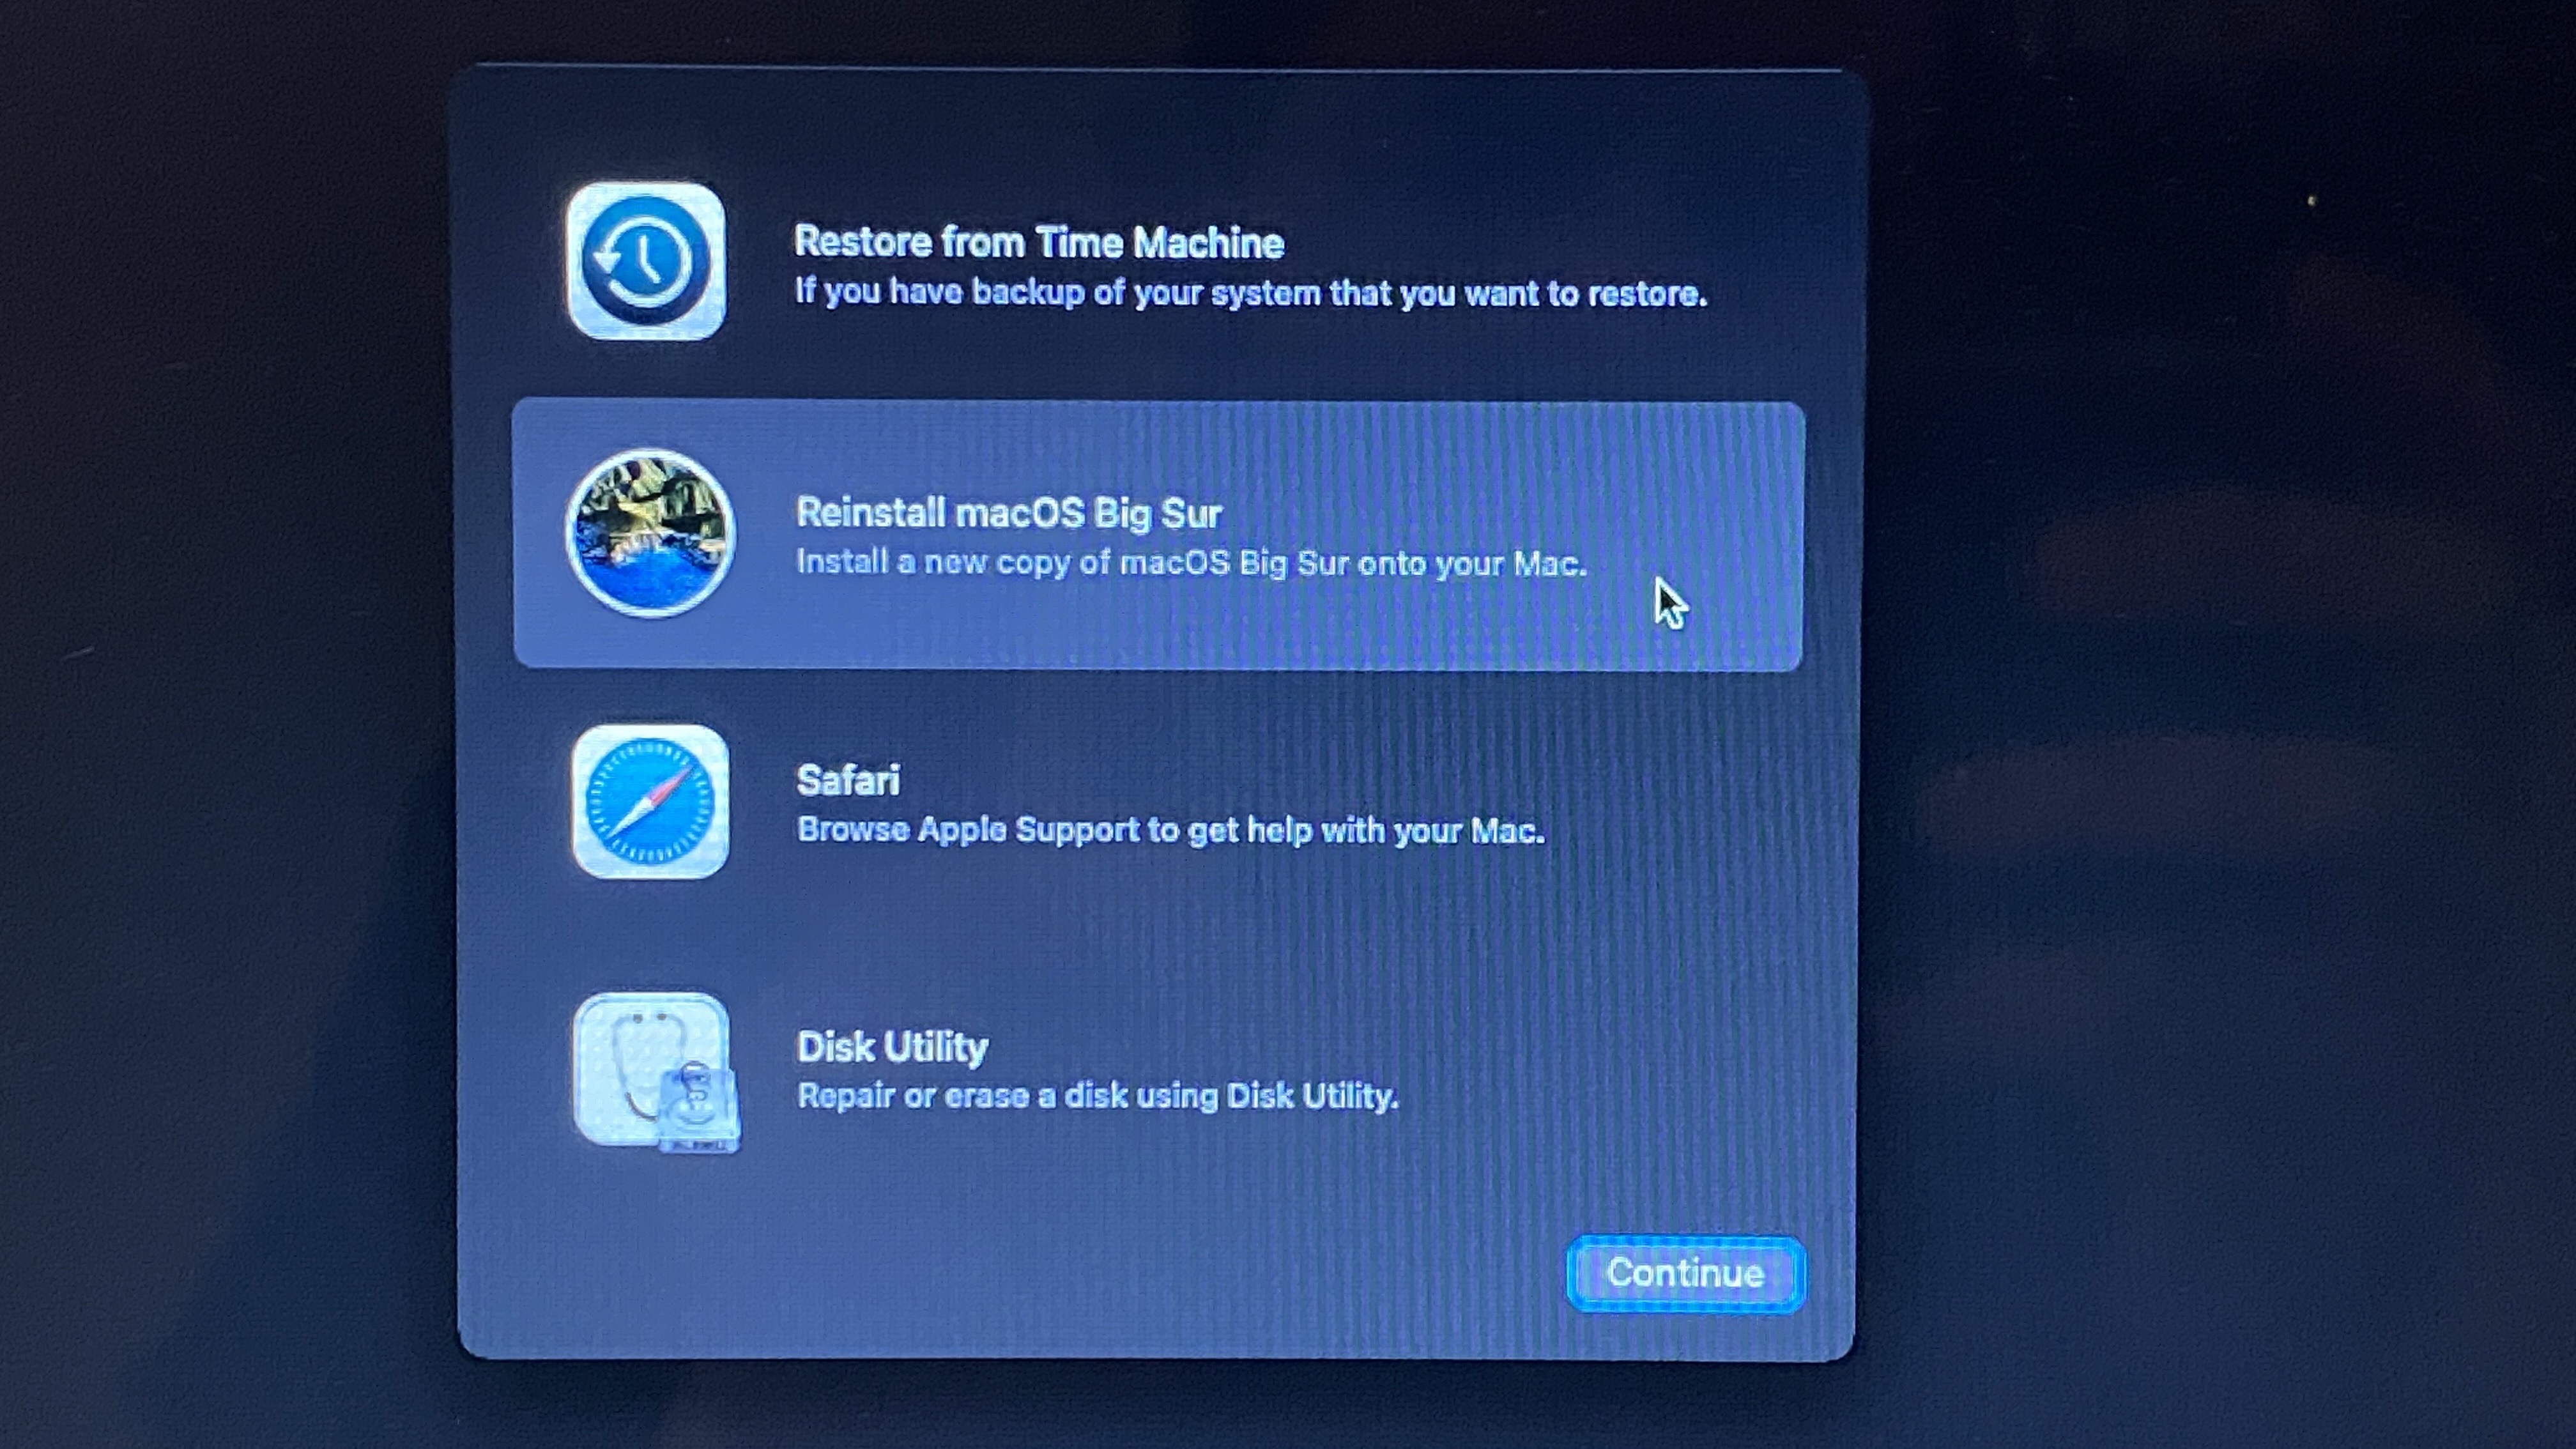
9. Click "Reinstall macOS" and then "Continue." Our image shows macOS Big Sur, but you may be using a different version.
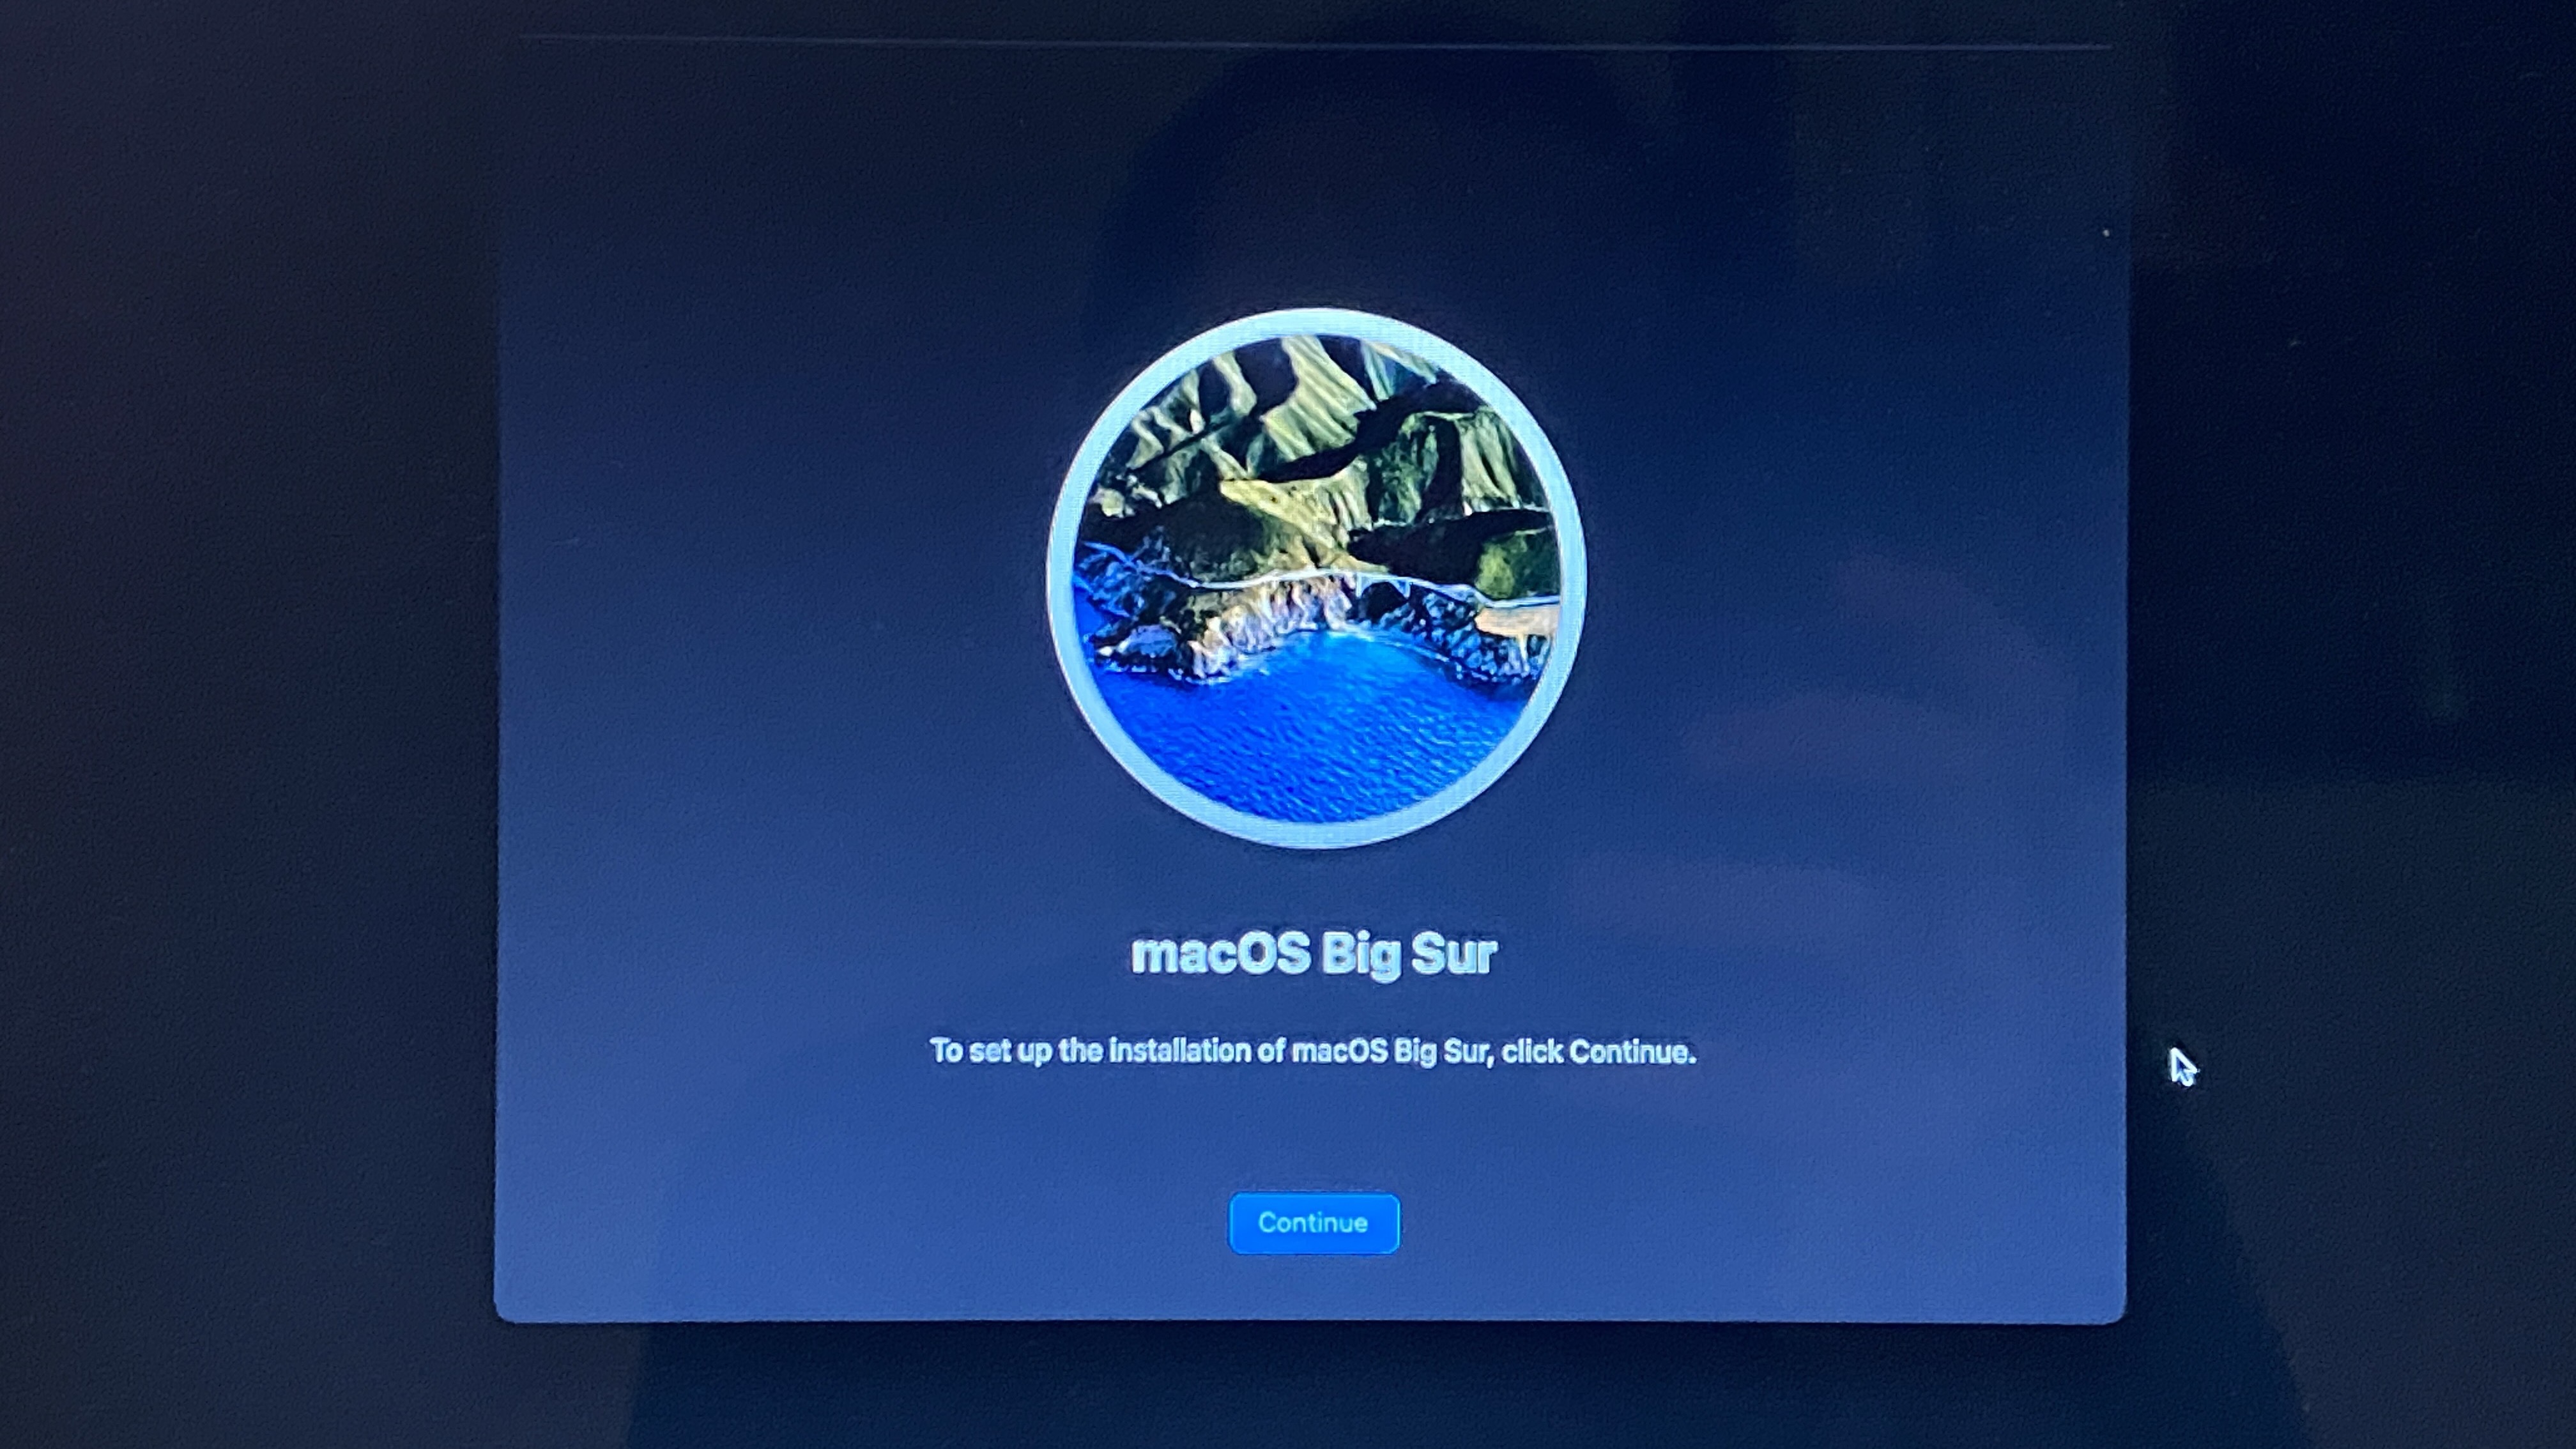
The installer for the version of macOS you were already using will pop up.
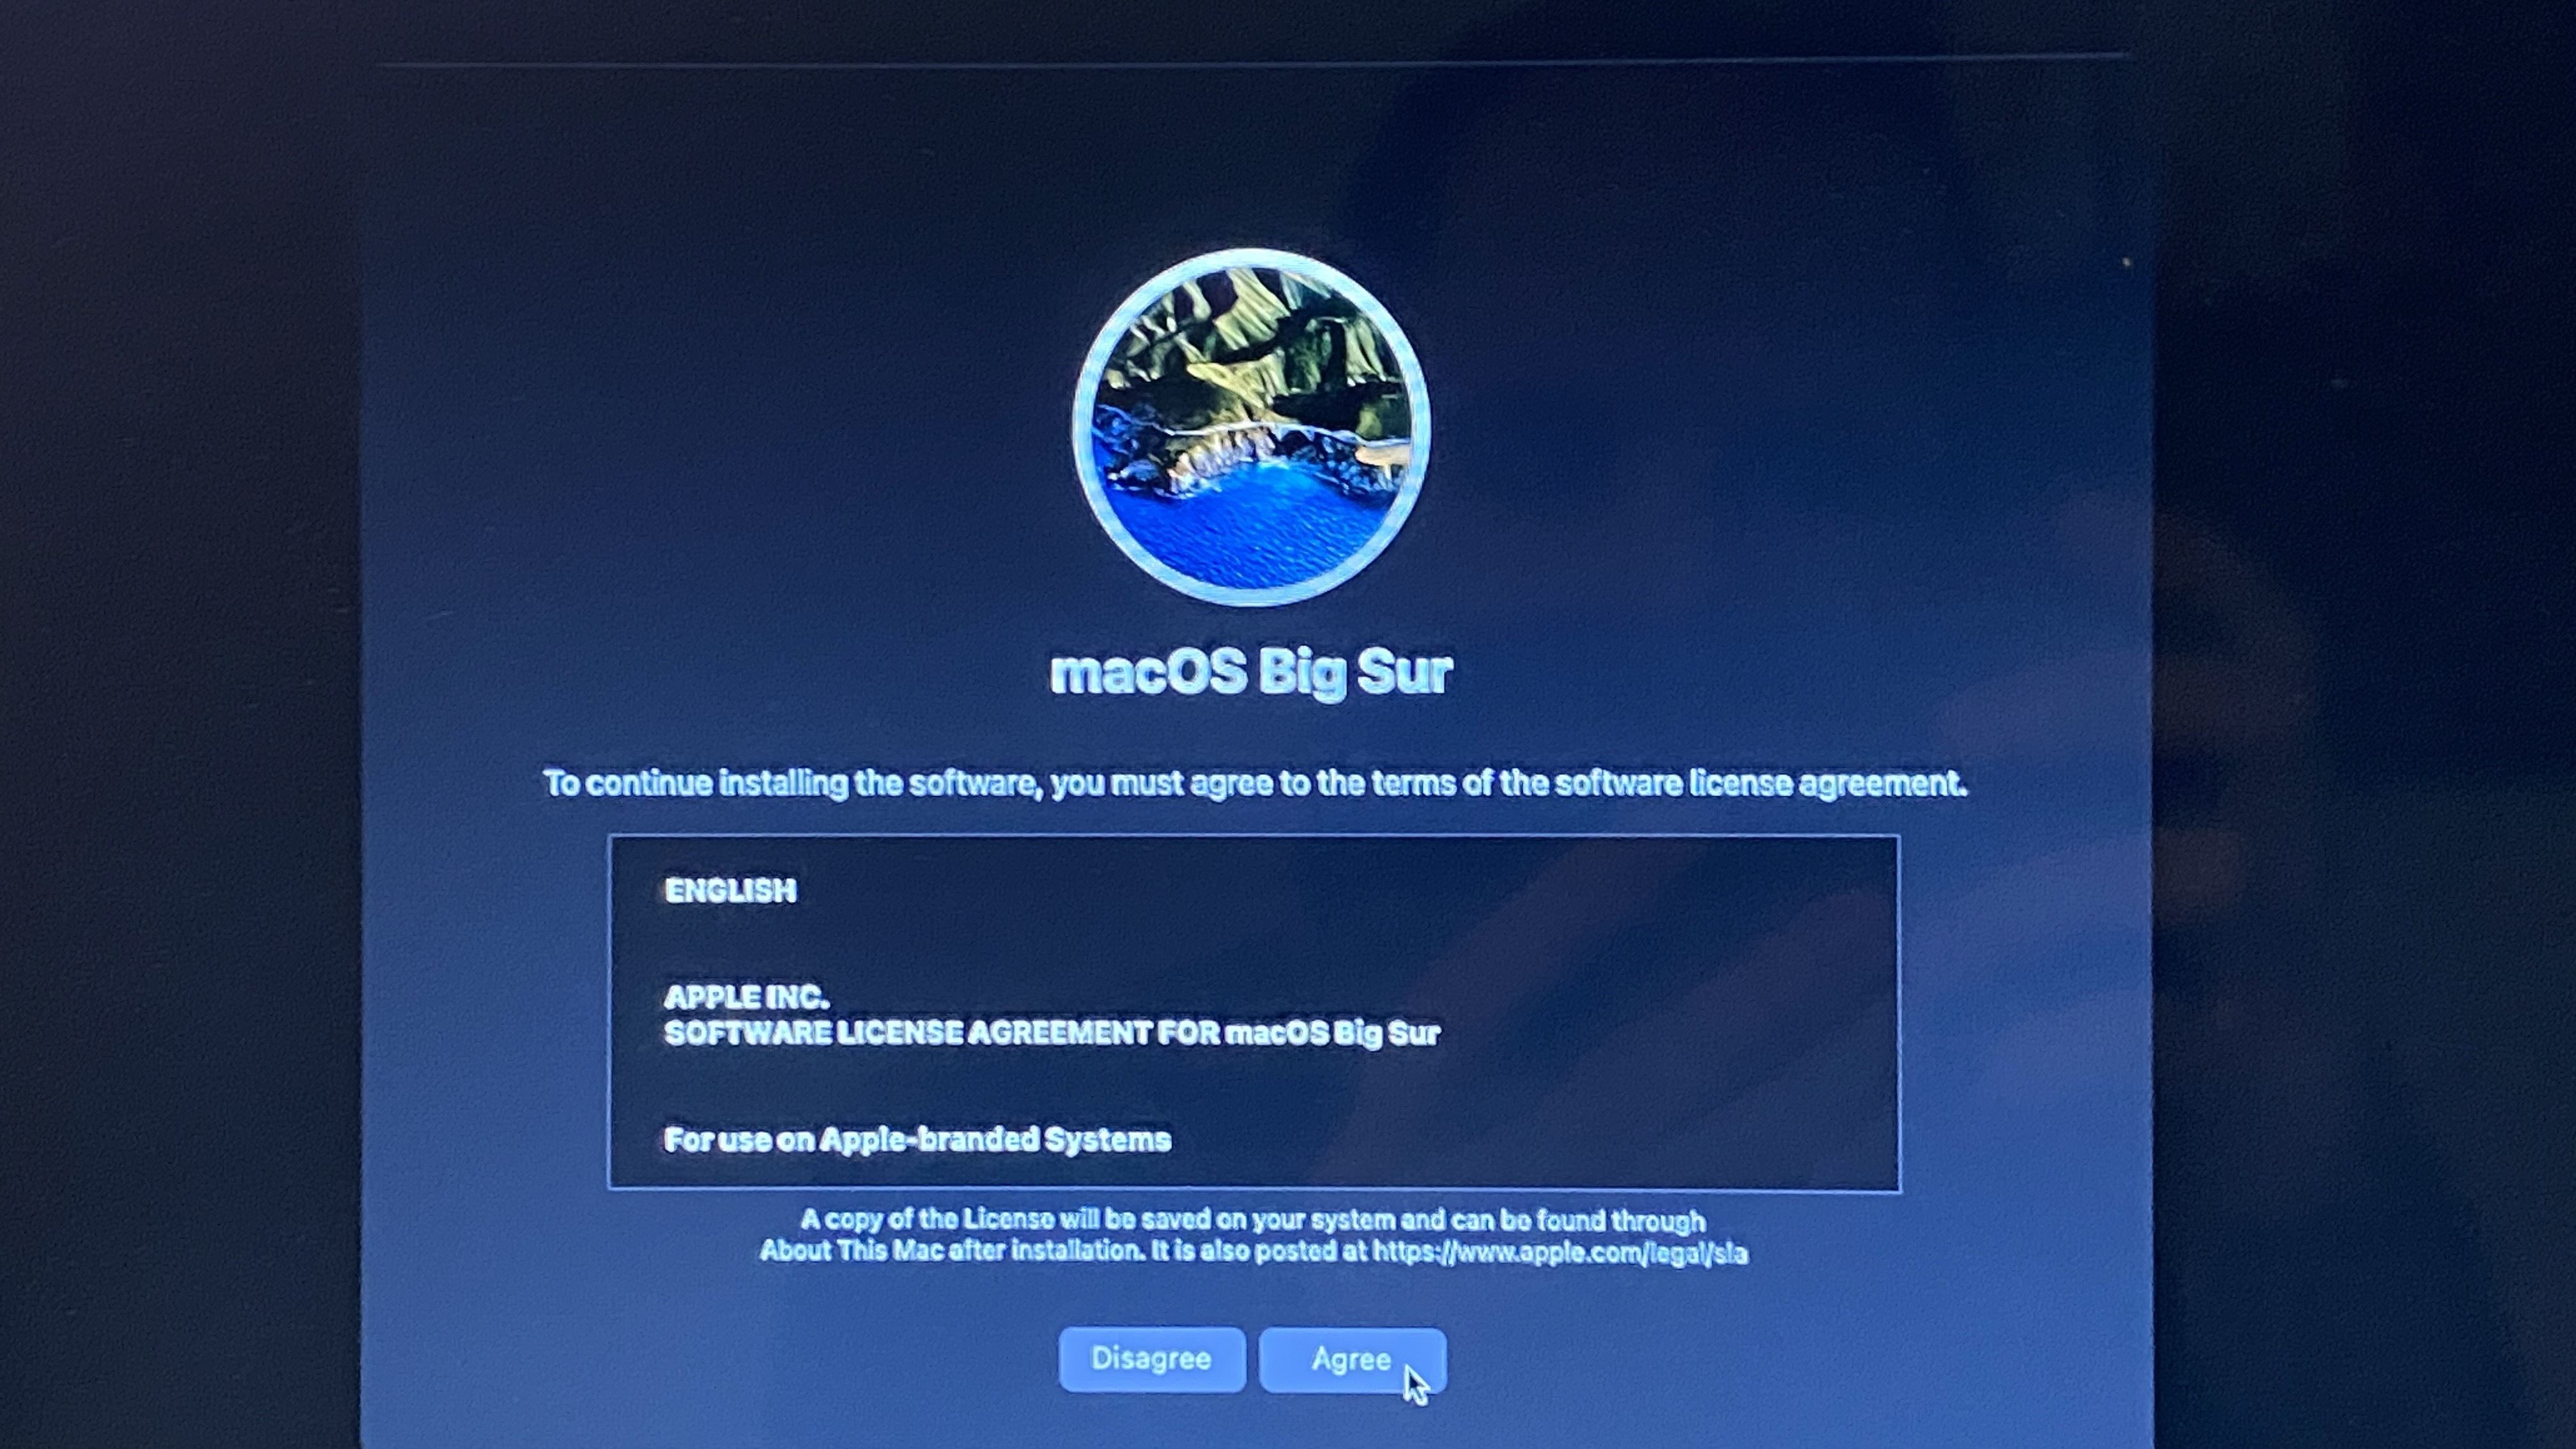
10. Click "Continue." You'll have to follow the prompts like you would for any installation, including accepting the terms of service and selecting the drive to install the OS to (most MacBooks will only have the one.)
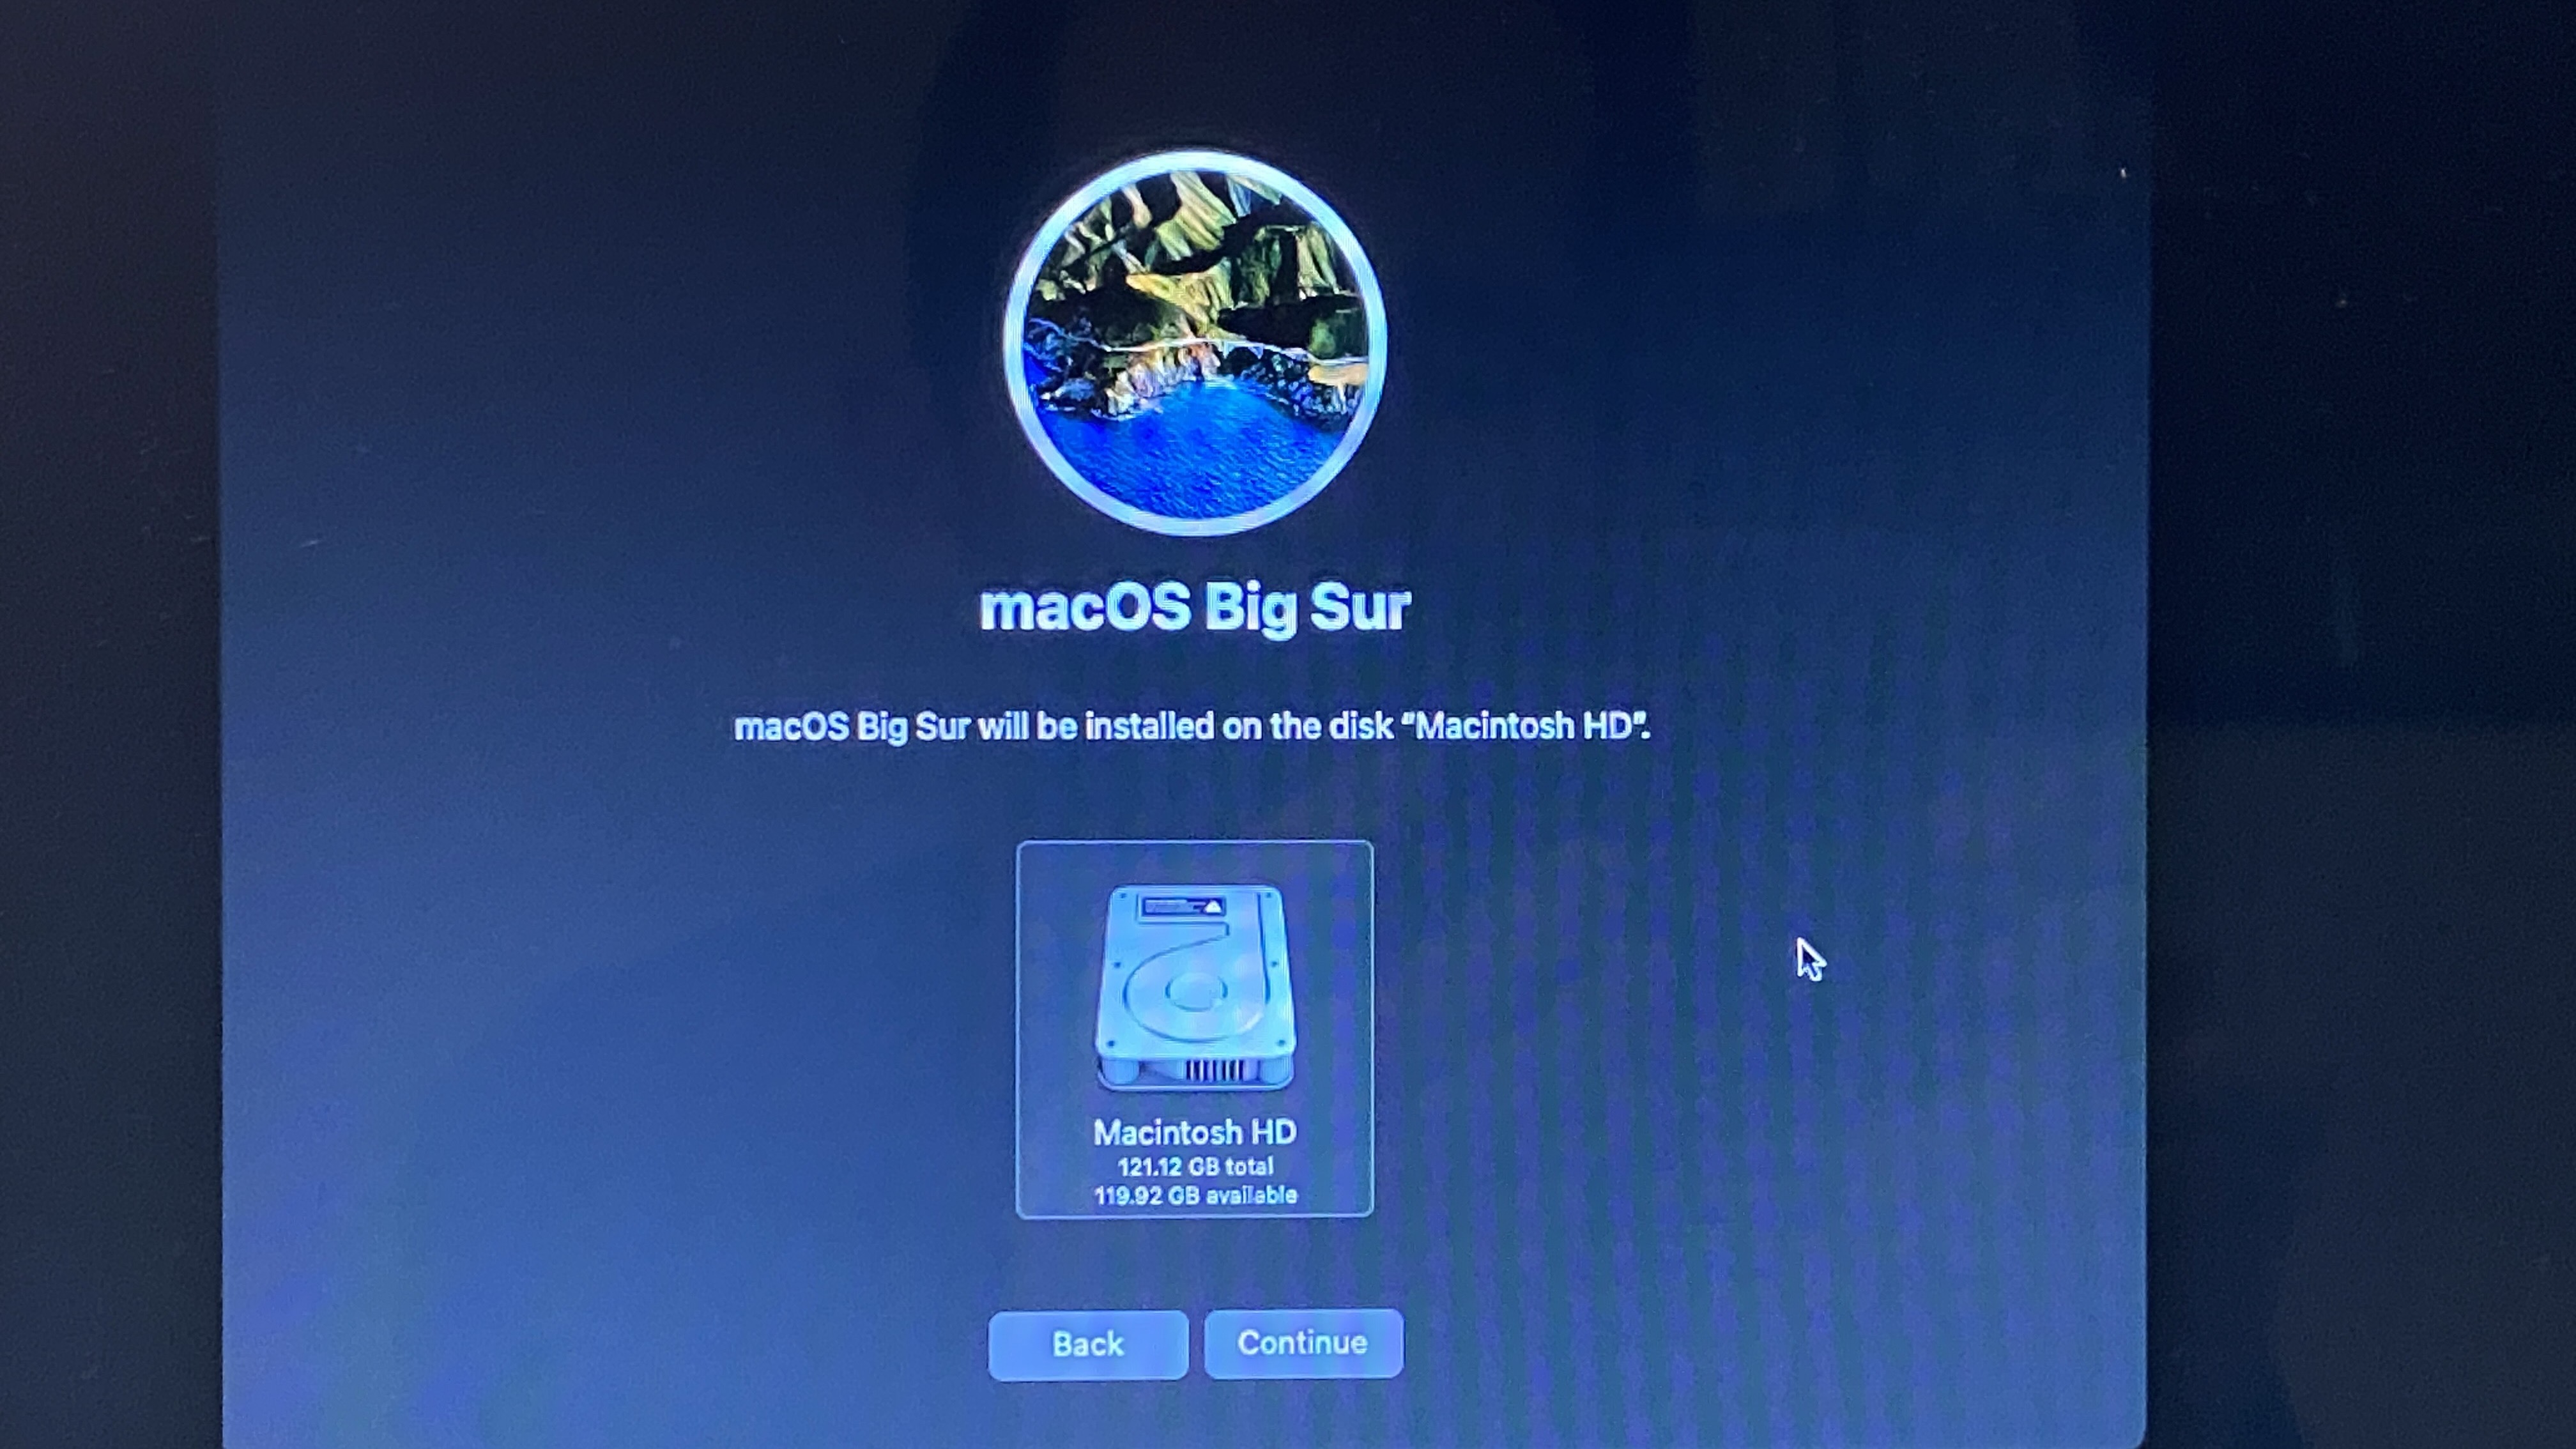
The installation may take awhile and include at least one reboot, if not more. The first boot up may take a bit longer than expected.
Your Mac will reboot, leaving you with a pristine MacBook (or desktop) with just the OS on it, ready to be set up as if it were the first time. Now it's suitable for a fresh start or a new owner. You can hold down the power button to shut it off, and you're ready to go.

Andrew E. Freedman is a senior editor at Tom's Hardware focusing on laptops, desktops and gaming. He also keeps up with the latest news. A lover of all things gaming and tech, his previous work has shown up in Tom's Guide, Laptop Mag, Kotaku, PCMag and Complex, among others. Follow him on Threads @FreedmanAE and BlueSky @andrewfreedman.net. You can send him tips on Signal: andrewfreedman.01
-
Yeah, and when you reset it to factory standards, it resets everything. Unlike Microsoft resets. these actually workReply
-
JaydenDev ReplyMandark said:Yeah, and when you reset it to factory standards, it resets everything. Unlike Microsoft resets. these actually work
I typically never recommend (and outright say don't use) Window's built-in reset function because of the following:
Includes/Reinstalls OEM bloatware
Inconsistent results
Rarely works, fails if repair image is corrupted.
