How to Turn On Bluetooth in Windows 10 or 11 and Pair Devices
Unite Your Devices, Just Like King Harald Bluetooth
Bluetooth is a short-range wireless technology standard that is in many of our daily devices. It’s named after King Harald Bluetooth, who united the disparate Danish tribes into a single kingdom. Bluetooth is one standard for our keyboards, mice, headsets and microphones. Laptops and mobile devices often come with Bluetooth pre-installed, older machines and desktops will often need a USB dongle or PCIe card installed to take advantage of this useful technology.
So how can we connect our Bluetooth devices to a Windows PC? How can we manage them? And how can we quickly connect in Windows 11? We’ll answer those questions in this how to.
How to Turn on Bluetooth and Pair Devices
1. Ensure that your Bluetooth dongle is connected if you’re on a desktop. Most laptops come with Bluetooth inside.
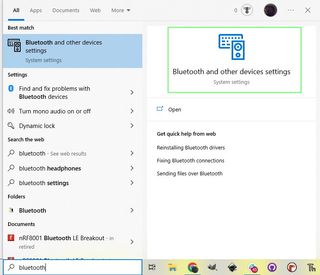
2. Click on Start and search for Bluetooth. Click on Bluetooth and Other Devices. You can also use the Bluetooth icon in the system tray, just click on Add a Bluetooth Device.
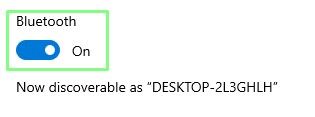
3. Click on the slide to set Bluetooth to on. This makes your computer discoverable to devices who are looking to connect and powers on the Bluetooth radio.
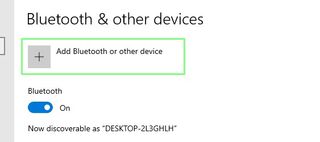
4. Click on Add Bluetooth or other device.
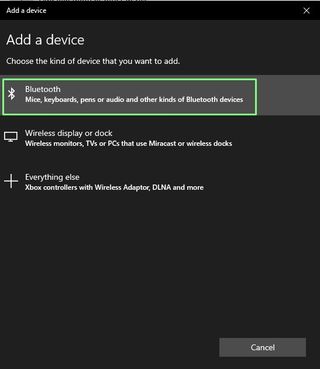
5. Select Bluetooth to start scanning for Bluetooth devices.
Stay on the Cutting Edge
Join the experts who read Tom's Hardware for the inside track on enthusiast PC tech news — and have for over 25 years. We'll send breaking news and in-depth reviews of CPUs, GPUs, AI, maker hardware and more straight to your inbox.
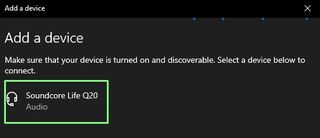
6. Set the Bluetooth device to pairing mode. We set our headphones into pairing mode.
7. Select the device to connect.
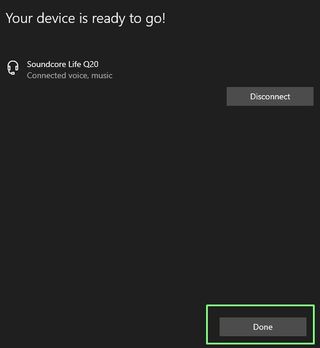
8. Click Done once the connection is confirmed.
How to Use Windows 11’s Swift Pair Bluetooth Feature
Swift Pair is a new feature for Windows 11 that enables quick connections between Bluetooth devices and your computer running Windows 11.
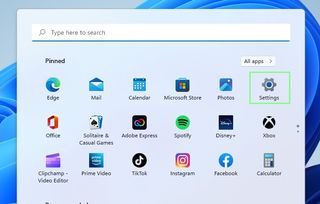
1. Click on the Start menu and select Settings.
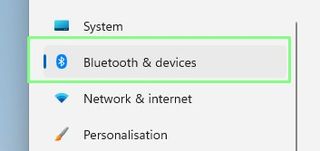
2. Click on Bluetooth and Other Devices.
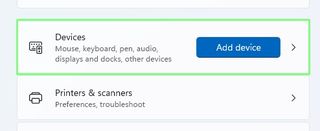
3. Click on Devices and enable Swift Pair notifications. This step can be skipped as Windows 11 should present a notification asking if you would like to receive notifications and use Swift Pair.
4. Turn on a Swift Pair compatible device and make it discoverable.
5. Move the device near the Windows 11 device.
6. Click on the Connect button in the notification to pair and connect.
7. Your Swift Pair device is now connected and can be managed just like any other Bluetooth device.
Managing Bluetooth Devices
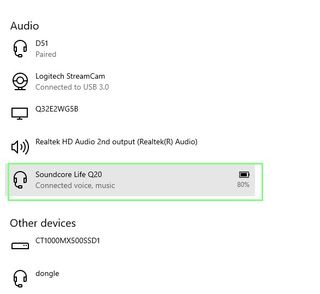
In the Bluetooth and Other Devices dialog we can find devices grouped by their function. Mouse, Keyboard and Pen inputs, Audio and Other. As we have connected a Bluetooth headset, we can find it under Audio.
1. Select the appropriate device from its group. Here we click on our headset. By default we can see the device's battery and connection status.
2. Click on Disconnect to disconnect the Bluetooth connection between your computer and the device. The device will stay paired, but will not be connected to your computer.

3. Click Connect to reconnect the device to your computer.

4. Click Remove Device to remove the connection and pairing. Click Yes to confirm. To reconnect the removed device, you will need to go through the pairing process again.

The Bluetooth Connection Process
How Bluetooth devices connect at a human level is incredibly simple. We have two devices that we wish to connect. We set them both as discoverable and they will find each other. From there we pair the devices so that they can work together, we can also trust the devices so that they automatically connect when we power up our computer. But under the hood, Bluetooth is doing a lot of work for us.
- Inquiry: Two Bluetooth devices, strangers to each other. One will make an inquiry to try and discover the other. The sender will send the inquiry and the receiver will listen to the request and respond with basic information such as its address and possibly name.
- Connecting: The two devices will form a connection using the address of one another, addresses that were gained during the enquiry. Here devices will often need to be paired in order to be used. Keyboard will require us to type in a code, mice / joypads / headsets should auto-connect.
- Connection: Devices will mainly go into an active mode, where they transmit and receive data. Some devices may go into “sniff” mode, a power saving mode where they will listen for connections.There are also “Hold” and “Park” modes where devices can go to sleep, waiting for a connection.
Les Pounder is an associate editor at Tom's Hardware. He is a creative technologist and for seven years has created projects to educate and inspire minds both young and old. He has worked with the Raspberry Pi Foundation to write and deliver their teacher training program "Picademy".

