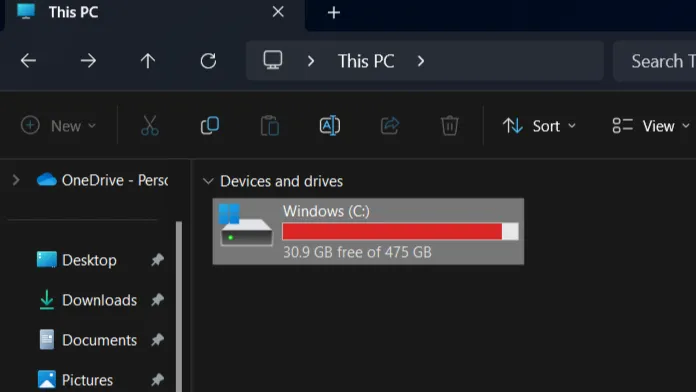
While some folks have 4TB SSDs with plenty of space left on them, many more are wondering how they can squeeze another 50GB of capacity out of their aging 500GB boot drives. The other day, I faced just such an issue.
My laptop is now five years old, still has a 500GB boot drive in it and, though I could buy one of the best SSDs and upgrade it, I don’t want to spend more money on it right now. I’m a Windows Insider and the other day, I was about to install a Windows 11 update that would take me to the latest Dev Channel build.
Article continues belowFortunately, if you’re running low on free disk space in Windows 11 or Windows 10, there are many ways to free up more GBs. Here are eleven methods I used together to recover more than 100GB on my drive. Some of these methods have trade-offs, so proceed accordingly.
Use Disk Cleanup to Free Disk Space
Windows 11 and Windows 10 have a built-in tool called Disk Cleanup, that allows you to get rid of temporary files, including Windows update files you no longer need, logs and error reports. It’s easy to use and has few trade-offs, so it was the first thing I tried.
1. Launch Disk Cleanup. You can find it by using Windows search.
2. Toggle on all the file categories (unless there’s one you really need to keep) and then click Ok and Delete Files to confirm. In my case, this was just 27MB worth of file savings.

3. Relaunch Disk Cleanup and click the “Clean up system files button.”

4. Check all the file types here (unless there’s something you want to save) and click OK, then the Delete Files button when prompted to confirm. I saved 1.05GB this way.

Use Windows 11’s Storage Settings Menu
If you’re using Windows 11, there’s a Storage Settings Menu that shows exactly how much space you’re using for different types of data: applications, documents, pictures and even downloads in your Downloads folder. Granted, just because you have a lot of pictures, that doesn’t mean that you would want to delete them. But Storage Settings does have some recommendations you can follow.
1. Navigate to Settings->Storage.
2. Make sure Storage Sense is toggled to On. This feature automatically helps you save disk space on a day-to-day basis by deleting some temporary files for you. However, enabling it is more of a benefit for the future than the present.
3. Click Cleanup recommendations.

4. Look at the recommendations under both Temporary Files and Large or Unused files and see which you want to delete. In my case, under Temporary Files there were 38.2GB of files in my download folder that I didn’t need. So I toggled on the checkbox next to Downloads and the button to erase them.

However, in my case, the system didn’t find much savings in the Large and Unused files section, with the largest being a 38MB audio clip I wanted to keep. It also didn’t identify any Unused apps or Files synced to the cloud.
Find Gigantic or Huge Files in File Explorer
Even the Storage Settings menu can’t help you hunt down every large file you have hanging around somewhere on your drive. However, File Explorer can help you find all the files you have that are above a certain size, and you may see one or more that you don’t need anymore. By using this method, I identified 23GB of files I could safely delete.
1. Launch FIle Explorer. You can get there by hitting Windows key + E.
2. Navigate to This PC.

3. Enter size:Gigantic into the Search box. The g in Gigantic has to be capitalized or it won’t work. This searches for files that are larger than 4GB.
The software may take several minutes to complete its search of the entire drive, but it will fill in files as it finds them. In my case, I found three files, each of which represented the disks of virtual machines I have used to do some testing. I decided to keep the disk for the Linux Subsystem for Windows, which I still use, and get rid of those for two VMs I probably won’t need again.

I saved 22GB of space this way.
4. Enter size:Huge into the search box and repeat the process. Huge shows files that are 1 to 4GB. Doing this, I found a few files, but only one I wanted to get rid of: a 1.4GB MP4 video.

Find Large Directories with WinDirStat
What if the problem is not a large single file, but instead a folder full of smaller files that add up to a huge amount of space? That’s where WinDirStat, a free utility, comes in. It helps you see the size of each folder on your drive so you can identify the ones that are eating up your free space.
1. Download, install and run WinDirStat. You can find links to download it at the official site.
Have some patience. It took mine about five and a half minutes to complete its task of scanning all the directories on my 500GB SSD.
2. Look over the list of directories and see if you find anything you don’t need. I noticed a folder called C:\pibkup on mine that was an old backup of a Raspberry Pi disk I used a long time ago. Deleting the folder and its contents saved me 18GB.

Compress Your OS to Add Free Disk Space
Windows 11 and 10 both have a free, built-in utility called “compact” that will compress some of the operating system’s core files so they take up less space. I tried it on my laptop and it did not seem to affect performance. The amount of saved space was pretty small in my case, but when you’re desperate, every gigabyte counts.
1. Open an elevated command prompt. You can do this by searching for “cmd,” right clicking the top result and selecting “run as administrator.”
2. Enter compact /compactos:query at the command prompt to find out whether Compact OS has already been enabled.

In my case, Windows responded saying that Windows had “determined” that Compact OS was not beneficial for this system. However, I tried enabling it anyway.
3. Enter compact /compactos: always to enable Compact OS. The system will take a couple of minutes to do its compressing.

This saved me 3GB, which is not a lot.
Compress Folders or the Whole Drive to Save Space
Windows 11 and 10 also have a featurethat allows you to compress any drive or folder that uses the NTFS file system. This will save some disk space, but will also hurt overall performance, as the system has to uncompress every single app and data file as you open them. It also takes a really long time to do or undo. Nevertheless, if you’re desperate for space, this could buy you some more.
1. Right-click on the folder or the Drive itself and select Properties.
2. Click the Advanced button.

3. Toggle “Compress contents to save disk space.”

4. Click Apply.

5. Select Apply changes to this folder, subfolders … and click Ok.

6. Click Continue if prompted for Admin permissions.

This will now take a long time to compress, the length of time depending on the amount of files and folders. It could take hours and the results can be mixed. Compressing a 2.36GB Documents folder took just 2 and a half minutes and saved 0.36GB of space. However, when I tried to compress my whole drive, the system warned me that it would take more than 16 hours to complete!
Disable System Protection
If you have the space, Windows System Protection is a good setting to have enabled. System Protection creates a restore point, a snapshot in time of your system that you can return to if the OS becomes unstable or won’t boot. However, even a small restore point can take up a lot of space. So if you either keep system backups on one of the best portable hard drives or SSDs or you want to live dangerously, you can disable System Protection.
1. Search for “restore point” and click the top result.
2. Select your boot drive (likely the C drive) and click Configure.

3. Toggle Disable System protection to on and click Ok

4. Click Yes if prompted for permission.

At minimum, this would have saved me 9.5GB.
Uninstall Windows Features
1. Navigate to the “Turn Windows features on or off” menu. You can get there by searching for “Turn Windows features.”
2. Uncheck features you don’t want and click OK.

However, most of these are really small and you might need them. I didn’t see many that I wanted to remove.
Delete Recovery Partition
Most prebuilt desktops and all laptops come with a recovery partition, a small space on the boot drive that’s reserved for files Windows can use to bring the OS back to factory settings. In some cases, this is less than 1GB, but in others, it can be several gigabytes.
If you keep a backup of your system, you don’t need a recovery partition. And, even if you don’t have a backup, you can always do a clean Windows 11 install. If you delete the recovery partition, you can then add it to your main partition and reclaim that space. However, you need to be careful and make sure you don’t delete a different partition by accident as doing so could cause major problems. If you accidentally delete the boot partition or the main Windows partition, you’ll lose all data on the drive and need to reinstall the OS from scratch.
1. Launch an elevated command prompt.
2. Enter diskpart.

3. Enter list disk, after which you’ll see a list of all your drives. If you have only one drive, it will be Disk 0.

4. Enter select disk [num] where [num] is the drive number (ex: 0). So, for the C drive, it’s likely select disk 0.

5. Enter list partition. A list of partitions will appear.

6. Enter select partition [num] where [num] is the partition number for the recovery partition. In my case, it was 4. Make sure this is the right one.
7. Enter delete partition override.

The partition should now be gone but you need to reclaim that space for your main partition.
8. Launch disk management. You can get there by searching for disk management.
9. Right click on the main partition and select Extend Volume.

10. Click Next twice to select the free space and then click Finish.

You’ll now have those extra MBs or GBs added to your main partition.

Disable Hibernation to Free Disk Space
When you want to save power, you can put your computer to sleep or make it enter hibernation. While sleep keeps the memory powered up and the CPU in a low-power, but on state, hibernation saves the contents of your RAM to disk so that the computer uses much less power.
Even if you never choose to use hibernation, your laptop is probably taking advantage of it without you knowing. If you put your computer to sleep and the battery drains to a certain point, modern laptops will automatically switch themselves to hibernation.
So, in general, we think that leaving hibernation enabled is a good thing. However, if you want to save space and are willing to sacrifice this ability, you can disable hibernation, which will free up the amount of disk space your RAM would take up.
1. Launch an elevated command prompt.
2. Enter powercfg /h off
You will now save the amount of space that hibernation takes up, which is roughly the amount of RAM you have, though in my case it was 6GB instead of the 16GB of RAM I have. However, you will lose the ability to put your PC into hibernation mode. I decided not to take this trade-off, but you might think differently.
Delete Apps You Are No Longer Using
I saved this space-saving method for last, because it almost goes without saying. When you’re short on space, it’s wise to look at what applications you have installed and see if there are one or two that you don’t need anymore.
1. Navigate to Settings->Apps->Installed apps in Windows 11 or Settings->Apps in WIndows 10.
2. Sort by app size Large to Small.

3. Click the … next to an app you want to uninstall and select uninstall.

I saved 2.27GB by getting rid of Windows Subsystem for Android, which I never ever use. If you have games on your PC that you’re not currently playing, you could save a lot more space as some of today’s hottest titles use more than 100GB.
Not all of the methods above are worth the trade-offs. I did not want to keep hibernation disabled on my laptop and I found that compressing the whole disk was too time-consuming and probably would harm performance, so I only compressed one folder. Also, I found that after conducting some of these steps, such as Disk Cleanup, I had more free space than I expected, which could mean that more temporary files were erased than I thought. However, after a concerted effort, I was left with 188GB free, more than enough to be comfortable.
