How To Program Webcam-Powered Scratch Games
Image recognition will use your hands and feet as controllers.
Keeping fit can be fun. What if, instead of running around a park we made a game where you have to hit as many balls as you can to score points? The catch is that you only have 30 seconds to get the highest score! Sounds easy, hand me the joypad! No! To control the game we have to use our body and a webcam that will look for our hands, feet, head and react when we hit a ball. In a twist, we can only start the game shouting “GO” and then the countdown starts!
For This Project You Will Need
- Raspberry Pi 4 or 400 (or a Windows / Apple computer)
- The latest Raspberry Pi OS
- A USB webcam
Starting the Game
1. Power up your Raspberry Pi 4 / 400 and connect your USB webcam. We are using a USB webcam instead of the official Raspberry Pi camera as we need the built in microphone.
2. Go to Preferences >> Recommended Software to install Scratch 3. Scratch 3 is found in the Programming category, place a tick in the box and click Apply to install.
3. Open Scratch 3, found in the main menu under Programming. On first start Scratch may take a little while to open. We’re going to assume that you have an understanding of how to code with Scratch.
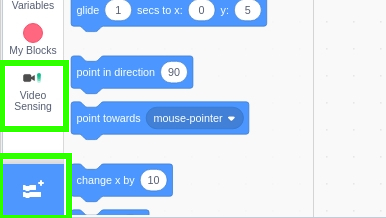
4. Click on the blue folder icon in the bottom left of the screen to load the Extensions menu. Select Video Sensing to add a palette of new blocks that will be used to create our interface.
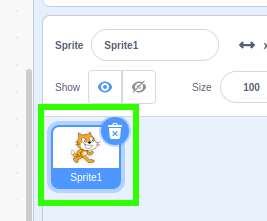
5. Delete the cat sprite. In the bottom right of the screen click on the Cat sprite and then click on the trash can icon to delete the cat.
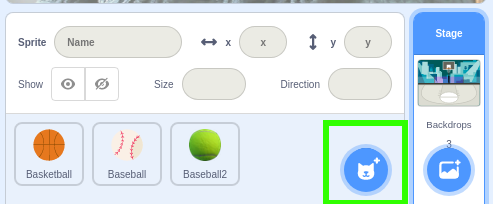
6. Click on the cat logo and select “Choose a sprite”. From the selection choose a basketball.
Get Tom's Hardware's best news and in-depth reviews, straight to your inbox.
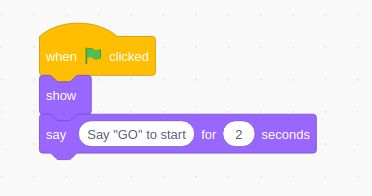
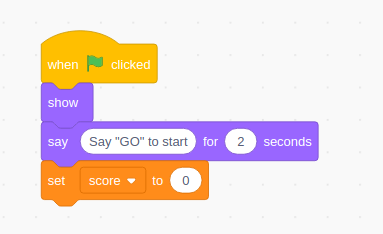
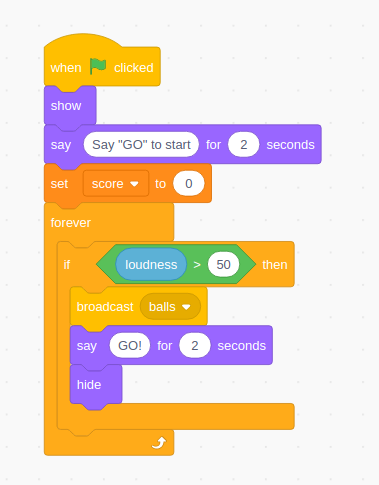
7. From the Events blocks, drag the “When Green Flag Clicked.” From Looks drag both “show” and “say hello for 2 seconds.” This will create the trigger to start the game and force our sprite to appear. Change the text inside “say” to “Say GO to start”.
8. on Variables, then “Make a Variable.” Call the variable “score” and make it available for all sprites.
9. From Variables drag the “Set score to 0” and place it under the previous blocks. You may need to use the drop down menu to select the correct variable name.
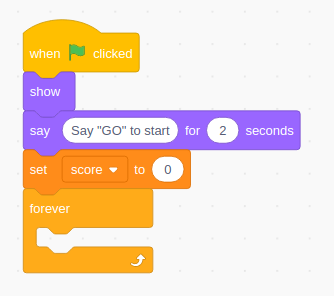
10. From Control drag a “forever” loop and connect it to the previous blocks of code.
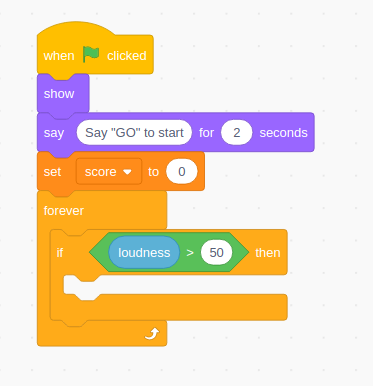
11. From Control, drag “if..then” and place it inside the loop. This is a conditional test, a question. To form the question we need to go to Operators and drag “ __ > __” and place it inside the hexagon shaped blank of “if..then”.
In the second blank type 50, and in the first drag “loudness” from the Sensing blocks. Loudness uses the microphone to detect noise, and the noise level is given a value of 0 to 100. If we shout “GO” then it should be over 50 and trigger the game to start. But this number may need tweaking for your home.
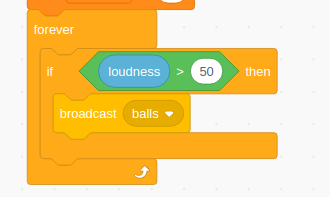
12. Drag “broadcast,” found in Events inside the “if..then” section and use the dropdown to create a new message called “balls.”
13. Drag “say hello for 2 seconds” and “hide” from Looks and place them inside the “if..then” section. Change the say block to read “GO!”. So when the player shouts “GO” the basketball will disappear and the game will start. The code for this sprite should look like this.
Adding More Sprites
Right now we have created a means to start the game, but we do not yet have a game. For that we need to add sprites with which we can interact with.
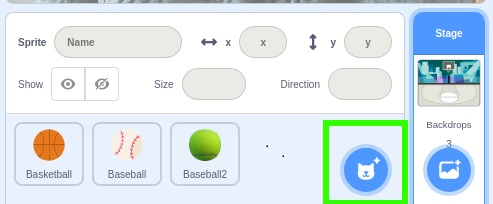
1. Create a new sprite using the “Choose a sprite” button in the bottom right of the screen. Select a baseball.
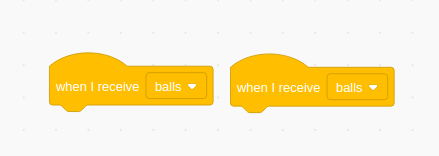
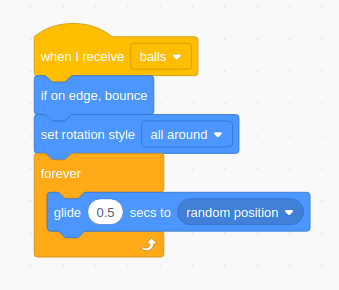
2. From Events, drag two “When I receive balls” blocks. This broadcast is triggered when the player shouts “GO!”.
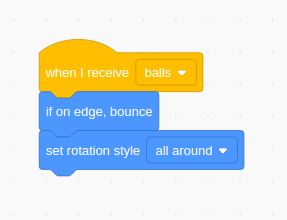
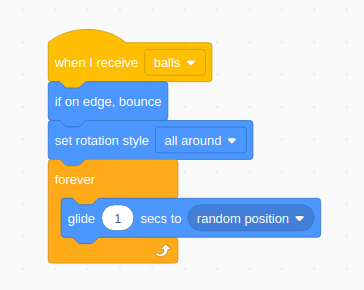
3. From Motion drag “if on edge bounce” and “set rotation style” and connect them under one of the blocks. Set the rotation to “all around”.
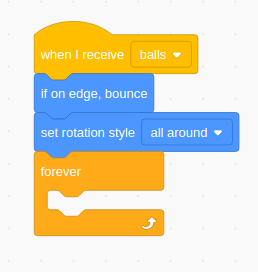
4. From Control drag “forever” and place it under the previous blocks.
5. Inside forever drag “glide 1 secs to random position,” found in the Motion blocks. Your code should now look like this.
When this sprite receives the message “balls” it will set the sprite to bounce off walls and to reflect at realistic angles off the borders of the screen. Lastly the ball will glide around the screen, similar to a ball travelling in air.
Our attention now turns to the remaining “When I receive balls” block which will use our webcam to detect if there is movement on a sprite, indicating we are trying to hit the ball.
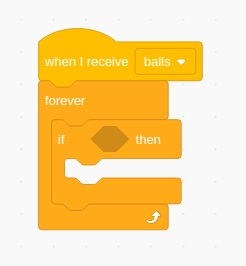
1. From Control place a forever loop under the second “When I receive balls” block and then add “if..then” so that it is nested inside the forever loop.
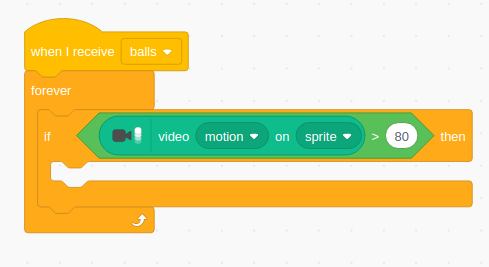
2. From Operators drag “ __ > __” and place it inside the hexagon shaped blank of “if..then”. In the second blank type 80 and in the first blank drag “video motion on sprite” from the Video Sensing blocks. This will use the camera to see if we are waving / punching on a sprite and it will check to see how fast we are waving. In reality this block checks for movement and assigns a value, so you may need to tweak 80 to match your goals.
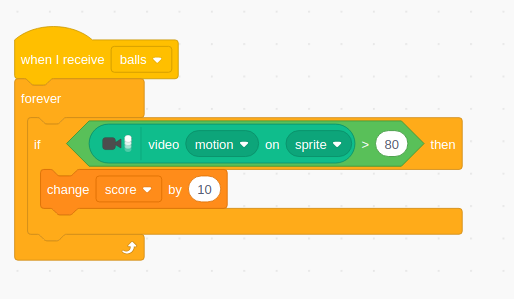
3. Inside the if block we need to drop a “change score by” block from Variables. The score should change by 10 points if the baseball is hit. Your code should now look like this.
Duplicating Sprites
Rather than repeat the process of creating a new sprite we can duplicate a sprite and edit.
1. Right click on the baseball sprite and select Duplicate. We now have two identical balls in the game.
2. Change the “glide 1 secs” to 0.5 seconds to make the ball move faster.
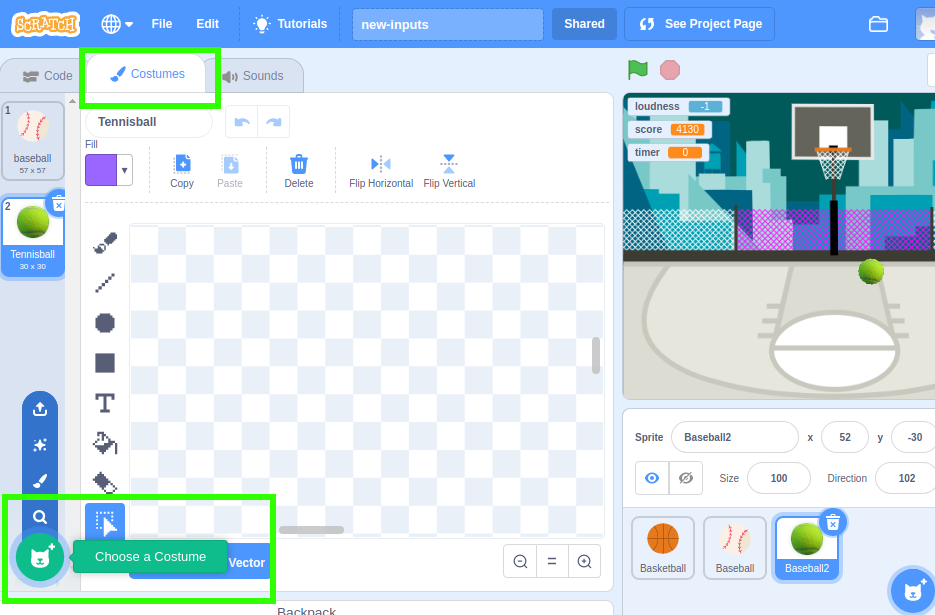
3. Select costumes and click on the “Choose a costume” button in the bottom left of the screen. Select the tennis ball. Back in the Costume editor, click on the tennis ball on the left side of the screen to make it the default. Click on Code when done.
Adding a Countdown Timer
Right now our game will run forever, or until we get tired. We need to add a timer in order for players to have a goal. How many points can they score in 30 seconds? The countdown timer is set for 30 seconds and the code for it is contained inside the Stage, the place where our game plays.
1. Click on the Stage icon, found in the bottom right of the screen.
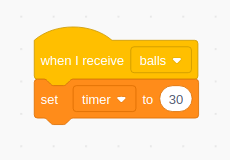
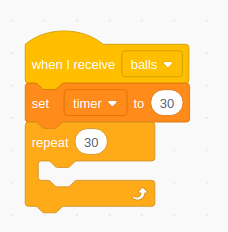
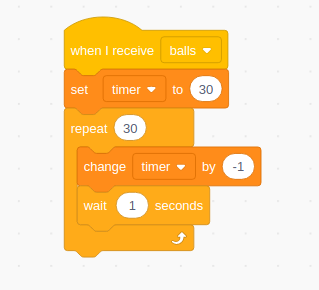
2. Drag “When I receive balls” from Events, this will trigger our code to run at the same time as the sprites move.
3. Create a new variable, called timer, and then drag “set timer to 0” and place it under the block. Set the value to 30.
4. From control drag “repeat 10” and place it under the previous. Change 10 to 30. This will force the loop to repeat 30 times, effectively our countdown timer.
5. Inside the loop, drag a “change timer by 0” from Variables. Set the value to -1. From Control, drag a “wait 1 seconds” block. So now this loop will timer from 30 seconds to 0, the time for our game.
6. From Control drag “Stop All” and place it outside of the Repeat 30 loop. When the timer reaches zero, the loop ends and the final block, “stop all” is triggered and stops all sprites and running code.
The game is now complete, but you can also add a new backdrop to the stage using the “Choose a Backdrop” button found in the bottom right of the screen. This changes the look of the stage, but we can still see the live video preview, of us playing the game overlaid on top.
To start the game click on the Green Flag, place yourself in the view of the camera and then shout “GO!” to start the game. Good luck!
The article originally appeared in Linux Format magazine.

Les Pounder is an associate editor at Tom's Hardware. He is a creative technologist and for seven years has created projects to educate and inspire minds both young and old. He has worked with the Raspberry Pi Foundation to write and deliver their teacher training program "Picademy".
