Tom's Hardware Verdict
The best codable keypad on the market, Adafruit’s MacroPad RP2040 is stuffed with features you won’t find elsewhere.
Pros
- +
Attractive Design
- +
Built-in speaker, rotary encoder and screen
- +
CircuitPython Support with helpful tutorials
- +
Stemma QT Connector
- +
Customizable RGB
Cons
- -
Not height adjustable
- -
Screen not color
Why you can trust Tom's Hardware
There’s a small, but interesting cottage industry in Raspberry Pi-powered macro keypads you can use to add some custom functions to your PC. A few years ago, Pimoroni launched its Keybow, which relies on a Raspberry Pi Zero but you need to wait for it to boot every time you plug it in and you have to program it in Lua. Then, this year, the Pimoroni came out with Pimoroni Keybow RP2040 and the Pico RGB Keypad base, which use the Raspberry RP2040 CPU and work with a variety of programming languages, including CircuitPython. And, given that the Raspberry Pico and other RP2040 boards can double as USB HID devices, there are several tutorials that explain how to build custom keypads using them.
However, Adafruit’s MacroPad RP2040 stands out from the rest and is so useful that even non-makers may want one, just to make their lives easier. Available either as a complete kit for $49 or as a barebones (no switches or keycaps) for $34, the MacoPad RP2040 has a built-in RP2040 chip with a slew of helpful features, including an OLED screen, a rotary encoder dial, 8MB of Flash storage, Neopixel RGB lights under each key and a Stemma QT connector for attaching other electronics such as sensors and additional OLED / LCD screens. Whether you’re a maker who likes DIY projects or just someone who wants a really flexible second keyboard, the Adafruit MacroPad RP2040 is your best choice.
Specifications of Adafruit MacroPad RP2040
| Processor | Raspberry Pi RP2040 (130 Hz, 264K of RAM) |
| Storage | 8MB of Flash Memory |
| Ports | USB-C / Stemma QT |
| Keys | 3 x 4 hot-swappable sockets |
| RGB | One Neopixel RGB LED per switch |
| Screen | 128 x 64 SH1106 Monochrome OLED |
| Speaker | 8mm Speaker / Buzzer |
| Additional Inputs | Rotary encoder (pressable), Reset button |
| Size | 4.1 x 2.3 x 1.1 inches (104 x 59.5 x 29mm) |
| Weight | 1.2 ounces (34g) |
Configuration Choices for Adafruit MacroPad RP2040
You can buy the Adafruit MacroPad either as a complete Starter Kit for $49 or just the board for $34, after which you will need some other components. The $49 kit comes with the board, 12 Kailh linear red key switches, 12 clear keycaps and the MacroPad enclosure kit, all of which are also sold separately at Adafruit.com. The $5 enclosure kit is a must-buy if you get the bare board, because it includes a bottom plate and feet to go below the board, a top plate that holds the key switches in place, a rubber knob that sits on top of the rotary encoder and the screws you need to attach the bottom plate.
Because I don’t like the feel of linear switches, I bought the bare board and the enclosure kit and brought my own key switches, a set of very-clicky Kailh Box Jades. I attached some clear keycaps I had sitting around, but eventually also bought some translucent blue caps that Adafruit sells separately. In short, if you like linear switches or don’t care one way or the other, it’s easiest to buy the full kit. If you prefer other switches, do what I did. Whatever you do, make sure you’re getting the enclosure kit; you need it.
Design of the Adafruit MacroPad RP2040
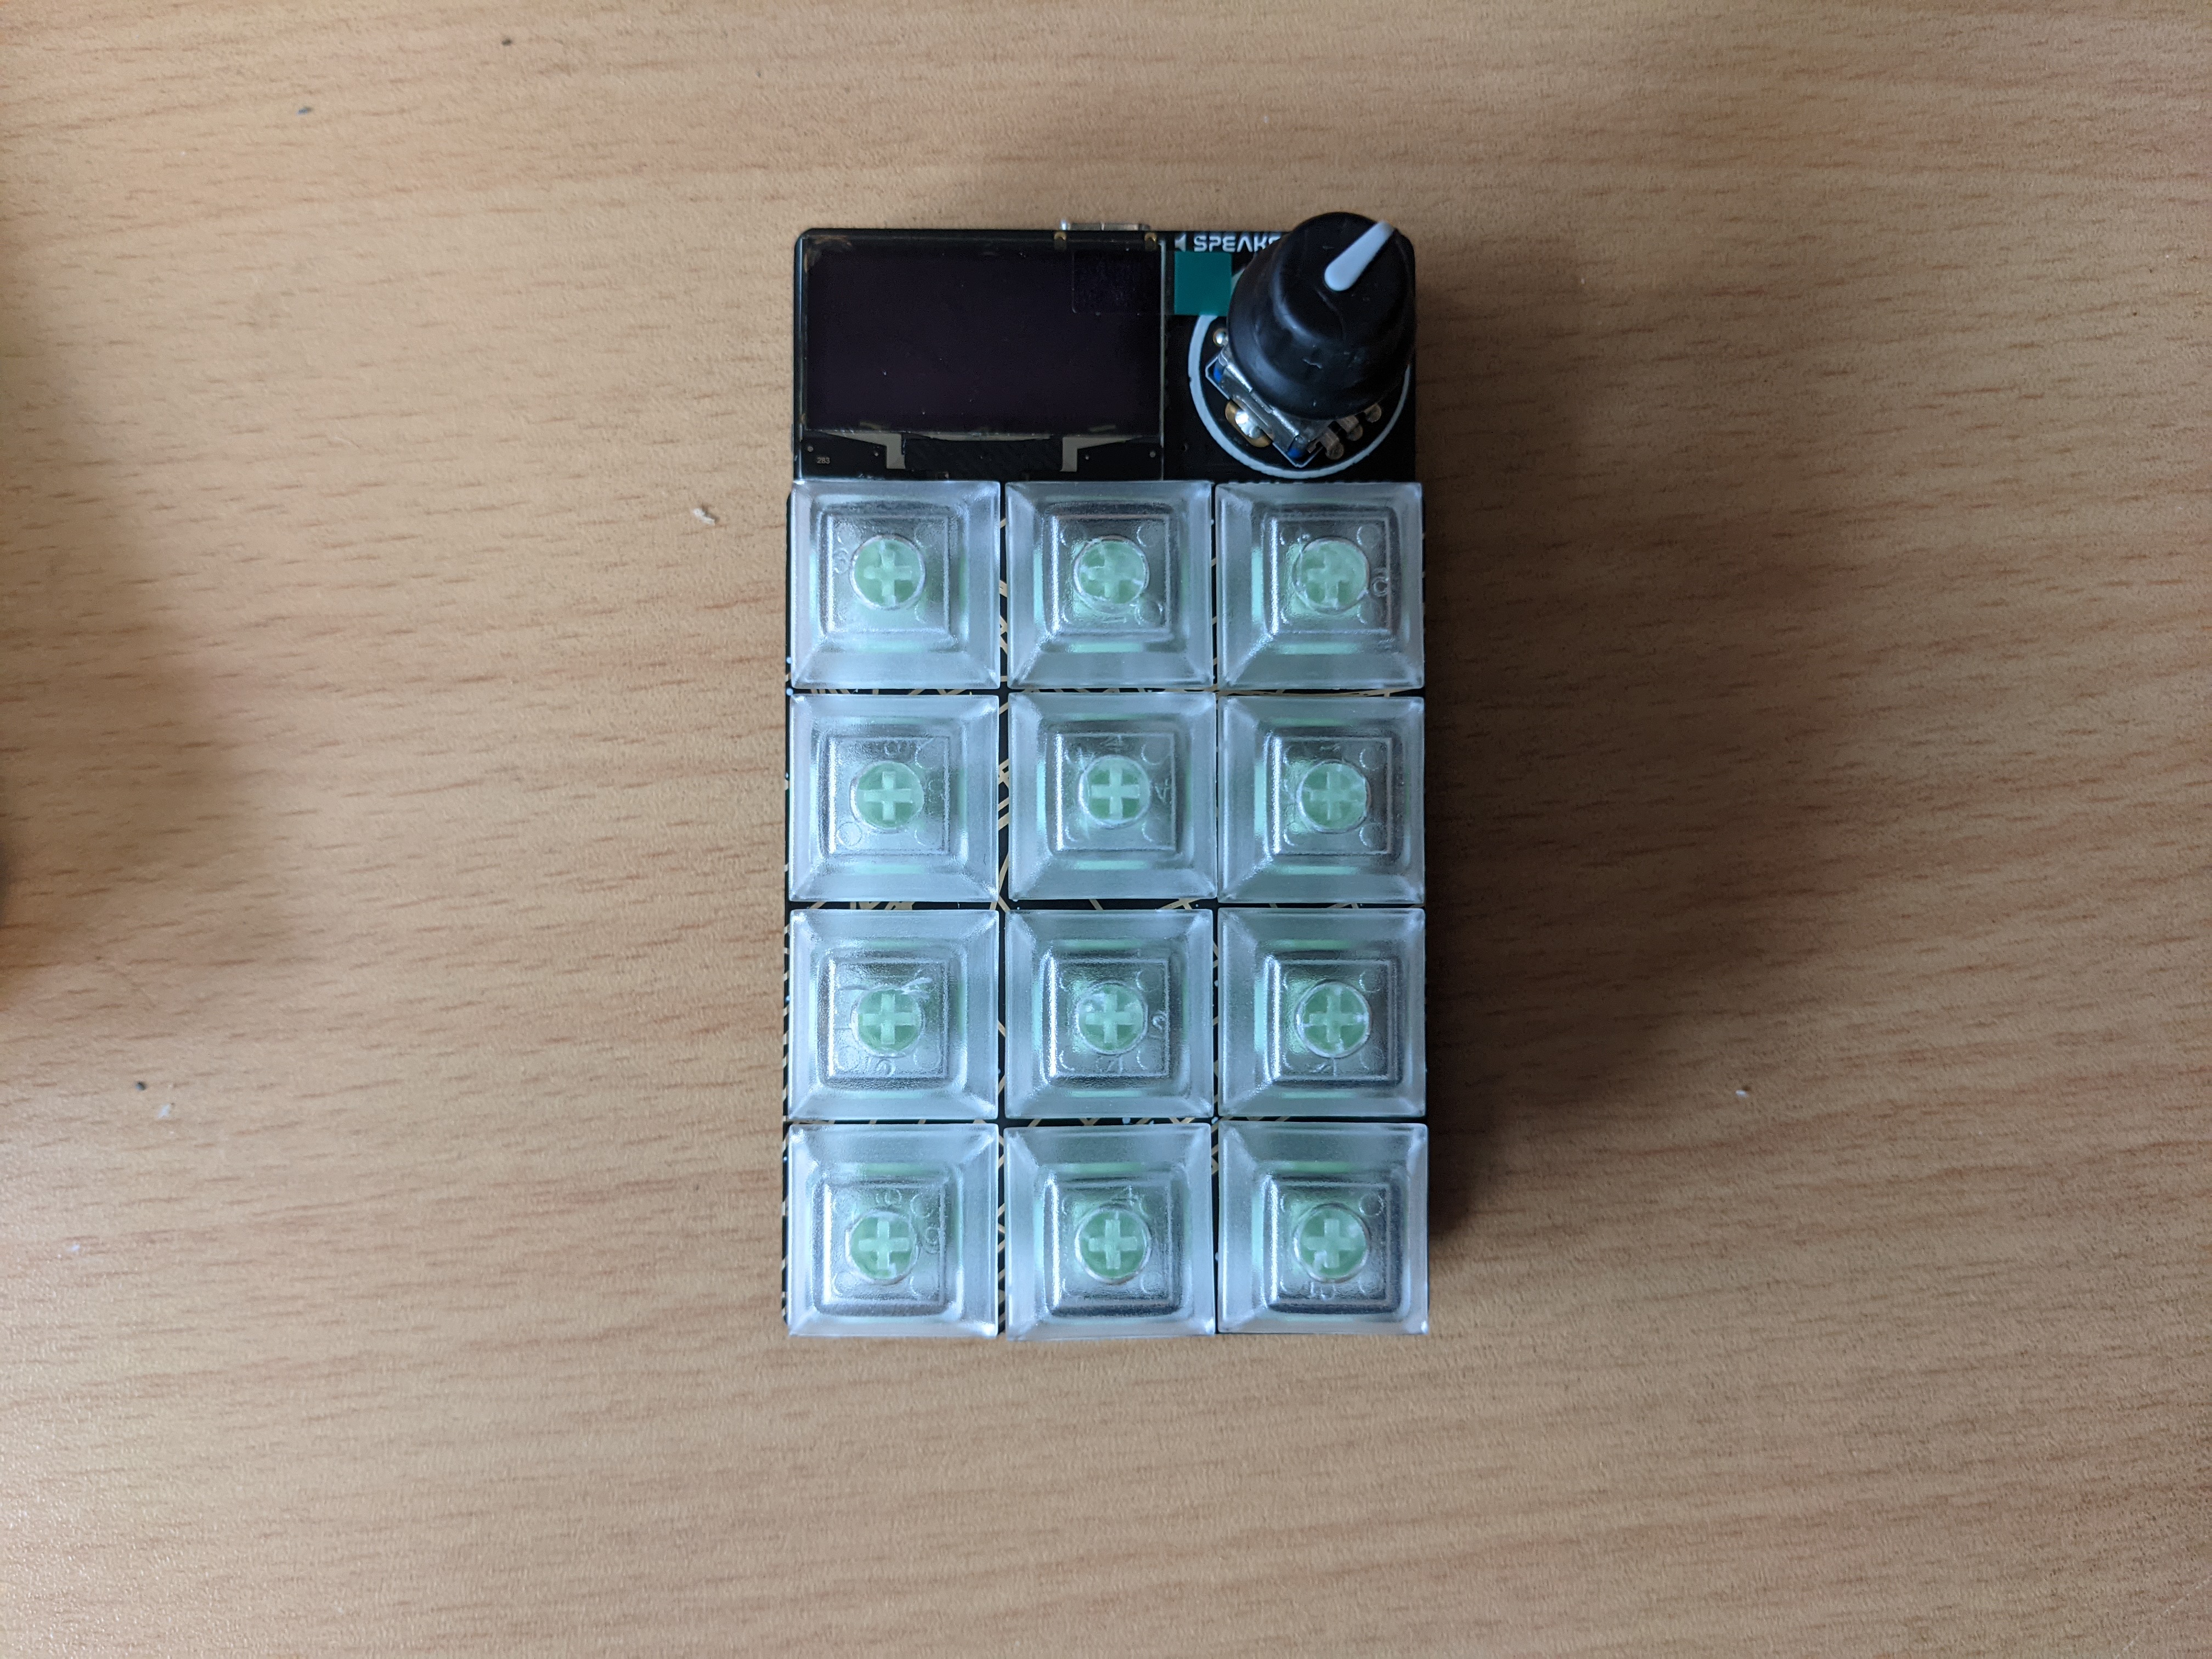
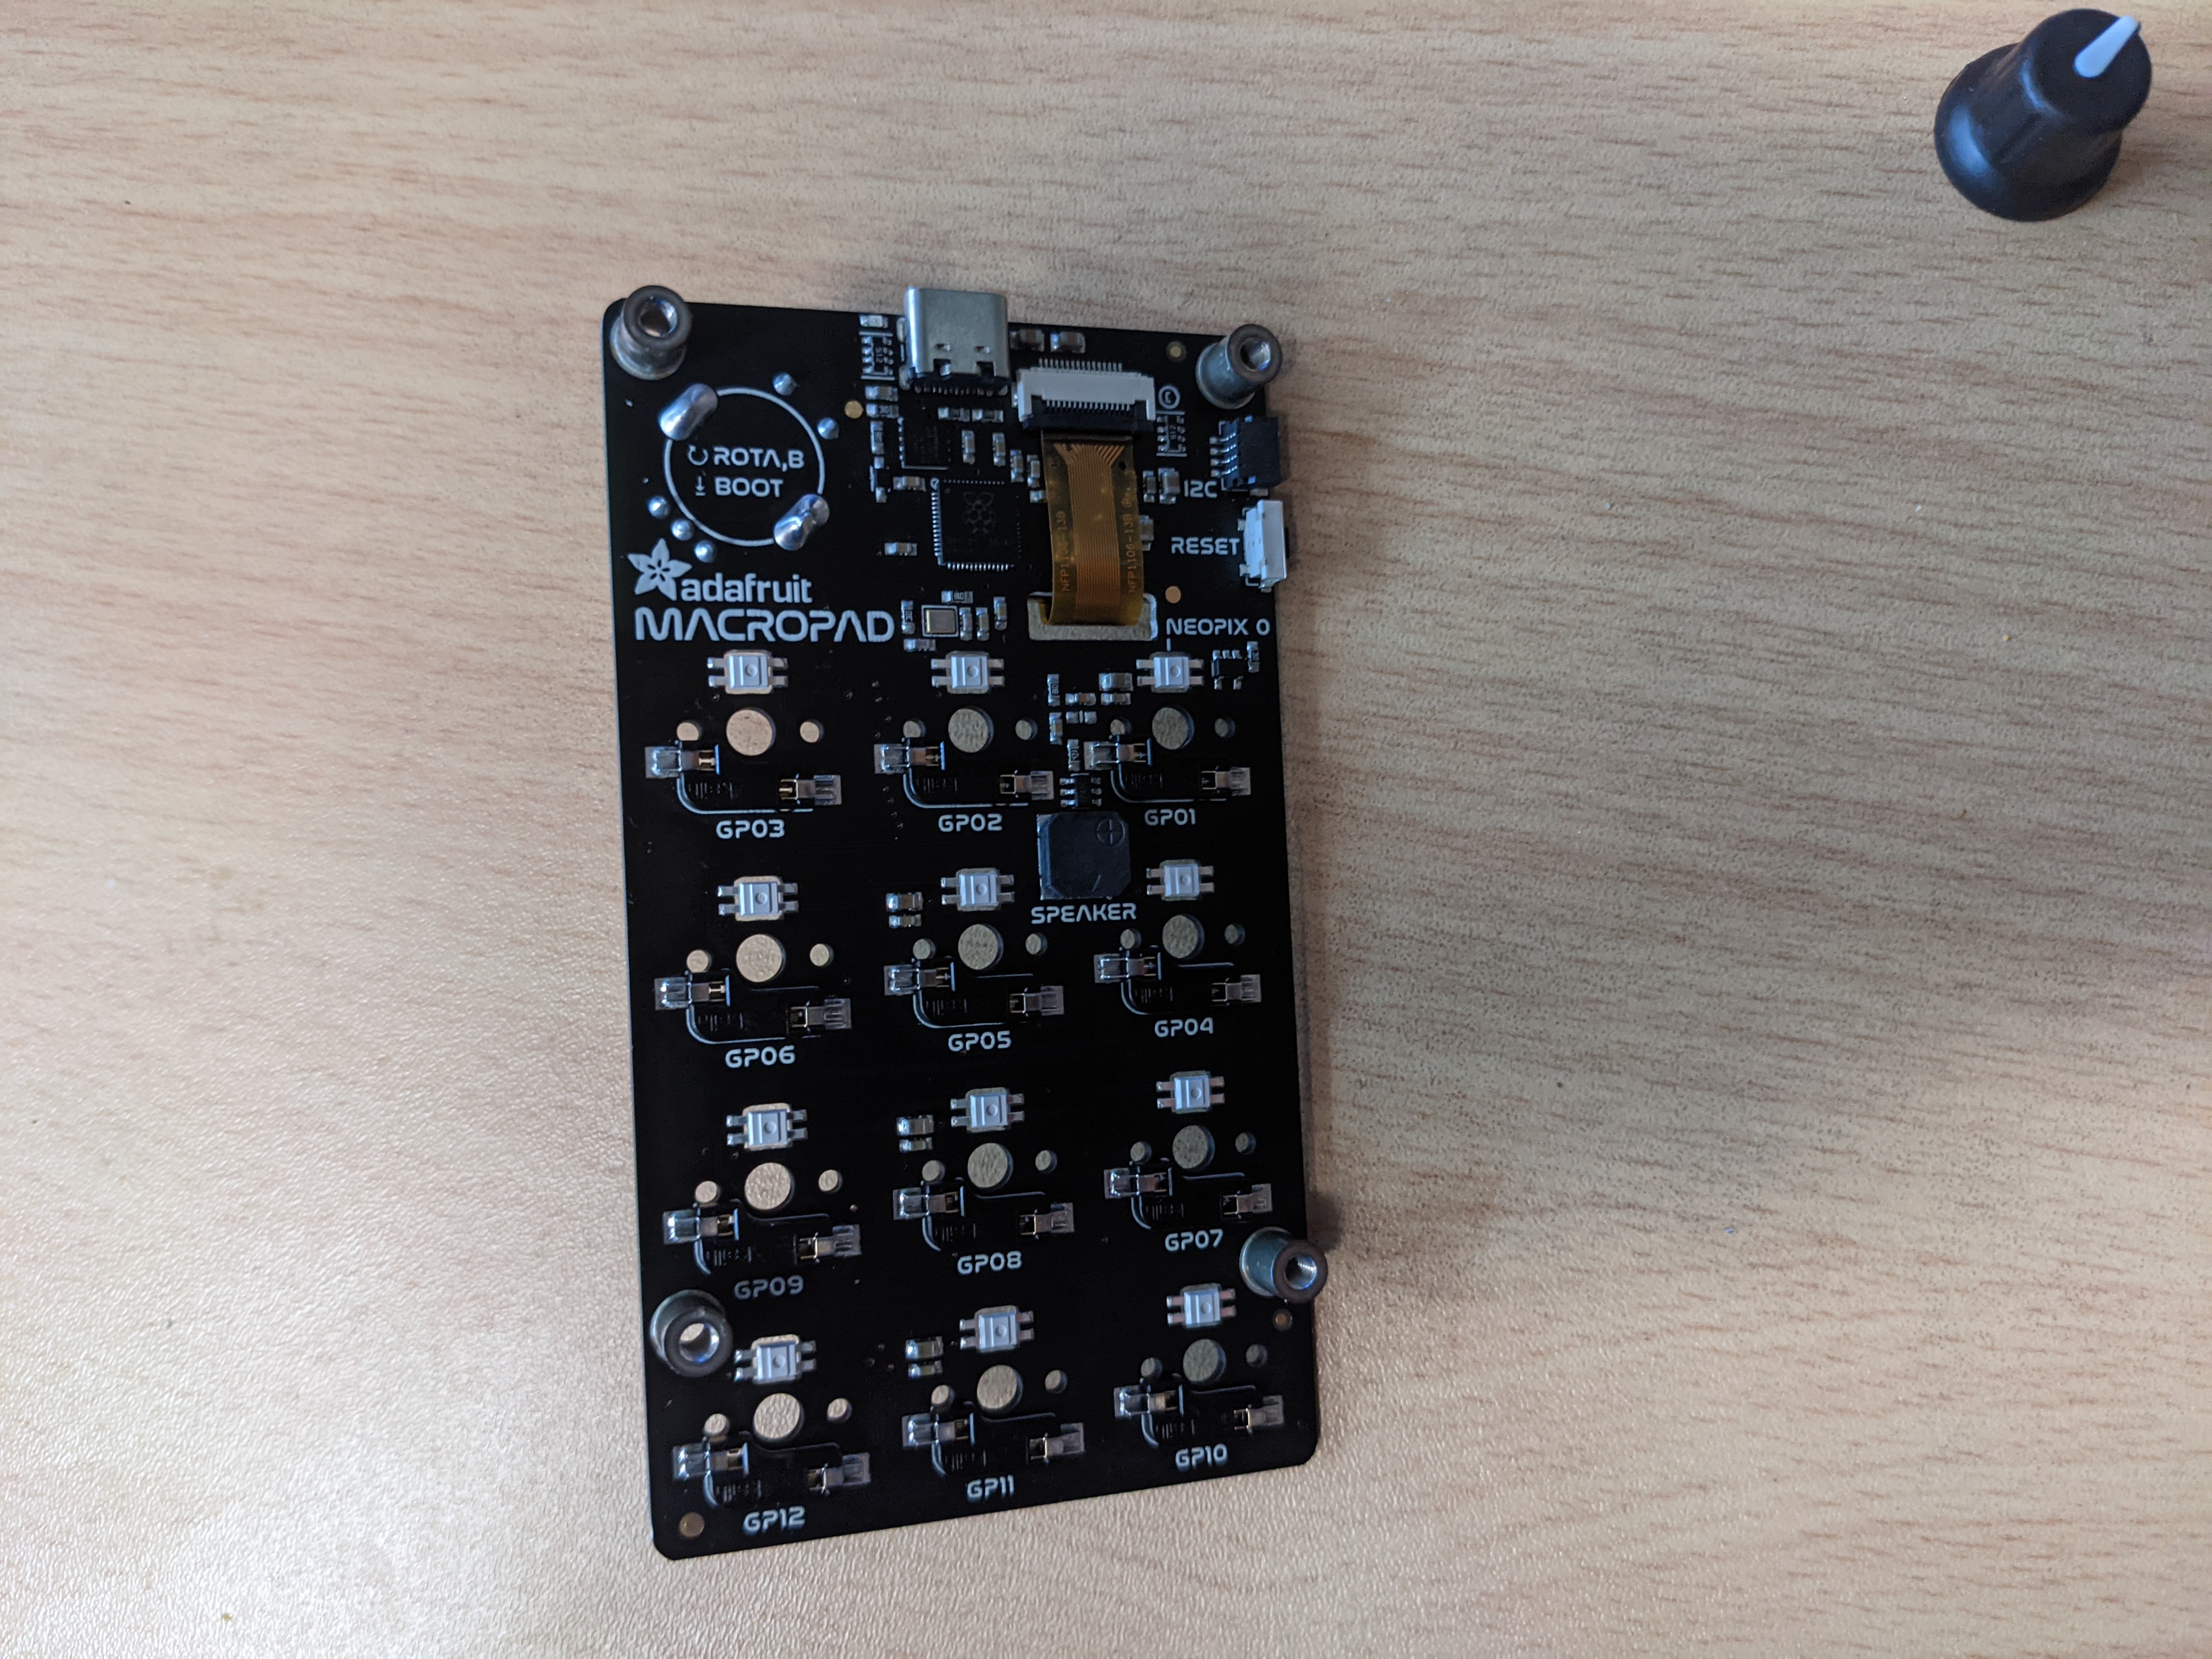
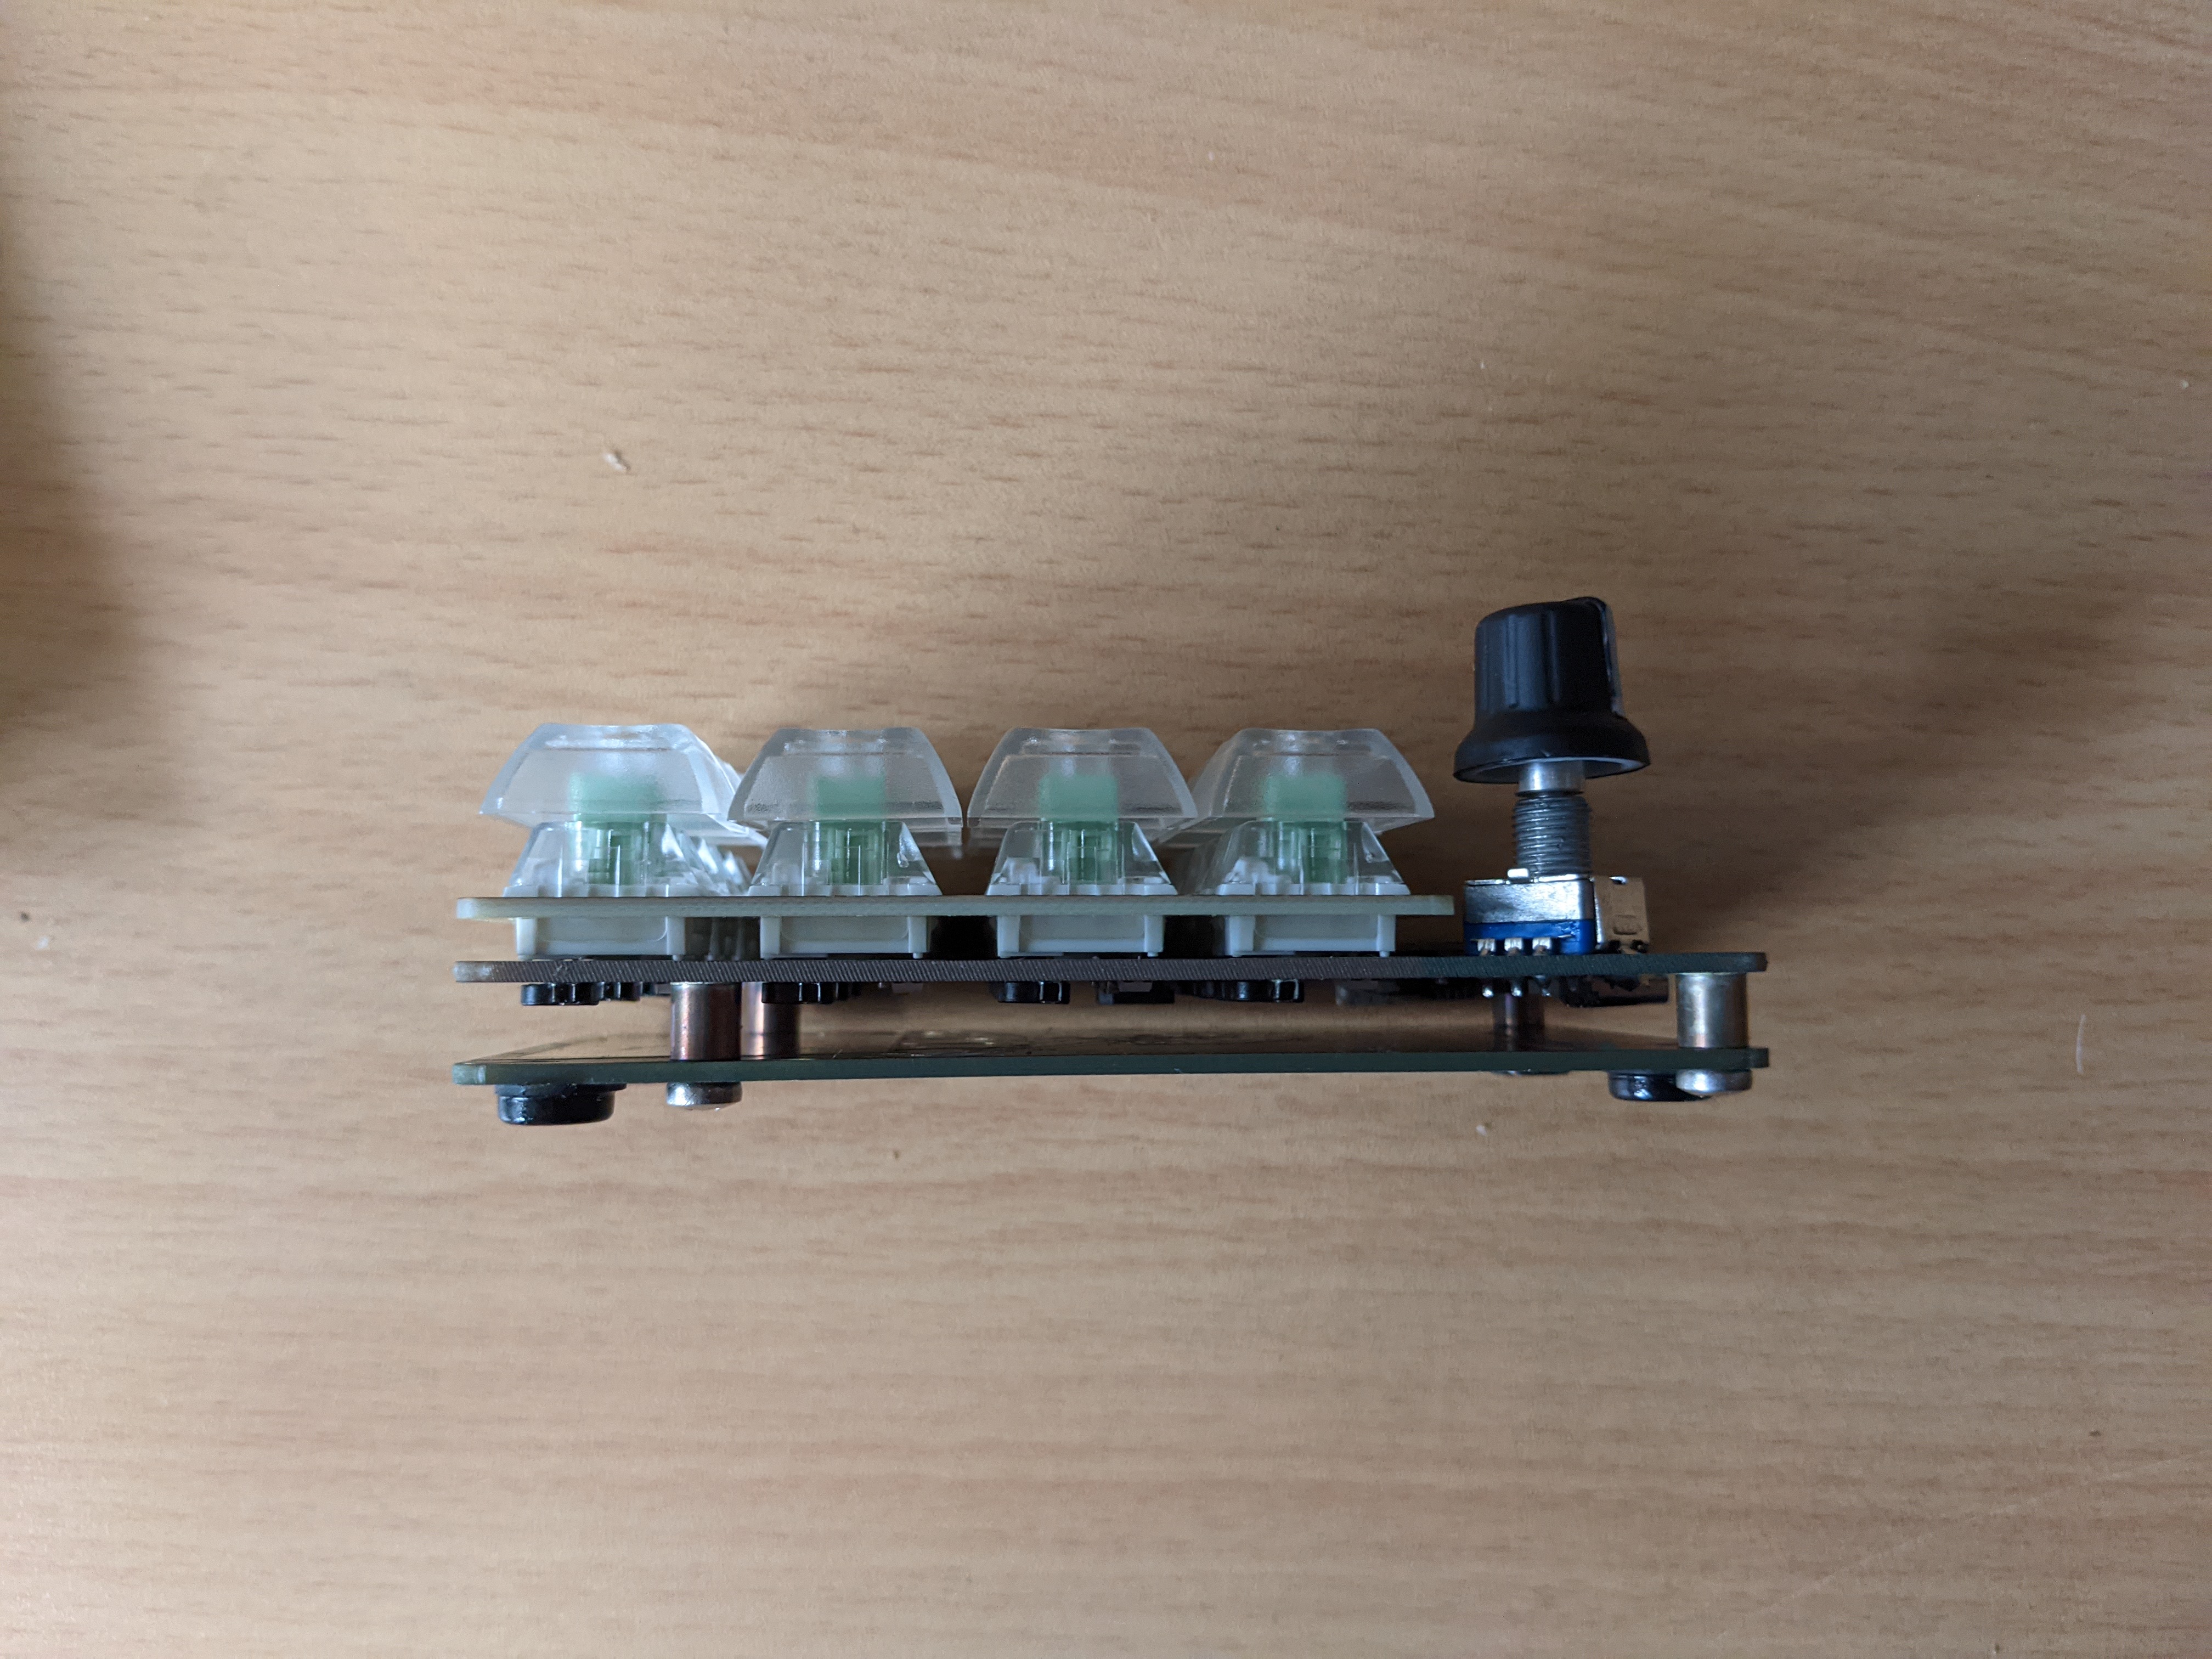
At 4.1 x 2.3 inches, the Adafruit MacroPad RP2040, is very compact, using the minimal amount of space to display its four rows of three keys each, with a small 128 x 64 monochrome OLED display and a rotary encoder lining the top row above the keys. On its back side, the MacroPad RP2040 has a USB-C port to get power and exchange data with a computer. On the left sit a physical reset button and Stemma QT port. To enter boot select mode -- for installing new firmware -- you must press down the rotary encoder while powering on the device.
The MacroPad has a little bit of a NASA theme to it as there’s a tiny icon of a space shuttle near the encoder and the word “Speaker” on the board is written in a very NASA-like font. If you get the enclosure kit or the Start kit which has the enclosure within it, the bottom piece has a picture of the keypad and dial along with the word MacroPad written in the same font. Depending on how you program it, there’s also lots of opportunity to add color as each key has an individually-addressable RGB Neopixel light underneath its switch.
More importantly, the bottom board lifts the keyboard 1.1 inches off your desk but that still left it significantly lower than my regular keyboard. There’s no built-in way to adjust the height of the MacroPad RP2040, but Adafruit does have a couple of 3D-printable enclosures / stands you can use with it, provided you have access to a 3D printer.
Get Tom's Hardware's best news and in-depth reviews, straight to your inbox.
Assembly and Set Up of Adafruit MacroPad RP2040
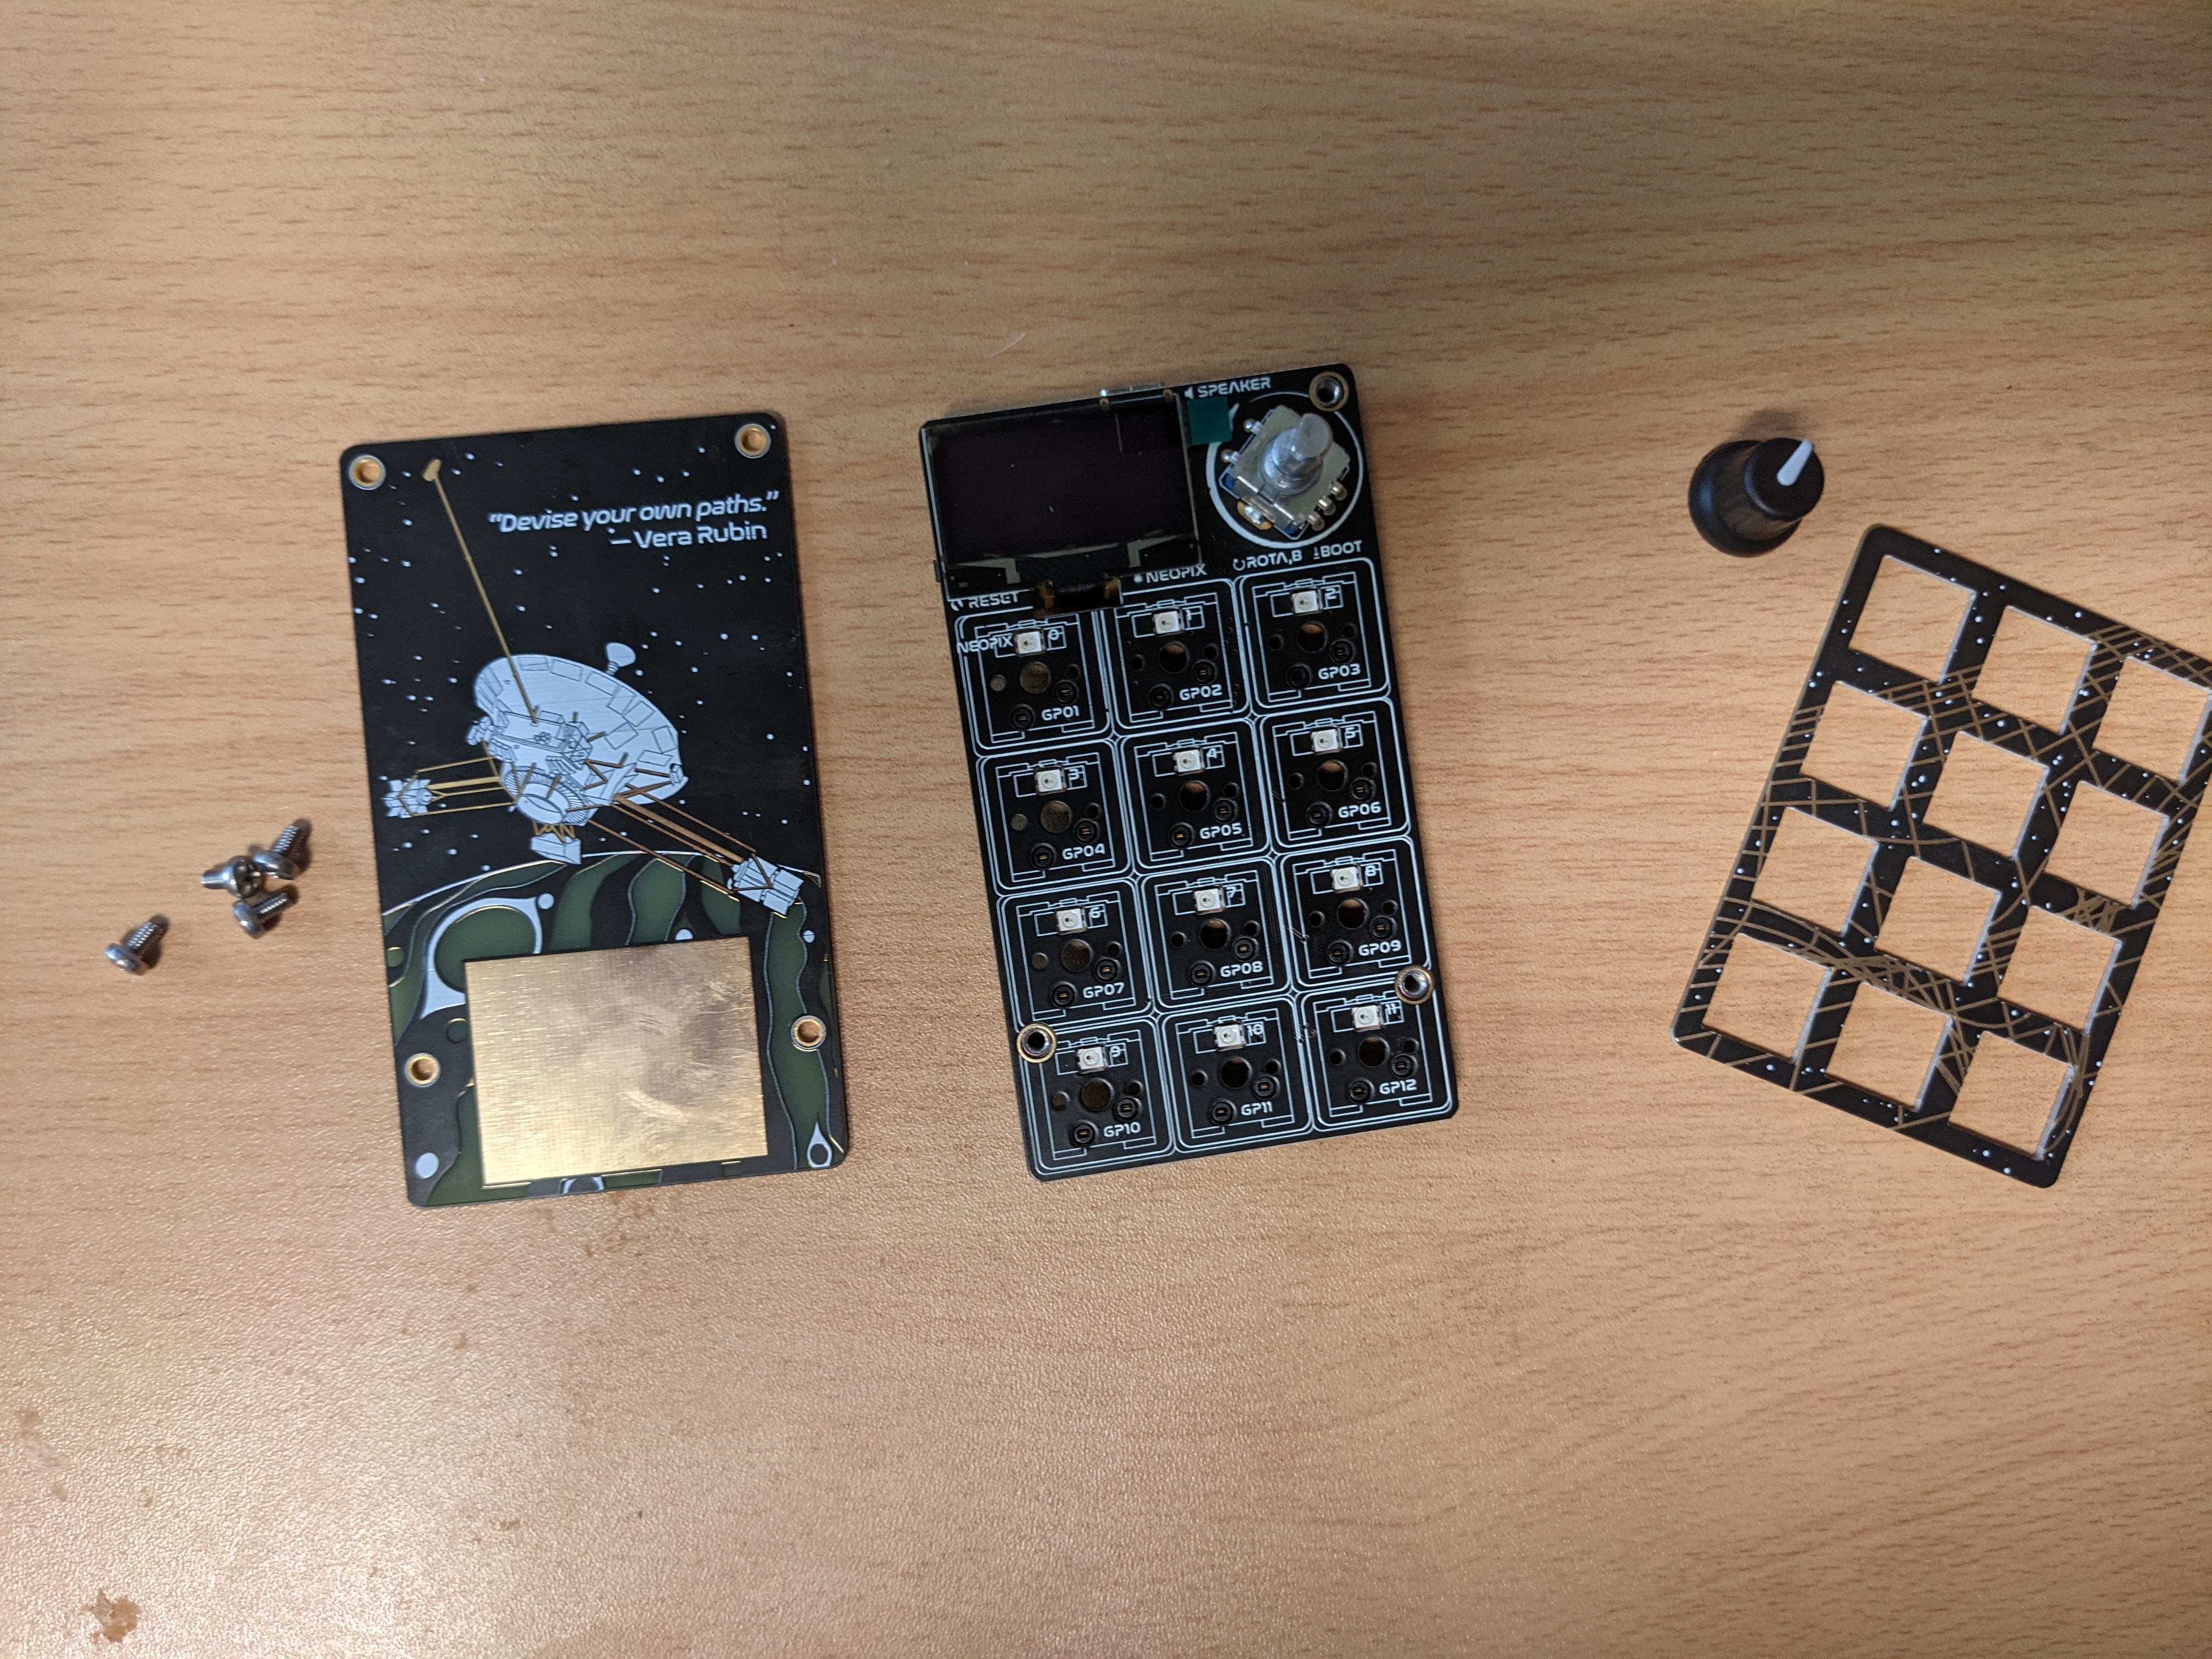
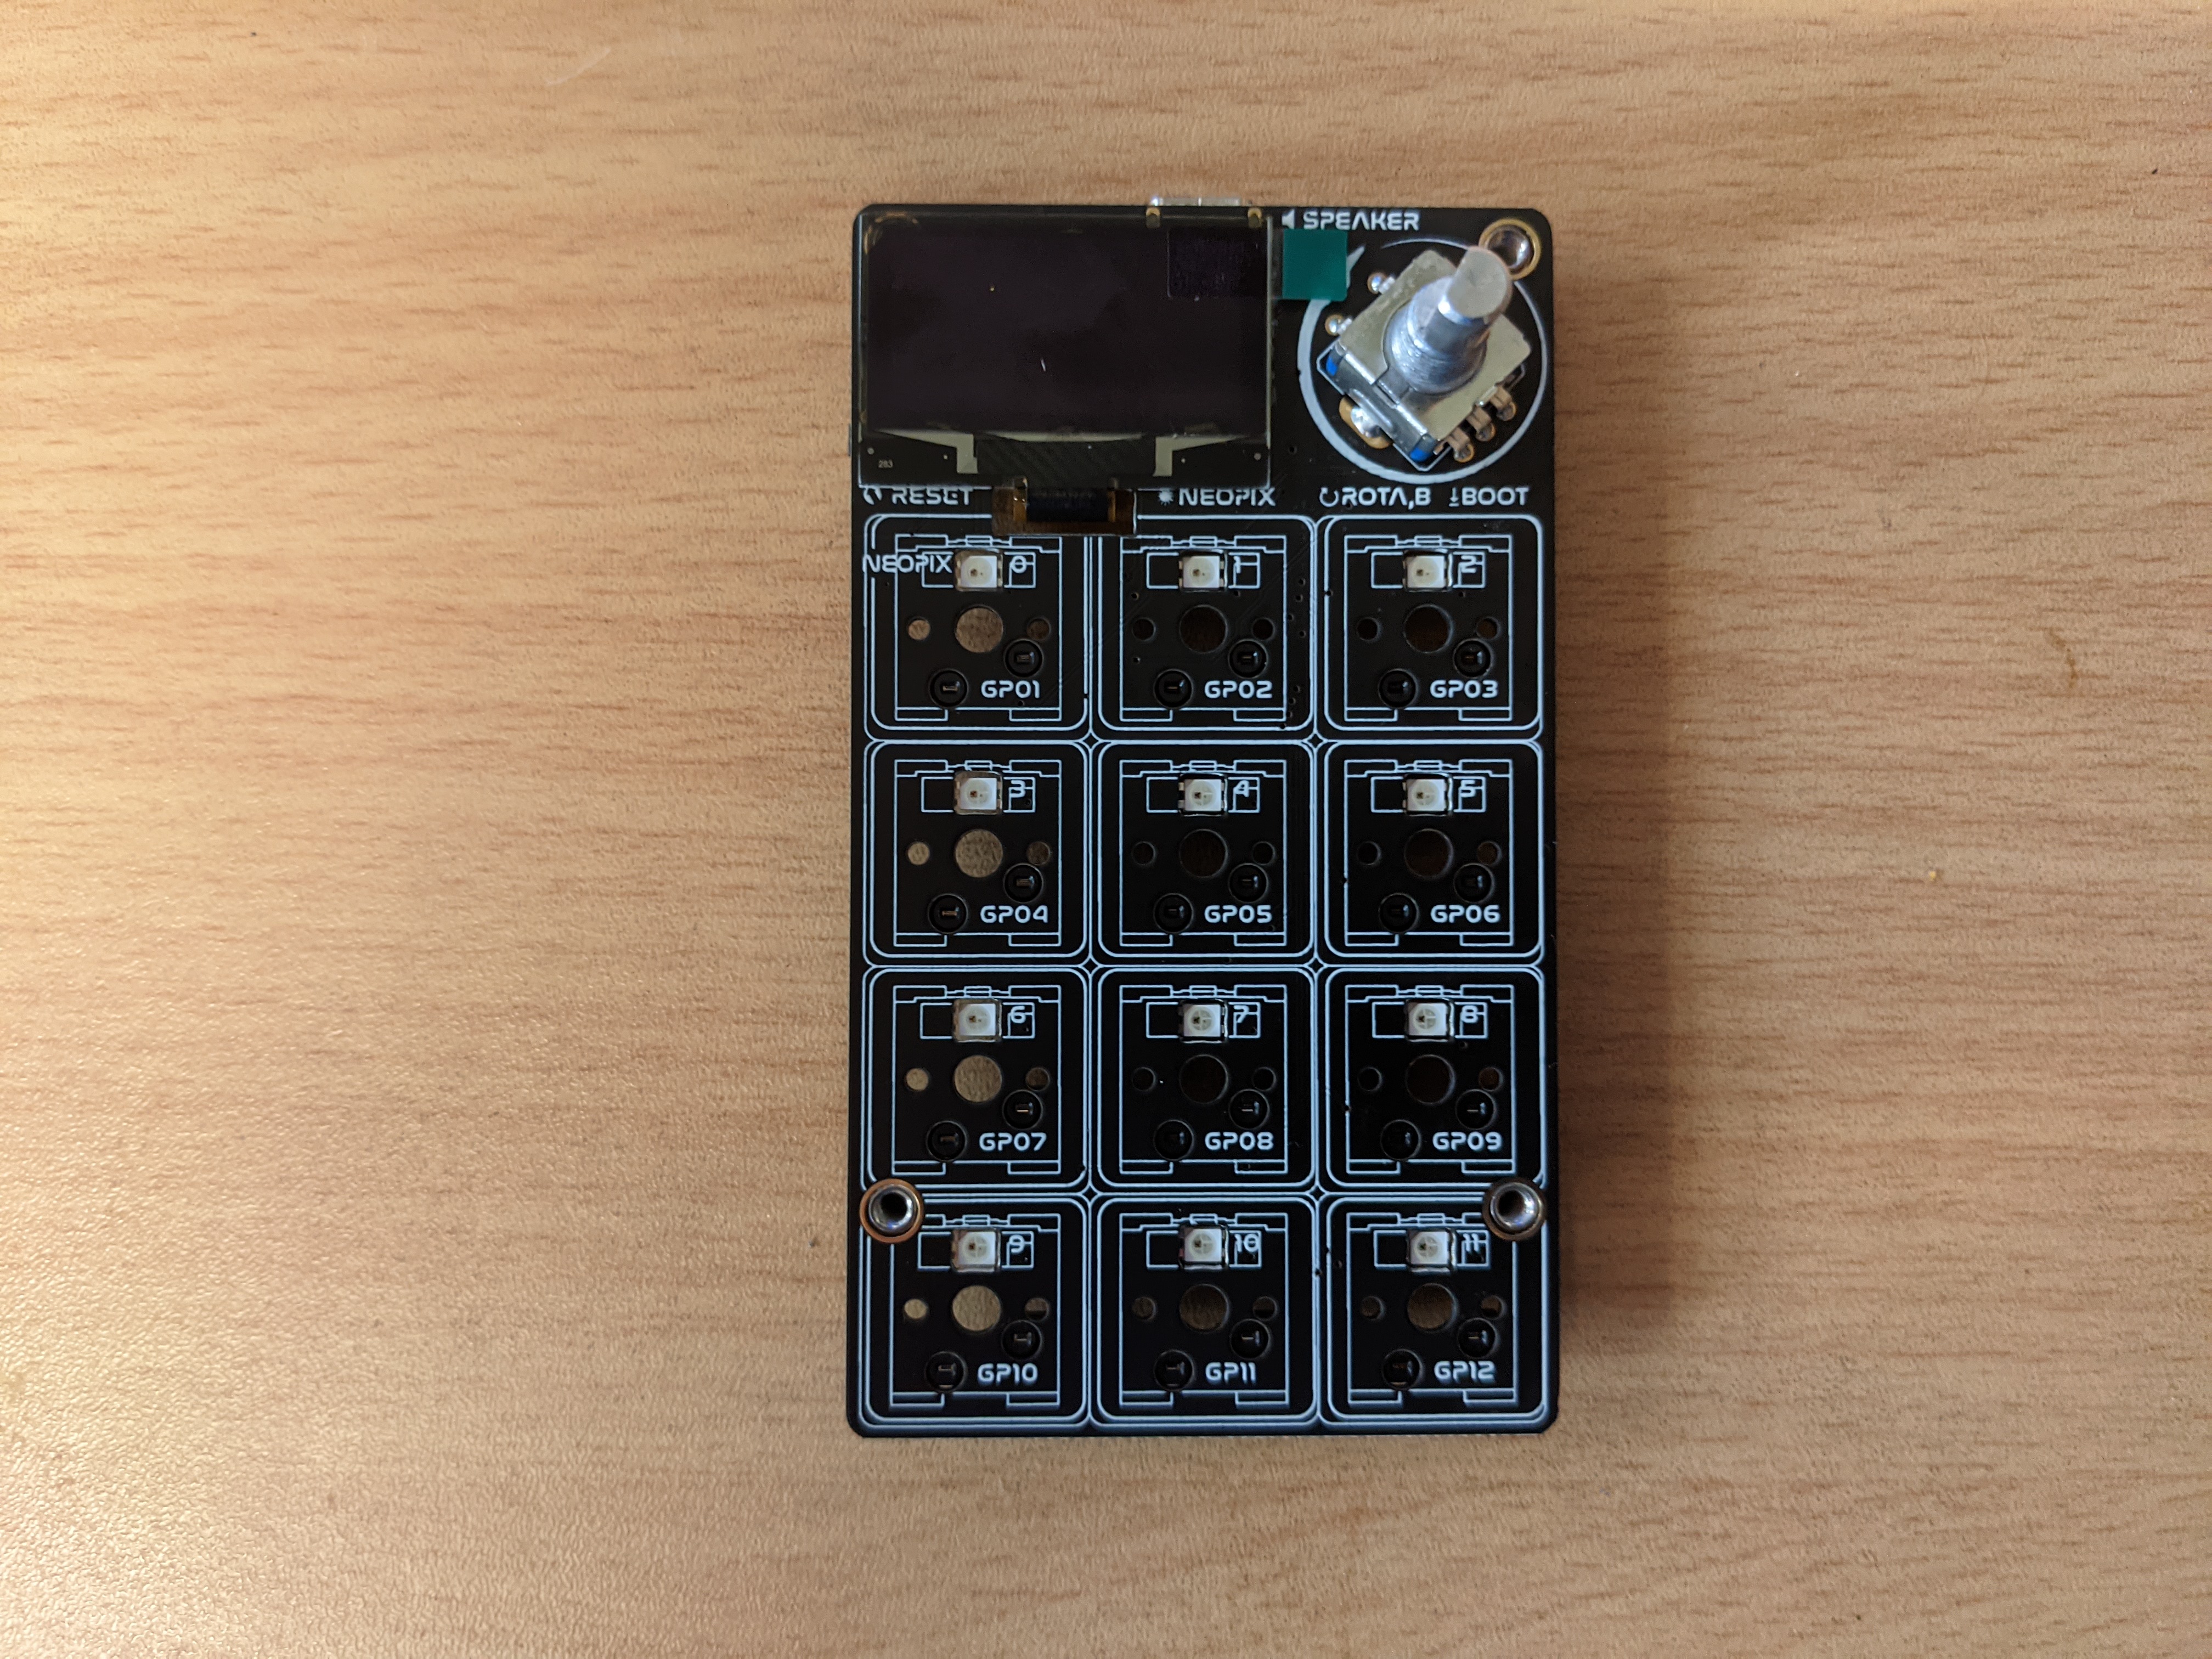
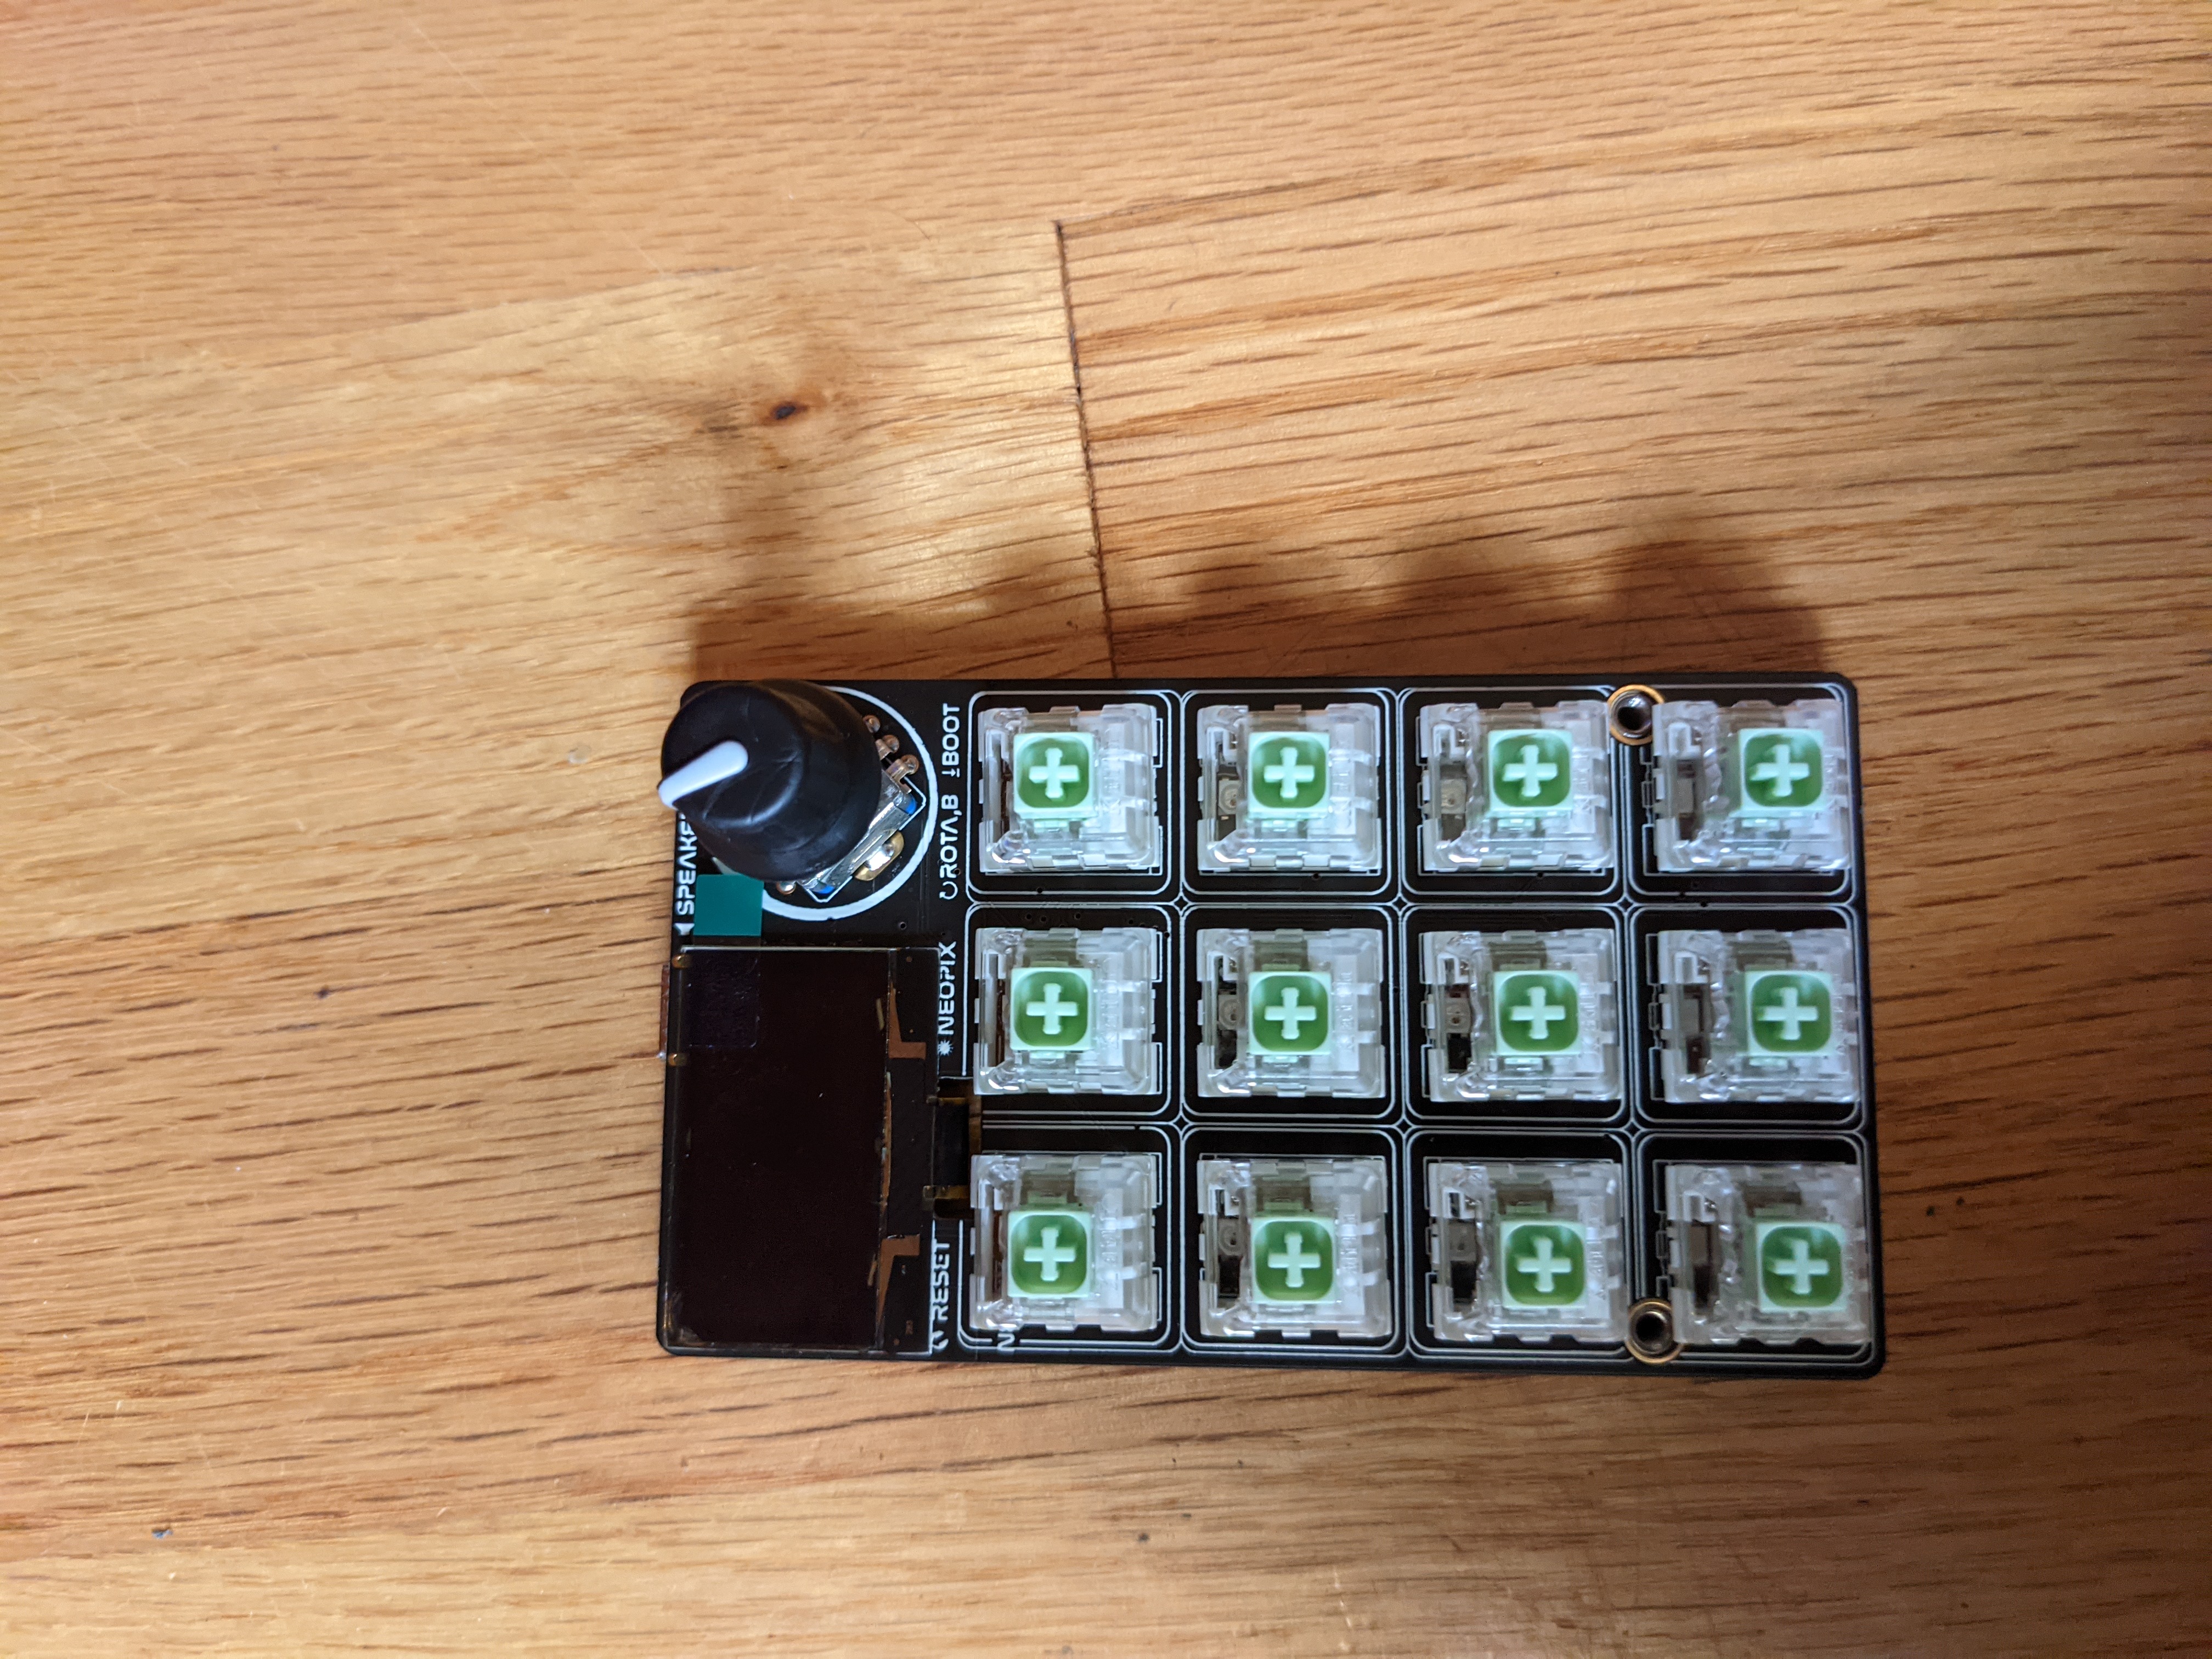
Setting up the Adafruit MacroPad RP2040 was a fairly quick process, though getting all 12 switches to stick in the hot-swappable sockets on the board took a couple of tries as a couple of times switches popped out when I tried to push the plate from the enclosure kit down on them. I found that putting all the switches into the plate and then pushing down might be easier. However, after I had all the switches on board, they were sturdy and didn’t pop out from regular use.
Screwing on the bottom plate takes just a moment and you may want to do it before you pop in the switches, just so you don’t accidentally dislodge them during the process. And, whether or not you get the enclosure kit, you should definitely attach some kind of cover knob to the rotary encoder dial, a process that takes a few seconds.
To do anything with the MacroPad RP2040, you’ll need to install CircuitPython firmware, in particular right now version 7. As with any other RP2040 board, it’s easy enough to do that. Just download the appropriate UF2 file from MacroPad’s page on CircuitPython.org, launch the device into boot select mode (by holding down the rotary encoder button while powering on / connecting to your PC) and drag the UF2 file over to the board, which appears as a storage drive with the label RPI-RP2 (as on every other RP2040 board).
You’ll also want to install some CircuitPython libraries. Depending on what you want to program, you may want the displayio, adafruit_hid or adafruit_displaytext libraries, among others. Adafruit also has a dedicated adafruit_macropad library, just for this device.
Programming the Adafruit MacroPad RP2040
While the RP2040 SoC supports several other programming languages, including C, MicroPython and Arduino language, you’ll really want to code this in CircuitPython. Adafruit’s fork of MicroPython has built-in support for turning any RP2040 device, including this one, into a USB HID device you can use like a regular peripheral in Windows, Linux or macOS. It also has libraries specifically for the macropad and for the Neopixel RGB lights and the screen.
Known for its detailed and helpful tutorials, Adafruit has no less than six tutorials on how to program the MacroPad RP2040, each of which has code that you can just download and use. The most useful of these is the MacroPad Hotkeys tutorial, which provides a template for creating different macro keysets for different apps. By default, the code in the tutorial includes nine macro sets that include Microsoft Edge in Windows, Adobe Photoshop in Windows or Mac and Firefox in Linux. You just turn the rotary encoder to choose among macro sets while the screen shows what each key does. Using this tutorial and sample code alone might be enough for many users.
However, since we like to build our own programs, my son and I created a few simple programs for the MacroPad RP2040. First, we coded a program that turns the device into an electronic keyboard where the first seven keys represent the A through G keys on a piano, holding down another key makes them sharps and rotating the rotary encoder changes the octave, which is displayed on the screen. Since we used the internal speaker, the sound wasn’t particularly high-volume or beautiful, but it worked. We also coded the MacroPad to play whole songs when we pressed a button.
The most useful program I wrote for the MacroPad RP2040 is one that simply maps each of the keys to function keys F13 to F24. Using just a few lines of code, you can map the 12 keys to any existing keyboard key or keyboard combination. For example, if you wanted to make a “copy” button, you could map CTRL+C to one of MacroPad’s keys. Or, if you don’t have a numeric keypad on your main keyboard, you can turn the MacroPad into one.
I chose to make my keys into F13 - F24 because these extended function keys, which are absent from 99% of PC keyboards, aren’t already assigned to anything else. So I could then use a dedicated macro program on my PC, in my case AutoHotKey, to assign complex macros or program launches to them, without worrying about interfering with anything else.
Use Cases for Adafruit MacroPad RP2040
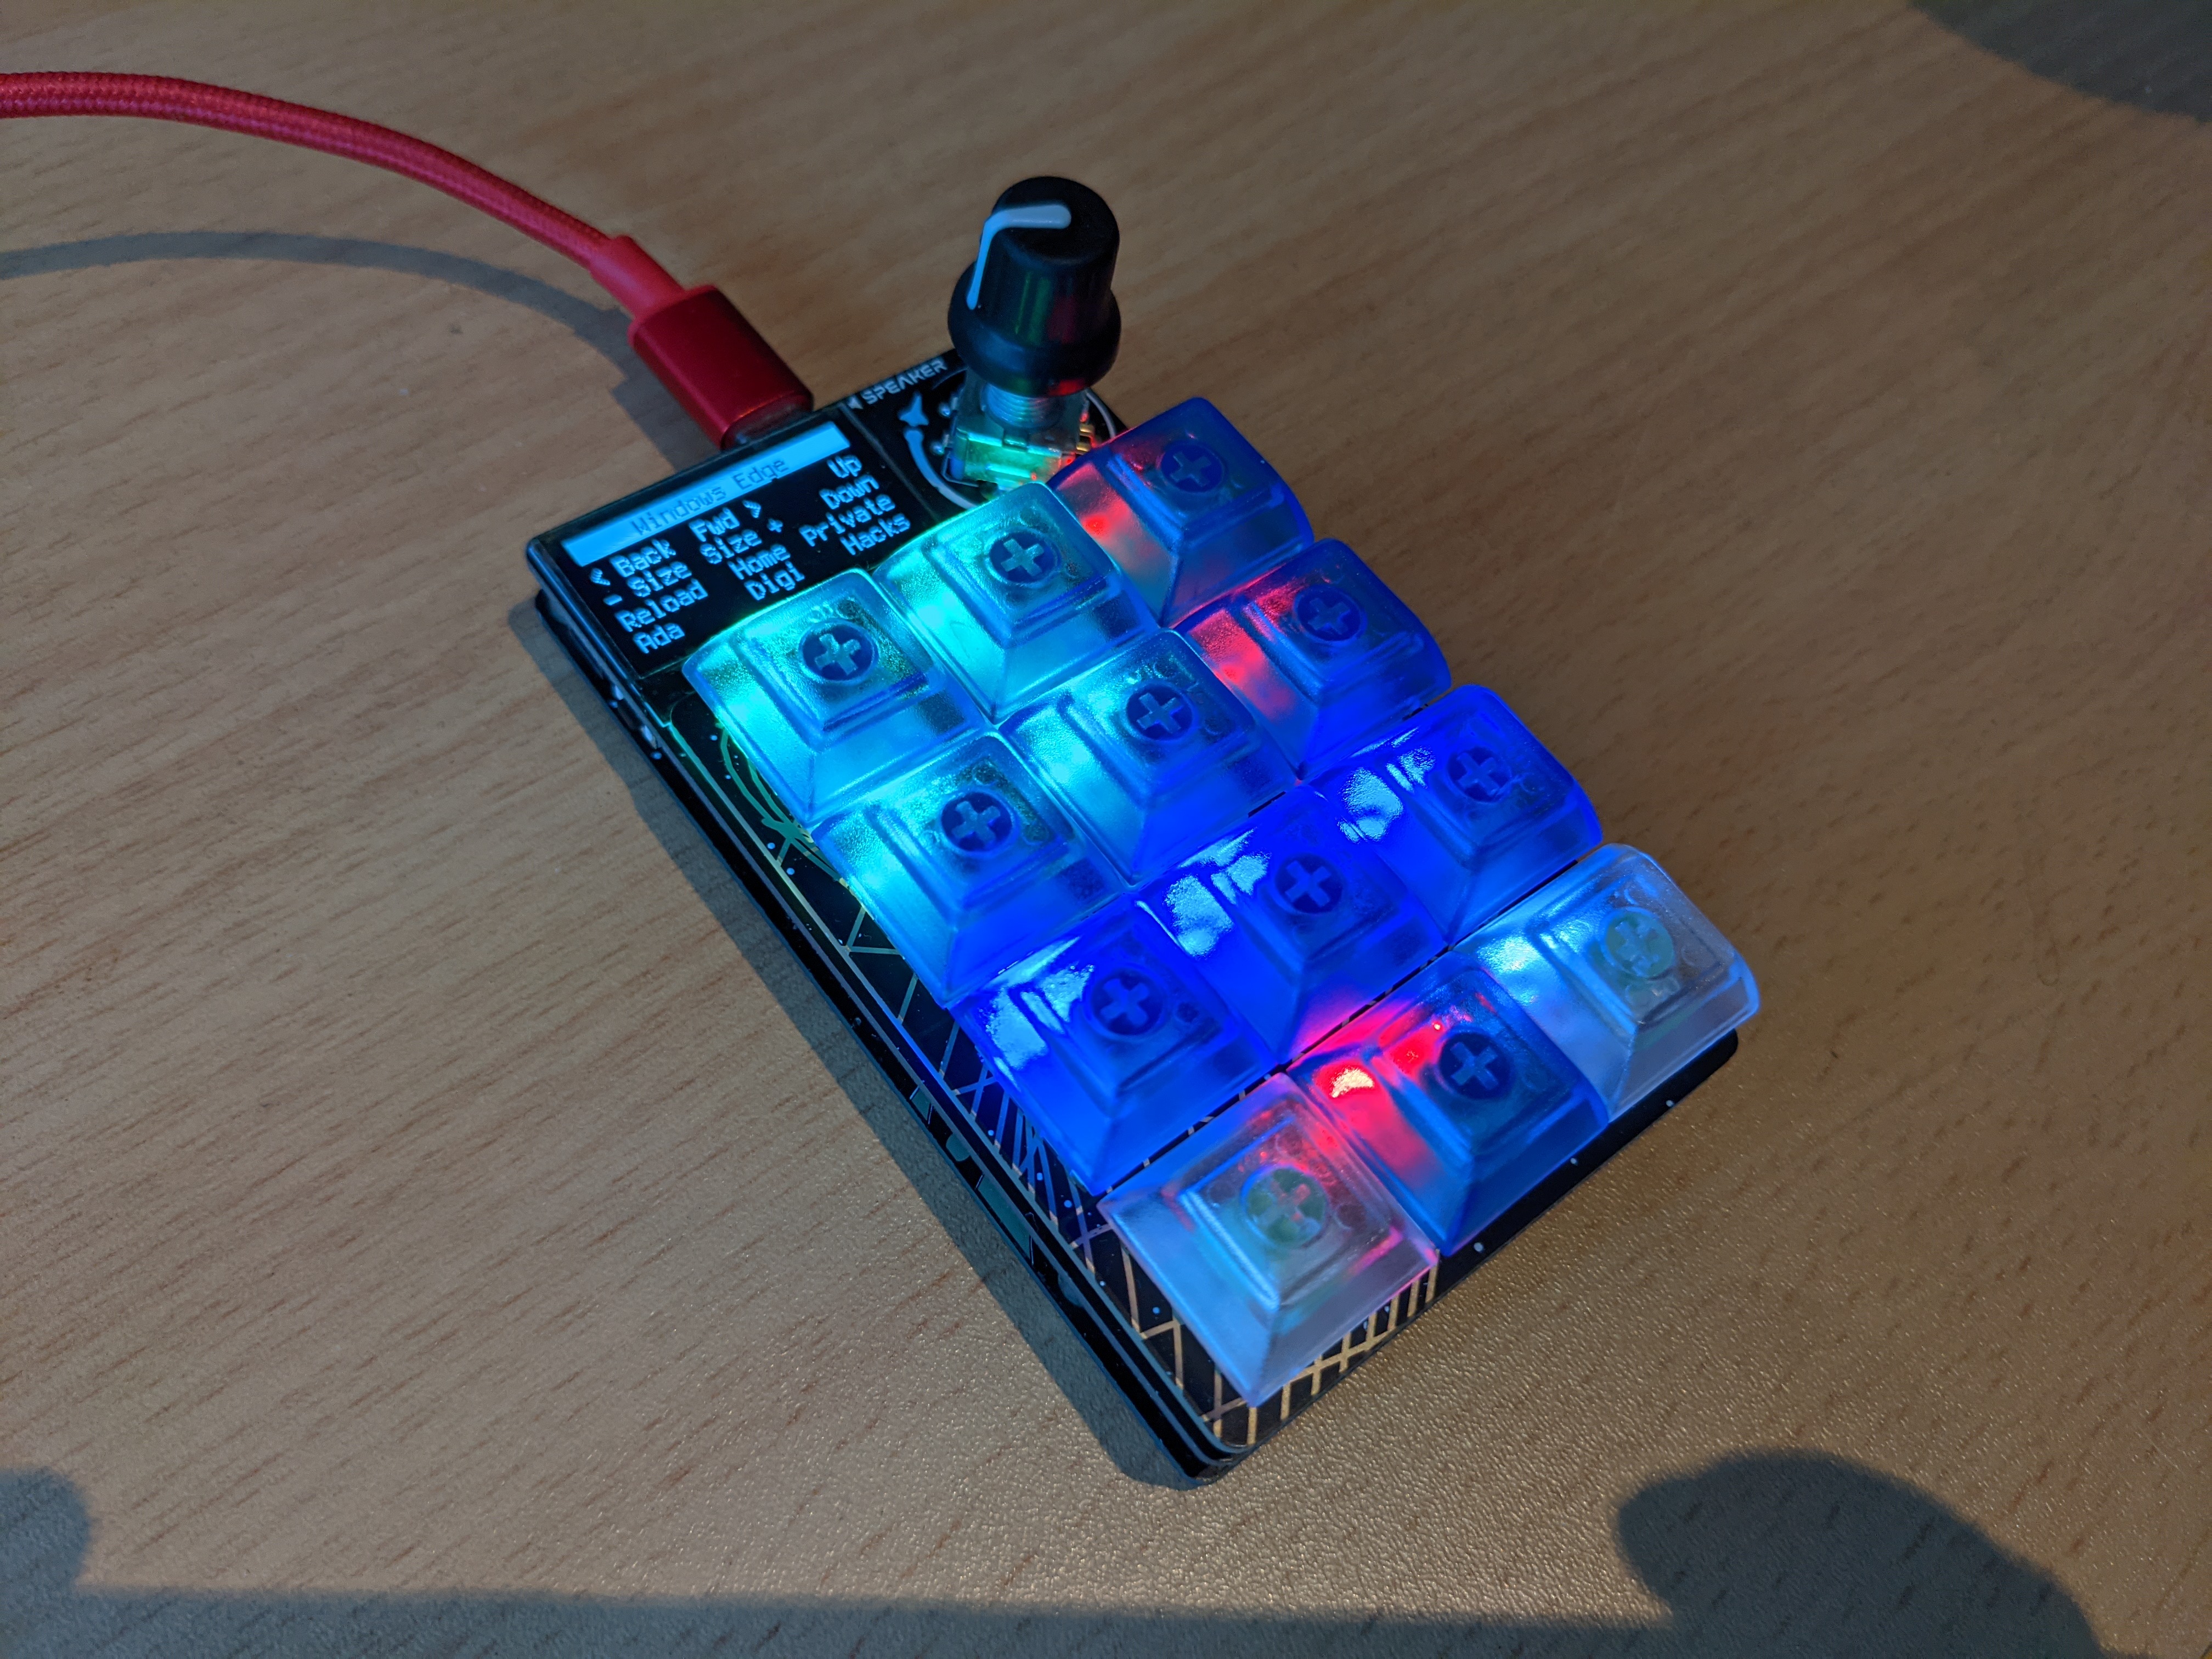
The most obvious use case for any macro keypad is as a second keyboard that gives you additional keys. With a few lines of code, you can make each key send a keyboard combination or dedicated function key message to any computer you plug it into. However, there are other possibilities.
Like me, you can program the MacroPad RP2040 to play music. Or you can use it to create simple games like Simon Says or this TK tutorial from Adafruit.
Another practical use for the MacroPad RP2040 is as a Time-based One Time Password (TOTP) generator that you can use as the second factor in 2FA for various services the way you use Google Authenticator on your phone. Adafruit has a great tutorial on how to use the pad for TOTP and each key can be for a different service.
You can also connect a Stemma QT device such as an accelerometer, air quality monitor or touch sensor to the MacroPad RP2040. The possibilities are nearly endless.
Bottom Line
There’s a lot to love about the Adafruit MacroPad RP2040 and not much to quibble with. The pad provides much more flexibility and functionality than competitors such as the Pimoroni Keybow RP2040. However, if you don’t like the idea of putting together and coding your own keypad, there are many off-the-shelf keypads such as the Elgato Streamdeck line or the Coolermaster ControlPad.
No device is perfect. I wish the MacroPad was height adjustable so I could get it to the same height and angle as my regular keyboard, though 3D printing a stand could get me there. Having a color rather than a monochrome screen would be another plus, but one that undoubtedly would add to the price.
However, all things considered, the MacroPad RP2040 is a fantastic device that any electronic hobbyist or productivity geek would love. Just consider whether you like linear switches or not. If you don’t, skip the starter kit and buy the bare bones kit and the enclosure kit, along with the switches and caps of your choice.
Avram Piltch is Managing Editor: Special Projects. When he's not playing with the latest gadgets at work or putting on VR helmets at trade shows, you'll find him rooting his phone, taking apart his PC, or coding plugins. With his technical knowledge and passion for testing, Avram developed many real-world benchmarks, including our laptop battery test.
