Tom's Hardware Verdict
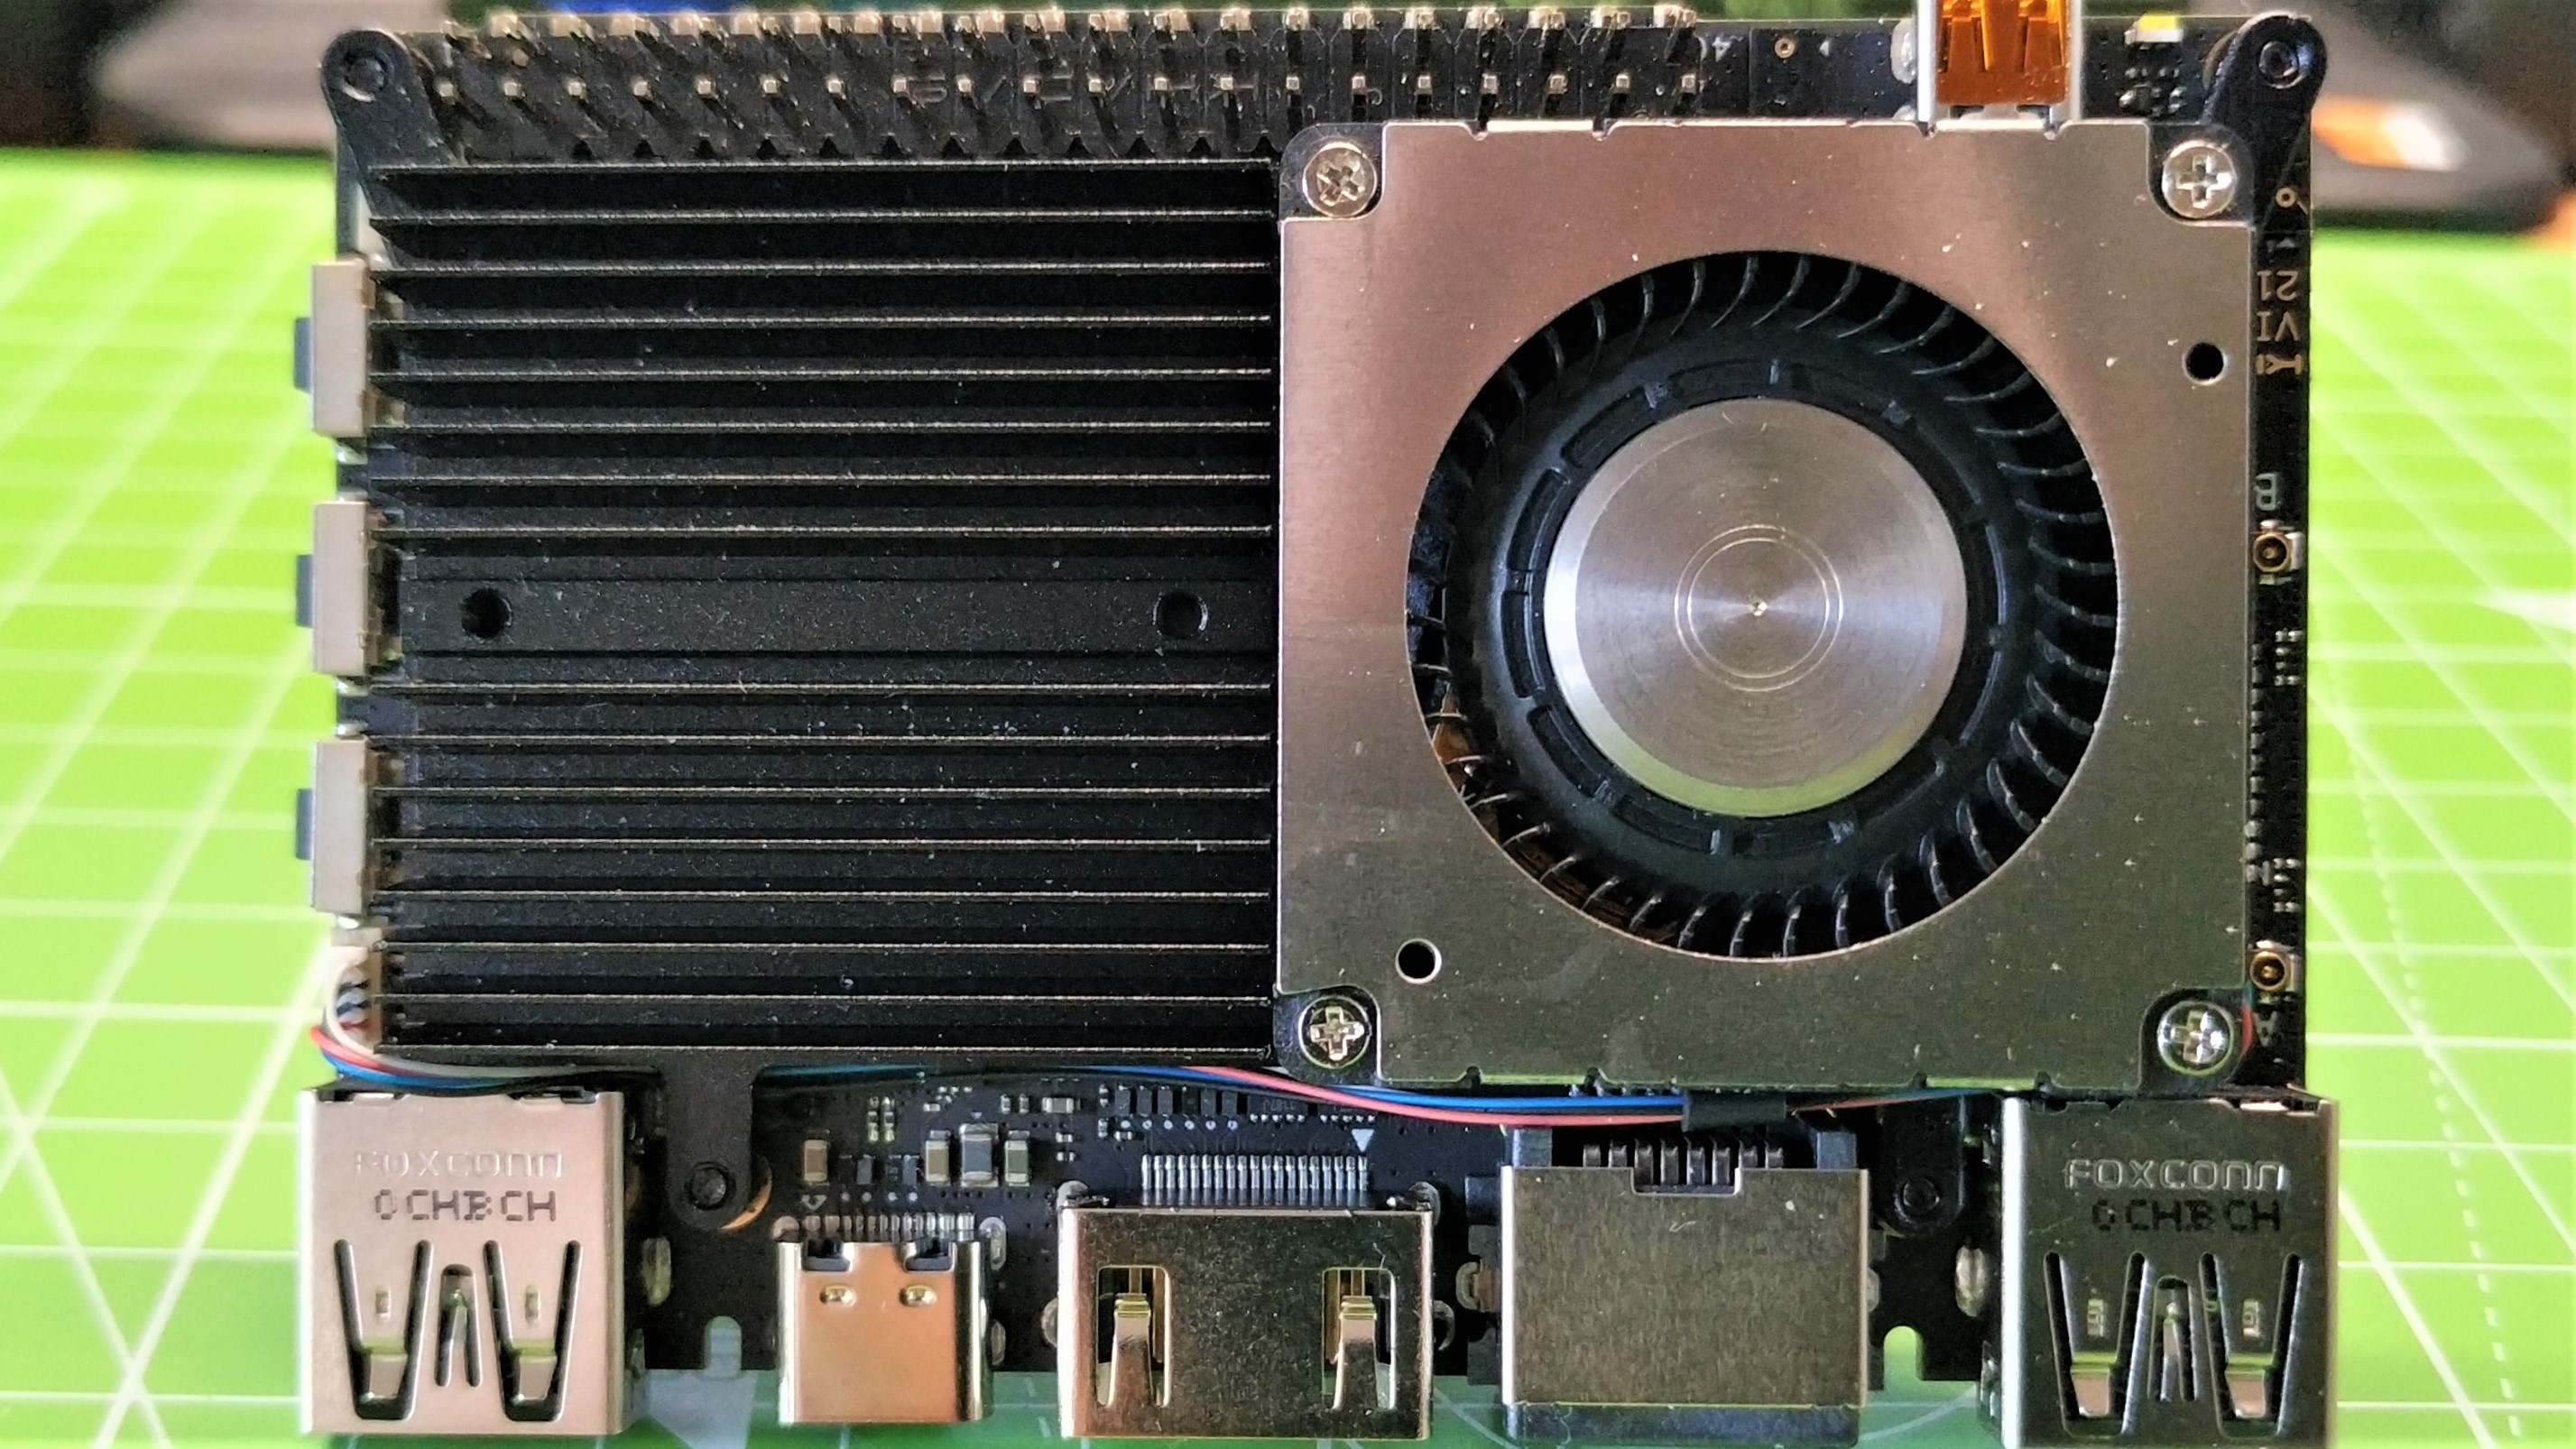
The Khadas VIM4 is faster than the fastest Raspberry Pi and offers more connectivity options, but it’s not currently compatible with the huge array HATs and other Pi add-on boards.
Pros
- +
For factor is great
- +
Very powerful
- +
Impressive Android performance
- +
4K YouTube with Android
- +
Onboard eMMC
Cons
- -
Limited GPIO Support
- -
Not compatible with Raspberry Pi HATs
Why you can trust Tom's Hardware
There have been many pretenders to the Raspberry Pi’s crown, some good and some bad. But none have managed to throw the Raspberry Pi offs its throne as the go-to single board computer for projects. Khadas’s VIM4 is the latest to make the attempt and it comes so close.
The Khadas VIM4 is an octa-core Arm CPU package with a quad-core Arm Cortex A73 running at up to 2.2 GHz, and a 2-GHz Arm Cortex A53. This is backed up with 8GB of LPDDR4X running at 2016 MHz. But there is something else with the Khadas VIM4. Hidden under the flat heatsink is a 32GB eMMC 5.1 chip which gives us better performance than a micro SD card.
Measuring roughly the same as the Raspberry Pi 4, the $239 Khadas VIM4 doesn’t share the same exact form factor as the Pi nor its price range (when the Pi is at MSRP). Rather we have the ports located along one long side of the board. This makes it look a little tidier and dare we say, more professional.
But good looks will only get you so far; you need the brains and the brawn to get the job done, and the only way to find out is to put the Khadas VIM4 on the bench and take it for a test drive.
Khadas VIM4 Specifications
| SoC | Amlogic A311D2 2.2GHz Quad core ARM Cortex-A73 and 2.0GHz Quad core Cortex-A53 CPU |
| Row 1 - Cell 0 | ARM Mali-G52 MP8(8EE) GPU up to 800MHz 8K 24fps decoder & low latency 4K H.264/H2.65 50fps encoder Support multi-video decoder up to 4Kx2K@60fps+1x1080P@60fps HDR10, HDR10+, HLG and PRIME HDR video processing TrustZone based security for DRM video streaming |
| RAM | 8GB LPDDR4X 2016MHz, 64 bit |
| Storage | 32GB eMMC 5.1 |
| Row 4 - Cell 0 | Micro SD card |
| Row 5 - Cell 0 | M.2 NVMe via external breakout board (sold separately) |
| Ports | 1 x USB 2 |
| Row 7 - Cell 0 | 1 x USB 3 |
| Row 8 - Cell 0 | 1 x HDMI 2.1 |
| Row 9 - Cell 0 | Gigabit Ethernet |
| Row 10 - Cell 0 | 1 x USB Type C (USB 2 OTG and USB PD) |
| Wi-Fi / Bluetooth | AP6275S Wi-Fi 6 Module |
| Row 12 - Cell 0 | 802.11a/b/g/n/ac/ax, 2T2R MIMO with RSDB [2] |
| Row 13 - Cell 0 | Bluetooth 5.1 |
| GPIO | 40 pin GPIO not Raspberry Pi compatible CPU: USB, I2C, I2S, SPDIF, UART, PWM, ADC, GPIO MCU: SWCLK, SWDIO |
| Power | USB C 9 - 20V (12V in our tests) |
| OS Support | Ubuntu 22.04 |
| Row 17 - Cell 0 | Android 11 |
| Dimensions | 82.0 x 58.0 x 11.5 mm |
Setting Up Khadas VIM4
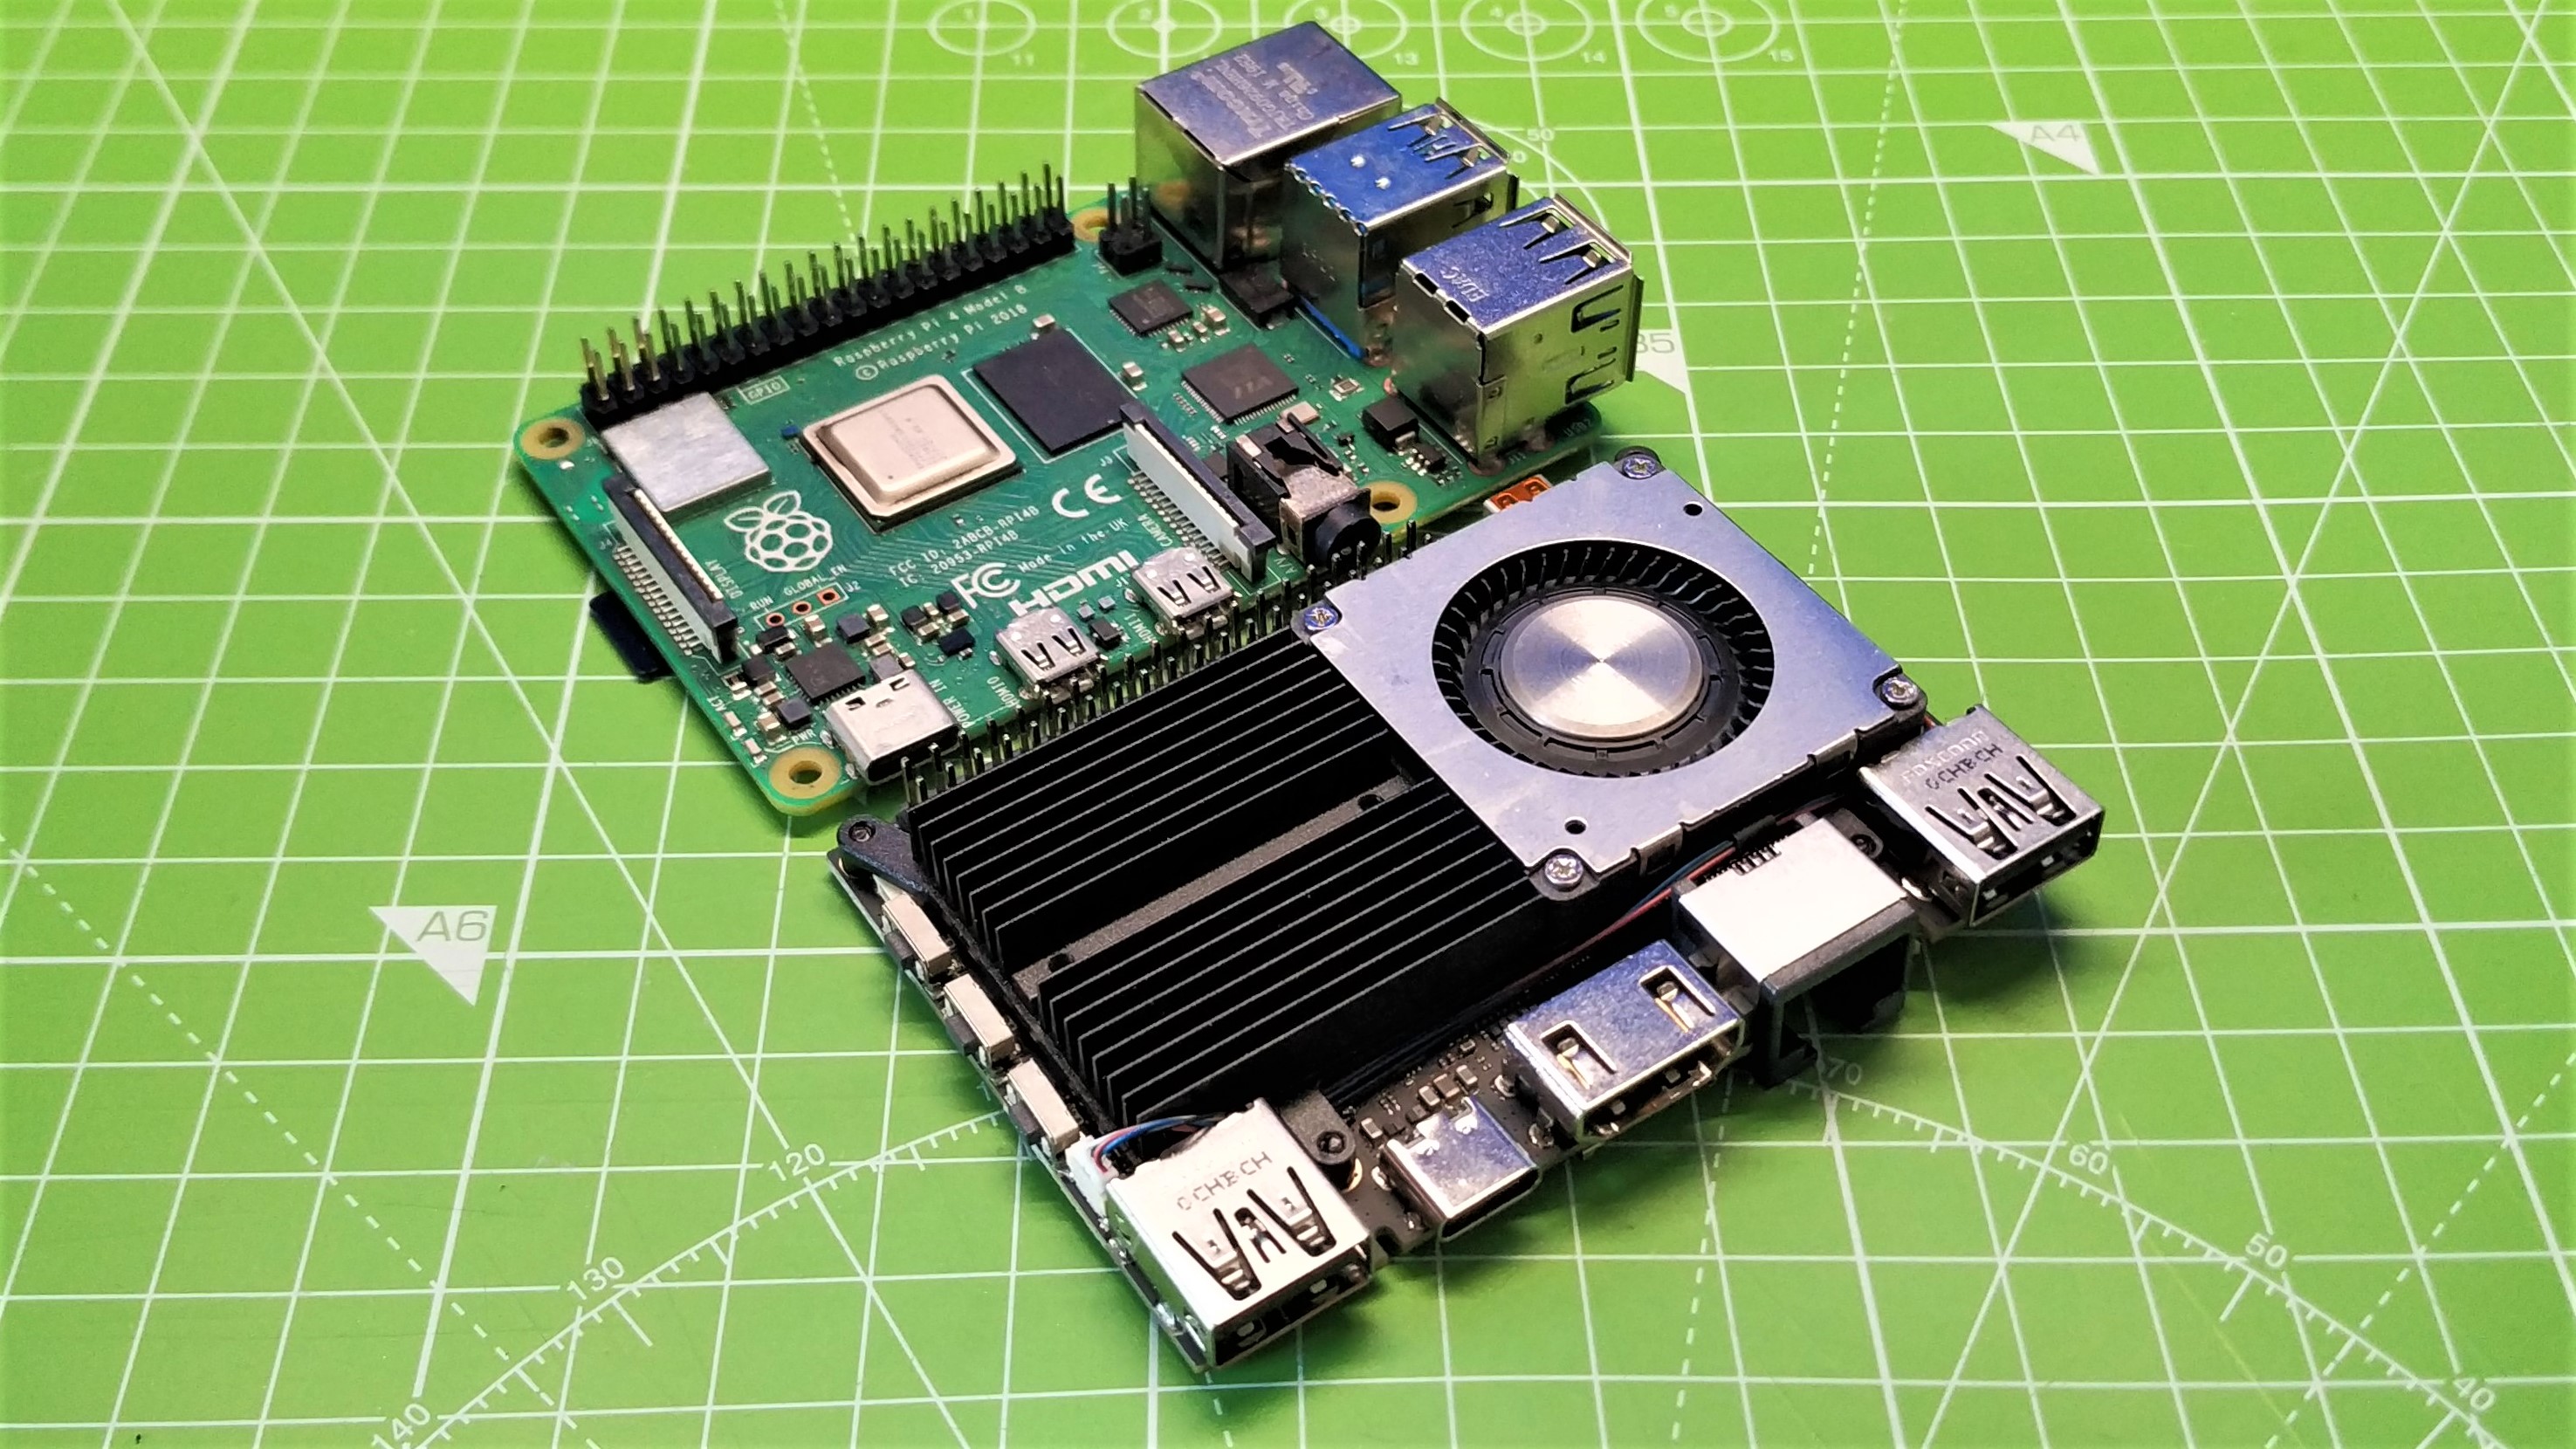
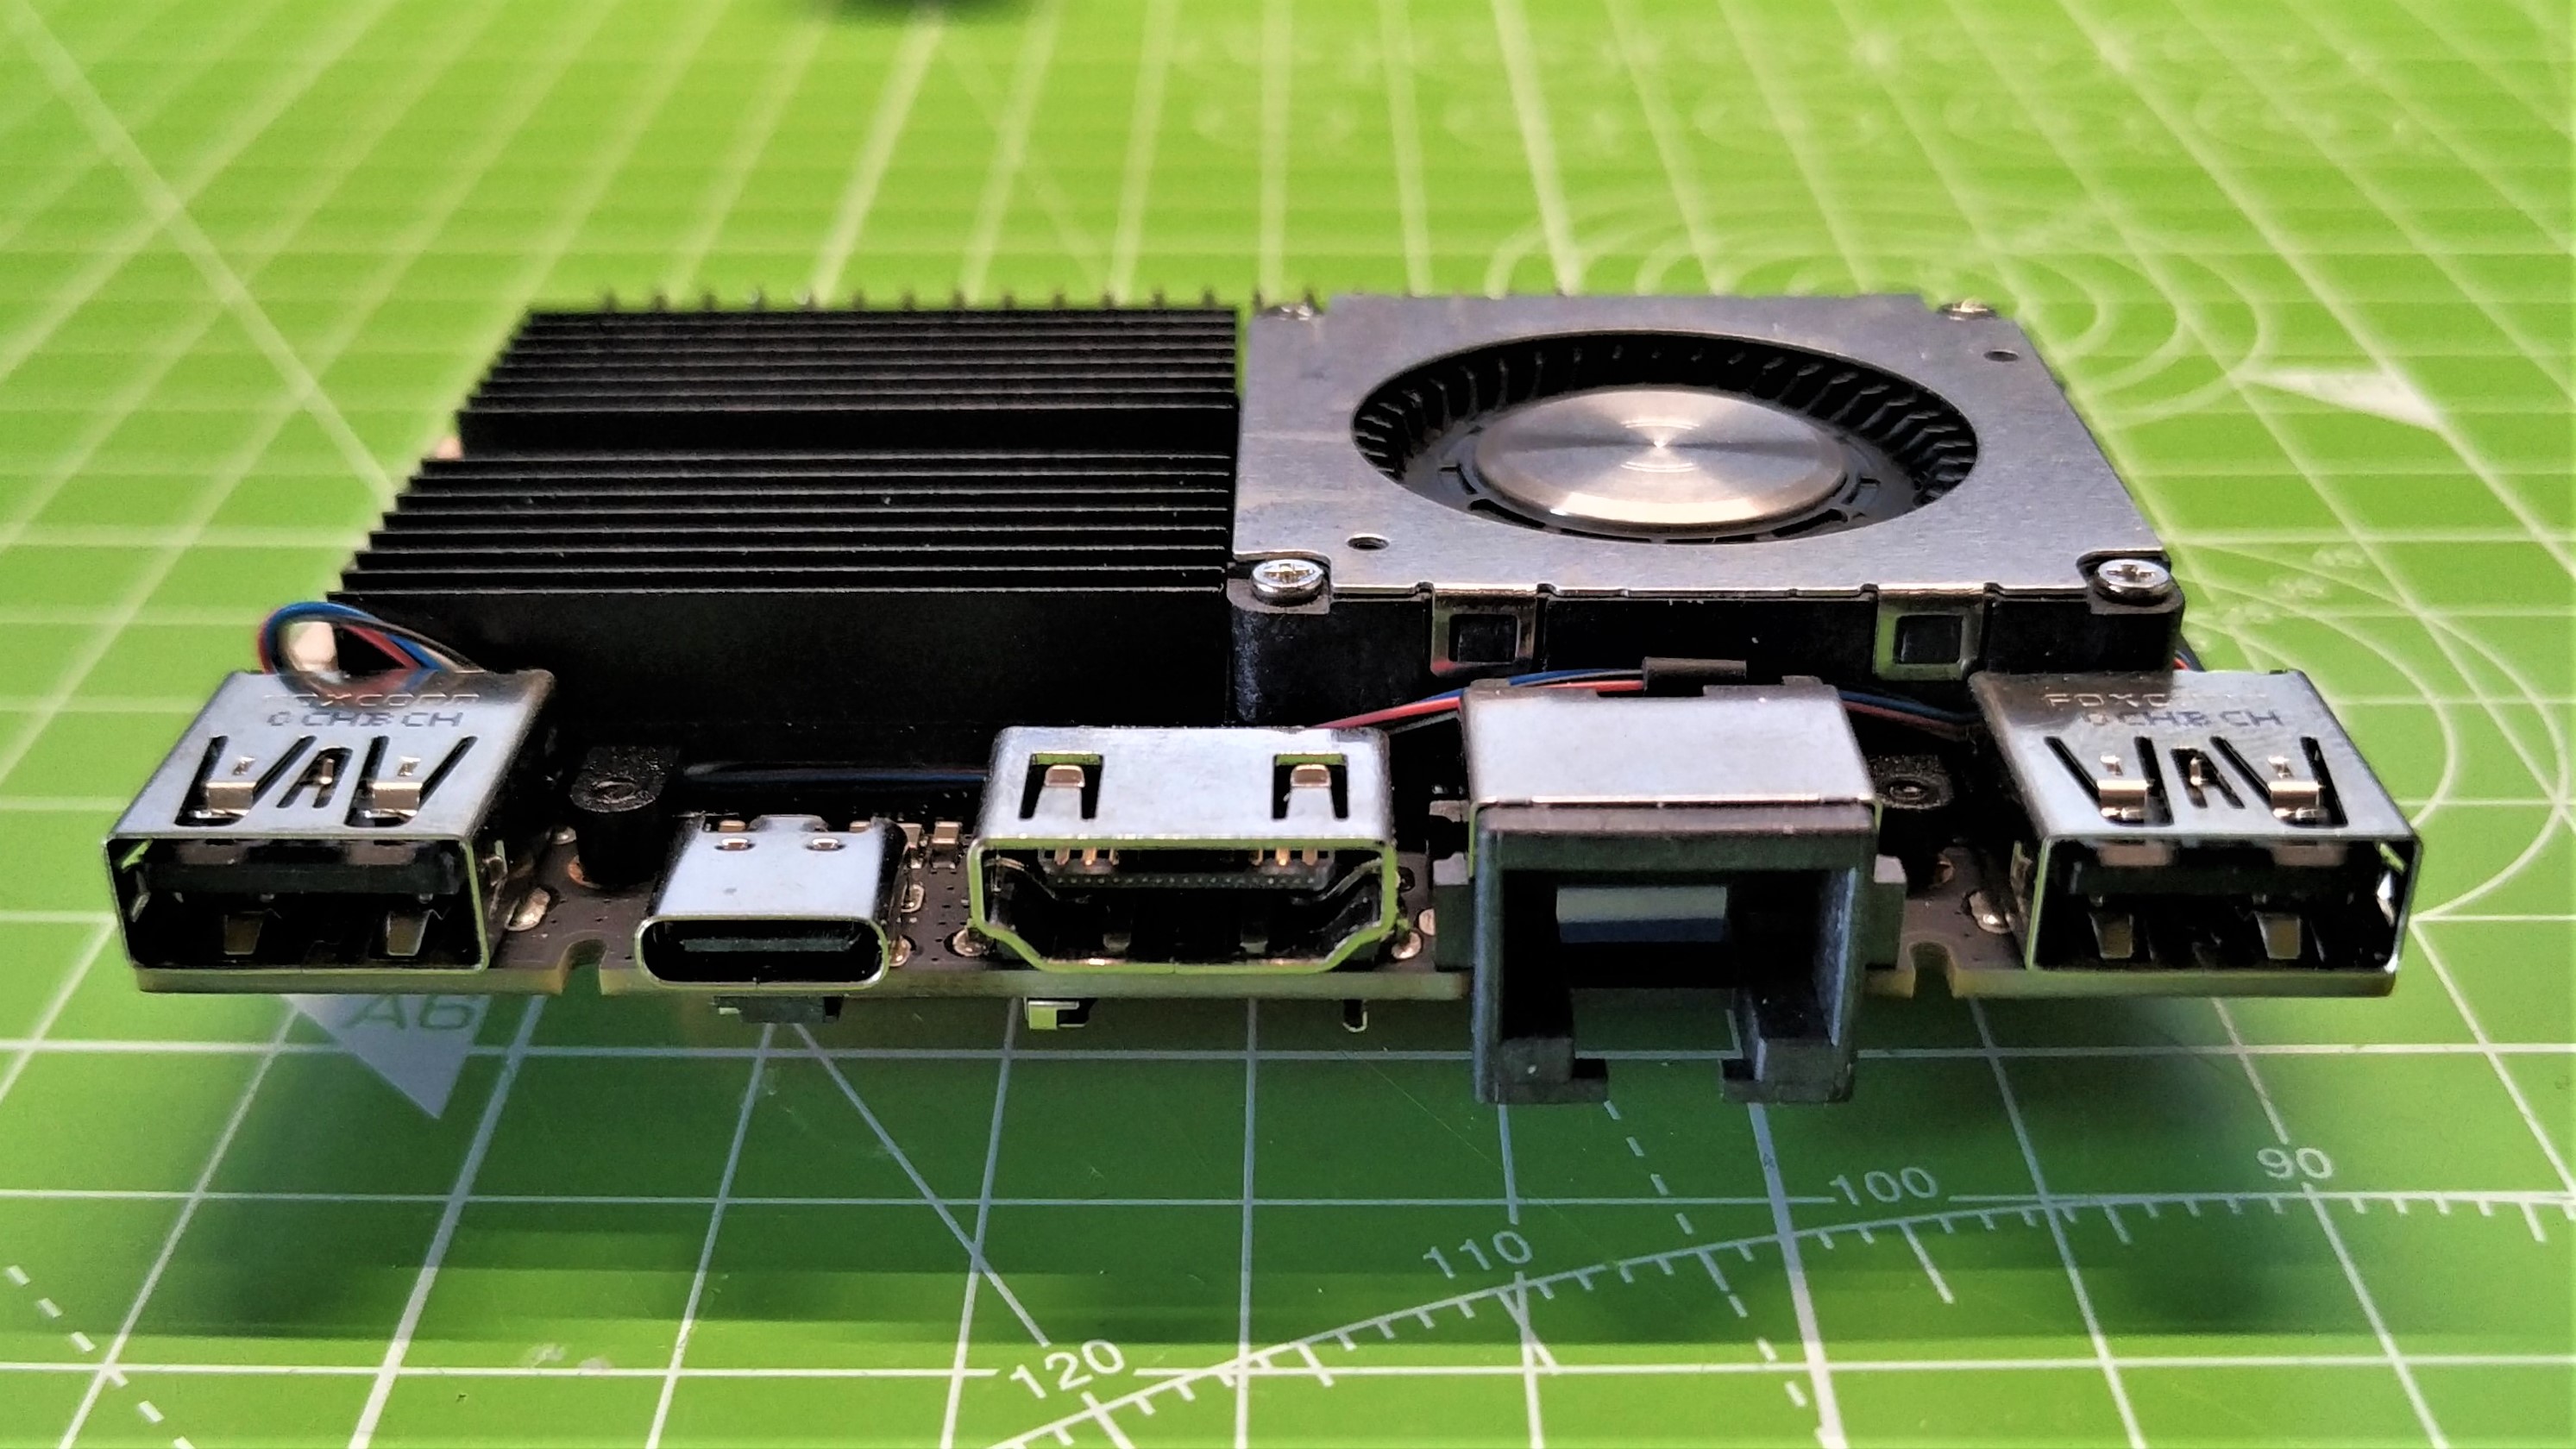
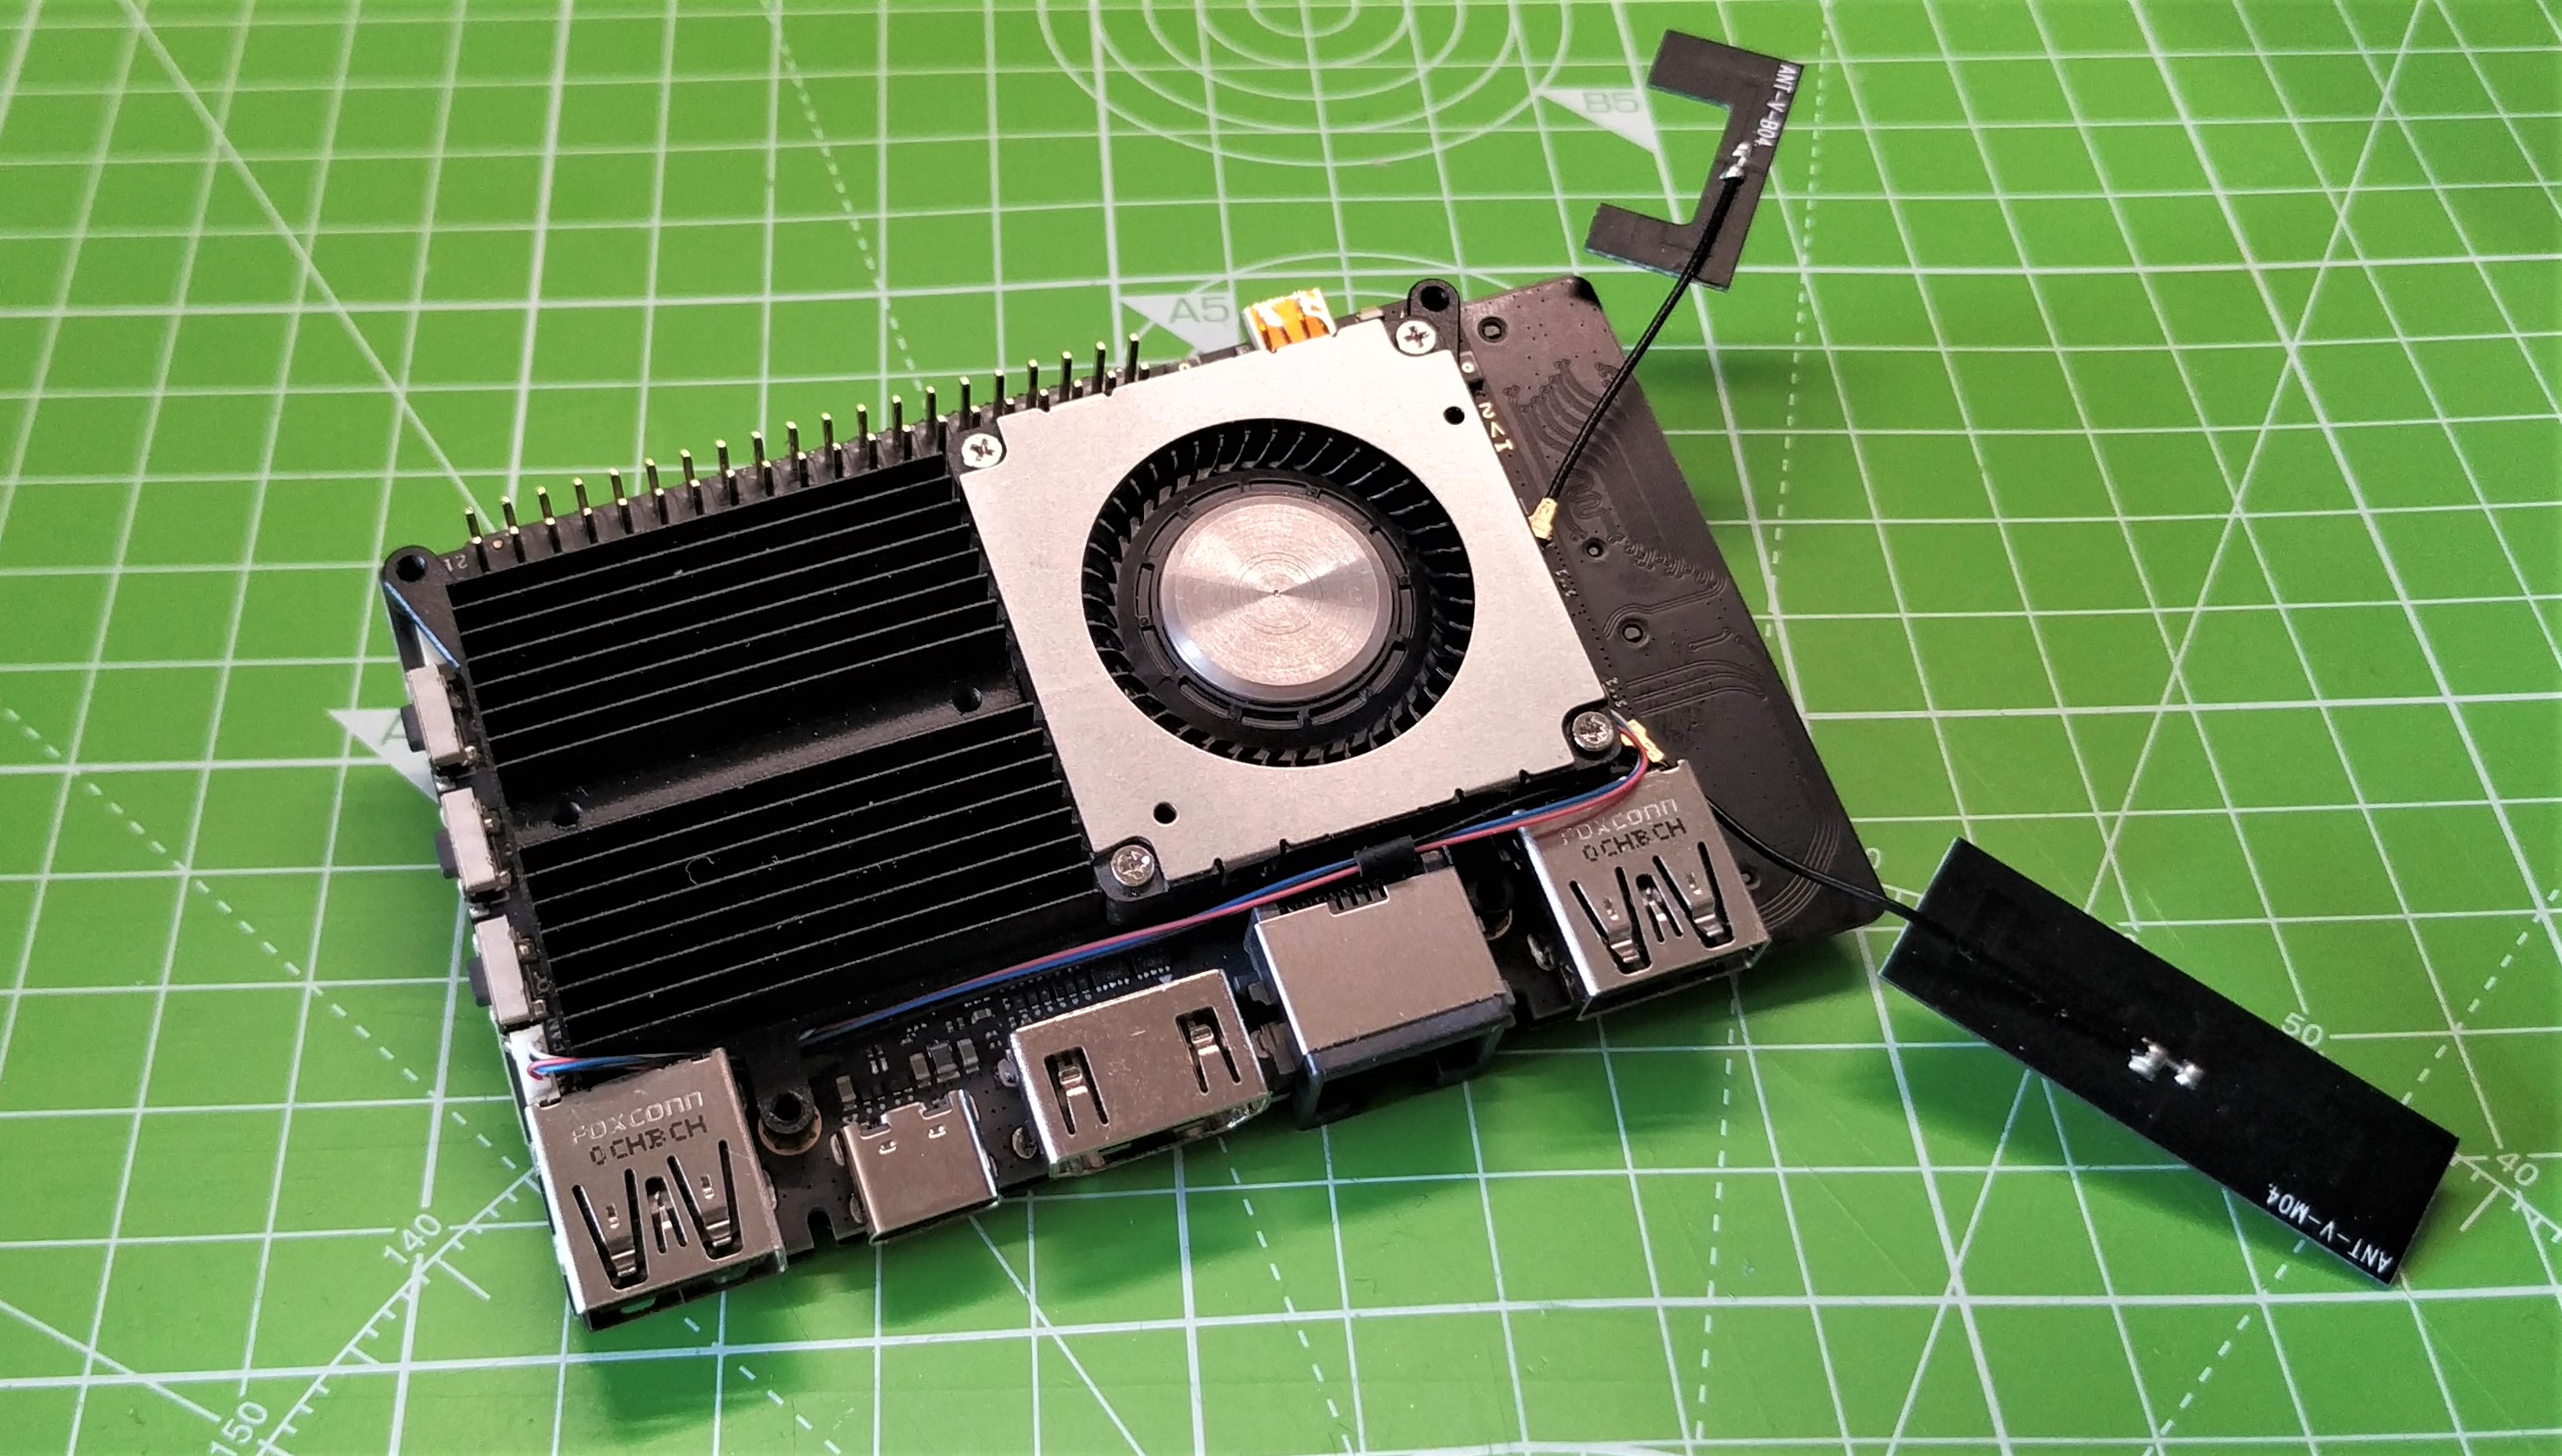
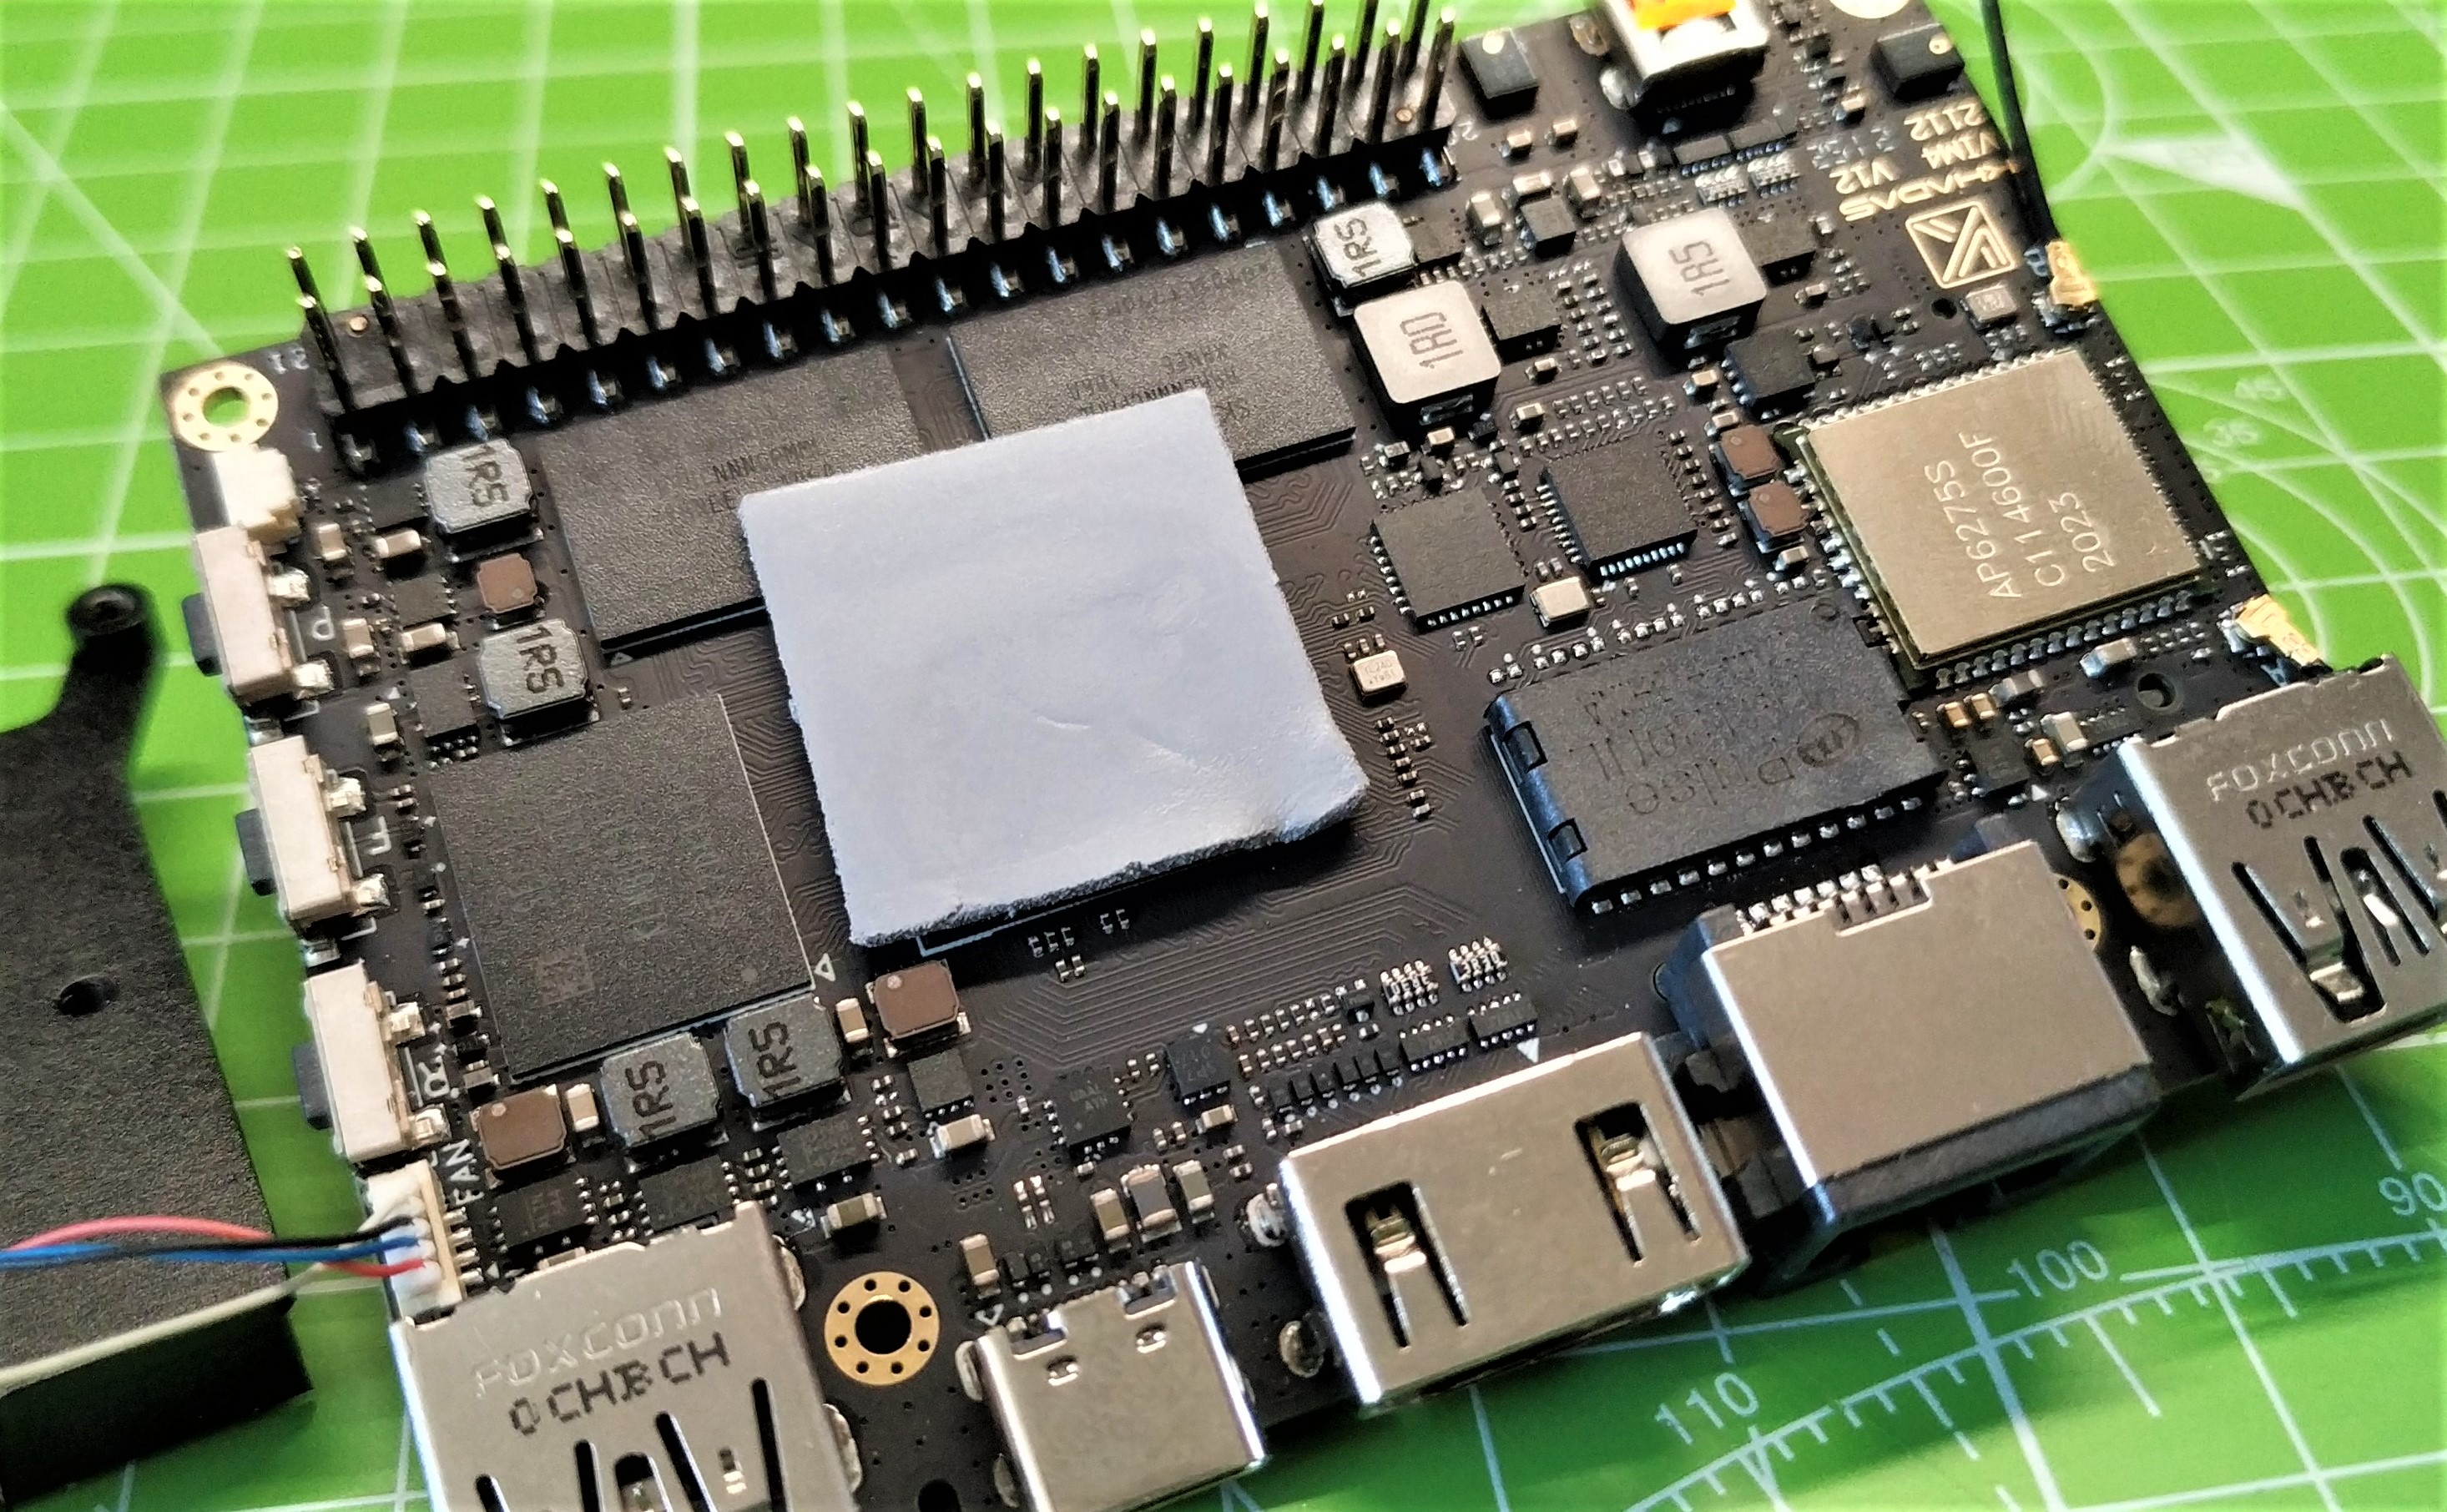
The Khadas VIM4 may be of a similar size to the Raspberry Pi 4, but its form factor is very different. Eschewing ports covering two sides of the board, VIM4 instead has all of its ports along one long edge. From left to right we have a USB 2.0, USB C (PD and display), HDMI 2.0 Gigabit Ethernet and USB 3. Under the HDMI port is a sneakily hidden microSD port. That’s a clever hiding place but your HDMI cable may prevent easy access.
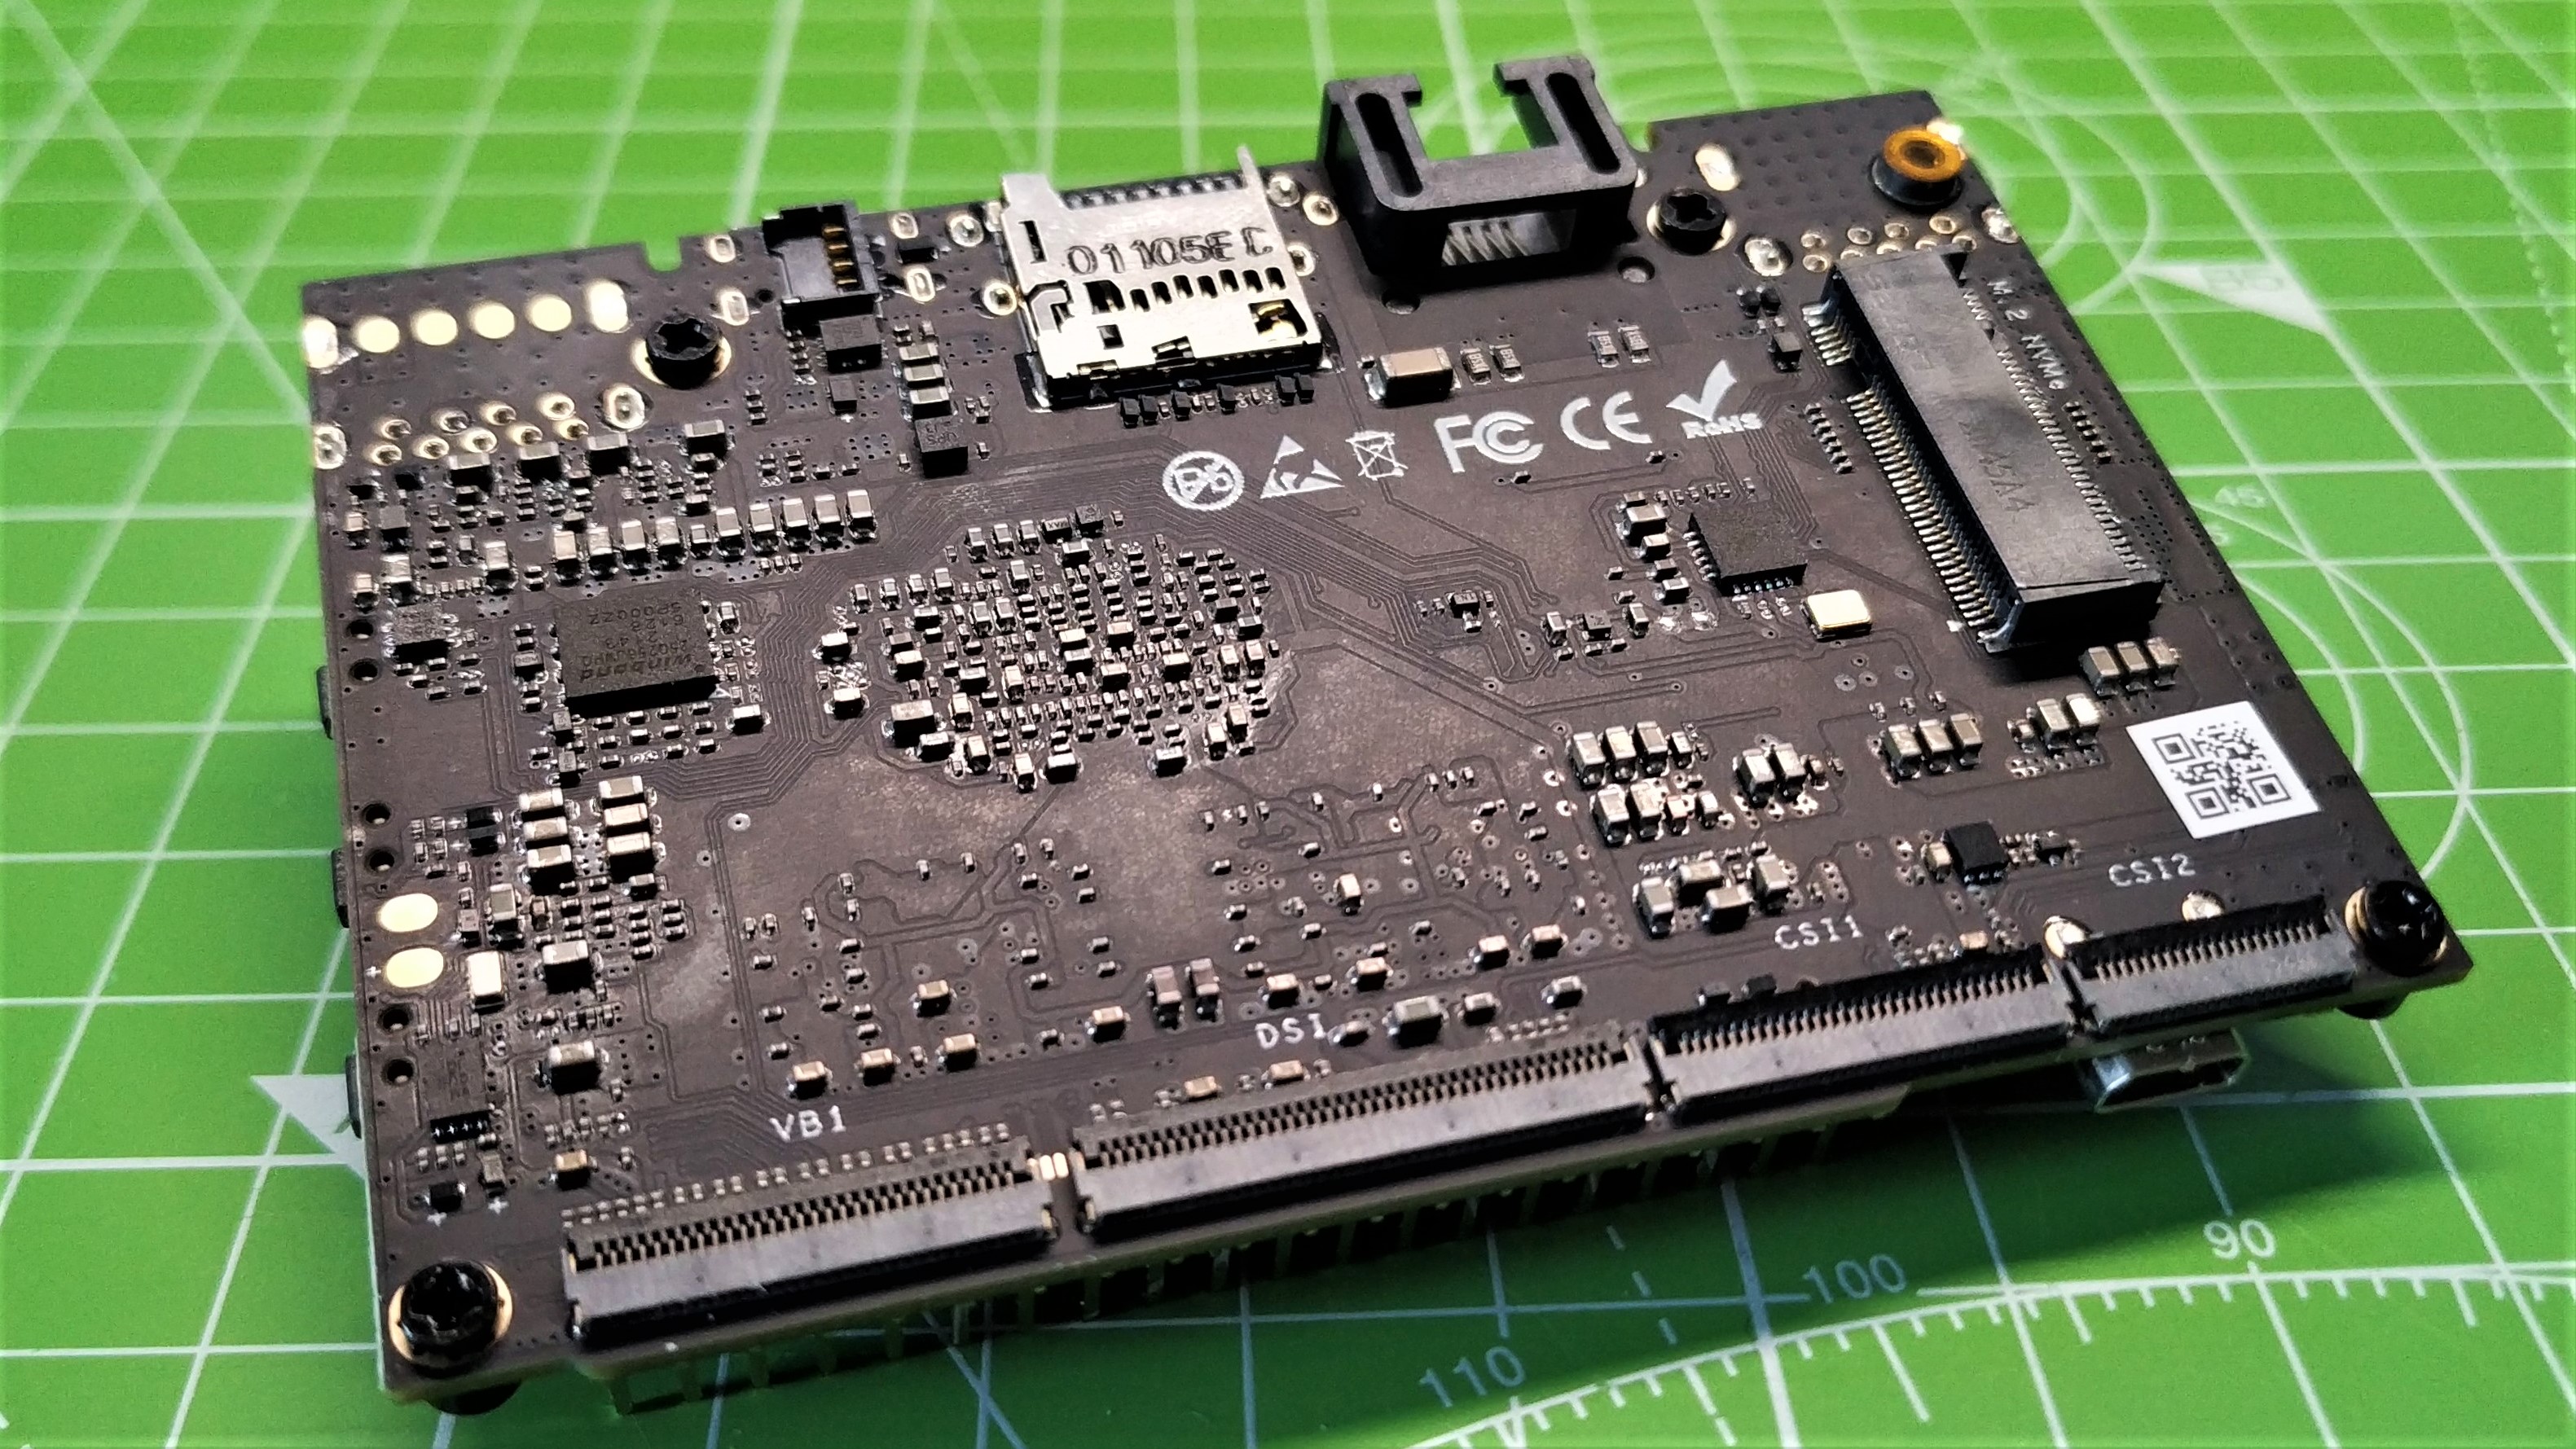
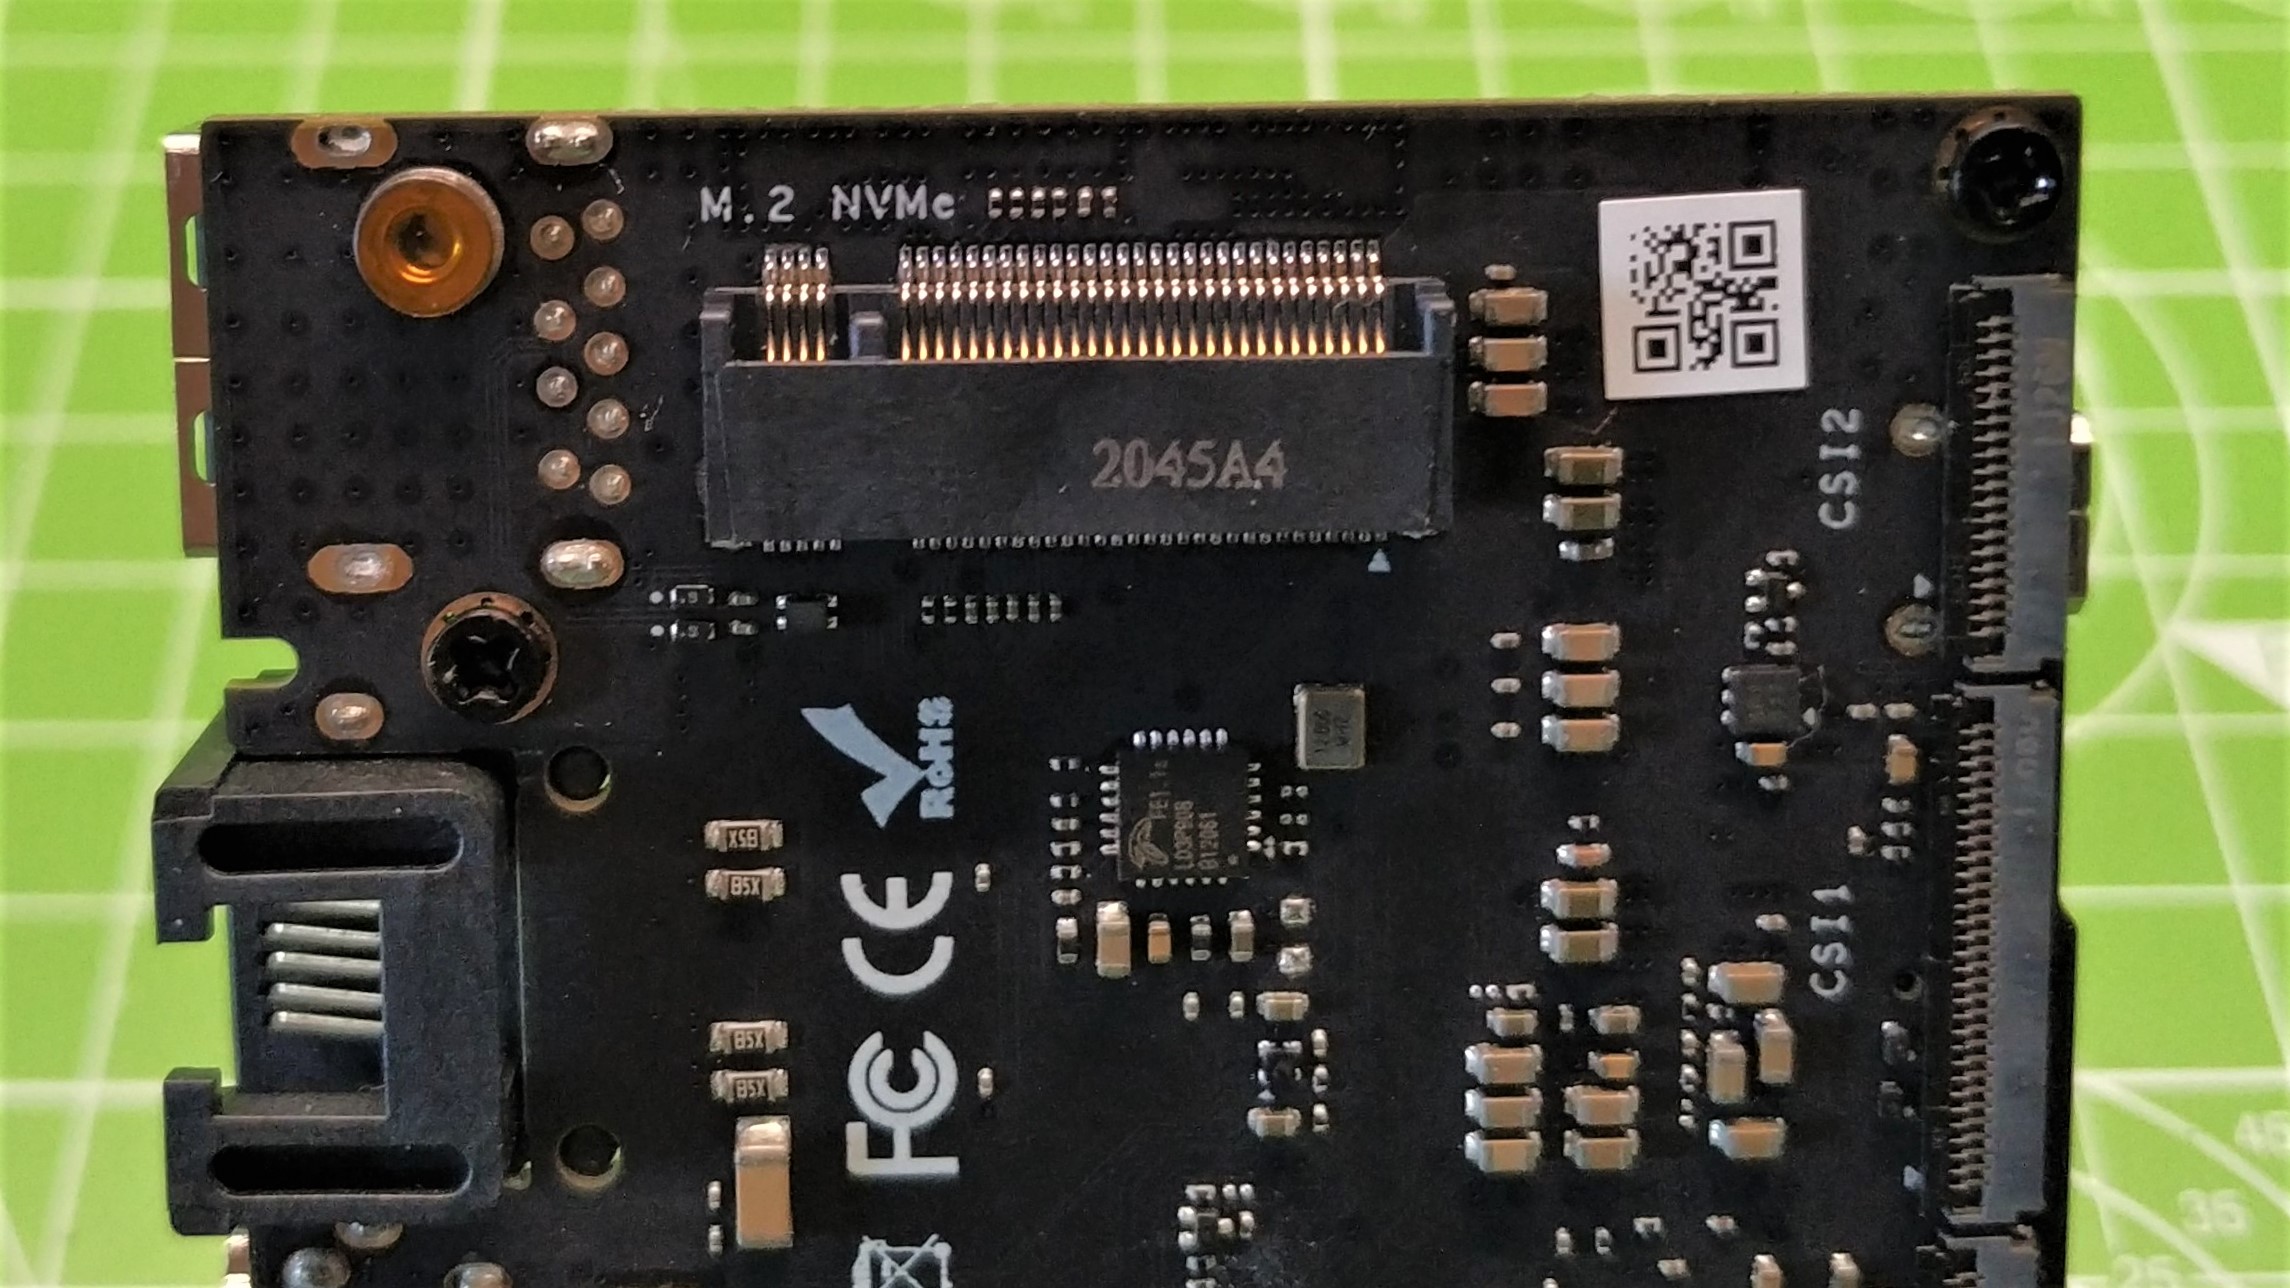
On the opposite edge of the board is a 40-pin GPIO, but don’t go thinking you can use your Raspberry Pi HATs with it (more on that later). Flipping the board over, we are greeted by two MIPI-CSI camera connectors, a MIPI display, touchscreen connector and a V-by-One high speed interface for machine vision / industrial applications.
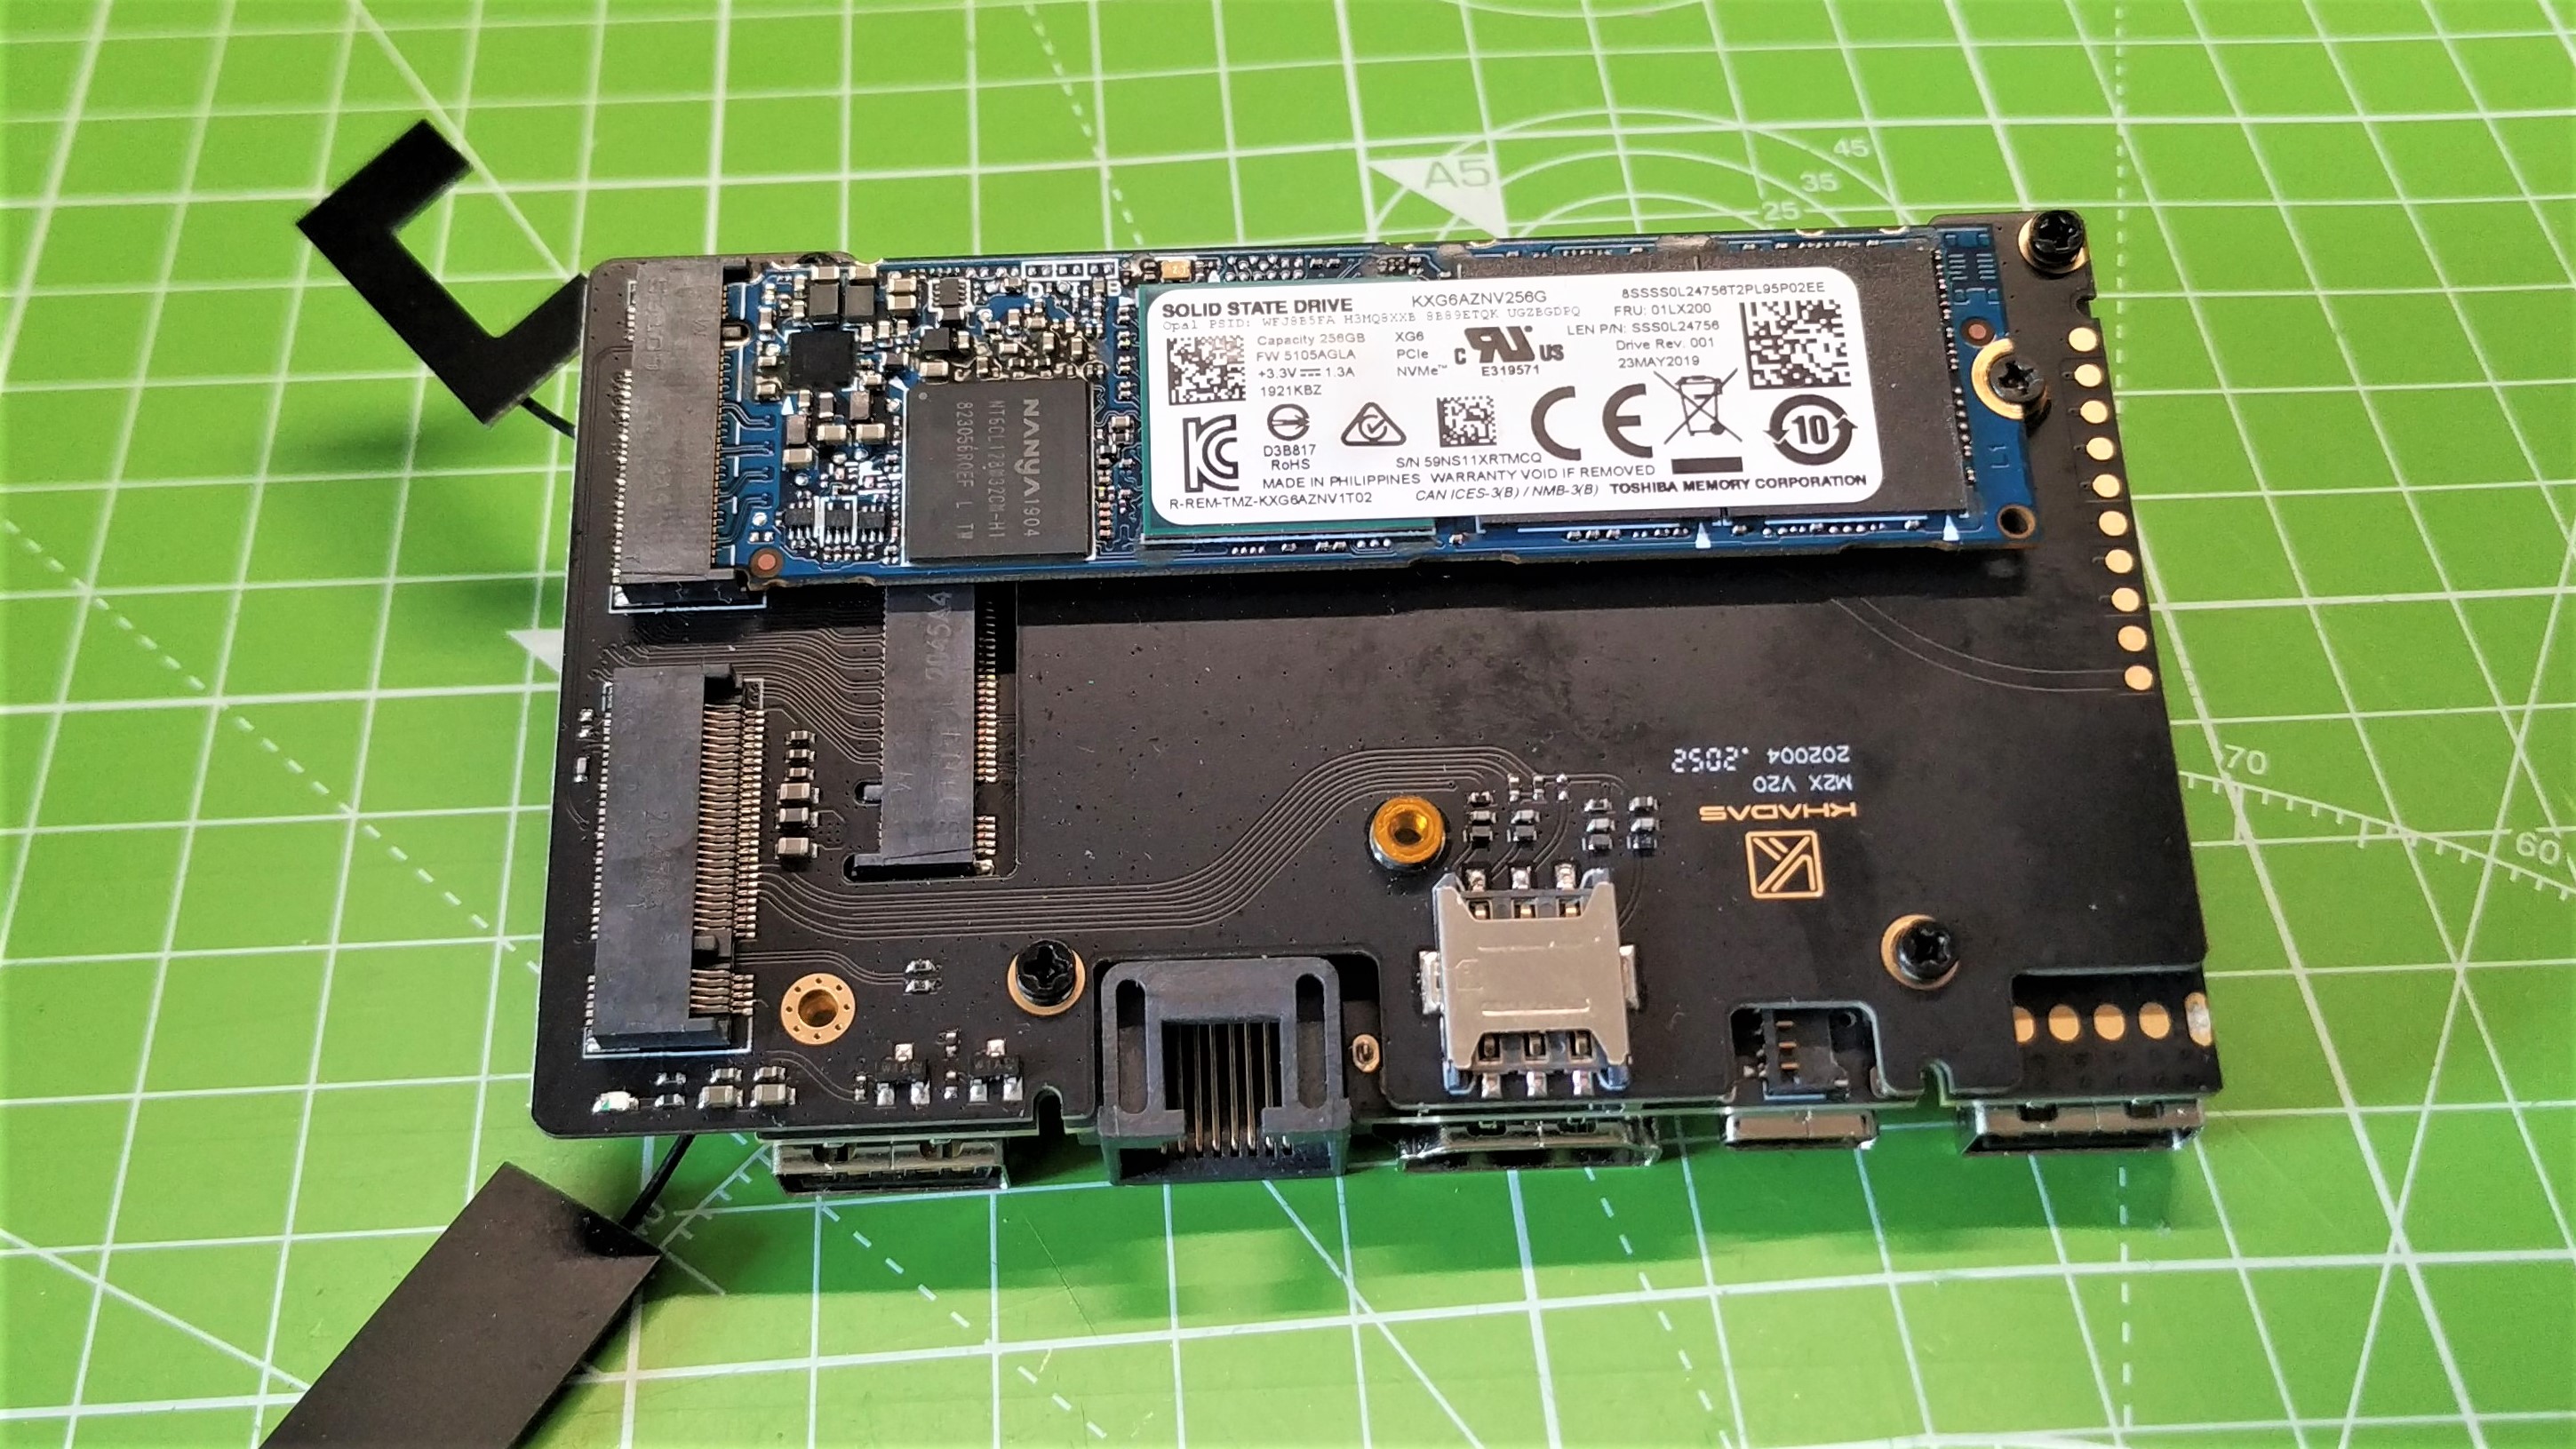
Also present is an M.2 slot, but the connector faces away from the underside of the board. So how can we attach an NVMe SSD? For that we need to purchase an add-on board which provides M.2 slots for NVMe and an additional 4G modem. We purchased our own add-on board and popped in a spare 256GB NVMe drive.
Get Tom's Hardware's best news and in-depth reviews, straight to your inbox.
From the OOWOW user interface (more on this later) we couldn’t find a means to install Ubuntu to the NVMe. So we installed Ubuntu to the eMMC with a view to clone the eMMC install to the NVMe drive. Alas this was not possible, but we could see the NVMe drive in the Ubuntu file manager. We would love the ability to install Ubuntu to a faster storage device and it has been done with the VIM3 but it requires an investment of time and skills.
Using Khadas VIM4
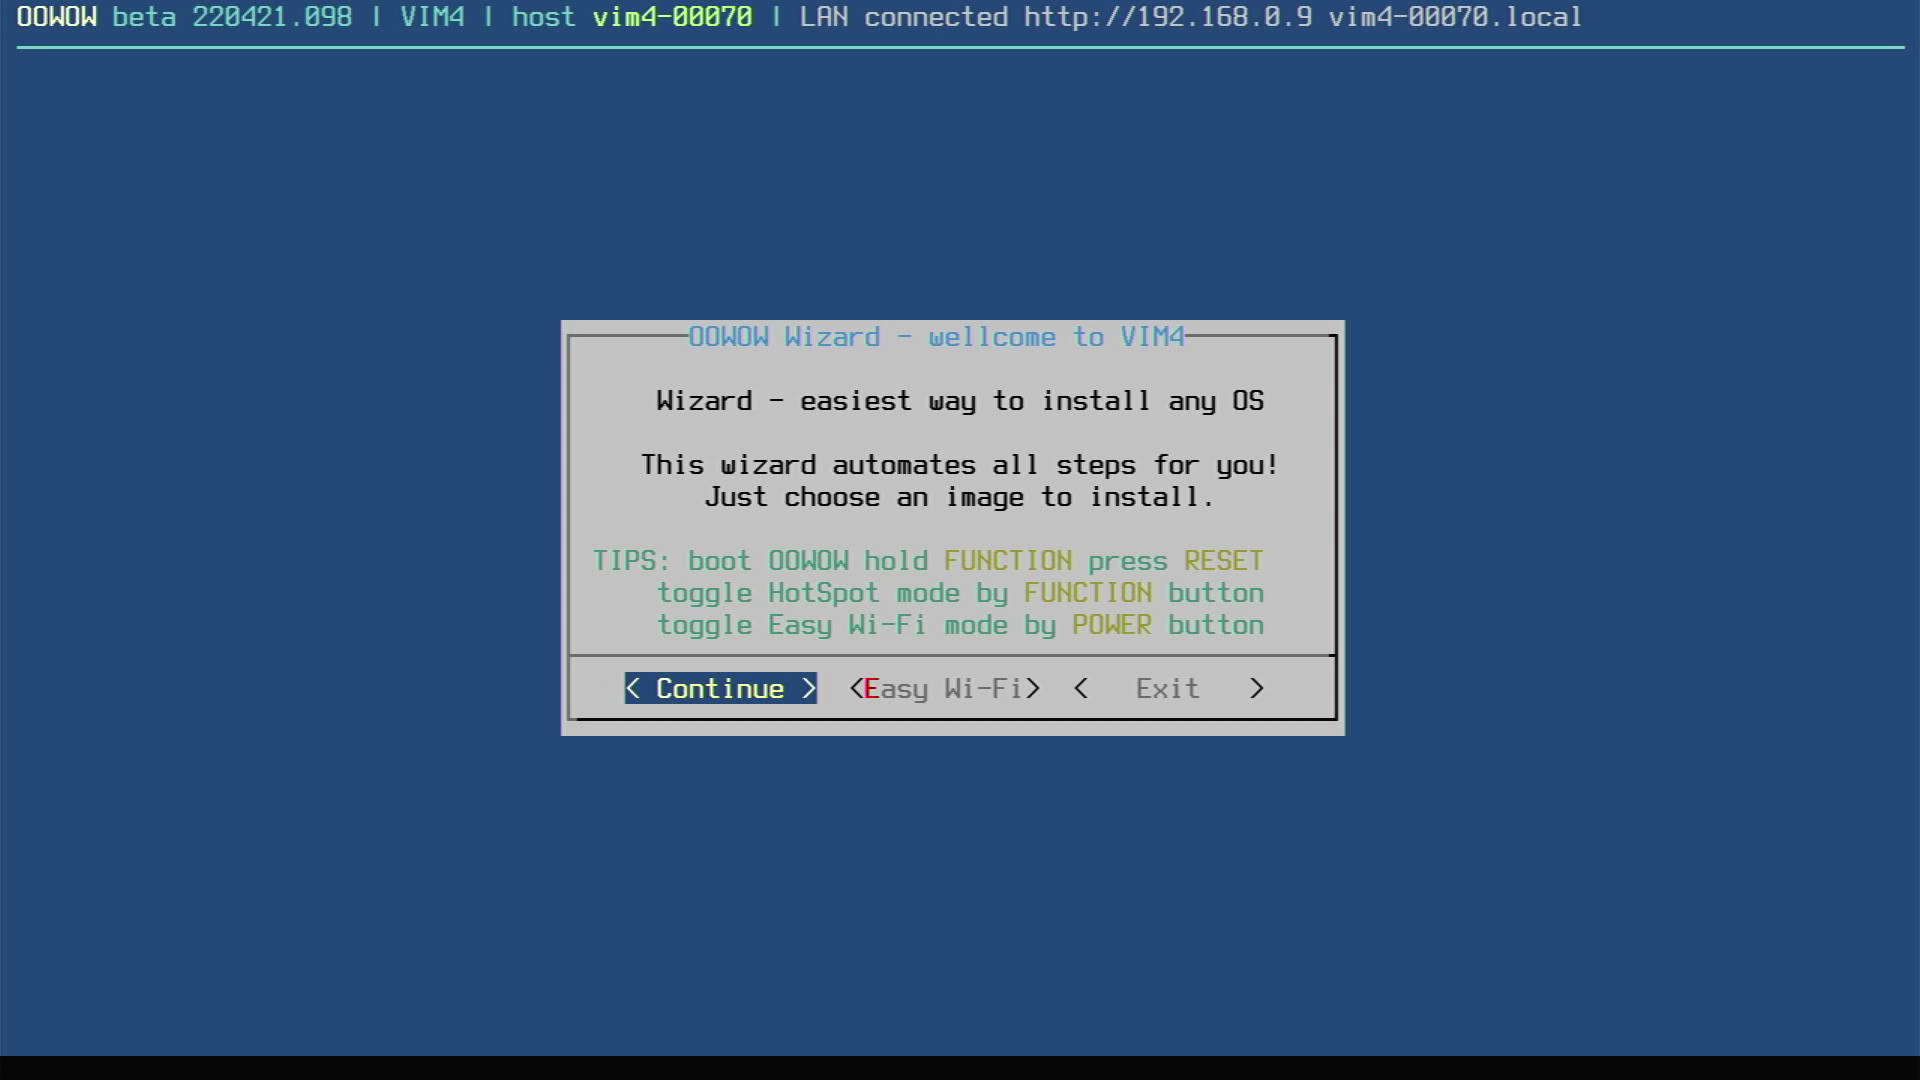
The first step to using the Khadas VIM4 is to install an operating system, and this process is super slick. It seems that network installers are all the rage right now, even Raspberry Pi Foundation is testing a beta. But Khadas have gone one step further and its installer is ready to go from the start. OOWOW could be the noise that you make on discovering this feature, but it really is the name of the BIOS like interface that we use to search for and download the latest OS.
Using OOWOW, we can update the list of available operating systems, which at the time of writing was Ubuntu 22.04 (desktop and server) and a version of Android 11. The interface reminds us of Raspberry Pi’s raspi-config which also uses the whiptail menu interface.
We used OOWOW to update the list of available operating systems and then performed a clean install of Ubuntu 22.04. The download took 60 seconds, and installation another 74 seconds, a total of 134 seconds (2 minutes 14 seconds) which is refreshingly quick and simple. Operating system download images are stored in RAM, then decompressed to the 32GB eMMC drive.
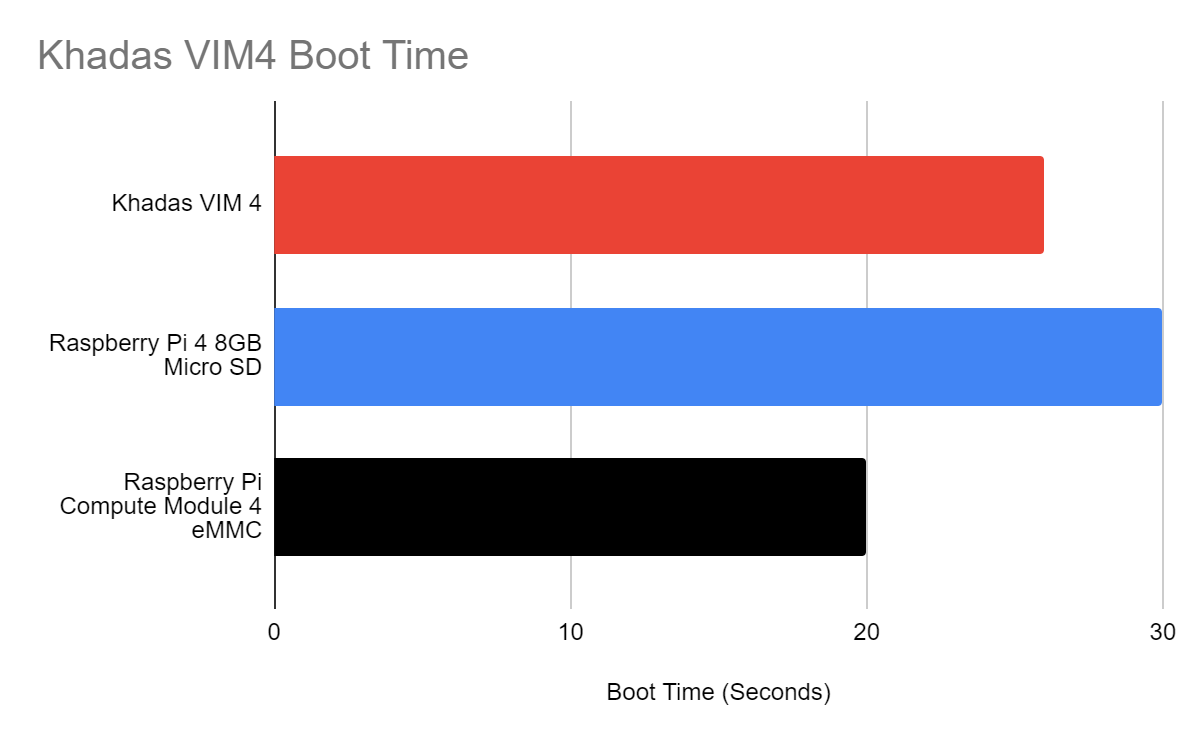
Boot time from seeing the Khadas boot logo to the Ubuntu login screen is 26 seconds. For our Raspberry Pi 4 running from microSD it was 30 seconds. We then booted a Raspberry Pi Compute Module 4 from eMMC and that got to the desktop in 20 seconds.
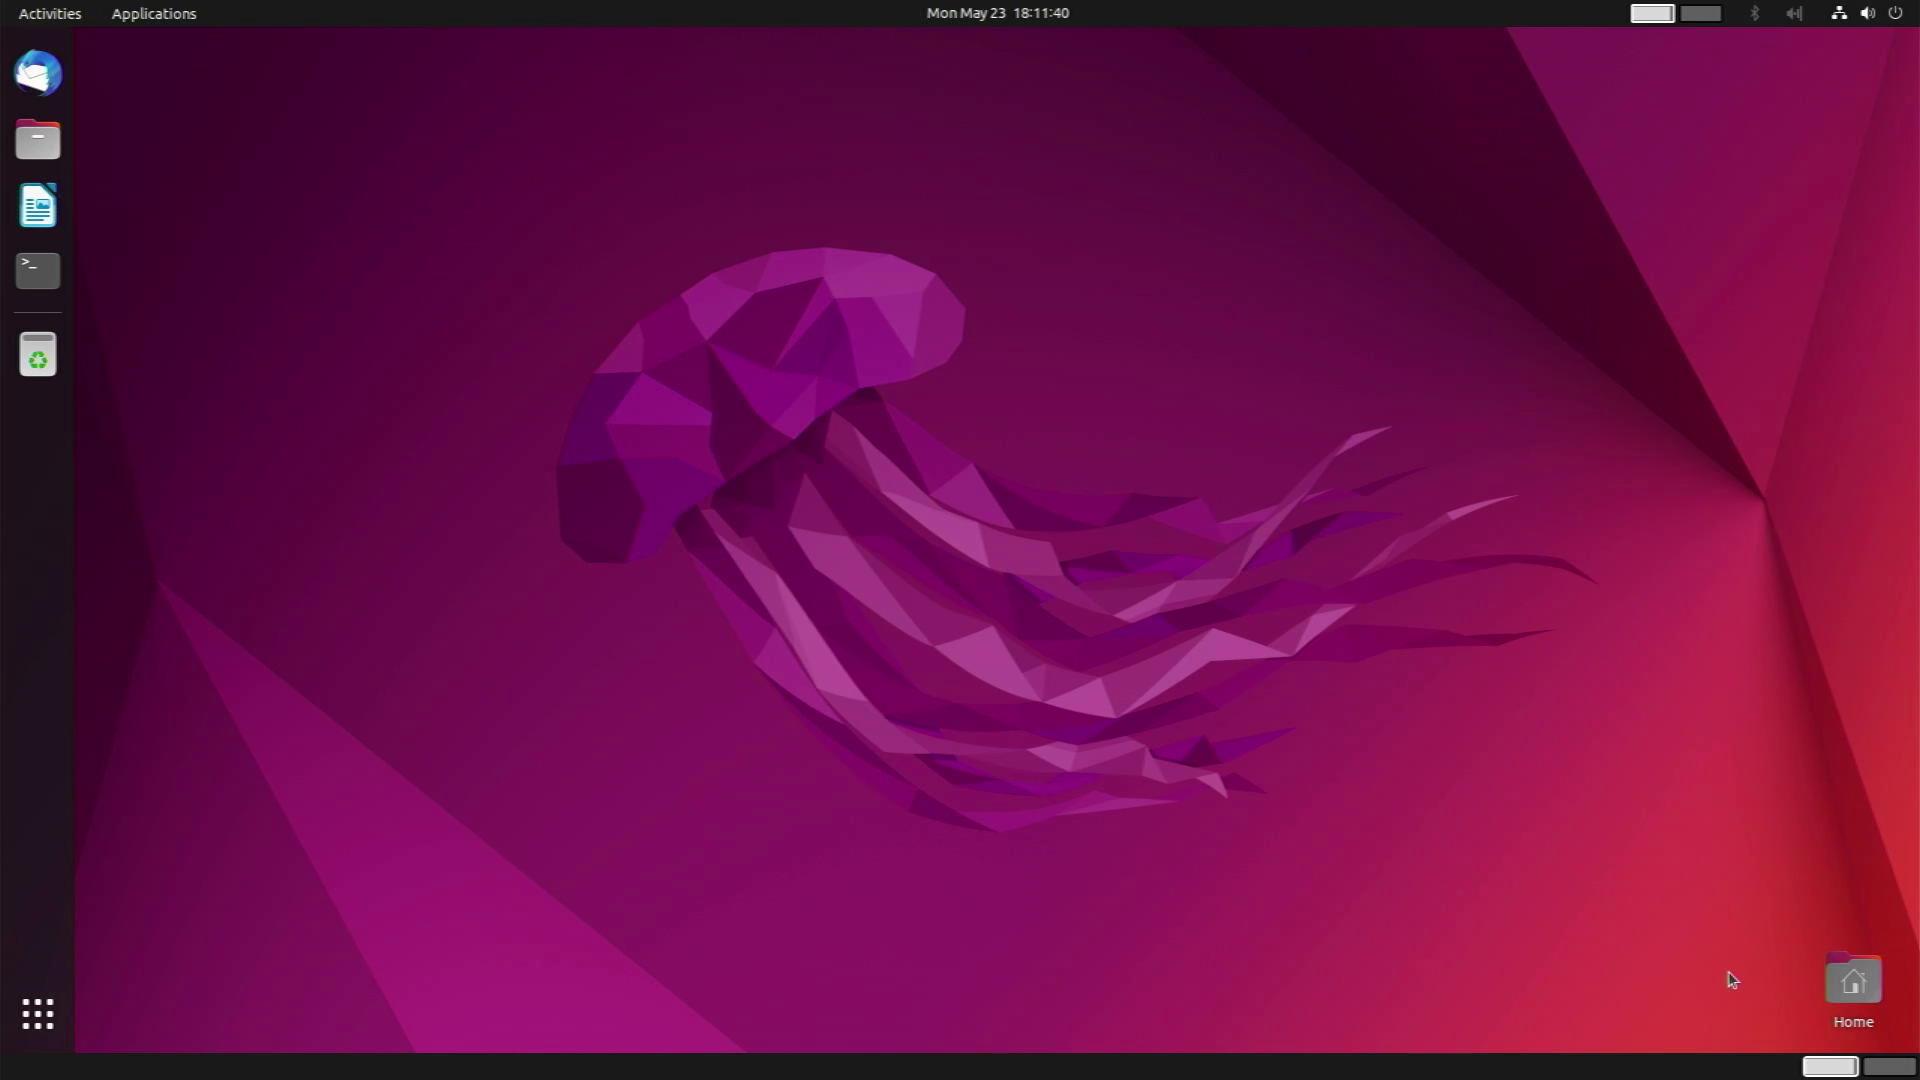
The general Ubuntu experience is smooth. It feels much better than what we have experienced on the Raspberry Pi 4. The extra CPU cores and eMMC provide a much needed boost. We tested the Khadas VIM4 for a full day, using it as our main machine to host a video call with a local Linux user group, flash Arduino code to a Raspberry Pi Pico and some light photo editing.
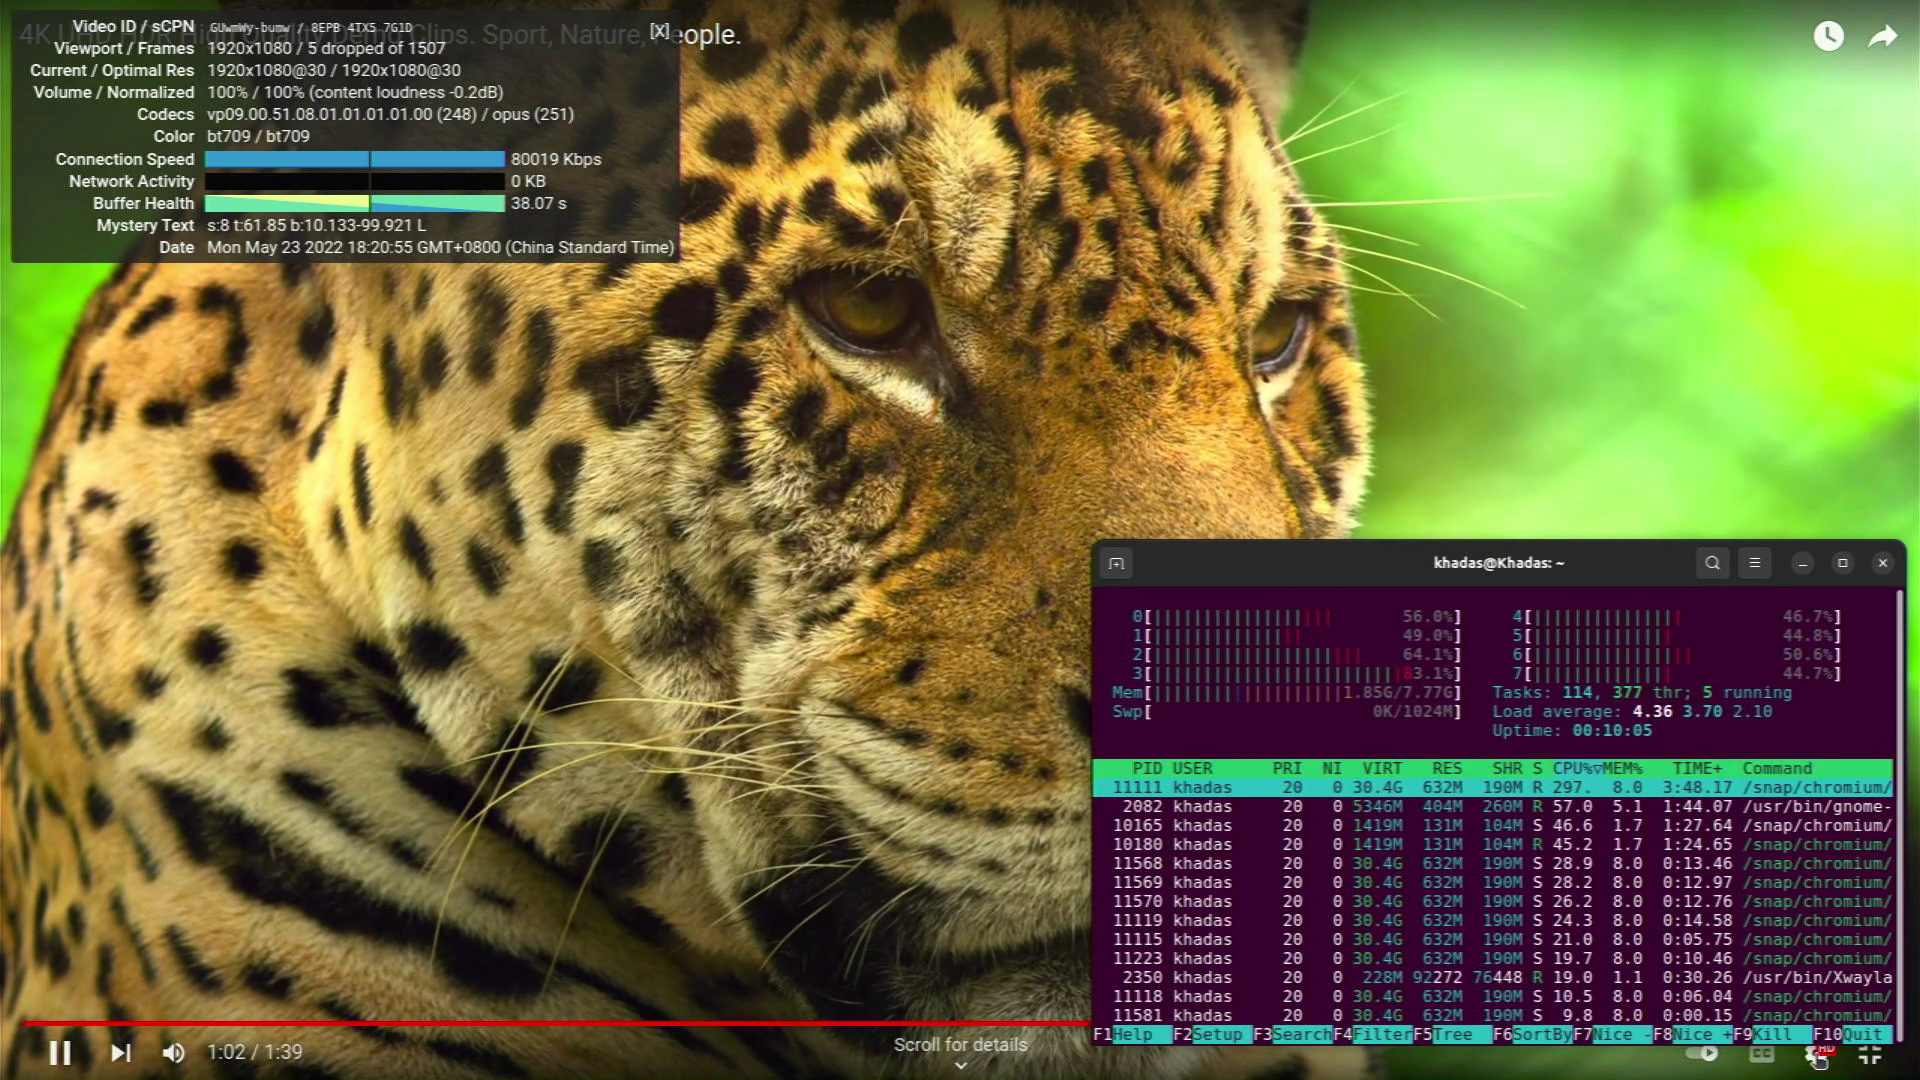
We watched a 40 minute 1080p YouTube video from YouTuber Jan Beta, and the performance was great. In windowed and fullscreen mode, the video was smooth, but when we took it up to 4K, we saw performance significantly drop and it became a sub-par experience.
We returned to 1080p and watched leepspvideo’s HDR test video and turned on the stats for nerds. At 1080p, we dropped a total of 10 frames out of 2232 (0.45%), something that would be imperceptible to the human eye. The Raspberry Pi 4 can do fullscreen YouTube at 720p, but 1080p rapidly becomes unwatchable. The Kahads VIM4 feels like a low powered desktop rather than a single board computer and when we say low power we mean it.
Power and Temperature Tests of Khadas VIM4
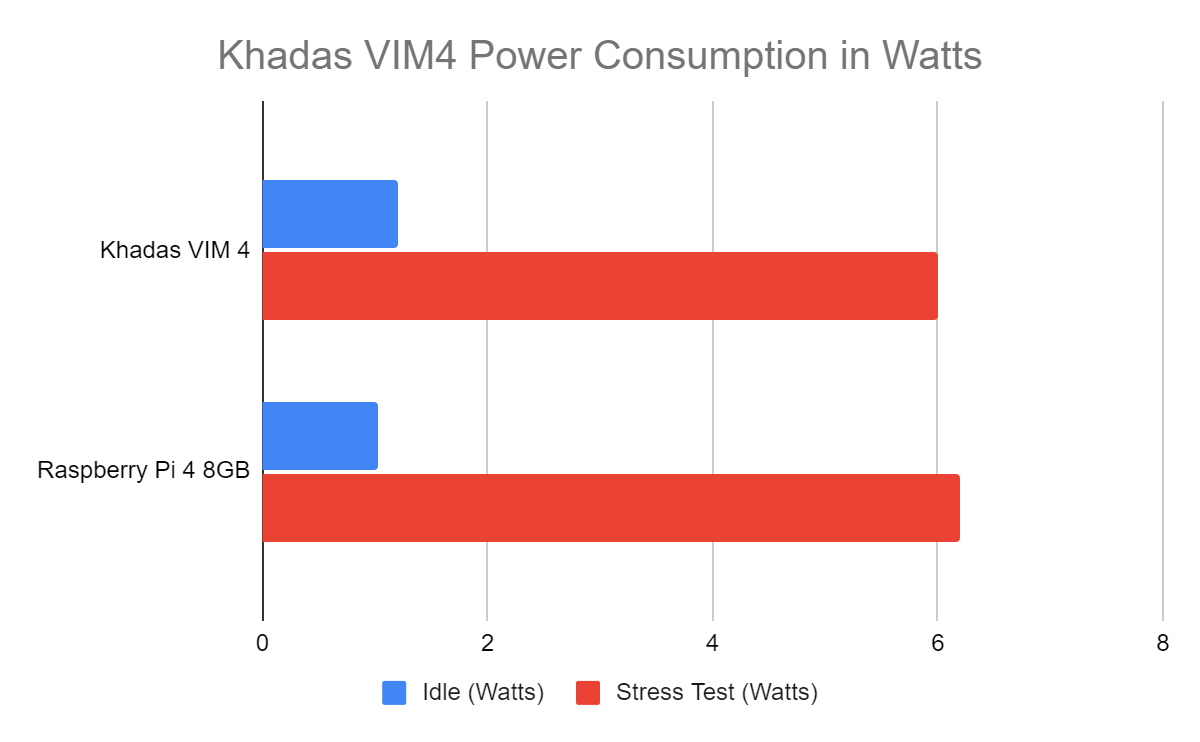
In our tests, we connected the VIM4 to our PinePower desktop power supply’s USB-C output and saw that the unit auto-negotiated 12V, and at idle, it pulled 0.1A, giving us a 1.2W idle power consumption. When under load for our stress tests, the unit didn’t go above 12V at 0.5A, a 6W power consumption. That’s compared to the Raspberry Pi 4 which idled at 5.1V 0.2A, a 1.02W power consumption. During a stress test, we saw a peak of 5.3V at 1.2A, 6.24W. So this tells us that the two are almost evenly matched in power consumption despite the Khadas VIM4 having four additional CPU cores.
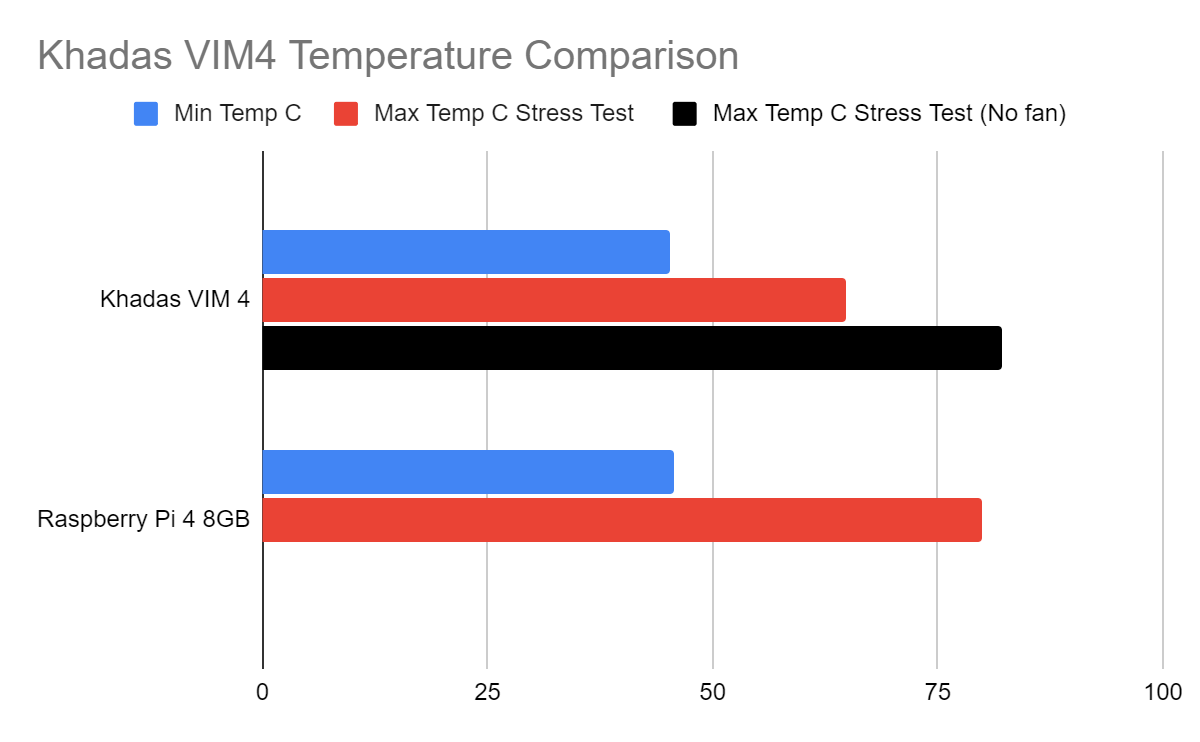
With all this power, how does it perform thermally? The large flat heatsink and fan of the Khadas VIM4 are clear indicators that the SoC can get hot. Our tests involved a five minute idle period then a five minute all-core CPU stress test, where the temperature was logged to an external file every second. We also benchmarked a Raspberry Pi 4 8GB. Both machines were running at their stock speeds, which in the case of the Raspberry Pi 4 is now 1.8 GHz thanks to a recent update.
Both machines idled at around 45 Celsius, with the Khadas VIM4 idling at a lower 45.2 Celsius (versus the Pi 4’s 45.7 Celsius). When running the stress test, we saw the fan of the Khadas VIM4 spin to life. The trigger temperature appears to be 50 Celsius in auto mode. The fan and heatsink kept the SoC relatively cool, with a peak of 64.7 Celsius. Our Raspberry Pi 4 fared less well, hitting 79.8 Celsius, but remember that our Pi has no cooling, passive or active. We repeated the stress test on the VIM4 but this time we disabled the fan. The stress test temperature hit a high of 82.2 Celsius, but the overall system performance remained usable.
To push the CPU, we used sysbench to verify all prime numbers up to two million. We tuned the test to use eight CPU cores for the Khadas VIM4 and four CPU cores for the Raspberry Pi 4. The Khadas VIM4 outperforms the Raspberry Pi 4 in this task, coming in at half the time of the Pi. This is due to shear brute force. We have eight cores, and a CPU clocked at 2.1 GHz versus the Pi 4’s 1.8 GHz. This does mean that the Khadas VIM4 is a much better alternative for raw computational power and this is where the VIM4’s promoted position as a possible platform for machine learning comes to the fore.
Using the GPIO on the Khadas VIM4
The 40 pin GPIO may entice us into thinking “Can I use my Raspberry Pi HATs with the VIM4?” but our hopes are quickly dashed. They may be physically compatible, but their pinout and functionality are very different. That said, there is basic GPIO access and we also have access to I2C, UART, PWM and 1-Wire (commonly used for DS18B20 temperature sensors)
In the example code snippets given in the Khadas VIM4 documentation, we can see that we have basic access to the GPIO via the Linux terminal and a Python library. Despite our best efforts, the Python library “wiringpi” was unusable. We hit an error with both the wiringpi Python and its underlying OS package. A board revision for the VIM4 was not present, which prevented the library from understanding the GPIO layout. We reached out to Khadas with this issue and in their honest response they advised that there was no device tree overlay for the GPIO with WiringPi and that it was being looked into.
We chose to pursue the Linux terminal method of GPIO access. To use the GPIO in this manner, we need to do a little math and workaround a permission issue. Accessing the GPIO is strangely a privilege only for root, not sudo. Luckily the root user has the same password as our Khadas user so after a quick su root we were able to start using the GPIO, well almost.
GPIO pins are given a non-trivial reference which requires us to first identify which pin we wish to use. After a little guesswork we stumbled upon the pinout and after referring to the splendid documentation we followed the example of GPIOT_19. This GPIO pin is located four pins from the micro HDMI port and to it we connected an LED, using a 330 Ohm resistor and breadboard along with some jumper jerky. On a Raspberry Pi we would use a Python library (RPi.GPIO, GPIO Zero etc) and directly work with this pin. With the Khadas VIM4 we need to do a little math.
First we need to calculate the Range Base (the base values given to the GPIO) and then we need to find the Pin Index reference for our chosen GPIO pin. To work out the Range Base, we read the contents of the gpio-ranges. Which returns that the Range Base starts at 355.
cat /sys/kernel/debug/pinctrl/fe000000.apb4\:pinctrl\@4000-pinctrl-meson/gpio-rangesNext we need to identify the GPIO pin , GPIOT_19. For this we need to use another command to list the available GPIO pins and their corresponding index.
cat /sys/kernel/debug/pinctrl/fe000000.apb4\:pinctrl\@4000-pinctrl-meson/pinsThis returns a slew of data, all we need to know is the index for GPIOT_19. So with a little grep magic we sliced the data from the list and saw that the GPIO index was 110.
cat /sys/kernel/debug/pinctrl/fe000000.apb4\:pinctrl\@4000-pinctrl-meson/pins | grep GPIOT_19We added the Range Base to the Pin Index and confirmed that the documentation’s calculation of 456 was correct. After this we enabled the GPIO for use and then wrote a quick Bash script to flash the LED. This worked well but the process to make it happen has far too much friction when compared to the Raspberry Pi.
Android 11 64-bit Testing
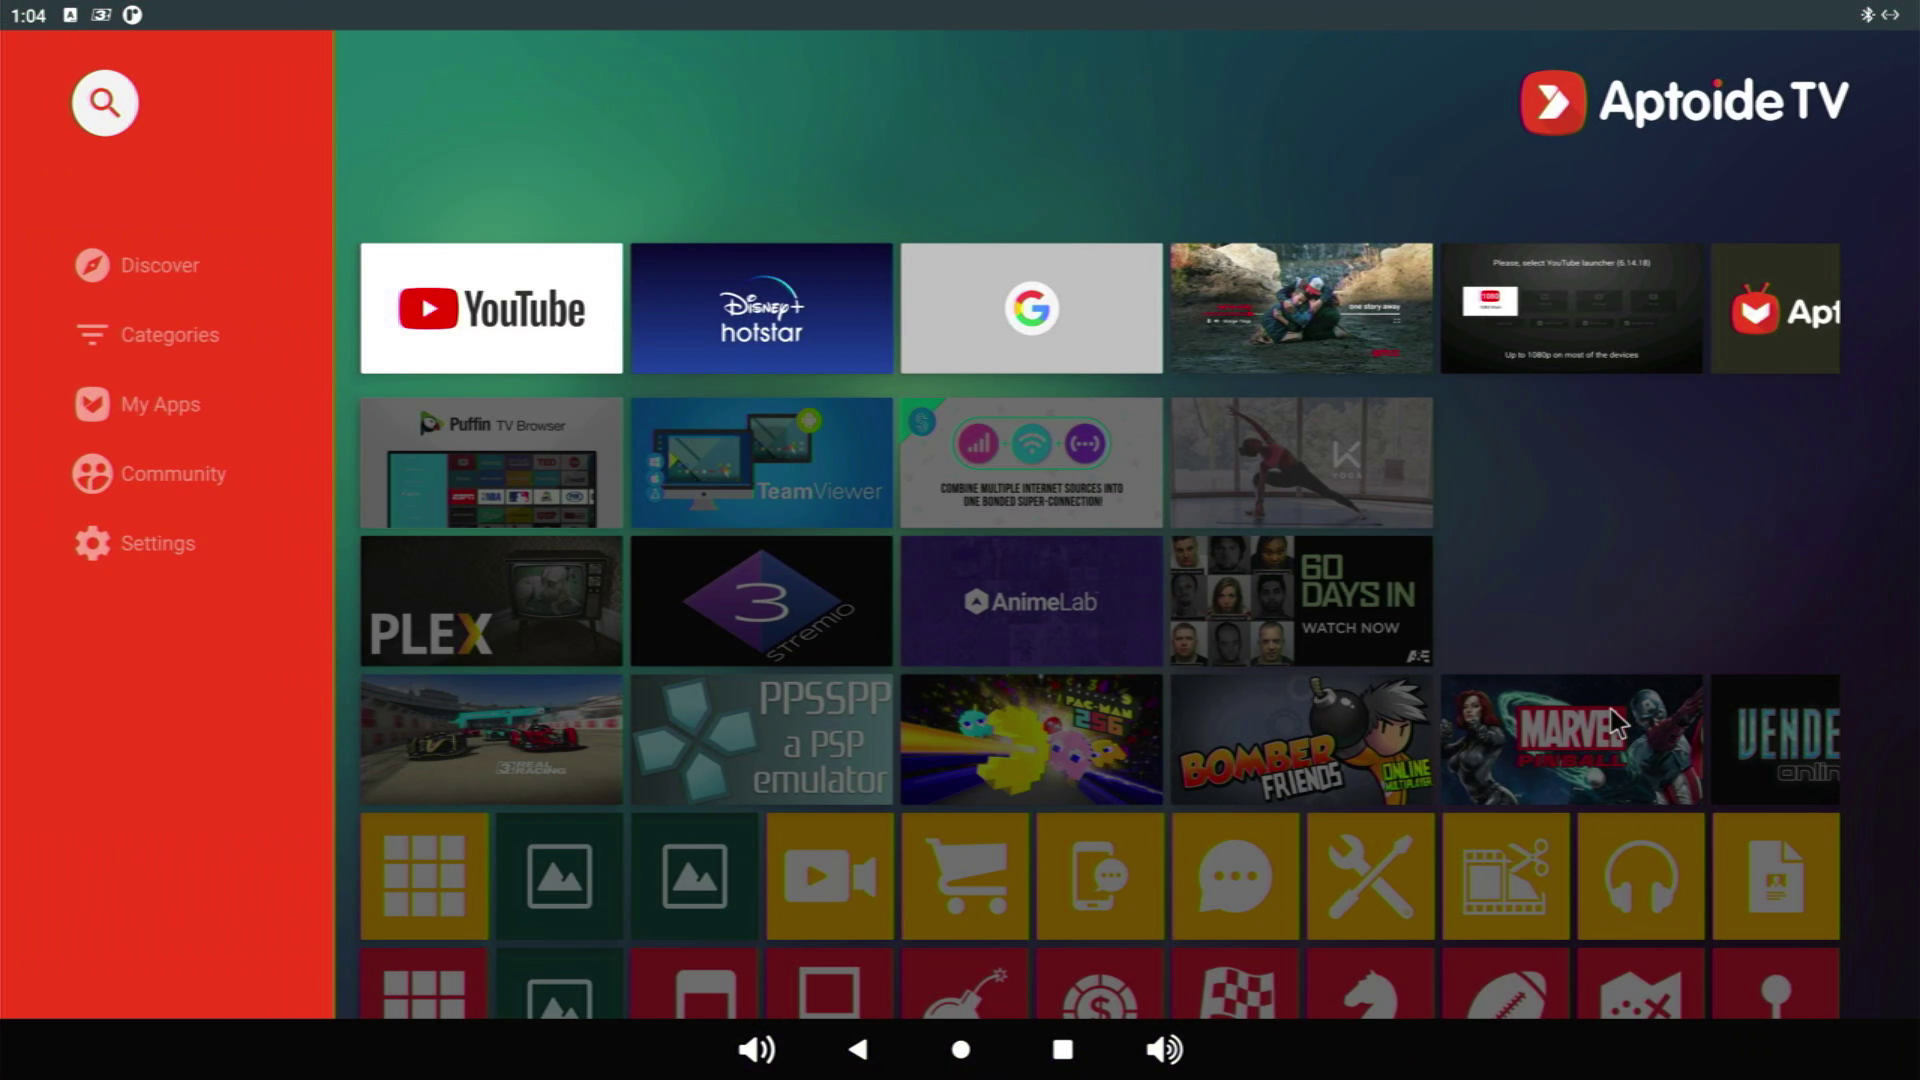
Via the OOWOW installer, we can install a 32-bit or 64-bit version of Android 11. This is a rather basic version of Android, lacking all of the Google apps, but we are not without an app store. Installed and ready for use is Aptoide, a third-party app marketplace which has a decent selection of applications. For our tests, we installed YouTube, PPSSPP and Real Racing 3.
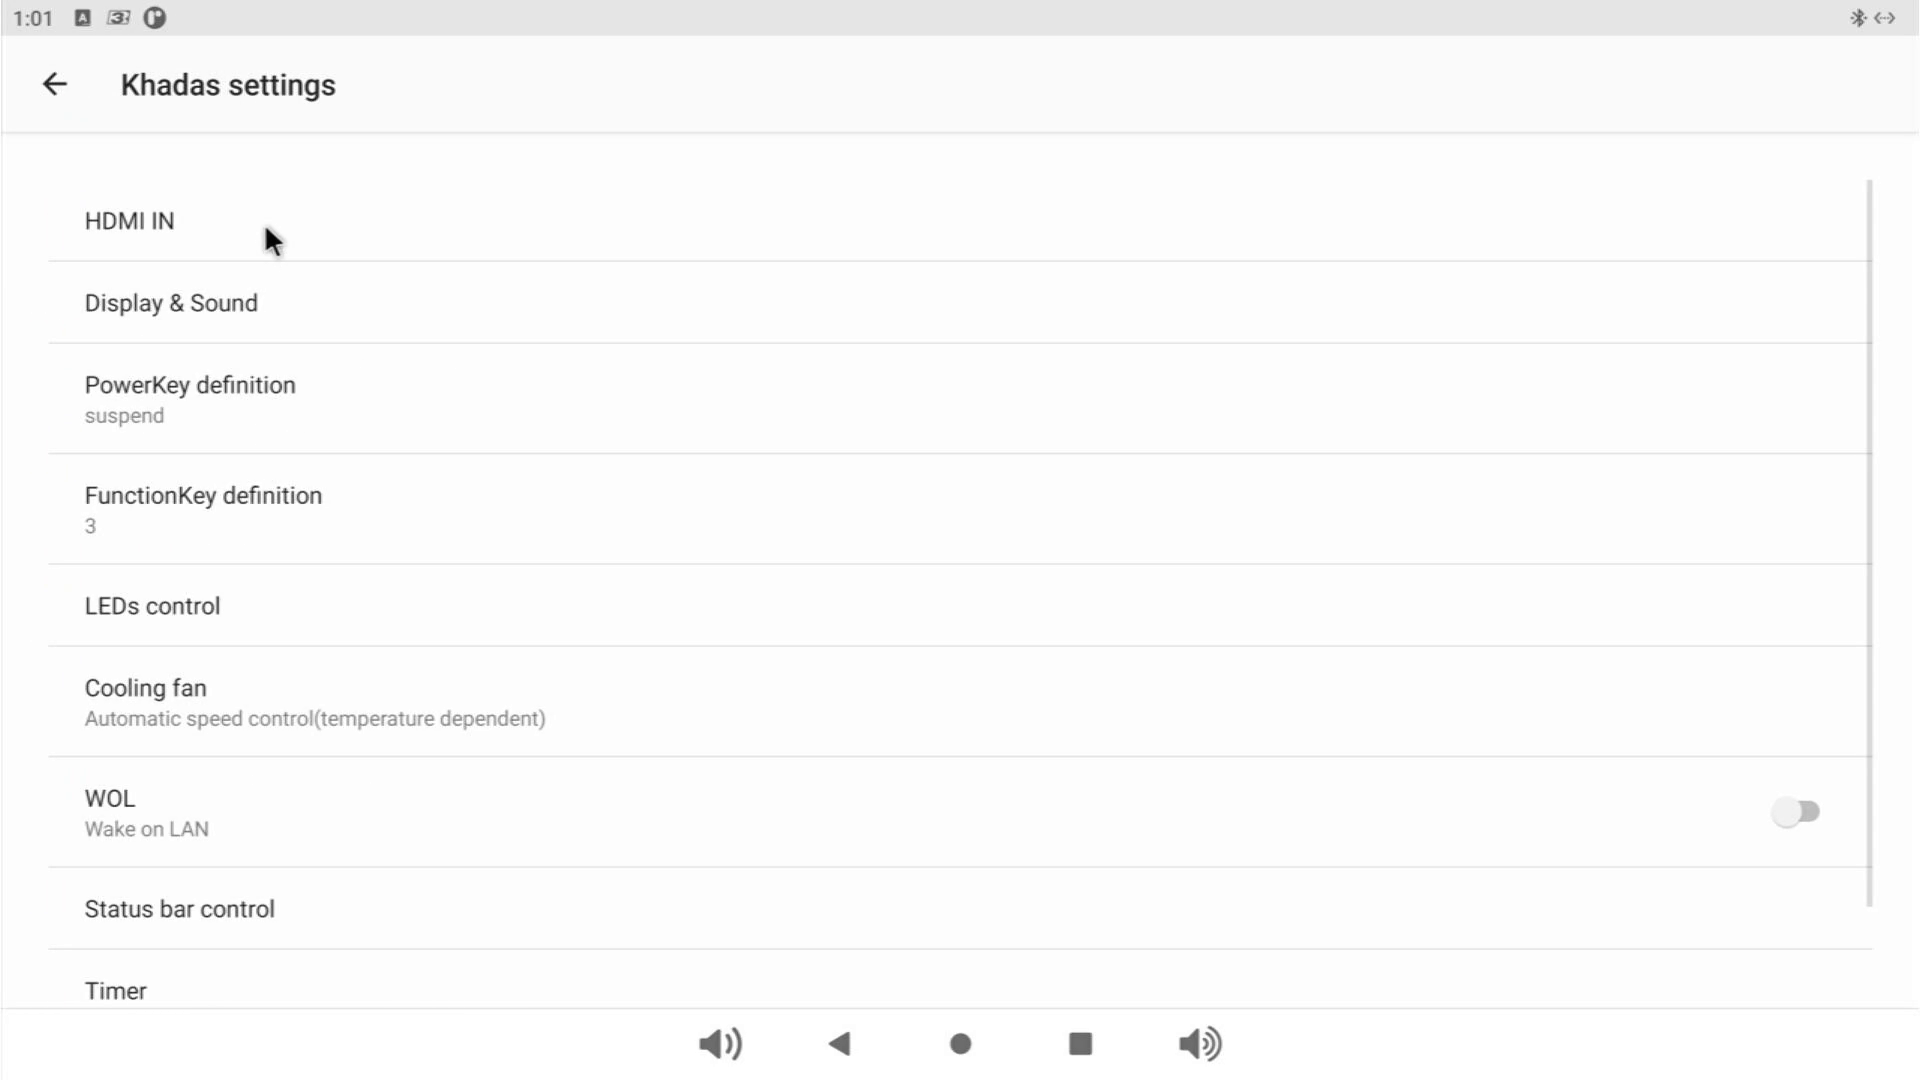

The basic Android interface is as you would expect on any Android device, just a little less “Google.” We have access to the full Android experience and are able to tweak the settings via the general settings menu.
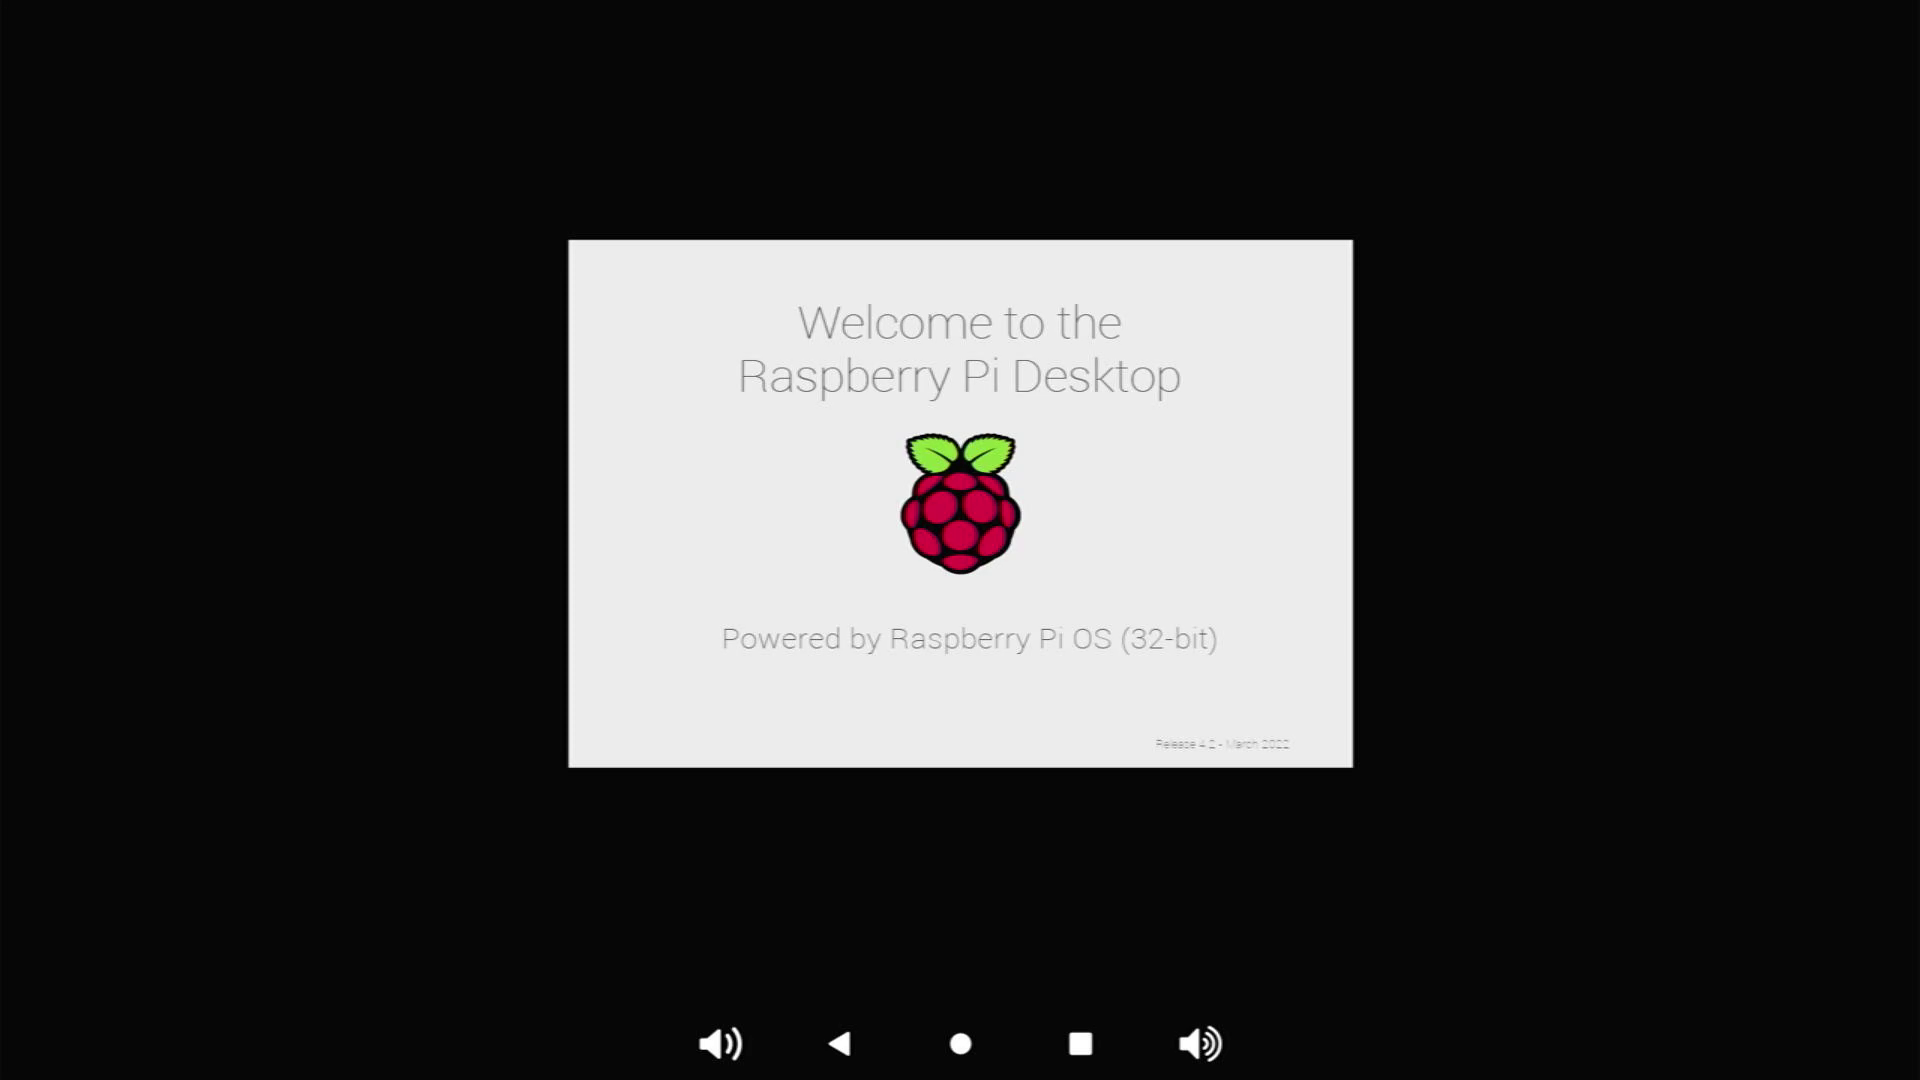
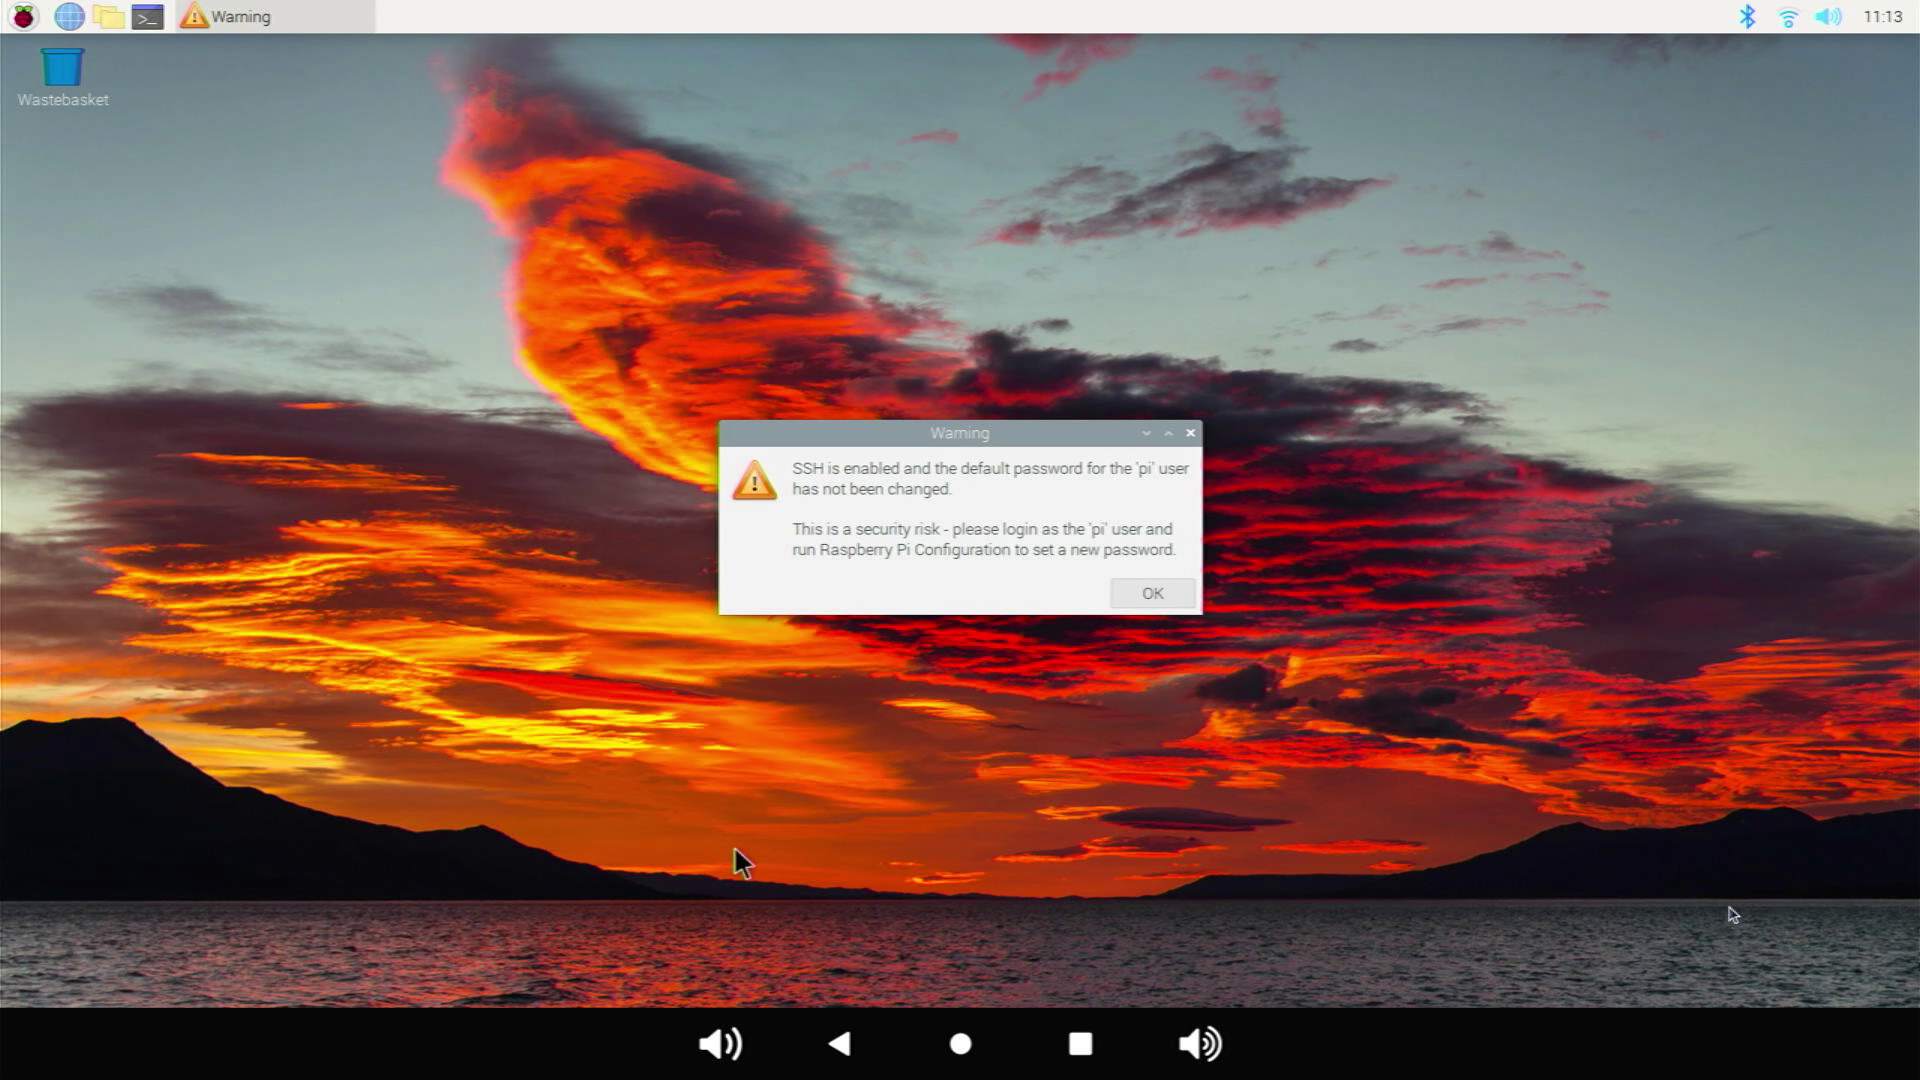
Under the Khadas Settings sub-menu we found HDMI-IN. This launches a media interface which can display a video feed from the HDMI input. We tested by connecting a Raspberry Pi 4 to the input and powering up. A few moments later, we were greeted with the familiar Raspberry Pi desktop. There wasn’t a direct means to record the feed, but there are third-party applications which can do this.

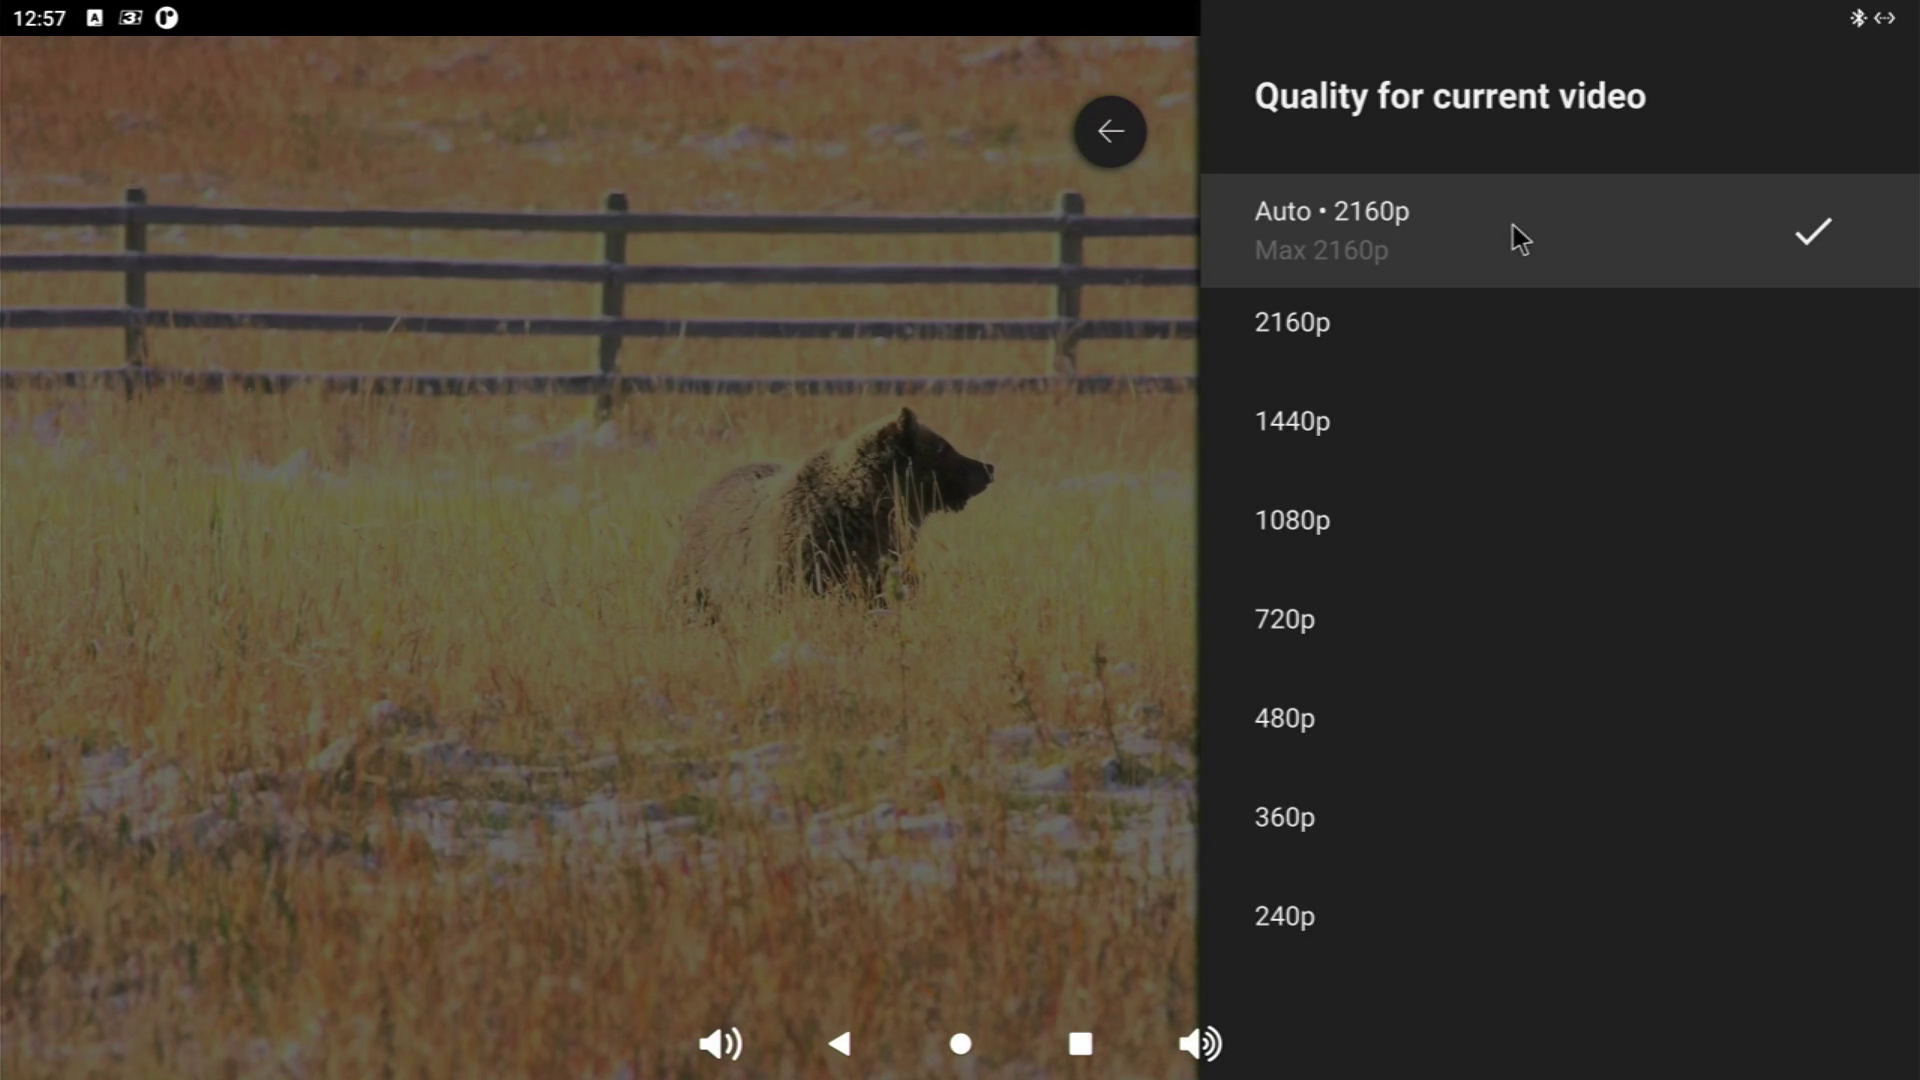

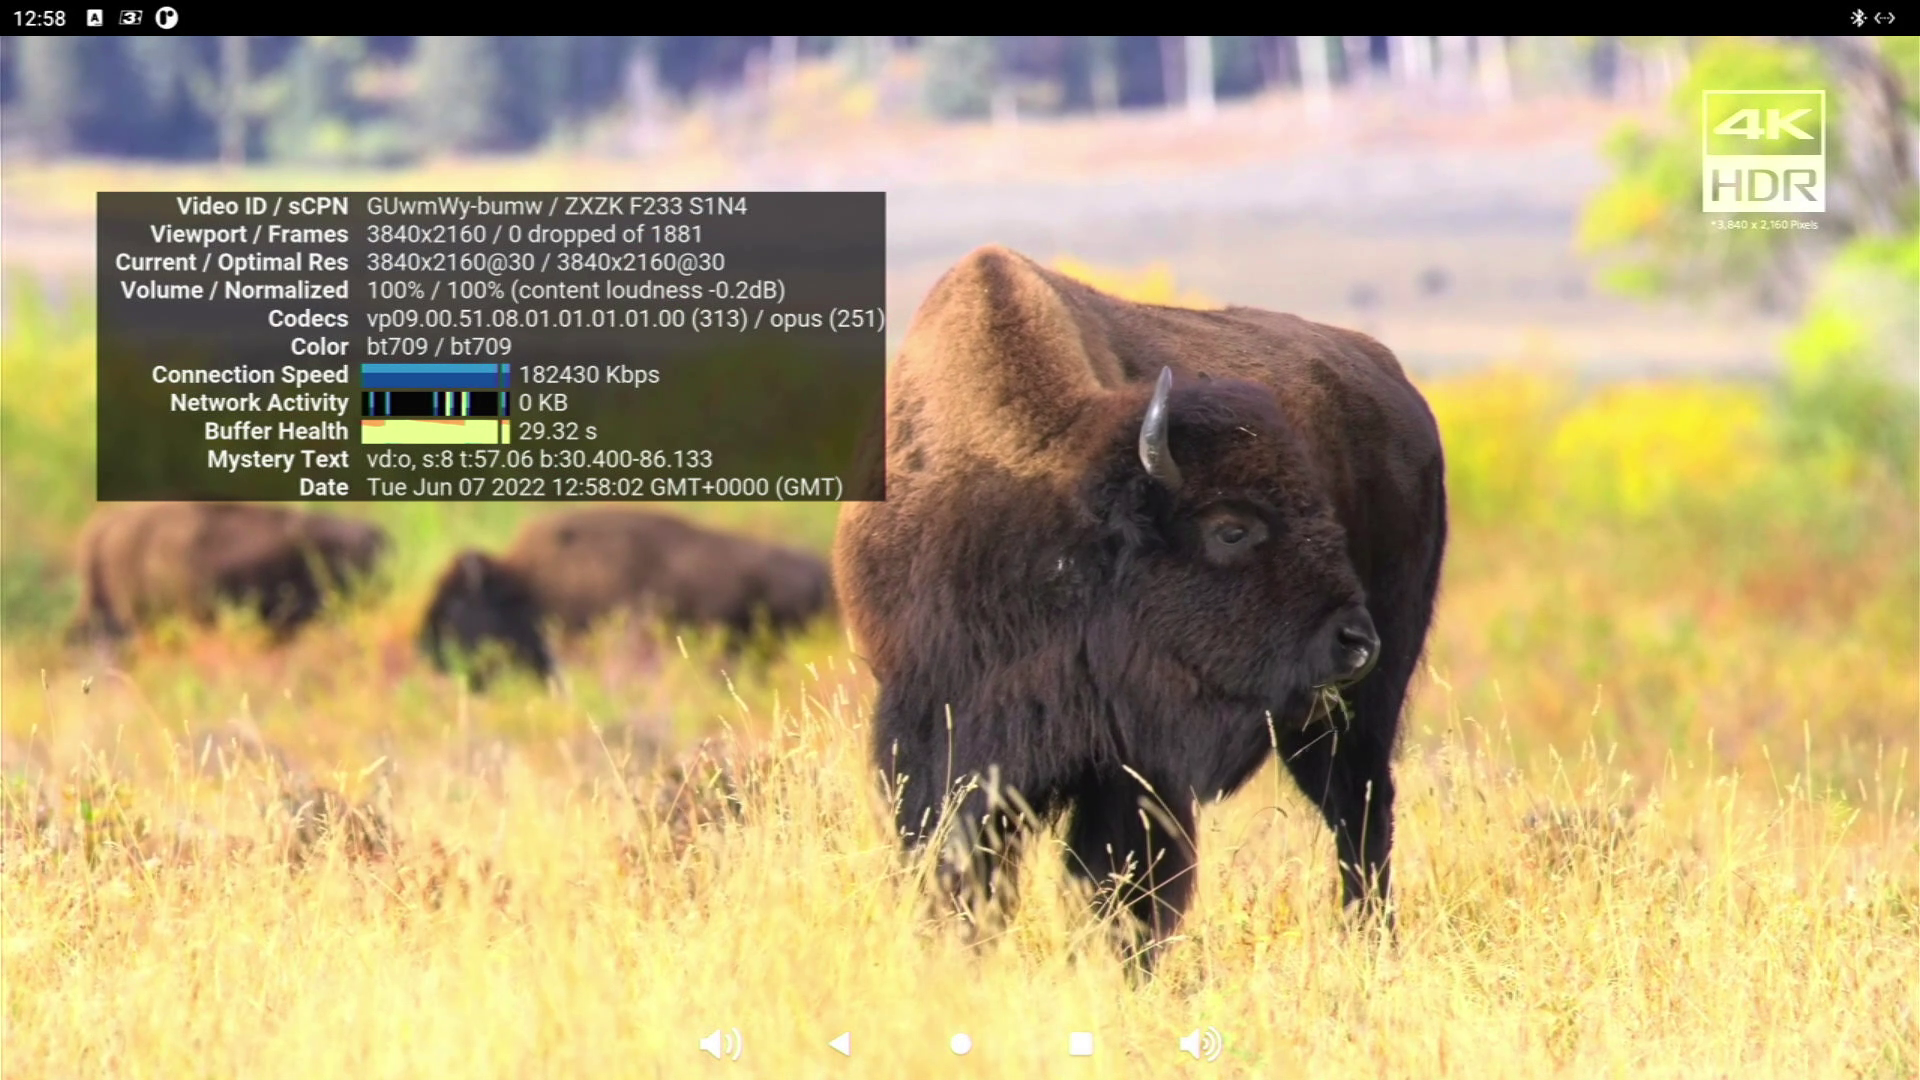

Via Ubuntu, YouTube playback maxed out at 1080p, but with Android we were pleasantly surprised to see that our 4K television was fully utilized. YouTube played the same 4K video from leepspvideo but this time with zero dropped frames over a Wi-Fi 5 connection.
The Khadas VIM4’s octa-core CPU is a great fit for retrogaming. We connected our Xbox One controller via Bluetooth and readied ourself for a morning of in-depth testing.


The Playstation Portable (PSP), released in the early 2000s, is one of the harder machines to emulate and God of War: Chains of Olympus is considered a good benchmark. We tested this game with PPSSPP, a PSP emulator and without any configuration we hit a few issues. Gameplay was less than 60fps, and sound was garbled.
The cause? The default OpenGL render settings. We changed this to Vulkan and restarted the test, and it was much better, in fact it held steady at 60fps with 2x resolution scaling. Using frameskip, we dropped to 30fps and gameplay didn’t suffer at all. We could even push the resolution scaling to 3x. We tried to test a Nintendo 64 emulator (mupen64) installed via Aptoide, but alas it wasn’t meant to be and it crashed everytime we opened it.
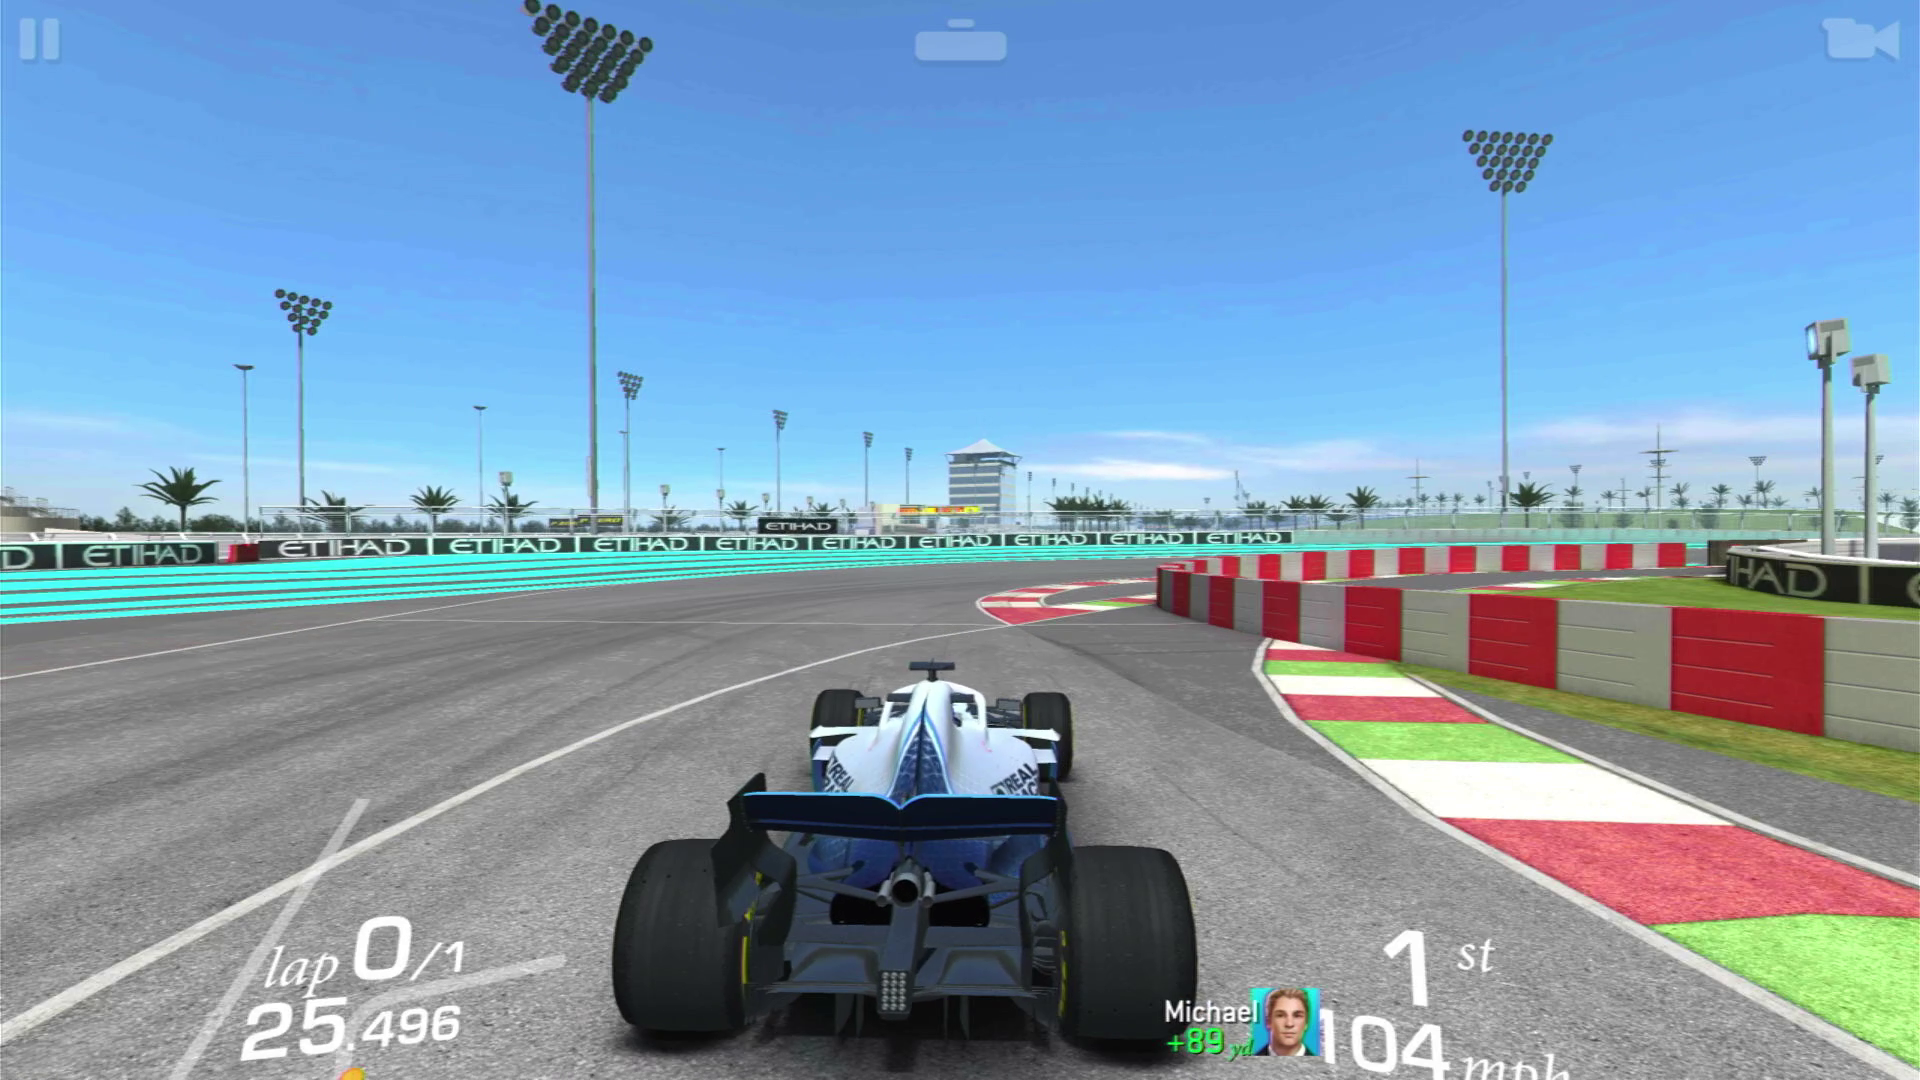
Native Android gaming is buttery smooth, EA’s Real Racing 3 is a fast-paced sports racing game which runs at 4K with no issues at all. We even discovered that the VIM4’s onboard accelerator is compatible and can be used to control the game. By titling the VIM4, we can control the car’s steering, but it does get a little too warm for comfort.
General web browsing via the Google Chrome browser is excellent and feels identical to a typical Android experience, just with a much larger screen. It seems that Android is where the Khadas VIM4 excels.
What Projects Can We Use Khadas VIM4 For?
The power and the form factor of the Khadas VIM4 lends itself to many projects. Let’s focus on its raw power first. We have plenty of power to use the Khadas VIM4 as a low power desktop replacement or for machine learning projects. If you need a little more grunt than a Raspberry Pi 4, the Khadas VIM4 is a viable option especially given that the price of the 8GB Pi 4 is near to the Khadas VIM4.
Makers, for now, the Khadas VIM4 is not your best option. The GPIO access is limited at present, but there is hope for this to be resolved in the coming months.
Those that benefit the most from the Khadas VIM4 are the retrogamers and movie watchers. The horsepower of the Arm based SoC, along with 64-bit Android makes this a delight to use in the lounge. Bluetooth just works and we can control the Android OS from the comfort of our sofa.
Bottom Line
We like the Khadas VIM4. It is a powerful board that finds itself in that awkward spot of “more power than a Pi, less powerful than an APU” but it straddles the divide quite well. Given the current Pi shortage, this could be the time for the Khadas VIM4 to shine. Sure the price, currently $239, is hard to swallow, but you have to be lucky to snag a Raspberry Pi 8GB for its RRP. If you’re not lucky, then prices can go up to $150.
The downside of this Khadas VIM4 is the GPIO. We would love to see full access via Python and other programming languages. Once we have that, then the Khadas VIM4 will be “on par” with the features of the Raspberry Pi, though it will never have the level of support and huge ecosystem of the Pi.
Retrogamers looking to build a cabinet or home gaming system should consider the Khadas VIM4 and Android 11. We have access to a plethora of emulators, games and 4K YouTube when we need a guide to beat that boss.
Movie lovers, Android on the Khadas VIM4 is for you. Plex, YouTube, Disney+, Netflix etc are all there and ready to entertain and inform.

Les Pounder is an associate editor at Tom's Hardware. He is a creative technologist and for seven years has created projects to educate and inspire minds both young and old. He has worked with the Raspberry Pi Foundation to write and deliver their teacher training program "Picademy".
-
Ockwig Thanks for thr GPIO review, it’s what I suspected, not fully developed, I’m not ready to buy until those issues are resolvedReply -
Robin Davies Any idea on which kernel version they settled on for Ubuntu? Last time I checked they were vacillating between a 4.4 and a 5.x Linux kernel. I'm specifically Interested in the re-written 5.15+ USB Audio stack that provides pro-audio USB support, and in the new GPIO driver system, which would provide a path to next-gen GPIO support (both available on Raspberry PI OS and Raspberry PI Ubuntu).Reply
I've been given to understand that Android can run on very ancient kernels, but there are monstrous complications with porting android-compatible Bluetooth and Wi-Fi stacks to modern Linux kernels due to lack of support by chipset vendors other than Broadcom. -
peachpuff ReplySure the price, currently $239, is hard to swallow
My Ferrari is faster than your vw golf too...
