Tom's Hardware Verdict
The ideal robot for beginners and intermediate roboteers alike. Trilobot is simple to build, great software and a vast number of expansions affords this robot a place in your home.
Pros
- +
+ PCB chassis is excellent
- +
+ Great software
- +
+ Expandability
Cons
- -
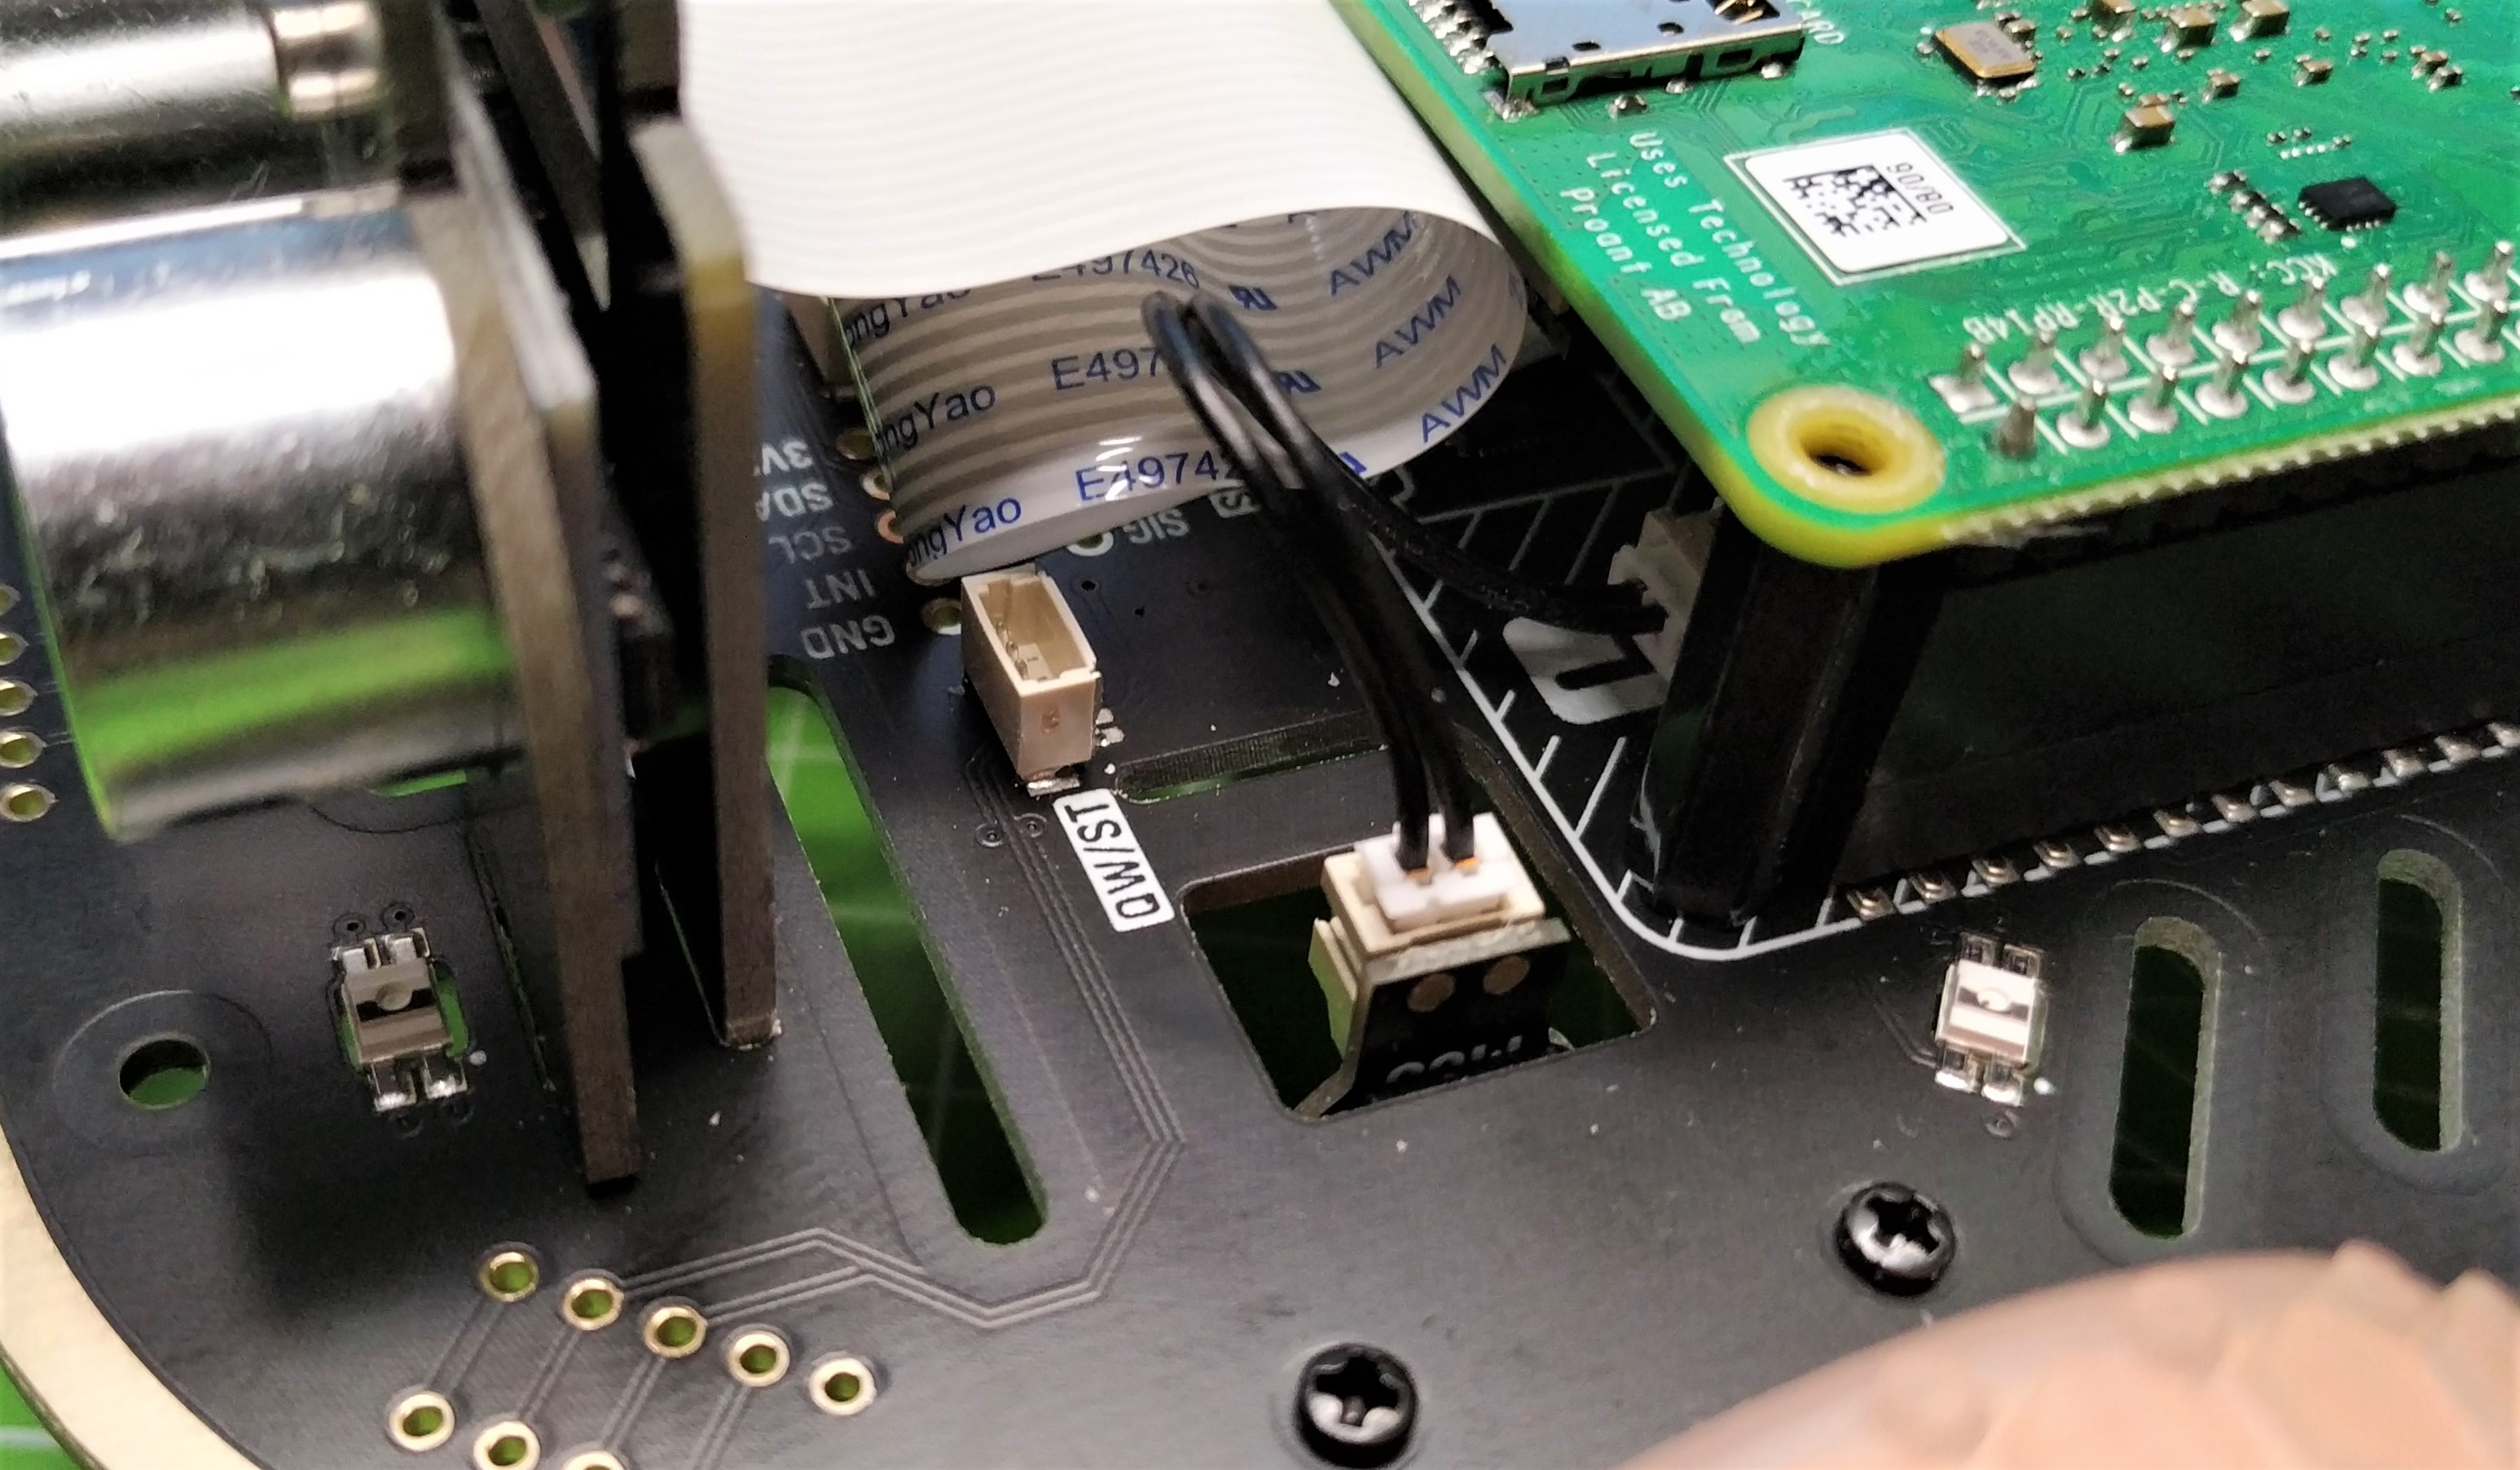
Qw/St connectors are difficult to access
Why you can trust Tom's Hardware
If we believe science fiction, robots will be the end of us. From Skynet to the Decepticons, robots have had a bad press but there are a few friendly robots in this world. Trilobot, powered by the Raspberry Pi 4 is well designed and easy to use robot kit from Pimoroni. For $50 (plus a Raspberry Pi, camera and battery you bring on your own), we get a gloriously designed chassis which uses two FR-4 PCBs to provide a light, yet strong chassis which embeds all of the electronics necessary for building a robot.
We’ve tested and own many different robots, from beginner centric bots designed to hone your skills, to multi-board bots based on Mars rovers. The journey from beginner to advanced roboteer is full of false starts and issues. To learn you need the right tool and the Pimoroni Trilobot is the Raspberry Pi robot kit that will bridge that gap.
Pimoroni Trilobot Specifications
| Movement | 2 x Front Wheel Drive |
| Ball Castor | |
| 2 x 110:1 DC motors with pre-soldered shims | |
| Grippy wheels | |
| Connectivity | 2 x Qw/St (Qwiic / Stemma QT) connectors |
| 40 Pin GPIO header for Raspberry Pi | |
| User expanded headers for | |
| Servo | |
| 5 x Breakout Garden sockets (sold separately) | |
| 1 x I2C Header | |
| Optional Raspberry Pi Camera | |
| Sensors / Camera | Ultrasonic Distance Sensor |
| Official Raspberry Pi Camera clamp (Camera purchase separately) | |
| Power | USB C to power Raspberry Pi 4 |
| Robot powered via GPIO | |
| Chassis | 2 x FR-4 PCB |
| Dimensions | 6 x 4.17 x 2.1 inches (150 x 106 x 53.4mm) |
Assembling Pimoroni Trilobot
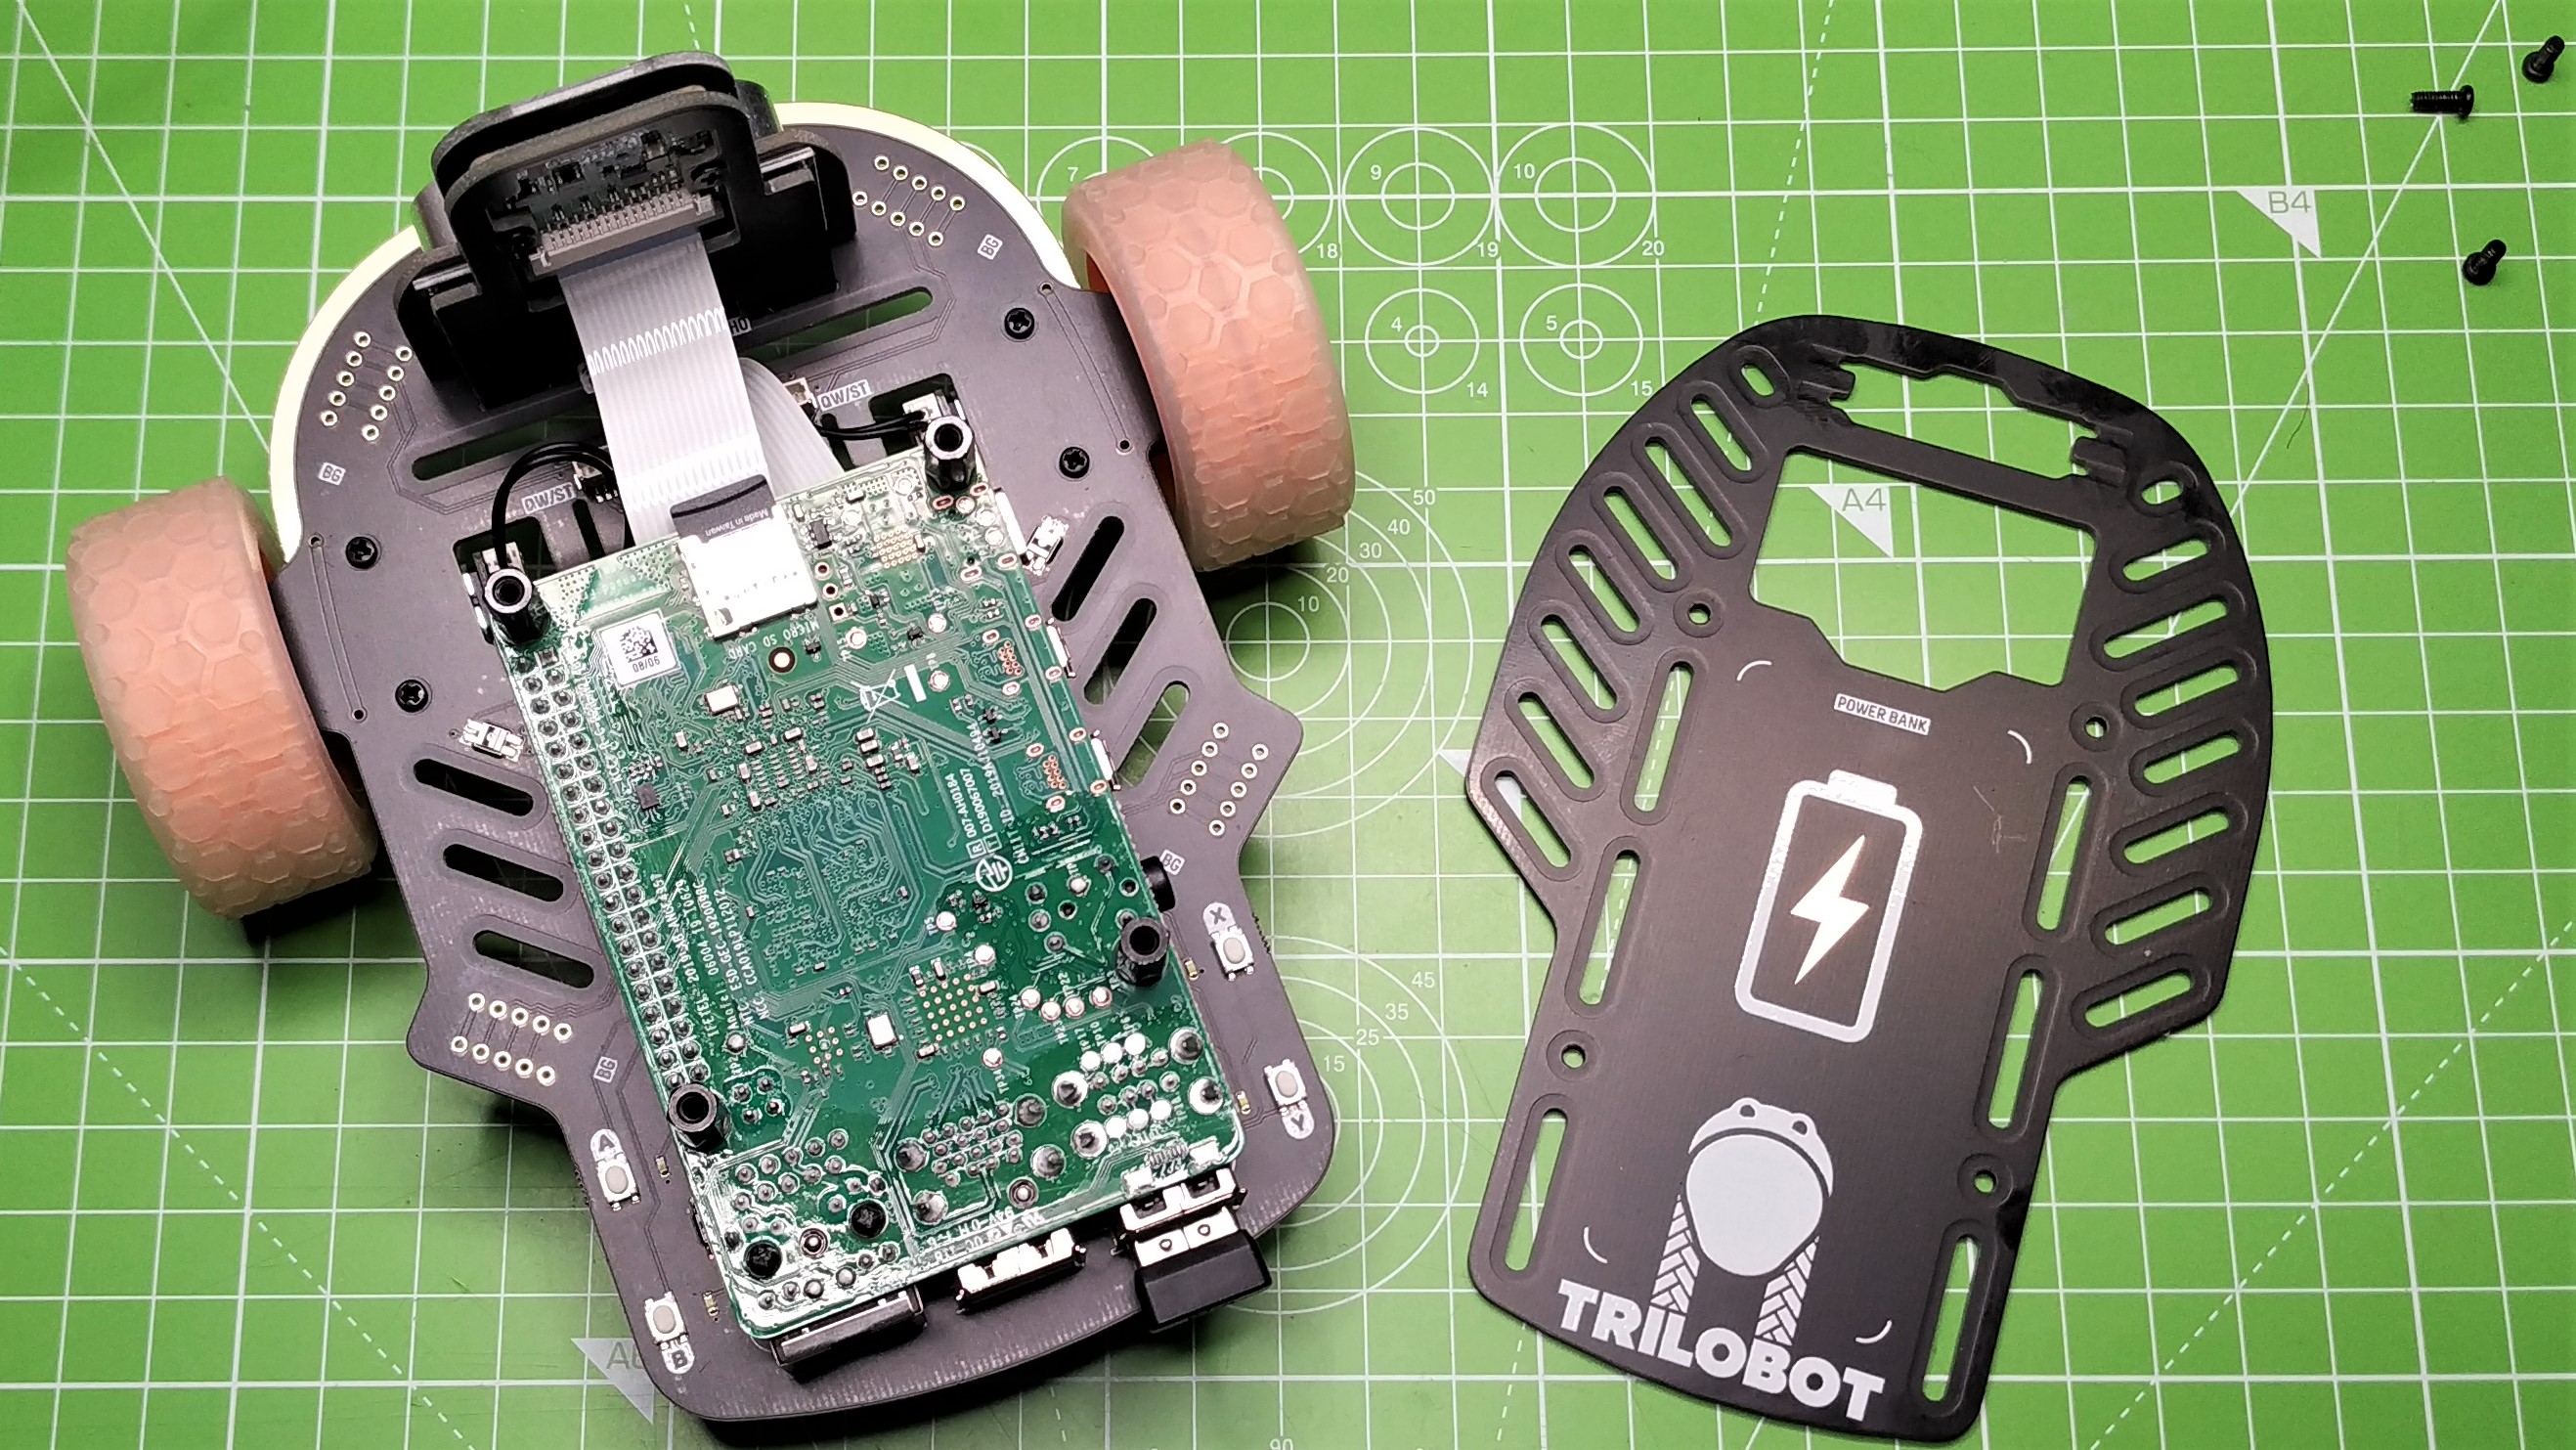
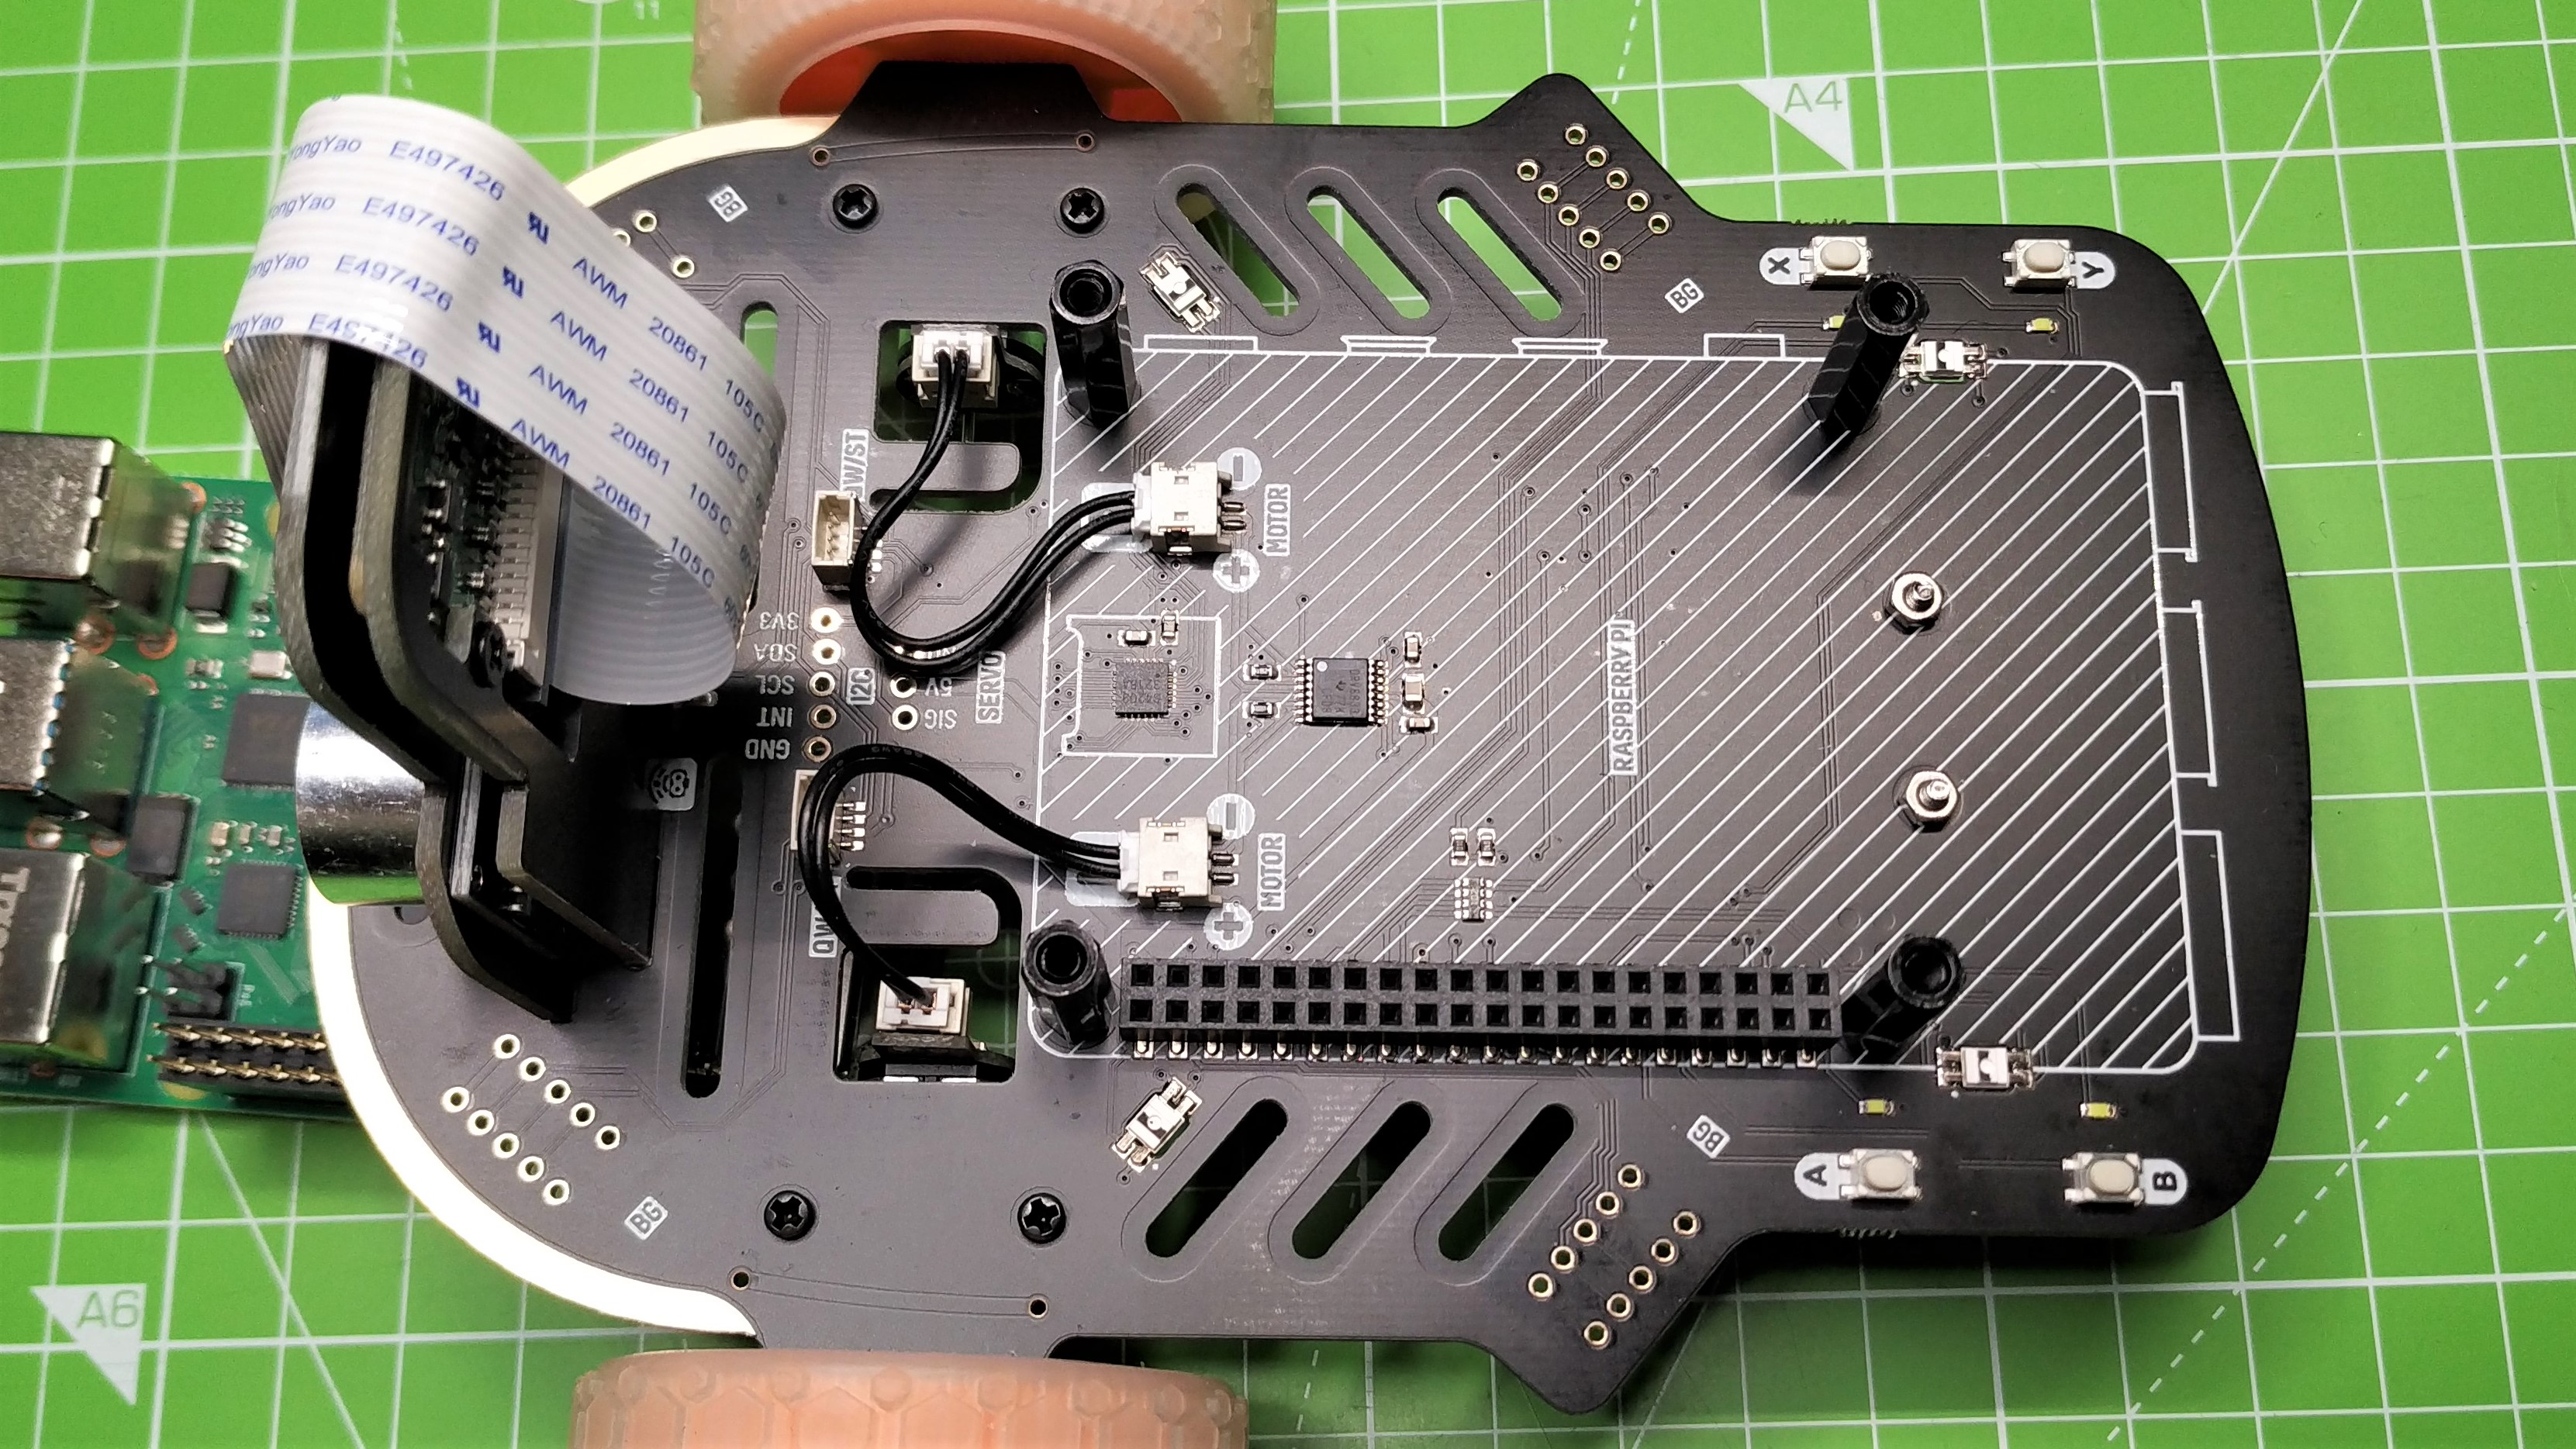
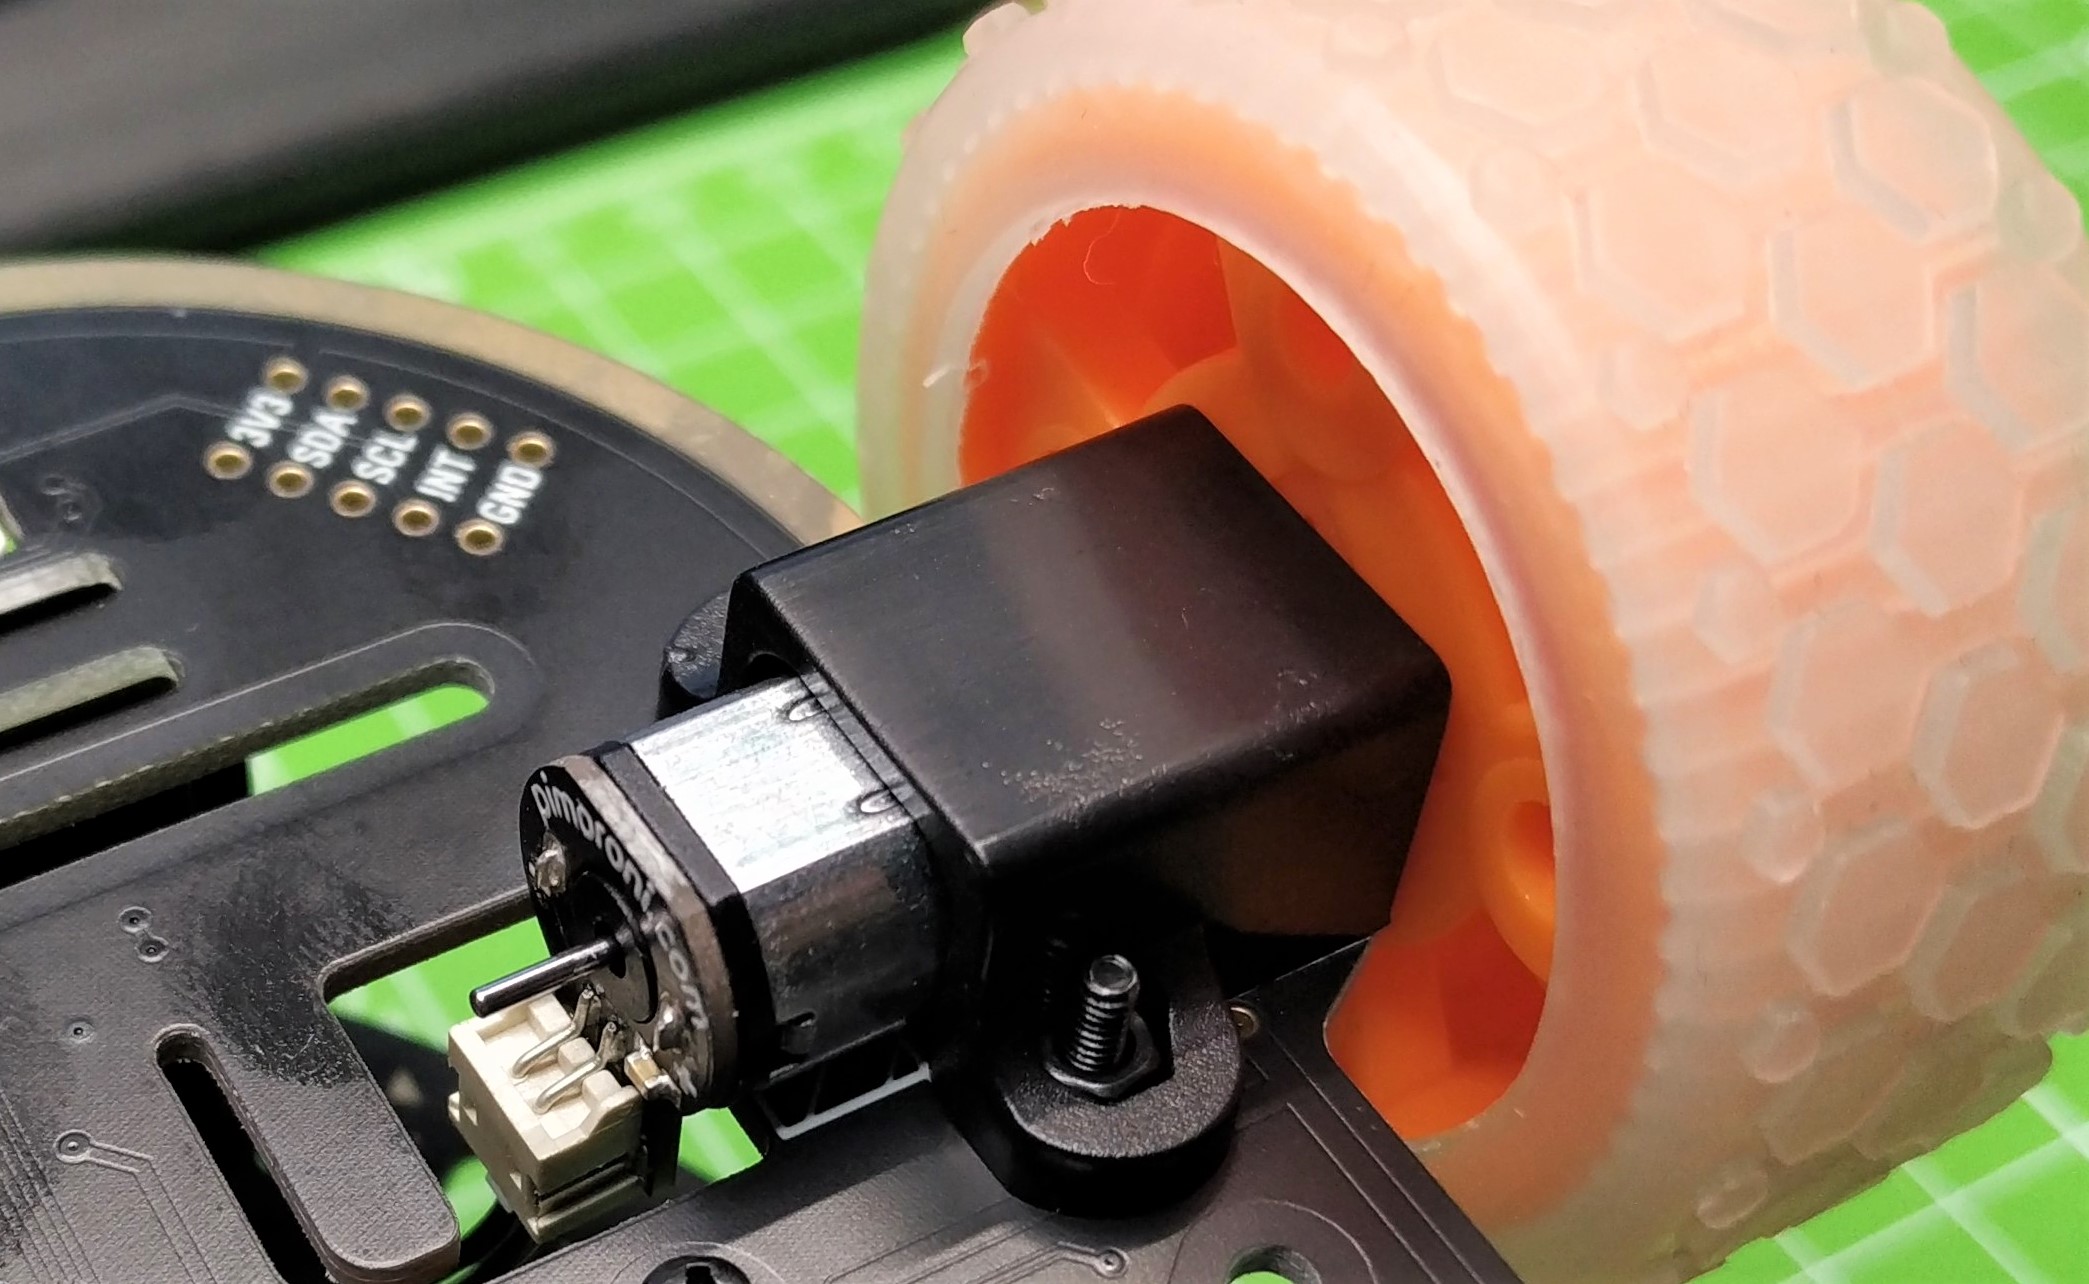
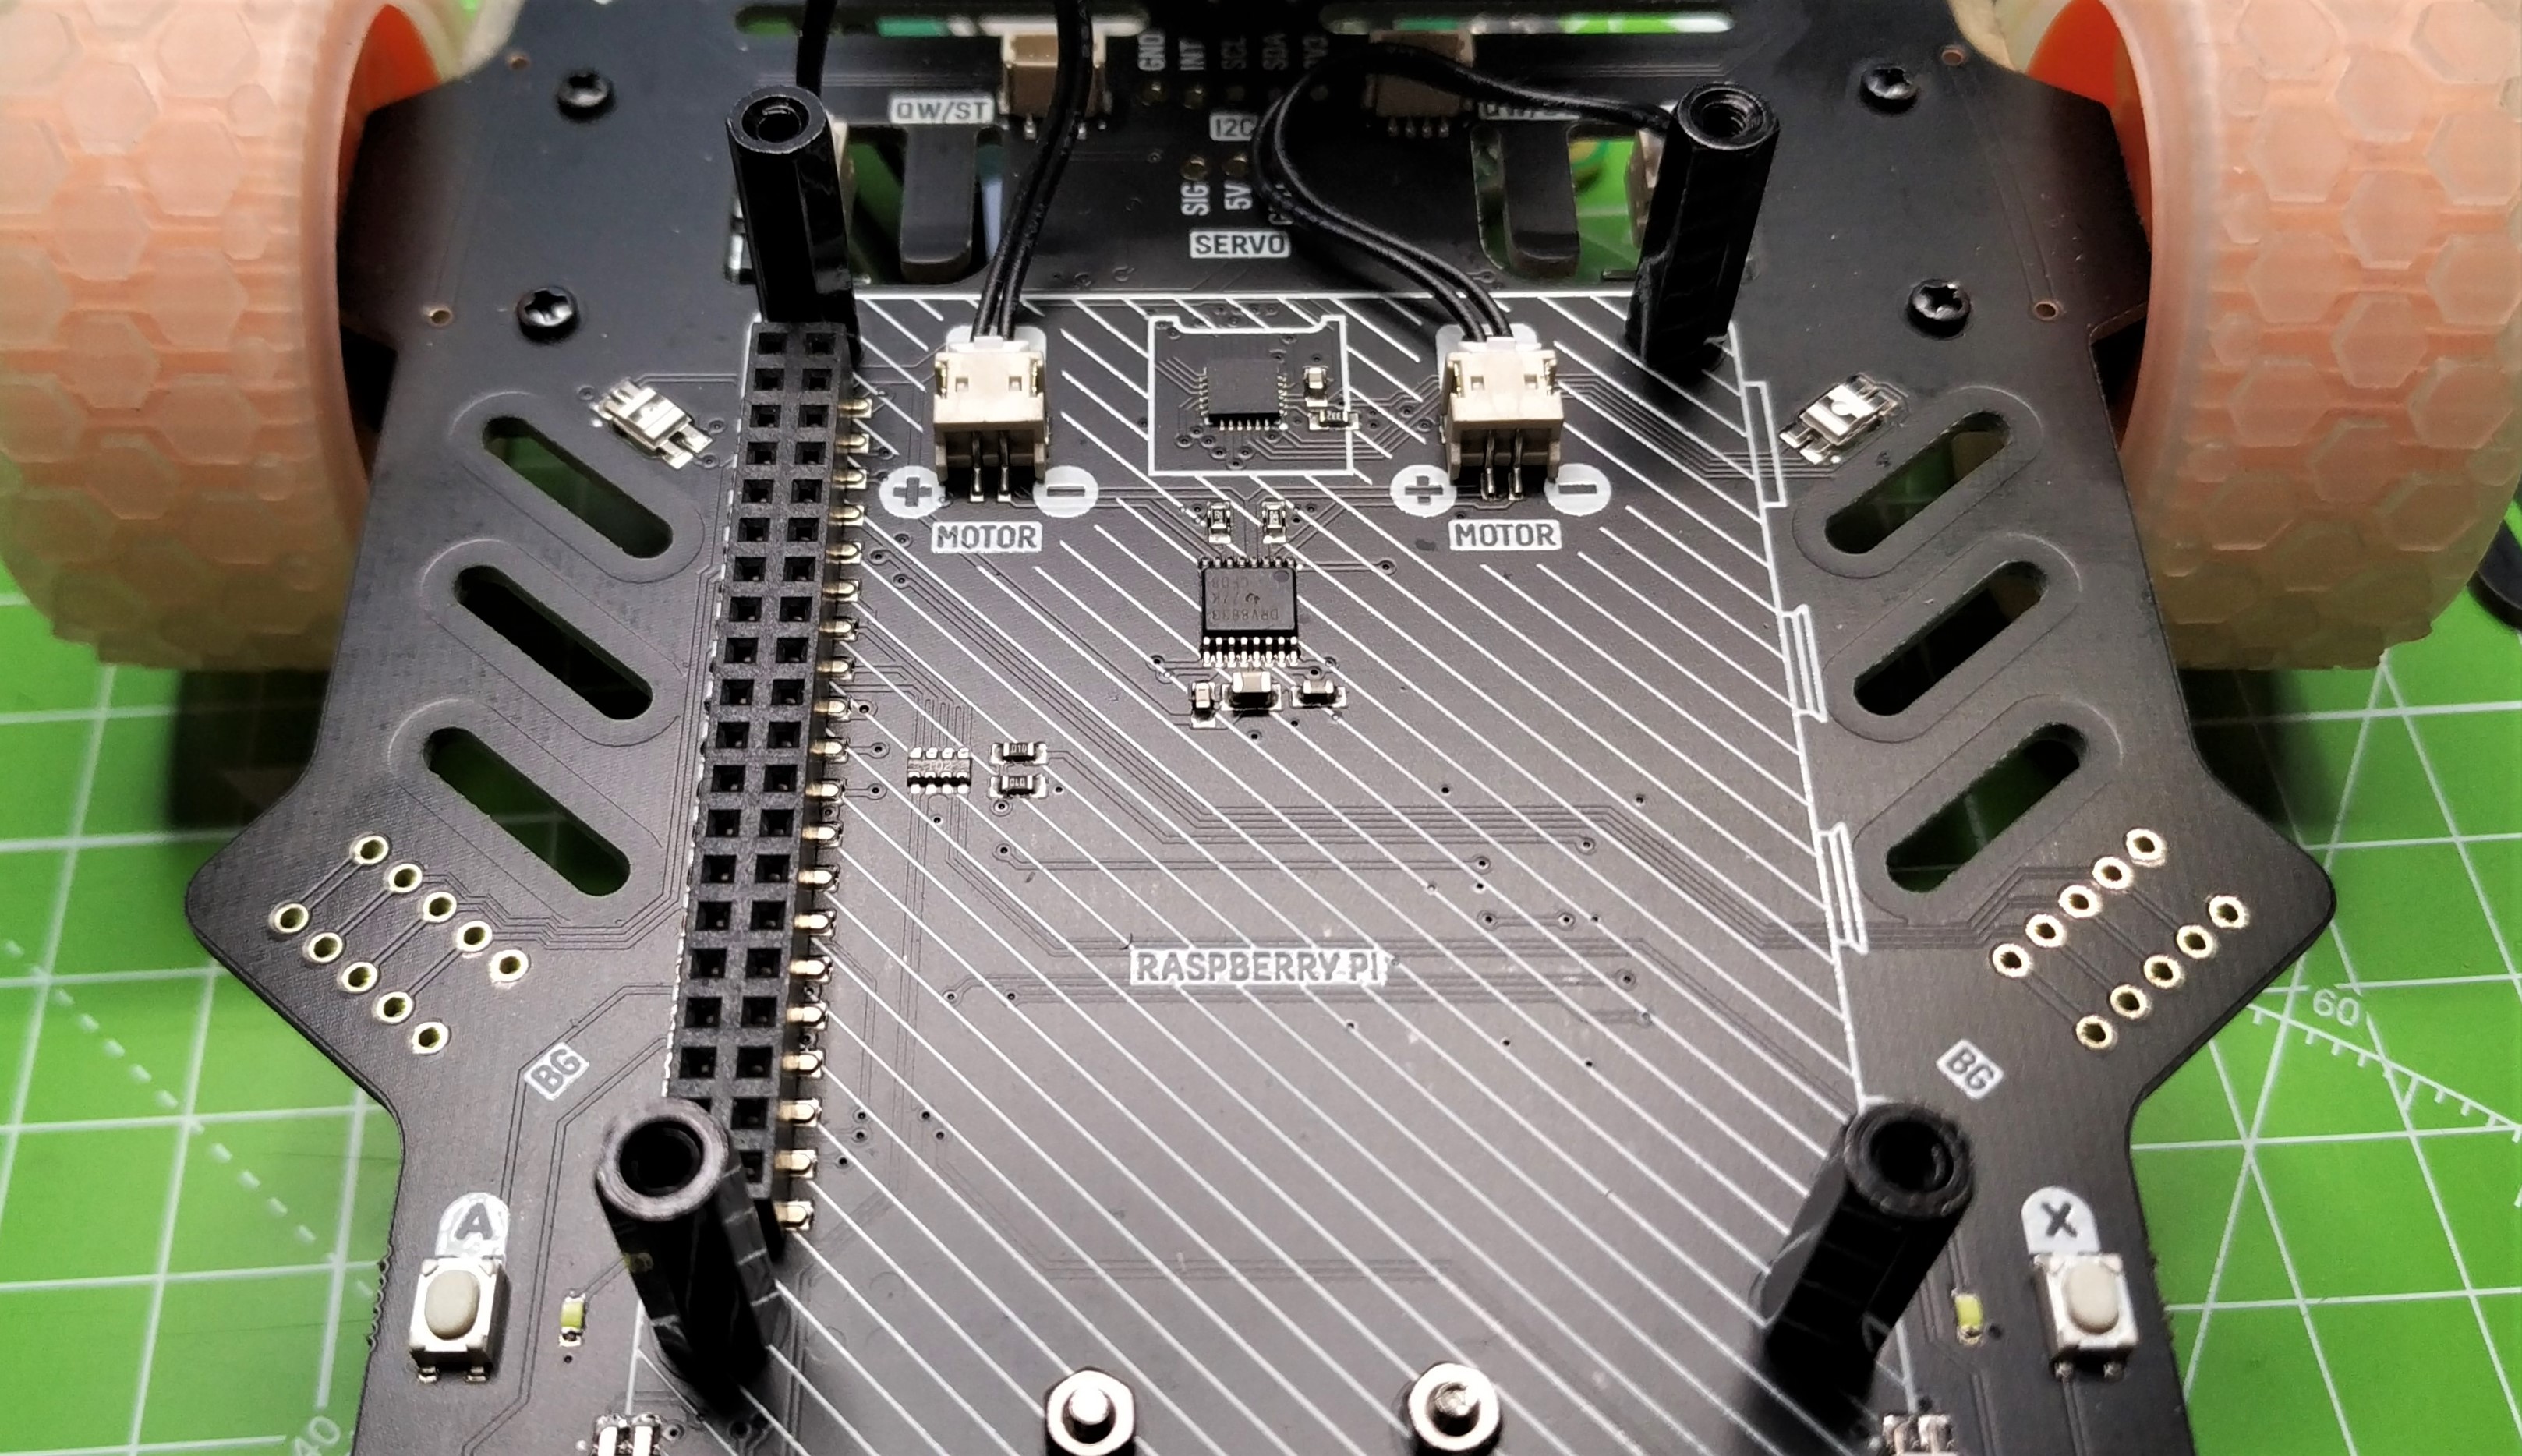
Our review unit came preassembled, but we quickly took it apart to see how it works. The use of FR-4 PCBs is not new. Raspberry Pi and micro:bit reseller 4Tronix have long used this method, but Pimoroni’s attempt is exceptional. Clear silkscreens, easy to find connections and a lovely “paint job” elevate Trilobot from being “just another robot”.
The build is straightforward but full of exquisite touches that show the level of detail creator Chris Parrott has poured into the robot. The main PCB is where we see the electronics that make this project. On this board is a single DRV8833 motor controller, the GPIO header for the Raspberry Pi 4, buttons, sockets for sensors and Breakout Garden boards and six RGB LEDs. The Raspberry Pi sits upside down on the GPIO header and provides control and power to the main chassis. Motors connect on the underside of the chassis via custom holders, with two JST connectors on the mainboard providing a simple means to connect the motors.
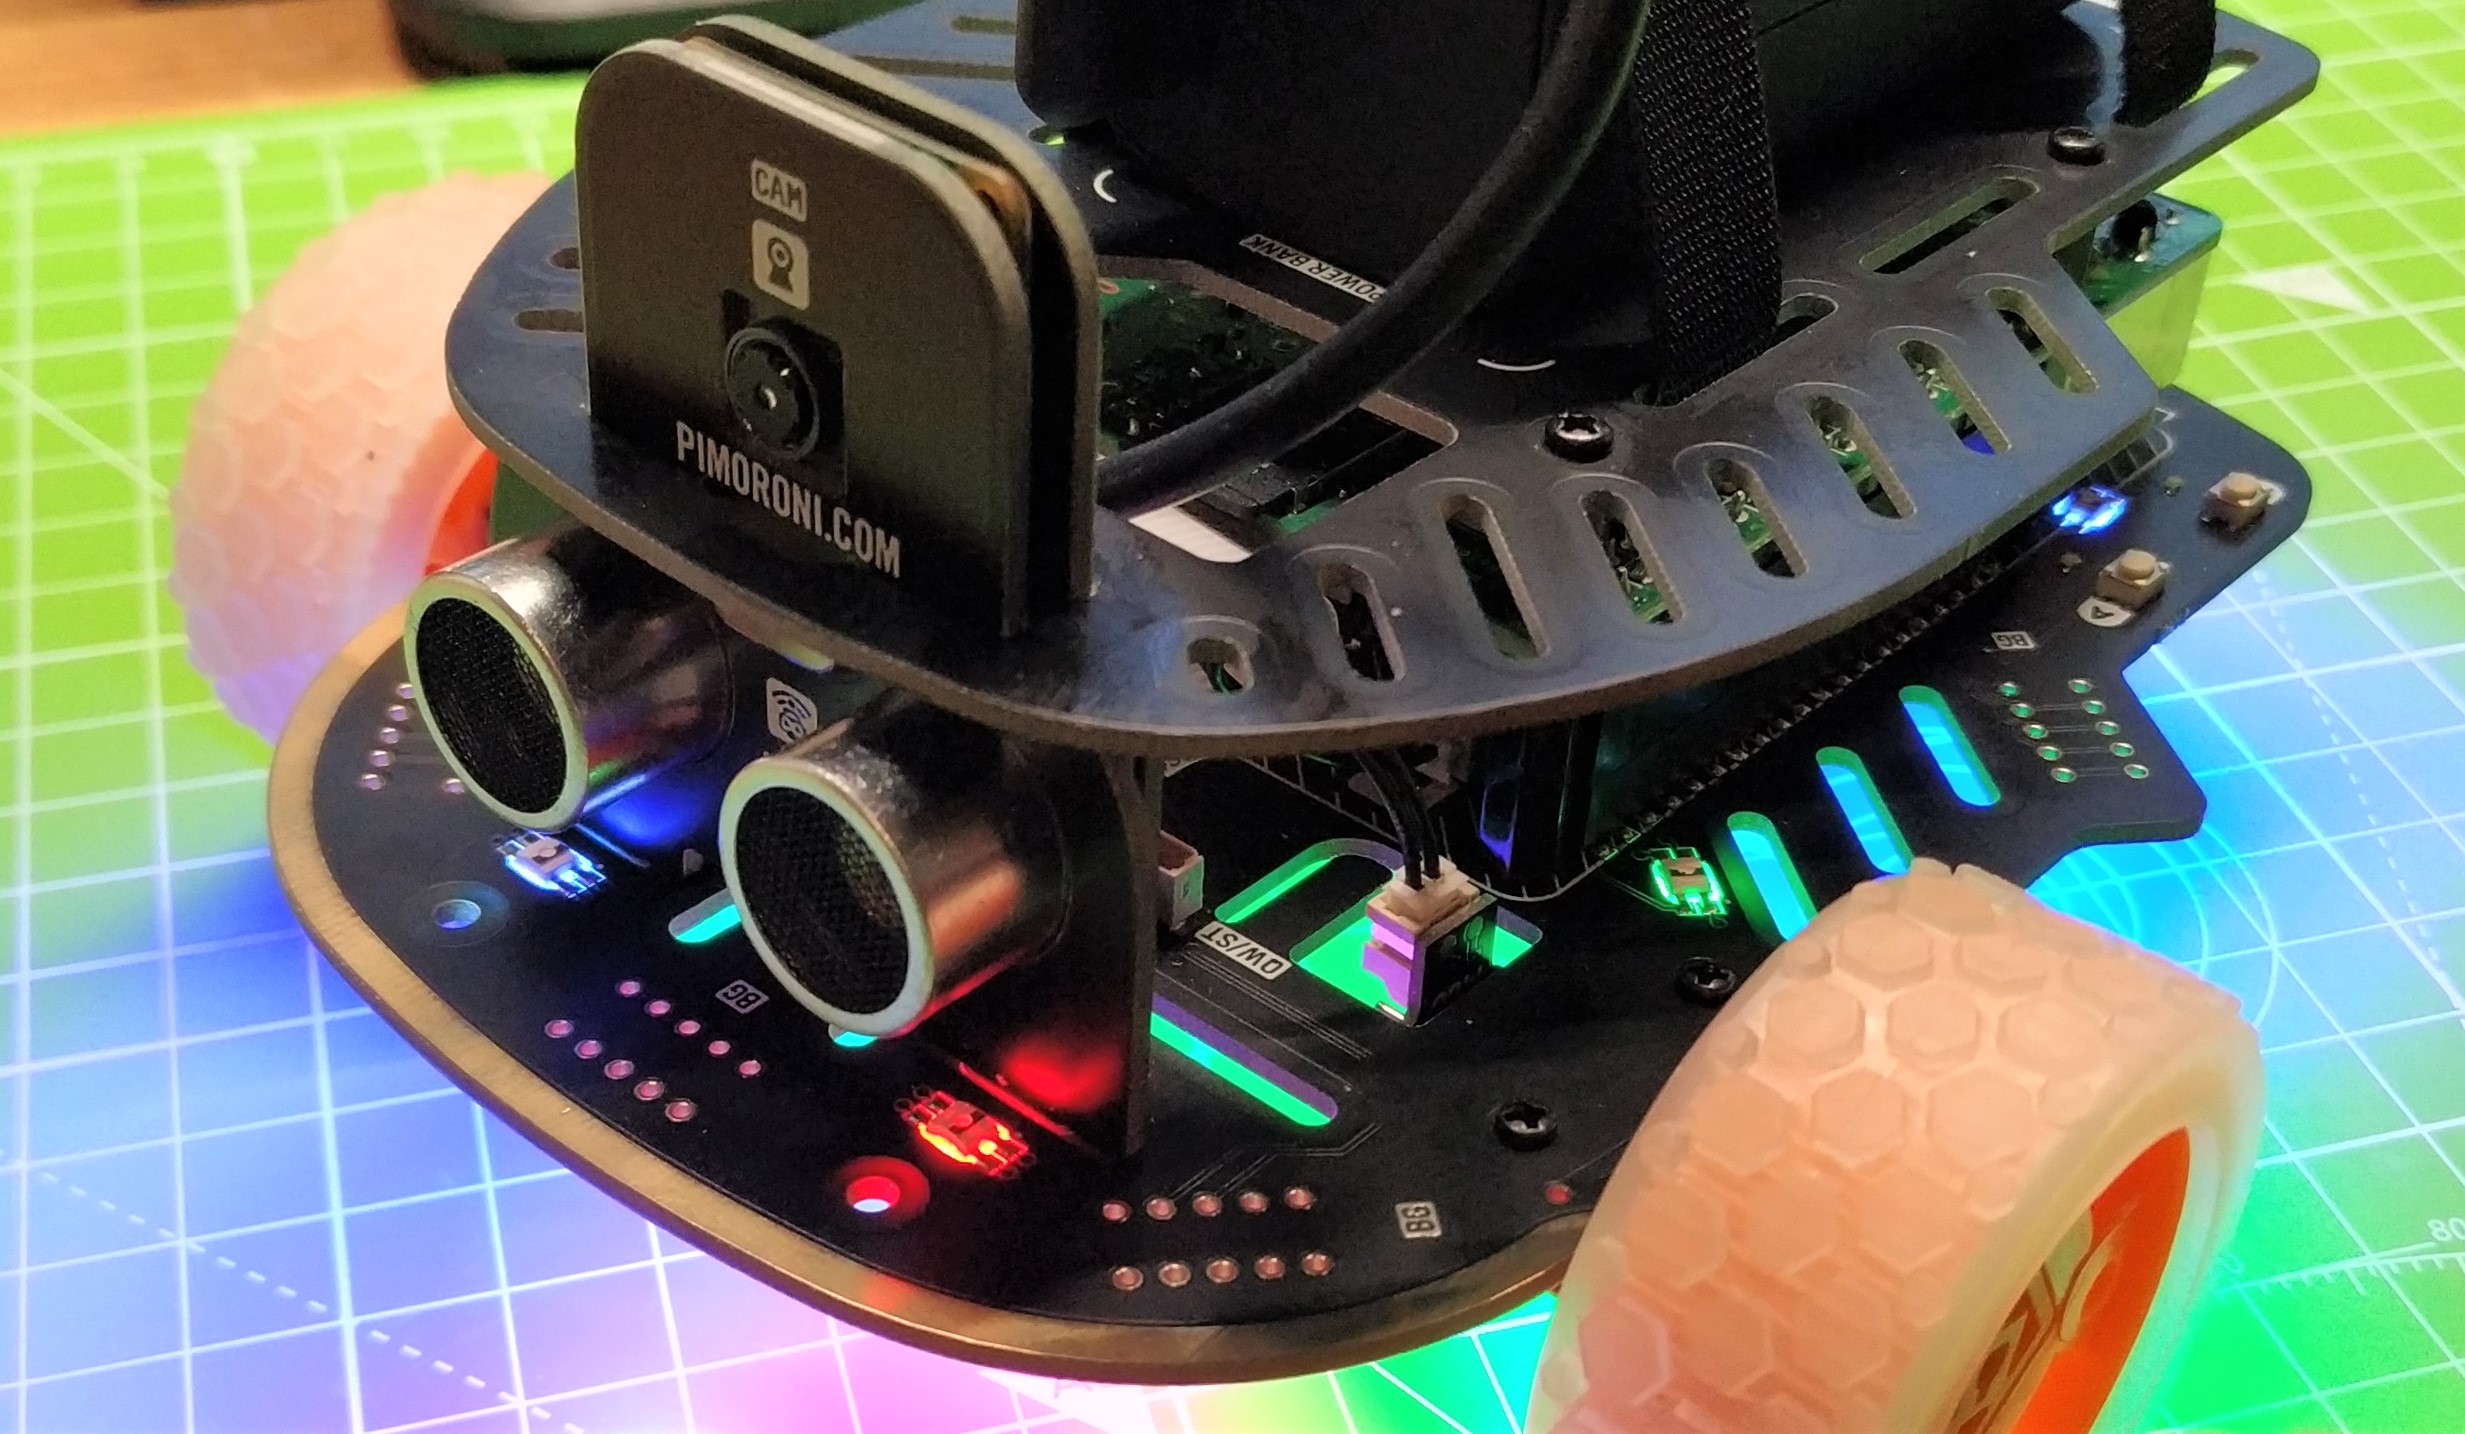
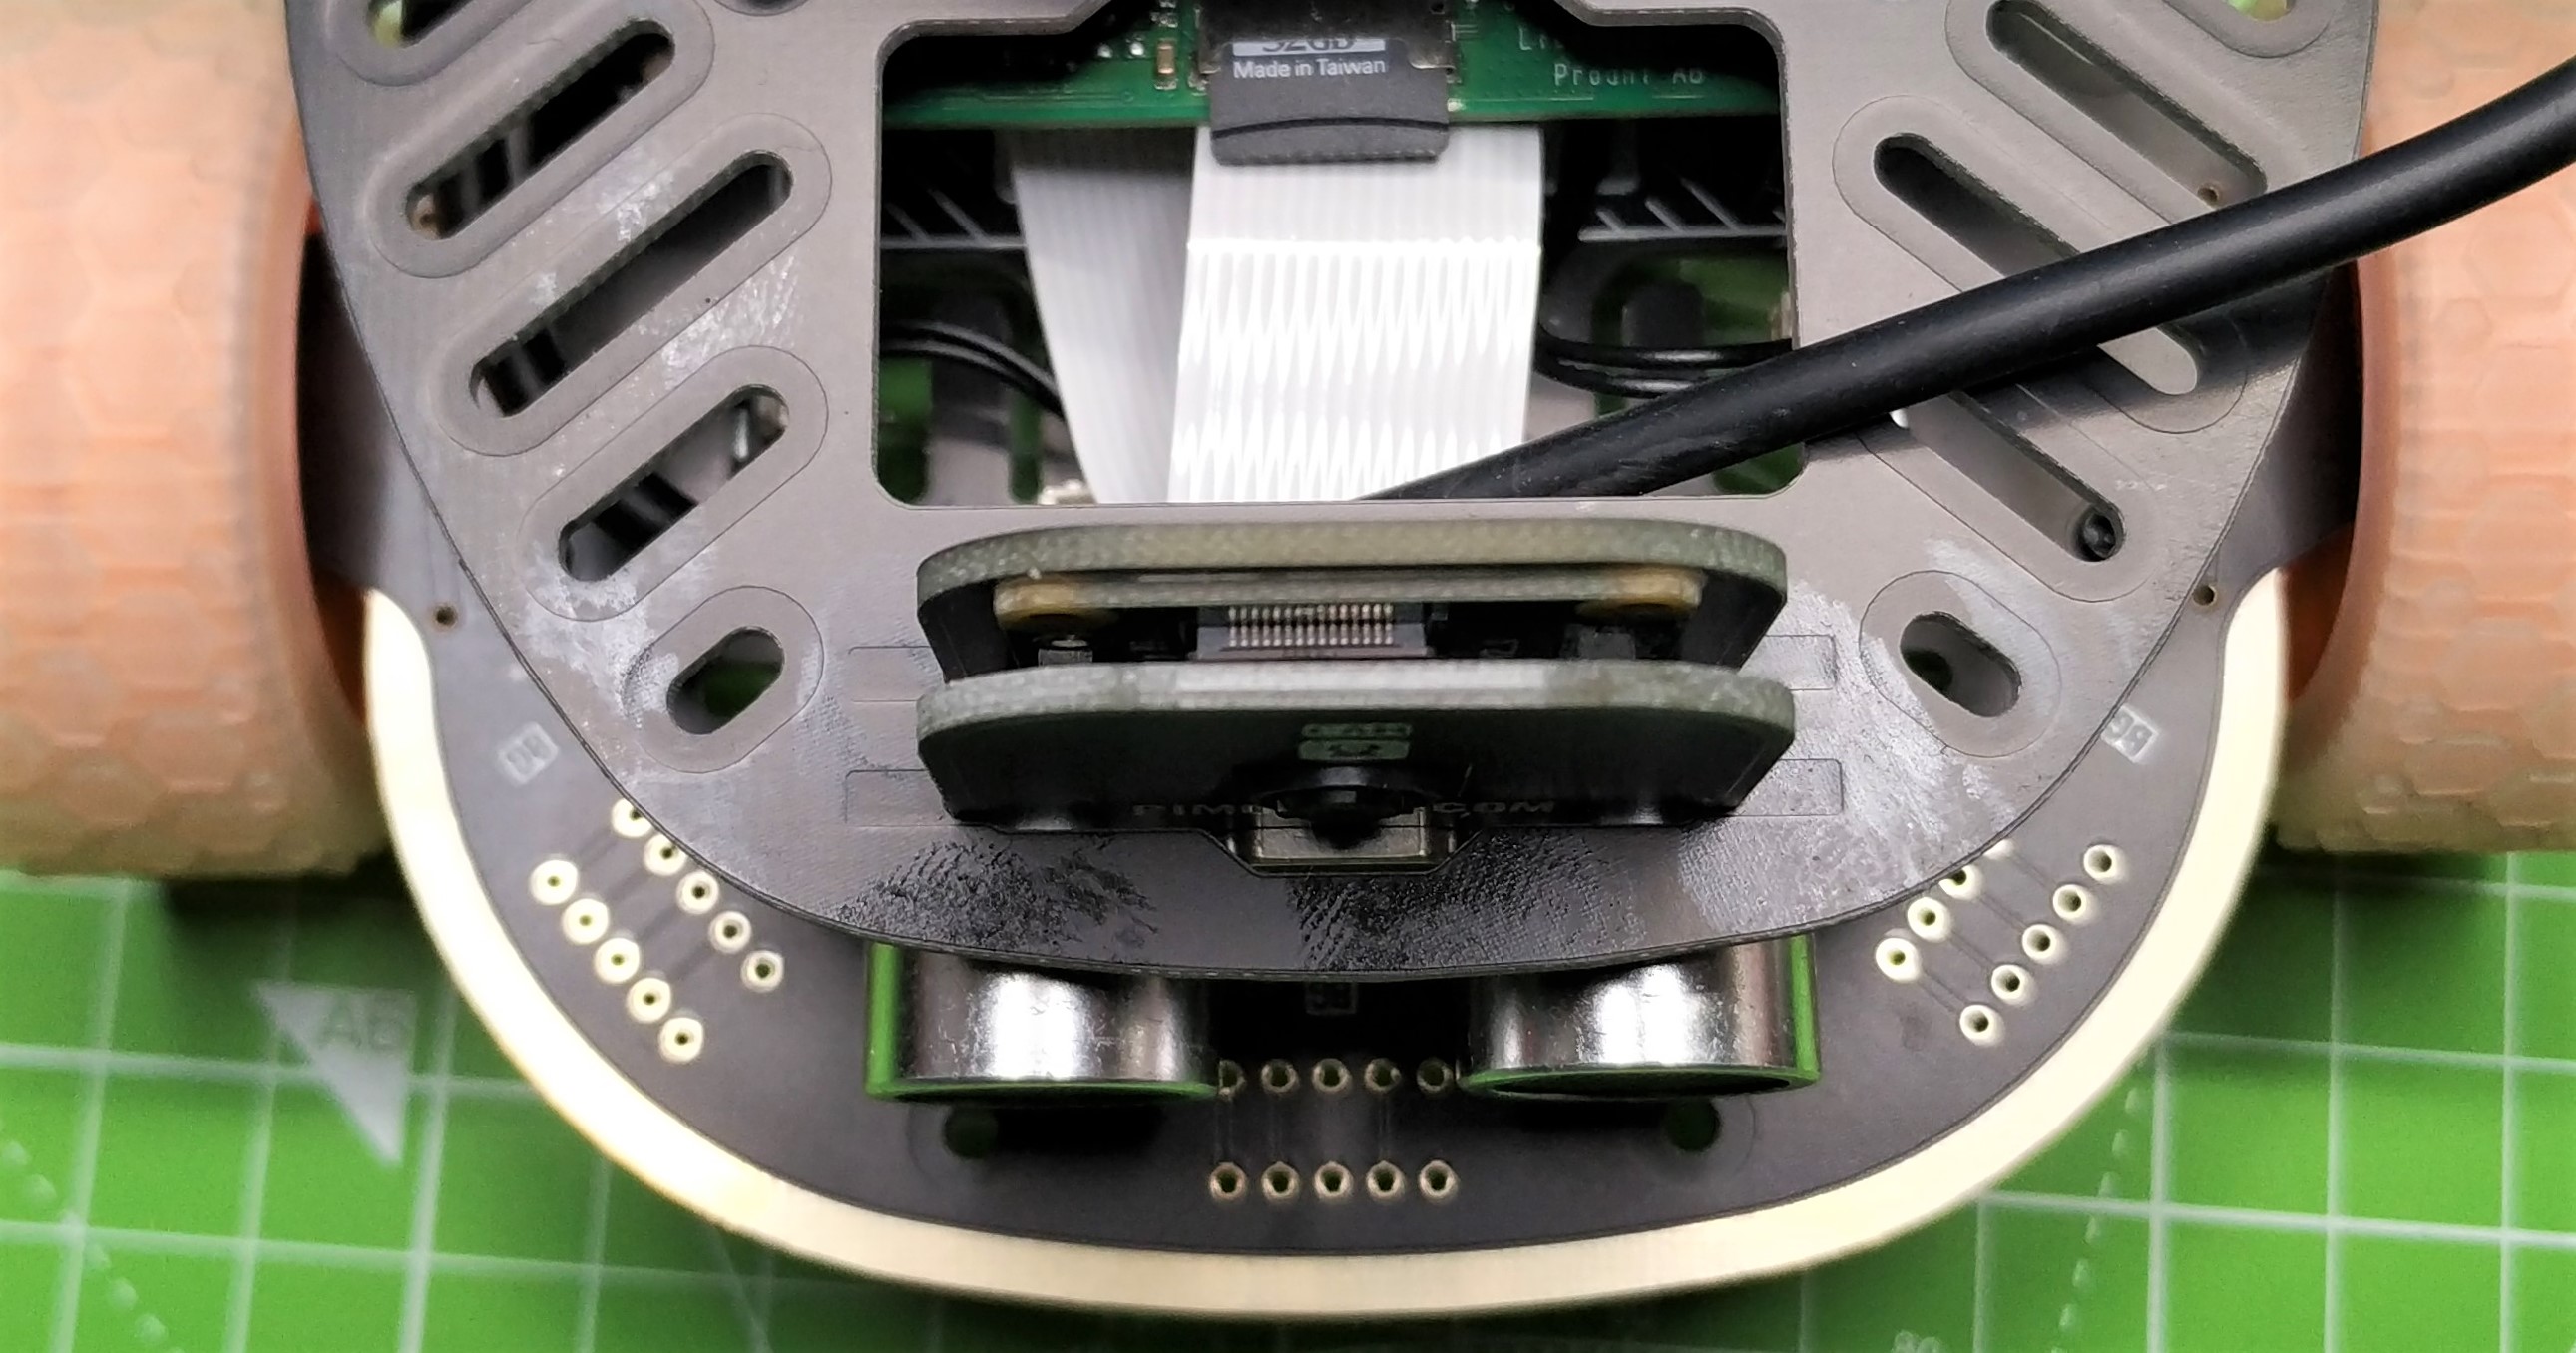
The ultrasonic sensor, an HC-SR04 variant and official Raspberry Pi camera are held in place at the front of Trilobot using two more FR-4 boards and a few screws. The camera’s ribbon cable is routed to the Pi between the top and the main chassis to prevent snags and a clean aesthetic.
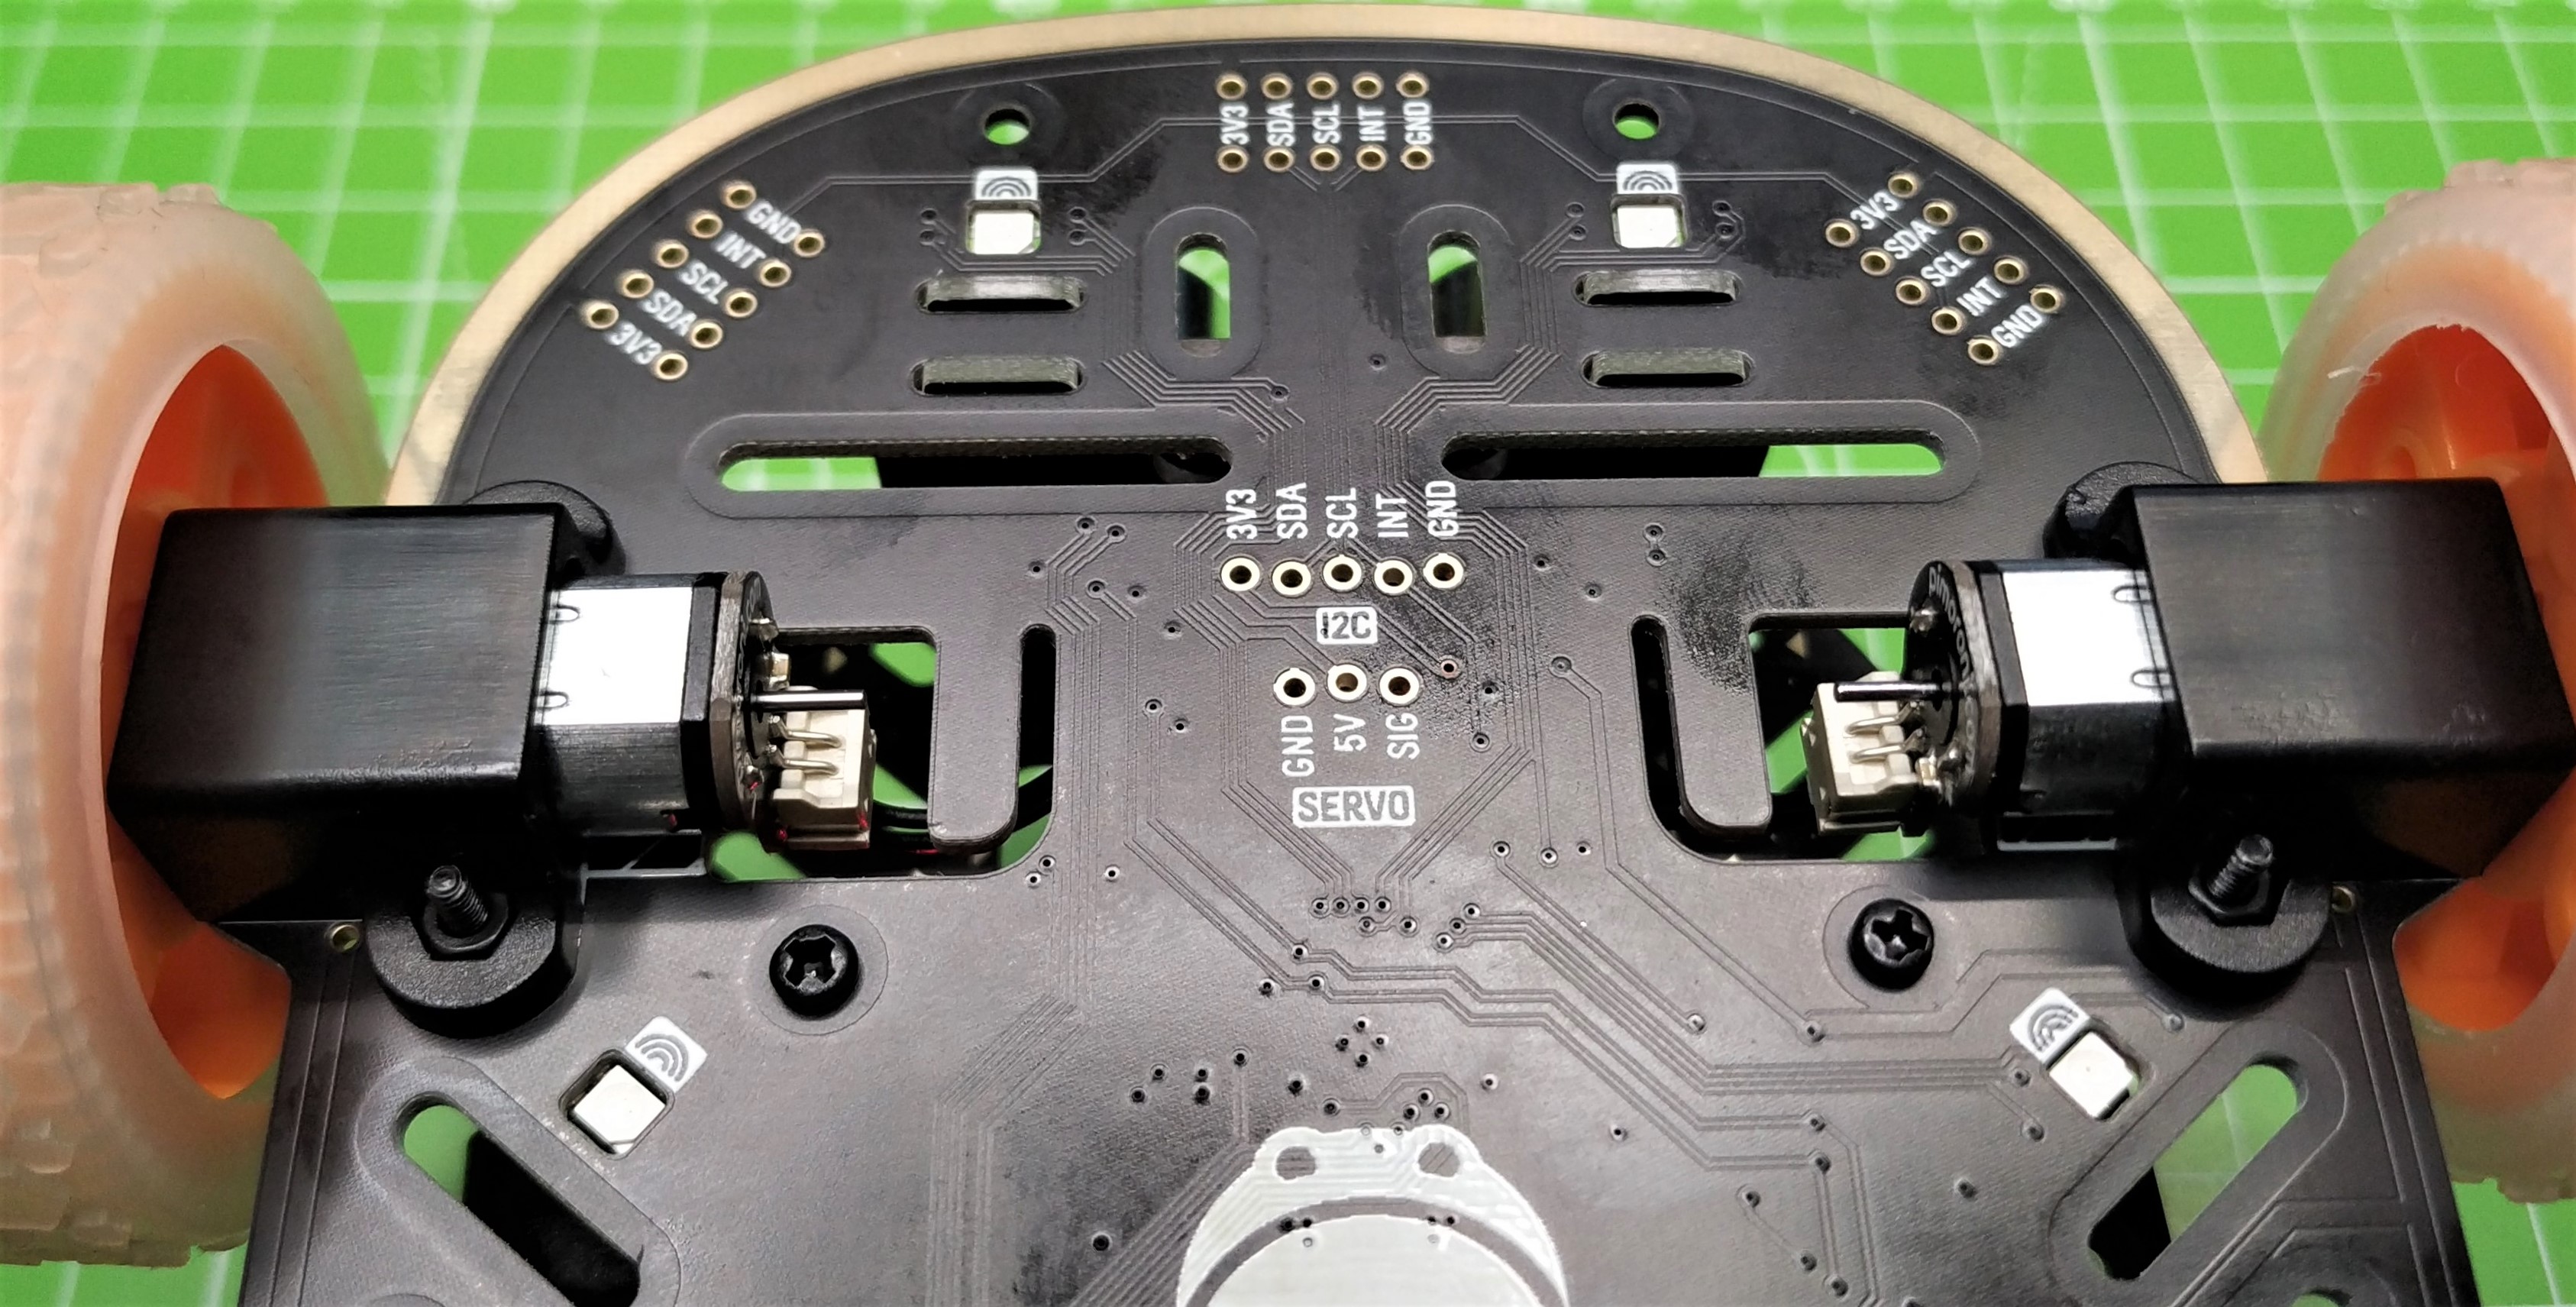
One criticism we have about the design is the access to Qw/St connectors. Located behind the ultrasonic sensor and between the wheels, they require nimble fingers to insert the connectors but you can take the top layer off for slightly easier access. This access isn’t a deal breaker; patience will grant us access to the connectors, or we can just use Breakout Garden.
Speaking of connectors, there are five Breakout Garden sockets ready to be soldered. It would’ve been nice to have a couple of these in the full kit, but it doesn’t detract from the overall appeal of the robot as Breakout Garden is an investment in another sensor interface standard. In-between the Qw/St connectors is a single socket for a 5V servo. This will require soldering but you have the option to add a servo to your robot. At the rear of the chassis are four push buttons which can be programmed to trigger any action.
Get Tom's Hardware's best news and in-depth reviews, straight to your inbox.
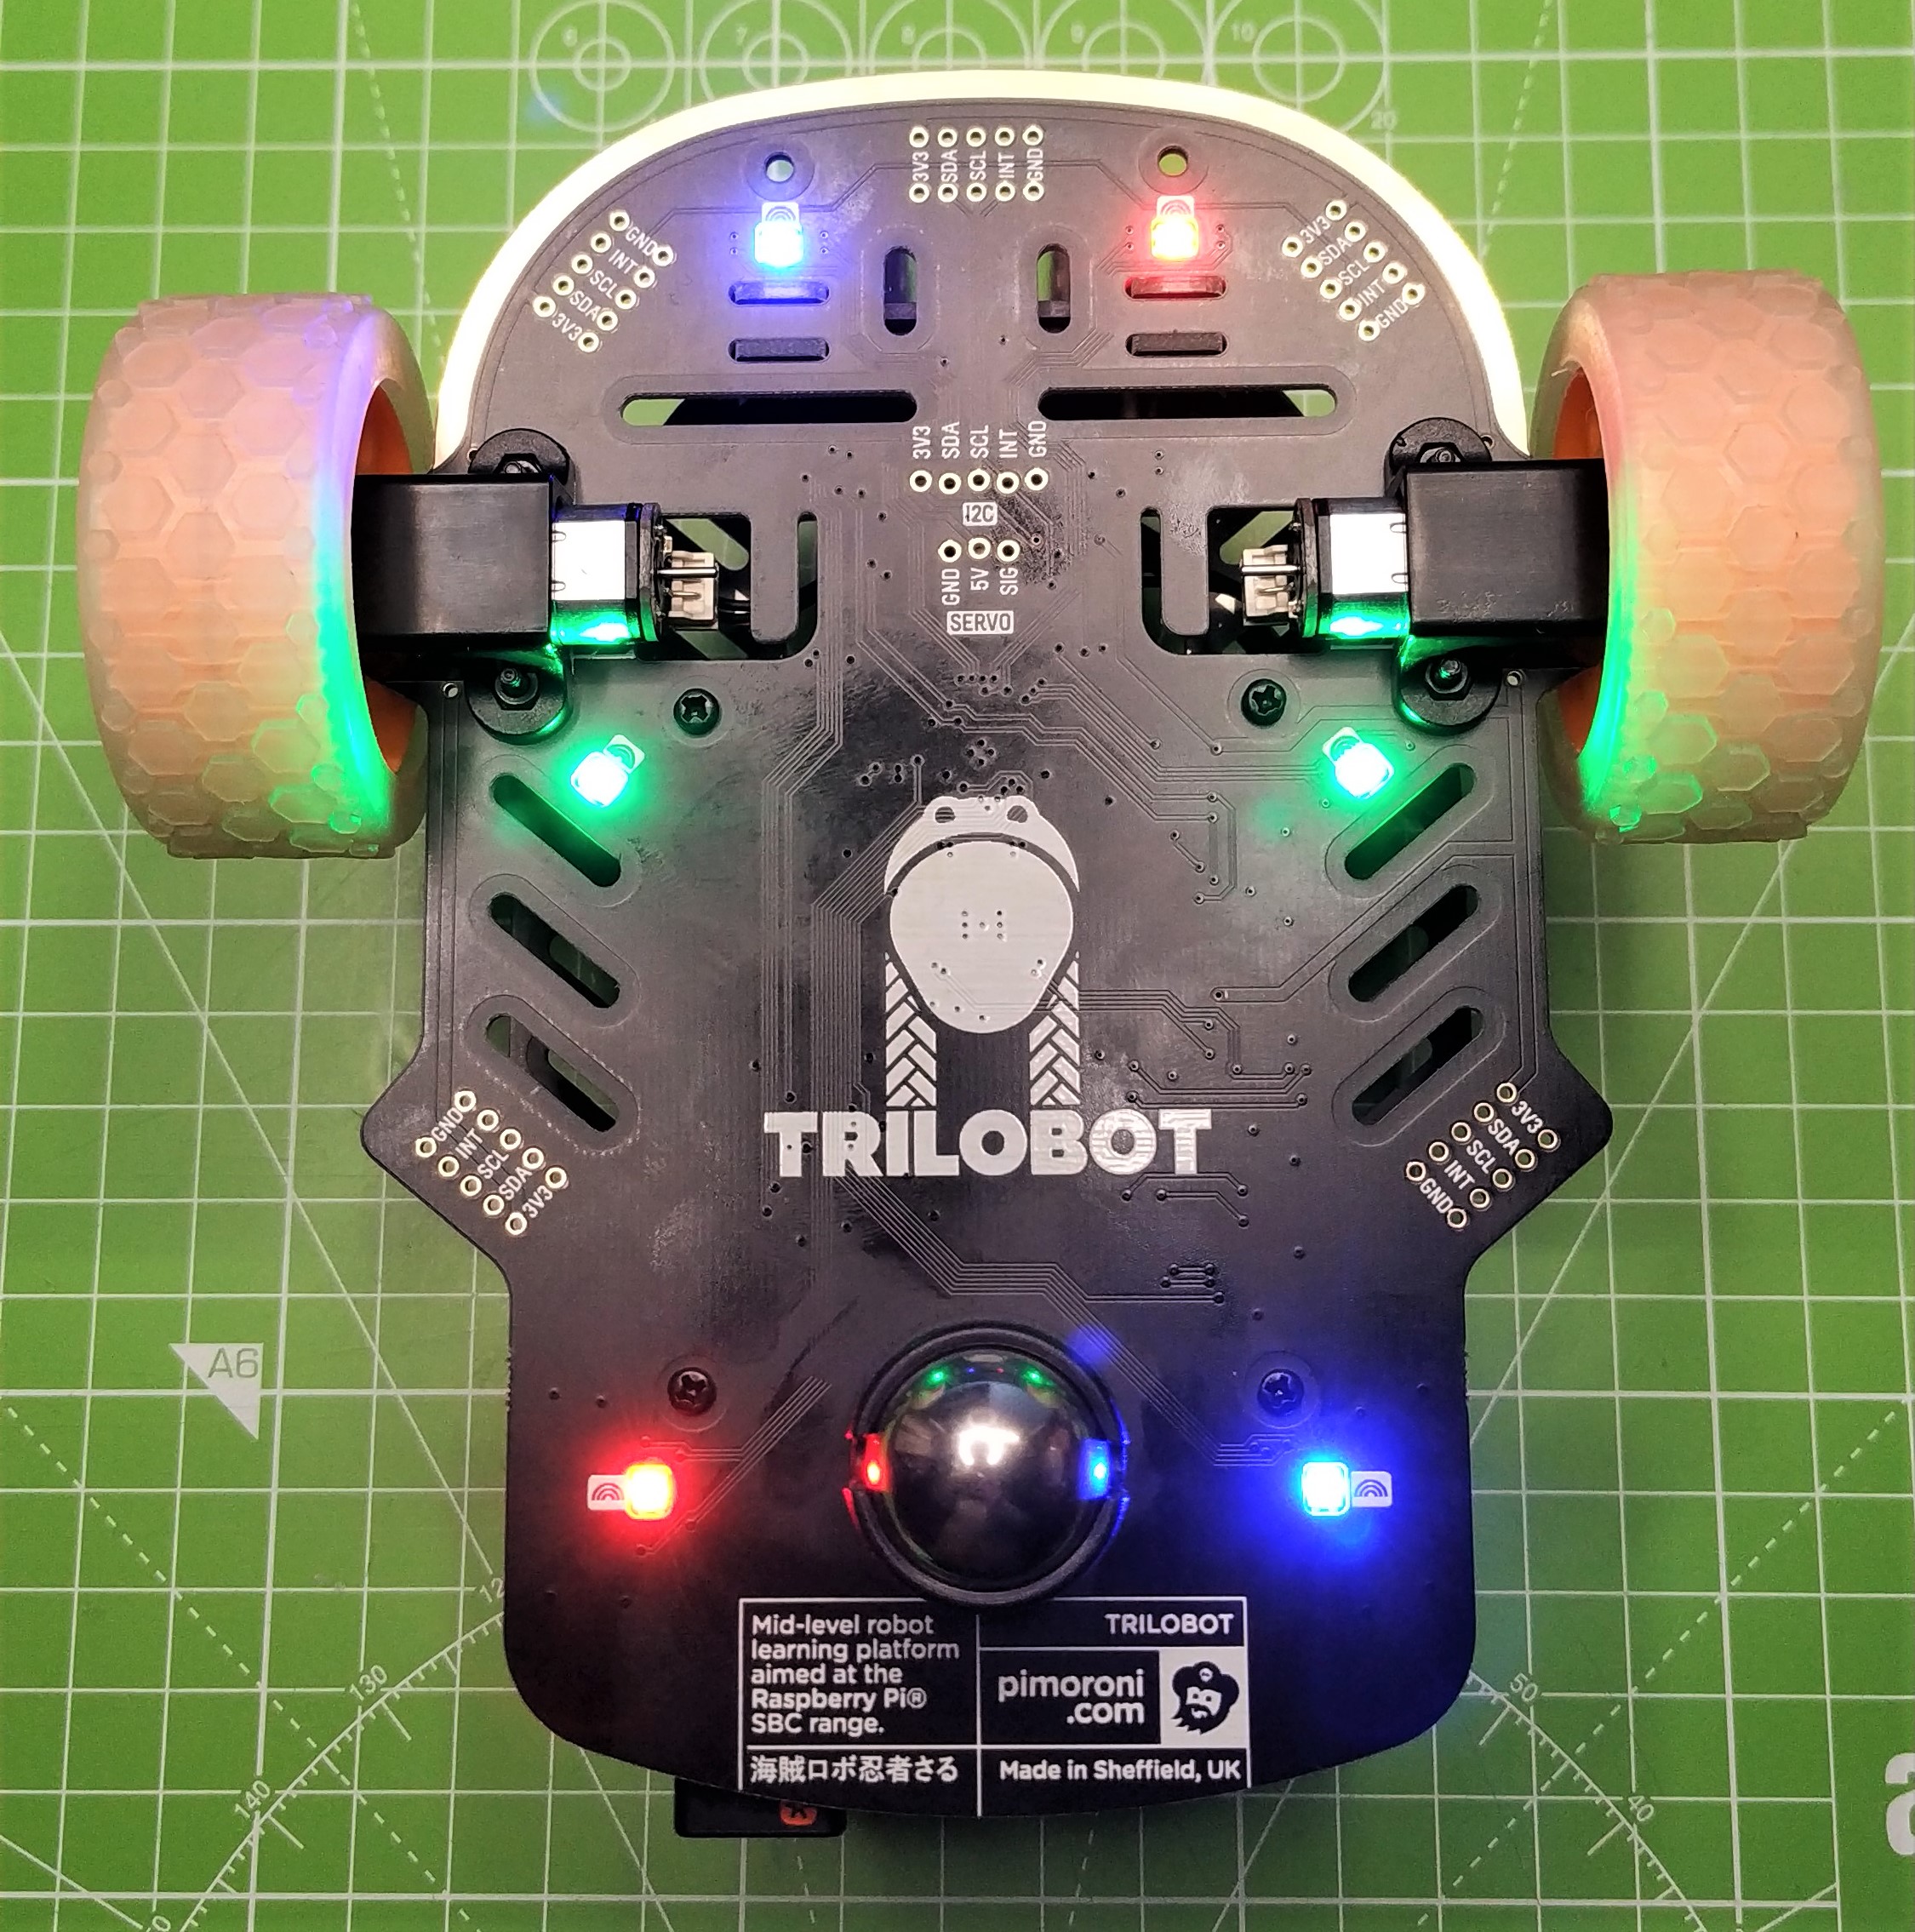
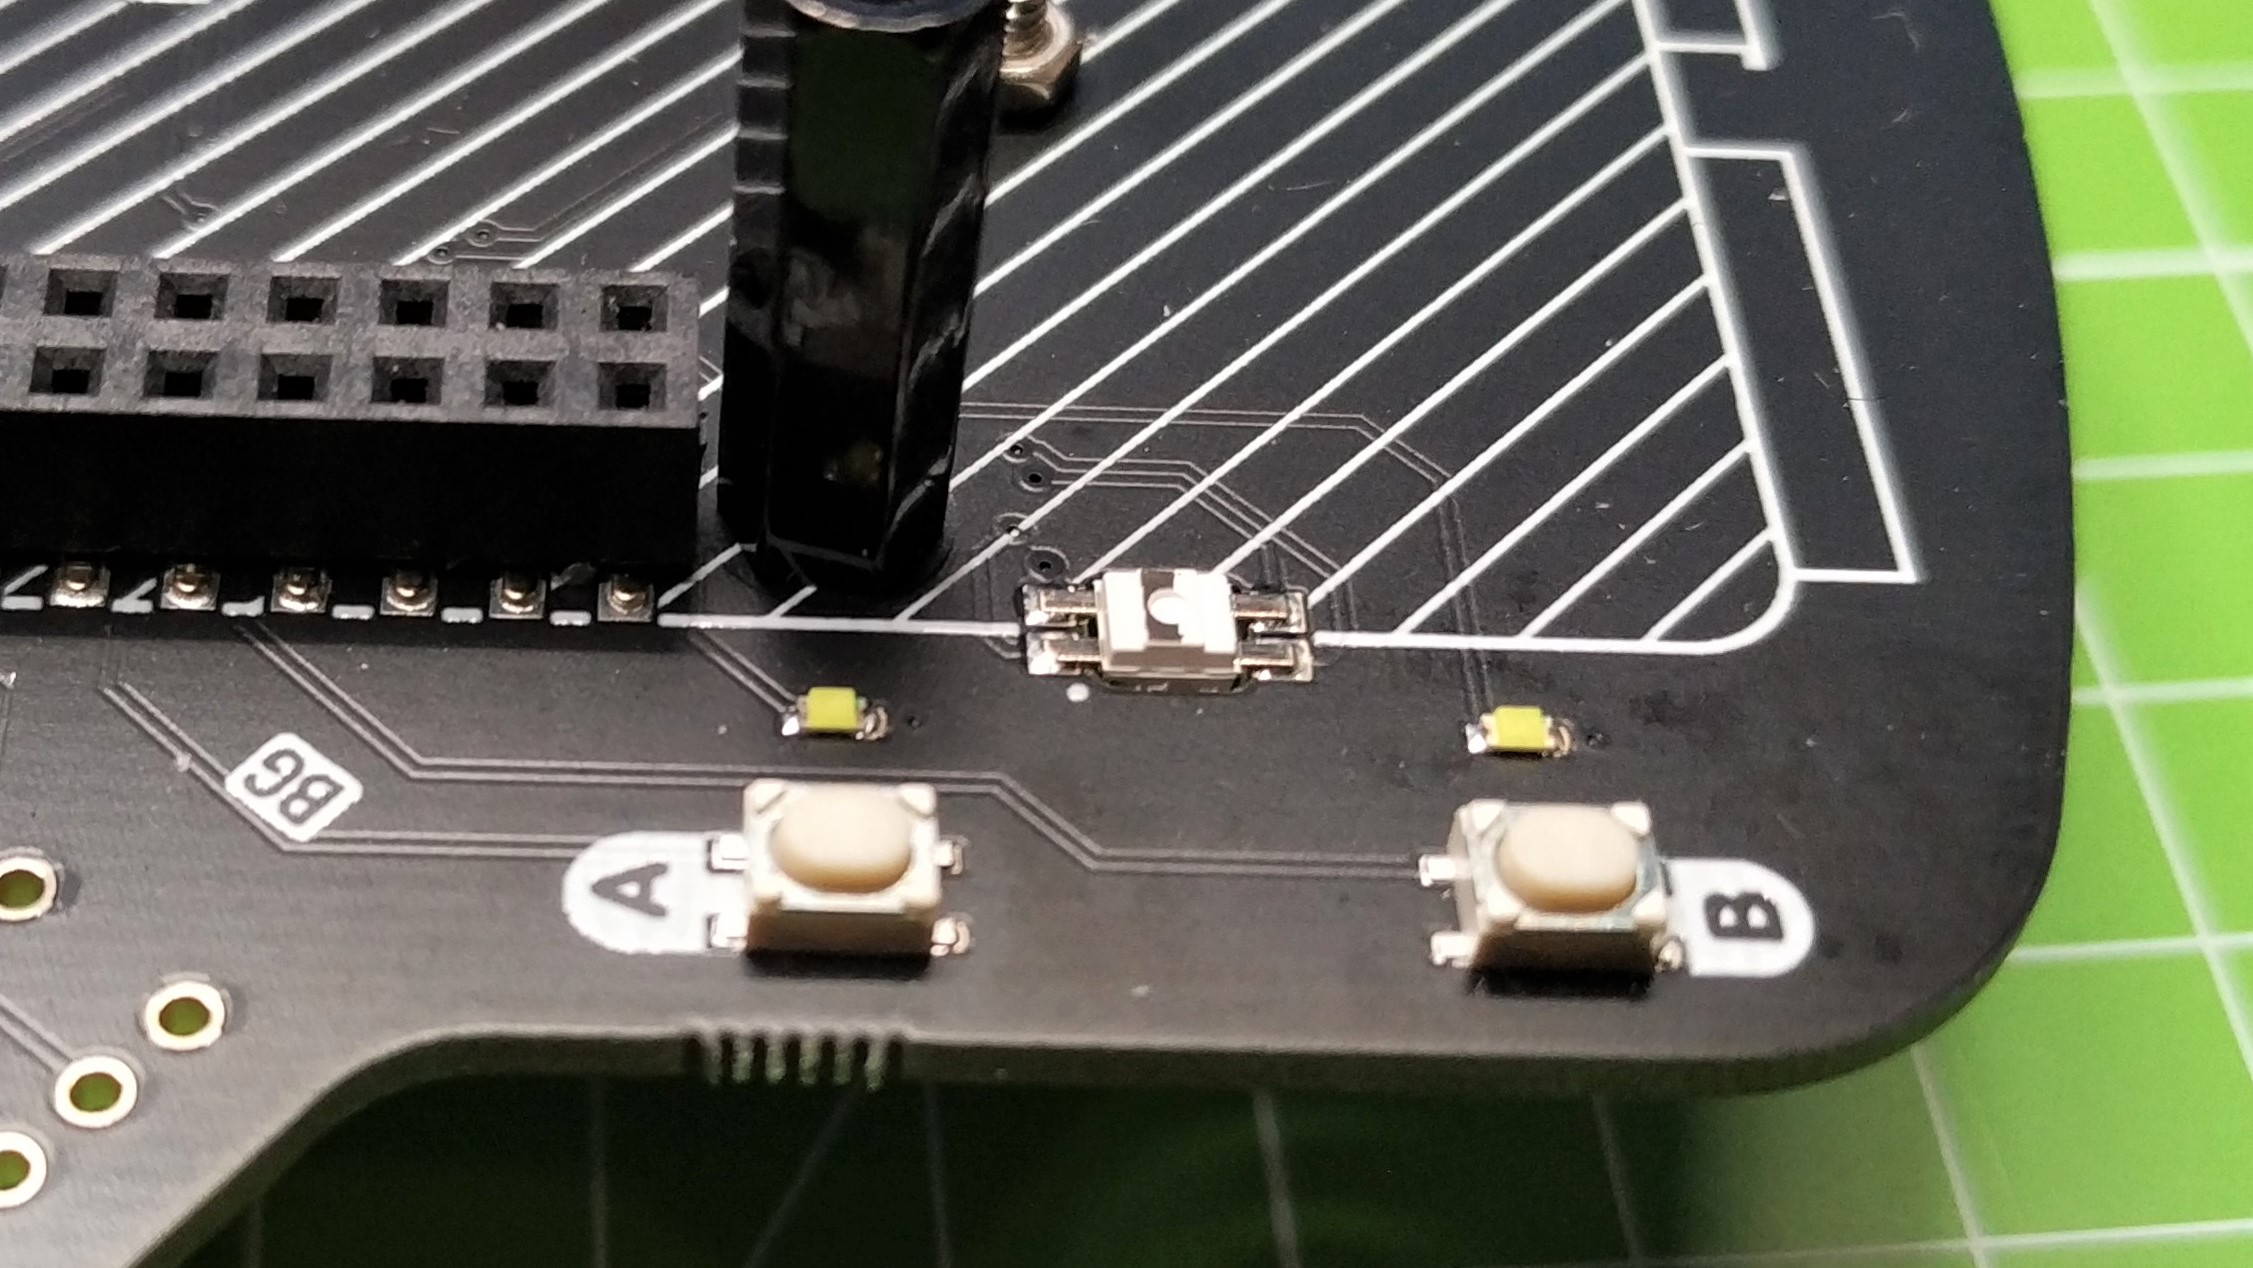
On the underside are six reverse mounted RGB LEDs. Reverse mounting means that the LEDs are soldered to the top side of the chassis with a cut-out on the board enabling them to shine onto the floor. Despite there being only six LEDs they sure do throw plenty of light out. The RGB underlights have a wide angle of illumination and create the perfect glow as your robot traverses the world.
Battery for Pimoroni Trilobot
To power Trilobot, we need a USB battery, but this is where things get a little tricky. On the top layer, we have slots for hook and loop tape which is used to secure a Lithium battery. With our review unit, we received a 5,000 mAh USB-C powerbank which provides 5V at 3 amps, which was enough to power our Pi 4 and all the motors, sensors, lights and camera.
To see just how much juice the Trilobot requires, we wrote a tortue test which saw the motors rapidly change direction while the RGB LEDs were lit at full brightness. From our USB power monitor we saw Trilobot draw 1 Amp at 5.2V, giving us 5.2W power draw. When we stalled the motors, we didn’t see any increase in the current draw.
The battery Pimoroni sent measured 3 x 1.3 x 1 inches, and may be included in a future kit that the company will sell with the Trilobot, Pi 4 and camera. But for this barebones Trilobot, you will need to find a power bank with similar dimensions and output.
Software for Pimoroni Trilobot
Hardware is just half of the Trilobot package and we are pleased to say that software support is just as refined as the hardware. Parrott and Pimoroni have created a Python 3 package which abstracts control of the motors, RGB LEDs and ultrasonic sensor for ease of use but retains plenty of configuration for the user to tweak.
Take for example the ultrasonic sensor which requires precise timing and a little math in order to determine a distance. With the Trilobot Python library we find this handled via a function, but we can specify extra parameters such as multiple samples (for an average distance) and a timeout which can be used to tweak timings for longer distances.
The underside LEDs are fully controllable, in groups or individually. We can pass colors as RGB and HSV values using the corresponding functions. If you want to use the Qw/St (Qwiic / Stemma QT) ports then you will need to install CircuitPython to use the many compatible components. You can do it from standard Python as Qw/St is really just I2C, but with CircuitPython, we have a frictionless experience of software installation. We tested with a BME688 temperature sensor and everything worked well. Our only issue wasn’t software related. The recessed Qw/ST connectors require the removal of the top PCB, or extremely nimble fingers.
During our installation, we managed to damage the pins in a Qw/St port which prevented the Pi from booting. A few minutes with a magnifying glass and some tweezers and we were back in business.
The Python software library is extremely mature for a new product, and it shows that Pimoroni has worked with beta testers from the Raspberry Pi robot community. There is no support for the Raspberry Pi camera in the Trilobot Python library, rather we need to use the PiCamera or libcamera software to stream video or take pictures as our robot runs amok.
Who is Trilobot for?
Trilobot replaces STS Pi, Pimoroni’s first robot platform aimed at beginners. But Trilobot straddles the divide between beginners and intermediate roboticists with newfound expertise, thanks to Chris Parrott’s hard work. The build process and software support is mature and well documented, something which is seldomly seen in new products. If you are just getting into robotics, or are a seasoned pro, then Trilobot has plenty to offer you.
Bottom Line
$50 for the base model is the sweet spot for price and functionality. You may have the official Raspberry Pi camera and a Raspberry Pi 4 already, but if not now is the time to get hold of a Raspberry Pi 4.
If you are pricing up a completely new build then we need to factor in the cost of the cheapest Raspberry Pi 4, the $35 1GB model, then price up a camera. Official V2 cameras go for around $25, but you can pick up Arducam cameras which look and work in exactly the same way. A USB battery can be picked up for around $20, we found this model which has the same capacity as our test unit, slightly lower max current but well over what Trilobot requires. So in all, we are spending $130 for a brand new robot.
The hardware and software are superb, well documented and easy to access. The use of PCBs as building material provides strength and functionality to the robot. The electronics and chassis are one, cutting down on wires and issues. If you are new to robotics, get one of these. If you are a pro, still get one and use it as a stable platform for your next robot project.

Les Pounder is an associate editor at Tom's Hardware. He is a creative technologist and for seven years has created projects to educate and inspire minds both young and old. He has worked with the Raspberry Pi Foundation to write and deliver their teacher training program "Picademy".
