How to Use an Ultrasonic Sensor with Raspberry Pi Pico
Take distance measurements with your Pico.
There are many ways to detect movement and distances with your electronics. In another tutorial, we showed how to use a PIR motion sensor with Raspberry Pi Pico. Used in alarm systems, PIRs employ Infrared light to detect moving bodies in a room and are good for projects where, for example, you want users to wave their hands in front of a device to activate it. Our tutorial on how to build a Raspberry Pi handwashing timer uses a PIR.
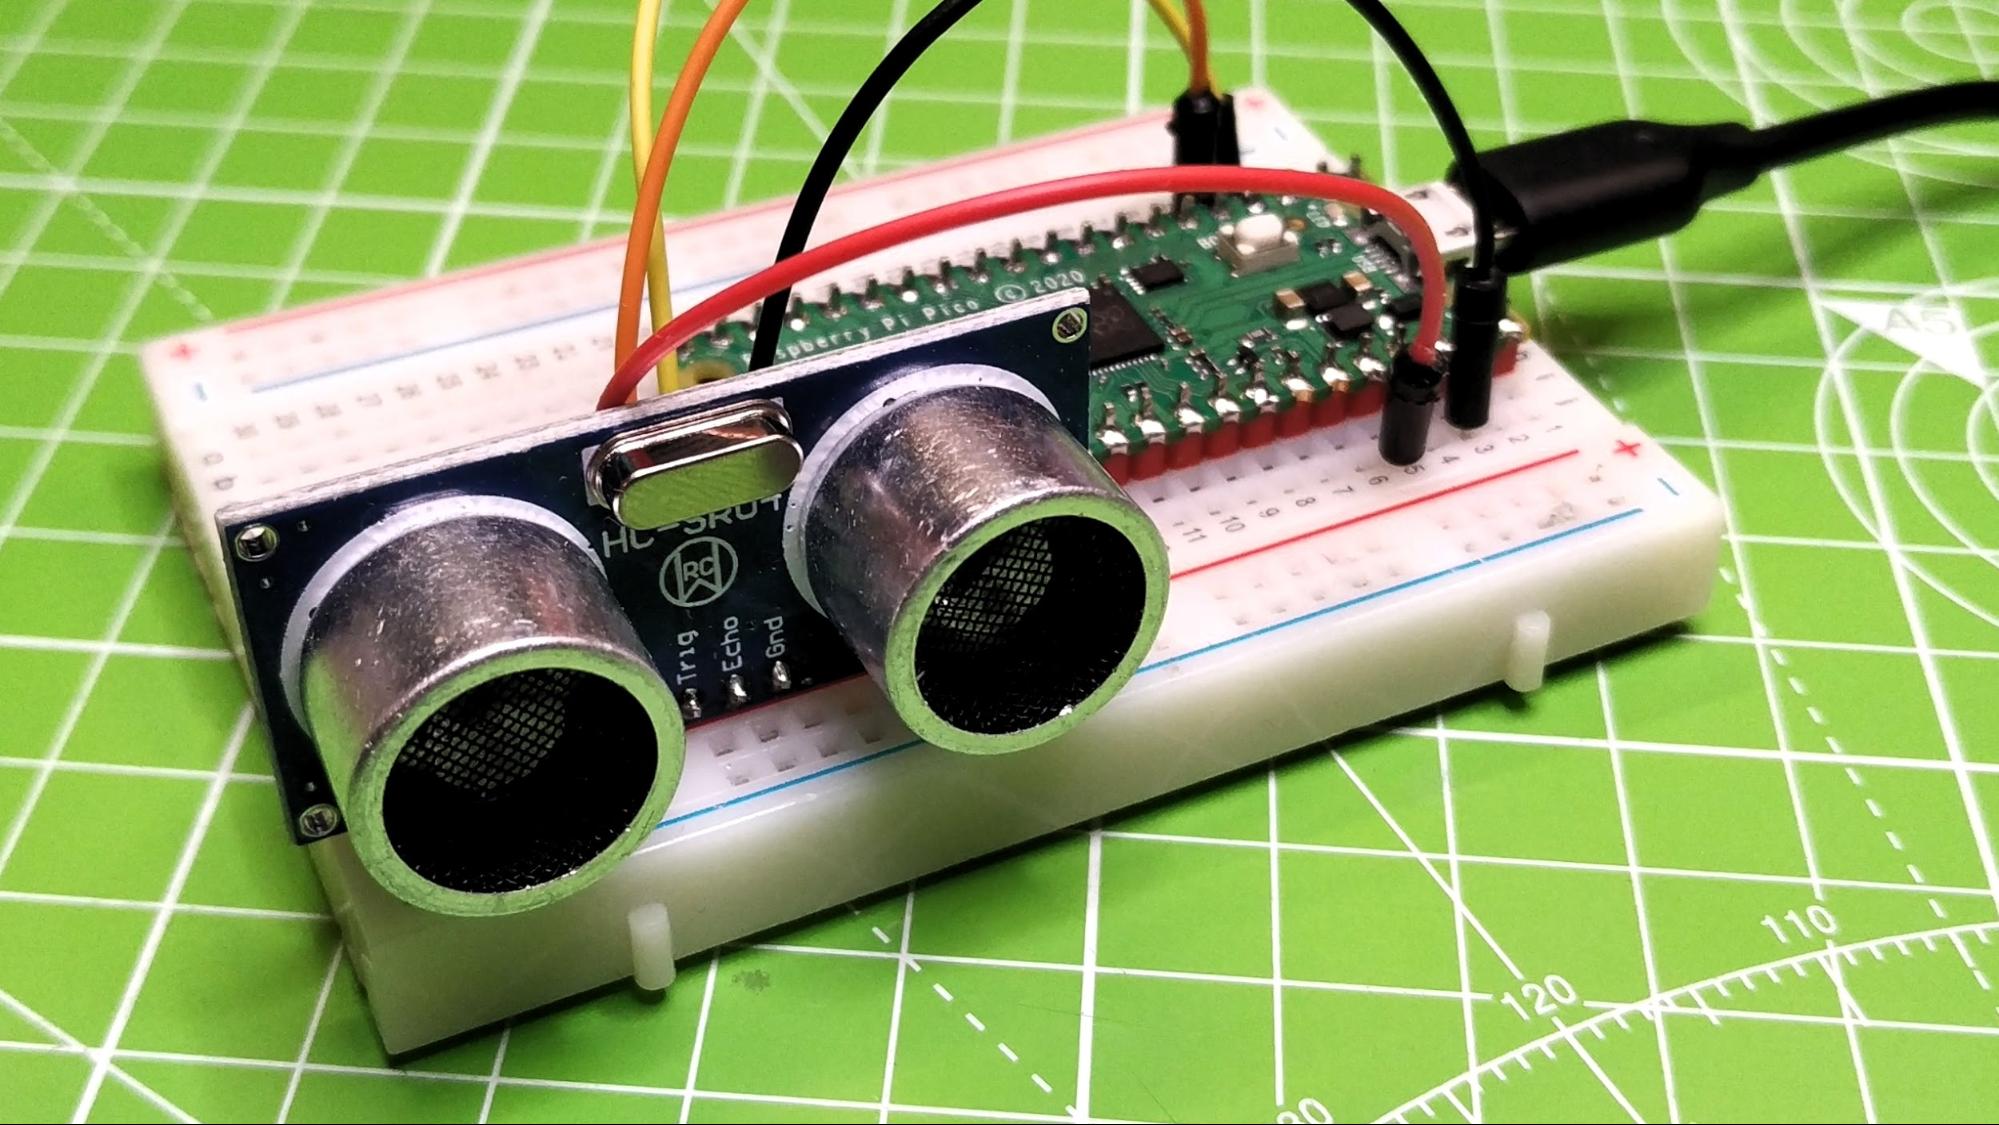
Ultrasonic sensors, on the other hand, use pulses of sound and a simple calculation to determine the distance between themselves and the objects in front them. They are often used in robots to make sure the bot doesn’t walk or roll into an obstacle. We also used one in our Raspberry Pi Toilet paper reminder to tell when we’re running out of rolls. In this tutorial we will use an ultrasonic distance sensor, an HC-SR04+, to quickly determine the distance of an object from our Raspberry Pi Pico.
For this project you will need
- A Raspberry Pi Pico running MicroPython (see how to set up Raspberry Pi Pico)
- Thonny installed on your computer
- An HC-SR04P or HC-SR04+ Ultrasonic Sensor
- 4 x Male to male jumper wires
- Half or full-size breadboard
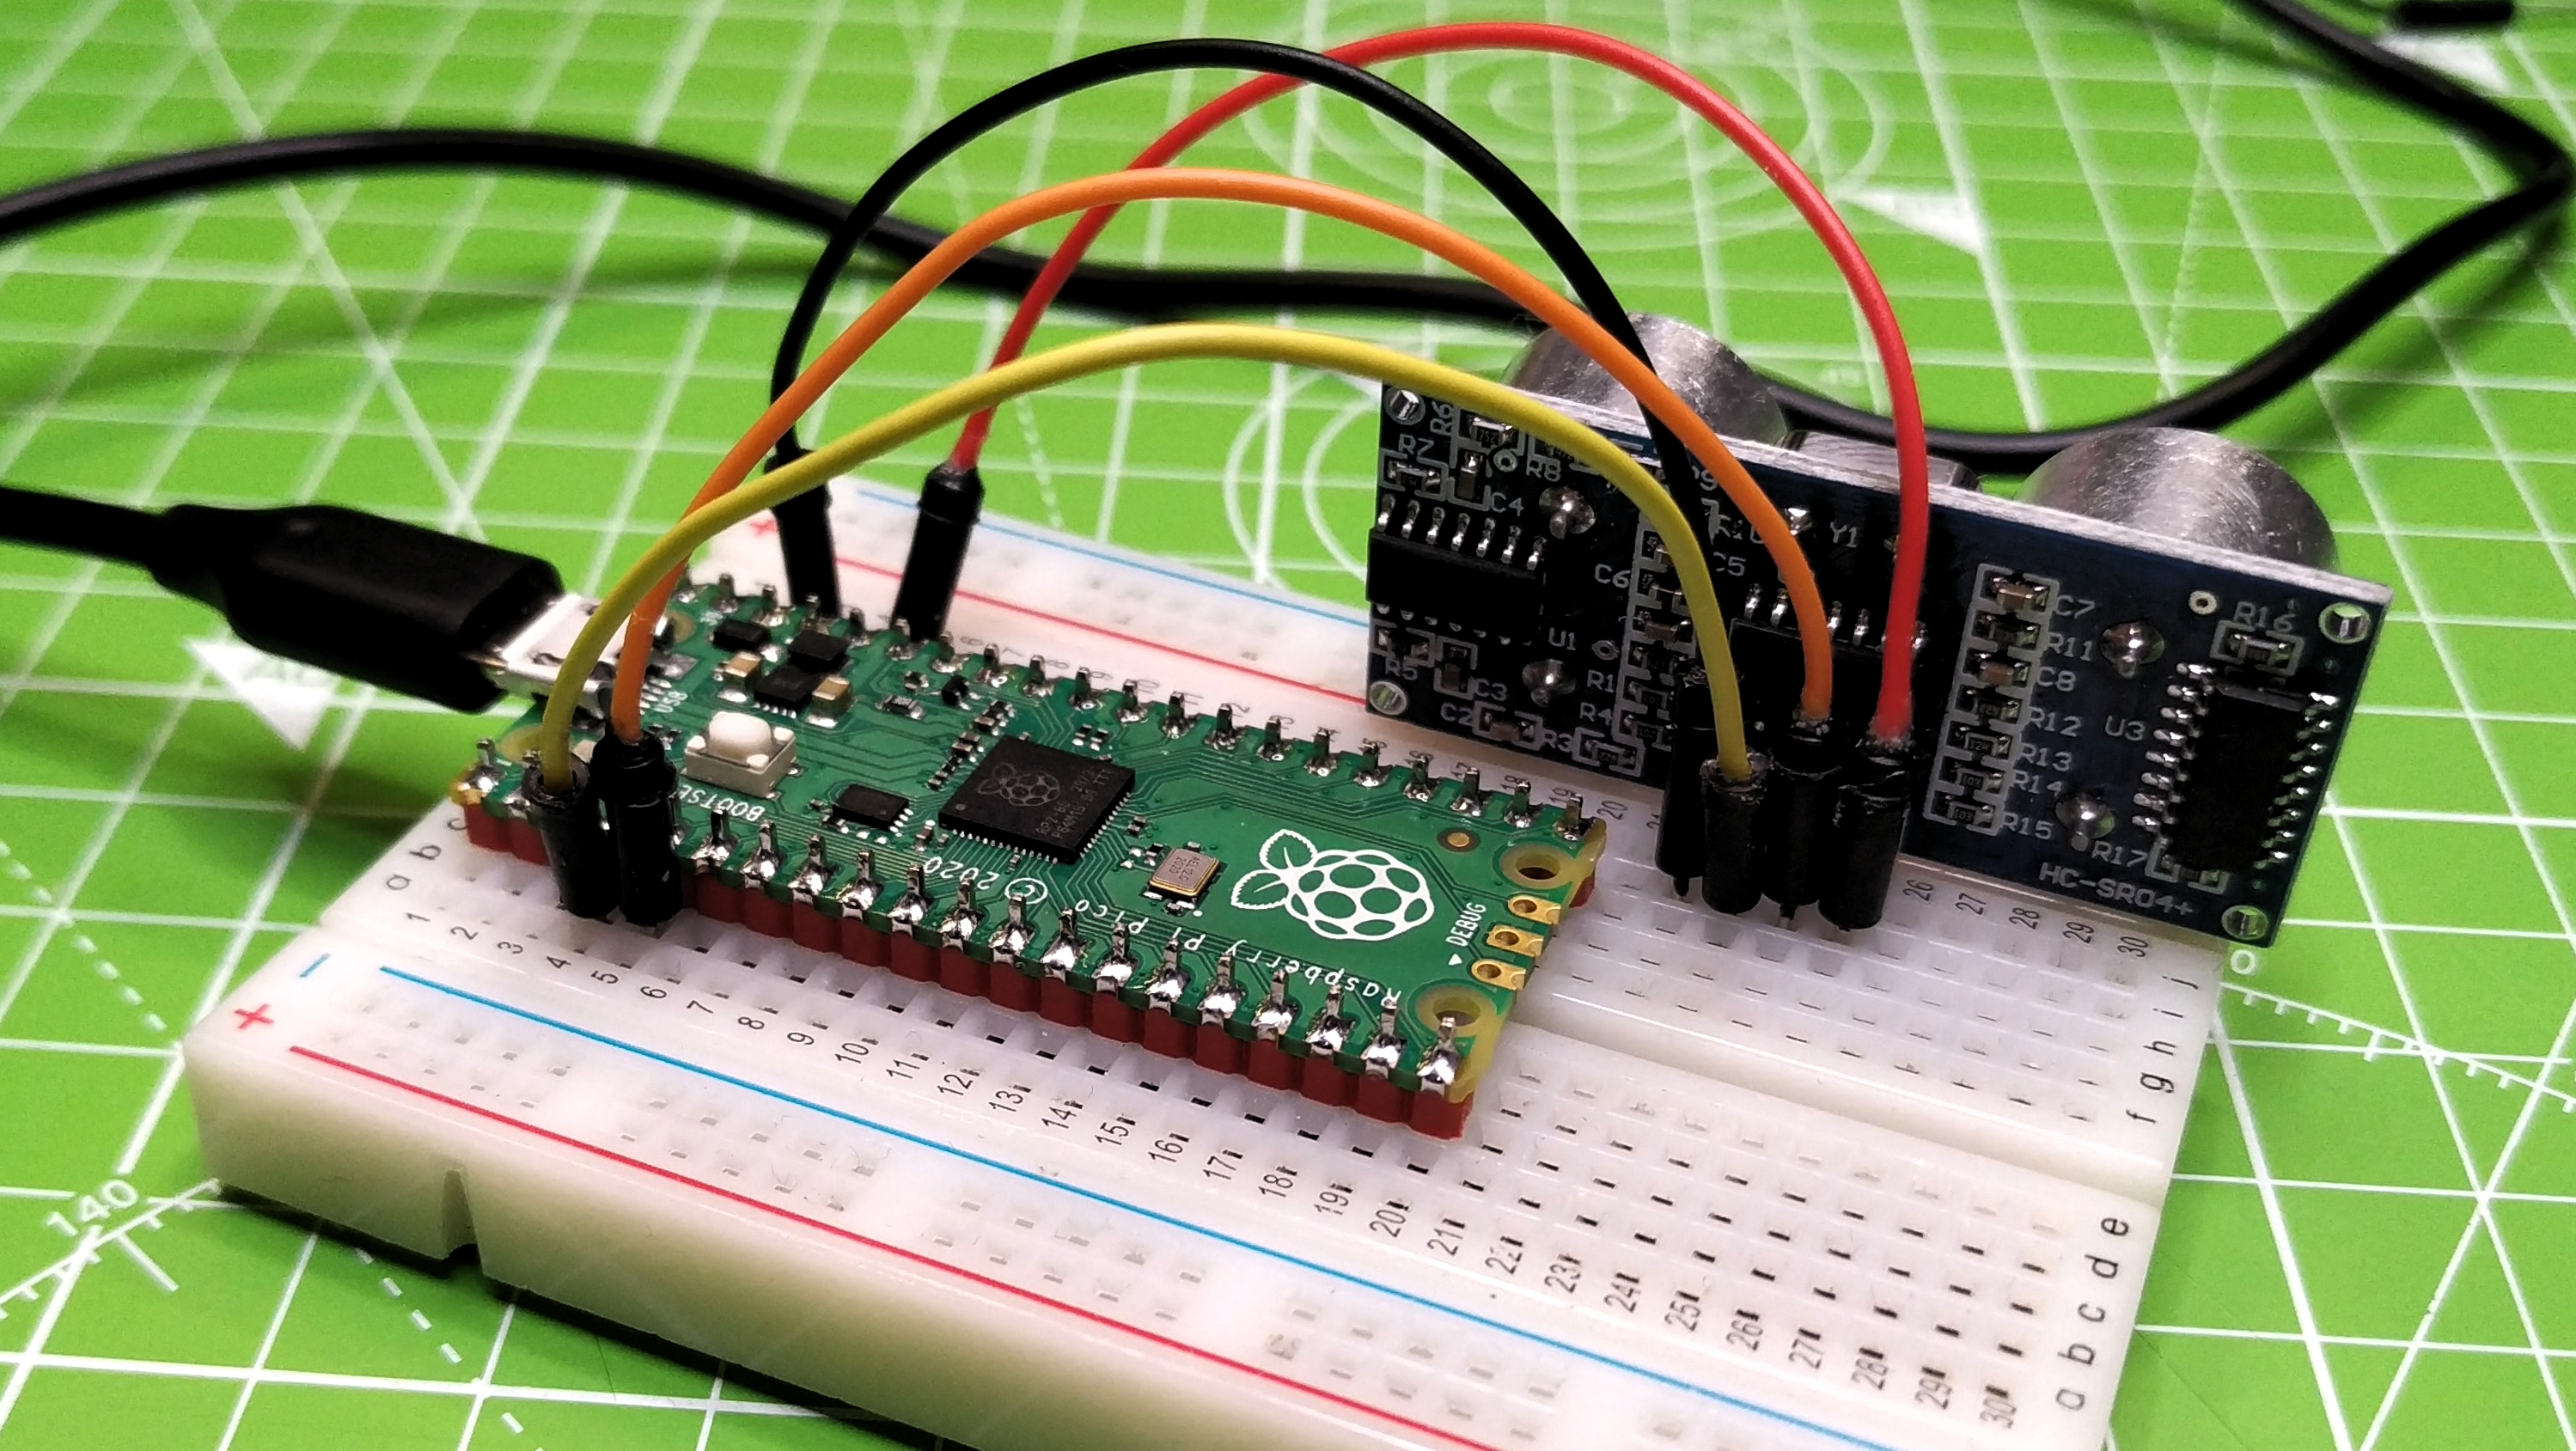
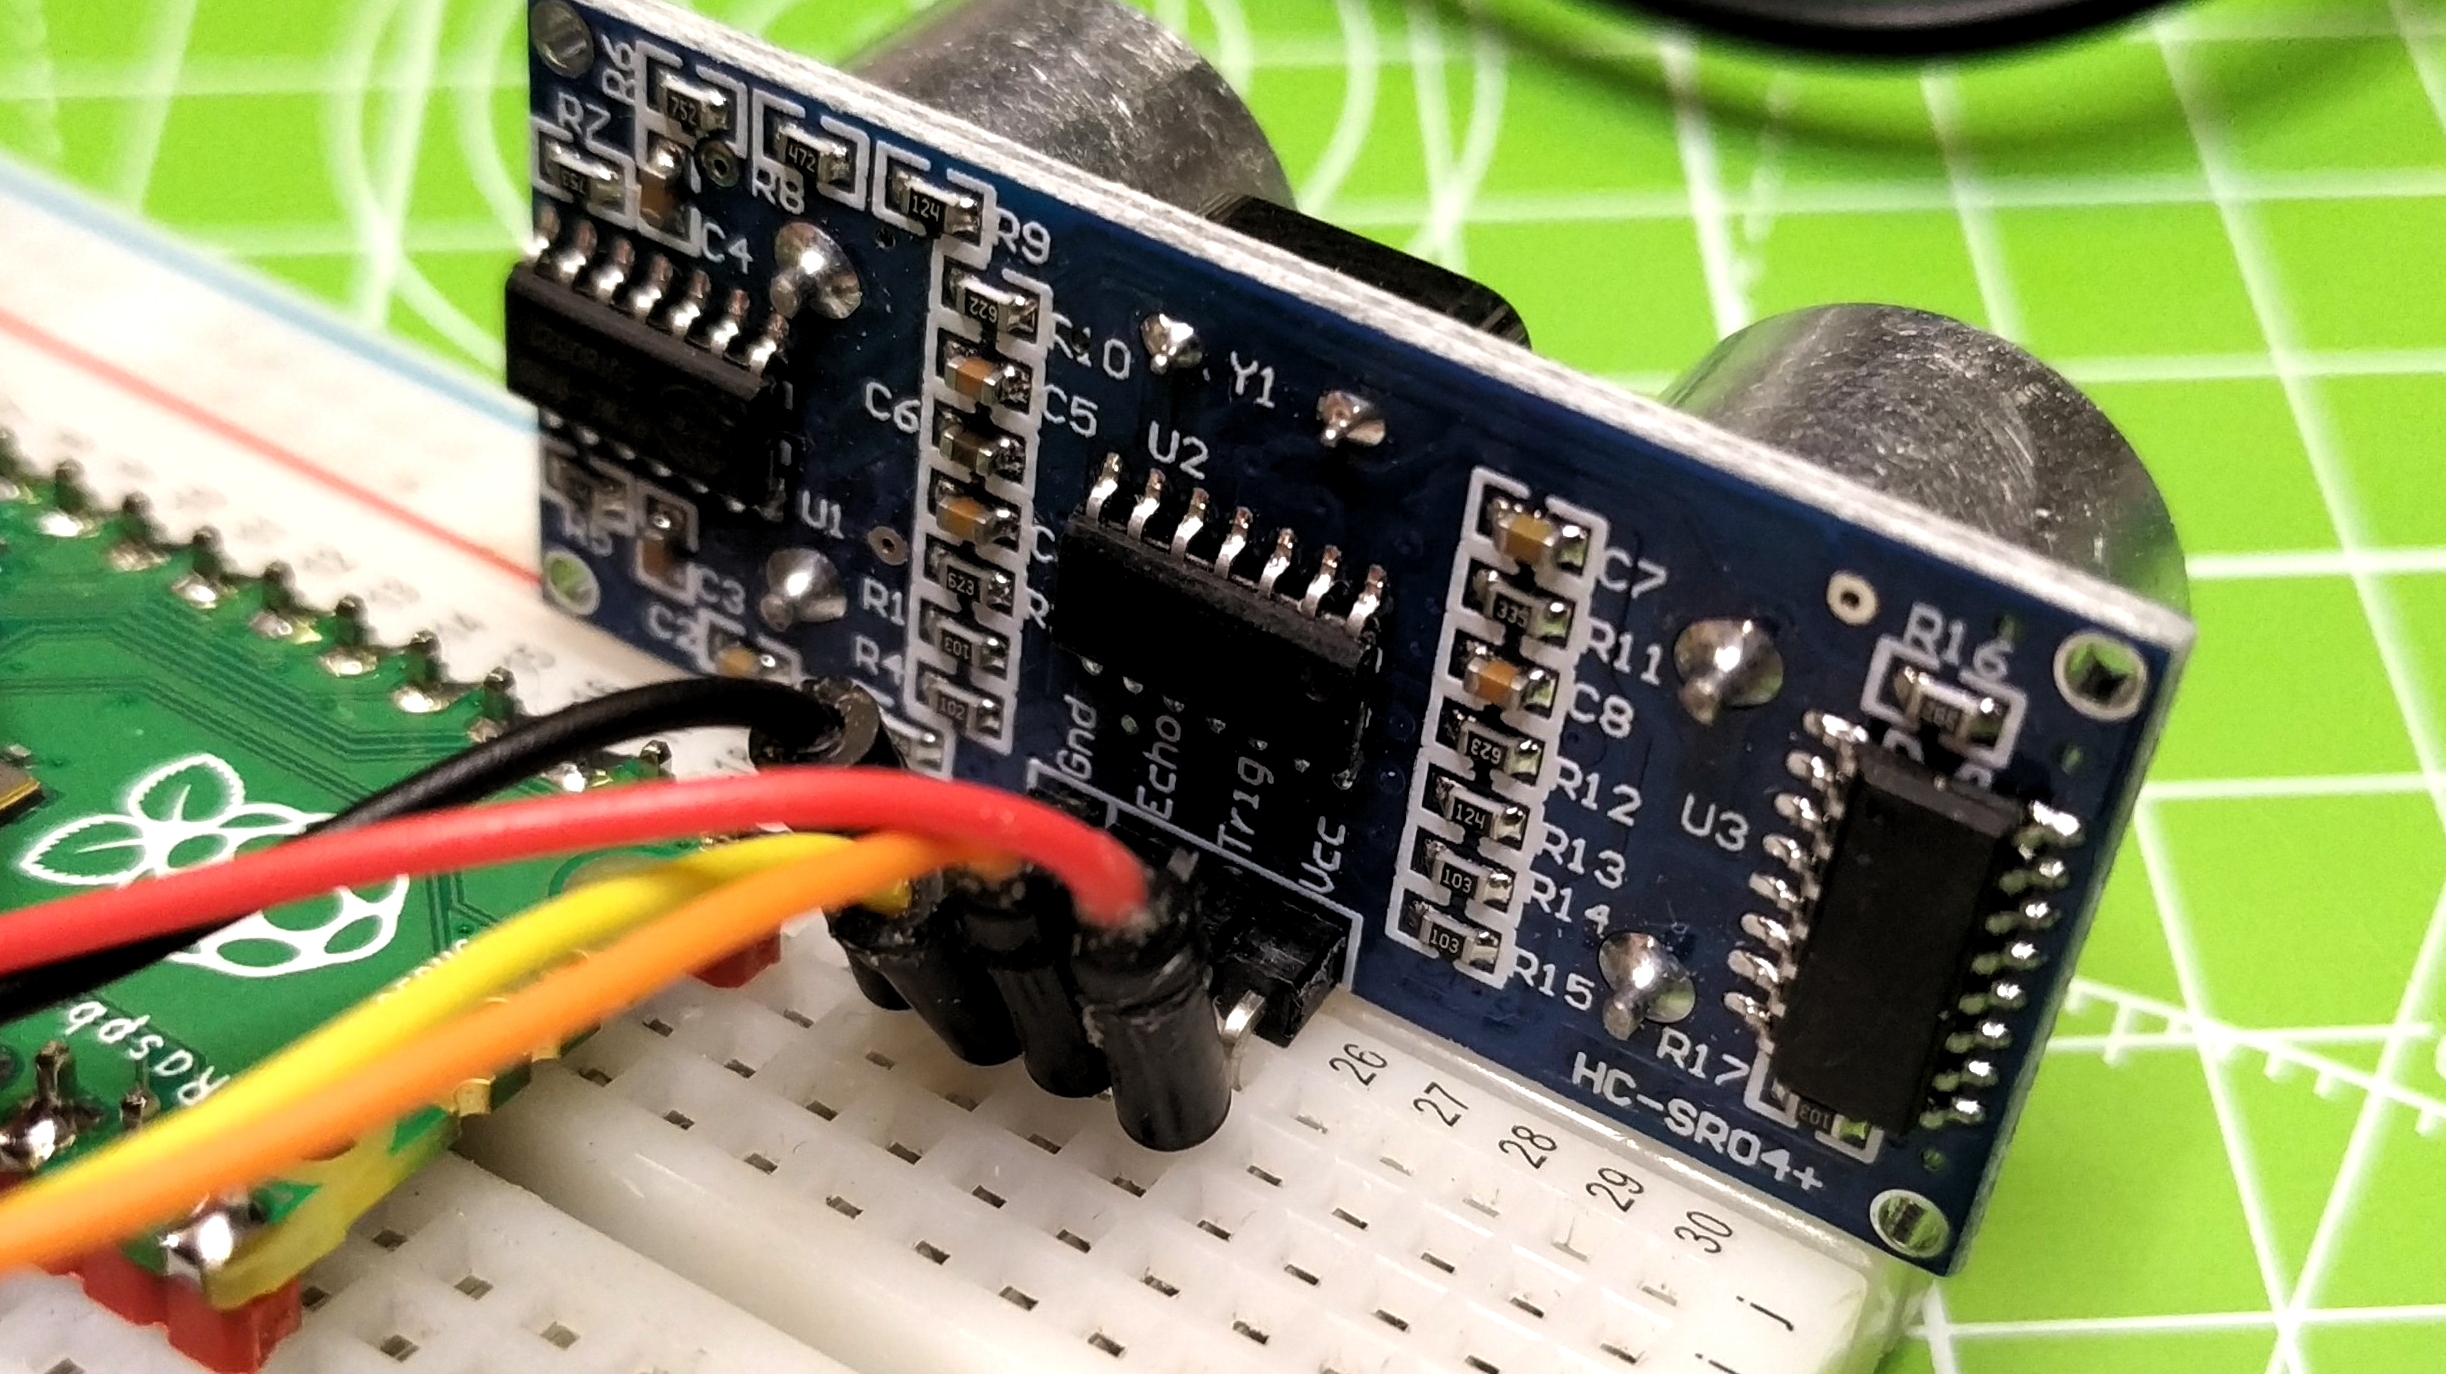
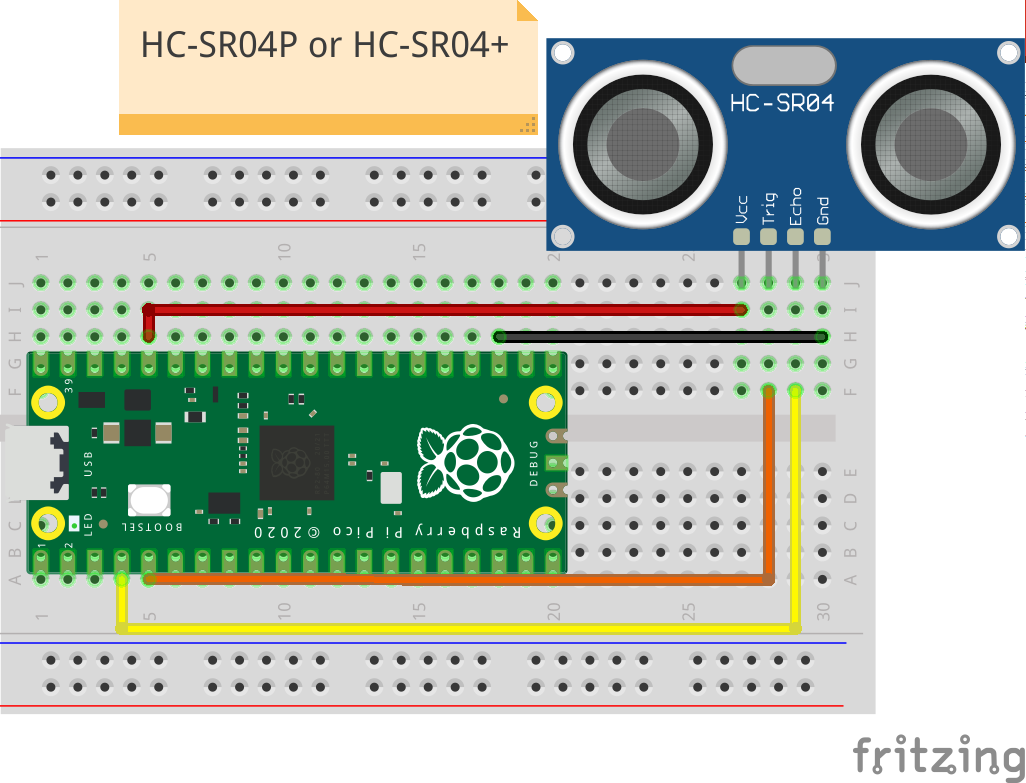
Hardware Setup of Ultrasonic Sensor on Raspberry Pi Pico
This build exclusively uses an ultrasonic sensor compatible with the 3V logic used on the Raspberry Pi Pico GPIO. The HC-SR04P and HC-SR04+ are compatible with 3V and 5V logic making them ideal for Raspberry Pi Pico, Pi and Arduino projects.
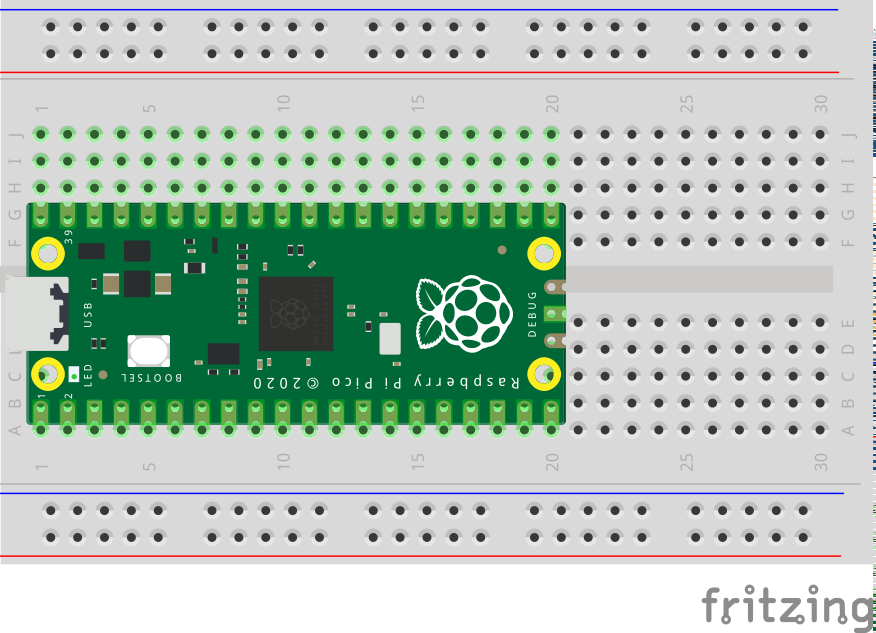
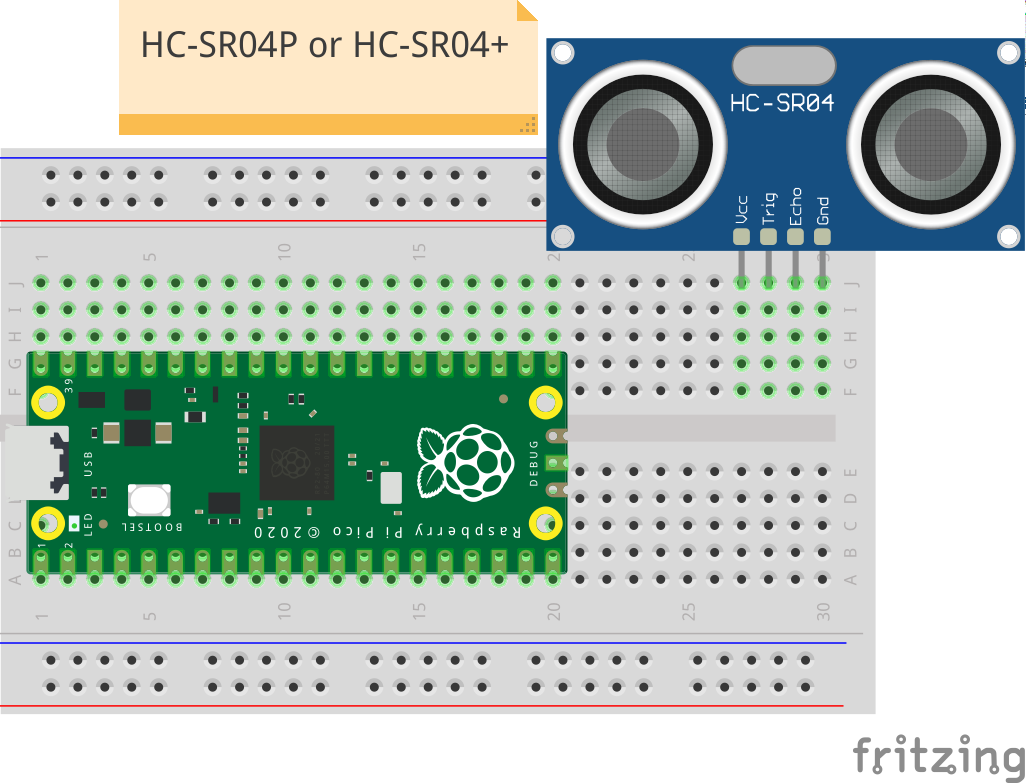
2. Insert the HC-SR04P ultrasonic sensor into the breadboard.
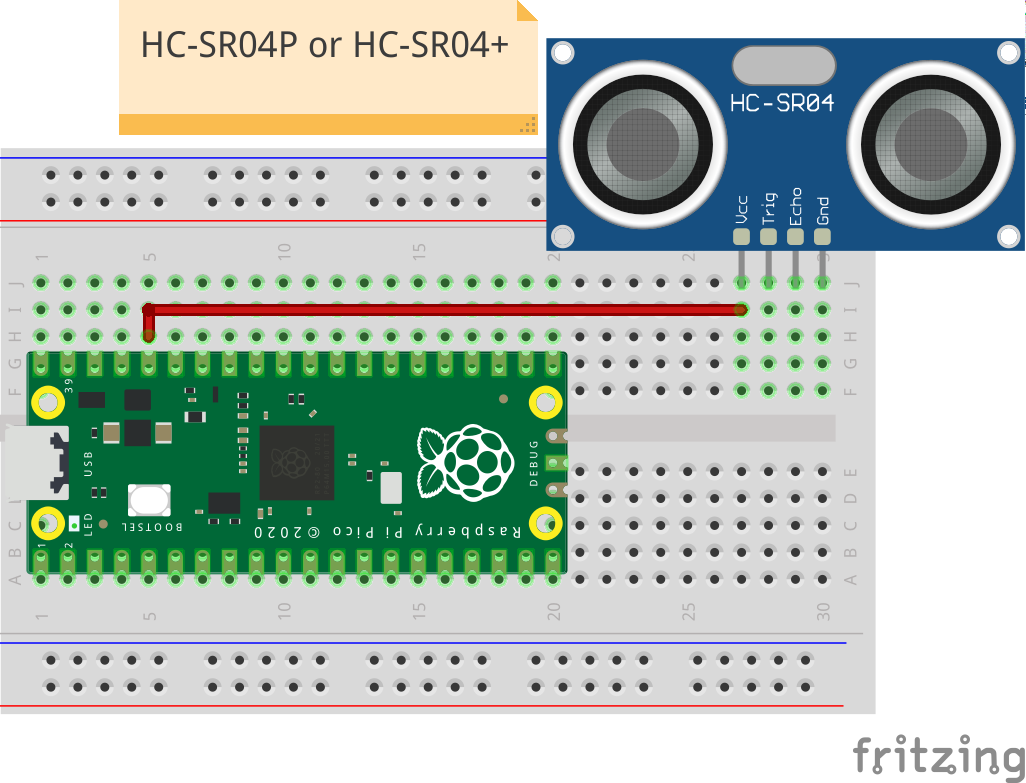
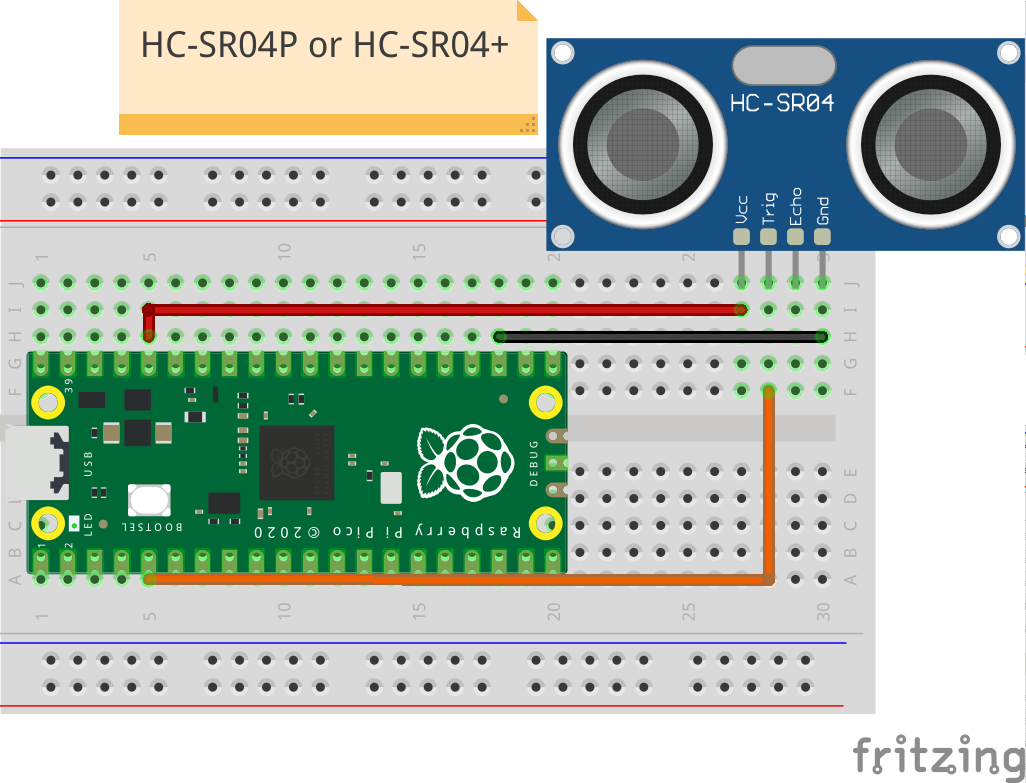
3. Connect the 3V3 pin of the Raspberry Pi Pico to the VCC pin of the ultrasonic sensor using a male to male jumper wire.
4. Connect a GND pin on the Raspberry Pi Pico to the GND pin of the ultrasonic sensor using a jumper wire.
5. Connect the Trigger pin of the ultrasonic sensor to GPIO pin 3 of the Raspberry Pi Pico.
Get Tom's Hardware's best news and in-depth reviews, straight to your inbox.
6. Connect the Echo pin from the ultrasonic sensor to GPIO pin 2 of the Raspberry Pi Pico.
Software Setup of Ultrasonic Sensor on Raspberry Pi Pico
With the circuit built, connect your Raspberry Pi Pico and open the Thonny application.
1. Import the Pin class from the machine library and then import the utime library. The former is used to control GPIO pins, the latter is a library of time based functions.
from machine import Pin
import utime
2. Create two new objects, trigger and echo. These objects configure the GPIO pins of the Pico to be used with the ultrasonic sensor. For example our trigger pin is used to send a pulse of current, as such it is an output pin. The echo pin receives the reflected pulse, so echo is an input.
trigger = Pin(3, Pin.OUT)
echo = Pin(2, Pin.IN)
3. Create a function, ultra(), which will contain the code necessary to take a reading.
def ultra():4. Pull the trigger pin low, to ensure that it is not active, then pause for two microseconds.
   trigger.low()
   utime.sleep_us(2)
5. Pull the trigger pin high for five microsends before pulling the trigger pin low. This will send a short pulse from the ultrasonic sensor and then turn off the pulse.
   trigger.high()
   utime.sleep_us(5)
   trigger.low()
6. Create a while loop to check the echo pin. If no echo pulse is received, update a variable, signaloff so that it contains a timestamp in microseconds.
   while echo.value() == 0:
       signaloff = utime.ticks_us()
7. Create another while loop, this time to check if an echo has been received. This will store the current timestamp in microseconds to the signalon variable.
   while echo.value() == 1:
       signalon = utime.ticks_us()
8. Create a new variable, timepassed, which will store the value total time taken for the pulse to leave the sensor, hit the object and return back to the sensor as an echo.
timepassed = signalon - signaloff9. Create a new variable, distance. This variable will store the answer of the equation. We multiply the journey time (timepassed) by the speed of sound (343.2 m/s, which is 0.0343 cm per microsecond) the product of that equation is divided by two as we do not need the total journey distance, just the distance from the object to the sensor.
distance = (timepassed * 0.0343) / 210. Print a message to the Python Shell showing the distance.
print("The distance from object is ",distance,"cm")11. Moving out of the function we now create a loop that will run the function every second.
while True:
   ultra()
   utime.sleep(1)
Here’s the complete code:
Complete Code Listing
from machine import Pin
import utime
trigger = Pin(3, Pin.OUT)
echo = Pin(2, Pin.IN)
def ultra():
   trigger.low()
   utime.sleep_us(2)
   trigger.high()
   utime.sleep_us(5)
   trigger.low()
   while echo.value() == 0:
       signaloff = utime.ticks_us()
   while echo.value() == 1:
       signalon = utime.ticks_us()
   timepassed = signalon - signaloff
   distance = (timepassed * 0.0343) / 2
   print("The distance from object is ",distance,"cm")
while True:
   ultra()
   utime.sleep(1)
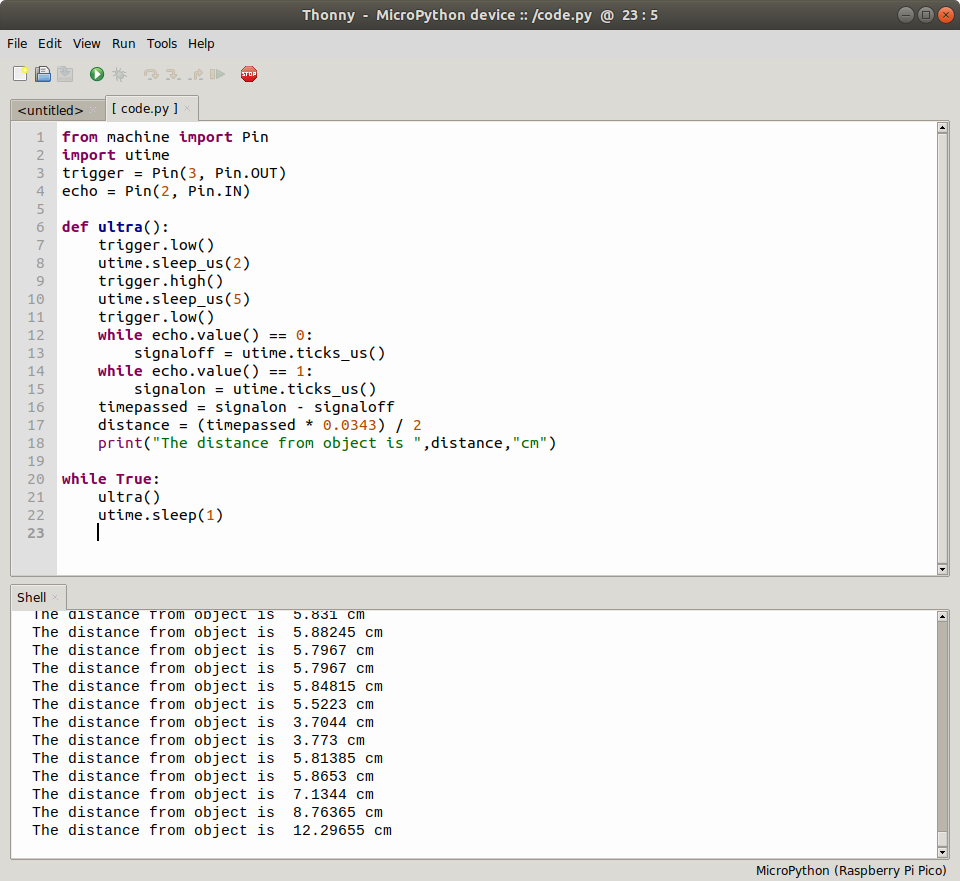
Save the code to the Raspberry Pi Pico as code.py and click on the green arrow to run the code. In the Python Shell you will see the distance printed every second.

Les Pounder is an associate editor at Tom's Hardware. He is a creative technologist and for seven years has created projects to educate and inspire minds both young and old. He has worked with the Raspberry Pi Foundation to write and deliver their teacher training program "Picademy".
-
Sel199 I was having an issue which I thought was the code but it seems to be a wiring issue, the connections seem to be intermitent so it only work when I fiddle with the wires.Reply
Odd though as I've changed all the wires out and even swapped boards and it still won't run.
Update it turns out I had the 5v version Sensor HC-SR04 however I also had a US-015 sensor also 5v wich works perfectly. -
kopjasa You can use the 5V version e.g.: HY-SRF05. Just you need the change the 3V3 pint to the VBUS pin and you have to feed through USB port. (Please note that in this case you have to use a voltage divider for the ECHO wire.)Reply -
dathai You can save 3 wires if you line up the Trigger with pin 16 and echo with 17, that puts GND with GND .Reply
One wire is needed to go from a 3V3 or the VSYS/VBUS if you need 5V and are powering via micro-USB. -
ZukaBlue I'm curious how some of this works in terms of the code.Reply
I keep looking at this section:
while echo.value() == 0:
signaloff = utime.ticks_us()
while echo.value() == 1:
signalon = utime.ticks_us()
timepassed = signalon - signaloff
dist = (timepassed * 0.0343) / 2
I keep trying to figure out exactly how this works. To my brain, it seems like this is just measuring the length of the incoming pulse. Someone correct me if I'm wrong, or let me know how this all works, but this is my logic -
Send out a pulse
While we are not detecting a received pulse, keep updating a number. Ex:
1001, 1002, 1003, 1004, 1005While we are receiving a pulse, update a different number. Ex:
1006, 1007, 1008Subtract the first from the second:
1008 - 1005 = 3This just measures the number of microseconds that we actually detect the pulse returning and not the time that it took for the pulse to bounce back.How am I thinking of this wrong? Am I misunderstanding what utime.ticks_us() does? Is that simply counting up from the time it is called and then starting to count again when it starts detecting a high signal? My thought would be to take just a single measurement of utime.ticks_us() immediately after sending a high pulse from the trigger. That would find some value of microseconds and store it as a value, then we wait until we get a high pulse and do nothing until then. When we do get a high pulse we mark the beginning of that high pulse in terms of microseconds, and then we can find the difference between the initial out pulse and the return pulse, multiply by the speed of sound in cm/s, and then divide by 2.
Edit: Obviously I know that it does work, I'm just trying to piece together exactly how it works. Also, the signaloff and signalon are defined in the while loops, but then they are used later on again outside of those indents. Why does it allow this? -
Jpico Replydathai said:You can save 3 wires if you line up the Trigger with pin 16 and echo with 17, that puts GND with GND .
One wire is needed to go from a 3V3 or the VSYS/VBUS if you need 5V and are powering via micro-USB.
You're so right on this!
you saved us from the spaghetti cables! :) -
PicoCrook ReplyZukaBlue said:I'm curious how some of this works in terms of the code.
I keep looking at this section:
while echo.value() == 0:
signaloff = utime.ticks_us()
while echo.value() == 1:
signalon = utime.ticks_us()
timepassed = signalon - signaloff
dist = (timepassed * 0.0343) / 2
I keep trying to figure out exactly how this works. To my brain, it seems like this is just measuring the length of the incoming pulse. Someone correct me if I'm wrong, or let me know how this all works, but this is my logic -
Send out a pulse
While we are not detecting a received pulse, keep updating a number. Ex:
1001, 1002, 1003, 1004, 1005While we are receiving a pulse, update a different number. Ex:
1006, 1007, 1008Subtract the first from the second:
1008 - 1005 = 3This just measures the number of microseconds that we actually detect the pulse returning and not the time that it took for the pulse to bounce back.How am I thinking of this wrong? Am I misunderstanding what utime.ticks_us() does? Is that simply counting up from the time it is called and then starting to count again when it starts detecting a high signal? My thought would be to take just a single measurement of utime.ticks_us() immediately after sending a high pulse from the trigger. That would find some value of microseconds and store it as a value, then we wait until we get a high pulse and do nothing until then. When we do get a high pulse we mark the beginning of that high pulse in terms of microseconds, and then we can find the difference between the initial out pulse and the return pulse, multiply by the speed of sound in cm/s, and then divide by 2.
Edit: Obviously I know that it does work, I'm just trying to piece together exactly how it works. Also, the signaloff and signalon are defined in the while loops, but then they are used later on again outside of those indents. Why does it allow this?
I'm in the same boat. This is the code that I would write:
signaloff = utime.ticks_us() # to get the time from when the pulse ended
while echo.value() == 0:
pass # wait for a signal.....
signalon = utime.ticks_us() # get new time
timepassed = signalon - signaloff # this is now the time from when the pulse stopped being sent to when it's first detected - the return trip for the sound
I don't get the listed code either.
