How to Build A Person-Following Creepy Head for Halloween with a Raspberry Pi
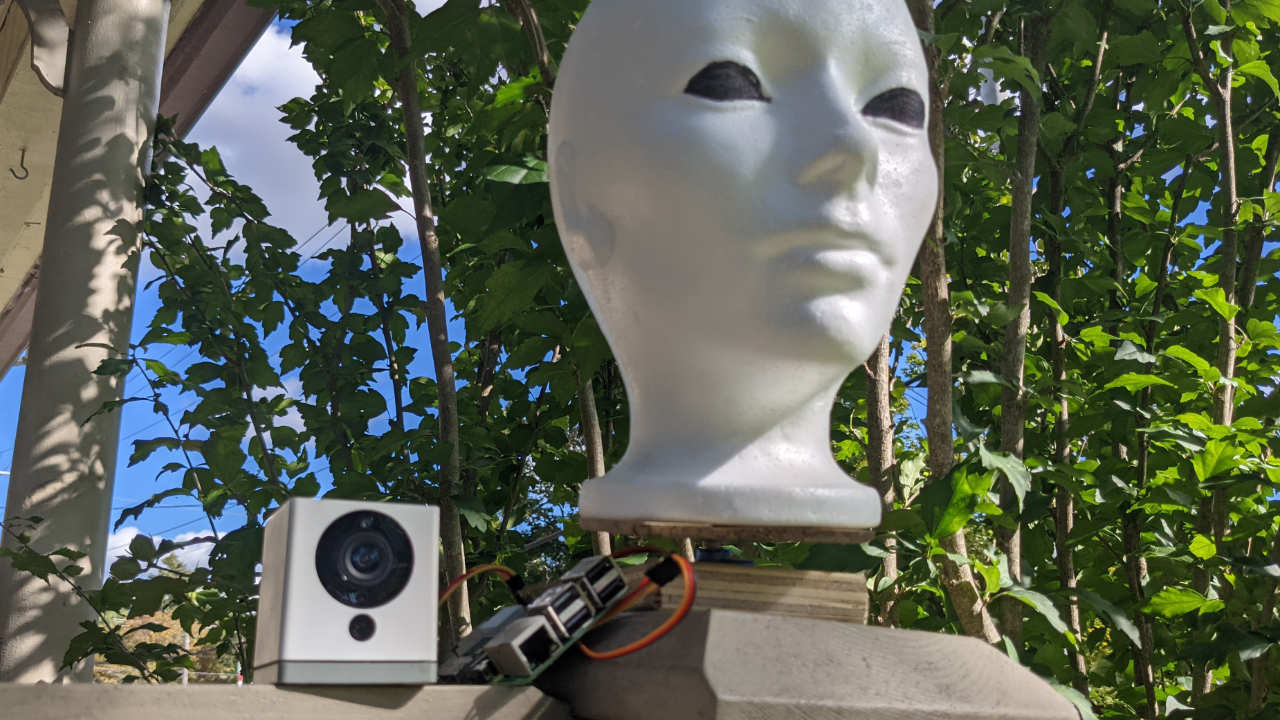
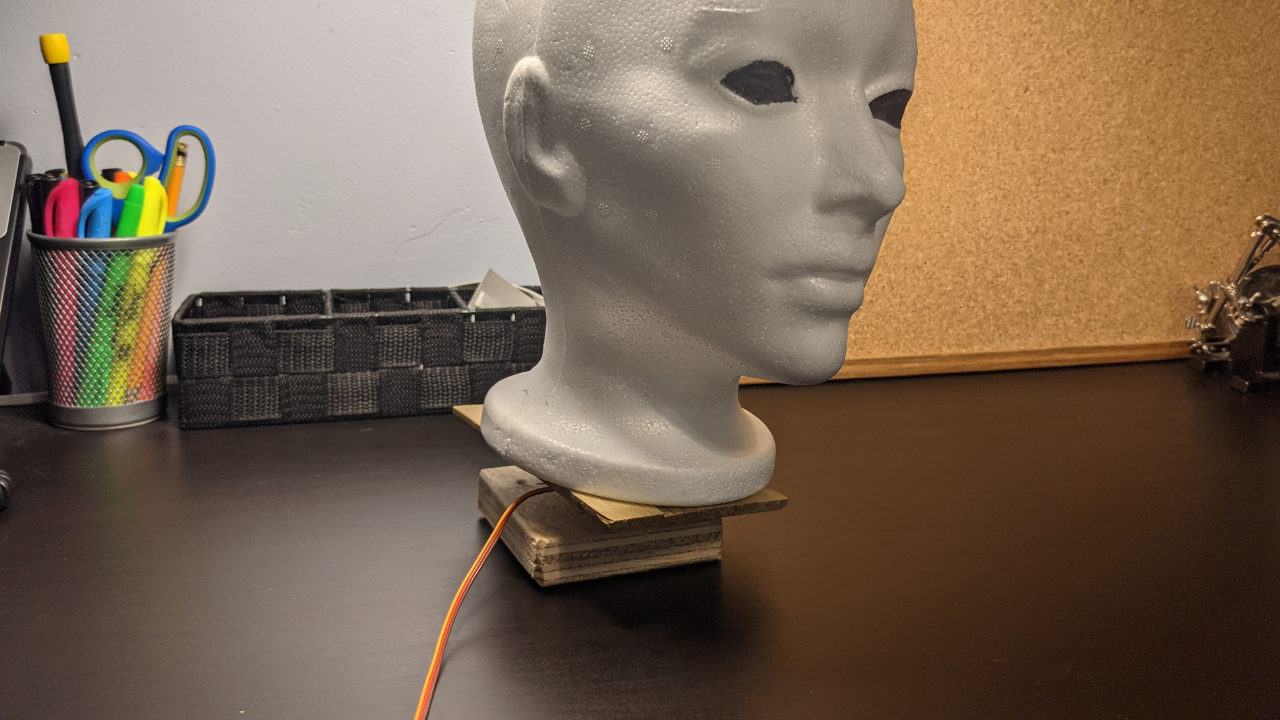
The scary mannequin head detects a person and moves to ‘look’ at them.
Halloween is coming, and what better way to celebrate the season than by using machine learning and a Raspberry Pi to accomplish something spooky! This year I’ve built a mannequin head that uses person detection and a simple servo motor to detect when a person is walking by and turn the head to follow them. I’m using a simple styrofoam mannequin head with some coloured in eyes from the dollar store, but you’re welcome to dress it up to fit your house’s theme or use a completely different kind of head or object. As long as you can use a servo to rotate it, the result is the same.
This project won’t require any machine learning training, and is more or less plug and play just in time for the season. Here’s how to build it.
What You’ll Need For This Project
- Raspberry Pi 4 or Raspberry Pi 3 with power adapter and MicroSD card
- Mannequin Head (styrofoam or something equally light weight works best)
- 5V Micro-Servo motor compatible with a Raspberry Pi
- Hot Glue Gun
- Misc. Blocks of Wood or Cardboard
- Wyze Cam V2 (Wyze Cam V3 is not yet compatible) or Raspberry Pi Camera
How To Build A Person-Following Halloween Mannequin Head for Halloween
Before you get started, get your Raspberry Pi set up. If you haven’t done this before, see our article on how to set up a Raspberry Pi for the first time or how to do a headless Raspberry Pi install (without the keyboard and screen). For this project, we recommend a headless Raspberry Pi install.
1. Install git. We’ll need it to download the code from GitHub.
sudo apt-get update
sudo apt-get -y install git
2. Clone the repository to your home directory. This will ensure we have all the code and audio files we need to run the project.
cd ~/
git clone https://github.com/rydercalmdown/halloween_mannequin_head.git
3. Run the “make install” command to install all project dependencies. This script will take care of installing lower level dependencies, as well as the Python libraries you need for the project to run. This should take about 10-15 minutes on a Raspberry Pi 4 as it needs some time to install machine learning libraries and models.
cd ~/halloween_mannequin_head/
make install
4. Choose your camera; if you’re using a Wyze V2 camera, skip to step 6. If you’re using a Raspberry Pi camera, move to step 5. Both will work, but the advantage of the Wyze camera is the ability to mount it in a different place away from your Pi (and mannequin head).
Get Tom's Hardware's best news and in-depth reviews, straight to your inbox.
5. Connect your Raspberry Pi camera directly to the Raspberry Pi and test it with the following command. Do not set the STREAM_URI environment variable, it will by default use the Pi camera. Skip to step 8.
sudo raspistill -o test.jpeg
6. Flash the RTSP custom firmware to your Wyze Camera using these instructions. This will allow us to access the stream from the camera wirelessly with the Raspberry Pi. This will only work with a Wyze V2 camera.
7. Get the RTSP URL value from your Wyze application, and edit the STREAM_URI variable in the Makefile to point the Raspberry Pi to your camera. You can find the RTSP URL in the “Advanced Settings” section of your Wyze application on your phone.
nano Makefile
# Only edit this if you’re using a RTSP camera; leave blank if you’re using a Pi camera
STREAM_URI=rtsp://username:password@camera_ip_address/live
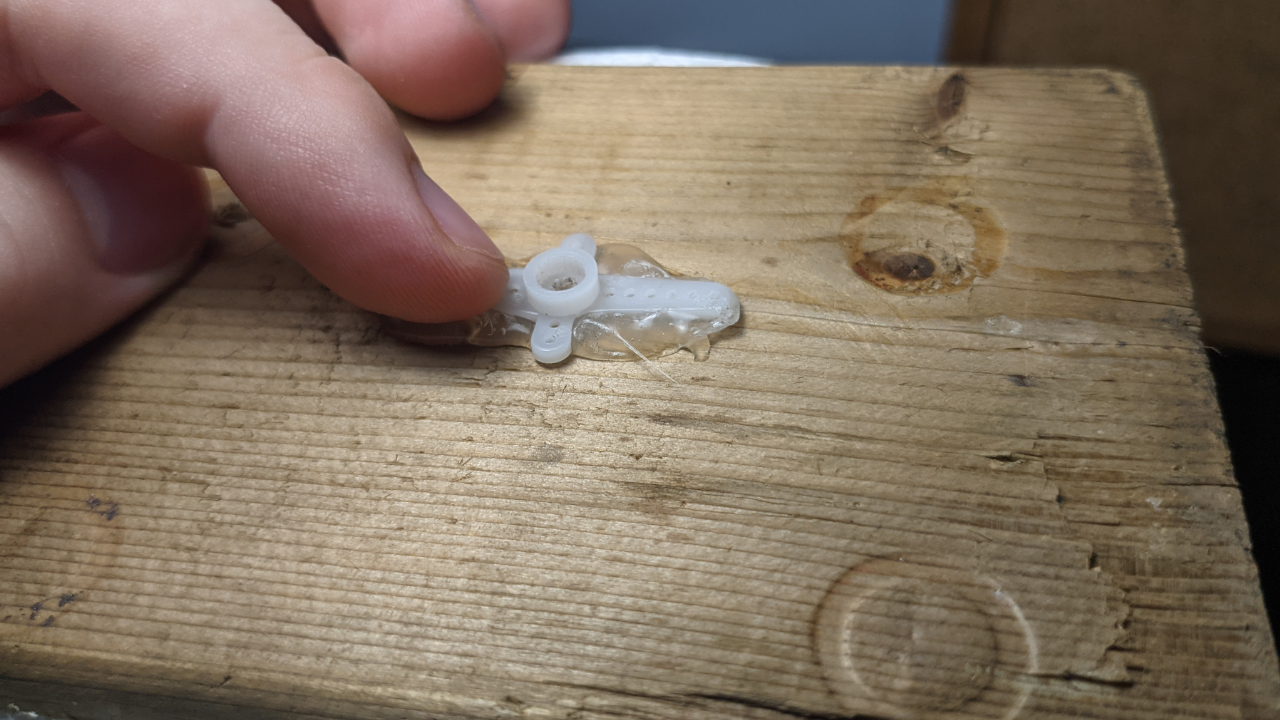
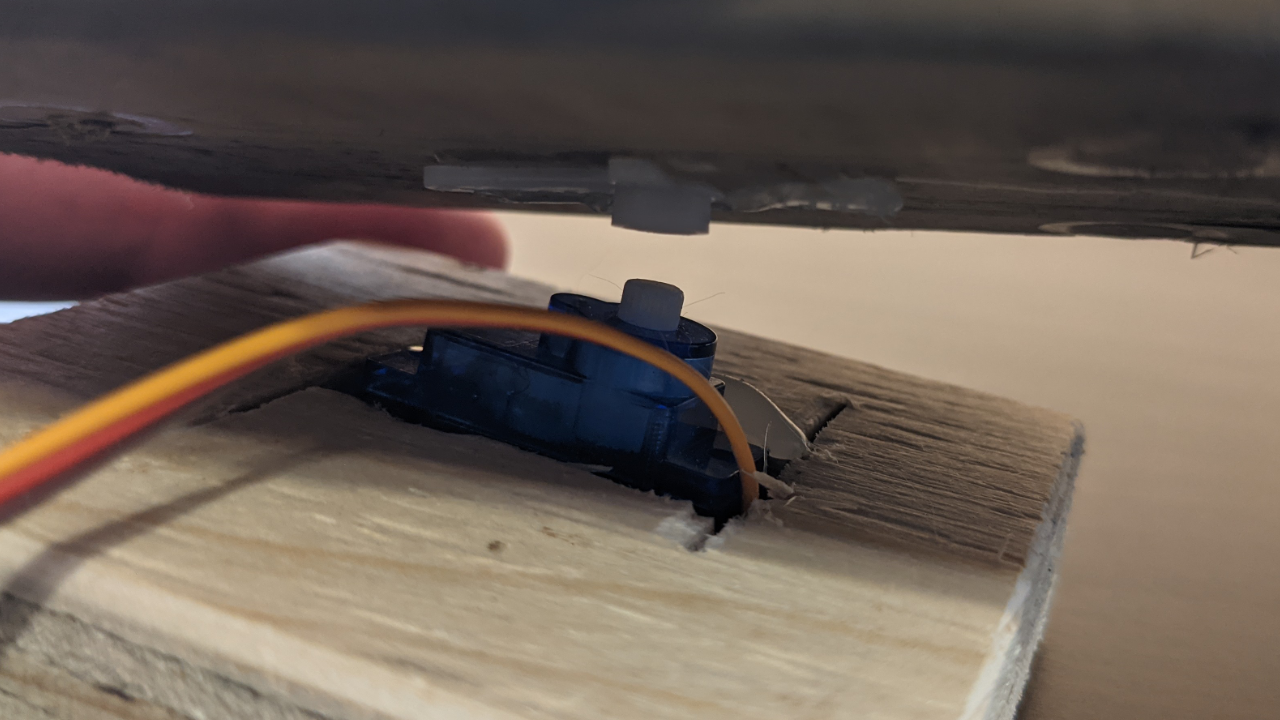
8. Hot glue your servo motor to a base piece of wood, or directly to the place you intend on mounting the mannequin head. I drilled out a small piece of wood to use as my base and fit the motor inside.
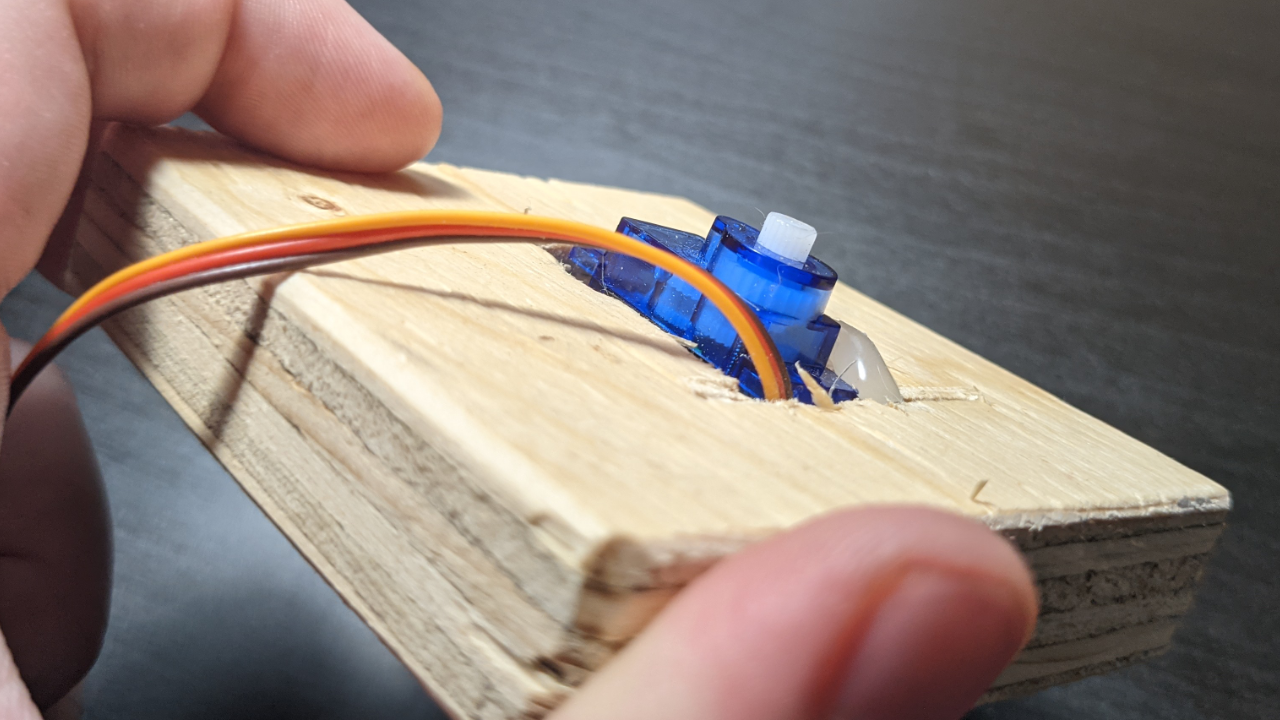
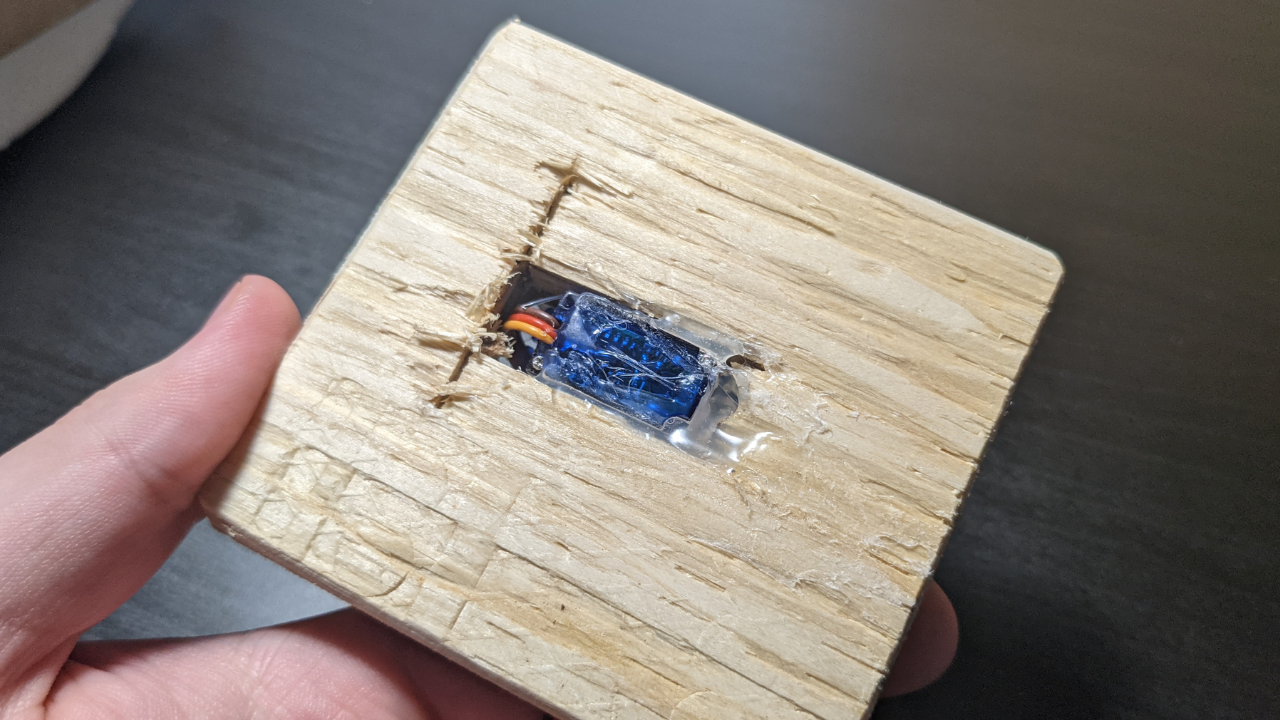
9. Hot glue the servo bracket with the motor to the base of the mannequin head. I used a small piece of wood to reinforce the connection, but depending on yours you might not need one. Make sure the bracket can still connect to the motor.
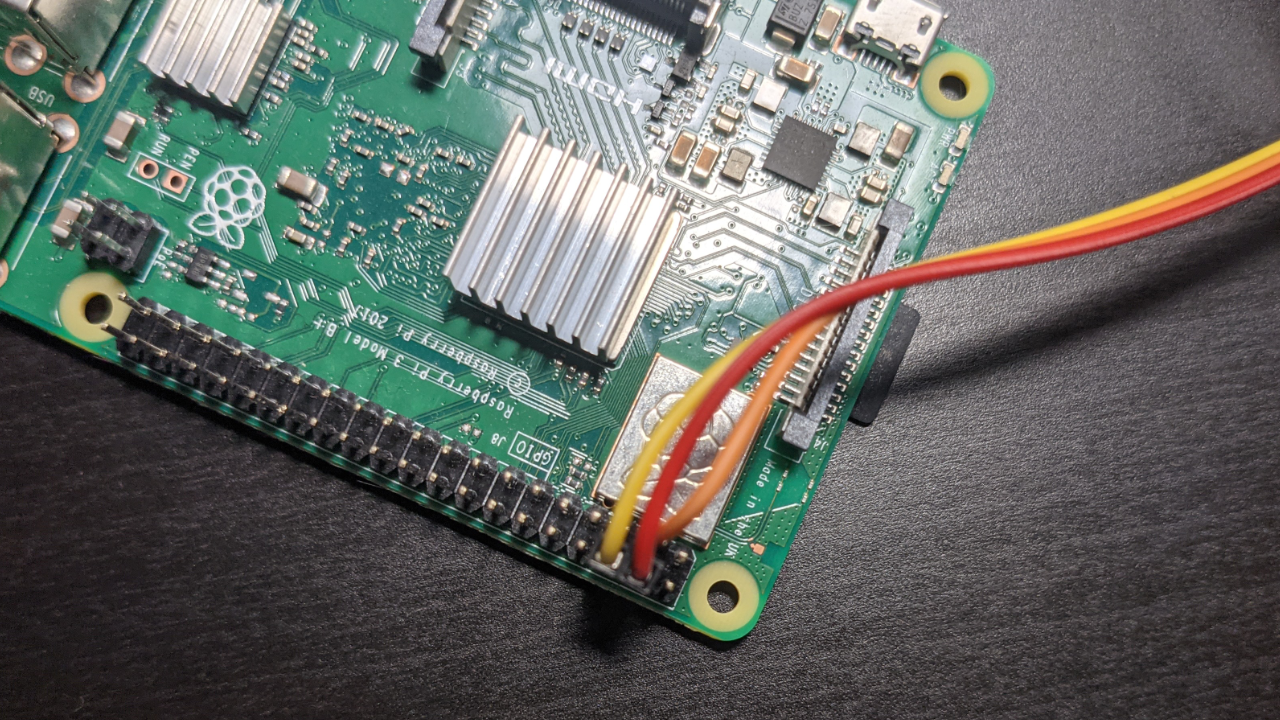
10. Using jumper cables attach the 5V and ground pins of the servo motor to Raspberry Pi pins #4 and #6 respectively.
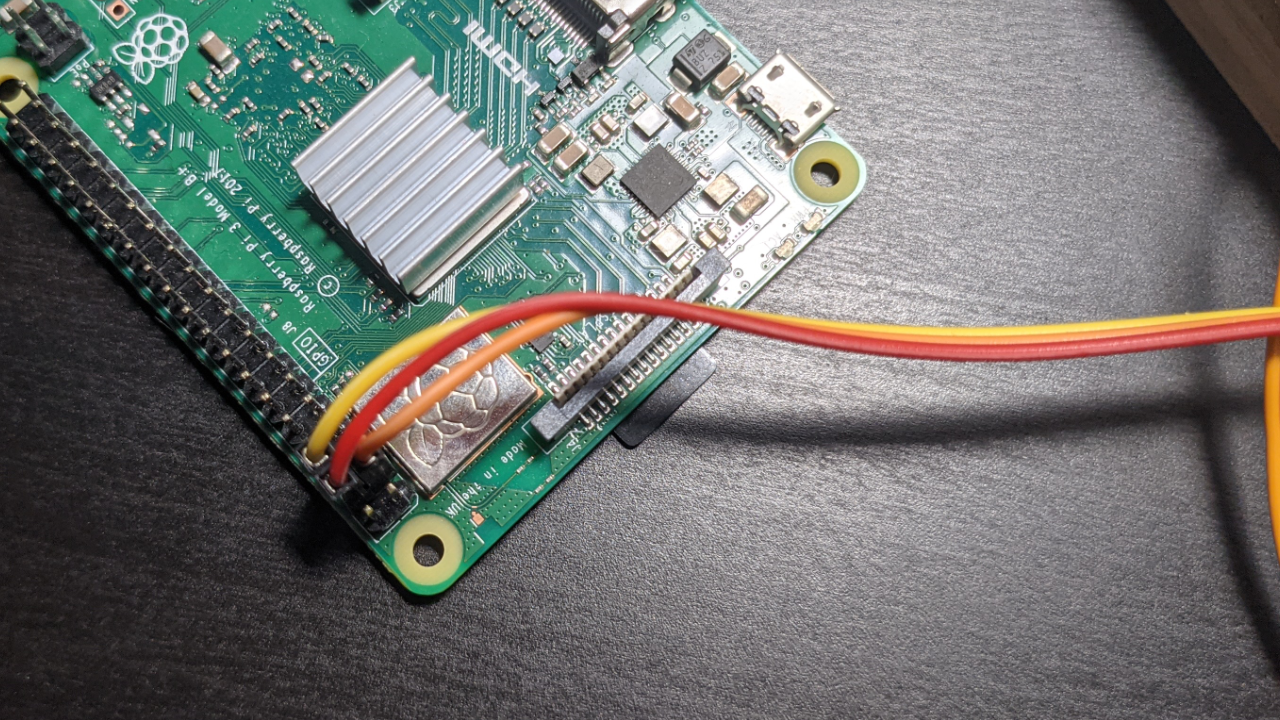
11. Using a jumper cable, attach the data pin of the servo motor to board pin #3 on the Raspberry Pi. This pin allows control of the servo motor by the Pi directly.
12. Using the bracket, connect the mannequin head so it sits on top of the servo motor and mount the device and camera in your desired location.
13. Use the make run command to test the system. Step into frame of the camera and move left to right to have the servo turn.
14. Adjust the mannequin head on the servo by lifting it and recentering it to calibrate it to follow you properly.
15. Buy your trick or treat candy and get it ready for halloween.

Ryder Damer is a Freelance Writer for Tom's Hardware US covering Raspberry Pi projects and tutorials.
-
therevoman Went to set this up and ran into problems with the code when building on the "bullseye" release. Is the code Python 2 or Python3?Reply -
andrsg Reply
Fix was to run fresh install of rasberrypi OSandrsg said:DEPRECATION: Python 3.5 reached the end of its life on September 13th, 2020. Please upgrade your Python as Python 3.5 is no longer maintained. pip 21.0 will drop support for Python 3.5 in January 2021. pip 21.0 will remove support for this functionality.
Looking in indexes: https://pypi.org/simple, https://www.piwheels.org/simpleCollecting objectdaddy==0.0.4
Using cached https://www.piwheels.org/simple/objectdaddy/objectdaddy-0.0.4-py3-none-any.whl (32.9 MB)
Collecting rtsparty==0.0.1
Using cached https://www.piwheels.org/simple/rtsparty/rtsparty-0.0.1-py3-none-any.whl (4.0 kB)
Collecting RPi.GPIO==0.7.0
Using cached https://www.piwheels.org/simple/rpi-gpio/RPi.GPIO-0.7.0-cp35-cp35m-linux_armv7l.whl (67 kB)
Collecting flask
Using cached https://www.piwheels.org/simple/flask/Flask-1.1.4-py2.py3-none-any.whl (94 kB)
Collecting requests
Using cached https://www.piwheels.org/simple/requests/requests-2.25.1-py2.py3-none-any.whl (61 kB)
ERROR: Could not find a version that satisfies the requirement opencv-contrib-python==4.5.1.48 (from objectdaddy)
ERROR: No matching distribution found for opencv-contrib-python==4.5.1.48
Makefile:12: recipe for target 'install' failed
make: *** Error 1
Getting error on step 3,
When running
cd ~/halloween_mannequin_head/
make install -
jdjii76 So I got this working. I used a pi camera but want to switch to my logitech usb webcam in hopes of getting a wider view. I am completely new to this and don't know how to make that happen if it is possible at all. The goal would be to have a wider area that the head can track someone. Thanks for any help!Reply -
markdhaney Thanks for the write up. I am having an issue that the make run gets hung on setting up servo.Reply
I have tried a few diff servos marketed as rpi compatible, verified the 5v but still hangs there with no error or indication of issue. Any thoughts? -
markdhaney Reply
did you run into any unknowns while setting up? I am also using the pi cam but the make run hangs on setting up servo.jdjii76 said:So I got this working. I used a pi camera but want to switch to my logitech usb webcam in hopes of getting a wider view. I am completely new to this and don't know how to make that happen if it is possible at all. The goal would be to have a wider area that the head can track someone. Thanks for any help! -
markdhaney Reply
Thanks for the write up. I am having an issue that the make run gets hung on setting up servo.Admin said:Scare your friends and neighbors with a creepy mannequin head that follows them around, based on A.I. person detection.
How to Build A Person-Following Creepy Head for Halloween with a Raspberry Pi : Read more
I have tried a few diff servos marketed as rpi compatible, verified the 5v but still hangs there with no error or indication of issue. Any thoughts? -
jdjii76 Reply
I don't remember where it did not work the first few times I tried it, but going in and deleting the user name and address worked. I believe it was the part I struck through below. I know it says only edit if, but you have to remove that part I believe. Anyway, that is what I did.markdhaney said:did you run into any unknowns while setting up? I am also using the pi cam but the make run hangs on setting up servo.
# Only edit this if you’re using a RTSP camera; leave blank if you’re using a Pi camera
STREAM_URI=rtsp://username:password@camera_ip_address/live -
jdjii76 Reply
I had to reinstall. And now I am getting stuck at the servo.jdjii76 said:I don't remember where it did not work the first few times I tried it, but going in and deleting the user name and address worked. I believe it was the part I struck through below. I know it says only edit if, but you have to remove that part I believe. Anyway, that is what I did.
# Only edit this if you’re using a RTSP camera; leave blank if you’re using a Pi camera
STREAM_URI=rtsp://username:password@camera_ip_address/live
