How to Make CircuitPython Projects on a Chromebook with Raspberry Pi Pico
Low cost and low friction hardware is the gateway to learning
There is no denying that the Raspberry Pi Pico made a big impact back in 2021. The $4 microcontroller was quickly adopted by many of the maker communities and groups and one of those was CircuitPython. CircuitPython, a fork of MicroPython which is a version of Python 3 for microcontrollers, is backed by Adafruit who are one of the partners that launched its own RP2040 range of boards. Since its creation back in 2018, CircuitPython has seen a massive investment from the community, with many projects and libraries being ported to the language.
CircuitPython is the best means to introduce Python on microcontrollers, because it’s easy to use with devices appearing in the host OS as USB flash drives. We write our code into the code.py file and we can enable external sensors, screens and inputs via a dazzling array of libraries.
So how can we work with the Raspberry Pi Pico and CircuitPython? Typically we connect up our Pico to a PC and start writing code, but we can also build projects with a Chromebook or other Chrome OS device. With an easy-to-use programming language, cheap microcontroller and an easy-to-use OS we have the perfect platform for creativity, no matter our age or ability.
In this how to we will show you how to set up your Raspberry Pi Pico for CircuitPython, install the software to write code and communicate with your Pico, and finally we shall build a temperature sensor project.
For this project you will need
- Chromebook or other Chrome OS device
- Raspberry Pi Pico
- Half size breadboard
- LED
- 330 Ohm resistor
- DHT22 temperature sensor
- 5x Male to male jumper wires
- 10K Ohm Resistor (Brown-Black-Orange-Gold)
Install CircuitPython onto the Raspberry Pi Pico
The Raspberry Pi Pico can run many different languages, even a version of a 50+ year old language. Our focus is on CircuitPython, and installing CircuitPython on a Pico is super easy to do.
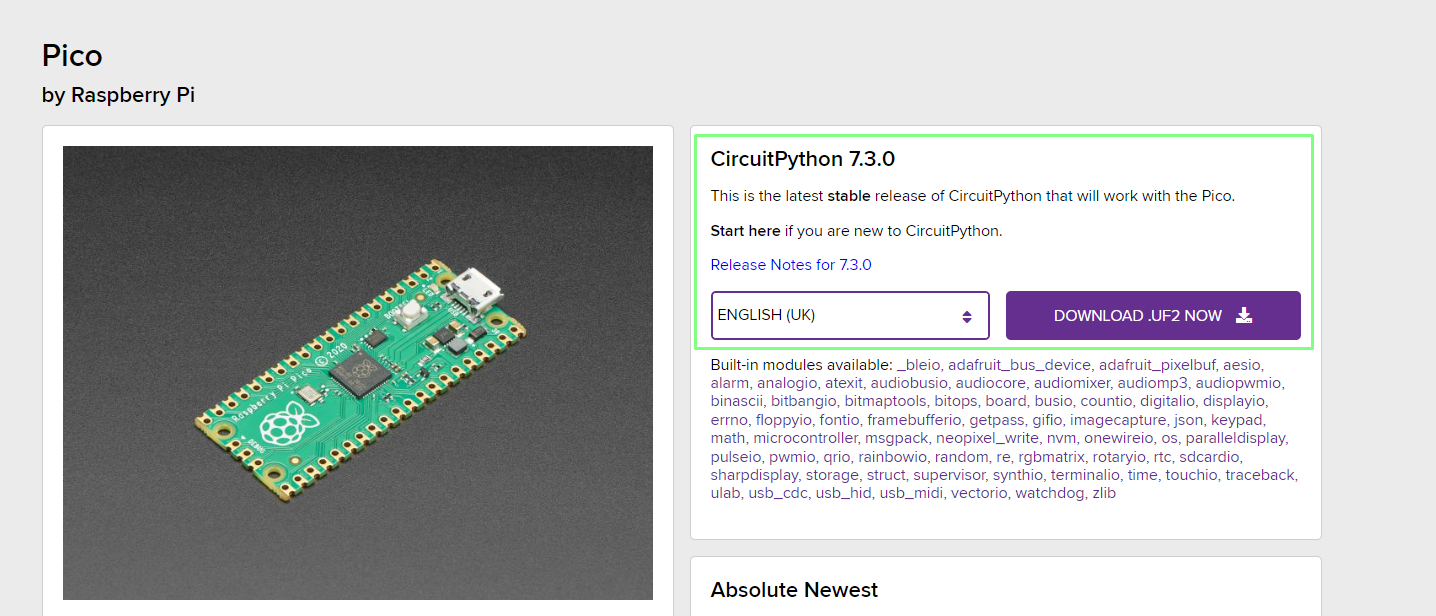
1. Download the latest version of CircuitPython for the Raspberry Pi Pico. At the time of writing the latest version was 7.3.0.
2. Press and hold the BOOTSEL button on the Raspberry Pi Pico, then connect your Pico to the Chromebook via a USB cable.
Get Tom's Hardware's best news and in-depth reviews, straight to your inbox.
3. Copy the downloaded UF2 file from Downloads to the RPI-RP2 drive in files. The process will take under a minute and when complete a new drive CIRCUITPY will appear in the Files browser.
Install the Tools to use CircuitPython on Chrome OS
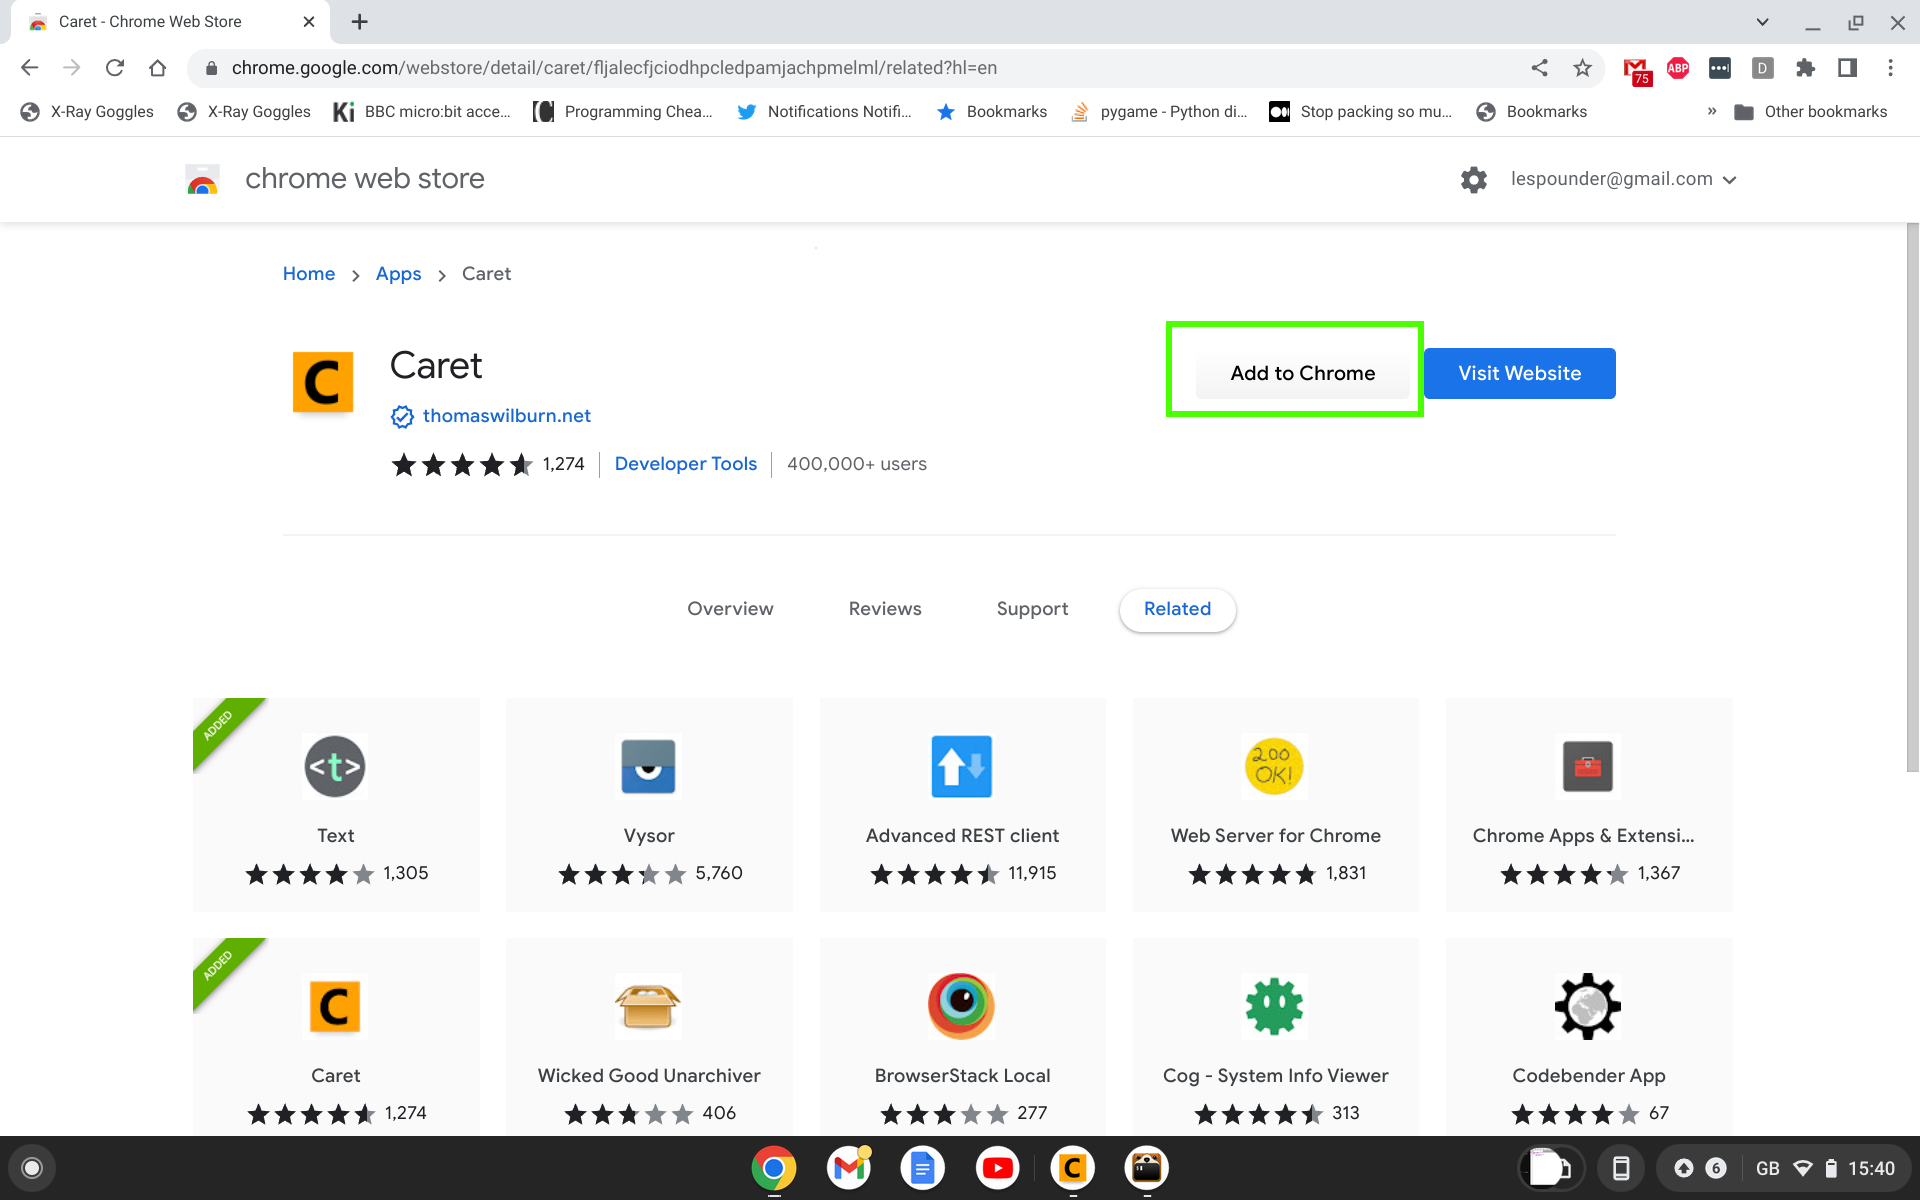
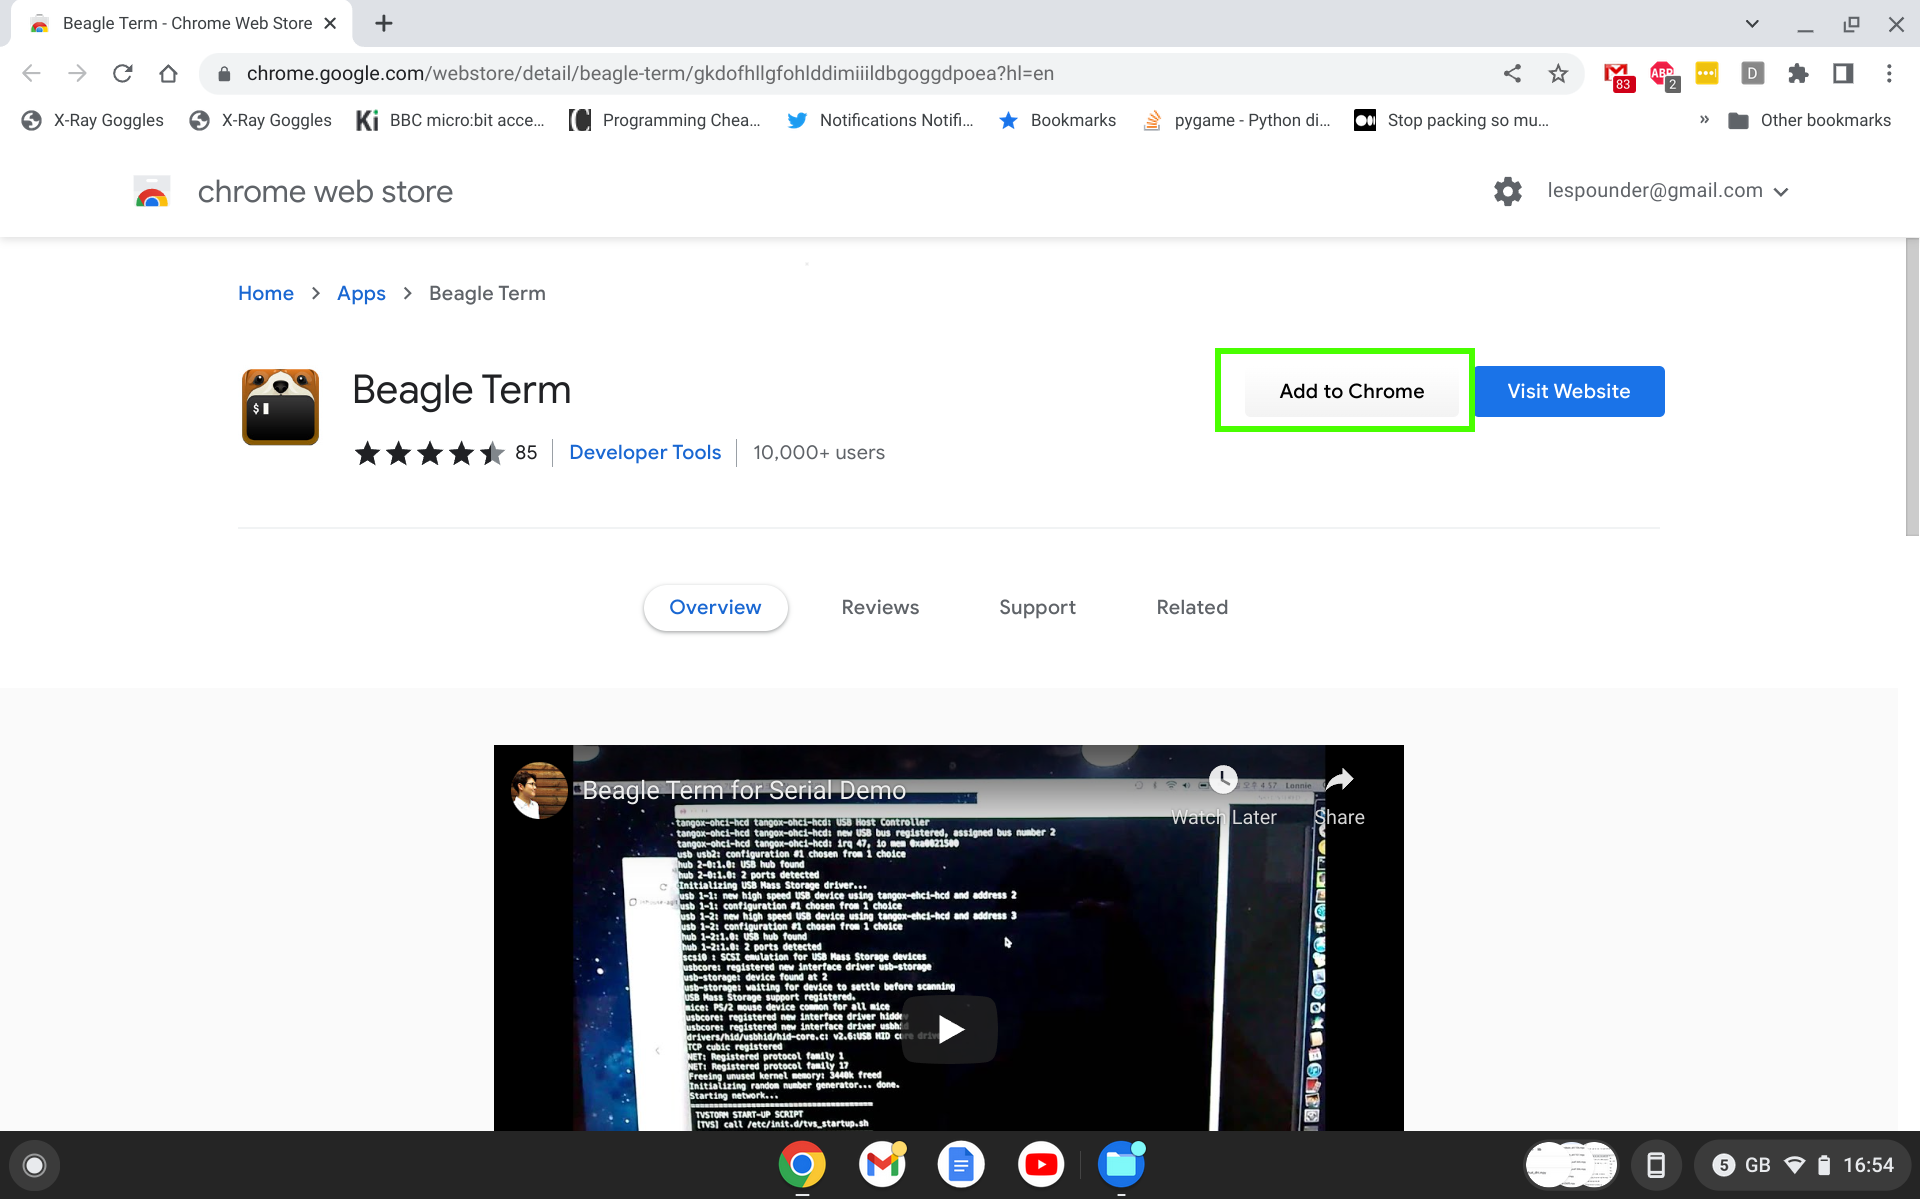
Ideally we would have just one application which could do everything, but for now, alas we need to install two. The first is a text editor, Caret, which we can use to write CircuitPython code directly to the CIRCUITPY drive. The second is Beagle Term, a serial terminal emulator for Chrome OS.
1. Install the Caret Text Editor via the Chrome Web Store.
2. Install Beagle Term via the Chrome Web Store.
Writing our Test CircuitPython Code on Chromebook
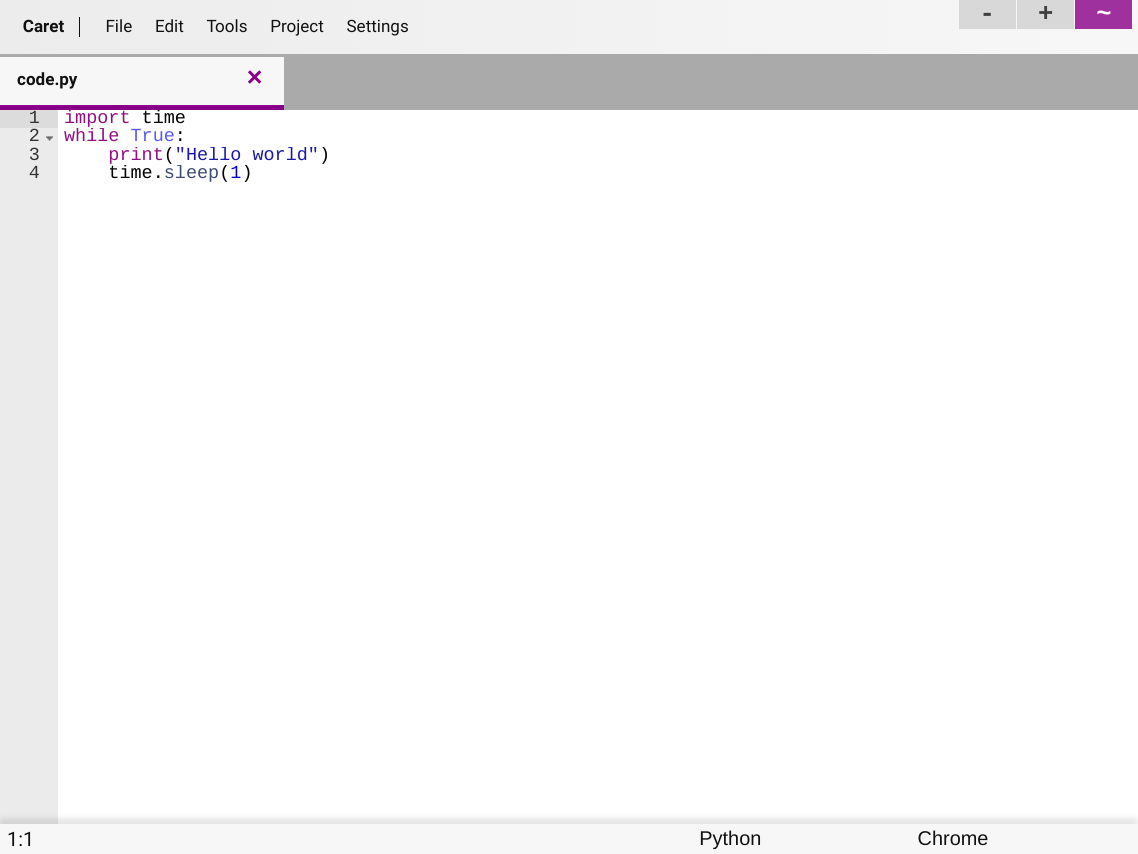
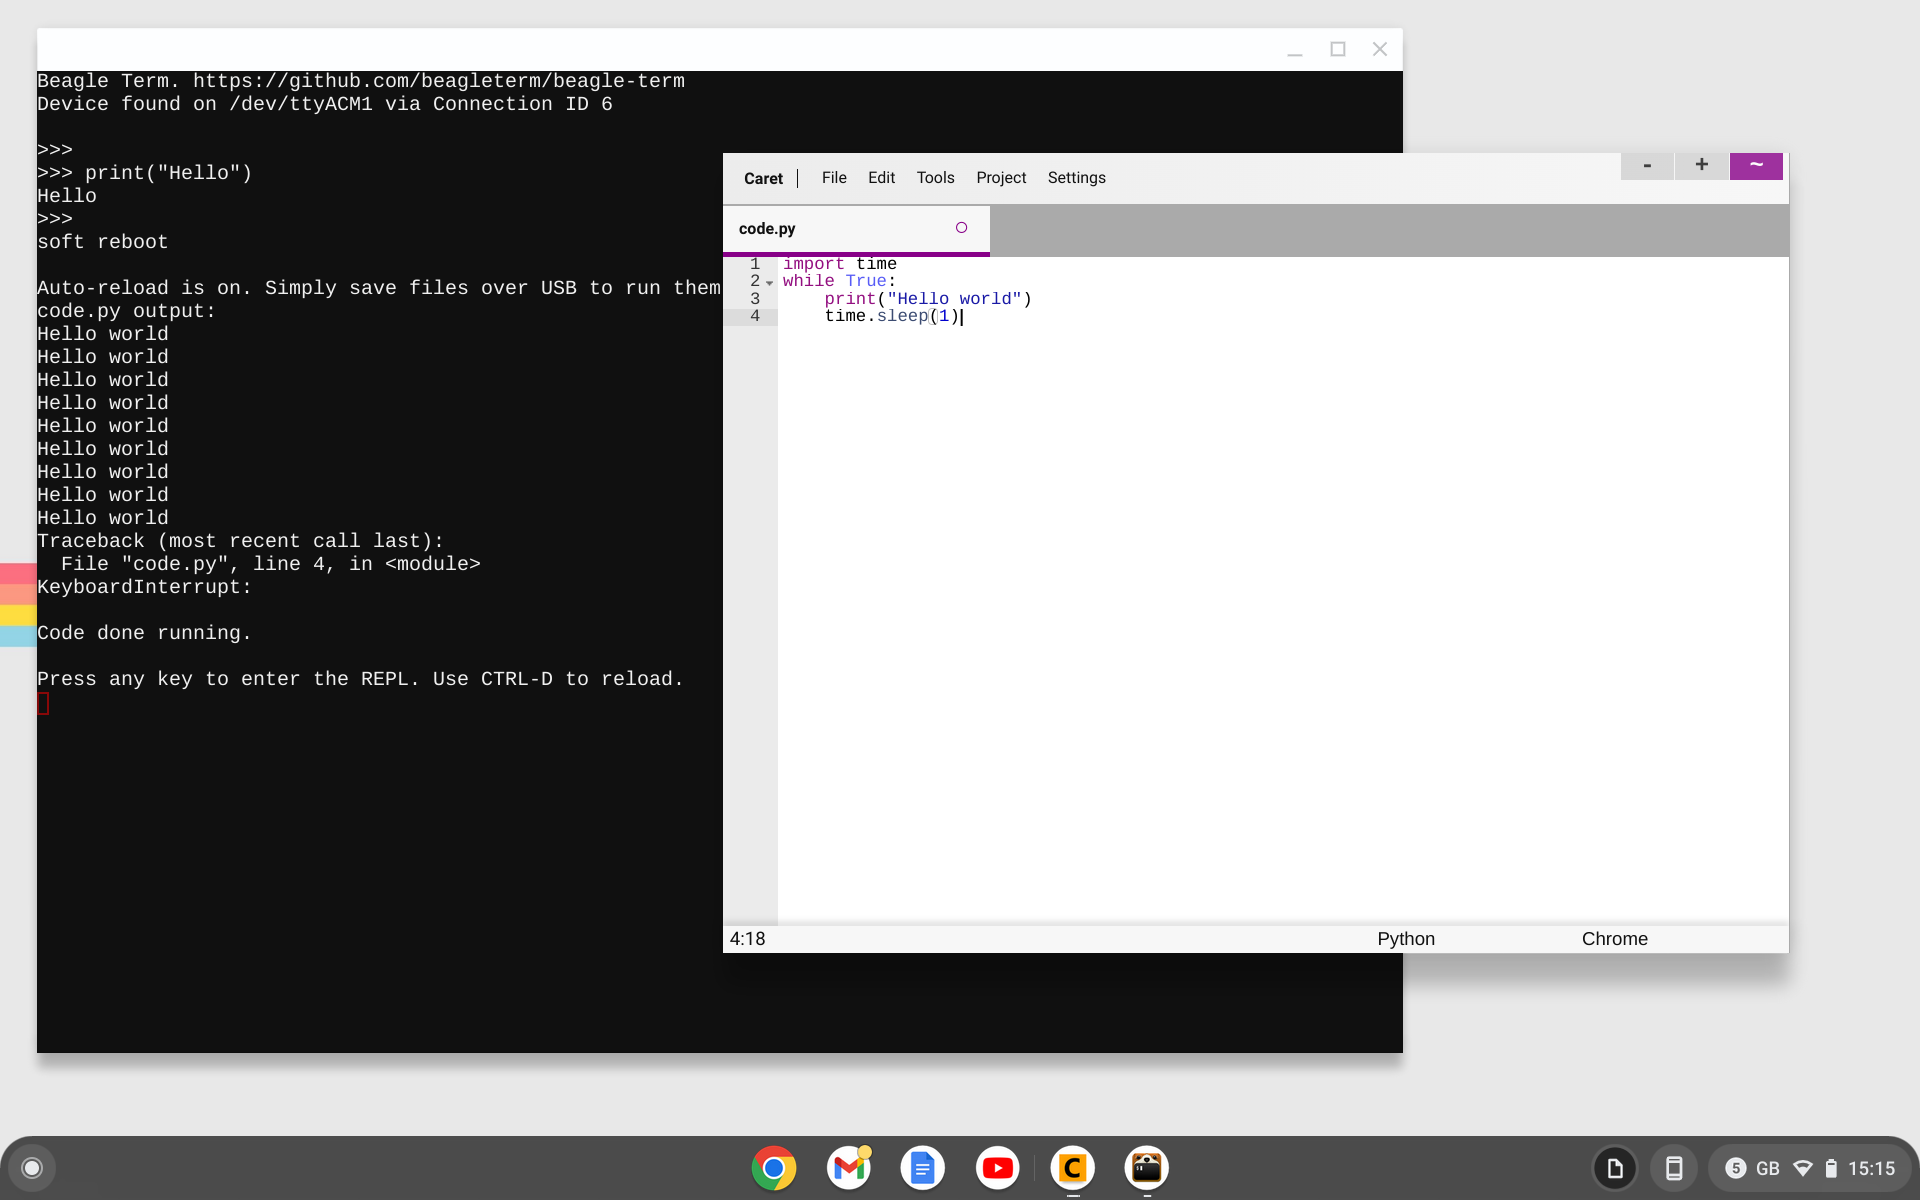
Before we start any electronics, let's check that we can control and communicate with the Raspberry Pi Pico. Our demo code is a simple Hello World that prints to the Python shell every second.
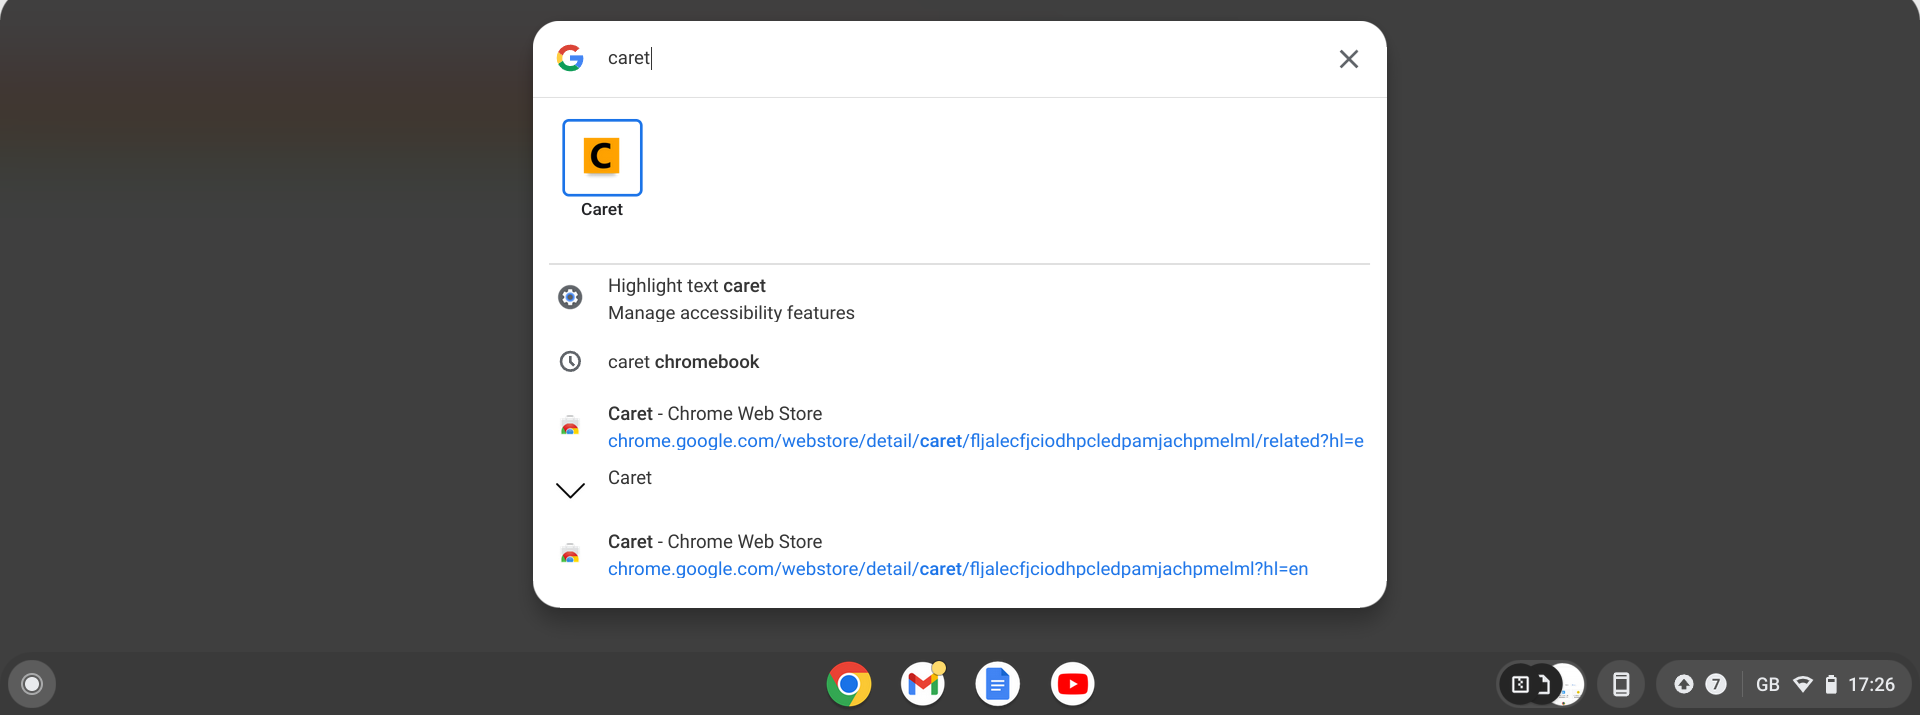
1. Open the Caret text editor using the Search key (the spyglass where caps lock normally resides) and type Caret. Press Enter to open.
2. Click on File >> Open and select code.py found on your CIRCUITPY drive. This drive is your Raspberry Pi Pico running CircuitPython.
3. Delete any code in the file.
4. Import the time module. We will use this to control the speed at which our code loops.
import time
5. Create a while True loop to continually run the code within.
while True:
6. Use a print function to print “Hello World”. Note that the code is indented by one TAB keypress or four spaces. Do not mix tabs and spaces as Python will throw an error. This is a classic example of testing code. It is a simple means that we can use to confirm that we have control of and communication with a device.
print(“Hello World”)
7. Add a one second pause
This gives us a second to read the Hello World message.
time.sleep(1)
8. Save your code to code.py. CircuitPython will automatically run the code each time we save.
Test Code Listing
import time
while True:
    print(“Hello World”)
    time.sleep(1)
Using the Beagle Term Serial Emulator
To see the output of our code we need to run the Beagle Term serial terminal emulator. This app will connect to the Python console, running over a USB to serial connection. CircuitPython has a REPL (Read, Eval, Print, Loop) Python console which can be used to interactively work with the board and it can output information directly to the console.
1. Open the Beagle Term application using the Search key (the spyglass where caps lock normally resides) and type Caret. Press Enter to open.
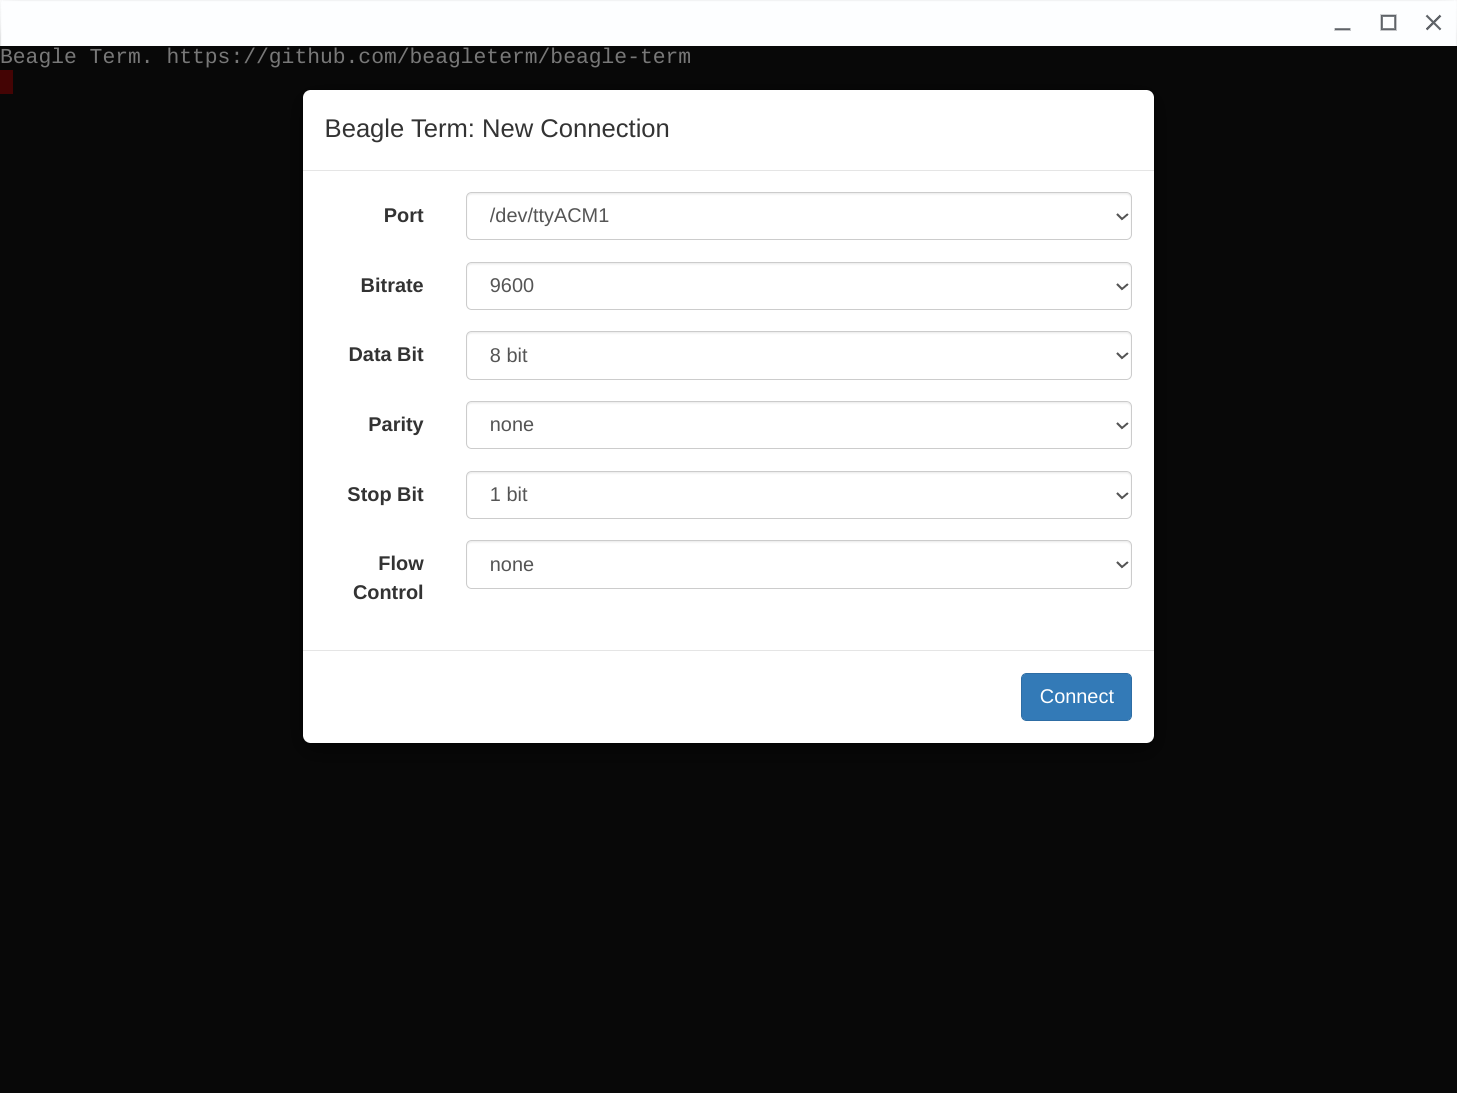
2. Set your Port to your Raspberry Pi Pico. This is a little bit of a trial and error approach as we do not know the name of the port. In our tests we saw /dev/ttyACM1 for our Raspberry Pi Pico.
3. Set the Bitrate to 9600. This is the speed at which our Chrome OS device and Raspberry Pi Pico will communicate.
4. Set the Data Bit to 8 bit, Parity to none, Stop Bit to 1 bit, and finally set Flow Control to none.
5. Click Connect to start the serial connection to your Raspberry Pi Pico. Hello World should be scrolling down the screen. If not, press CTRL+C to stop the code running, and then press CTRL+D to restart the code.
Building a Temperature Sensor Project
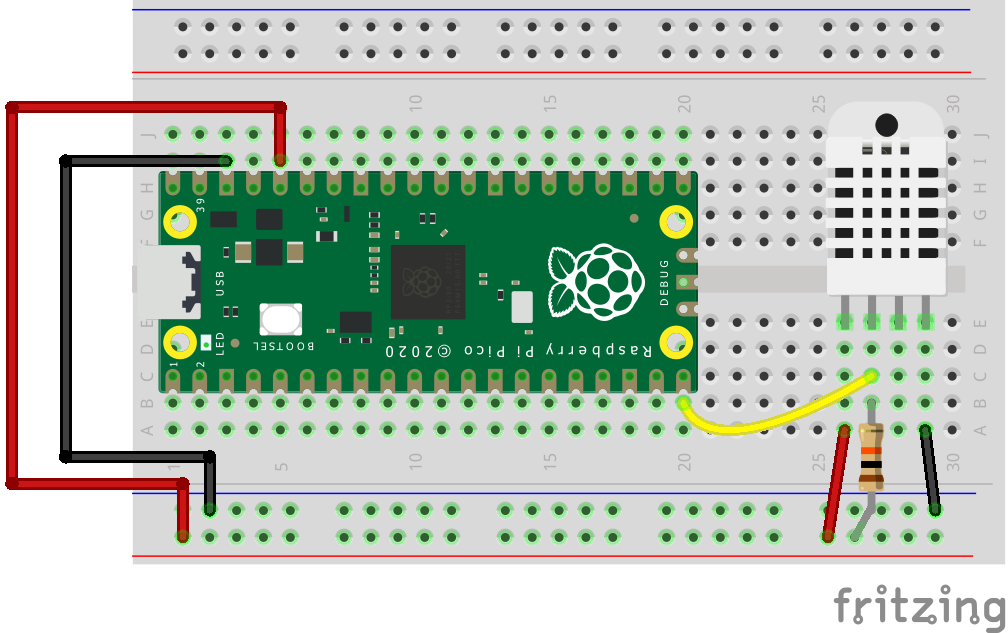
The DHT22 has four pins, but we shall only need to use three of them. The sensor is relatively easy to work with. It needs 3V to power it, and the data output pin is pulled high using a 10K Ohm resistor. By pulling the pin high we ensure that the data from the sensor is read, as the pin is always “on”.
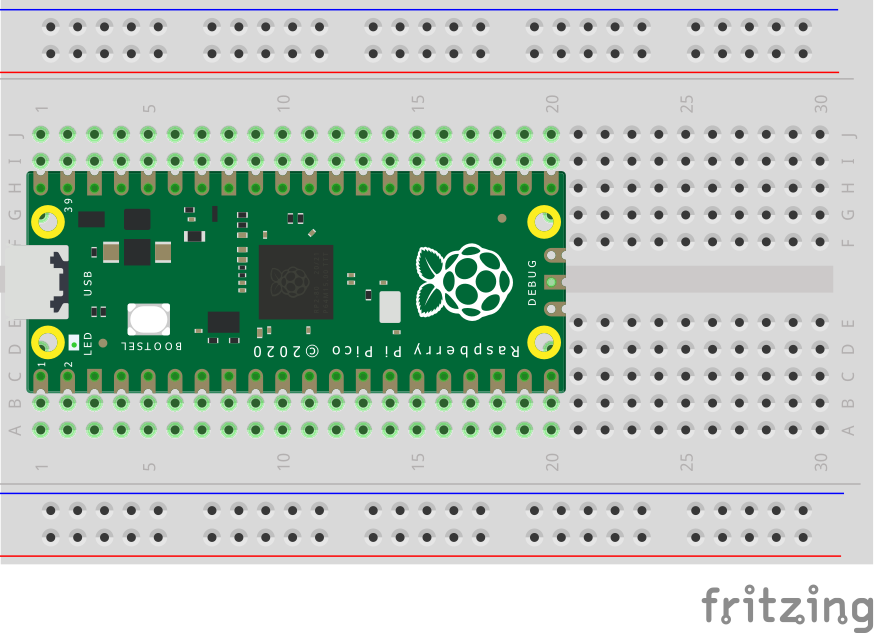
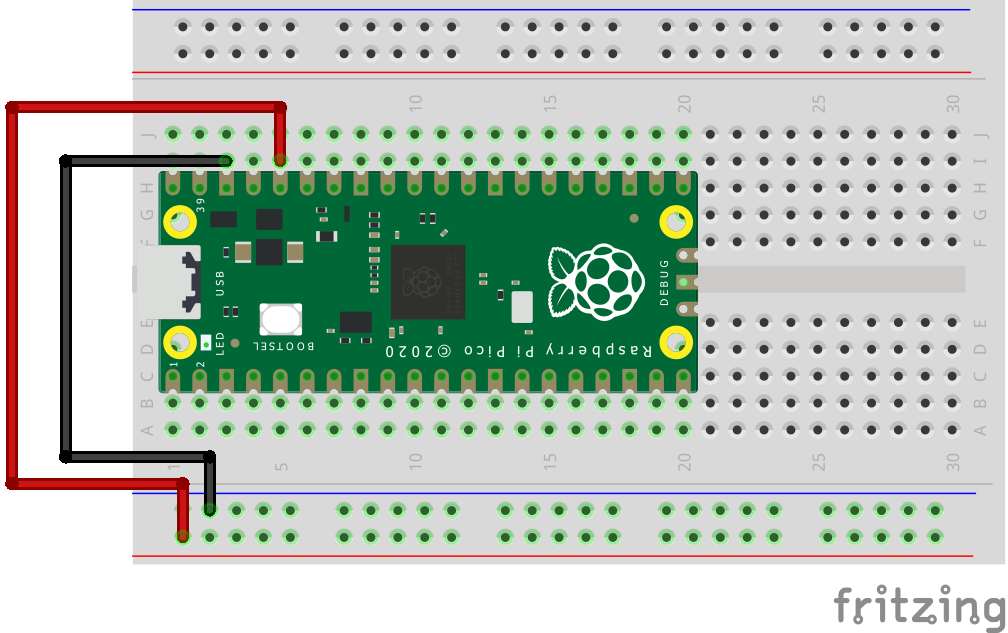
1. Insert your Raspberry Pi Pico into the breadboard so that the microUSB port is on the left side of the board.
2. Run a jumper wire from the 3V3 out (red wire) to the + rail of the breadboard. This provides a connection to the 3.3V pin to the entire + rail. Run another wire from the GND pin to the - rail.
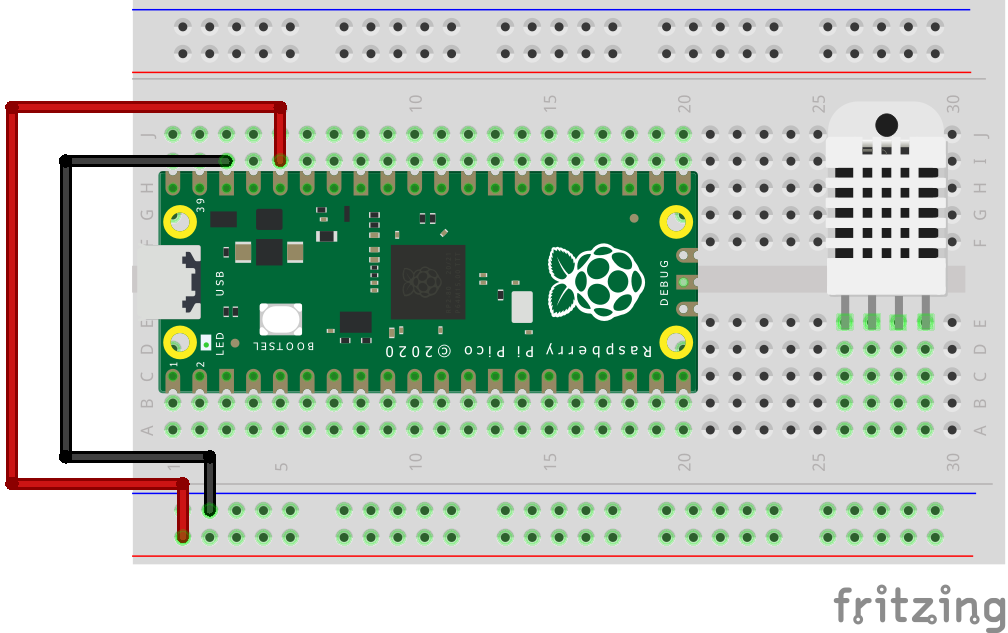
3. Insert the DHT22 into the breadboard.
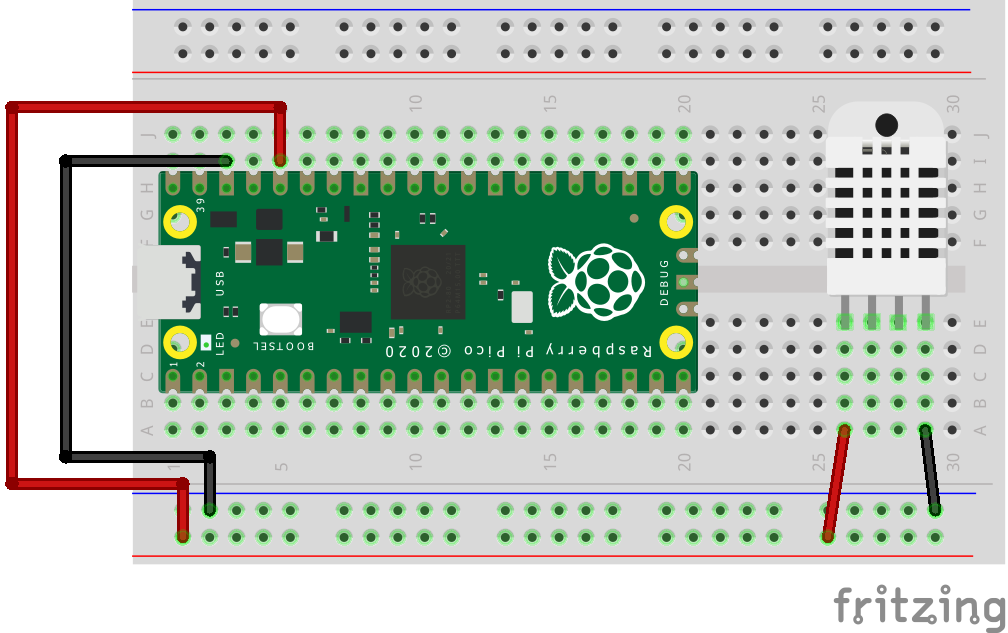
4. Connect 3.3V (red wire) and GND (black wire) to pins 1 and 4 of the DHT22. The pin numbers go from left to right, as we face the plastic “frame” of the sensor.
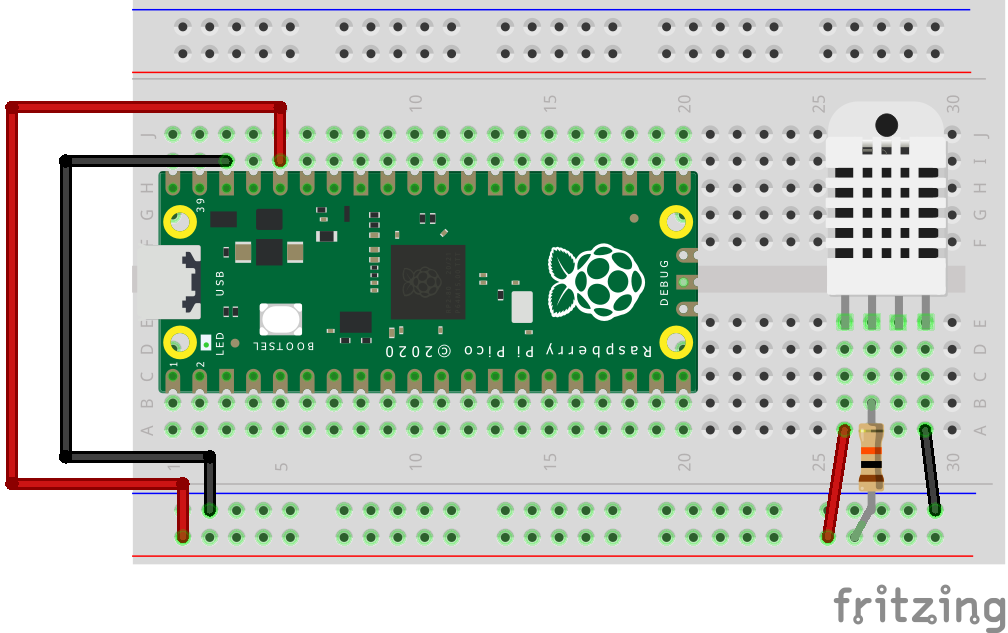
5. Connect the 3.3V rail to pin 2 of the DHT22 using a 10K Ohm resistor. This is our pull-up resistor for the data pin.
6. Connect the data pin (pin 2) of the DHT22 to GP15 of the Raspberry Pi Pico. Your breadboard should look like this.
Coding the Project
1. Download the CircuitPython Libraries bundle for your version of CircuitPython.
2. Go to your Downloads folder. Right click and extract the ZIP file.
3. Open the adafruit-circuitpython-bundle folder and navigate to the lib sub-folder.
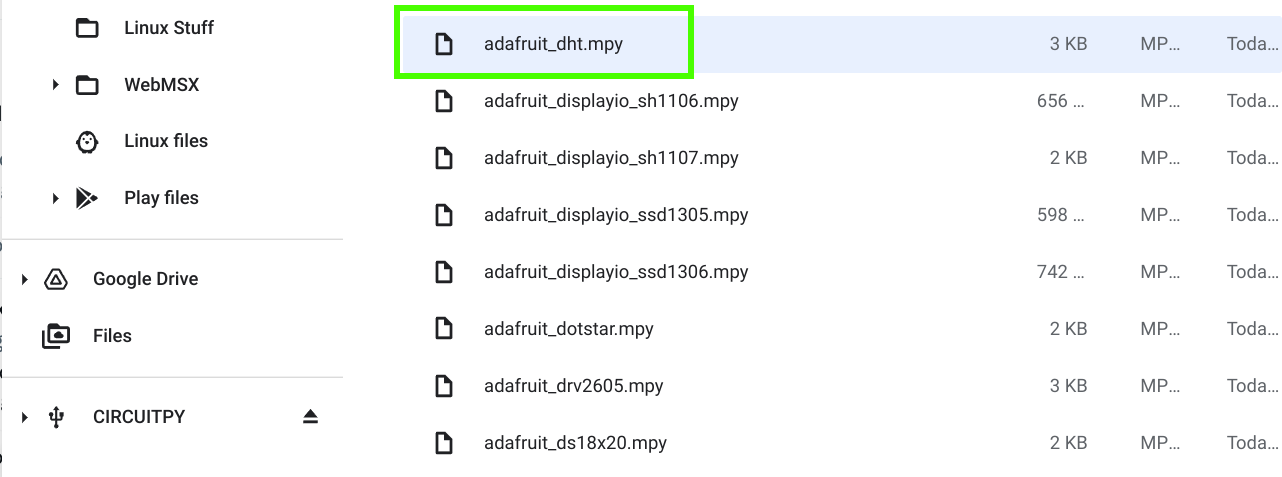
4. Copy adfafruit_dht.mpy to the /lib/ folder of your CIRCUITPY drive. This library enables our Raspberry Pi Pico to work with the DHT11 and DHT22 sensors.
5. Open code.py on your Raspberry Pi Pico using the Caret text editor. Delete the test code from the file.
6. Import three modules to enable our code to access the GPIO (board), use the temperature sensor(adafruit_dht) and to control the speed of the loop (time).
import board
import adafruit_dht
import time
7. Create an object, dht to connect the code to the DHT22 sensor connected to GP15 on the Raspberry Pi Pico.
dht = adafruit_dht.DHT22(board.GP15)8. Create a loop to run the code.
while True:9. Store the current temperature in a variable called temp. The temperature is saved in Celsius.
temp = dht.temperature10. Create an object, text and in there store a string which will print “The temperature is Celsius”. You’ll notice {:>8}, this is a string format which will include eight spaces in the center of the sentence. This gives us a clear space to place the temperature data.
text = "The temperature is {:>8} Celsius."11. Use the print function along with the text format to insert the temperature data into the gap.
print(text.format(temp))12. Finally add a one second pause. This enables the loop to slowly repeat.
time.sleep(1)13. Save the project to code.py on your CIRCUITPY drive.
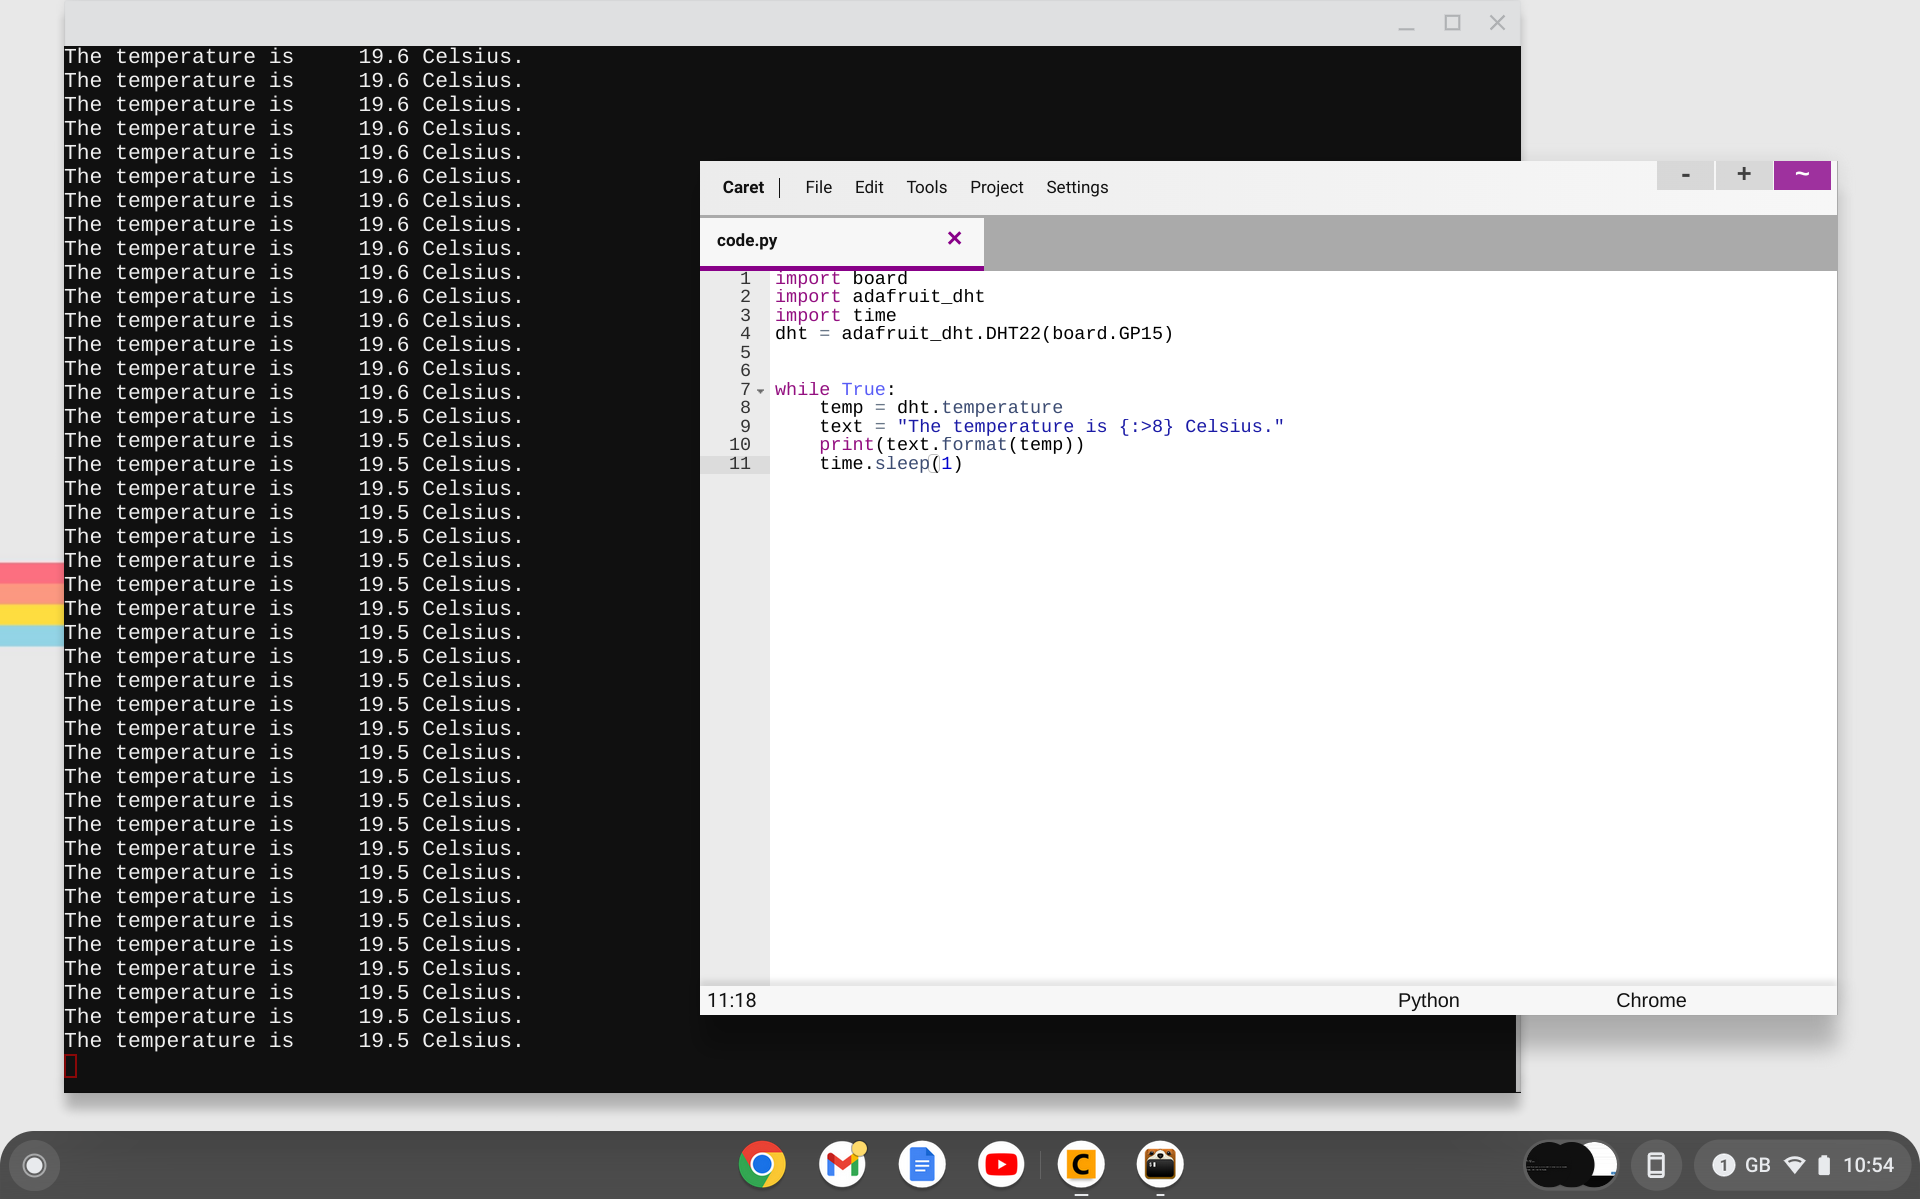
14. Open Beagle Term and connect to your Raspberry Pi Pico. You should see the temperature data scroll across the screen. If not, press CTRL + C, then CTRL+D to restart the code.
Complete Code Listing
import board
import adafruit_dht
import time
dht = adafruit_dht.DHT22(board.GP15)

while True:
    temp = dht.temperature
    text = "The temperature is {:>8} Celsius."
    print(text.format(temp))
    time.sleep(1)
Related Tutorials

Les Pounder is an associate editor at Tom's Hardware. He is a creative technologist and for seven years has created projects to educate and inspire minds both young and old. He has worked with the Raspberry Pi Foundation to write and deliver their teacher training program "Picademy".
-
maxible This article is super underrated, this allowed my kids to get started with microcontroller programming without spending a small fortune on a decent laptop they are inevitably going to break. Thanks!Reply
