How to Find Your MAC Address in macOS
Each networking adapter connected to your Mac has its own MAC address.
When you connect to your wireless router at home or public Wi-Fi, your device needs to be identifiable. The best way to do that is by giving each device that connects its own unique identity that can be trusted to join a network. If you're using a Mac, Windows PC, an Android smartphone or an iPhone, your device is assigned a unique media access control (MAC) address from the factory.
If your computer has a Wi-Fi adapter and a physical Ethernet port, each will have its own unique MAC address. These MAC addresses are permanent fixtures on a computer, smartphone, tablet, etc. So while I may rename my smartphone "Brandon's iPhone 14 Pro" or change its name to "Brandon Rulez," the Wi-Fi MAC address will stay the same, allowing me to easily connect to known networks. You may need to know your MAC address for several reasons, including in order to whitelist it on your router (if you want to create a list of allowed devices).
Below, we’ll show you how to find your MAC address on both macOS 13 Venture and macOS 12 Monterey. If you’re using Windows, see our article on how to find your MAC address in Windows.
How to Find Your MAC Address in macOS 13 Using System Settings
The System Settings app is where you can access the vast majority of configuration options available for your Mac. Accessing your MAC address is relatively straightforward when using the following steps.
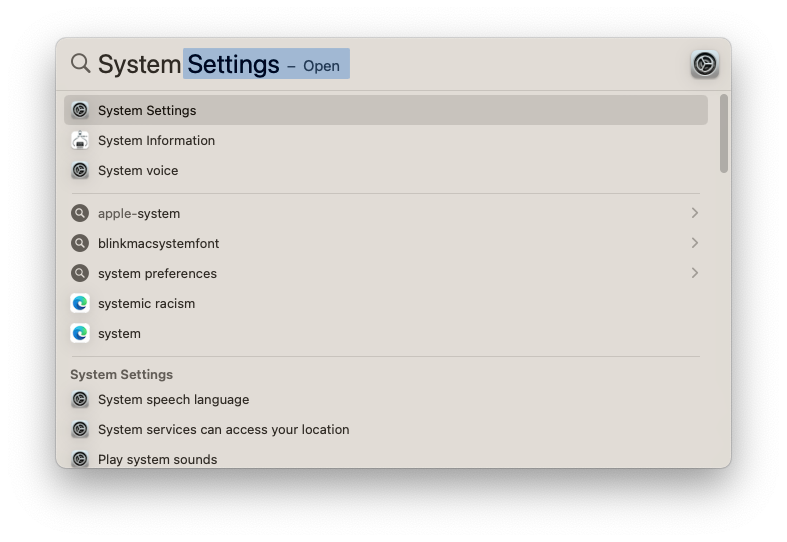
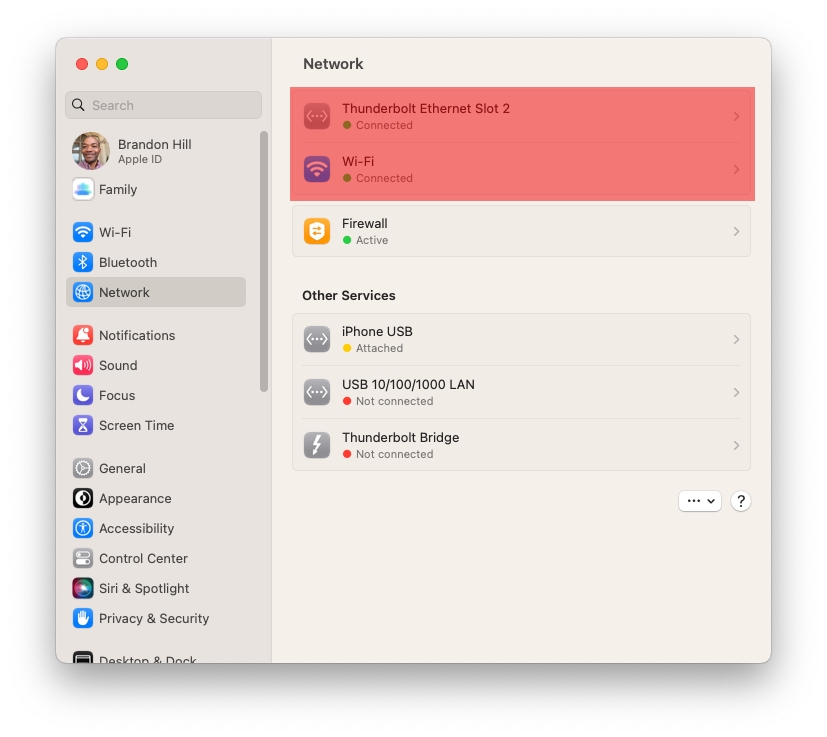
1. Navigate to the ‘Network’ tab in System Settings. You can get to System Settings by clicking on the gear icon in the Dock or by searching for ‘System Settings’ in Spotlight. Click on ‘Network’ in the sidebar.
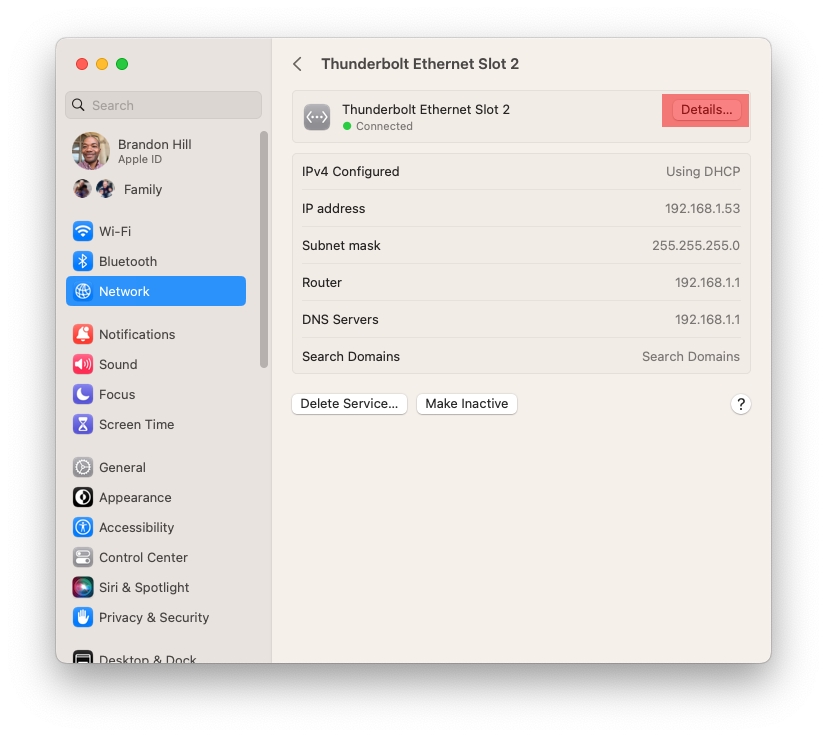
2. Click on ‘Wi-Fi’ or ‘Ethernet,’ depending on what MAC address you need and then click details. If you need to find your Wi-Fi adapter MAC address, click Wi-Fi, then Details.
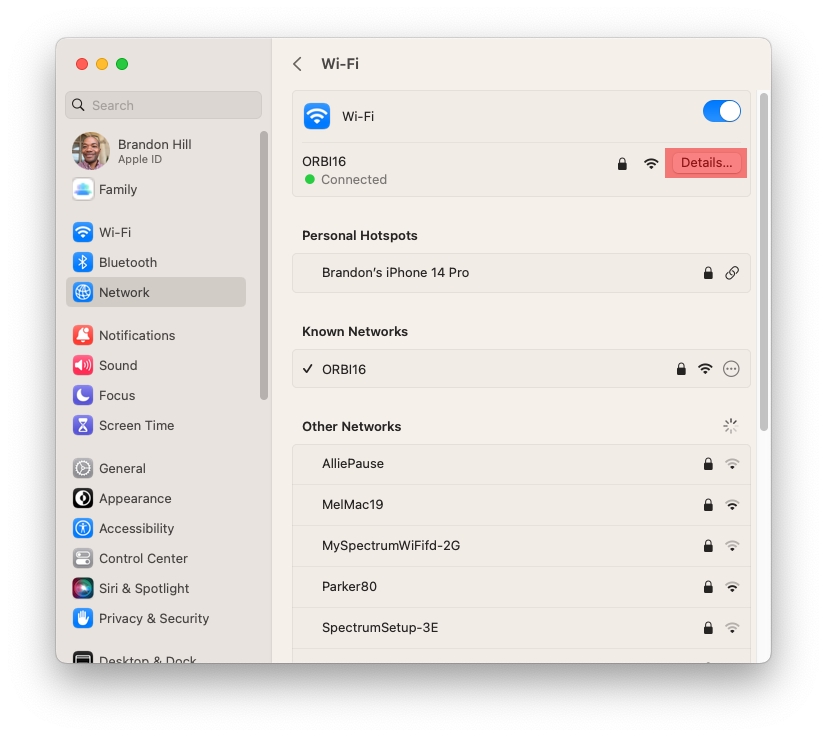
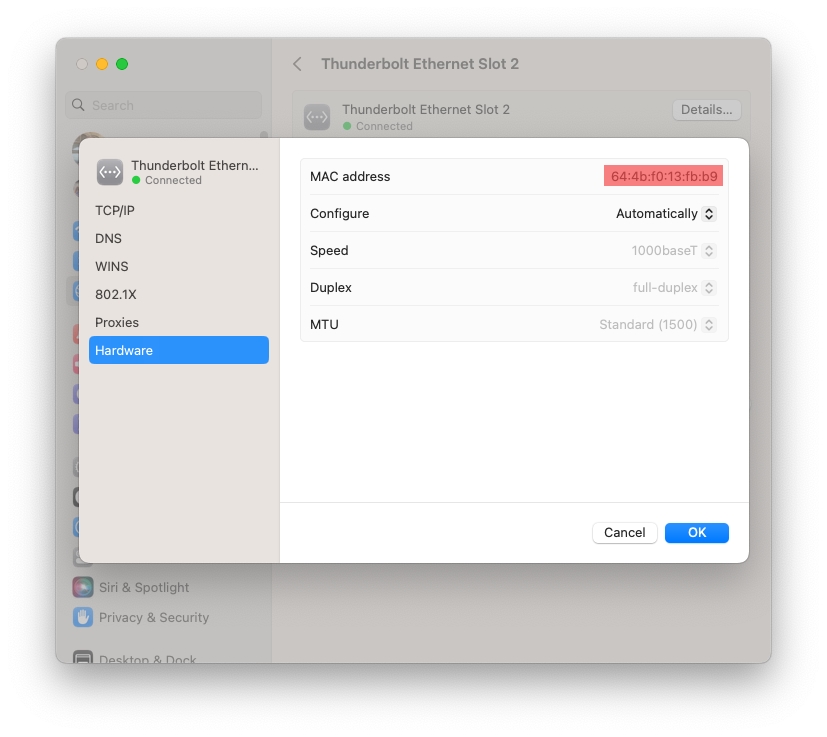
If you want to find your Ethernet MAC address, click Ethernet, then Details.
Get Tom's Hardware's best news and in-depth reviews, straight to your inbox.
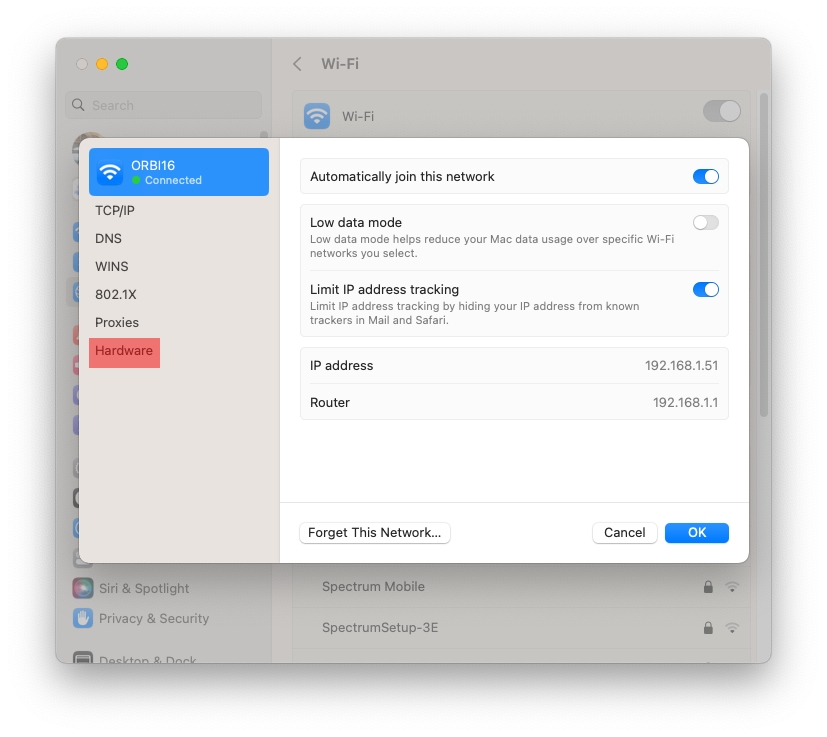
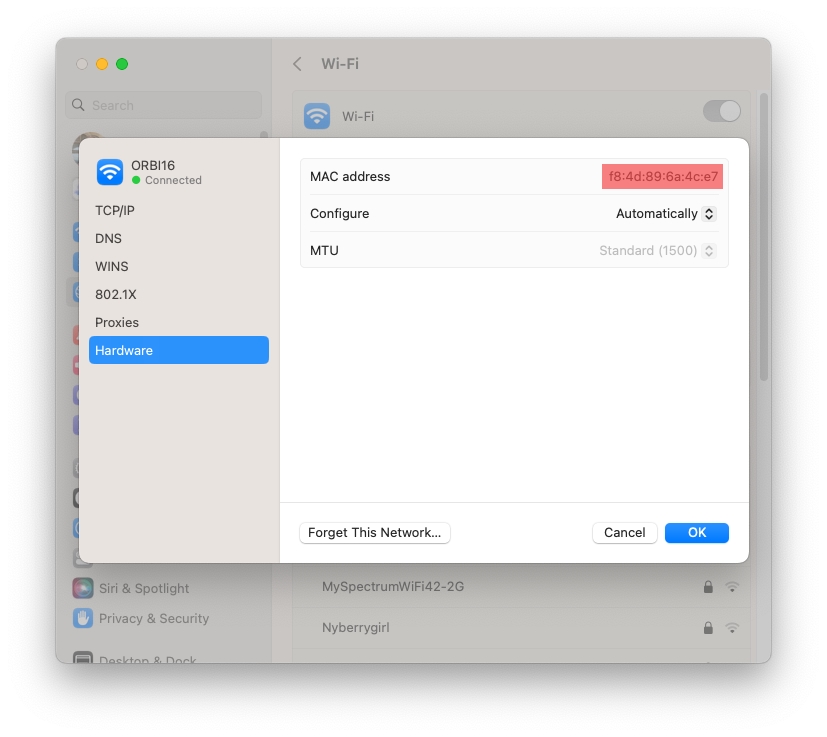
3. Now Click Hardware from the sidebar. Clicking the Hardware tab will bring up the final menu that will reveal your MAC address.
4. Look for ‘MAC address’ at the top of the page. If you need to use the MAC address for whatever reason, you can highlight it and copy it directly from this window to paste it wherever you want.
How to Find Your MAC Address in macOS 12 Using Network Preferences
The process in macOS 12 Monterey (and older versions of macOS) is a bit simpler.
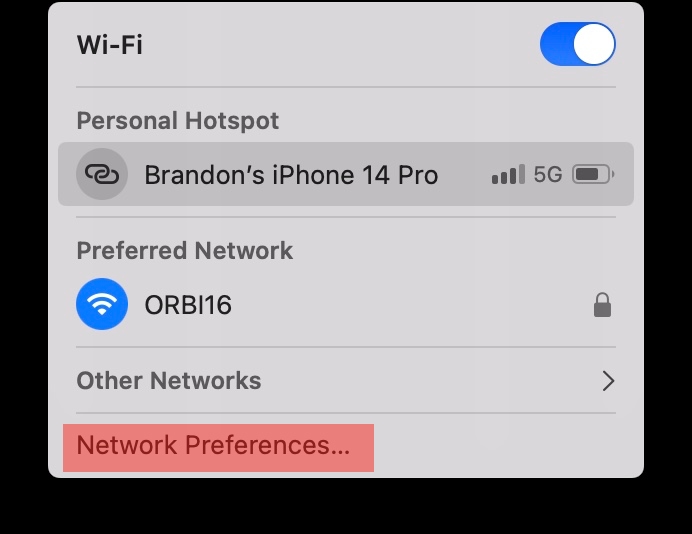
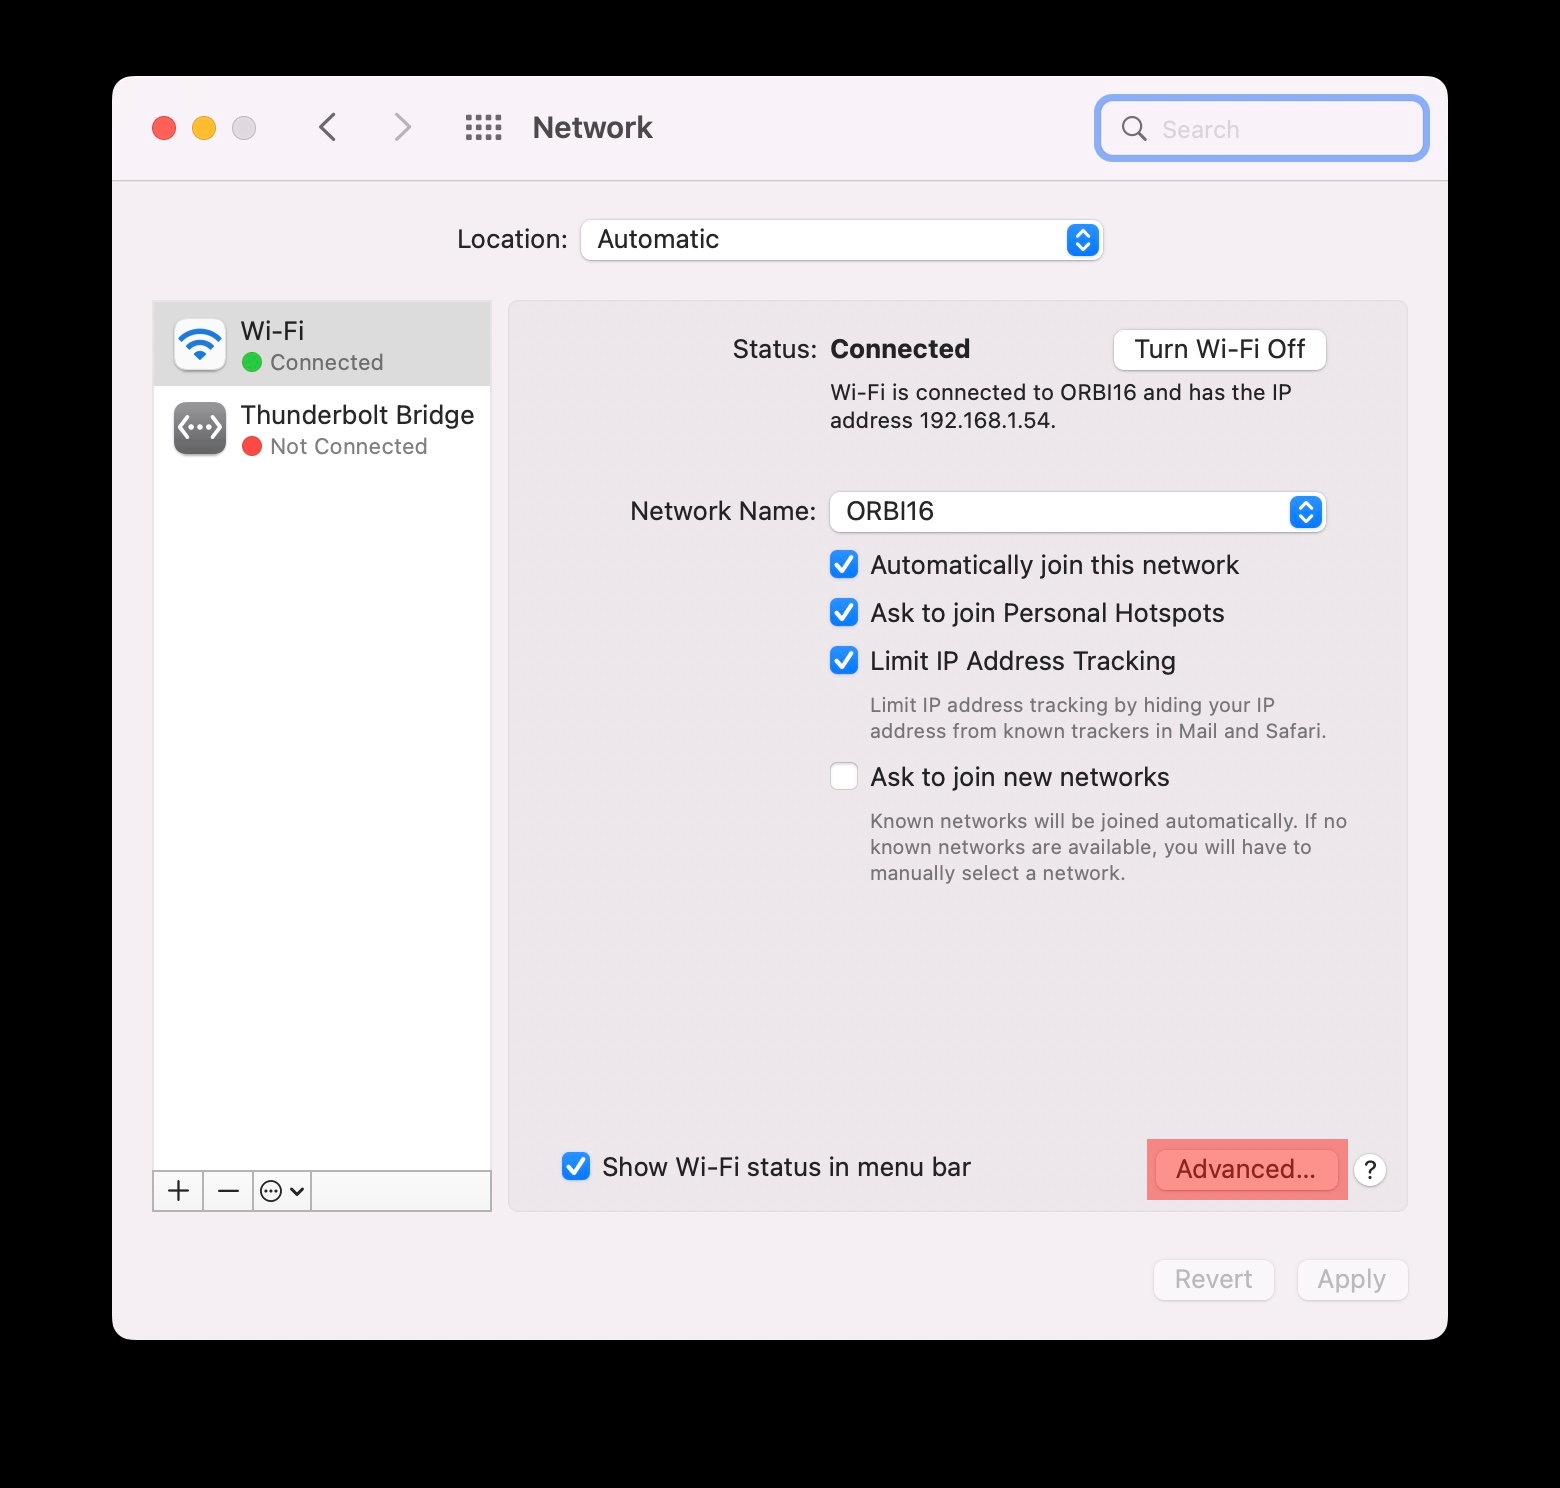
1. Click the Wi-Fi icon in the top Menu Bar. When you click the Wi-Fi icon, it will bring up a list of available wireless networks. At the bottom of the popup is a setting for Network Preferences, which you need to click.
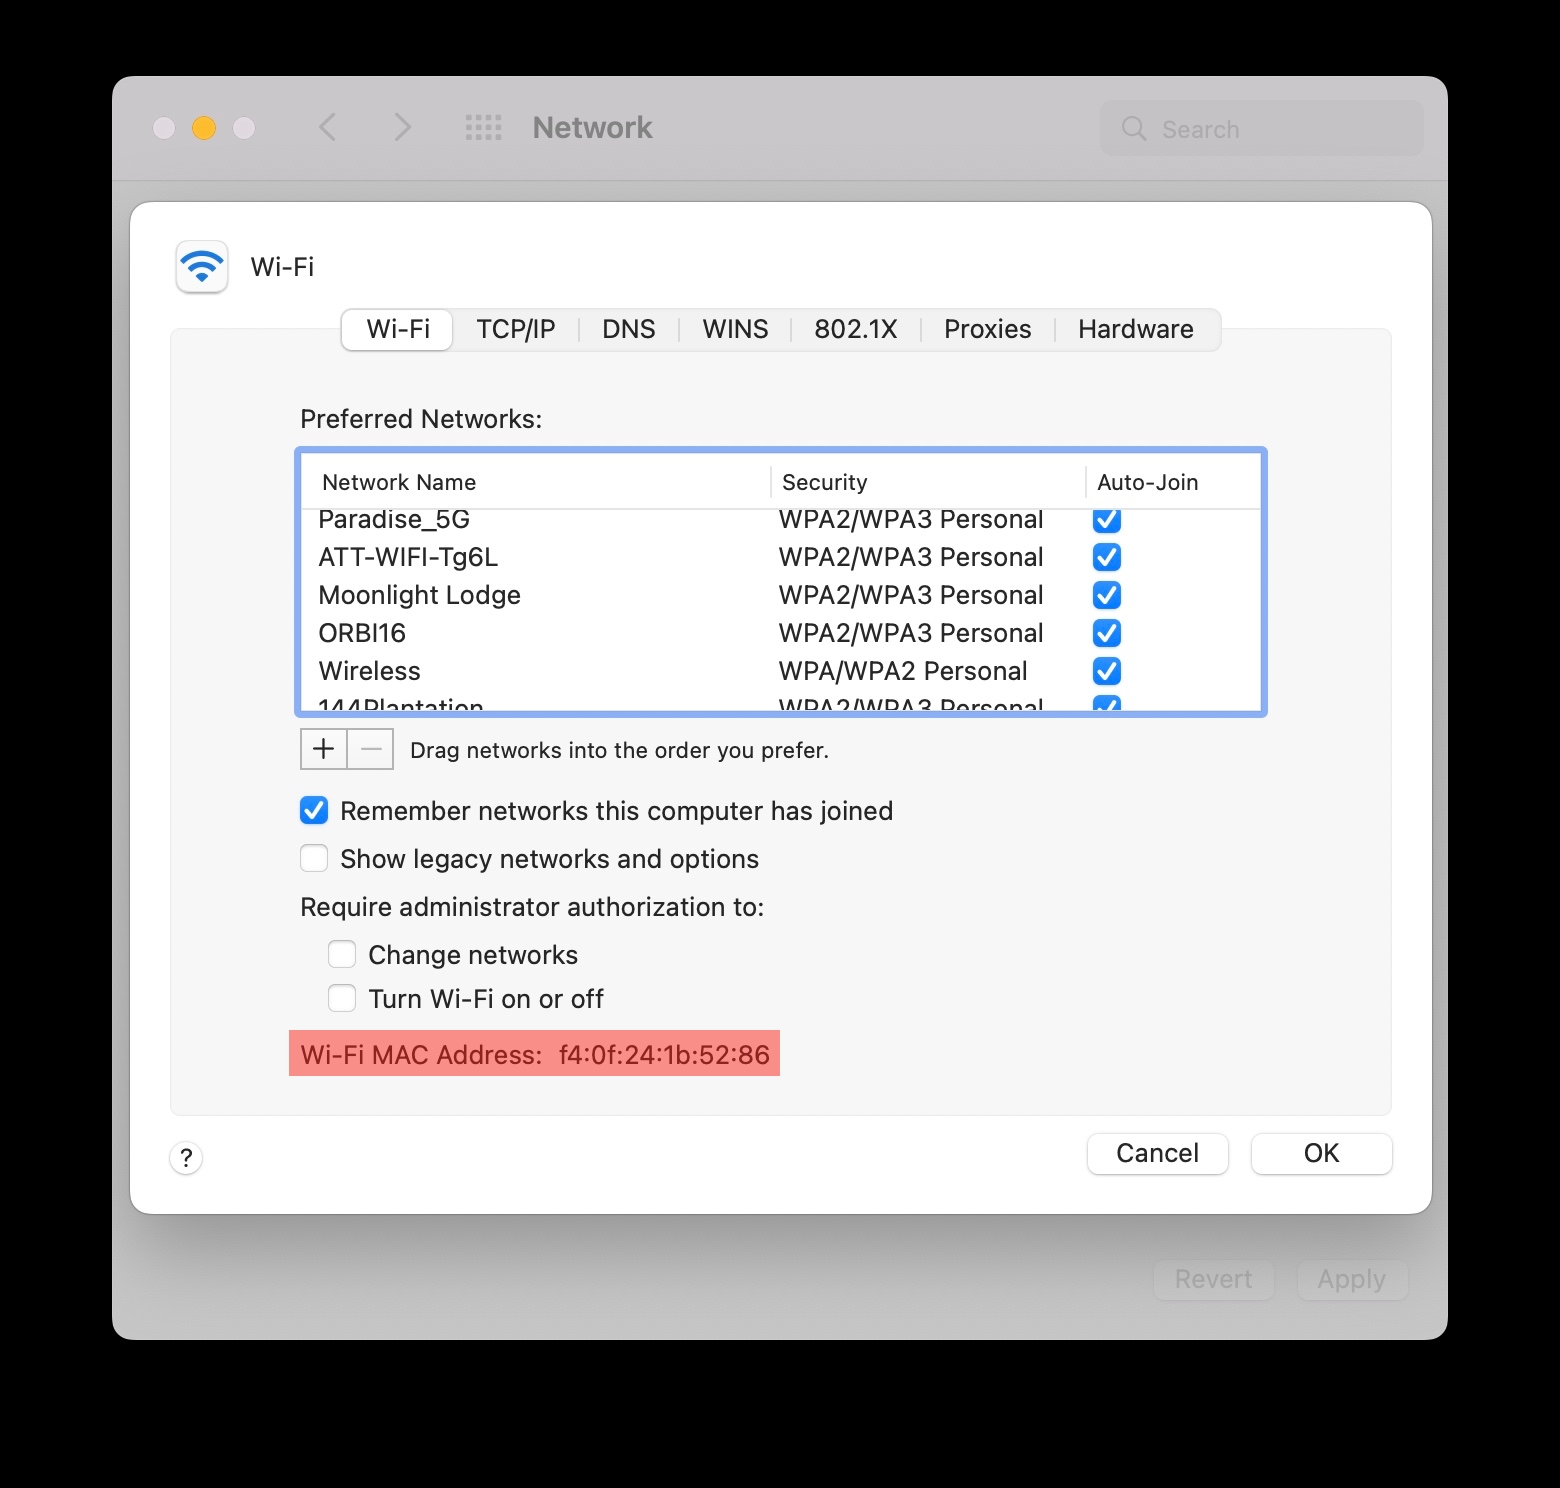
2. Select Wi-Fi (or Ethernet): You will need to select which network adapter you wish to view; in this case, we selected the Wi-Fi adapter on a MacBook Pro. Then click on Advanced.
3. Find the section labeled Wi-Fi MAC Address: You'll find your MAC address displayed at the very bottom of the window.
How to Find Your MAC Address in macOS 13 or macOS 12 Using Terminal
An alternative method for finding your MAC address in macOS is to use the Terminal app. This might be preferable if you don’t want to mouse and click through the macOS user interface.
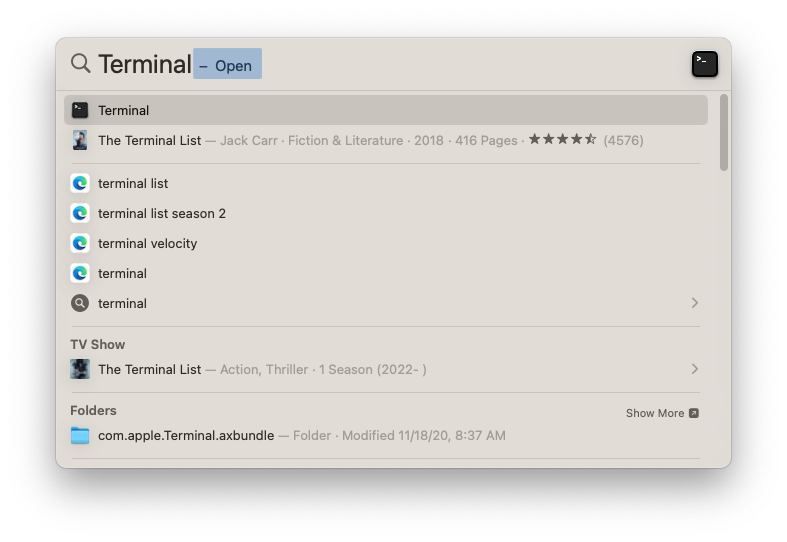
1. Open the Terminal app. The best way to do this is to type ‘Terminal’ in Spotlight.
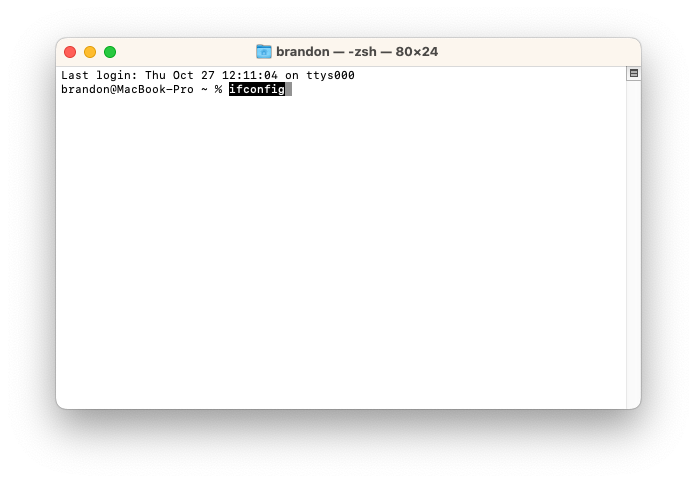
2. Enter the following ifconfig into Terminal and then hit enter.
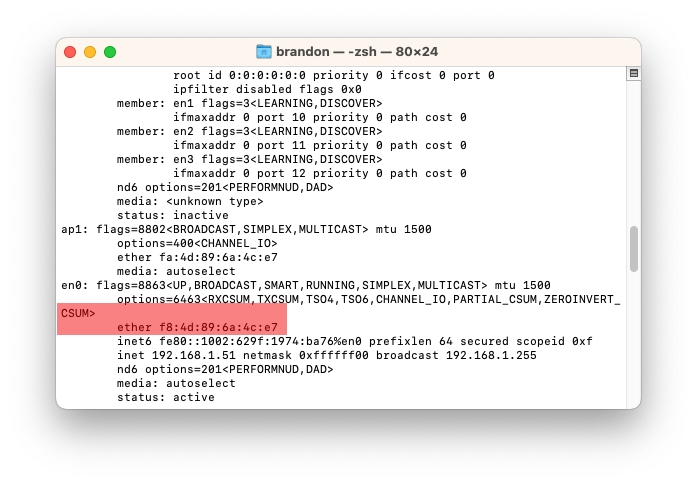
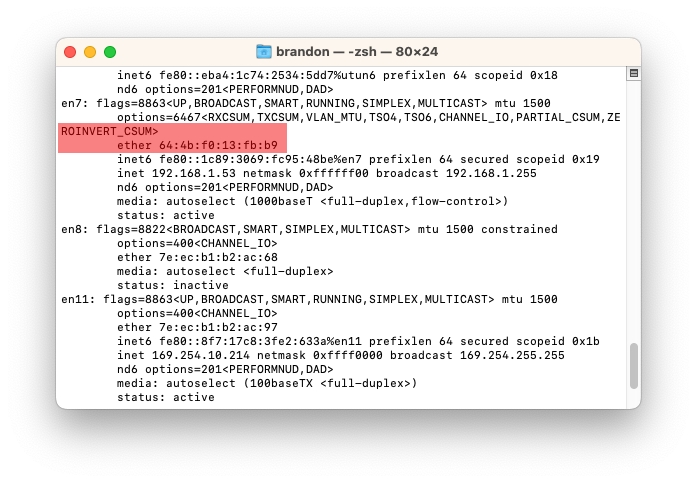
3. Look for CSUM> or ROINVERT_SUM>: You'll need to scroll down quite a bit to find the pertinent information regarding your MAC address. In my case, the Wi-Fi MAC address is found under CSUM>. The Ethernet MAC address is found under ROINVERT_CSUM>

Brandon Hill is a senior editor at Tom's Hardware. He has written about PC and Mac tech since the late 1990s with bylines at AnandTech, DailyTech, and Hot Hardware. When he is not consuming copious amounts of tech news, he can be found enjoying the NC mountains or the beach with his wife and two sons.
