How to Find Your MAC Address in Windows 11
Every device has a unique address, if you know where to find it.
Identifying devices on a network can be difficult. Most systems allow their owners to name them, which is why you’ll often find “John Doe’s PC” or “Jane Doe’s iPhone” on a given Wi-Fi network, but those names can’t be trusted because they’re easy to modify. A better way to make sure you’ve correctly identified a given device is to check its media access control (MAC) address. You may need this information for several reasons, including creating a whitelist of devices that are allowed access.
Manufacturers assign MAC addresses to different network adapters such as Wi-Fi radios and Ethernet controllers while they’re being made so any device with connectivity has at least one.
And unlike the names people give their devices, these identifiers are supposed to be permanent. (There are ways to spoof MAC addresses, but it’s more difficult than renaming “John Doe’s PC” to “JD’s Laptop.”) There’s just one problem: It can also be harder to find your device’s MAC address.
Luckily there are several ways to find a given system’s MAC address(es) in Windows 11 or 10: The built-in Settings app, Control Panel and PowerShell all make finding that unique identifier a little simpler.
How to Find a MAC Address in Windows 11 Settings
Settings is Windows 11’s and 10’s one-stop shop for the most commonly accessed, well, settings. The options presented here aren’t comprehensive, but the app can tell us our MAC address.
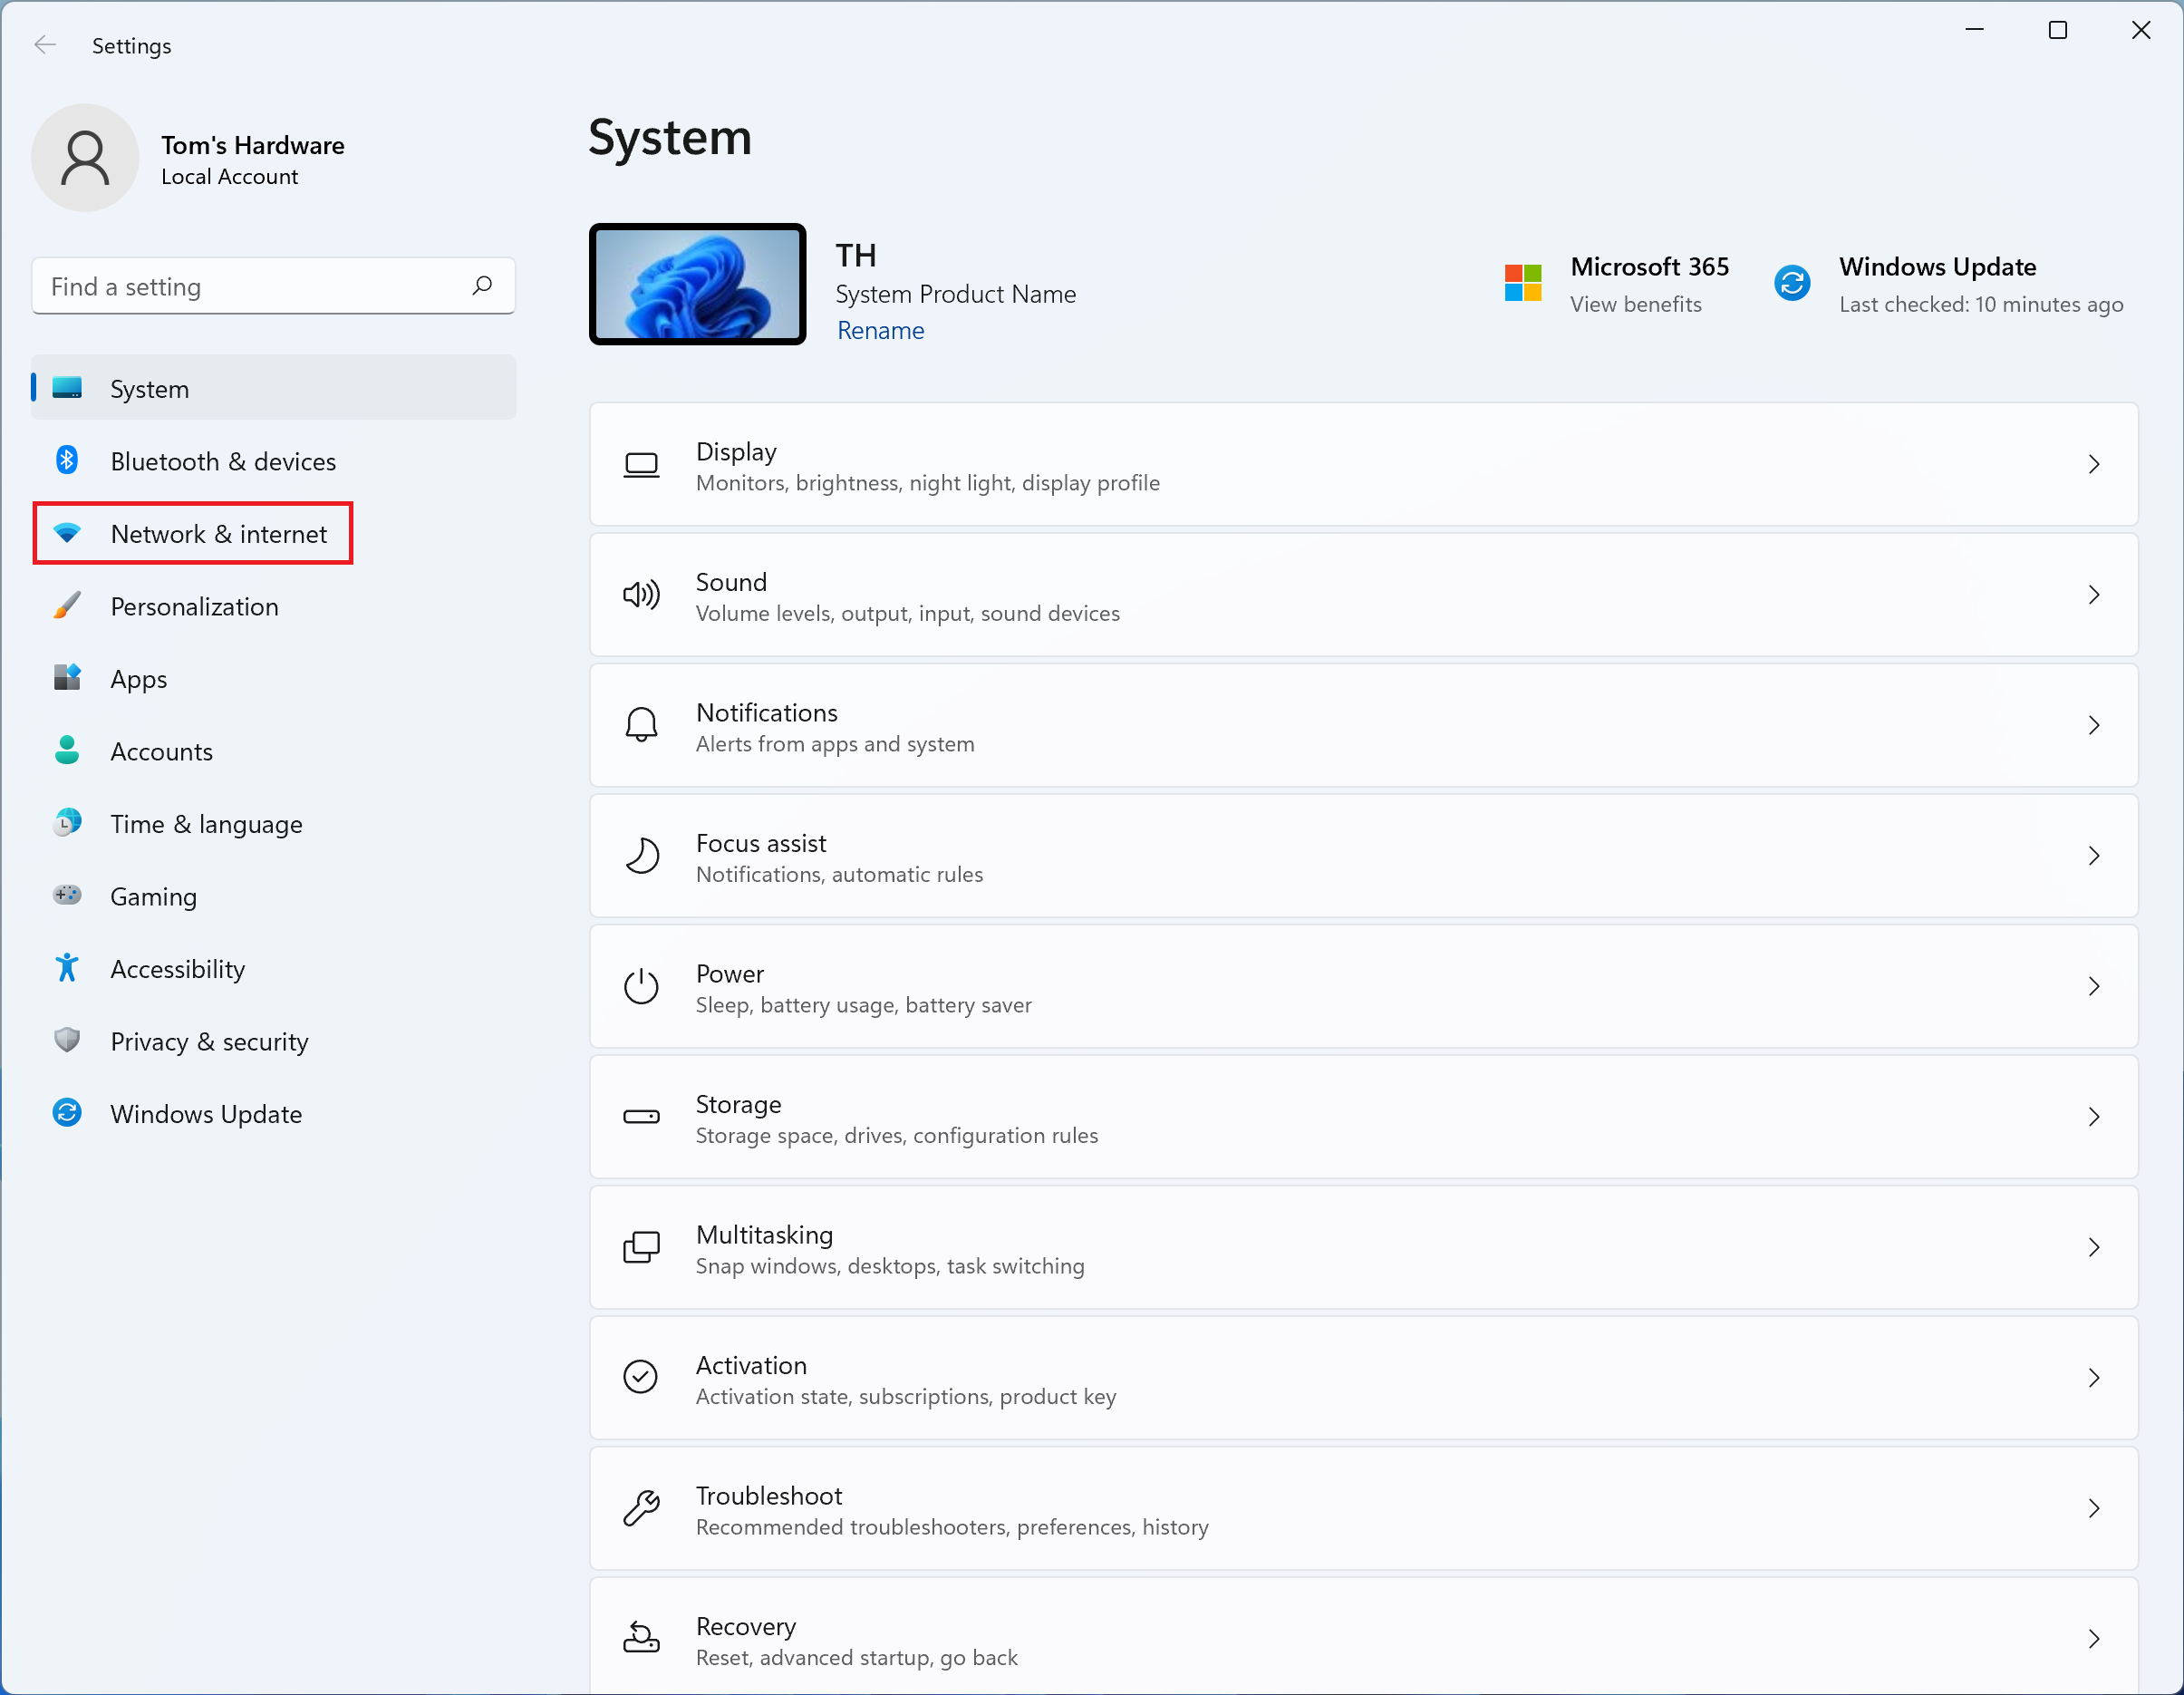
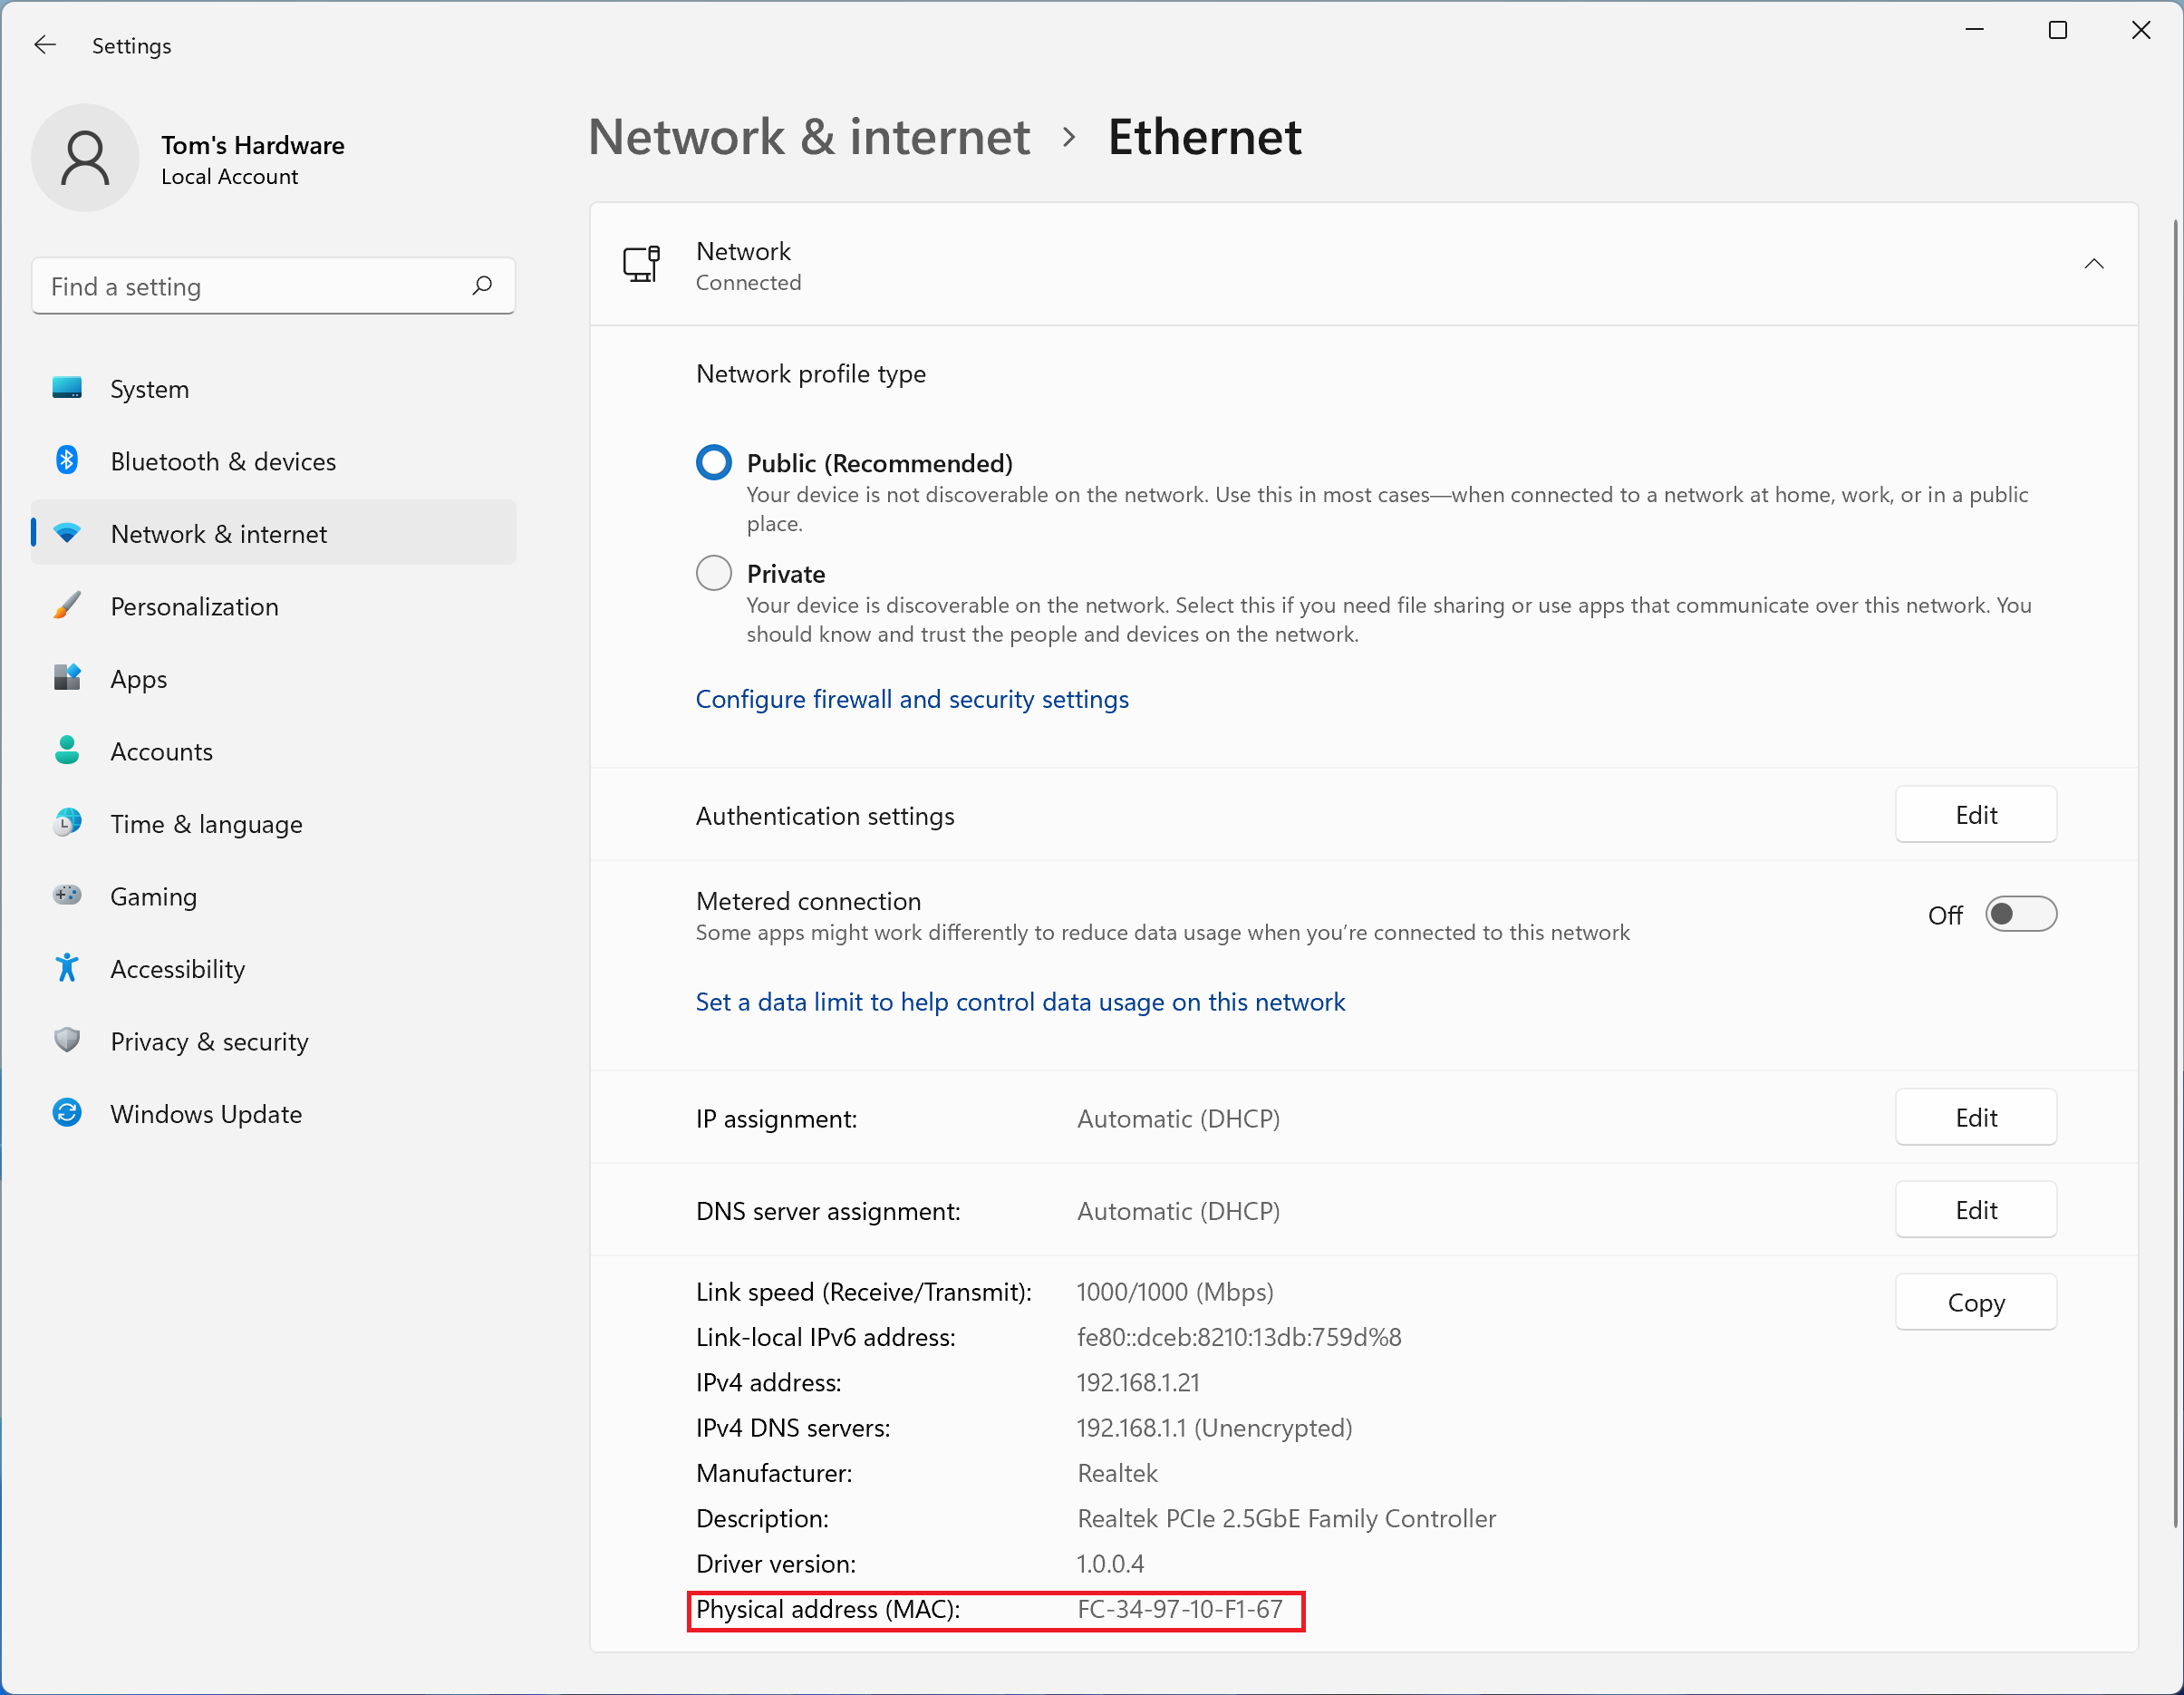
1. Navigate to the ‘Network & internet’ page in Settings. The fastest way to do this is to right-click the Start menu and select Network Settings from the pop-up menu. You can also search for Settings, open the app, then click “Network & internet” in the sidebar.
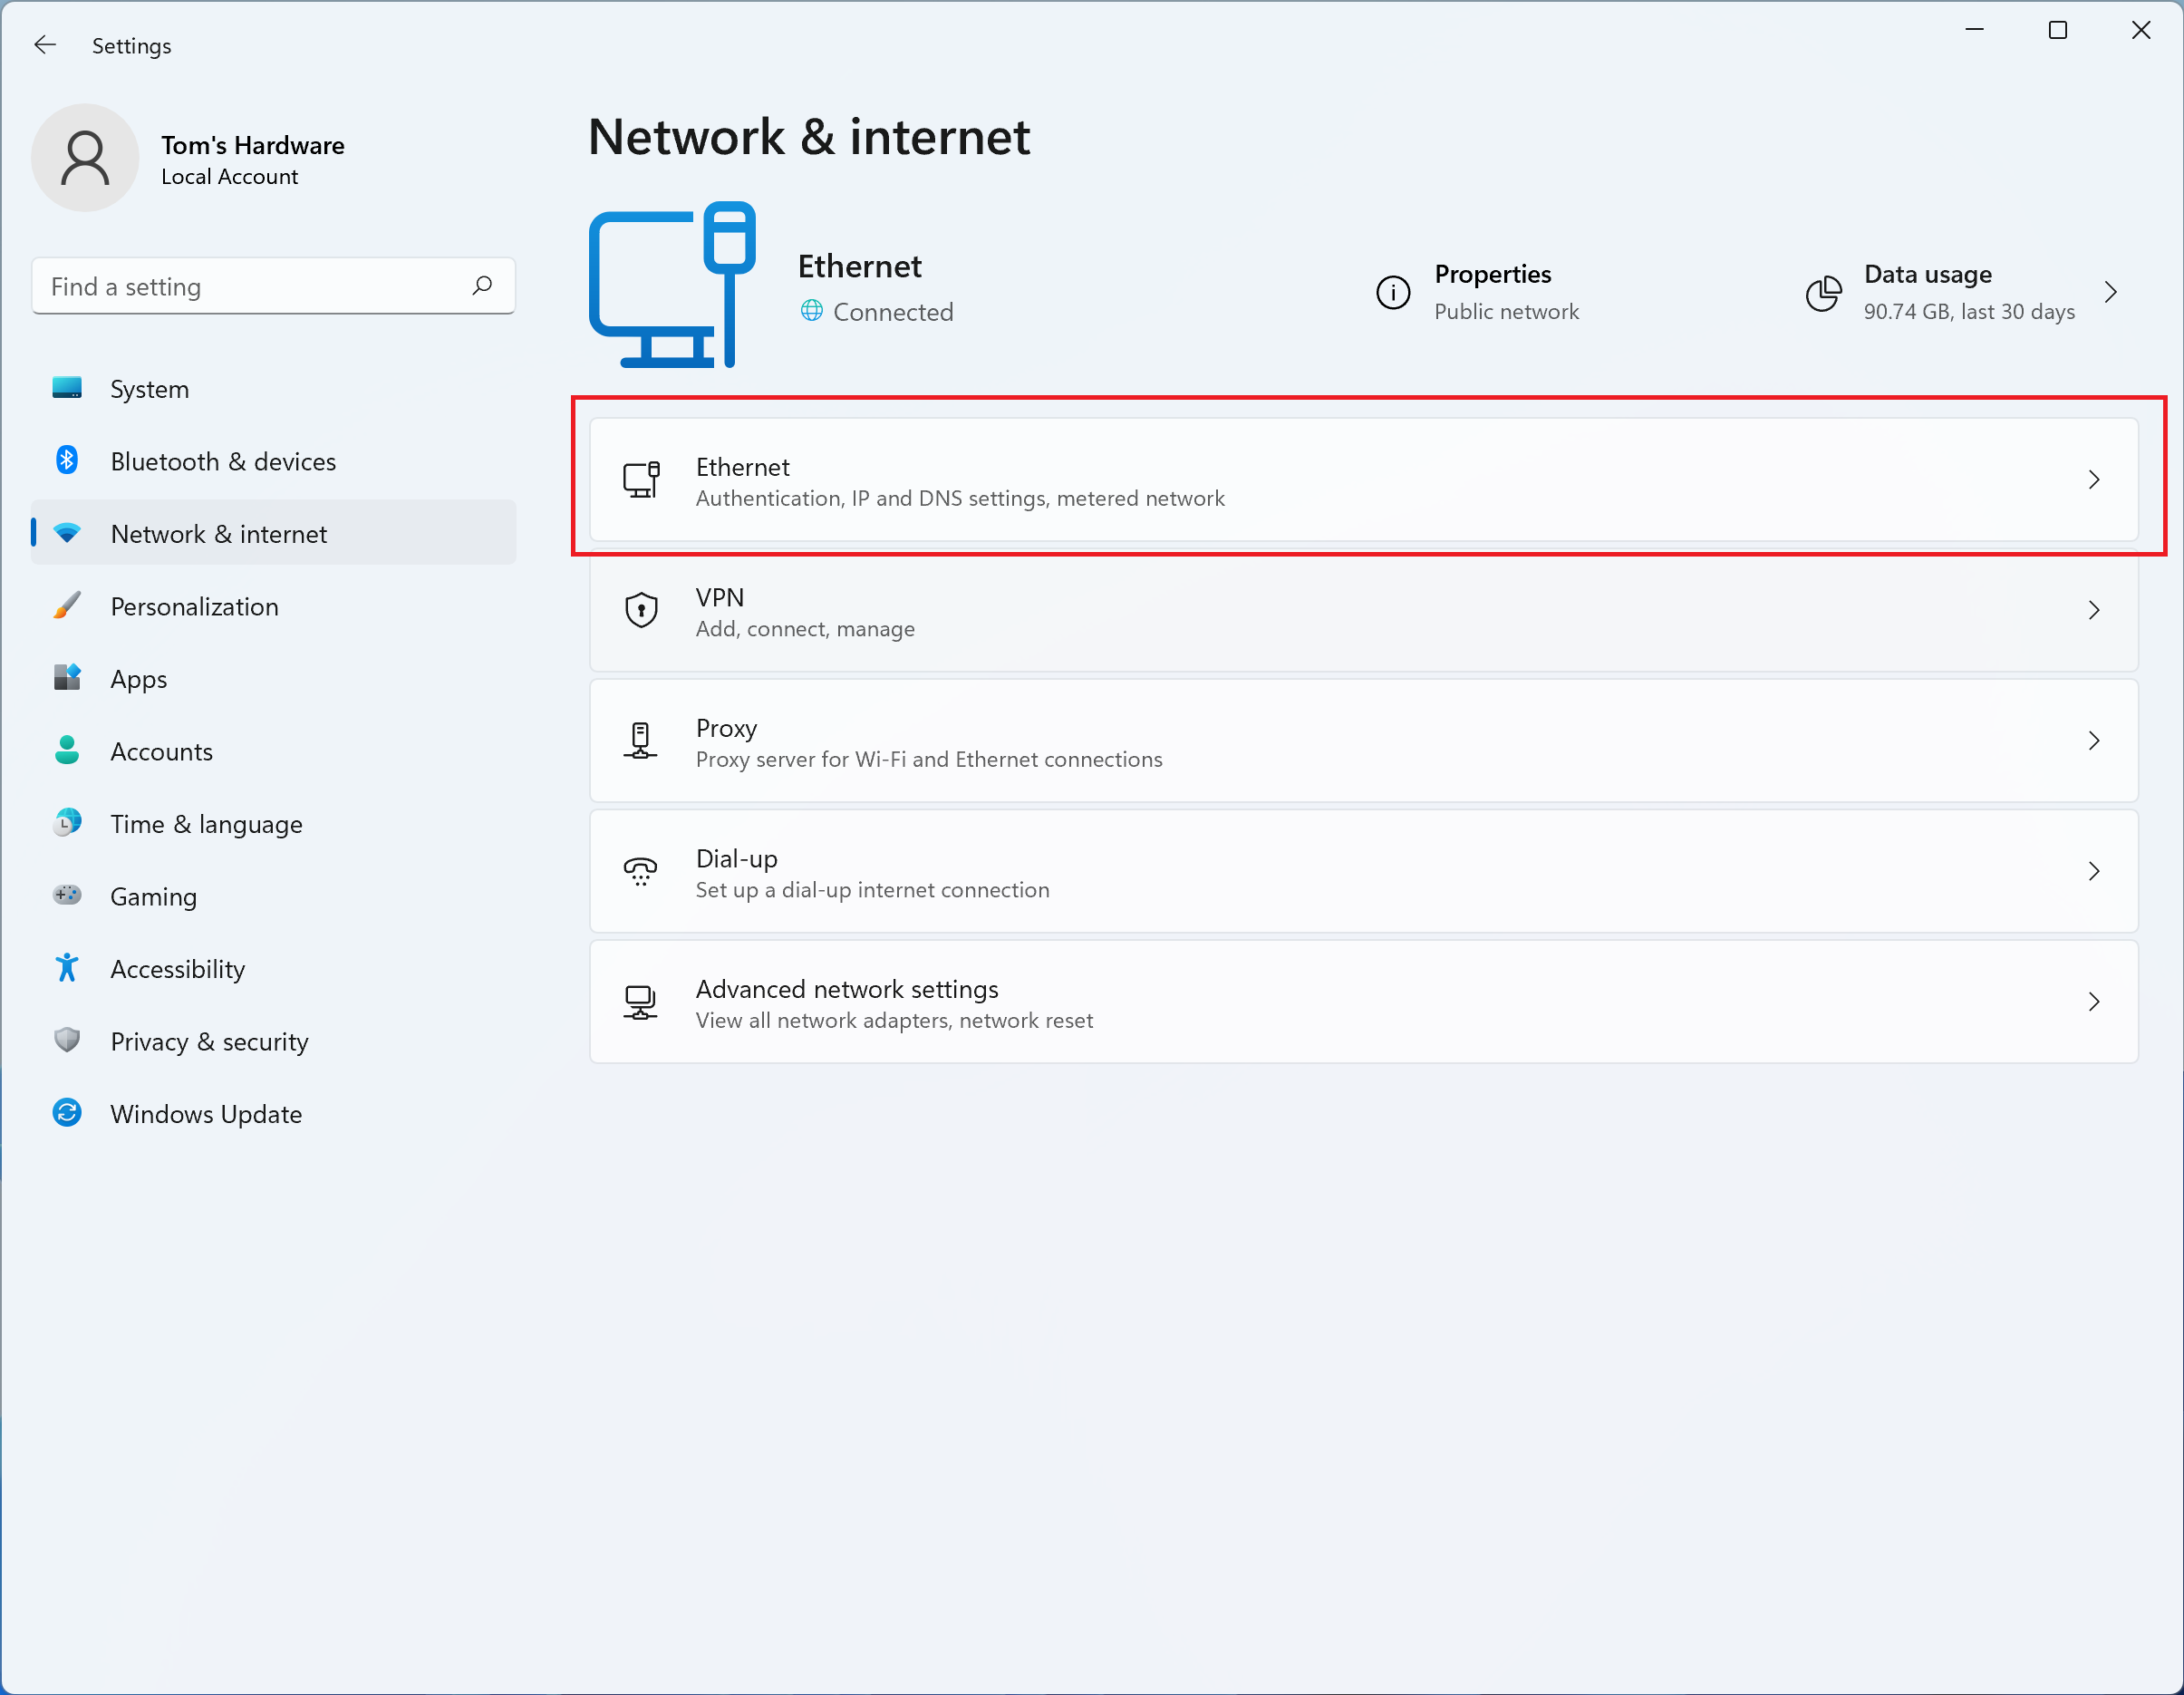
2. Open the Ethernet sub-menu if you’re looking for the Ethernet MAC address and go to step 3.
Get Tom's Hardware's best news and in-depth reviews, straight to your inbox.
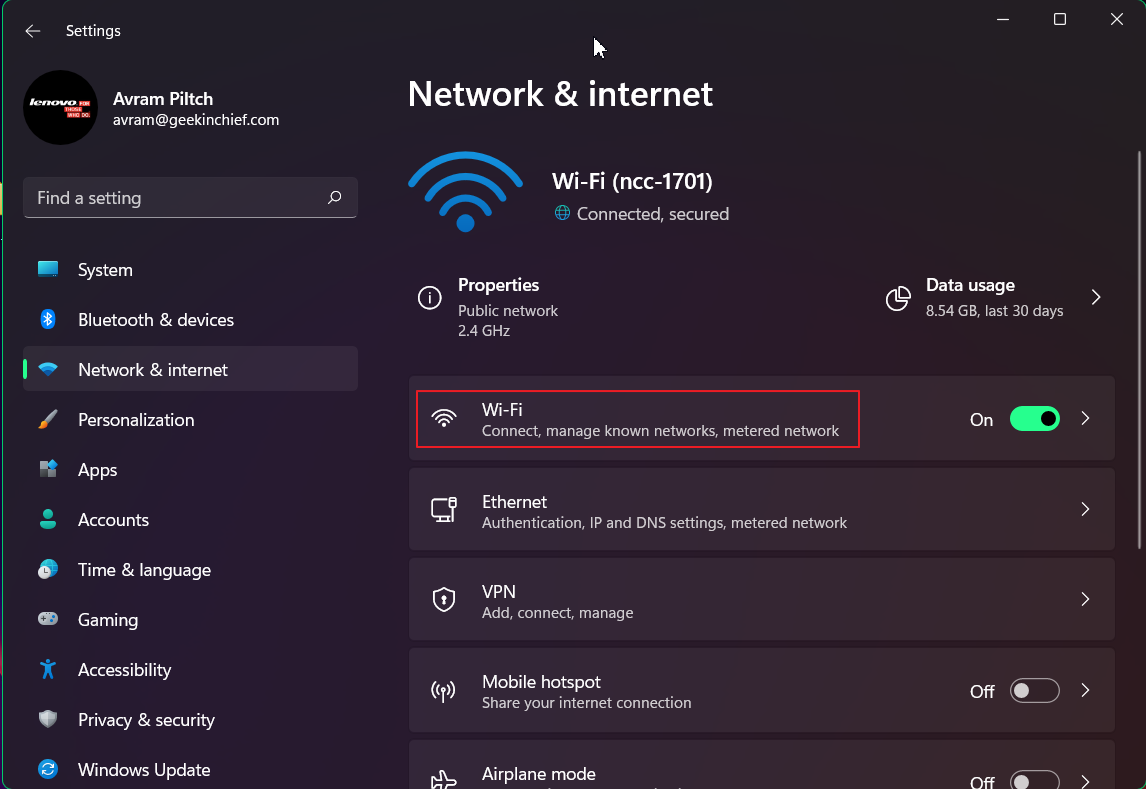
If you’re looking for the Wi-Fi adapter MAC address, click Wi-Fi
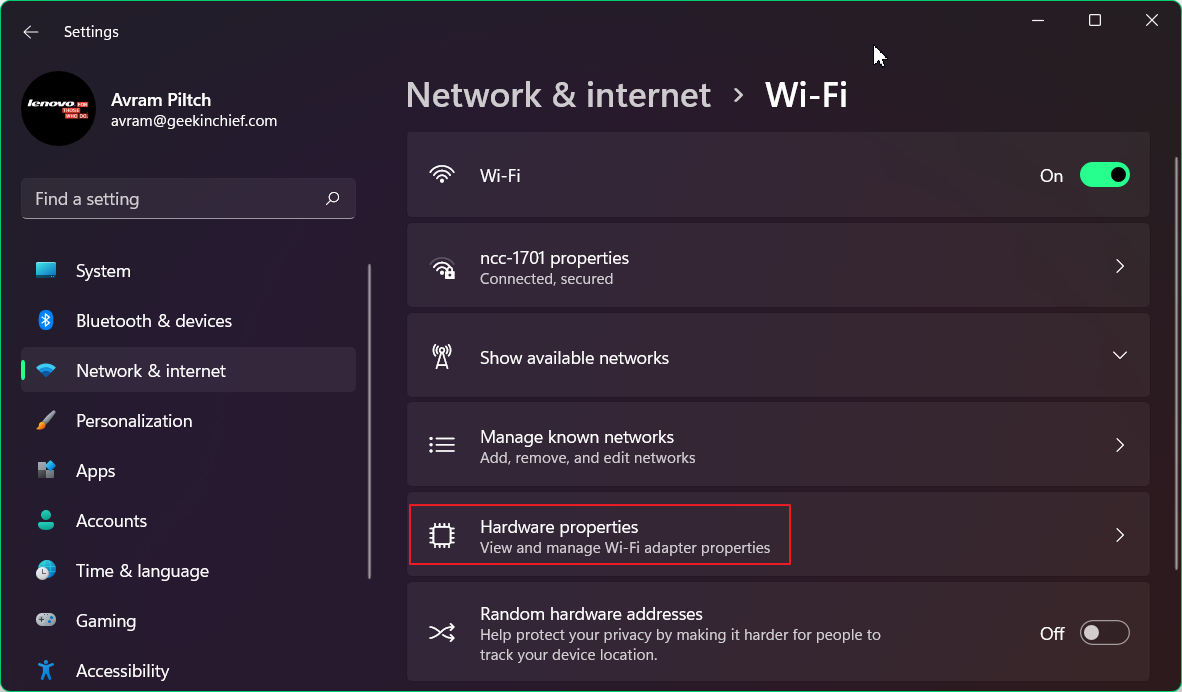
Then select Hardware properties.
3. Look for ‘Physical address (MAC)’ at the bottom of the page. Sometimes this setting is on-screen as soon as the Ethernet or Wi-Fi / Hardware properties sub-menu is opened, but if it’s not, scroll down. The MAC address will be listed there as six alphanumeric pairs separated by hyphens.
Finding a Windows 11 device’s MAC address in Control Panel
Windows 11 and 10 before it don’t necessarily make it easy to find the legacy Control Panel, but the Settings app’s predecessor offers more options and could be more familiar to advanced users.
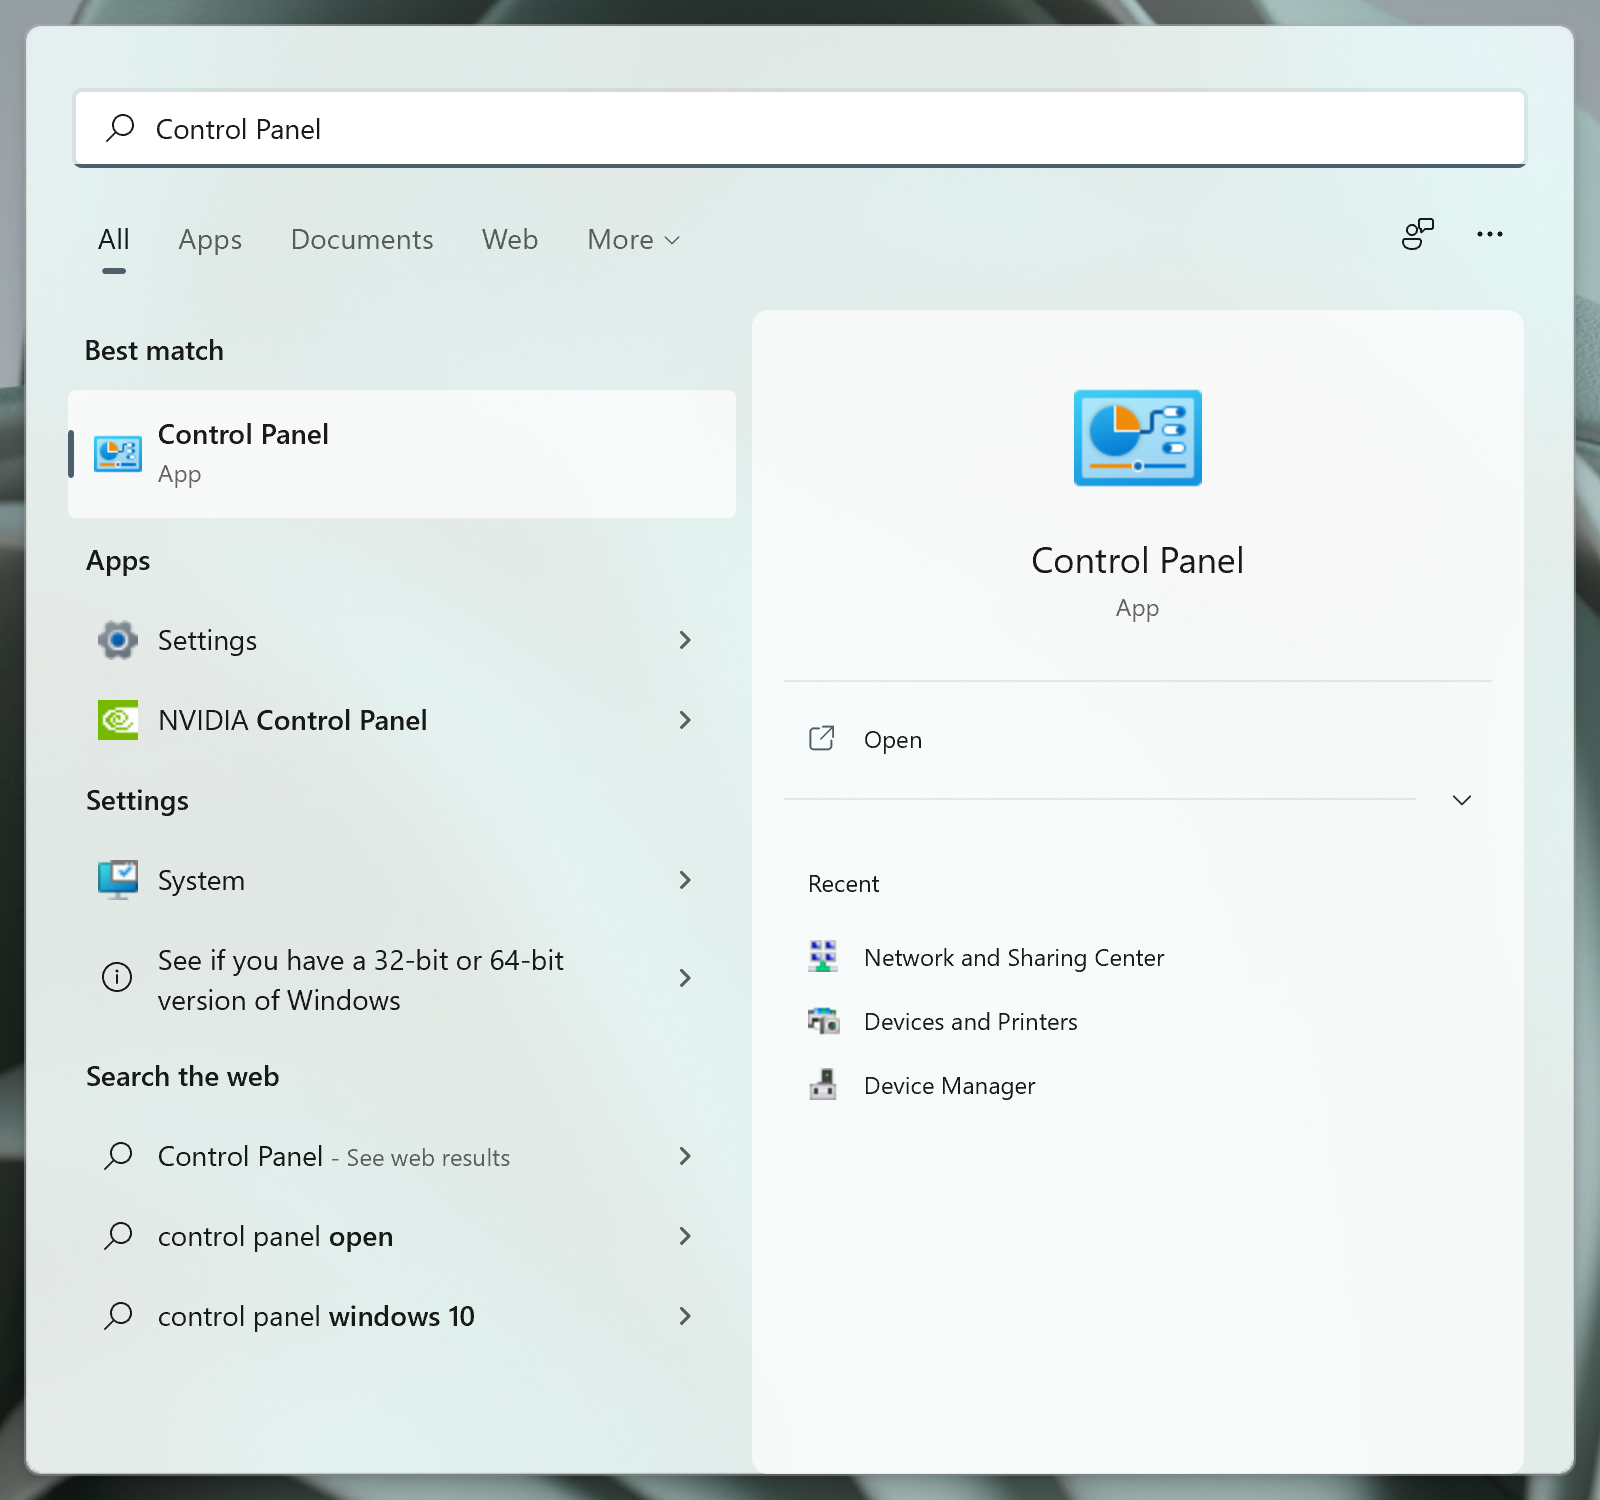
1. Open Control Panel. The quickest way to do this is via the Start menu’s search tool.
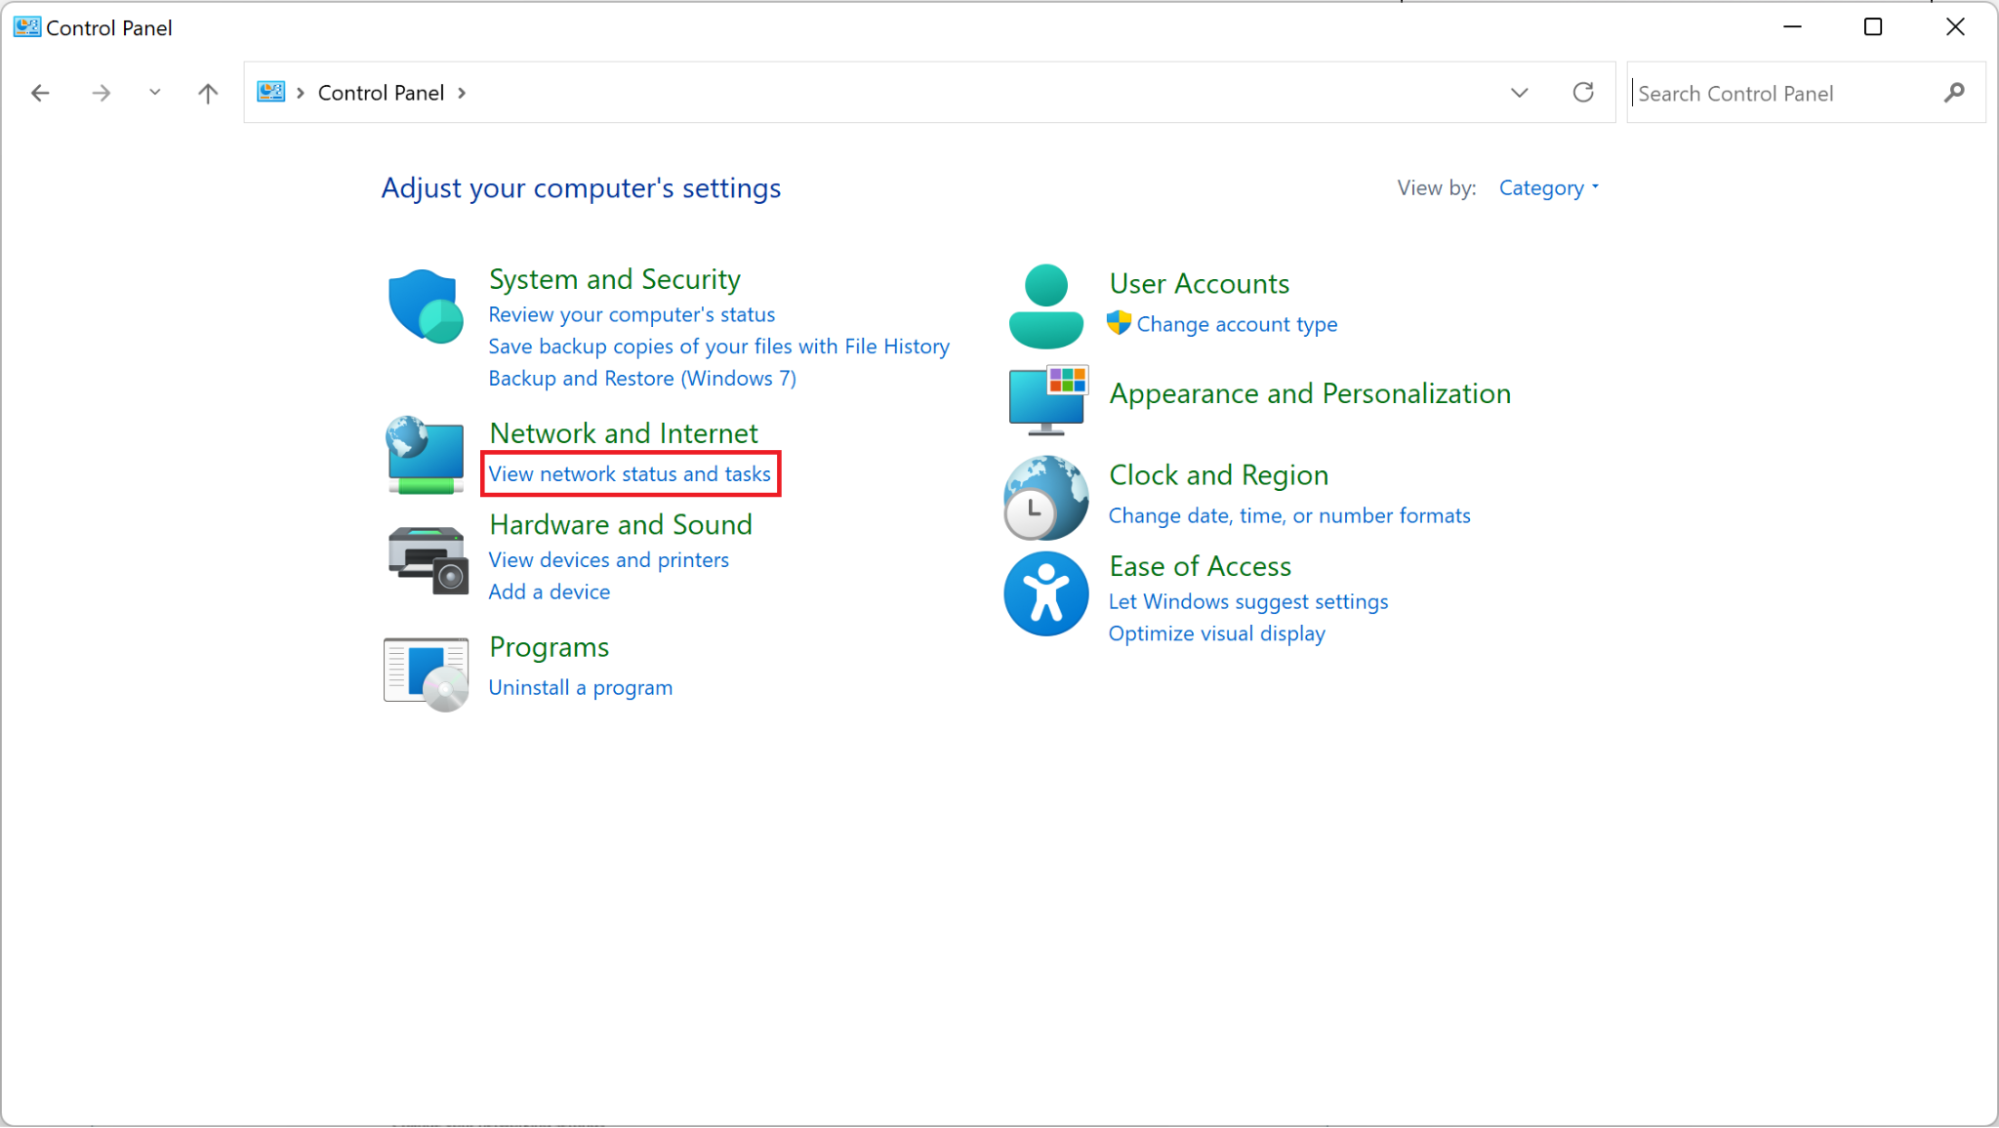
2. Open the Network Sharing Center. This is most easily accessible via the “View network status and tasks” link under the “Network and Internet” heading.
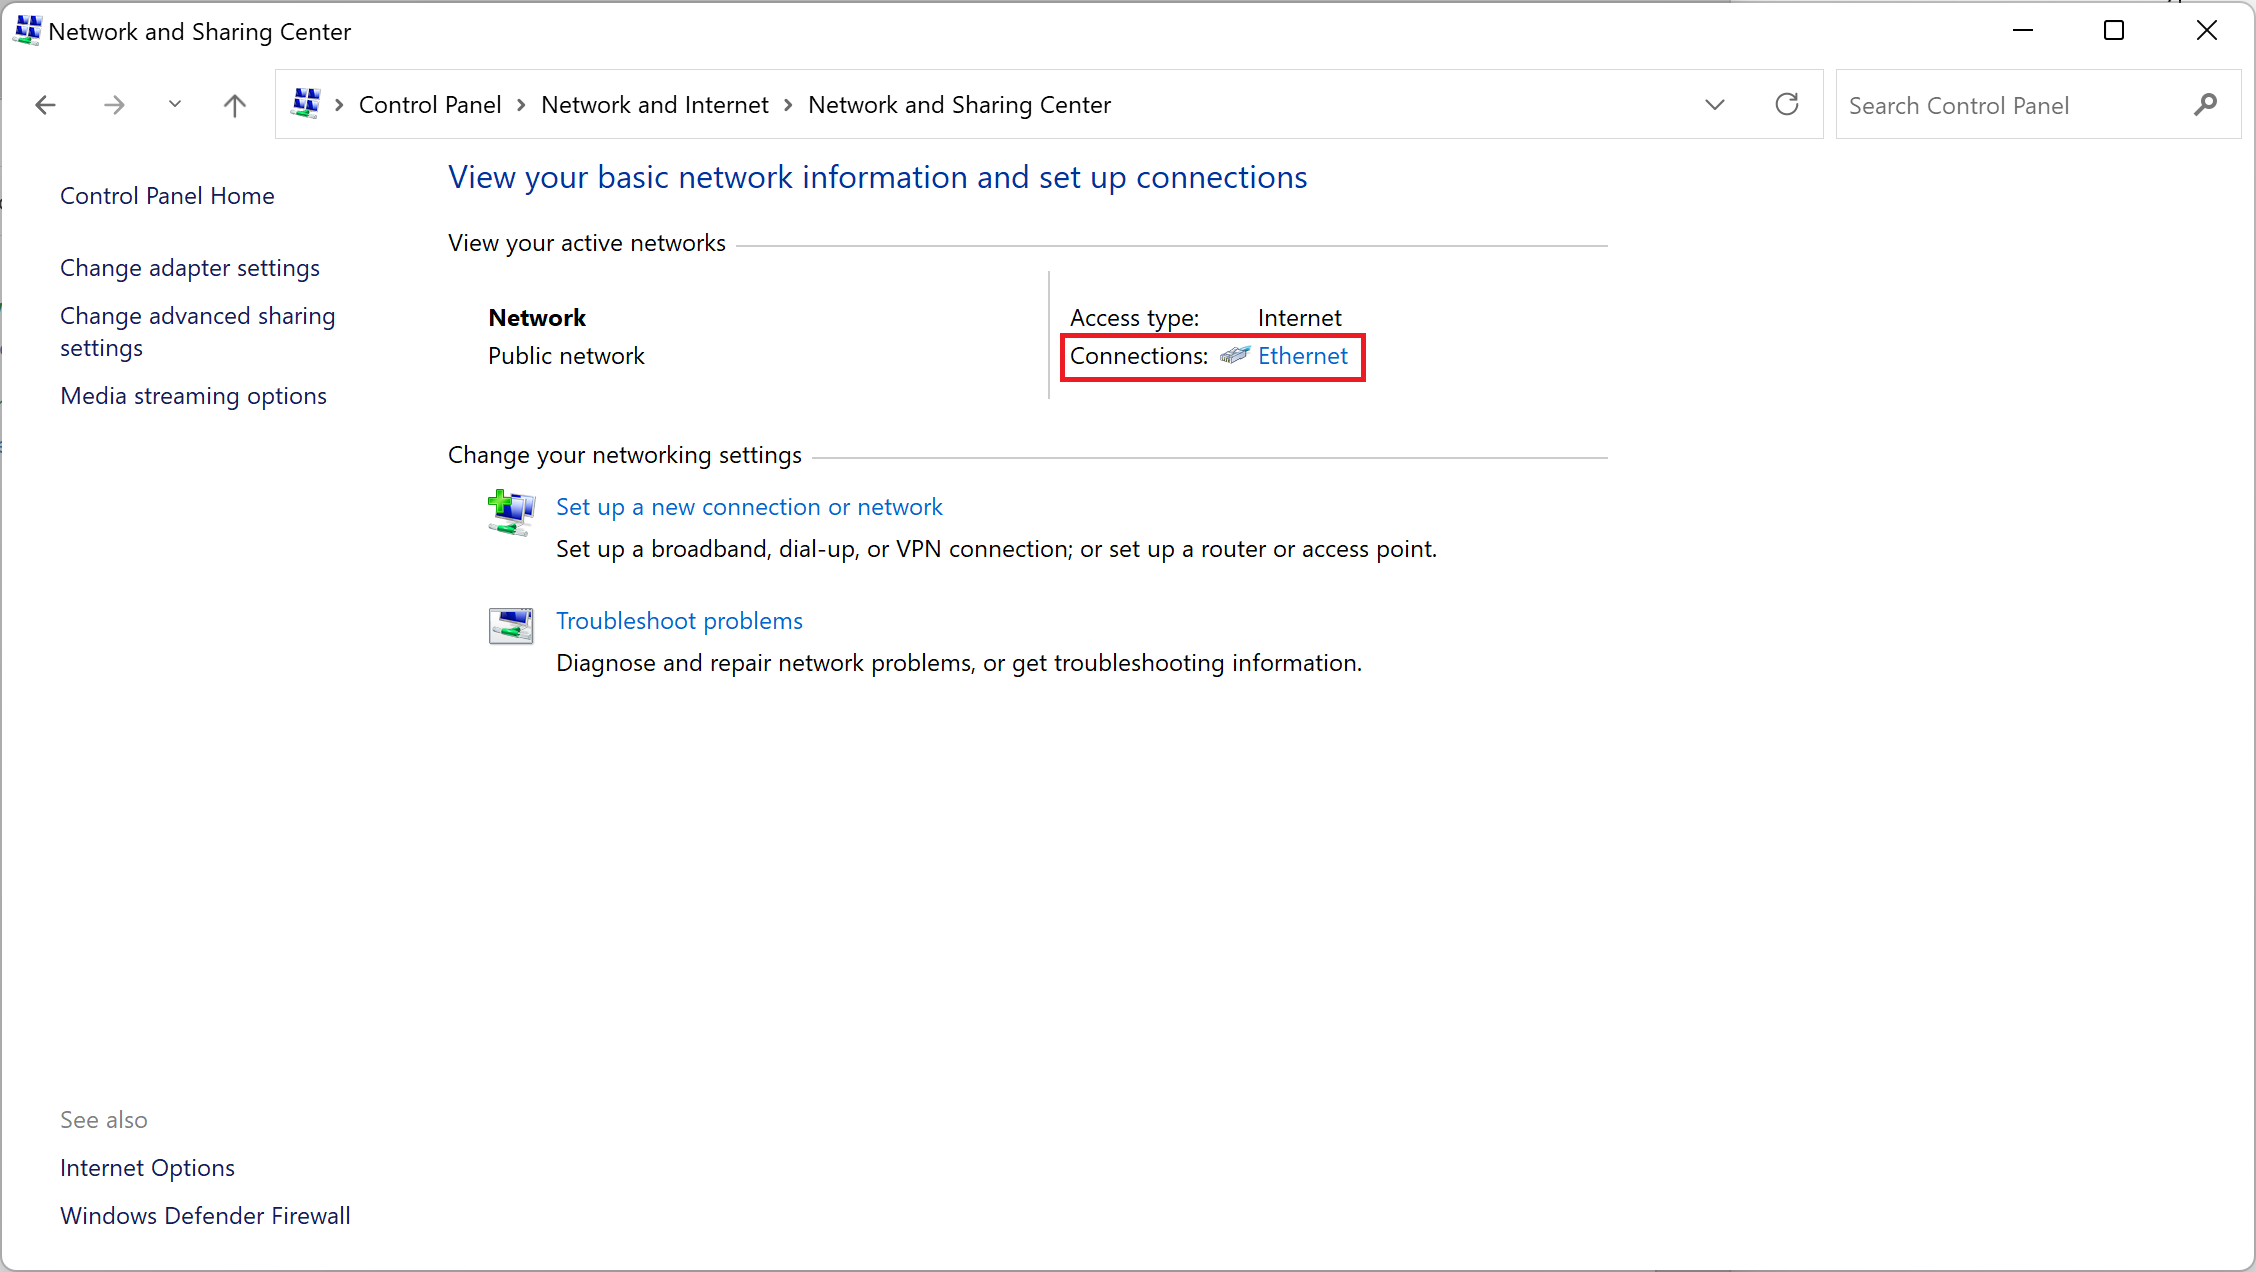
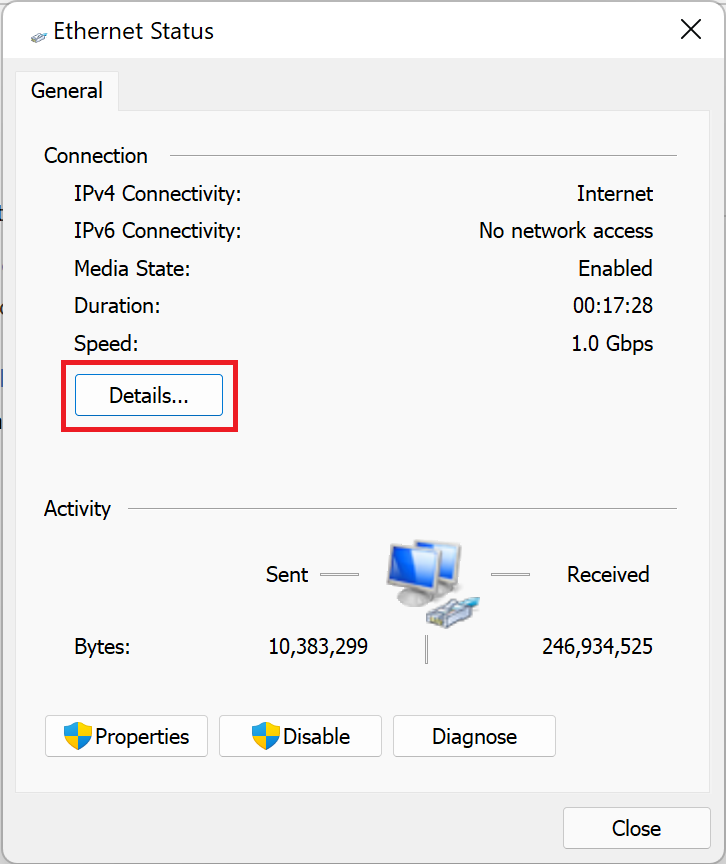
3. Select your connection type. Network Sharing Center should display your current internet connection type (Ethernet in our example) as a clickable link. Click it.
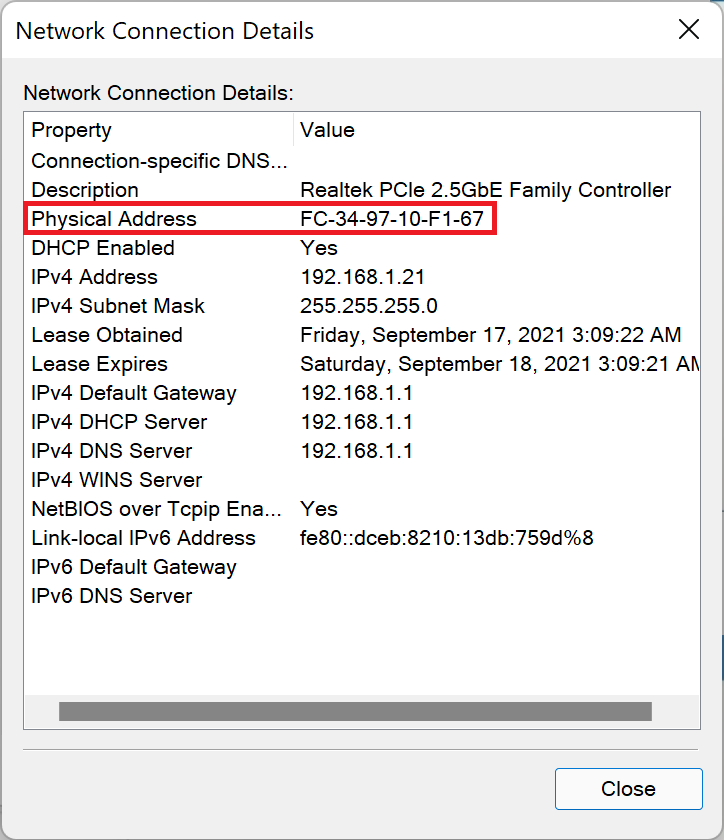
4. Click the ‘Details…’ button. A window should appear with information about your connectivity options, current download speeds, etc. Click on the “Details…” button.
5. Look for ‘Physical Address’. Windows 11 doesn’t identify the MAC address by name in this window, but the “Physical Address” entry should be correct, and is supposed to match the information provided via the Settings app and our next method.
Finding a Windows 11 device’s MAC address via PowerShell
Microsoft ships its cross-platform command shell and scripting language, PowerShell, with Windows 11 by default so people can perform common tasks without pointing and clicking.
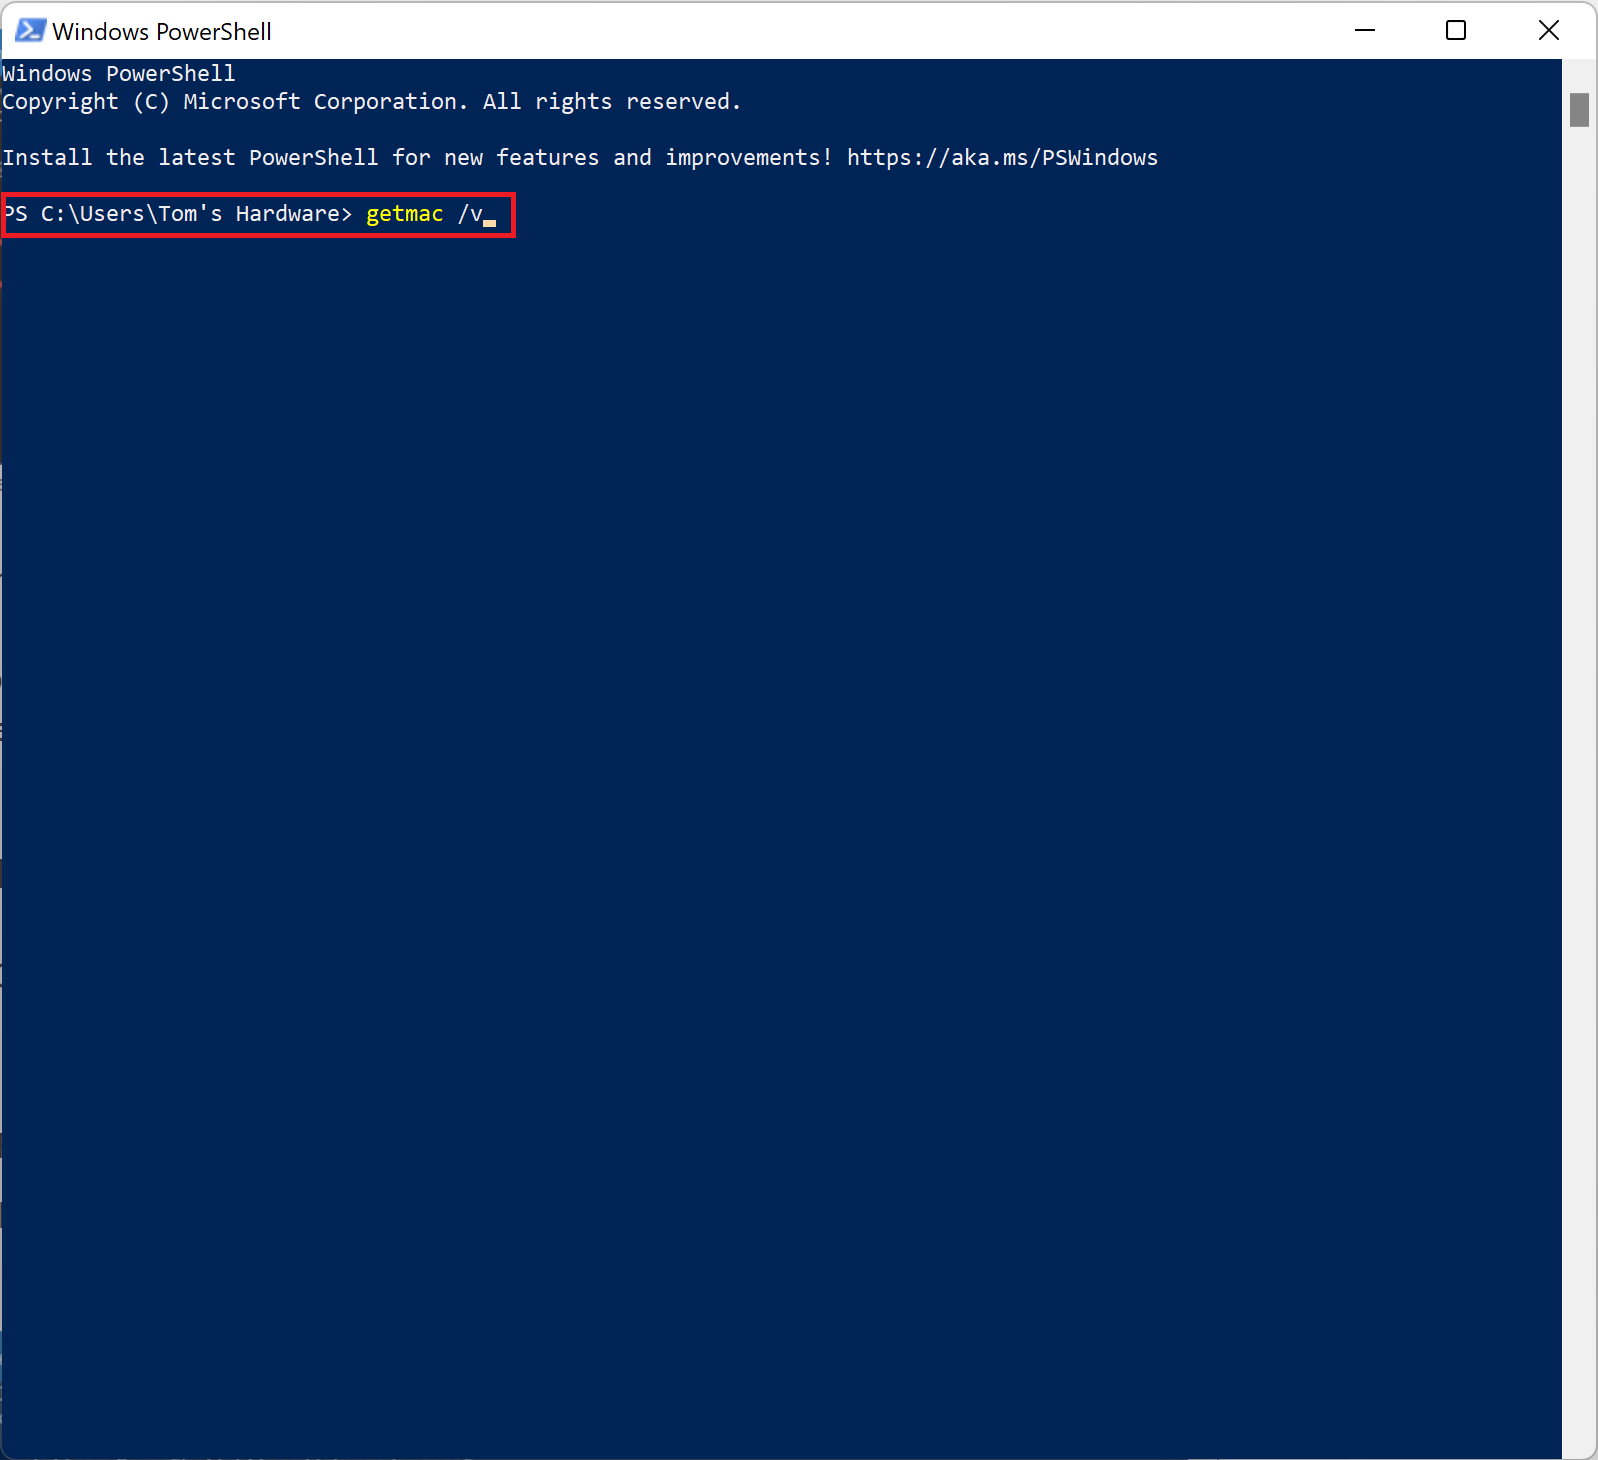
1. Open PowerShell. The quickest way to do this is to right-click the Start menu and select “Windows Terminal” from the pop-up menu. (There’s also an admin version of the tool, but that’s overkill for our needs.) It can also be found by searching for PowerShell.
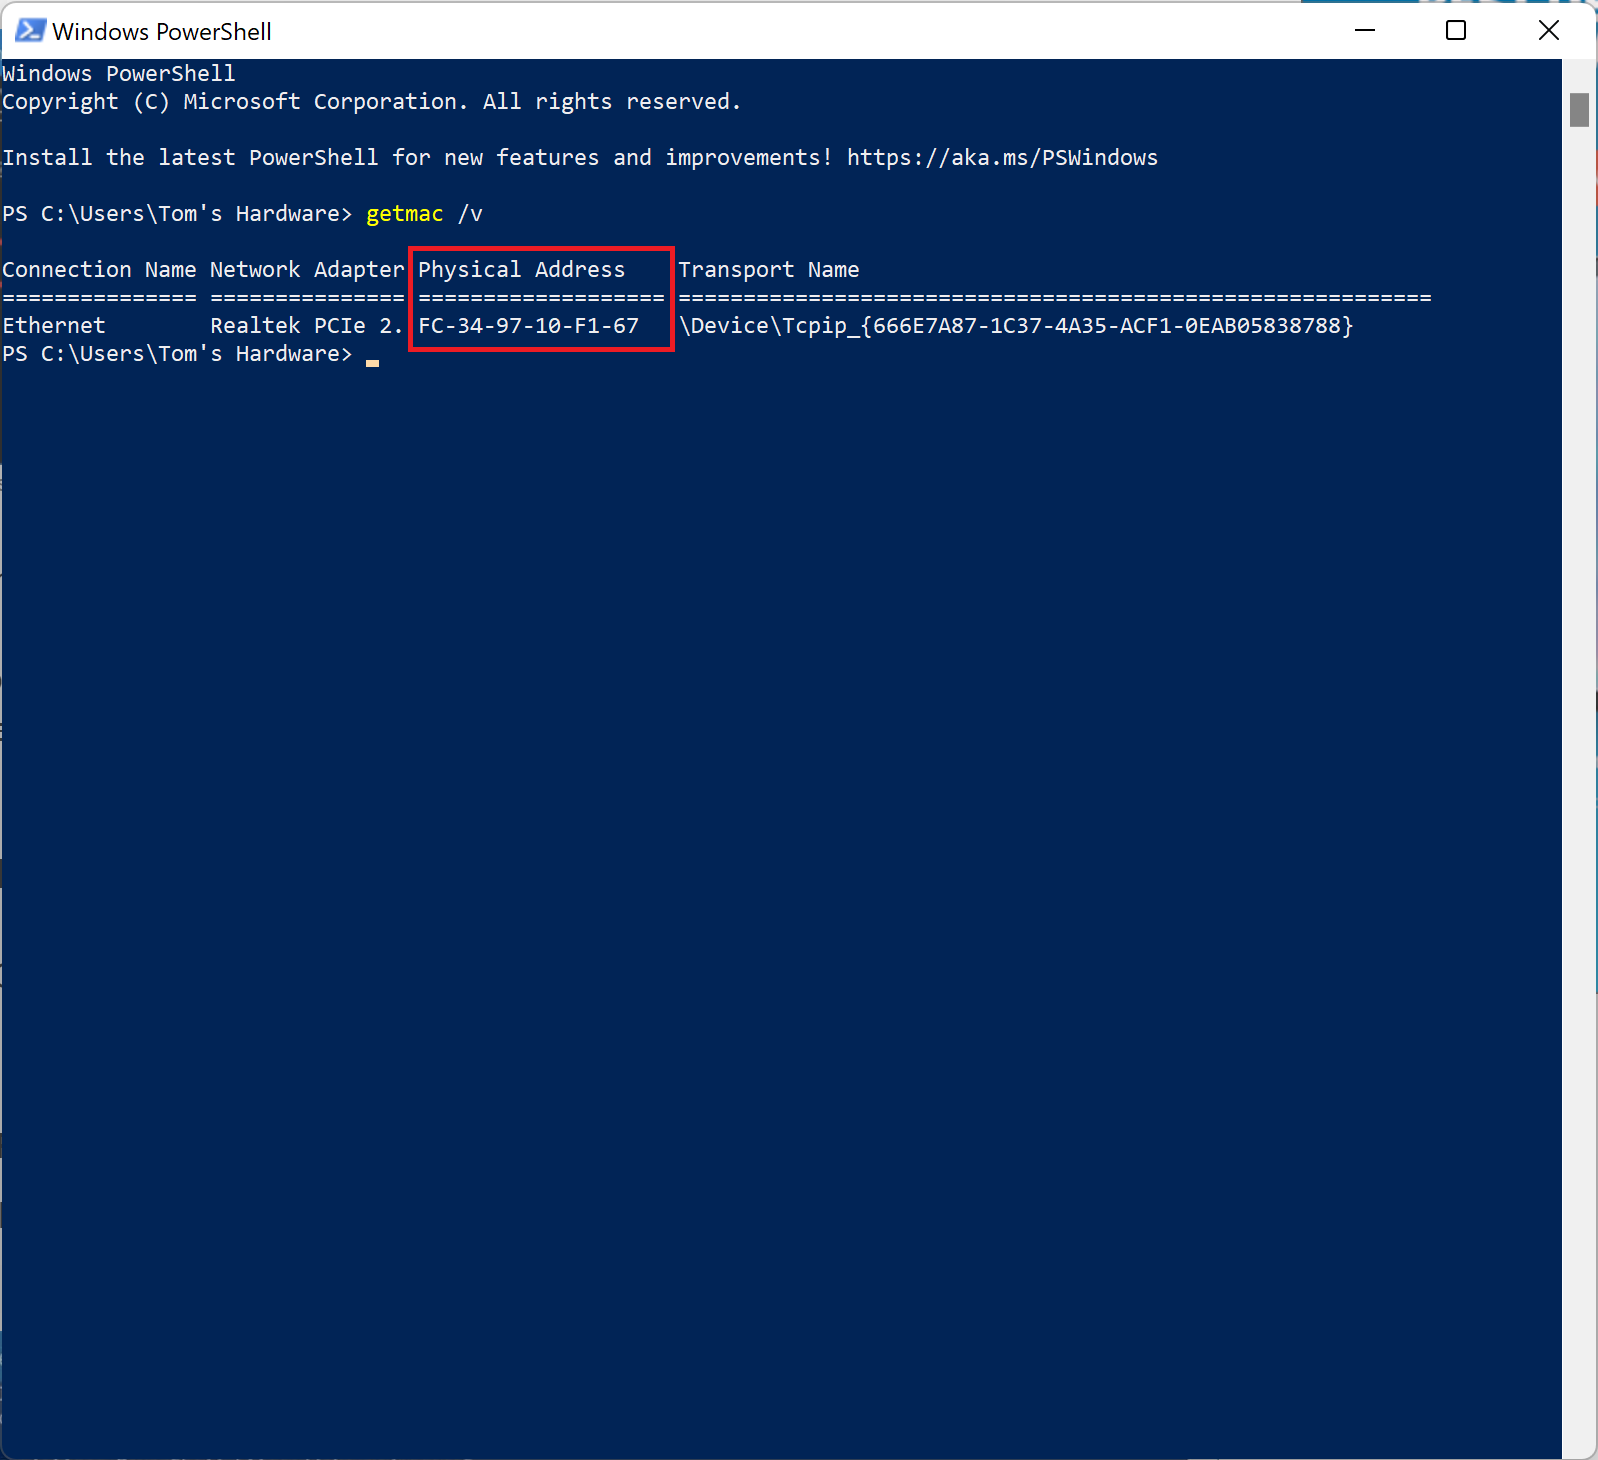
2. Enter the following command without quotation marks: “getmac /v”. The “getmac” portion of the command returns information about our hardware’s Physical Address and Transport Name, while the “/v” modifier tells Windows 11 to return verbose information, which means it will also provide the Connection Name and Network Adapter results.
3. Look for ‘Physical Address’. Windows 11 omits any mention of MAC address, probably because the command makes it clear that’s what we’re after, but “Physical Address” should once again contain six pairs of alphanumeric characters separated by hyphens.
Note that, if you have more than one network adapter, you will see all of them and their MAC addresses on this list.

Nathaniel Mott is a freelance news and features writer for Tom's Hardware US, covering breaking news, security, and the silliest aspects of the tech industry.
-
Indeed. All the bloat makes the whole thing seem overwhelming when in reality this is one of the simplest tasks to accomplish. Talk about confusing people.Reply
