How to Install Windows 10 on a Raspberry Pi 4
Yes, you can get a working Windows 10 desktop running on a Raspberry Pi 4
The Raspberry Pi is commonly associated with Linux operating systems such as Raspberry PI OS. But what about running Windows 10 on your Raspberry Pi? Officially, Microsoft’s only operating system for the Pi is an old version of Windows 10 IoT Core, which just lets you execute Visual Studio code on the computer but doesn’t work as a standalone OS with a GUI (in other words, no “windows”). However, the lack of support from Microsoft hasn’t stopped some ambitious developers from finding a way to run a full desktop version of Windows 10 on Raspberry Pi.
In 2019, we tried installing a hacked version of Windows 10 on a Raspberry Pi 3 and it ran, but it was extremely painful to use. Recent developments have now made it possible to run Windows 10 somewhat-competently on a Raspberry Pi 4, at least as a proof-of-concept We’ll show you how to install Windows 10 on your Raspberry Pi below.
However, before you begin, please note that this is not an official Microsoft product and the source of the images and software used is from a passionate and vibrant community working together to create this project. Amir Dahan is the creator of Windows 10 Lite, Marcin is responsible for UEFI and Pete Batard responsible for the 3GB RAM fix. The Windows 10 image file and RAM fix you’ll need to make this work are constantly changing as are their download locations so you’ll need to find them via the Windows on Raspberry Pi Discord Group, which is where all the developers hang out and share updates. We can’t vouch for the safety or legitimacy of any of the custom files the community has created for this project so proceed at your own risk.
At the time of writing this project runs surprisingly well (see below for more details) but has a lot of caveats. . The Raspberry Pi’s onboard Ethernet, Bluetooth and GPIO do not work so you’ll need a USB Ethernet or USB Wi-Fi dongle to get online (there’s no list of supported dongles so we can’t guarantee yours will work). Audio via HDMI is also not available but Bluetooth audio via a USB Bluetooth dongle is possible.
What you will need to install Windows 10 on a Raspberry Pi 4
- Raspberry Pi 4 4GB or 8GB
- 16GB or larger microSD card, (see best microSD cards for Raspberry Pi)
- Windows 10 PC
- USB to Ethernet or WiFi dongle
- Bluetooth dongle (if you want Bluetooth)
- Keyboard, mouse, HDMI and power for your Raspberry Pi
How to Install Windows 10 on the Raspberry Pi 4
1. Download the latest pre-release version of WoR tool https://www.worproject.ml/downloads and extract the files.
2. Visit the Windows on Raspberry Pi Discord server and go to the Downloads channel to Download the latest stable image, currently 0.2.1.
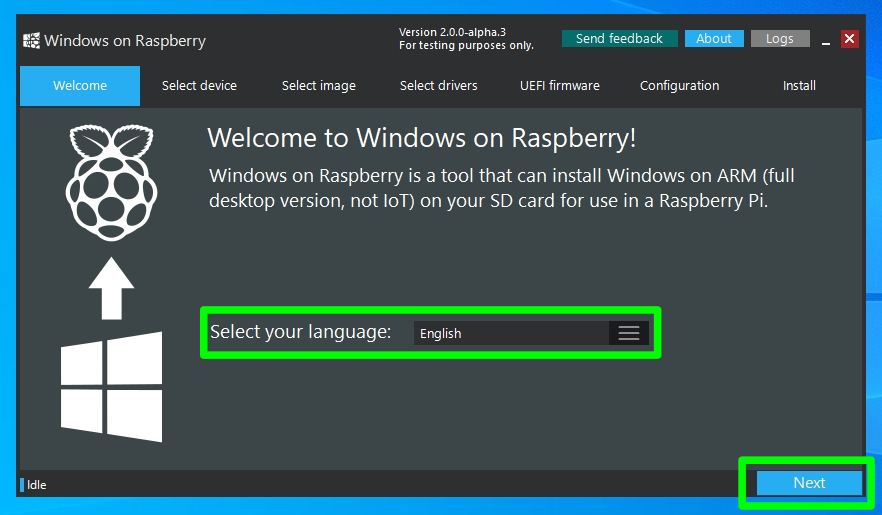
3. Open the WoR Alpha tool and select your language.
Get Tom's Hardware's best news and in-depth reviews, straight to your inbox.
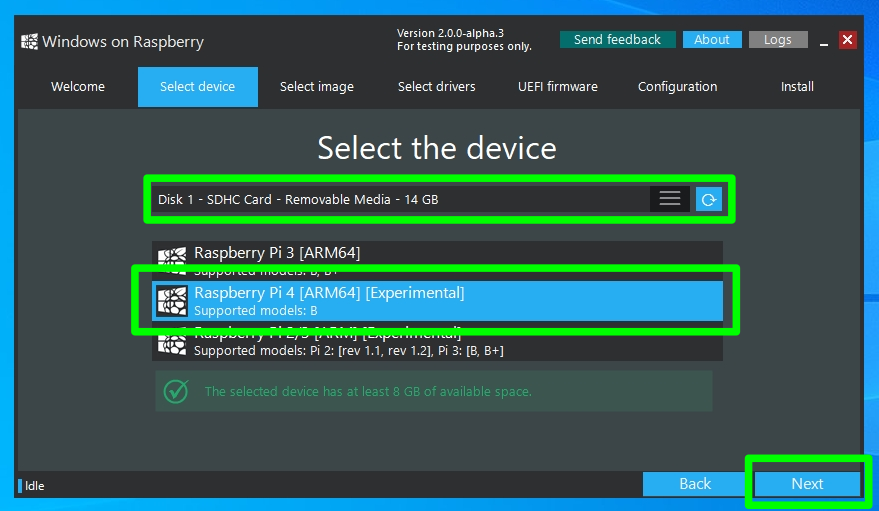
4. Insert microSD card and select the drive. The Raspberry Pi 4 mode is currently experimental, but has worked reliably in our tests.
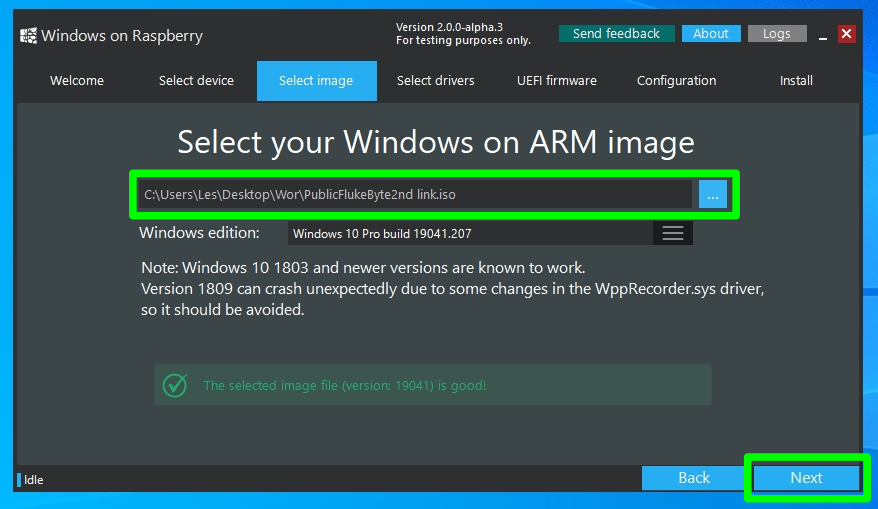
5. Select your Windows on ARM image.
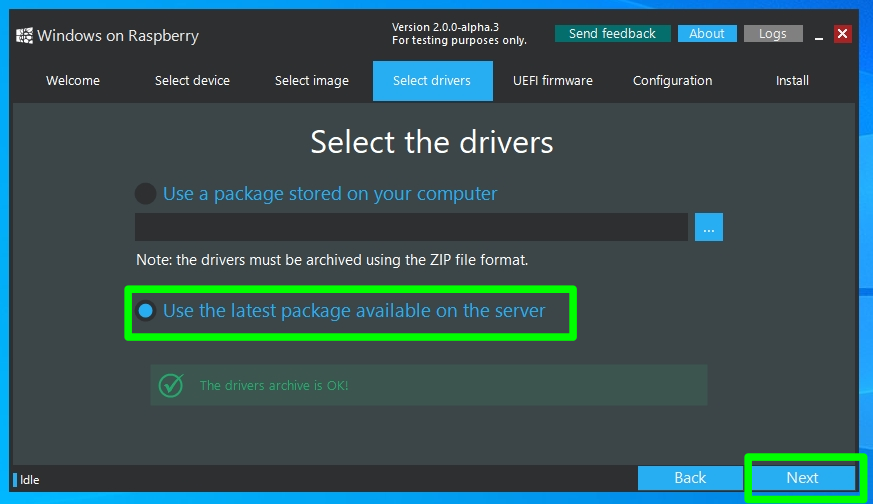
6. Select the latest package of drivers from the server.
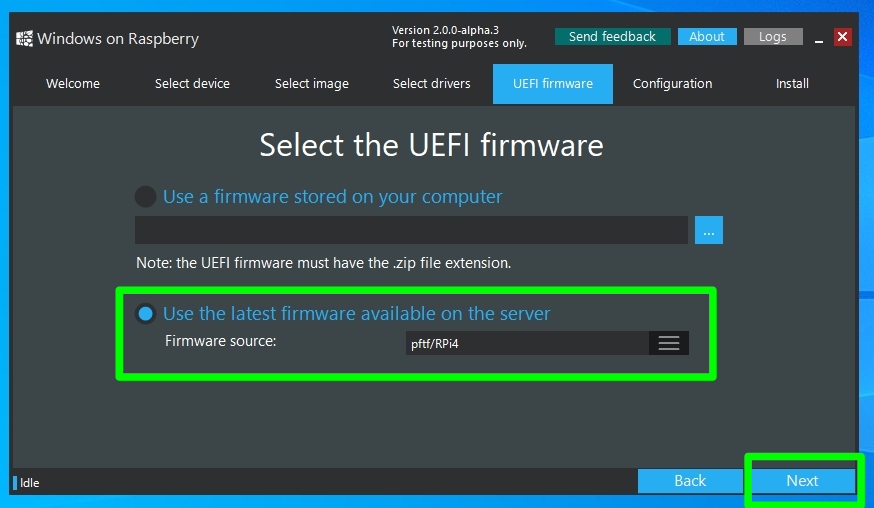
7. Use the latest UEFI firmware available.
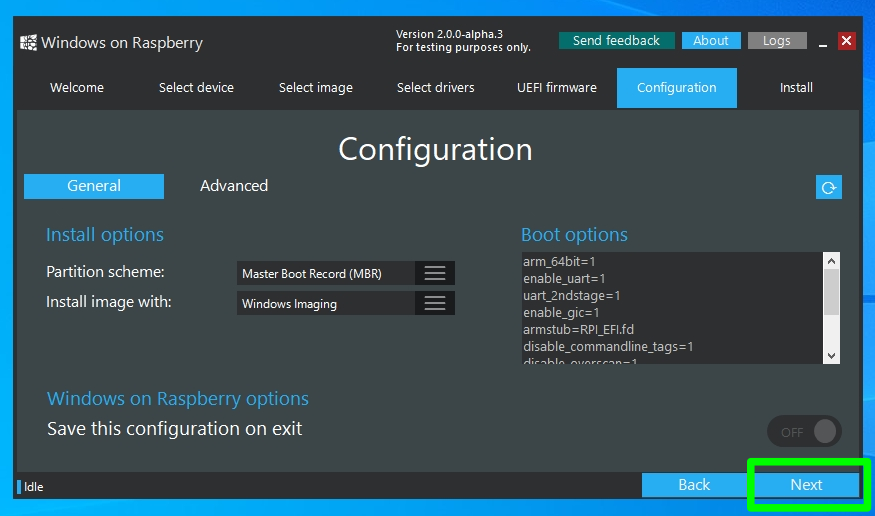
8. Check the configuration and when happy click Next.
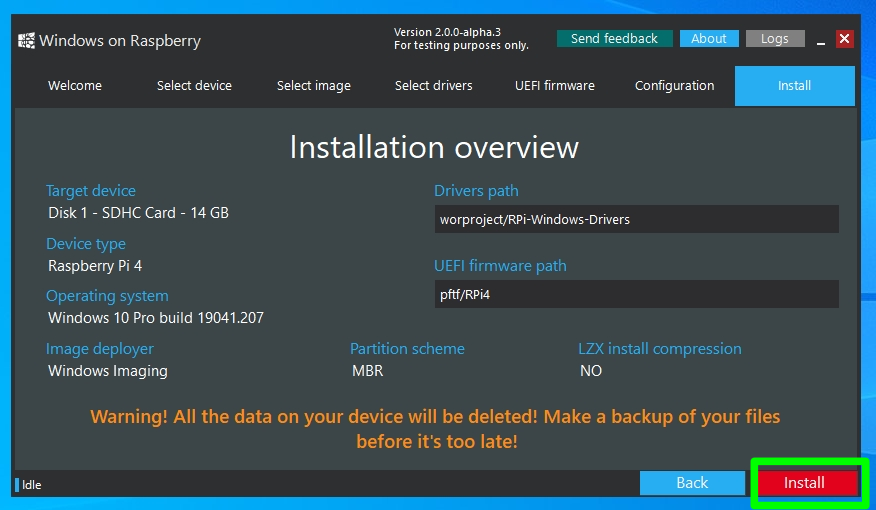
9. Double check everything before clicking Install.
The installation process can take as long as two hours to complete, depending on the speed of the microSD card.
10. Download the RAM fix for Rpi 4 file from the Windows On Raspberry Pi Discord server. Extract the contents.
11. Copy winpatch.exe to the root of C: drive.
12. Locate the drive containing the Windows 10 on ARM installation, make a note of the drive letter.
13. Open a Command Prompt as Administrator and go to the root of C: drive.
cd \
14. Patch the USB driver to enable USB ports on the Raspberry Pi 4. Change the drive letter to match your installation.
winpatch X:\Windows\System32\drivers\USBXHCI.SYS 910063E8370000EA 910063E8360000EA 3700010AD5033F9F 3600010AD5033F9F
15. Overclock the Raspberry Pi. This step is optional but highly recommended (though you’ll want a cooling fan). Edit the config.txt file found in BOOT drive. Add these two lines at the end of the file. Overclocking will require cooling for your Raspberry Pi.
over_voltage=6
arm_freq=2000
16. Eject the microSD card and insert it into the Raspberry Pi 4. Connect your keyboard, mouse etc and power on the Pi.
17. Follow the standard Windows 10 install process and after a short while you are ready to use Windows 10 on your Raspberry Pi 4.
18. As an administrator open a Command Prompt and run this command to enable 3GB of RAM. Press Enter to run the command.
bcdedit /deletevalue {default} truncatememory
19. Reboot the Raspberry Pi for the update to take effect.
20. For network access, use a USB to Ethernet or a compatible WiFi dongle.
21. Install Microsoft Edge by double clicking on the Microsoft Edge desktop icon.
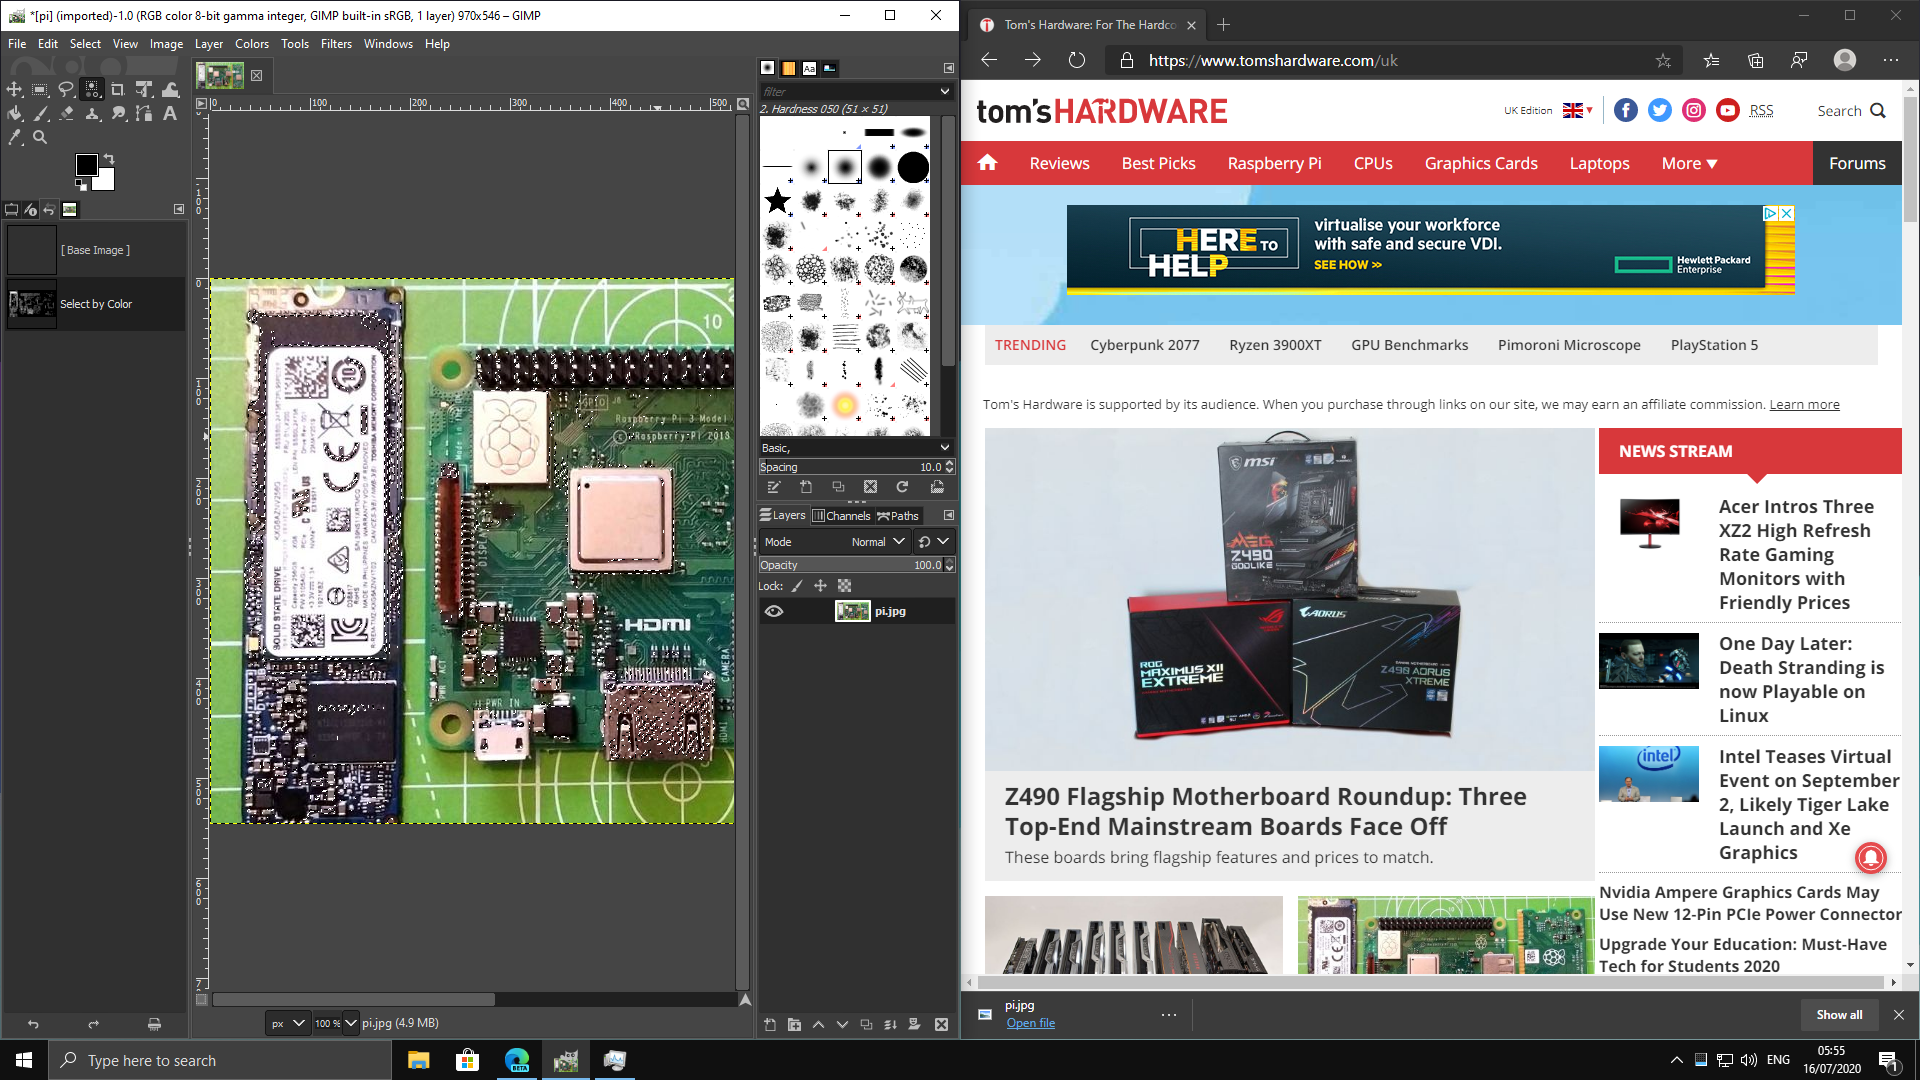
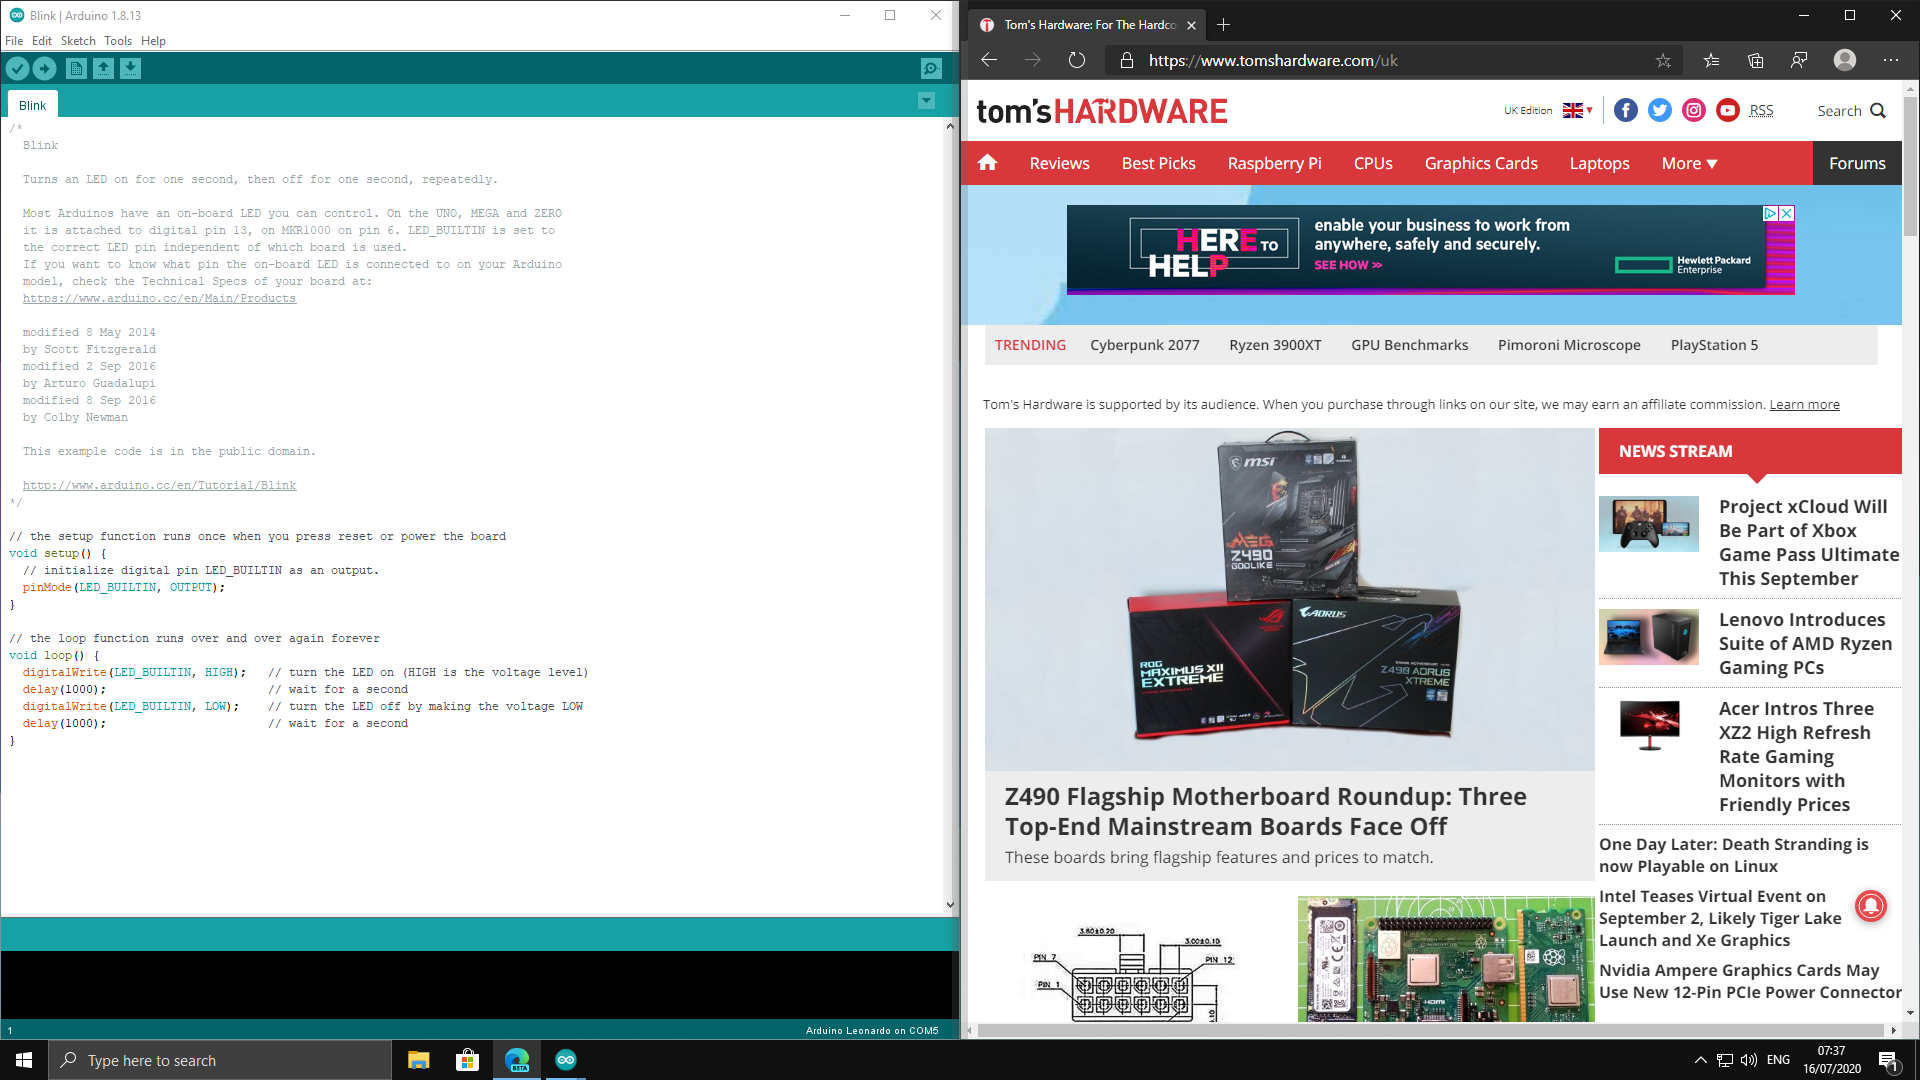
22. Installing software works in the same manner as a typical Windows 10 install. We tested GIMP Photo Editor and the Arduino IDE and both installed, albeit slowly and were usable for basic tasks.

How does Windows 10 on Raspberry Pi Perform?
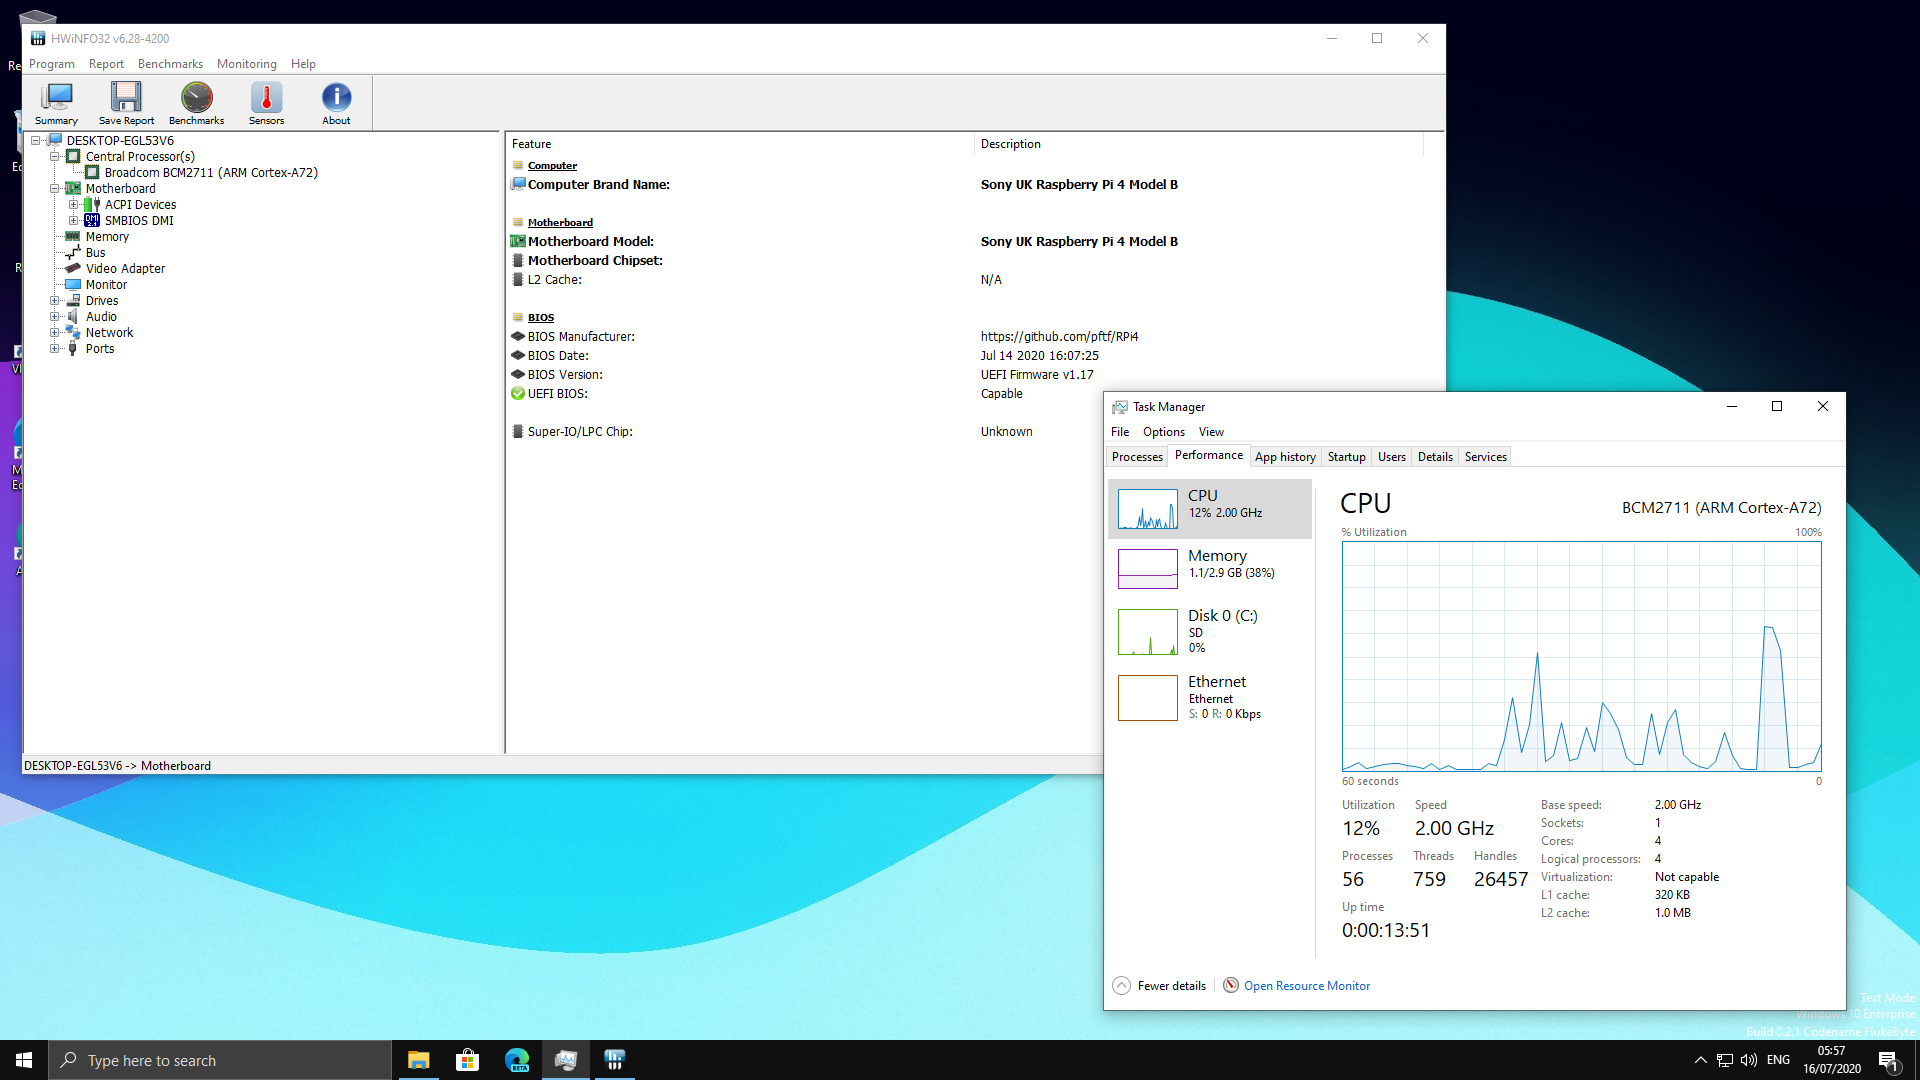
In our testing, overall performance is akin to a low end Intel Celeron / Atom CPU. Windows 10 on Raspberry Pi is usable, but more as a proof-of-concept than a daily driver. . Boot times were considerably longer than Raspberry Pi OS, at a sluggish 2 minutes 12 seconds.
Once the desktop was loaded the overall feel of Windows 10 on Raspberry Pi was responsive. The Edge web browser provided a good browsing experience. Heavy sites such as YouTube proved troublesome but that was compounded by our sluggish 100 Mbps Ethernet USB dongle and is not indicative of the OS as a whole.
We installed three applications in WIndows 10 on Raspberry Pi: GIMP Photo Editor, Arduino IDE and Python 3.8. We downloaded each program’s 32-bit installer and set it up without any issues. GIMP ran well and, while it would not be up to speed for a professional photo editor, it was quick enough for hobbyists to use.
The Arduino IDE was slow, mainly due to the way that the IDE uses Java behind the scenes. Again if you have a little patience, then the experience is good. Not every application can be installed, though. We tried Visual Studio Code and it flat out refused to install. But Python 3.8 was easily installed and ran well. The Python REPL (interactive shell) was available and the core modules were available for use. We installed an additional module, GPIO Zero, which is used to interact with the GPIO of the Raspberry Pi. Sadly, despite our best efforts, we were unable to use the GPI via Python 3.8 on Windows 10.
MORE: Windows 10 on Raspberry Pi: Hands-On

Les Pounder is an associate editor at Tom's Hardware. He is a creative technologist and for seven years has created projects to educate and inspire minds both young and old. He has worked with the Raspberry Pi Foundation to write and deliver their teacher training program "Picademy".
-
Erisa Visual Studio Code will work fine if you use the ARM64 installer for it. I used VSCode Insider but I hear its available on stable now, perhaps it wasn't when you tested?Reply
Performance of vscode is around the same as the rest of the OS, it works and is about equal to what you'd expect on a low end PC. When combined with a remote development environment (SSH or Codespaces) it provides a suitable development experience. -
scodd ReplyErisa said:Visual Studio Code will work fine if you use the ARM64 installer for it. I used VSCode Insider but I hear its available on stable now, perhaps it wasn't when you tested?
Performance of vscode is around the same as the rest of the OS, it works and is about equal to what you'd expect on a low end PC. When combined with a remote development environment (SSH or Codespaces) it provides a suitable development experience.
Can you run powershell ISE, authenticate and hit SPO and Azure? -
misanthropic-gamer Guys, power-fail. LOL I love RPi... but it ain't nevah going to run Win10, efficiently. I can barely run a thinned-downed desktop, on a Debian kernel. Interesting, but not useful.Reply -
2schnauzers Hi. Great tutorial. One question, I keep getting prompted for Activation but it doesn't seem to like a valid Pro or Ent product key.Reply
BTW using a high speed flash card and performance is pretty good (considering).
Are there plans to get the onboard bluetooth and ethernet drivers going? -
Timthe3nchanter Hey all, I've been looking on the discord and it looks like the Ram Fix isn't needed anymore. I did a search and it all comes up with "don't need, no longer needed" so, there has been an update that negates the need for it. Just a little update from the FNG.Reply
