How to Use an OLED Display With Raspberry Pi Pico (Updated)
Let us show you how to get started with these great displays.
Update April 23 2021:
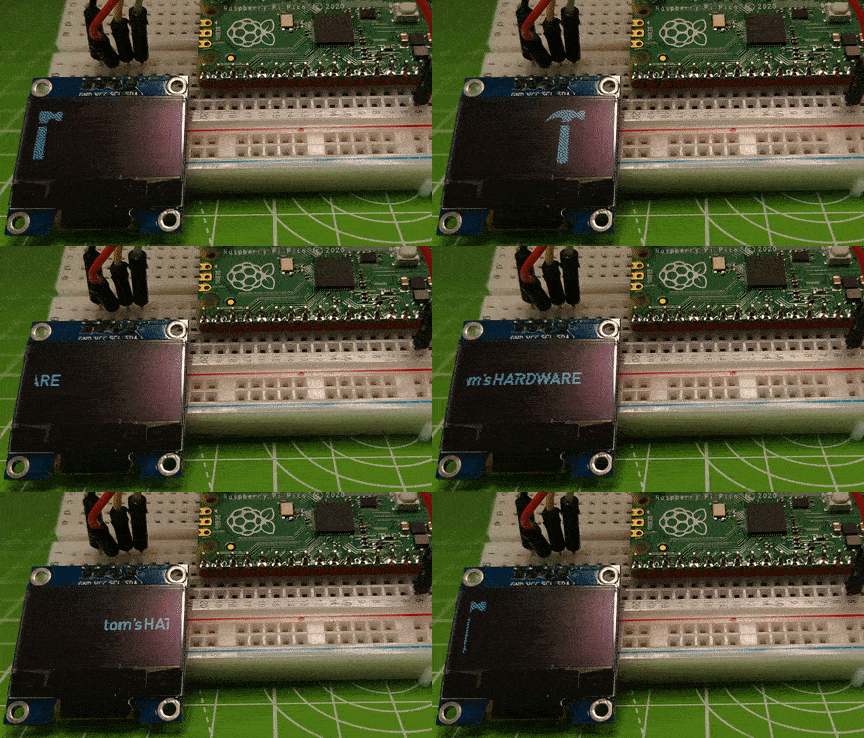
We've expanded this how to and it now includes sections on drawing shapes and objects to the display, how to convert bitmap images for OLED displays and how to animate images.
Original Article:
The Raspberry Pi Pico has no shortage of options when it comes to digital displays. We can use LCD screens, output to VGA / DVI or use bespoke screens such as the Pico Display or Pico Explorer Base’s IPS display. But sometimes we need a small, cheap option to get the job done. OLED screens such as the 0.96 inch model used in this tutorial, are trivial to use with MicroPython and they cost only a few bucks (or pounds) making them ideal for projects.
In this tutorial, we will learn how to connect an OLED screen to a Raspberry Pi Pico via the I2C interface, then we will install a MicroPython library via the Thonny editor and learn how to use it to write text to the display.
The OLED screen uses the I2C protocol to interface with the Raspberry Pi Pico. Which means that we only require.
- A Raspberry Pi Pico running MicroPython
- 4 x Female to Female jumper wires
- An I2C OLED screen 128 x 64
How to Connect an OLED screen to Raspberry Pi Pico
Use the following wiring.
Get Tom's Hardware's best news and in-depth reviews, straight to your inbox.
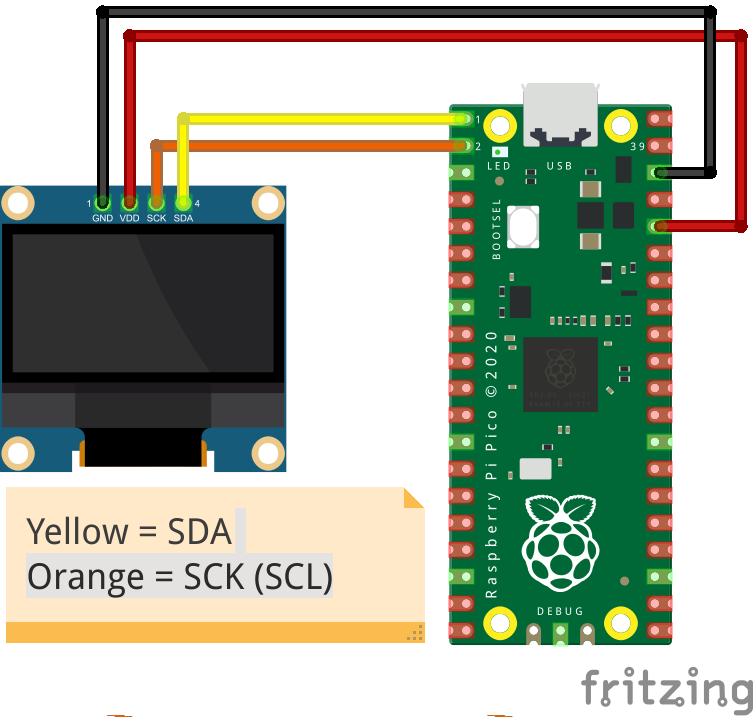
1. Connect the GND of the screen to any GND on the Pico (Black wire).
2. Connect VDD / VCC to 3V3 on the Pico (Red wire).
3. Connect SCK / SCL to I2C0 SCL (GP1, Physical pin 2, Orange wire).
4. Connect SDA to I2C0 SDA (GP0, Physical pin 1, Yellow wire).
5. Connect your Raspberry Pi Pico to your computer and open the Thonny application.
With the hardware connected and Thonny open, we now need to install a library in order for Python to communicate with the screen.
6. Click on Tools > Manage Packages to open Thonny’s package manager for Python libraries.
7. Type “ssd1306” in the search bar and click “Search on PyPI”.
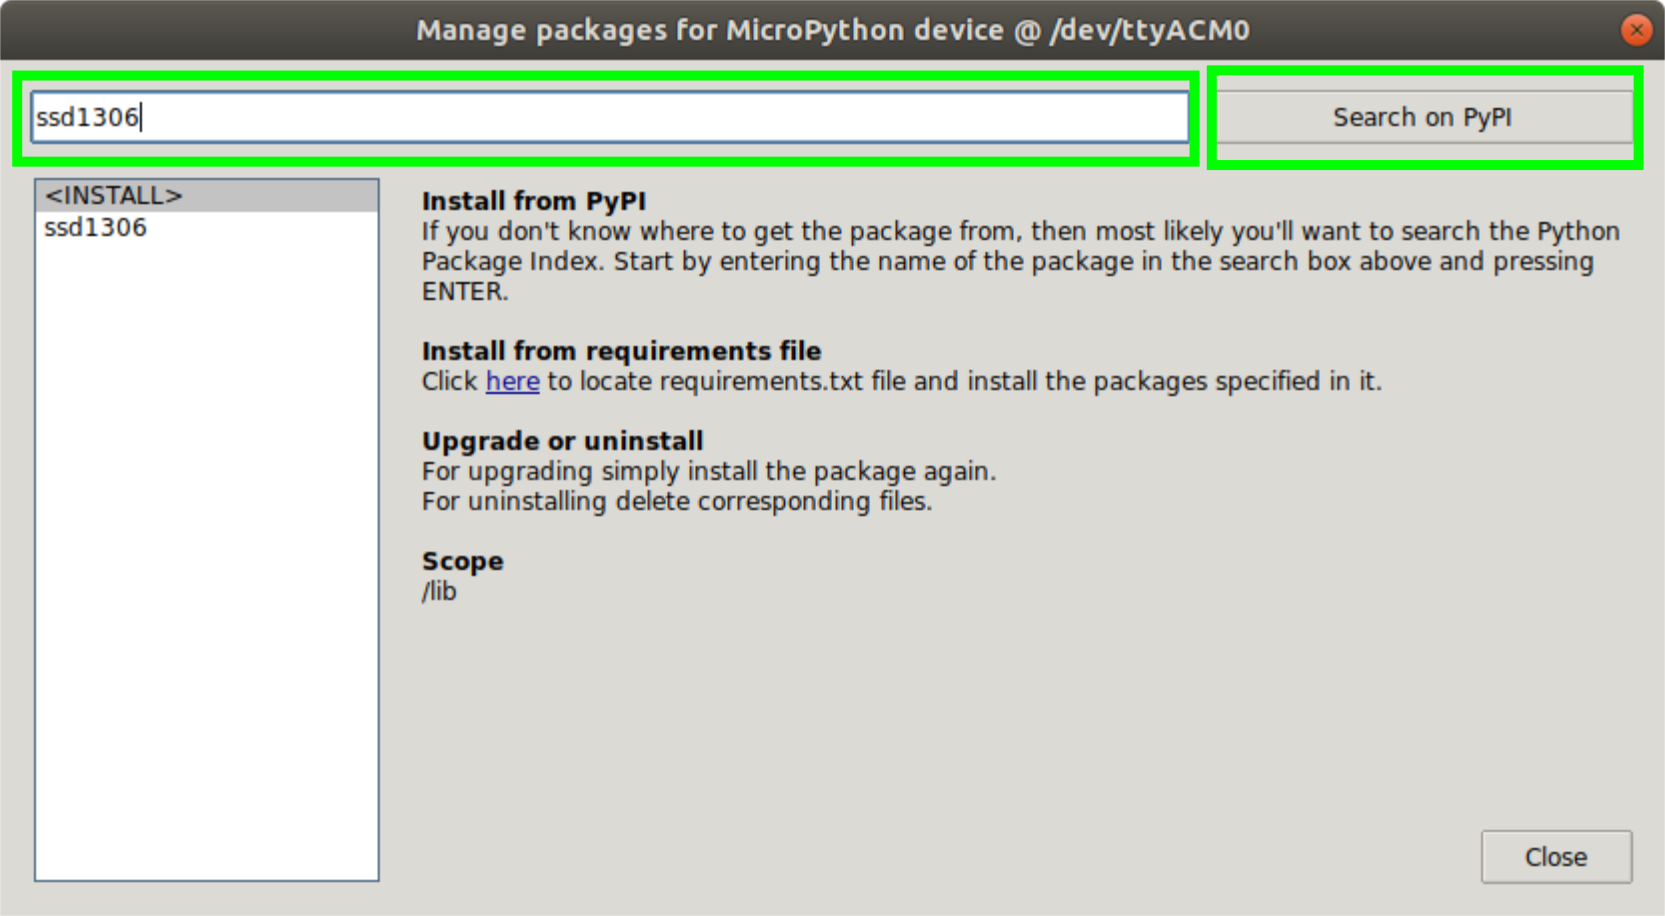
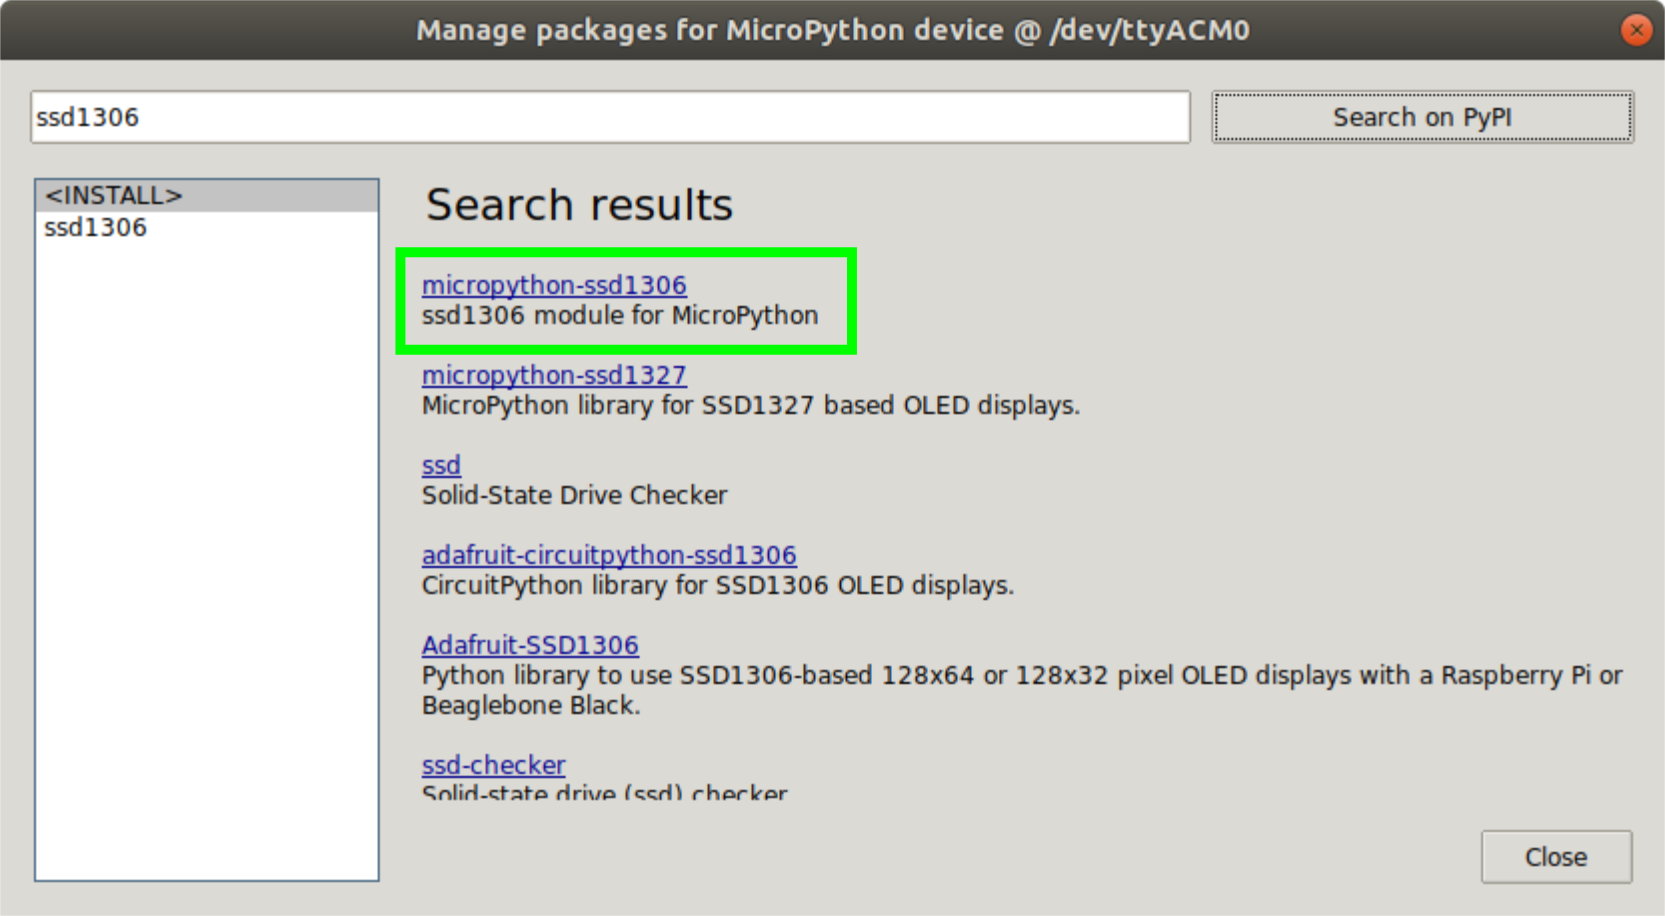
8. Click on “micropython-ssd1306” in the returned results and then click on Install. This will copy the library to a folder, lib on the Pico.
9. Click Close to return to the main interface.
Programming an OLED Screen on Raspberry Pi Pico
To write a single line of text to the OLED screen we need just six lines of MicroPython.
1. From the machine library, import the Pin and I2C classes. These are used to communicate with the OLED screen, attached to the GPIO of the Pico.
from machine import Pin, I2C2. Import the OLED screen library.
from ssd1306 import SSD1306_I2C3. Create an object, i2c, which stores the I2C channel in use, in this case zero, the SDA and SCL pins that we are connected to, and finally the frequency at which we connect to the OLED screen.
i2c=I2C(0,sda=Pin(0), scl=Pin(1), freq=400000)4. Create an object, oled, which will be used to communicate with the OLED screen. It has three arguments, the width and height of the screen (128 x 64 pixels) and the I2C connection details.
oled = SSD1306_I2C(128, 64, i2c)5. Write a line of text to the top left of the screen, position 0,0.
oled.text("Tom's Hardware", 0, 0)6. Finally use the show command to render the output to the screen.
oled.show()The final code should look like this
from machine import Pin, I2C
from ssd1306 import SSD1306_I2C

i2c=I2C(0,sda=Pin(0), scl=Pin(1), freq=400000)
oled = SSD1306_I2C(128, 64, i2c)

oled.text("Tom's Hardware", 0, 0)
oled.show()
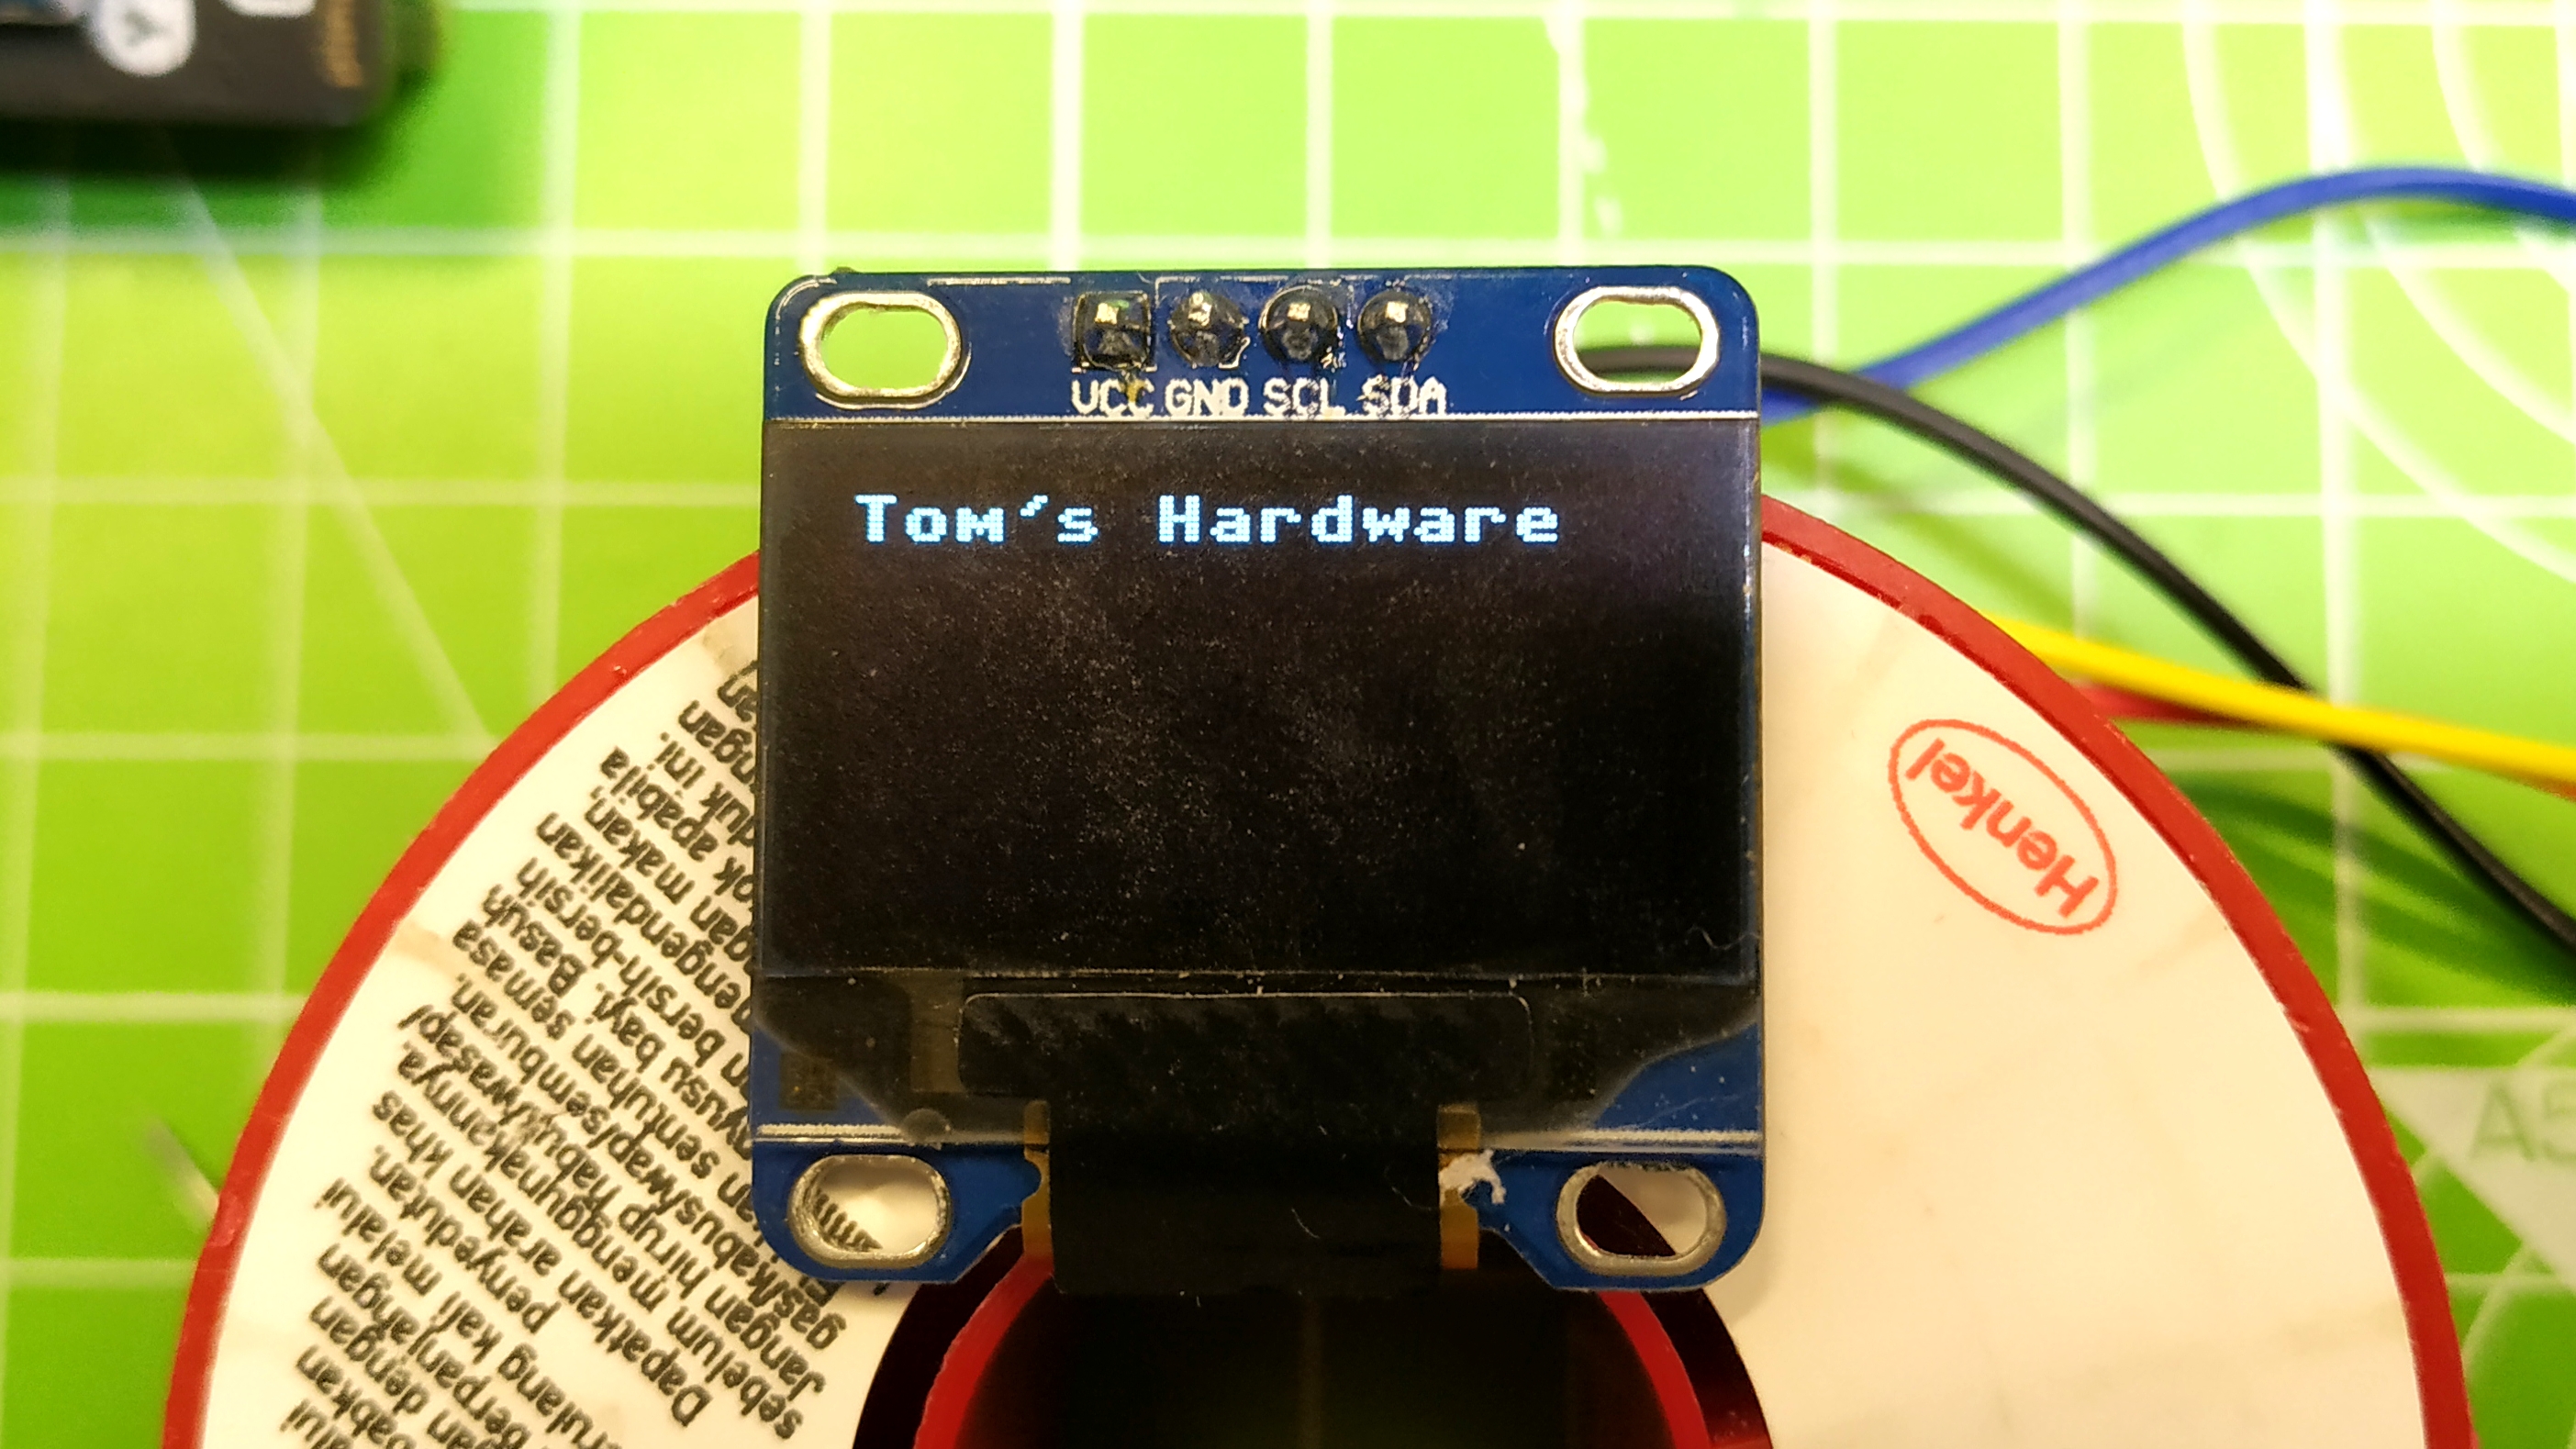
7. Save and run your code. As with any Python script in Thonny, Click on File >> Save and save the file to your Raspberry Pi Pico as oled-test.py. When ready click on the Green play button to start the code and your text will appear on the OLED screen.
Drawing Simple Shapes on OLED Screens with Pico
Simple shapes and lines can be drawn to the display with just a single command. Each of these commands will need oled.show() in order to be seen. Note that most of these methods have a color parameter but, with a monochrome screen, you’ll always put a color of “1” (0 means pixel off).
- oled.pixel(x,y,c): Draw a pixel at position x,y and uses c to set the color of the pixel, with 1 being lit, 0 being off. Example:
oled.pixel(10,10,1)
- oled.hline(x,y,w,c): Draw a horizontal line from point x,y that has a set width (w) in pixels, and color ( c ). Example:
oled.hline(2,3,4,1)
- oled.vline(x,y,h,c): Draw a vertical line from point x,y that has a set height (h) in pixels, and color ( c ). Example:
oled.vline(0, 0, 64, 1)
- oled.line(x1,y1,x2,y2,1): Draw a diagonal line from points x1, y1 to x2, y2 with the color ( c ). Example:
oled.line(0, 0, 128, 64, 1)
- oled.rect(x,y,w,h,c): Draw a rectangle starting at point x.y and for a set width (w) and height(h). Use ( c ) to set the color of the pixels. For example:
oled.rect(0, 0, 64, 32, 1)
- oled.fill_rect(x,y,w,h,c): Draw a filled rectangle starting at point x.y and for a set width (w) and height(h) use ( c ) to set the color of the pixels. For example:
oled.fill_rect(0, 0, 64, 32, 1)
Showing Graphics on the OLED Screen with Pico
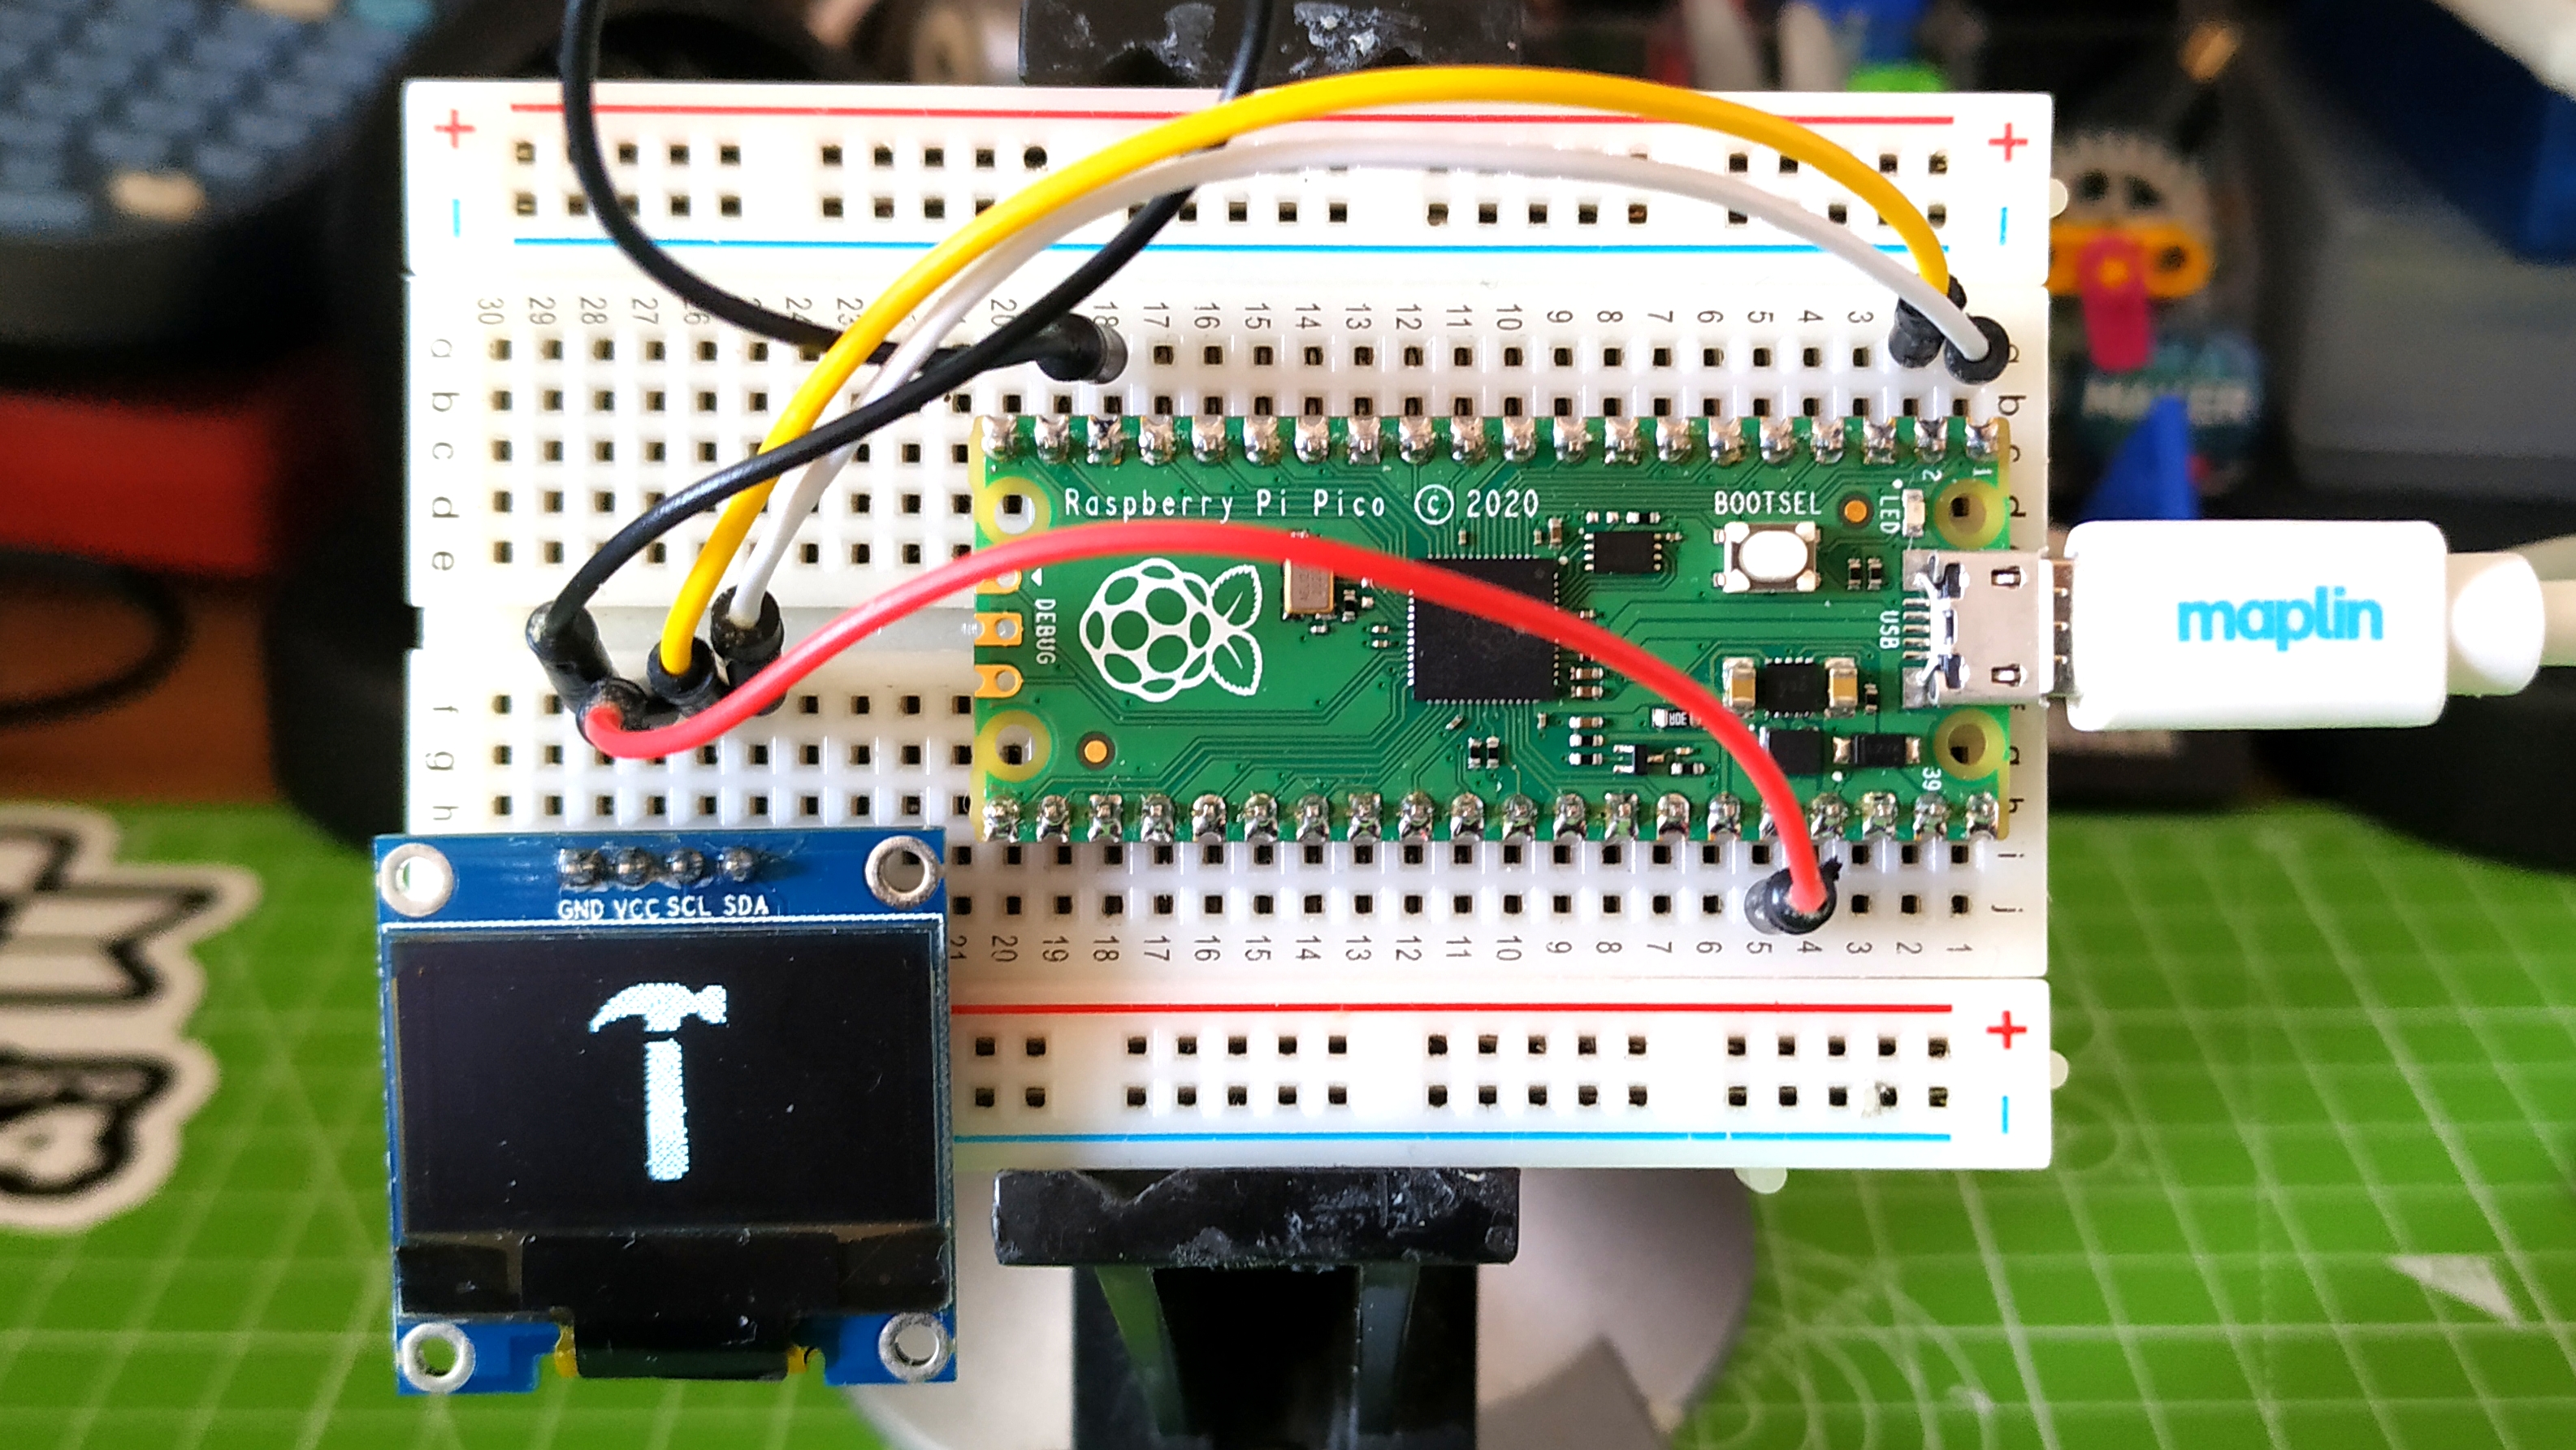
We can show much more than just text on the screen. Using a clever technique we can convert a JPEG image into a string of bytes.
We are going to use the code above as a base to work from. So if you haven’t already done so, copy and paste the final code above into Thonny.
1. Import the framebuf library. This library enables the code to create bitmap images and show them on the display.
from machine import Pin, I2C
from ssd1306 import SSD1306_I2C
import framebuf
2. Create a new object, TH which will store an array of bytes that make up our image. For now leave the contents of the array blank, we will fill in the blank later.
i2c=I2C(0,sda=Pin(0), scl=Pin(1), freq=400000)
oled = SSD1306_I2C(128, 64, i2c)
TH = bytearray()
3. Create an object, FB, which will load the image into the framebuffer. We pass the name of the bytearray object, the dimensions of the image (64 x 64 pixels) and then configure the image to be a 1-bit monochrome image.
fb = framebuf.FrameBuffer(TH,64,64, framebuf.MONO_HLSB)
4. Clear the screen, and then blit the image onto the screen. Then use show to update the screen. Blitting draws the image to the screen, in this case it places the 64 x 64 image dead center of the screen. Where 32 is the horizontal (x) position and 0 is the vertical (y) position.
oled.fill(0)
oled.blit(fb,32,0)
oled.show()
Our object, TH, currently has no image to display. To create a bytearray of an image we first need a suitable image. The screen is 128 x 64 pixels in size, but an image 64 x 64 pixels will fit nicely into the center of the screen. The image must be in a JPEG format.
To convert the image to a bytearray we shall use Don Hui’s (Novaspirit) img2bytearray python script.
1. Download and extract the ZIP archive to your machine. This creates a folder, img2bytearray which stores the Hui’s Python file.
2. Copy your image to the img2bytearray folder.
3. Open a Command Prompt / Terminal window and navigate to the img2bytearray folder.
4. To convert the image we call the command img2bytearray. We need to provide three extra parameters. First is the name of the image file, the next two are the dimensions of the image, in this case 64 by 64 pixels.
python3 img2bytearray.py YOUR-IMAGE.jpg 64 64
5. The command outputs a stream of bytes. Copy the text from b’ … ‘ and paste it inside the parenthesis of our TH object.
TH = bytearray(b’...’)
The final code should look like this
from machine import Pin, I2C
from ssd1306 import SSD1306_I2C
import framebuf

i2c=I2C(0,sda=Pin(0), scl=Pin(1), freq=400000)
oled = SSD1306_I2C(128, 64, i2c)
TH = bytearray(b’...’)

fb = framebuf.FrameBuffer(TH,64,64, framebuf.MONO_HLSB)
oled.fill(0)
oled.blit(fb,32,0)
oled.show()
6. Save and run your code. As with any Python script in Thonny, Click on File >> Save and save the file to your Raspberry Pi Pico as oled-test.py. When ready click on the Green play button to start the code and your image will appear on the OLED screen.
Animating Graphics on the OLED Screen with Pico
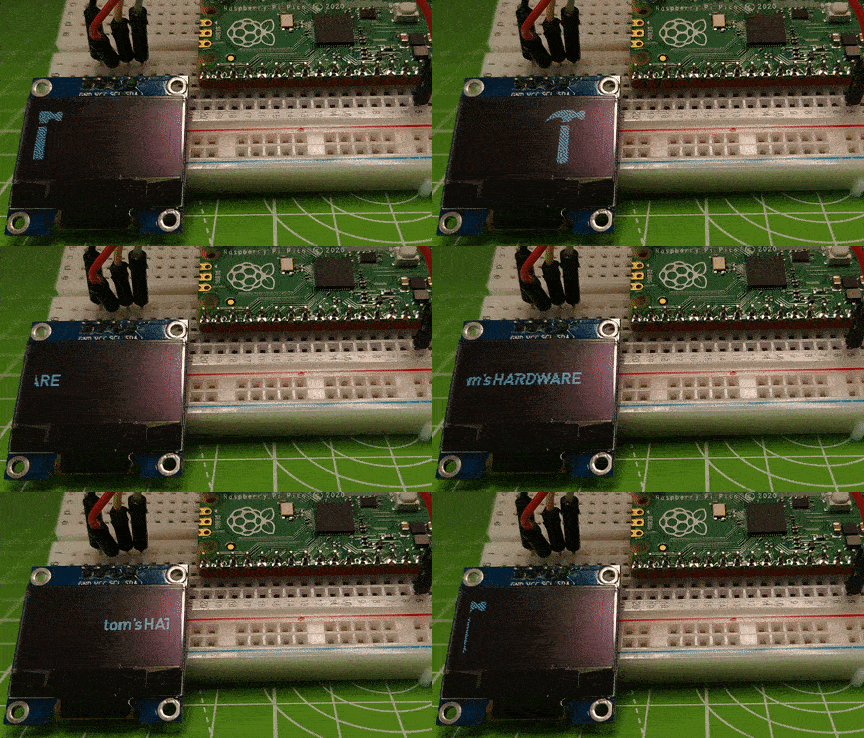
Creating an animation with the OLED display is a matter of moving or changing objects to give the illusion of movement. In the above GIF you can see the Tom’s Hardware hammer, and logo scrolling across the screen. To achieve this we used two byte arrays, for the hammer (TH) and the logo (LOGO).
Again we will build upon the code from the previous examples.
1. Import the previous libraries of code.
from machine import Pin, I2C
from ssd1306 import SSD1306_I2C
import framebuf
2. Setup the I2C pins for the OLED screen.
i2c=I2C(0,sda=Pin(0), scl=Pin(1), freq=400000)
oled = SSD1306_I2C(128, 64, i2c)
3. Create a while True loop to continuously run the code.
while True:
4. Create the TH bytearray. In there we store the bytes that make up the Tom’s Hardware hammer.
TH = bytearray(b'\x00\x00\x00\x00\x00\x00\x00\x00\x00\x00\x00\x00\x00\x00\x00\x00\x00\x00\x00\x00\x00\x00\x00\x00\x00\x00\x00\x00\x00\x00\x00\x00\x00\x00\x00[P\x00\x00\x00\x00\x00\x03\xad\xec\x0f\x00\x00\x00\x00\rv\xb6\x1a\x80\x00\x00\x00\x16\xdb[m\x80\x00\x00\x00um\xb5\xb6\x80\x00\x00\x00[\xb5n\xdb\x00\x00\x00\x01\xadW\xb5m\x80\x00\x00\x01w\xed[\xb6\x80\x00\x00\x03\xa8\x1a\xec+\x00\x00\x00\x05@\x17P\x1d\x00\x00\x00\x0e\x00\r\xb0\x06\x80\x00\x00\x08\x00\n\xd0\x00\x00\x00\x00\x08\x00\x17`\x00\x00\x00\x00\x00\x00\x00\x00\x00\x00\x00\x00\x00\x00\x00\x00\x00\x00\x00\x00\x00\x00\x00\x00\x00\x00\x00\x00\x00\x00\x00@\x00\x00\x00\x00\x00\x00\x1f\xa0\x00\x00\x00\x00\x00\x00\n\xd0\x00\x00\x00\x00\x00\x00\r`\x00\x00\x00\x00\x00\x00\x17\xb0\x00\x00\x00\x00\x00\x00\n\xd0\x00\x00\x00\x00\x00\x00\x1b`\x00\x00\x00\x00\x00\x00\r\xb0\x00\x00\x00\x00\x00\x00\x16\xa0\x00\x00\x00\x00\x00\x00\x0bp\x00\x00\x00\x00\x00\x00\x1d\xa0\x00\x00\x00\x00\x00\x00\n\xd0\x00\x00\x00\x00\x00\x00\x17p\x00\x00\x00\x00\x00\x00\x1a\xa0\x00\x00\x00\x00\x00\x00\r\xd0\x00\x00\x00\x00\x00\x00\x16\xb0\x00\x00\x00\x00\x00\x00\x1b`\x00\x00\x00\x00\x00\x00\r\xb0\x00\x00\x00\x00\x00\x00\x16\xd0\x00\x00\x00\x00\x00\x00\x1bp\x00\x00\x00\x00\x00\x00\r\xa8\x00\x00\x00\x00\x00\x00\x16\xb0\x00\x00\x00\x00\x00\x00\x1b`\x00\x00\x00\x00\x00\x00\x15\xb0\x00\x00\x00\x00\x00\x00\x1e\xd0\x00\x00\x00\x00\x00\x00\x13p\x00\x00\x00\x00\x00\x00\x1d\xa8\x00\x00\x00\x00\x00\x00\x16\xb0\x00\x00\x00\x00\x00\x00\x15\xd0\x00\x00\x00\x00\x00\x00\x1a\xb8\x00\x00\x00\x00\x00\x00\x17`\x00\x00\x00\x00\x00\x00\x1a\xd8\x00\x00\x00\x00\x00\x00\x17h\x00\x00\x00\x00\x00\x00\x1a\xb0\x00\x00\x00\x00\x00\x00\x1d\xd8\x00\x00\x00\x00\x00\x00+h\x00\x00\x00\x00\x00\x00\x16\xb0\x00\x00\x00\x00\x00\x00\x1b\xd8\x00\x00\x00\x00\x00\x00\x16`\x00\x00\x00\x00\x00\x00\x0b\xa0\x00\x00\x00\x00\x00\x00\x00\x00\x00\x00\x00\x00\x00\x00\x00\x00\x00\x00\x00\x00\x00\x00\x00\x00\x00\x00\x00\x00\x00\x00\x00\x00\x00\x00\x00')
5. Create an object, FB, which will load the image into the framebuffer, then clear the screen. We pass the name of the bytearray object, the dimensions of the image (64 x 64 pixels) and then configure the image to be a 1-bit monochrome image.
   fb = framebuf.FrameBuffer(TH,64,64, framebuf.MONO_HLSB)
   oled.fill(0)
6. Use a for loop with a range from -64 to 128, to create a basic sliding animation for the hammer. The negative value hides the hammer to the left of the screen, slowly scrolling the hammer from left to right until it goes out of visible range. By changing the value of “i” inside oled.blit() we create the illusion of movement.
   for i in range(-64,128):
       oled.blit(fb,i,0)
       oled.show()
7. Create a new bytearray for the Tom’s Hardware logo.
LOGO = bytearray(b'\x00\x00\x00\x00\x00\x00\x00\x00\x00\x00\x00\x00\x00\x00\x00\x00\x00\x00\x00\x00\x00\x00\x00\x00\x00\x00\x00\x00\x00\x00\x00\x00\x00\x00\x00\x00\x00\x00\x00\x00\x00\x00\x00\x00\x00\x00\x00\x00\x00\x00\x00\x00\x00\x00\x00\x00\x00\x00\x00\x00\x00\x00\x00\x00\x00\x00\x00\x00\x00\x00\x00\x00\x00\x00\x00\x00\x00\x00\x00\x00\x00\x00\x00\x00\x00\x00\x00\x00\x00\x00\x00\x00\x00\x00\x00\x00\x00\x00\x00\x00\x00\x00\x00\x00\x00\x00\x00\x00\x00\x00\x00\x00\x00\x00\x00\x00\x00\x00\x00\x00\x00\x00\x00\x00\x00\x00\x00\x00\x00\x00\x00\x00\x00\x00\x00\x00\x00\x00\x00\x00\x00\x00\x00\x00\x00\x00\x00\x00\x00\x00\x00\x00\x00\x00\x00\x00\x00\x00\x00\x00\x00\x00\x00\x00\x00\x00\x00\x00\x00\x00\x00\x00\x00\x00\x00\x00\x00\x00\x00\x00\x00\x00\x00\x00\x00\x00\x00\x00\x00\x00\x00\x00\x00\x00\x00\x00\x00\x00\x00\x00\x00\x00\x00\x00\x00\x00\x00\x00\x00\x00\x00\x00\x00\x00\x00\x00\x00\x00\x00\x00\x00\x00\x00\x00\x00\x00\x00\x00\x00\x00\x00\x00\x00\x00\x00\x00\x00\x00\x00\x00\x00\x00\x00\x00\x00\x00\x00\x00\x00\x00\x00\x00\x00\x00\x00\x00\x00\x00\x00\x00\x00\x00\x00\x00\x00\x00\x00\x00\x00\x00\x00\x00\x00\x00\x00\x00\x00\x00\x00\x00\x00\x00\x00\x00\x00\x00\x00\x00\x00\x00\x00\x00\x00\x00\x00\x00\x00\x00\x00\x00\x00\x00\x00\x00\x00\x00\x00\x00\x00\x00\x00\x00\x00\x00\x00\x00\x00\x00\x00\x00\x00\x00\x00\x00\x00\x00\x00\x00\x00\x00\x00\x00\x00\x00\x00\x00\x00\x00\x00\x00\x00\x00\x00\x00\x00\x00\x00\x00\x00\x00\x00\x00\x00\x00\x00\x00\x00\x00\x00\x00\x00\x00\x00\x00\x00\x00\x00\x00\x00\x00\x00\x00\x00\x00\x00\x00\x00\x00\x00\x00\x00\x00\x00\x00\x00\x00\x00\x00\x00\x00\x00\x00\x00\x00\x00\x00\x00\x00\x00\x00\x00\x00\x00\x01\x800\xc0\xc7\xf8~0\xc3\x0c\x1f\x87\xf8\x0c\x00\x00\x01\x800\xc1\xcf\xec\x7f0\xc7\x1c\x1f\xc7\xf8\x0c\x00\x00\x01\x800\xc1\xc1\x8ec\x99\xc6\x1c\x18\xe6\x00\x0c\x0c&`\x180\xc3\xe0\x06a\x99\xe6\x1e\x18f\x00\x1f>\x7f\xf8~0\xc3a\x8ea\x99\xe66\x18f\x00\x0cws\x98d?\xc3a\xbca\x99\xee6\x1f\xc7\xf0\x0ccs\x98`?\xc61\xb8a\x8f<s\x1f\x87\xf0\x0ccs\x18~0\xc61\x98a\x8f<c\x19\x86\x00\x0ccs\x18\x1e0\xc7\xf1\x9ca\x8f<\x7f\x99\xc6\x00\x0ccs\x18\x060\xcf\xf9\x8cc\x8e8\xff\x98\xc6\x00\x0f\x7fs\x18~0\xcc\x19\x8e\x7f\x06\x18\xc1\x98\xe7\xf8\x07>s\x18|0\xcc\x1d\x86|\x06\x18\xc1\xd8g\xf8\x00\x00\x00\x00\x00\x00\x00\x00\x00\x00\x00\x00\x00\x00\x00\x00\x00\x00\x00\x00\x00\x00\x00\x00\x00\x00\x00\x00\x00\x00\x00\x00\x00\x00\x00\x00\x00\x00\x00\x00\x00\x00\x00\x00\x00\x00\x00\x00\x00\x00\x00\x00\x00\x00\x00\x00\x00\x00\x00\x00\x00\x00\x00\x00\x00\x00\x00\x00\x00\x00\x00\x00\x00\x00\x00\x00\x00\x00\x00\x00\x00\x00\x00\x00\x00\x00\x00\x00\x00\x00\x00\x00\x00\x00\x00\x00\x00\x00\x00\x00\x00\x00\x00\x00\x00\x00\x00\x00\x00\x00\x00\x00\x00\x00\x00\x00\x00\x00\x00\x00\x00\x00\x00\x00\x00\x00\x00\x00\x00\x00\x00\x00\x00\x00\x00\x00\x00\x00\x00\x00\x00\x00\x00\x00\x00\x00\x00\x00\x00\x00\x00\x00\x00\x00\x00\x00\x00\x00\x00\x00\x00\x00\x00\x00\x00\x00\x00\x00\x00\x00\x00\x00\x00\x00\x00\x00\x00\x00\x00\x00\x00\x00\x00\x00\x00\x00\x00\x00\x00\x00\x00\x00\x00\x00\x00\x00\x00\x00\x00\x00\x00\x00\x00\x00\x00\x00\x00\x00\x00\x00\x00\x00\x00\x00\x00\x00\x00\x00\x00\x00\x00\x00\x00\x00\x00\x00\x00\x00\x00\x00\x00\x00\x00\x00\x00\x00\x00\x00\x00\x00\x00\x00\x00\x00\x00\x00\x00\x00\x00\x00\x00\x00\x00\x00\x00\x00\x00\x00\x00\x00\x00\x00\x00\x00\x00\x00\x00\x00\x00\x00\x00\x00\x00\x00\x00\x00\x00\x00\x00\x00\x00\x00\x00\x00\x00\x00\x00\x00\x00\x00\x00\x00\x00\x00\x00\x00\x00\x00\x00\x00\x00\x00\x00\x00\x00\x00\x00\x00\x00\x00\x00\x00\x00\x00\x00\x00\x00\x00\x00\x00\x00\x00\x00\x00\x00\x00\x00\x00\x00\x00\x00\x00\x00\x00\x00\x00\x00\x00\x00\x00\x00\x00\x00\x00\x00\x00\x00\x00\x00\x00\x00\x00\x00\x00\x00\x00\x00\x00\x00\x00\x00\x00\x00\x00\x00\x00\x00\x00\x00\x00\x00\x00\x00\x00\x00\x00\x00\x00\x00\x00\x00\x00\x00\x00\x00\x00\x00\x00\x00\x00\x00\x00\x00\x00\x00\x00\x00\x00\x00\x00\x00\x00\x00\x00\x00\x00\x00\x00\x00\x00\x00\x00\x00\x00\x00\x00\x00\x00\x00\x00\x00\x00\x00\x00\x00\x00\x00\x00\x00\x00\x00\x00')
8. Create an object, FB, which will load the image into the framebuffer, then clear the screen. We pass the name of the bytearray object, the dimensions of the image (128 x 64 pixels) and then configure the image to be a 1-bit monochrome image.
fb = framebuf.FrameBuffer(LOGO,128,64, framebuf.MONO_HLSB)
9. The remaining code is largely the same as before, the only difference being the for loop range changes to -128 to 128 to accommodate the larger Tom’s Hardware logo scrolling across the screen.
    oled.fill(0)
    for i in range(-128,128):
        oled.blit(fb,i,0)
        oled.show()
Your code should look like this
from machine import Pin, I2C
from ssd1306 import SSD1306_I2C
import framebuf


i2c=I2C(0,sda=Pin(0), scl=Pin(1), freq=400000)
oled = SSD1306_I2C(128, 64, i2c)

while True:
   TH = bytearray(b'\x00\x00\x00\x00\x00\x00\x00\x00\x00\x00\x00\x00\x00\x00\x00\x00\x00\x00\x00\x00\x00\x00\x00\x00\x00\x00\x00\x00\x00\x00\x00\x00\x00\x00\x00[P\x00\x00\x00\x00\x00\x03\xad\xec\x0f\x00\x00\x00\x00\rv\xb6\x1a\x80\x00\x00\x00\x16\xdb[m\x80\x00\x00\x00um\xb5\xb6\x80\x00\x00\x00[\xb5n\xdb\x00\x00\x00\x01\xadW\xb5m\x80\x00\x00\x01w\xed[\xb6\x80\x00\x00\x03\xa8\x1a\xec+\x00\x00\x00\x05@\x17P\x1d\x00\x00\x00\x0e\x00\r\xb0\x06\x80\x00\x00\x08\x00\n\xd0\x00\x00\x00\x00\x08\x00\x17`\x00\x00\x00\x00\x00\x00\x00\x00\x00\x00\x00\x00\x00\x00\x00\x00\x00\x00\x00\x00\x00\x00\x00\x00\x00\x00\x00\x00\x00\x00\x00@\x00\x00\x00\x00\x00\x00\x1f\xa0\x00\x00\x00\x00\x00\x00\n\xd0\x00\x00\x00\x00\x00\x00\r`\x00\x00\x00\x00\x00\x00\x17\xb0\x00\x00\x00\x00\x00\x00\n\xd0\x00\x00\x00\x00\x00\x00\x1b`\x00\x00\x00\x00\x00\x00\r\xb0\x00\x00\x00\x00\x00\x00\x16\xa0\x00\x00\x00\x00\x00\x00\x0bp\x00\x00\x00\x00\x00\x00\x1d\xa0\x00\x00\x00\x00\x00\x00\n\xd0\x00\x00\x00\x00\x00\x00\x17p\x00\x00\x00\x00\x00\x00\x1a\xa0\x00\x00\x00\x00\x00\x00\r\xd0\x00\x00\x00\x00\x00\x00\x16\xb0\x00\x00\x00\x00\x00\x00\x1b`\x00\x00\x00\x00\x00\x00\r\xb0\x00\x00\x00\x00\x00\x00\x16\xd0\x00\x00\x00\x00\x00\x00\x1bp\x00\x00\x00\x00\x00\x00\r\xa8\x00\x00\x00\x00\x00\x00\x16\xb0\x00\x00\x00\x00\x00\x00\x1b`\x00\x00\x00\x00\x00\x00\x15\xb0\x00\x00\x00\x00\x00\x00\x1e\xd0\x00\x00\x00\x00\x00\x00\x13p\x00\x00\x00\x00\x00\x00\x1d\xa8\x00\x00\x00\x00\x00\x00\x16\xb0\x00\x00\x00\x00\x00\x00\x15\xd0\x00\x00\x00\x00\x00\x00\x1a\xb8\x00\x00\x00\x00\x00\x00\x17`\x00\x00\x00\x00\x00\x00\x1a\xd8\x00\x00\x00\x00\x00\x00\x17h\x00\x00\x00\x00\x00\x00\x1a\xb0\x00\x00\x00\x00\x00\x00\x1d\xd8\x00\x00\x00\x00\x00\x00+h\x00\x00\x00\x00\x00\x00\x16\xb0\x00\x00\x00\x00\x00\x00\x1b\xd8\x00\x00\x00\x00\x00\x00\x16`\x00\x00\x00\x00\x00\x00\x0b\xa0\x00\x00\x00\x00\x00\x00\x00\x00\x00\x00\x00\x00\x00\x00\x00\x00\x00\x00\x00\x00\x00\x00\x00\x00\x00\x00\x00\x00\x00\x00\x00\x00\x00\x00\x00')
   fb = framebuf.FrameBuffer(TH,64,64, framebuf.MONO_HLSB)
   oled.fill(0)
   for i in range(-64,128):
       oled.blit(fb,i,0)
       oled.show()
   LOGO = bytearray(b'\x00\x00\x00\x00\x00\x00\x00\x00\x00\x00\x00\x00\x00\x00\x00\x00\x00\x00\x00\x00\x00\x00\x00\x00\x00\x00\x00\x00\x00\x00\x00\x00\x00\x00\x00\x00\x00\x00\x00\x00\x00\x00\x00\x00\x00\x00\x00\x00\x00\x00\x00\x00\x00\x00\x00\x00\x00\x00\x00\x00\x00\x00\x00\x00\x00\x00\x00\x00\x00\x00\x00\x00\x00\x00\x00\x00\x00\x00\x00\x00\x00\x00\x00\x00\x00\x00\x00\x00\x00\x00\x00\x00\x00\x00\x00\x00\x00\x00\x00\x00\x00\x00\x00\x00\x00\x00\x00\x00\x00\x00\x00\x00\x00\x00\x00\x00\x00\x00\x00\x00\x00\x00\x00\x00\x00\x00\x00\x00\x00\x00\x00\x00\x00\x00\x00\x00\x00\x00\x00\x00\x00\x00\x00\x00\x00\x00\x00\x00\x00\x00\x00\x00\x00\x00\x00\x00\x00\x00\x00\x00\x00\x00\x00\x00\x00\x00\x00\x00\x00\x00\x00\x00\x00\x00\x00\x00\x00\x00\x00\x00\x00\x00\x00\x00\x00\x00\x00\x00\x00\x00\x00\x00\x00\x00\x00\x00\x00\x00\x00\x00\x00\x00\x00\x00\x00\x00\x00\x00\x00\x00\x00\x00\x00\x00\x00\x00\x00\x00\x00\x00\x00\x00\x00\x00\x00\x00\x00\x00\x00\x00\x00\x00\x00\x00\x00\x00\x00\x00\x00\x00\x00\x00\x00\x00\x00\x00\x00\x00\x00\x00\x00\x00\x00\x00\x00\x00\x00\x00\x00\x00\x00\x00\x00\x00\x00\x00\x00\x00\x00\x00\x00\x00\x00\x00\x00\x00\x00\x00\x00\x00\x00\x00\x00\x00\x00\x00\x00\x00\x00\x00\x00\x00\x00\x00\x00\x00\x00\x00\x00\x00\x00\x00\x00\x00\x00\x00\x00\x00\x00\x00\x00\x00\x00\x00\x00\x00\x00\x00\x00\x00\x00\x00\x00\x00\x00\x00\x00\x00\x00\x00\x00\x00\x00\x00\x00\x00\x00\x00\x00\x00\x00\x00\x00\x00\x00\x00\x00\x00\x00\x00\x00\x00\x00\x00\x00\x00\x00\x00\x00\x00\x00\x00\x00\x00\x00\x00\x00\x00\x00\x00\x00\x00\x00\x00\x00\x00\x00\x00\x00\x00\x00\x00\x00\x00\x00\x00\x00\x00\x00\x00\x00\x00\x00\x00\x00\x00\x00\x00\x00\x00\x00\x00\x00\x01\x800\xc0\xc7\xf8~0\xc3\x0c\x1f\x87\xf8\x0c\x00\x00\x01\x800\xc1\xcf\xec\x7f0\xc7\x1c\x1f\xc7\xf8\x0c\x00\x00\x01\x800\xc1\xc1\x8ec\x99\xc6\x1c\x18\xe6\x00\x0c\x0c&`\x180\xc3\xe0\x06a\x99\xe6\x1e\x18f\x00\x1f>\x7f\xf8~0\xc3a\x8ea\x99\xe66\x18f\x00\x0cws\x98d?\xc3a\xbca\x99\xee6\x1f\xc7\xf0\x0ccs\x98`?\xc61\xb8a\x8f<s\x1f\x87\xf0\x0ccs\x18~0\xc61\x98a\x8f<c\x19\x86\x00\x0ccs\x18\x1e0\xc7\xf1\x9ca\x8f<\x7f\x99\xc6\x00\x0ccs\x18\x060\xcf\xf9\x8cc\x8e8\xff\x98\xc6\x00\x0f\x7fs\x18~0\xcc\x19\x8e\x7f\x06\x18\xc1\x98\xe7\xf8\x07>s\x18|0\xcc\x1d\x86|\x06\x18\xc1\xd8g\xf8\x00\x00\x00\x00\x00\x00\x00\x00\x00\x00\x00\x00\x00\x00\x00\x00\x00\x00\x00\x00\x00\x00\x00\x00\x00\x00\x00\x00\x00\x00\x00\x00\x00\x00\x00\x00\x00\x00\x00\x00\x00\x00\x00\x00\x00\x00\x00\x00\x00\x00\x00\x00\x00\x00\x00\x00\x00\x00\x00\x00\x00\x00\x00\x00\x00\x00\x00\x00\x00\x00\x00\x00\x00\x00\x00\x00\x00\x00\x00\x00\x00\x00\x00\x00\x00\x00\x00\x00\x00\x00\x00\x00\x00\x00\x00\x00\x00\x00\x00\x00\x00\x00\x00\x00\x00\x00\x00\x00\x00\x00\x00\x00\x00\x00\x00\x00\x00\x00\x00\x00\x00\x00\x00\x00\x00\x00\x00\x00\x00\x00\x00\x00\x00\x00\x00\x00\x00\x00\x00\x00\x00\x00\x00\x00\x00\x00\x00\x00\x00\x00\x00\x00\x00\x00\x00\x00\x00\x00\x00\x00\x00\x00\x00\x00\x00\x00\x00\x00\x00\x00\x00\x00\x00\x00\x00\x00\x00\x00\x00\x00\x00\x00\x00\x00\x00\x00\x00\x00\x00\x00\x00\x00\x00\x00\x00\x00\x00\x00\x00\x00\x00\x00\x00\x00\x00\x00\x00\x00\x00\x00\x00\x00\x00\x00\x00\x00\x00\x00\x00\x00\x00\x00\x00\x00\x00\x00\x00\x00\x00\x00\x00\x00\x00\x00\x00\x00\x00\x00\x00\x00\x00\x00\x00\x00\x00\x00\x00\x00\x00\x00\x00\x00\x00\x00\x00\x00\x00\x00\x00\x00\x00\x00\x00\x00\x00\x00\x00\x00\x00\x00\x00\x00\x00\x00\x00\x00\x00\x00\x00\x00\x00\x00\x00\x00\x00\x00\x00\x00\x00\x00\x00\x00\x00\x00\x00\x00\x00\x00\x00\x00\x00\x00\x00\x00\x00\x00\x00\x00\x00\x00\x00\x00\x00\x00\x00\x00\x00\x00\x00\x00\x00\x00\x00\x00\x00\x00\x00\x00\x00\x00\x00\x00\x00\x00\x00\x00\x00\x00\x00\x00\x00\x00\x00\x00\x00\x00\x00\x00\x00\x00\x00\x00\x00\x00\x00\x00\x00\x00\x00\x00\x00\x00\x00\x00\x00\x00\x00\x00\x00\x00\x00\x00\x00\x00\x00\x00\x00\x00\x00\x00\x00\x00\x00\x00\x00\x00\x00\x00\x00\x00\x00\x00\x00\x00\x00\x00\x00\x00\x00\x00\x00\x00\x00\x00\x00\x00\x00\x00\x00\x00\x00\x00\x00\x00\x00\x00\x00\x00\x00\x00\x00\x00\x00\x00\x00\x00\x00\x00\x00\x00\x00\x00')
   fb = framebuf.FrameBuffer(LOGO,128,64, framebuf.MONO_HLSB)
   oled.fill(0)
   for i in range(-128,128):
       oled.blit(fb,i,0)
       oled.show()
Save and run your code. As with any Python script in Thonny, Click on File >> Save and save the file to your Raspberry Pi Pico as oled-test.py. When ready click on the Green play button to start the code and your animation will scroll across the OLED screen.
Les Pounder is an associate editor at Tom's Hardware. He is a creative technologist and for seven years has created projects to educate and inspire minds both young and old. He has worked with the Raspberry Pi Foundation to write and deliver their teacher training program "Picademy".
-
WalexNET Hi,Reply
I'm trying to copy your example, but I can't get the oled display to work, I've tried several libraries, including the one you propose, but always in all cases it throws me this error:
The error is thrown at me whenever I try to instantiate the SSD1306_I2C object
This is my simple code
from machine import Pin, I2C
from time import sleep_ms
from ssd1306 import SSD1306_I2C
import framebuf
ANCHO = 128
ALTO = 64
PinSDA = Pin(0)
PinSCL = Pin(1)
Address = 0x3C
i2c =I2C(0, sda=PinSDA, scl=PinSCL, freq=400000)
sleep_ms(100)
oled = SSD1306_I2C(ANCHO, ALTO, i2c)
This is the error that it returns to me
>>> %Run -c $EDITOR_CONTENT
Traceback (most recent call last):
File "<stdin>", line 17, in <module>
File "/lib/ssd1306.py", line 110, in __init__
File "/lib/ssd1306.py", line 36, in __init__
File "/lib/ssd1306.py", line 73, in init_display
File "/lib/ssd1306.py", line 101, in show
File "/lib/ssd1306.py", line 119, in write_data
OSError: EIO
>>> Could you help me by indicating what the problem would be?
From already thank you very much -
Kananaskis I had the same problem and error message. I think there may have been some problem with the ssd1306.py program that was downloaded from PyPlReply
I had downloaded that program from the micropython website and didn't have an issue.
When I replaced it with the one from PyPl the errors showed up.
My question is how can we enlarge the text?
I want to display temperature and want the 128 x 64 OLED to display 2 large numbers so that it is easier to read.
I'm not sure how to change the font size in this software?
Thanks,
Robin -
Rob Latour When I try to install the micropython-ssd1306 library I get the following error:Reply
ERROR: Could not find a version that satisfies the requirement micropython-ssd1306
ERROR: No matching distribution found for micropython-ssd1306
Process returned with code 1
any idea on how to fix this? -
vikingsraven HI, thanks for the tutorial.Reply
The i2c port in micropython needs a slight delay before it sends data, to fix the
OSError: EIO
import utime , then add utime.sleep(100) after the i2c initialisation i2c = I2C... -
brokian Reply
Thanks for your example, it worked really well for me with some simple changes to work with the SPI version of the display that I have.Admin said:OLED displays are a cost effective way to add small text output to a project. They are super small but with a bright and clear display.
How to Use an OLED Display With Raspberry Pi Pico : Read more
from machine import SPI, Pin
from ssd1306 import SSD1306_SPI
import framebuf
# Assign chip select (CS) pin
cs = machine.Pin(16, machine.Pin.OUT)
dc = machine.Pin(20, machine.Pin.OUT)
res = machine.Pin(21, machine.Pin.OUT)
# Initialize SPI
spi = machine.SPI(0,
baudrate=10000000,
polarity=1,
phase=1,
bits=8,
firstbit=machine.SPI.MSB,
sck=machine.Pin(18),
mosi=machine.Pin(19))
oled = SSD1306_SPI(128, 64, spi, dc, res, cs)
while True:
.............as per your example. -
mgh128 Many thanks for this very helpful tutorial. Just one remark - that the photo at https://cdn.mos.cms.futurecdn.net/bExDKgAi9dCiAA9j9wqQqj-1200-80.jpg (at the end of step 6) shows the GND and VCC labels swapped relative to such OLED modules (and also contradicting the wiring diagrams elsewhere in the tutorial), so to avoid confusion and potential damage to displays, it could be a good idea to update that photo to show the sequence 1=GDN, 2=VCC, 3=SCK, 4=SDA as shown correctly in the Fritzing wiring diagram earlier in the tutorial and also in the other photos and the initial video in this tutorial.Reply
