Some Raspberry Pi 4s Can Now Overclock to 2.3 GHz. Here’s How.
Squeeze the best performance from your Raspberry Pi 4 and the new Compute Module 4
Leave no MHz behind. Where the previous Raspberry Pi overclocking high for the Pi 4 was 2.147 GHz, newer units, including the Raspberry Pi 4 8GB and some variations of the Compute Module 4 can now hit a full 2.3 GHz. All Raspberry Pi 4 units, except the Raspberry Pi 400, operate a stock clock speed of 1.5 GHz so this is a 35 percent speed jump you get by tweaking a few settings and, hopefully, providing active cooling.
Overclocking a Raspberry Pi is deceptively simple. We edit the config.txt file found in the boot partition and, after a reboot, we see a performance boost, for free. We spent the time testing the limits of the Raspberry Pi 4 and the Compute Module 4, deploying multiple overclocks from 2.2 GHz to 2.3 GHz to give you the data that you need to overclock your Raspberry Pi 4 / Compute Module 4.
Our tests involved the Raspberry Pi 4 4GB and 8GB, Compute Module 4 1GB and an 8GB Compute Module Lite connected to the official Compute Module 4 IO Board. For the Compute Module 4, we used its onboard eMMC flash storage as a boot device, and for the Raspberry Pi 4s and the Compute Module Lite we used a microSD card (see best Raspberry Pi microSD cards) as our boot medium. All test machines ran the latest version of Raspberry Pi OS, updated with the latest software. Our stress tests were conducted using Stressberry which runs the CPU at 100% to generate temperature data and to ensure that the CPU can cope with heavy tasks at those speeds.
Before we conducted the test we needed to prepare our devices for use.
Flashing an Image: Raspberry Pi 4 and the Compute Module 4 Lite
The Compute Module 4 Lite has no eMMC storage so we will need to write a micro SD card using the Raspberry Pi Imager. This is exactly the same process as if we were to write a card for other models of Raspberry Pi. See how to set up a Raspberry Pi for the first time or how to set up a headless Raspberry Pi for details. If you already have a microSD card set up, make sure you update your operating system by entering:
sudo apt update
sudo apt upgrade
You may also want to update your firmware to the latest version by entering
sudo rpi-updateFlashing an Image on Compute Module 4 with eMMC Storage
There are 32 variants of the Compute Module 4, but at the most basic level there are two key models. The Compute Module 4 and the Lite version. The Compute Module 4 has onboard eMMC flash storage, while the lite version omits any form of flash storage.
Get Tom's Hardware's best news and in-depth reviews, straight to your inbox.
For the Compute Module 4, to flash the onboard storage we need to download the contents of a Git repository to a machine running Linux, or another Raspberry Pi.
1. Open a terminal and clone the repository.
$ git clone --depth=1 https://github.com/raspberrypi/usbboot2. Change directory to enter the download repository.
$ cd usbboot3. Install libusb, a developer tool to enable USB access in scripts.
$ sudo apt install libusb-1.0-0-dev4. We then need to make the rpiboot application from the downloaded files.
$ make5. Connect the Compute Module 4 to the Compute Module 4 io Board. Connect a micro USB cable to micro USB port and then connect the other end to a USB port on your Linux computer.
6. Locate pins J2 and fit a jumper to disable eMMC boot. If you do not have a jumper, then a female to female connector can be used. This will prevent the Compute Module 4 from booting and will instead enable us to mount the Compute module 4 as if it were a USB flash drive.
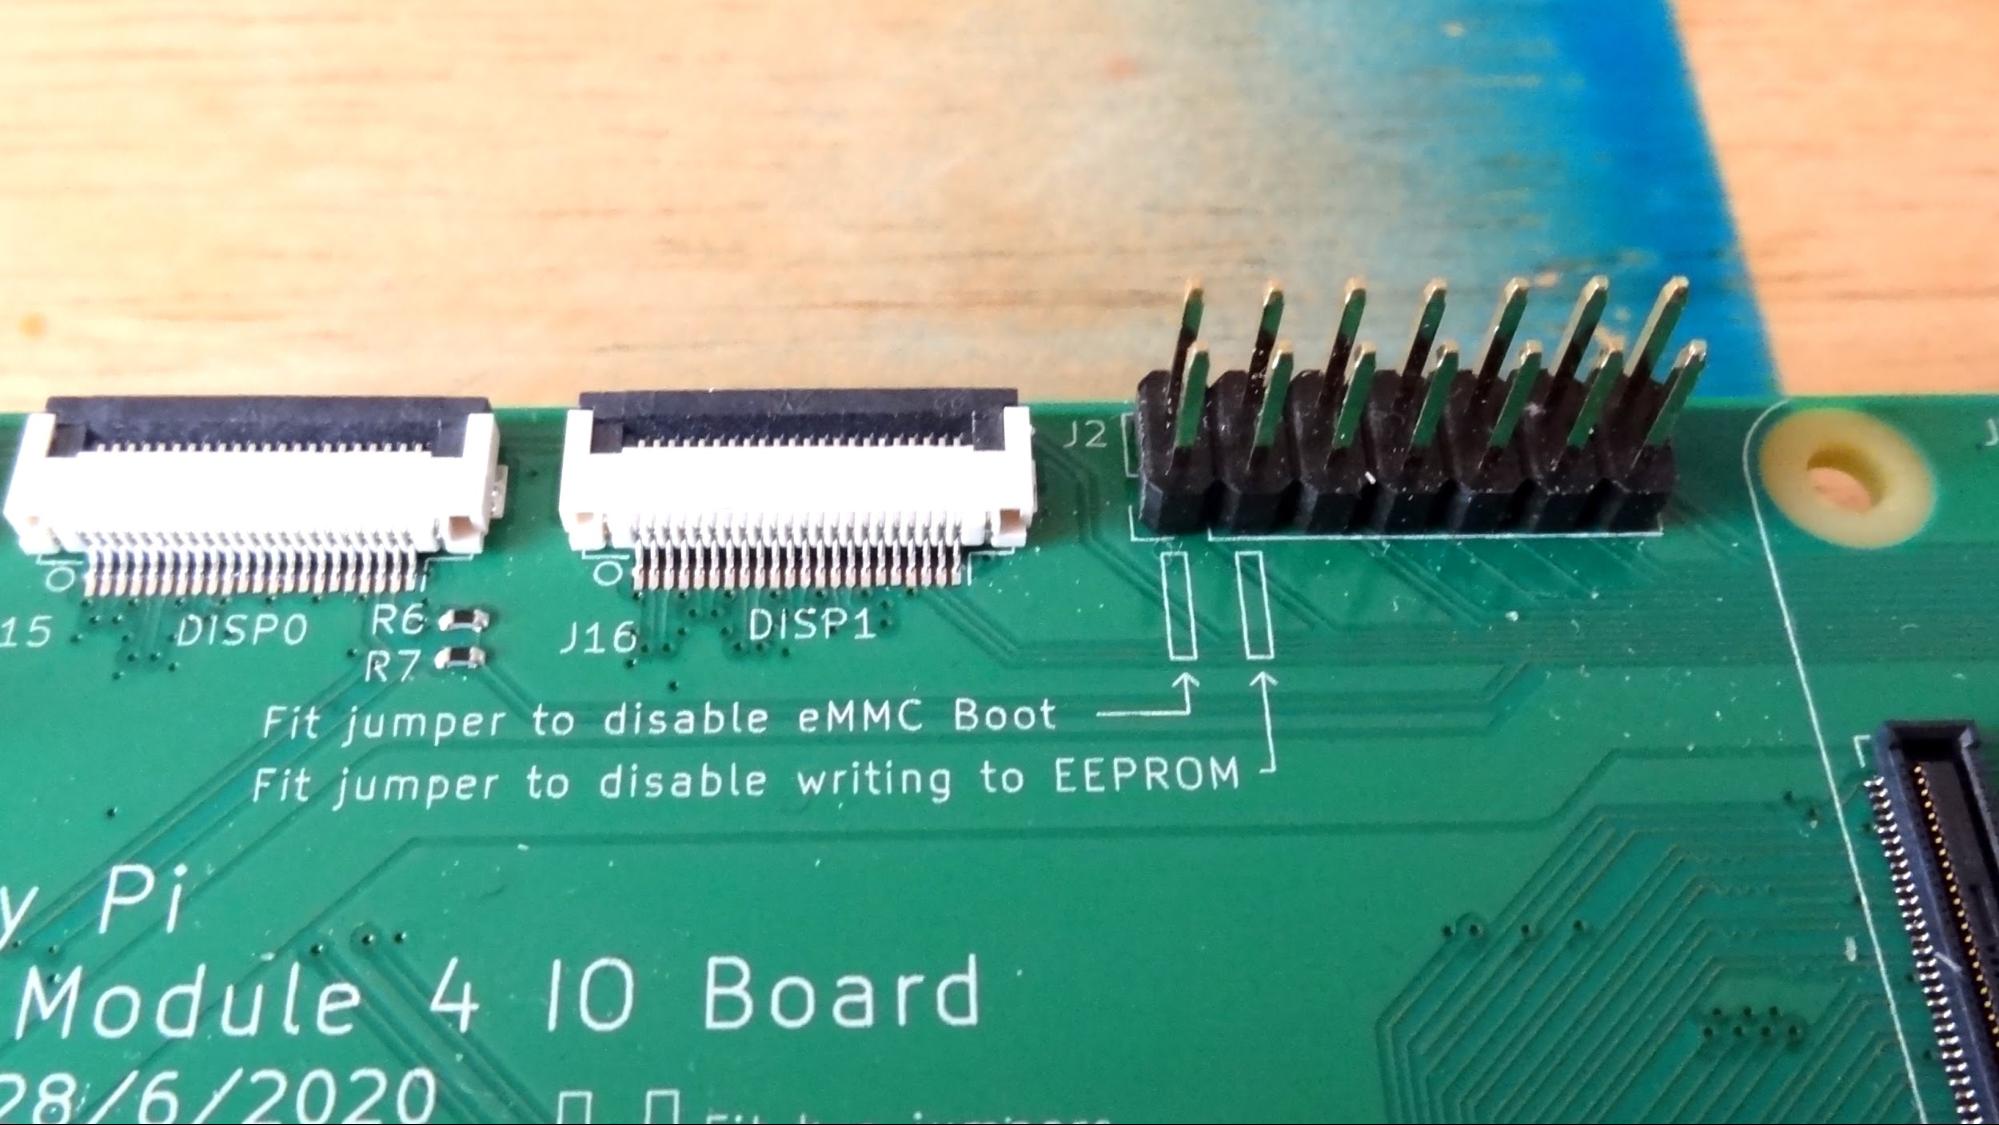
In the Terminal, run the rpiboot command to mount the Compute Module.
$ sudo ./rpibootAfter a few moments the drive will appear and be accessible.
7. On your Linux computer, navigate to https://www.raspberrypi.org/downloads/ to download Raspberry Pi Imager. Install the application.
8. Open Raspberry Pi Imager and select Raspberry Pi OS (32-bit).
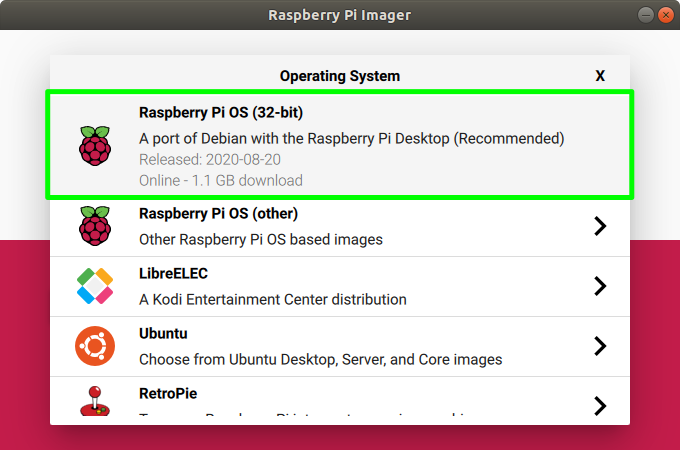
9. Click on CHOOSE SD CARD and select your Compute Module 4.
10. Click on Write, to flash the OS to the eMMC storage.
With the OS written to the Compute Module 4, we can now close Raspberry Pi Imager.
Extra Configuration Required for Compute Module 4
Before we can use the Compute Module 4, we need to make a change to a config file in order to use the USB ports of the IO Board which are disabled by default.
1. Open the File Manager, locate the Boot partition of the Compute Module 4, or the micro SD card and open the config.txt file with a text editor.
2. At the bottom of the file add the following lines to enable the USB ports. The first line is a comment to remind ourselves as to the function of the command underneath it.
#Enable USB ports on IO Board
dtoverlay=dwc2,dr_mode=host
An optional step is to enable the use of an external antenna. The Compute Module 4 has a built in Wi-Fi antenna and a ufl connector for an official external antenna. To use this we need to add a further line to the config file, config.txt.
At the bottom of config.txt add these lines to enable the external antenna.
#Enable external antenna
dtparam=ant2
Eject the boot and root partitions from your Linux machine before removing the USB cable / micro SD card.
Booting the Compute Module 4
If you are using the Compute Module 4, remove the micro USB cable and the jumper from J2 of the IO Board. If you are using the Compute Module 4 Lite, insert the micro SD card.
For both versions, connect your keyboard, mouse, HDMI and external antenna (if you have chosen to use an external antenna). Then plug into power, which will trigger the Compute Module 4 to boot to the Raspberry Pi OS desktop.
Overclocking the Raspberry Pi 4 and the Compute Module 4
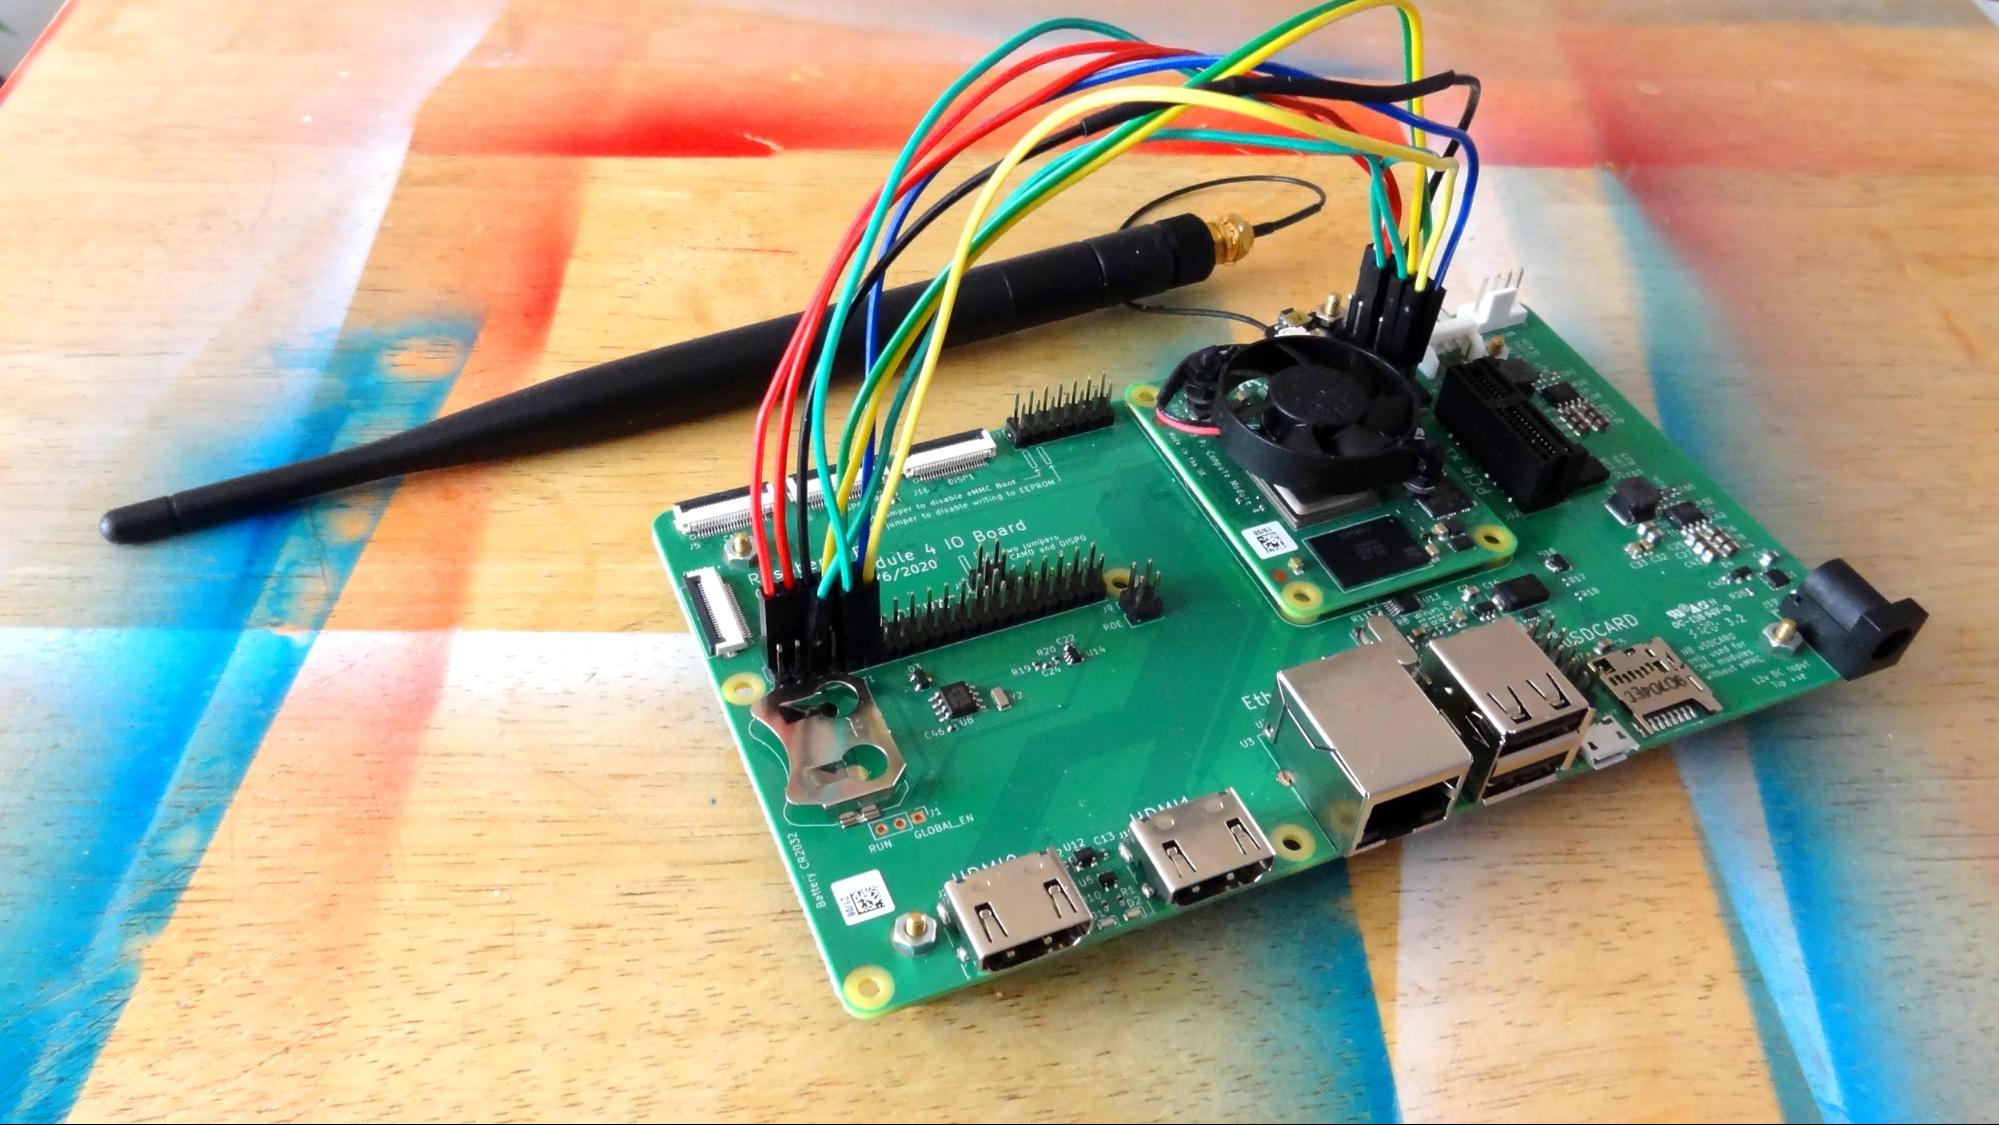
The stock speed of the Raspberry Pi 4 and the Compute Module 4 is 1.5 GHz. As with any model of Raspberry Pi, they can be overclocked to provide a free performance boost.
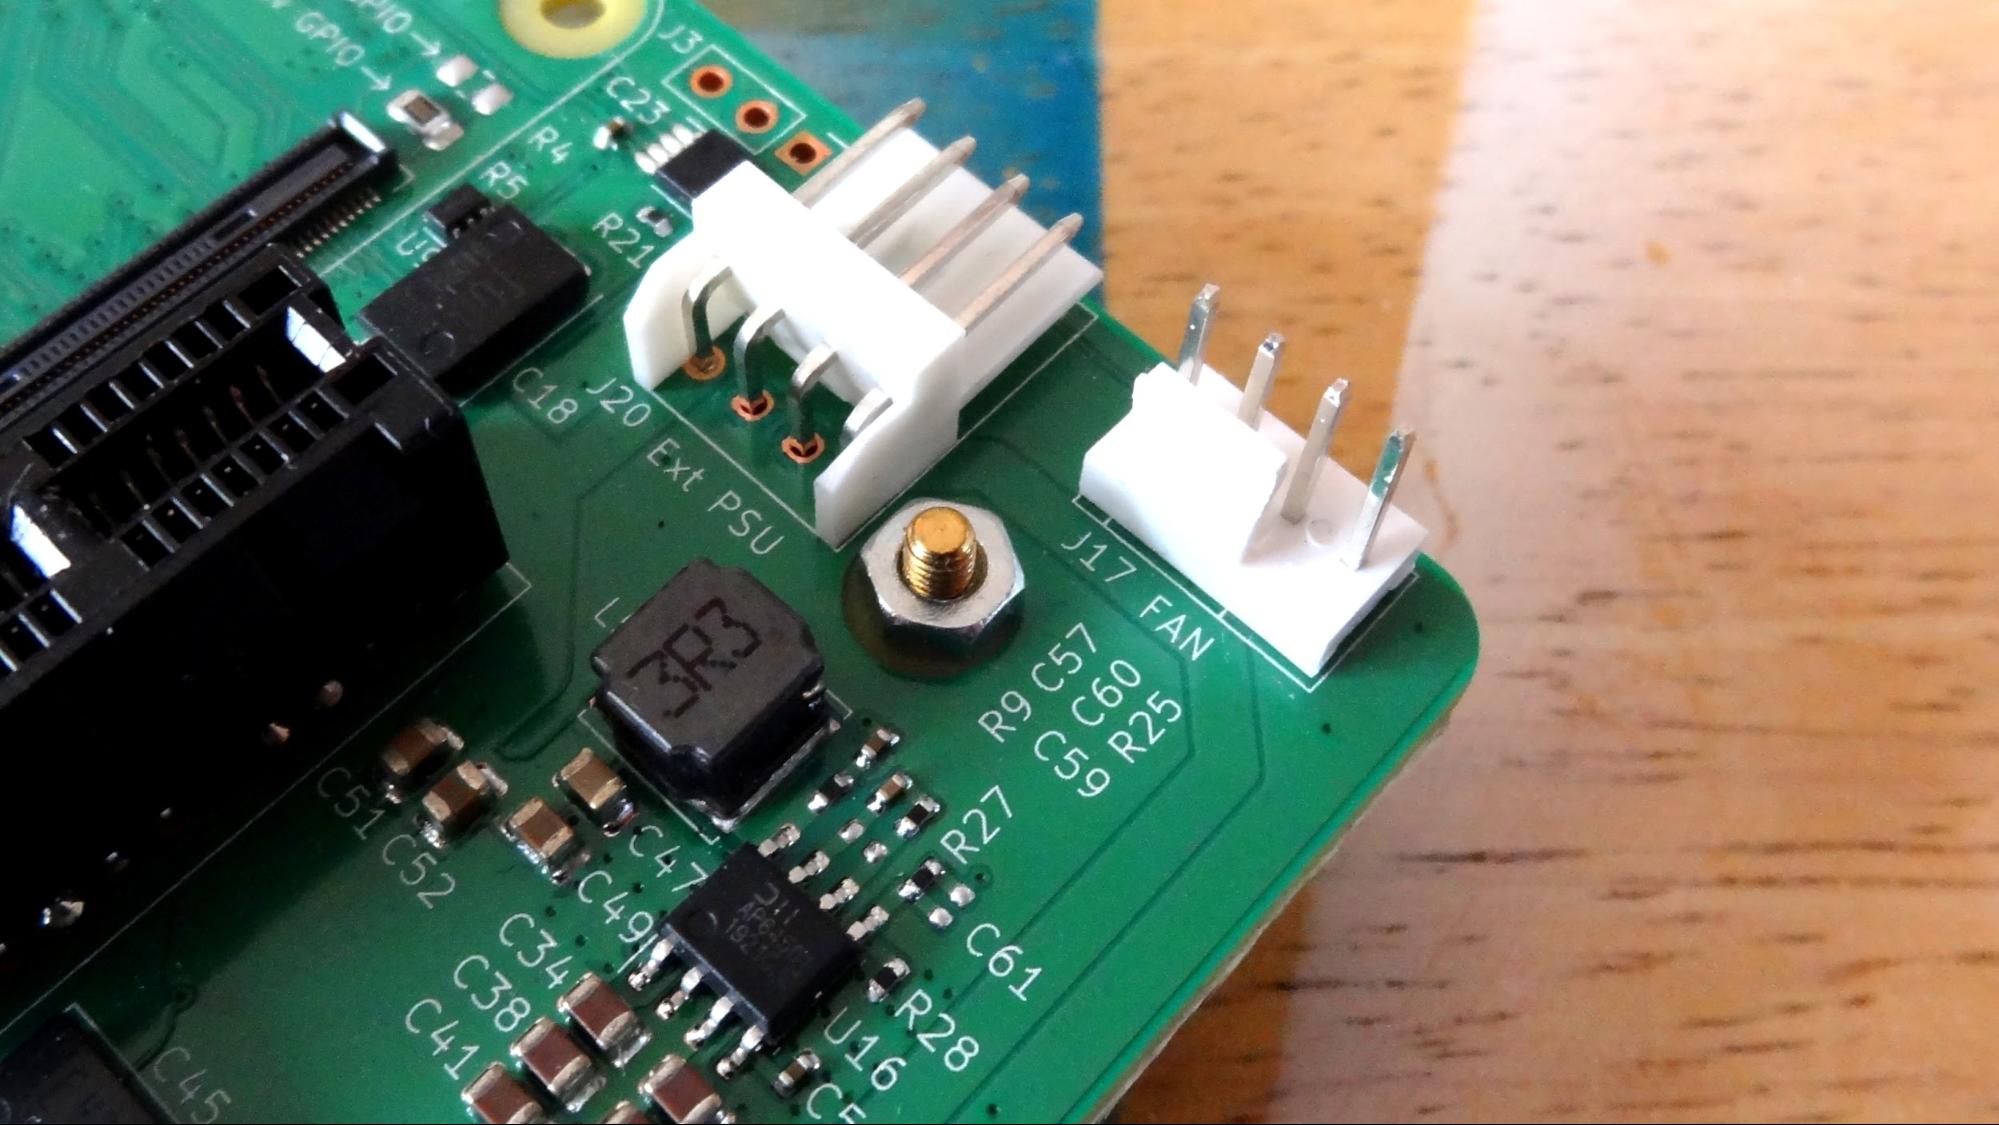
Before we even start the overclock process we will need to ensure that there is adequate cooling. For passive cooling you will need much more than some simple stick-on heatsinks. We chose to cool the Compute Module 4 with a Pimoroni Fan Shim, hacked to sit above the module and controlled from the GPIO. We also wrote a simple Python script to run on boot which started the fan at full speed. If you have access to, or a wish to use PC fans then the Compute Module 4 IO Board has a fan header at J17 which can be used with 12V PC fans.
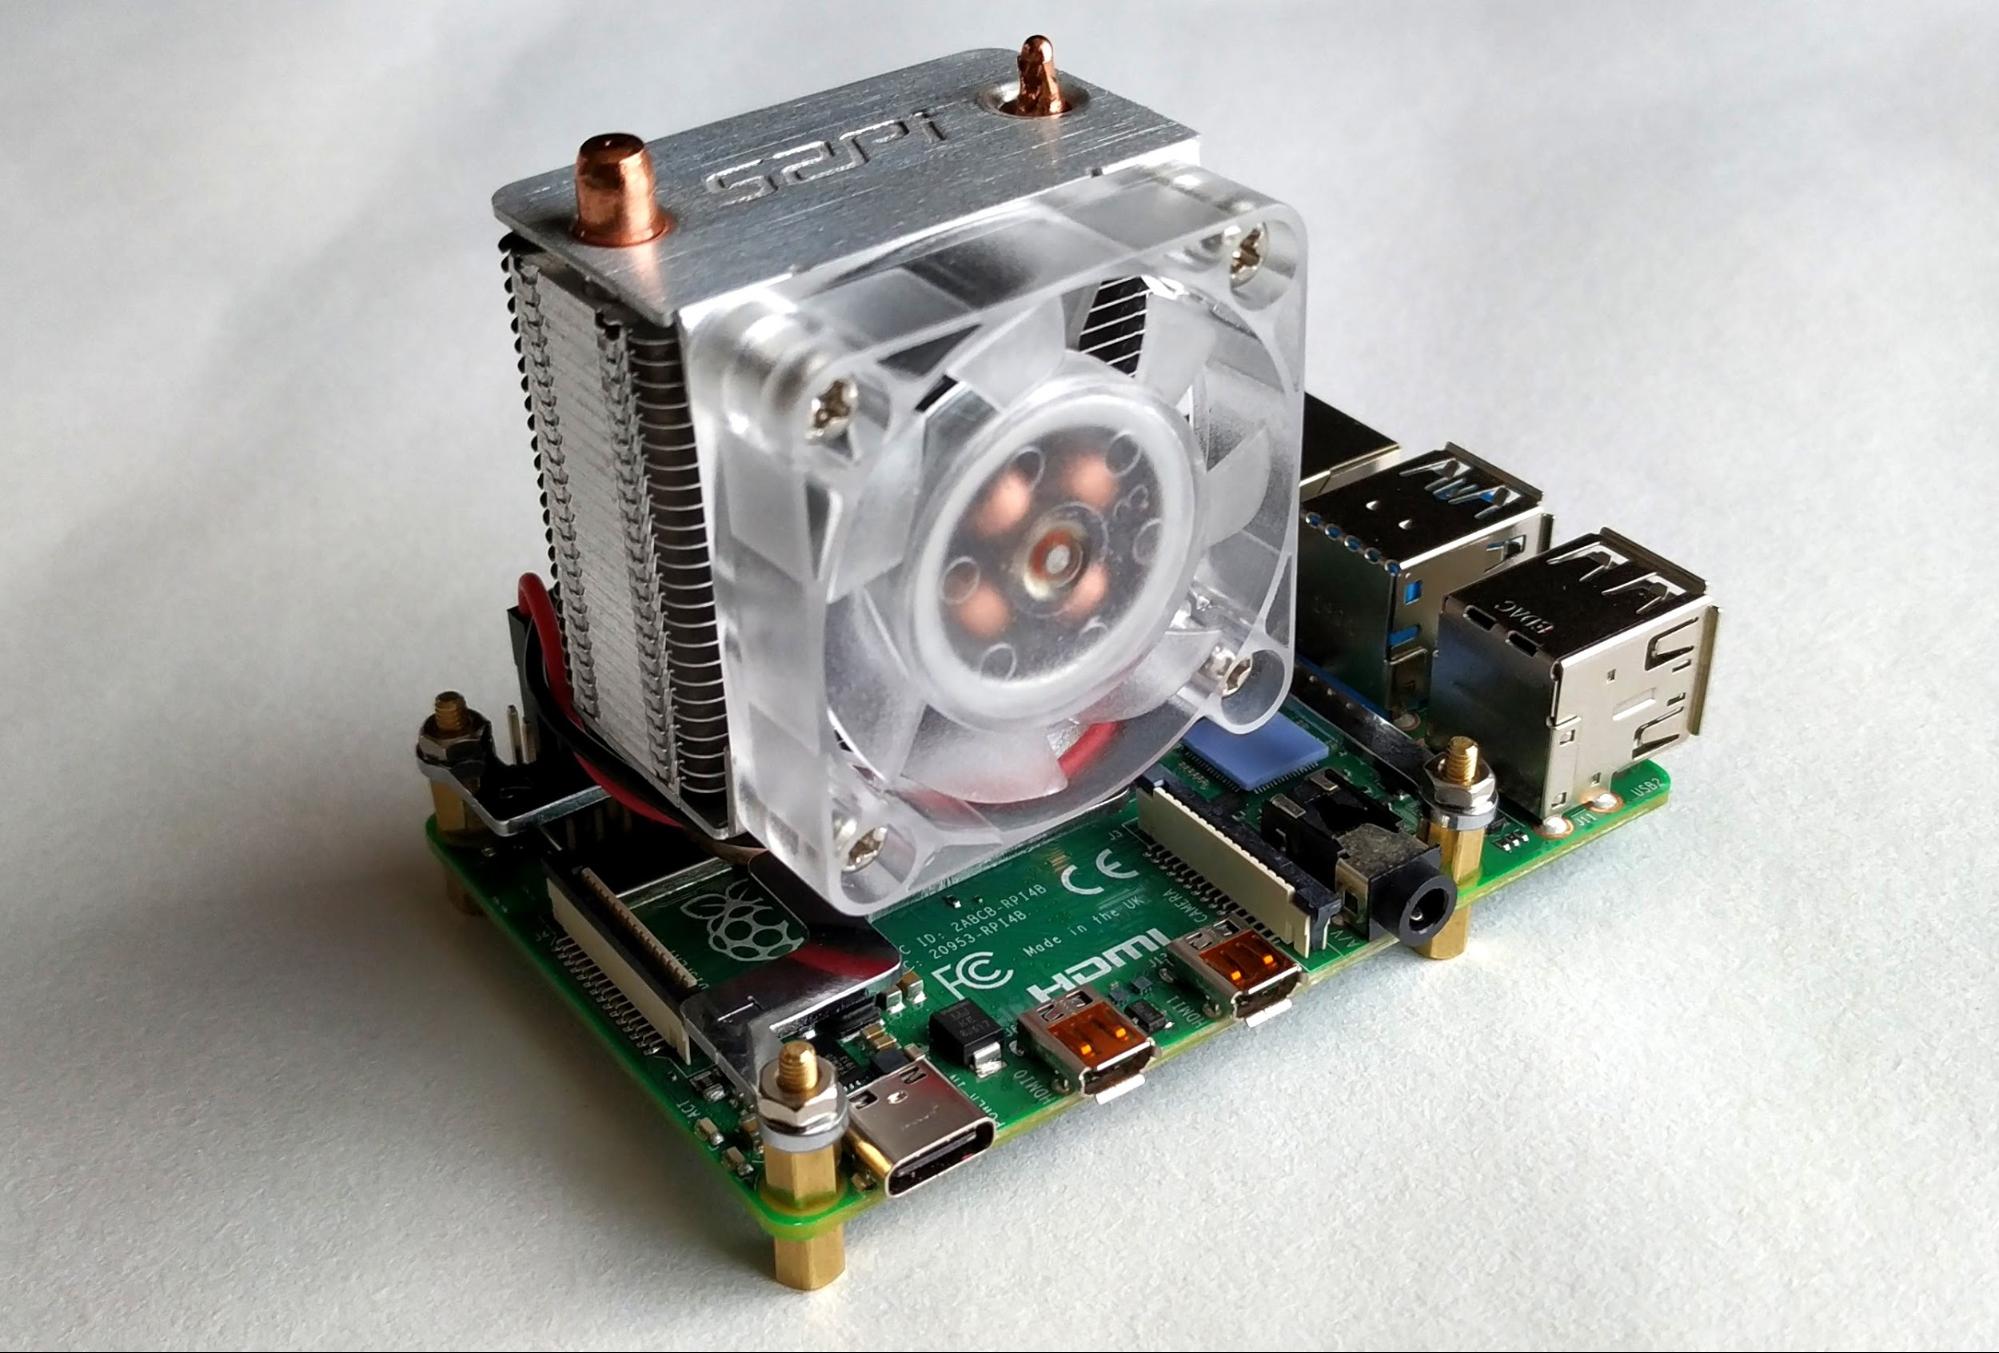
To cool our Raspberry Pi 4, we used a 52Pi IceTower, an extreme cooling solution which looks and acts as heatsink and fan found inside a PC case. This cooling solution runs directly from the 5V pins of the GPIO.
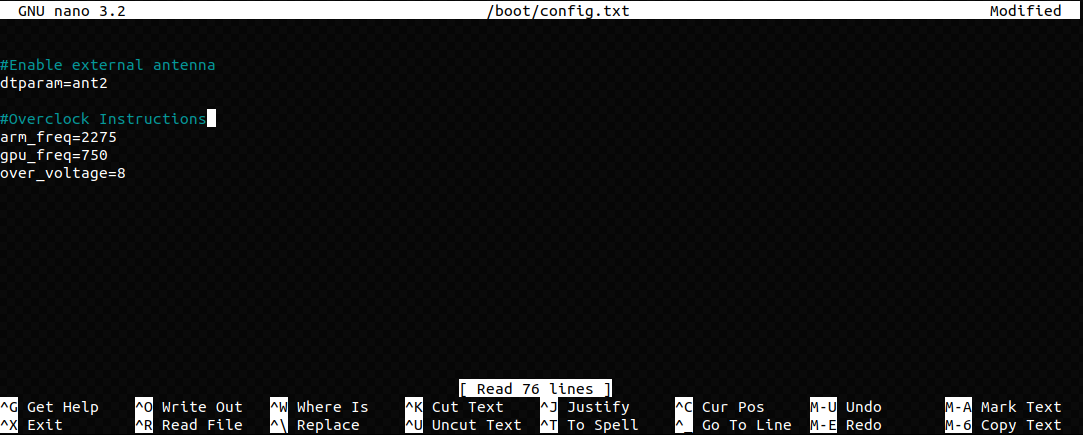
To overclock a Raspberry Pi we need to edit the config.txt file, the same file that we earlier edited to add USB and external antenna support.
1. Open the config.txt file for editing in a terminal window on your Pi.
sudo nano /boot/config.txt2. Using the keyboard, move to the bottom of the file and add a comment line to identify the overclock instructions.
#Overclock Instructions3. Set the CPU speed by adding the arm_freq option and entering the desired speed in MHz. In this example we set the overclock to 2275MHz. Changing the value will set the maximum CPU speed, so use 2200, 2250 and 2275 etc.
arm_freq=22754. Overclock the GPU to 750MHz by adding this line.
gpu_freq=7505. Overclocking requires extra voltage for the CPU. Add the over_voltage value of 8 to provide 1.4V of extra voltage.
over_voltage=86. Press CTRL + X and then press Y to save and exit the file.
7. Reboot the Raspberry Pi and once the reboot is complete open a Terminal and use the vcgencmd to show the current ARM CPU speed.

vcgencmd measure_clock armIf your Raspberry Pi does not boot, it means that your particular CPU cannot handle the clock speed you configured it for. Stick your microSD card in another computer or mount your Compute Module 4 on another computer so you can change the values in config.txt to a lower MHz.
Overclocking the Raspberry Pi 4 and Compute Module 4 to 2.3 GHz
Before we start, we need to make this very obvious. Overclocking to this level will invalidate your warranty. You break it, you bought it!
We found success with a Raspberry Pi 4 8GB and a Compute Module 4 Lite with 8GB RAM. This overclock did not work with our Compute Module 4 1GB or our Raspberry Pi 4 4GB and the maximum speed we achieved with those boards was 2275 MHz.
To overclock the Raspberry Pi 4 8GB and the Compute Module 4 to 2.3 GHz, we need to edit the config.txt file and most of the configuration is the same as before, except for the CPU speed, 2300 and an extra line which forces turbo mode frequencies even when the ARM cores are not busy. Using “force_turbo” will invalidate your warranty.
Here is our config for 2.3 GHz.
#Overclock
arm_freq=2300
gpu_freq=500
over_voltage=14
force_turbo=1
The Results: 2.3-GHz Raspberry Pi 4
We ran four overclock tests for each Raspberry Pi 4 and Compute Module 4. Using 2200, 2250, 2275 and 2300 overclocks.
The Compute Module 4 and Raspberry Pi 4 4GB reached 2275 MHz and ran stable. Taking them to 2300 MHz and repeating our tests caused them to lock up and crash during the cooldown period of the Stressberry test.
The same test on the 8GB Lite module and our 8GB Pi 4 ran perfectly on multiple occasions. Could RAM play a key factor in overclocking performance? Is there something about 8GB Raspberry Pi which makes them better for overclocking? We asked that question to Eben Upton, Chief Executive of Raspberry Pi Trading
“I think this is mostly a silicon lottery effect, possibly influenced by long-term process trends.
There certainly are boards out there that can do crazy speeds, and we've been very conservative in how hard we push (Broadcom) 2711: it's much more important to us that the product runs reliably at 1.5 GHz than that people can get good overclocks,” he said. “We've done a bit of attention-to-detail work on the power planes and decoupling on recent boards...but I would expect this to have a relatively marginal effect.”

Les Pounder is an associate editor at Tom's Hardware. He is a creative technologist and for seven years has created projects to educate and inspire minds both young and old. He has worked with the Raspberry Pi Foundation to write and deliver their teacher training program "Picademy".
-
Procyon-Orion Actually, you can bring it up to 2.35 GHz. I have been running my Raspberry Pi 4B 8GB unit at this speed since the Sep-2020 firmware updates. Stable as a rock, no lock-ups, no crashes. I use "over_voltage=15". (Use 16 and the Pi4 won't boot). Also, you don't need to use "force_turbo=1" to achieve 2.35 GHz. I don't include that line in my config.txt files on my Pi 4B 8GB and my new Pi 400, and they both run stable at 2.35 GHz. You do need good cooling if you are going to run at these speeds though. I use an Argon One case for my Pi4B 8GB. My Pi 400 is able to run at 2.35GHz without extra cooling (its massive heat spreader is excellent at keeping thermals in check).Reply
Here are the lines I use in my "/boot/config.txt" file:
---
arm_64bit=1
hdmi_enable_4kp60=1
over_voltage=15
arm_freq=2350
gpu_freq=750
gpu_mem=256
---
Even if your monitor is only Full HD 1080p, you should still add the "hdmi_enable_4kp60=1" line as this sets the GPU's base clock from 500MHz to 550MHz.
A word of caution about using the "force_turbo=1" setting in conjunction with anything higher than 6 in "over_voltage". It immediately sets the OTP warranty bit, voiding your warranty. Even if you don't care about the warranty, using "force_turbo=1" is just wasteful because it prevents the SoC from dynamically stepping down to a lower frequency whenever there isn't a need for maximum processing power. This will cause the SoC to run hotter than necessary, possibly shortening the SoC's lifetime. -
CooliPi Is there something about 8GB Raspberry Pi which makes them better for overclocking?Reply
It's PMIC runs at 1.5MHz instead of 1MHz like in the previous models of RPI4 model B. Means 50% more energy can be pumped to the 1V rail.
Our 4GB units rebooted when stressed with linpack on all four cores - above cca 1860 MHz. 8GB model is fine. The effect of overheating the PMIC and its inductors decreases output current, i.e. if you let it run at higher temperature, it reboots sooner (1-4GB model).
Look at the PMIC on 8GB model and compare it to the CM4 - it's the same. And in Raspi 400 also the same, upgraded layout and presumably frequency.
I run my 8GB model at 2200MHz with over_voltage=8, but I might try higher. Passive cooling with CooliPi. -
FusionDragon ReplyCooliPi said:Is there something about 8GB Raspberry Pi which makes them better for overclocking?
It's PMIC runs at 1.5MHz instead of 1MHz like in the previous models of RPI4 model B. Means 50% more energy can be pumped to the 1V rail.
Our 4GB units rebooted when stressed with linpack on all four cores - above cca 1860 MHz. 8GB model is fine. The effect of overheating the PMIC and its inductors decreases output current, i.e. if you let it run at higher temperature, it reboots sooner (1-4GB model).
Look at the PMIC on 8GB model and compare it to the CM4 - it's the same. And in Raspi 400 also the same, upgraded layout and presumably frequency.
I run my 8GB model at 2200MHz with over_voltage=8, but I might try higher. Passive cooling with CooliPi.
Yes, as far as I know newer raspberry pi's after the 8GB model was released, and all subsequent 8GB models have 2 phase power delivery, allowing for higher clocks/voltages on the cpu. This also added the functionality of a built in oc using arm_boost=1 in config.txt