How to Build a Motion-Triggered Raspberry Pi Security Camera
Build your own motion-triggered home security camera with Raspberry Pi
Get Tom's Hardware's best news and in-depth reviews, straight to your inbox.
You are now subscribed
Your newsletter sign-up was successful
Home security camera systems have exploded in popularity while decreasing in price over the past few years. For example, you could purchase a Ring Indoor Security Camera for around $60, but there are some drawbacks: first, vendors like Ring often charge a monthly fee to store your data and second, you might not want video and photos from inside your home being shared with a third party (in Ring’s case, Amazon) where strangers could potentially see them.
MotionEyeOS, a free open-source application, allows you to turn a Raspberry Pi with a camera into a home video monitoring system, where the photos and videos can either stay on your device (and home network) or, if you choose, be uploaded automatically to a cloud-storage service such as Google Drive or Dropbox.
In this tutorial, we will show you how to set up a Raspberry Pi security camera with MotionEyeOS. This software works with almost any Raspberry Pi (connected to the internet) and almost any webcam or Pi camera. There’s no fancy coding to be done in this project; it just works.
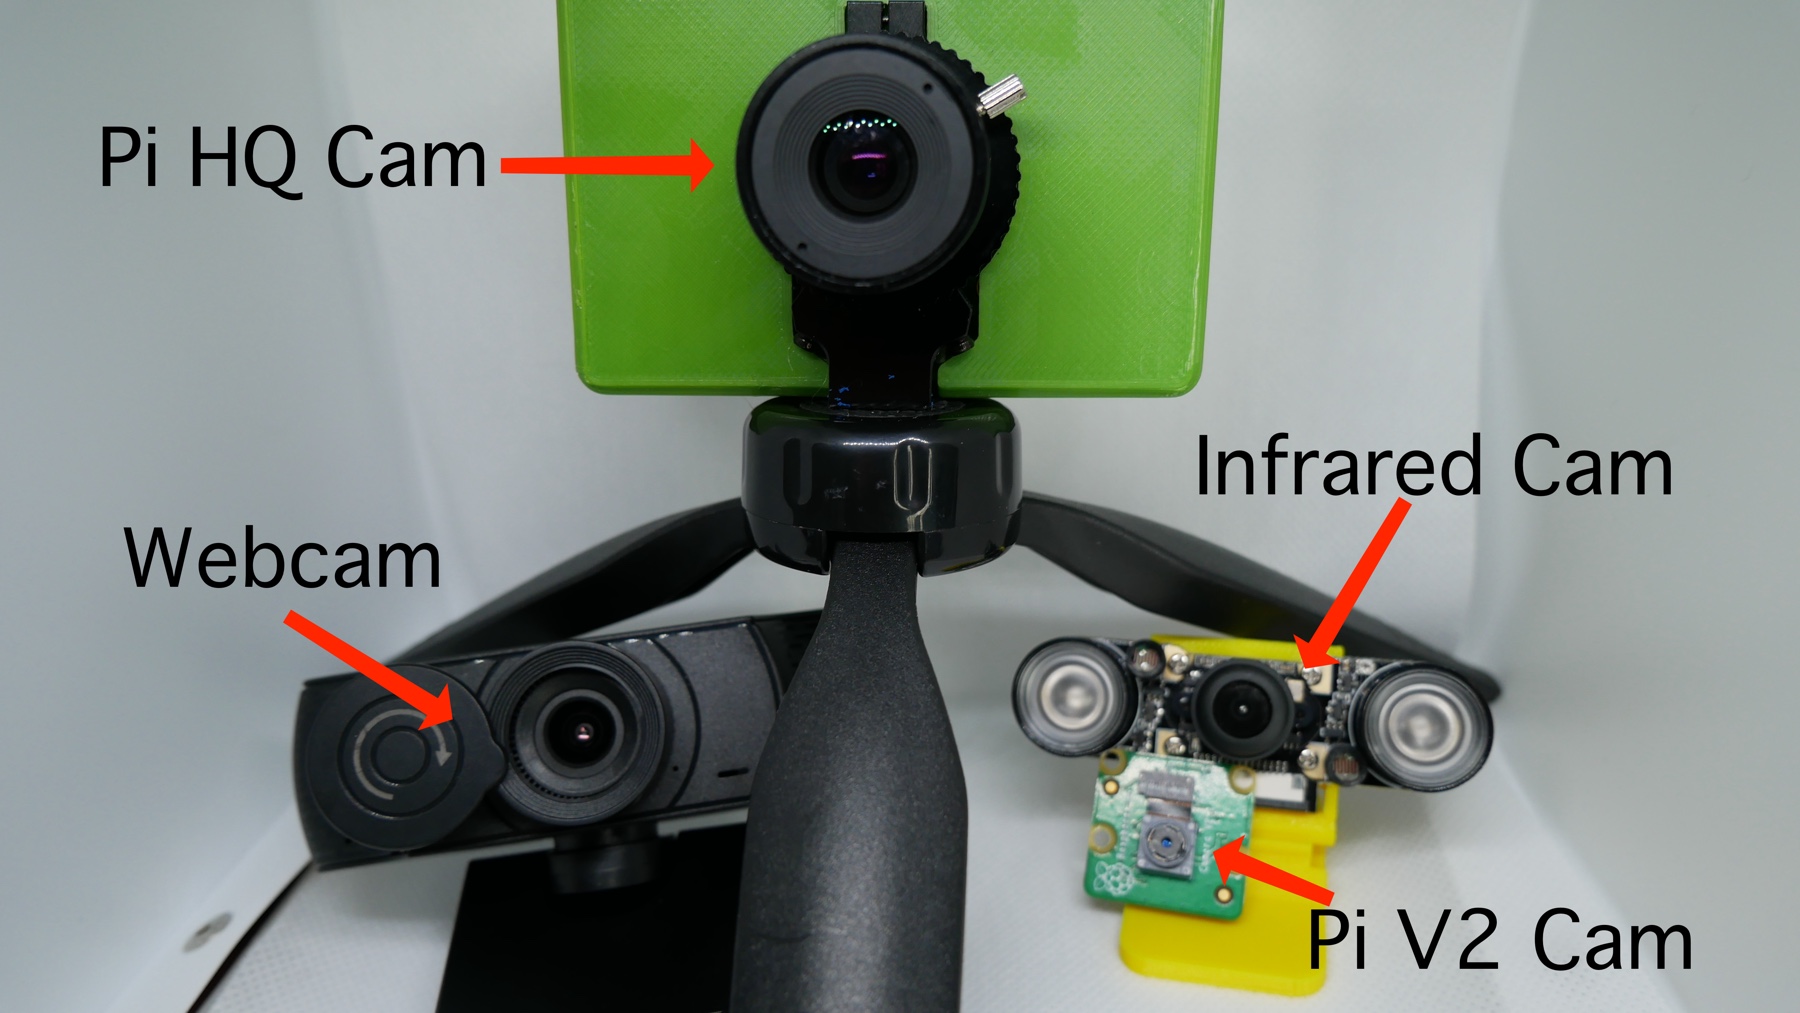
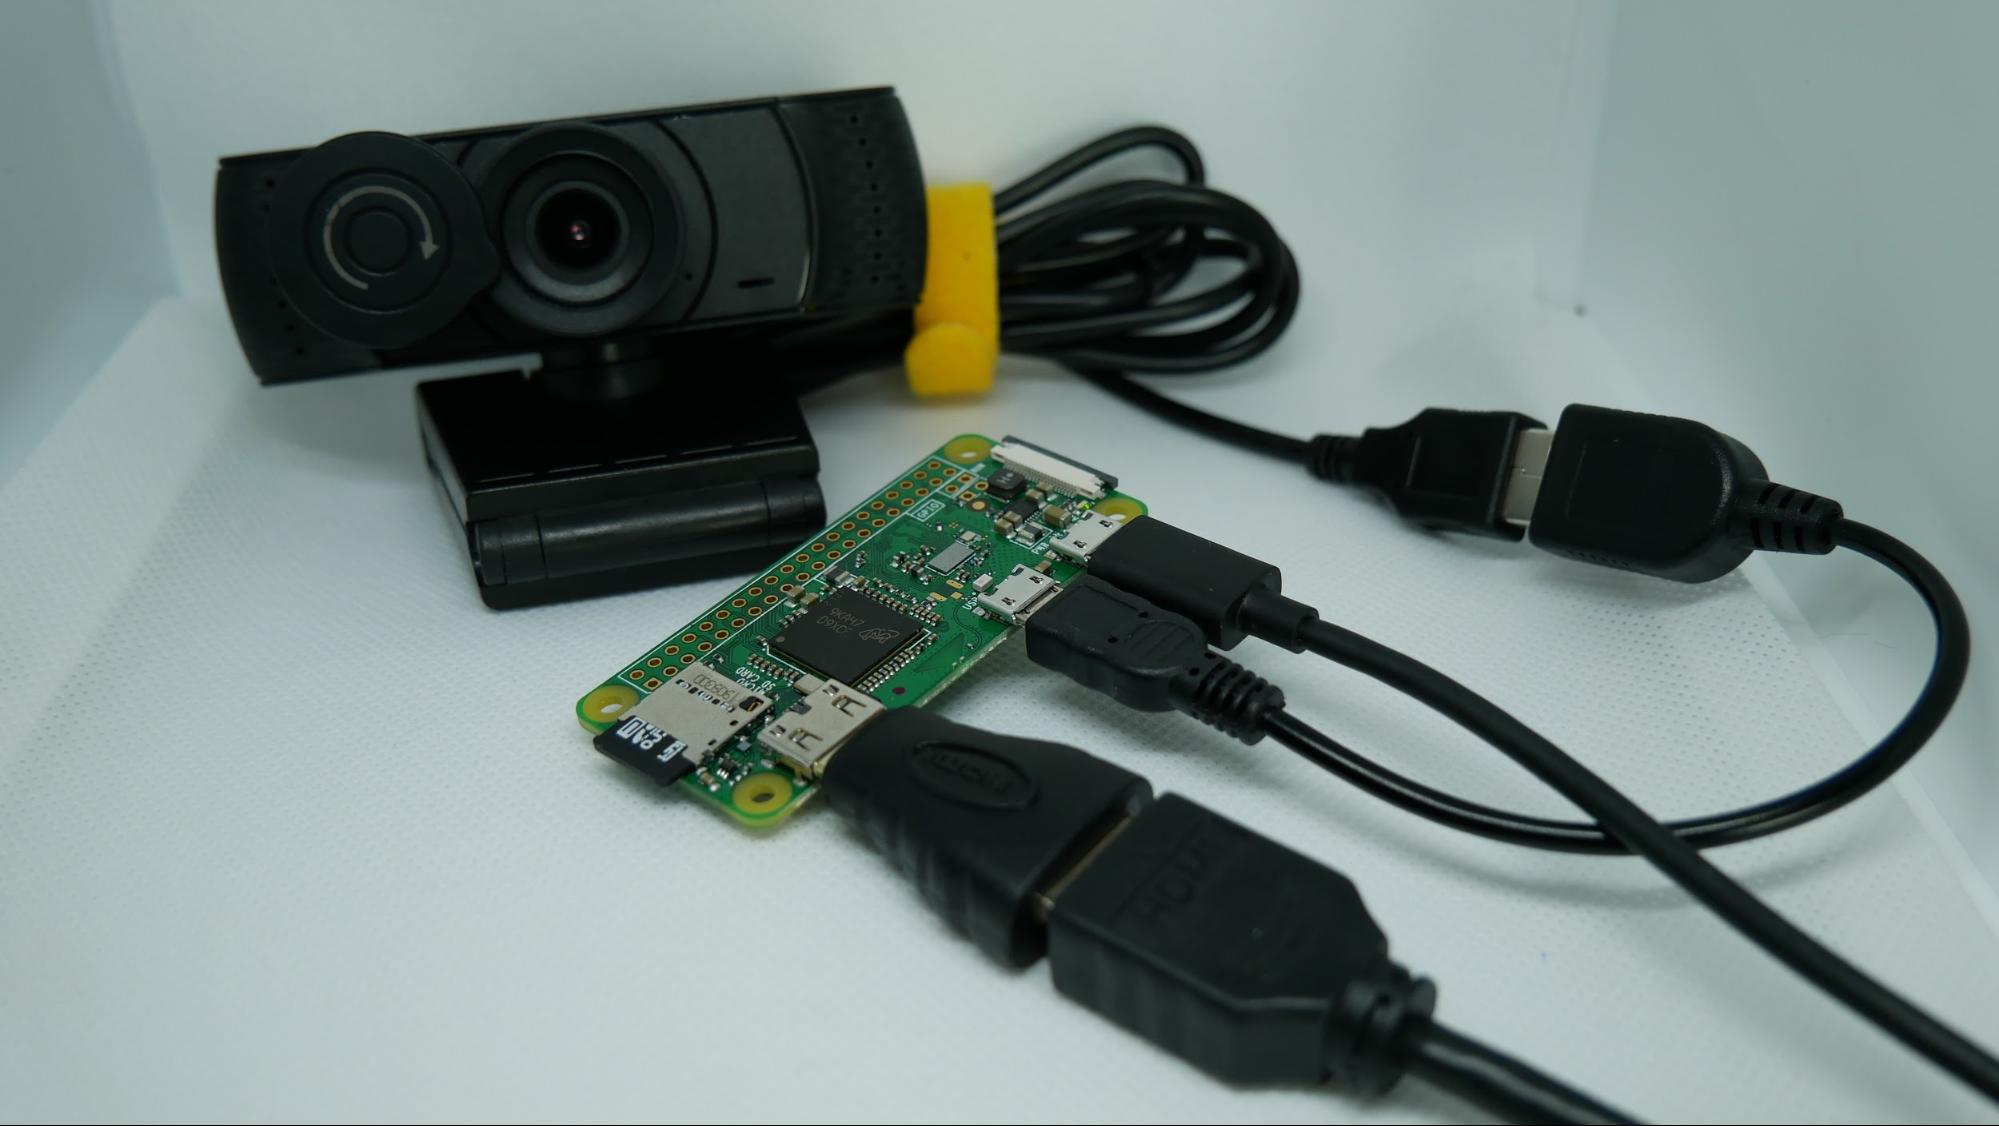
Here are a few of the cameras I’ve successfully used with MotionEye.
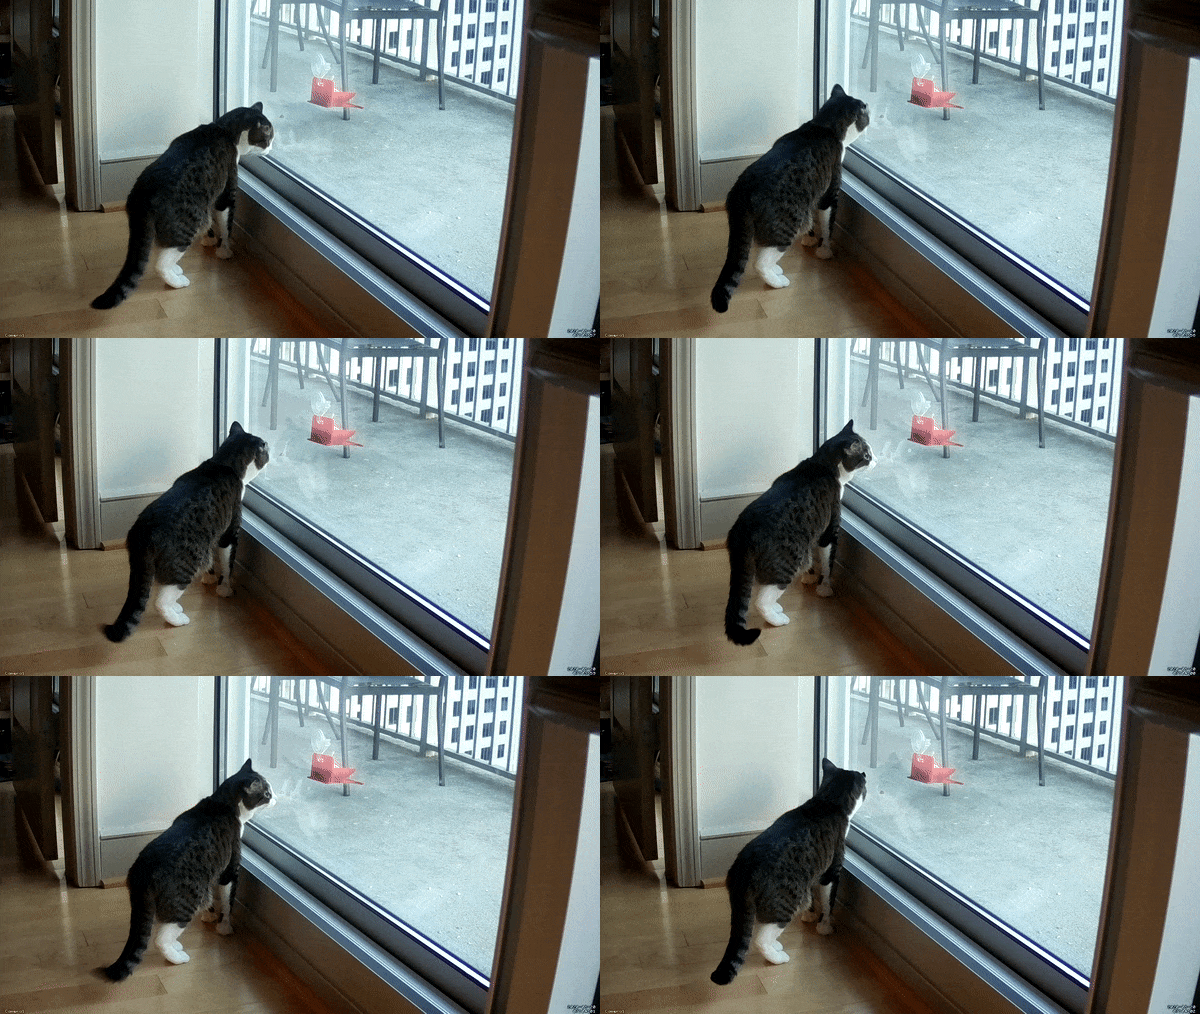
This Raspberry Pi security camera can be used to record porch pirates, monitor children or pets or to watch out for burglars.
Disclaimer: This article is provided with the intent for personal use. We expect our users to fully disclose and notify when they collect, use, and/or share data. We expect our users to fully comply with all national, state, and municipal laws applicable.
What You’ll Need
- Raspberry Pi 4 or Raspberry Pi 3B+, or Raspberry Pi Zero W
- 8 GB (or larger) microSD card
- Raspberry Pi Cam, HQ Camera, Infrared Camera, or webcam
- Monitor/Power supply/Monitor/HDMI Cable (for your Raspberry Pi)
- Your Windows or Mac computer.
Install MotionEyeOS
In this section, we will download MotionEyeOS, flash to a microSD card for our Raspberry Pi security camera, and set our WPA credentials.
Get Tom's Hardware's best news and in-depth reviews, straight to your inbox.
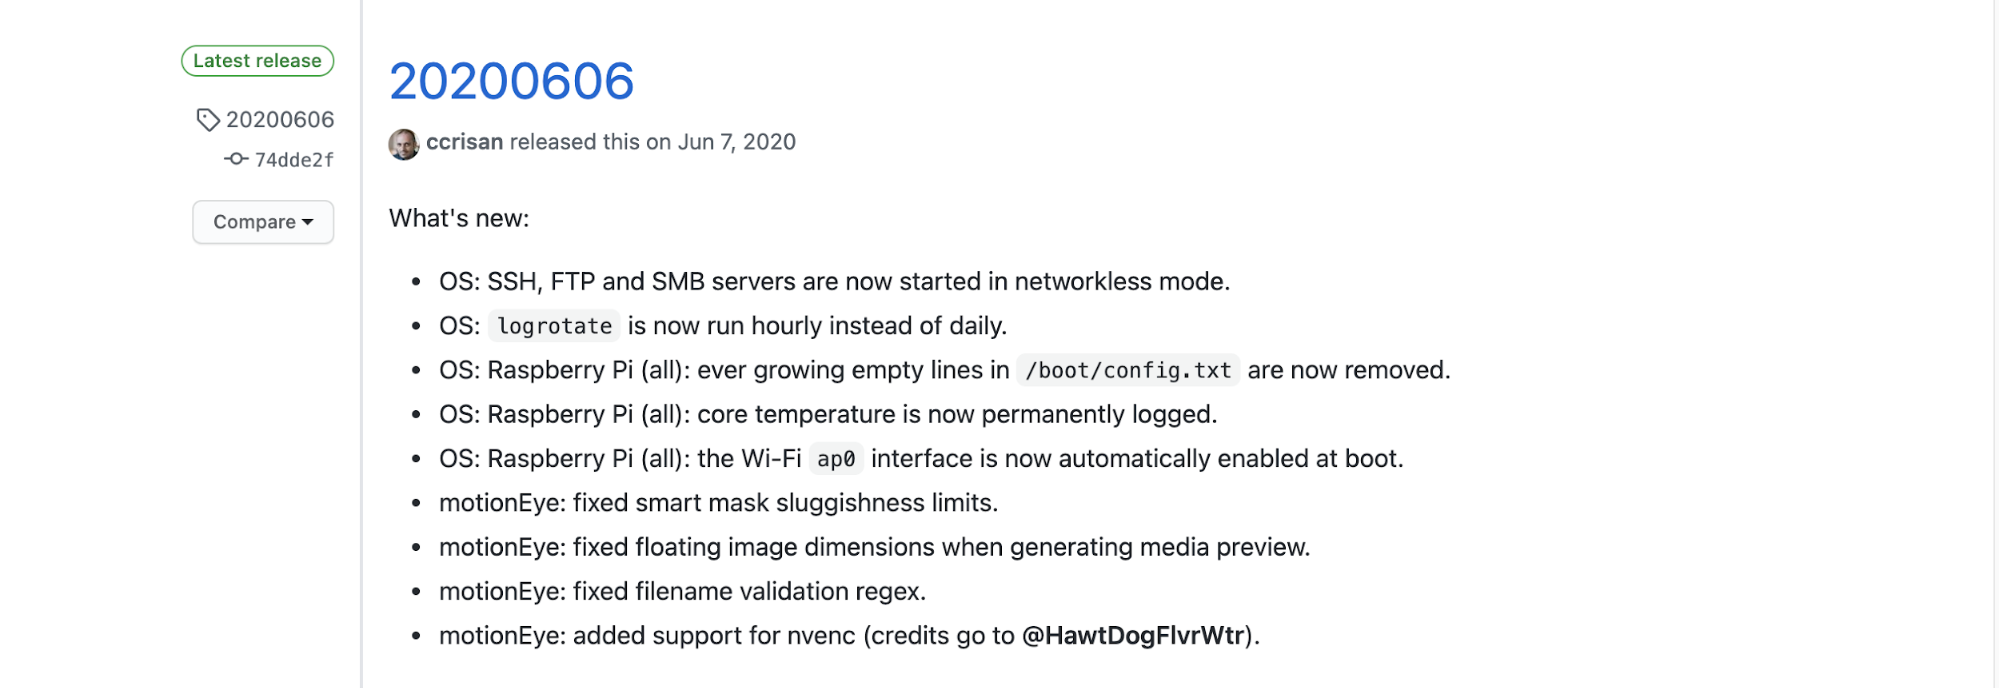
1. Download the latest version of MotionEyeOS corresponding to the specific model of Raspberry Pi you are using from https://github.com/ccrisan/motioneyeos/releases
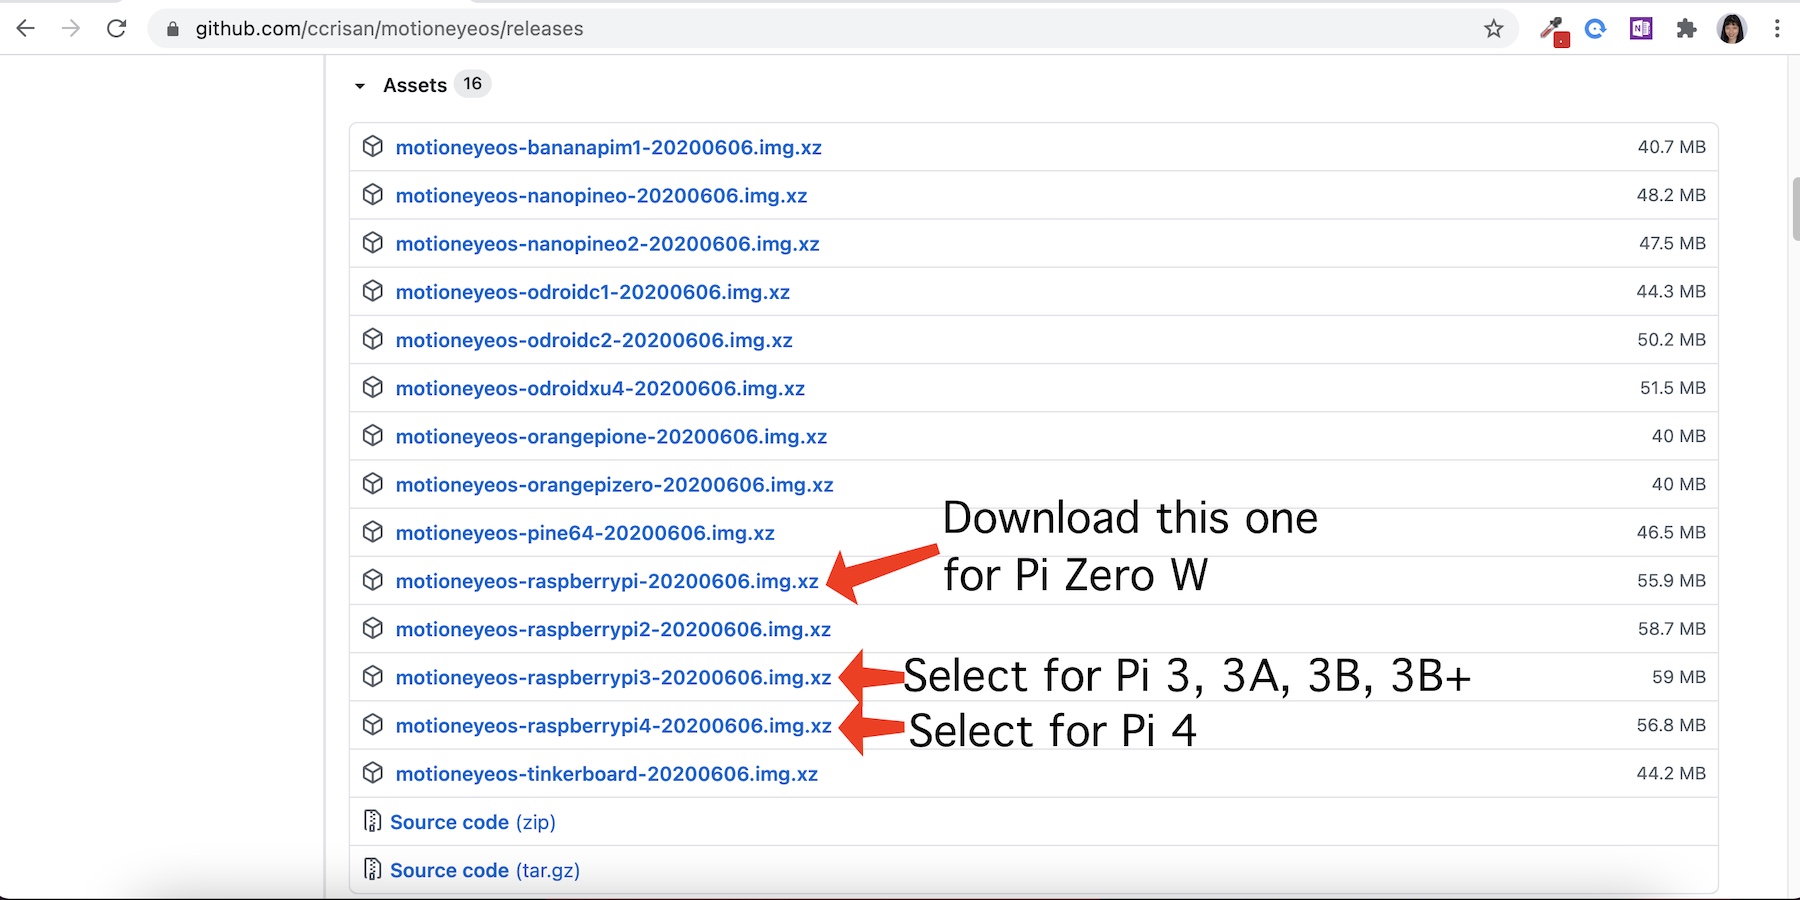
2. Insert your microSD card into your computer to be read as a storage device.
3. Launch Raspberry Pi Imager. You can download the imager here if you don’t already have it installed on your computer.
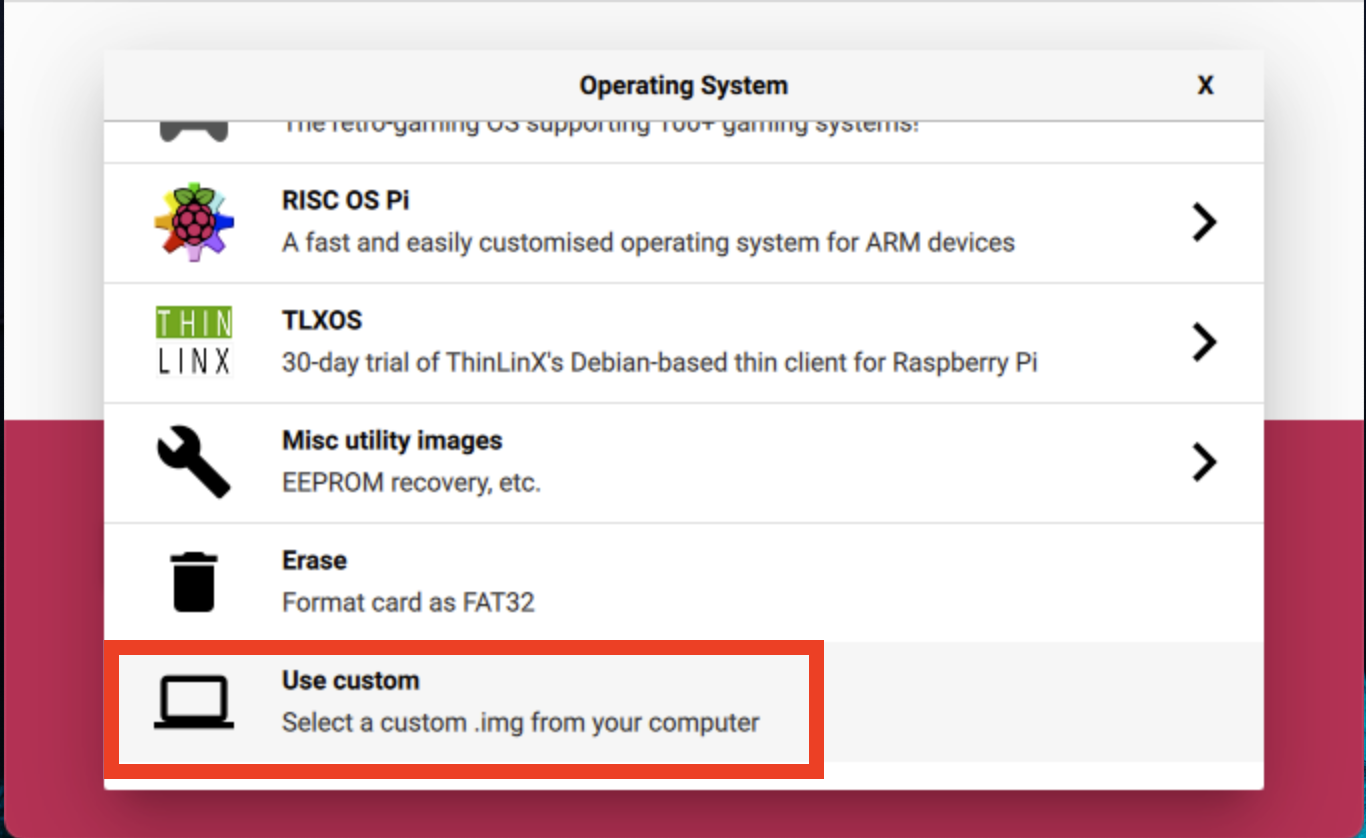
4. Select “Use custom” for the Operating System.
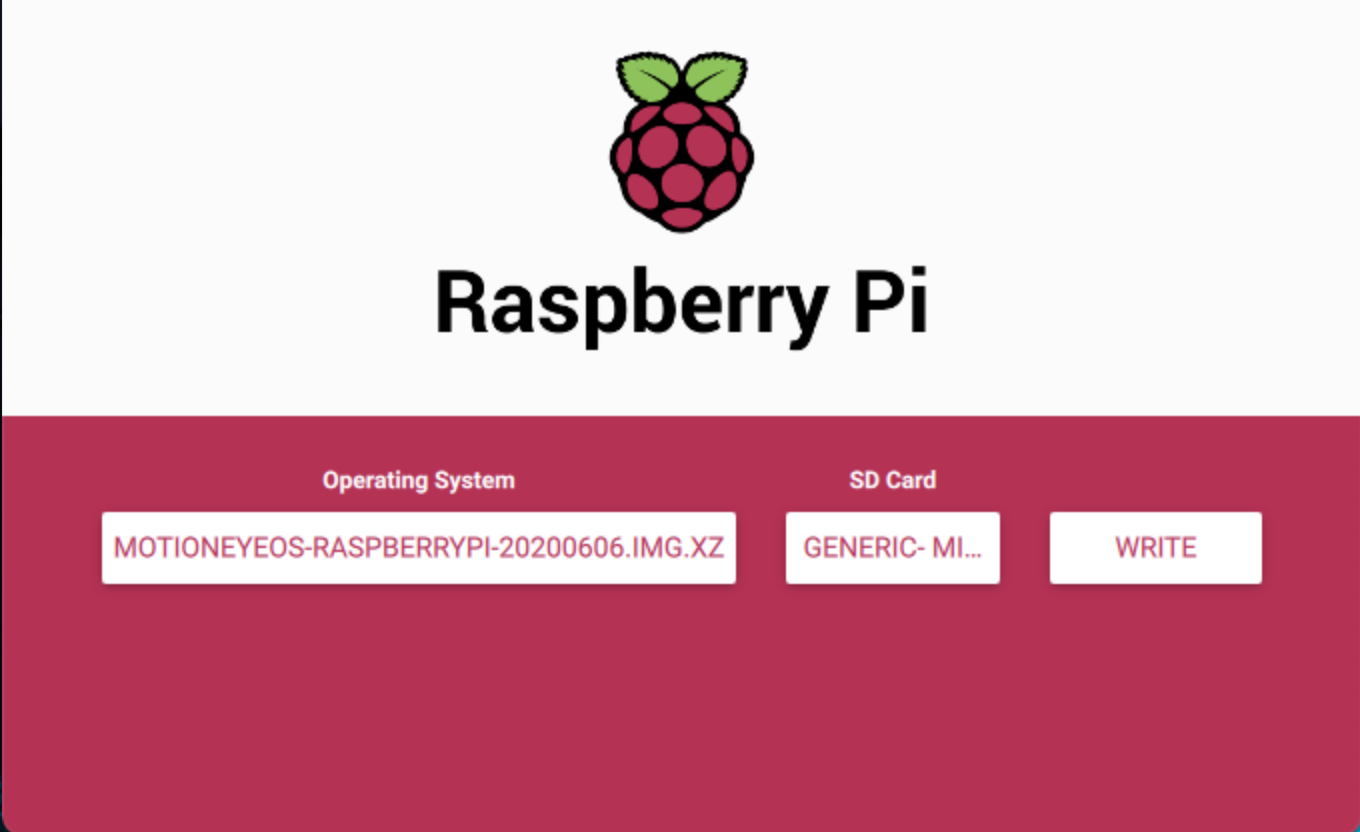
5. Select the motioneyeos version that you just downloaded. This should be a .img.xz file.
6. Select your microSD card under “SD Card.” Note that all data on your microSD card will be erased in the next step.
7. Click “Write” in the Raspberry Pi imager. The ‘write’ process could take 1 to 2 minutes.
8. When the process completes, physically remove and then reinsert your microSD card. We do this because the software automatically ejects the microSD card when the process completes, but we need to add one file before the next step.
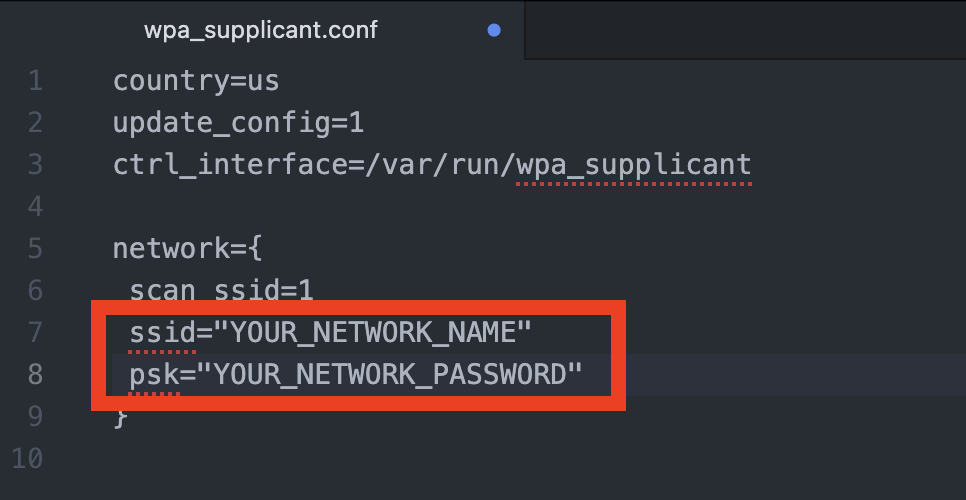
9. Create a new file named wpa_supplicant.conf with the following text, replacing “YOUR_NETWORK_NAME” and “YOUR_NETWORK_PASSWORD” with your information. A source code editor such as Atom works great for this purpose. WordPad and Notepad are not recommended to create this file as extra characters are added in the formatting process.
country=us
update_config=1
ctrl_interface=/var/run/wpa_supplicant

network={
 scan_ssid=1
 ssid="YOUR_NETWORK_NAME"
 psk="YOUR_NETWORK_PASSWORD"
}
10. Save wpa_supplicant.conf to your microSD card. Eject your microSD card.
11. Insert your microSD card into your Raspberry Pi.
12. Connect your camera, monitor and power supply to your Raspberry Pi. Power up your Pi.
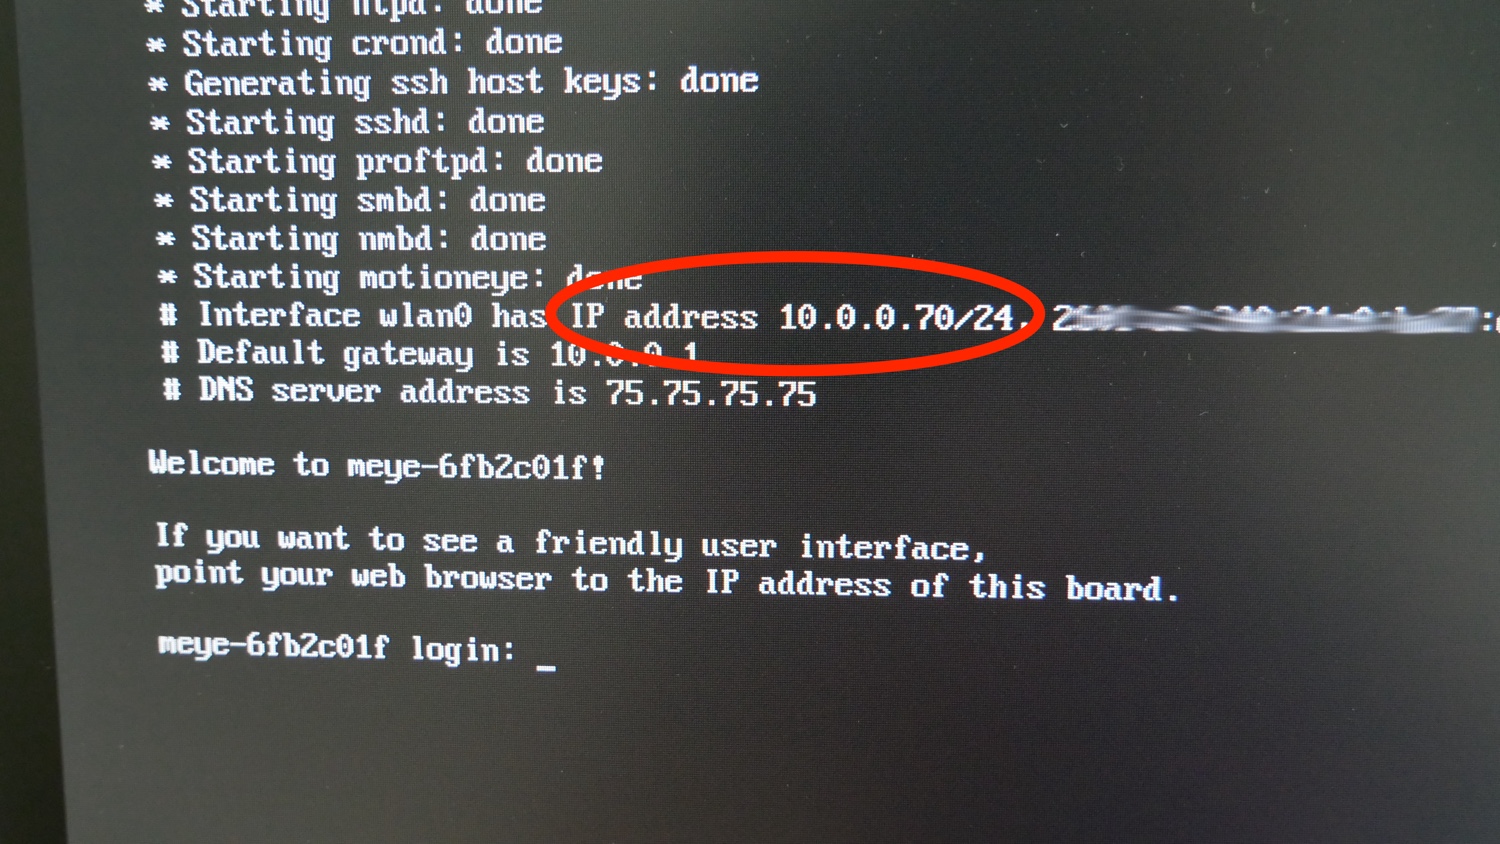
13. Find your internal IP address on the Pi screen. In most cases your internal IP address will start with 192.168.x.x or 10.0.0.x. Alternatively, if you do not have access to a monitor, you can download Angry IP Scanner and find your IP address for your Motioneye Raspberry Pi. Look for “MEYE” to identify your MotionEye Pi.
14. Enter your internal IP address into a browser window of your Windows or Mac computer. Alternatively, you could use a Chromebook or a tablet. At this point your Motioneye should start streaming.
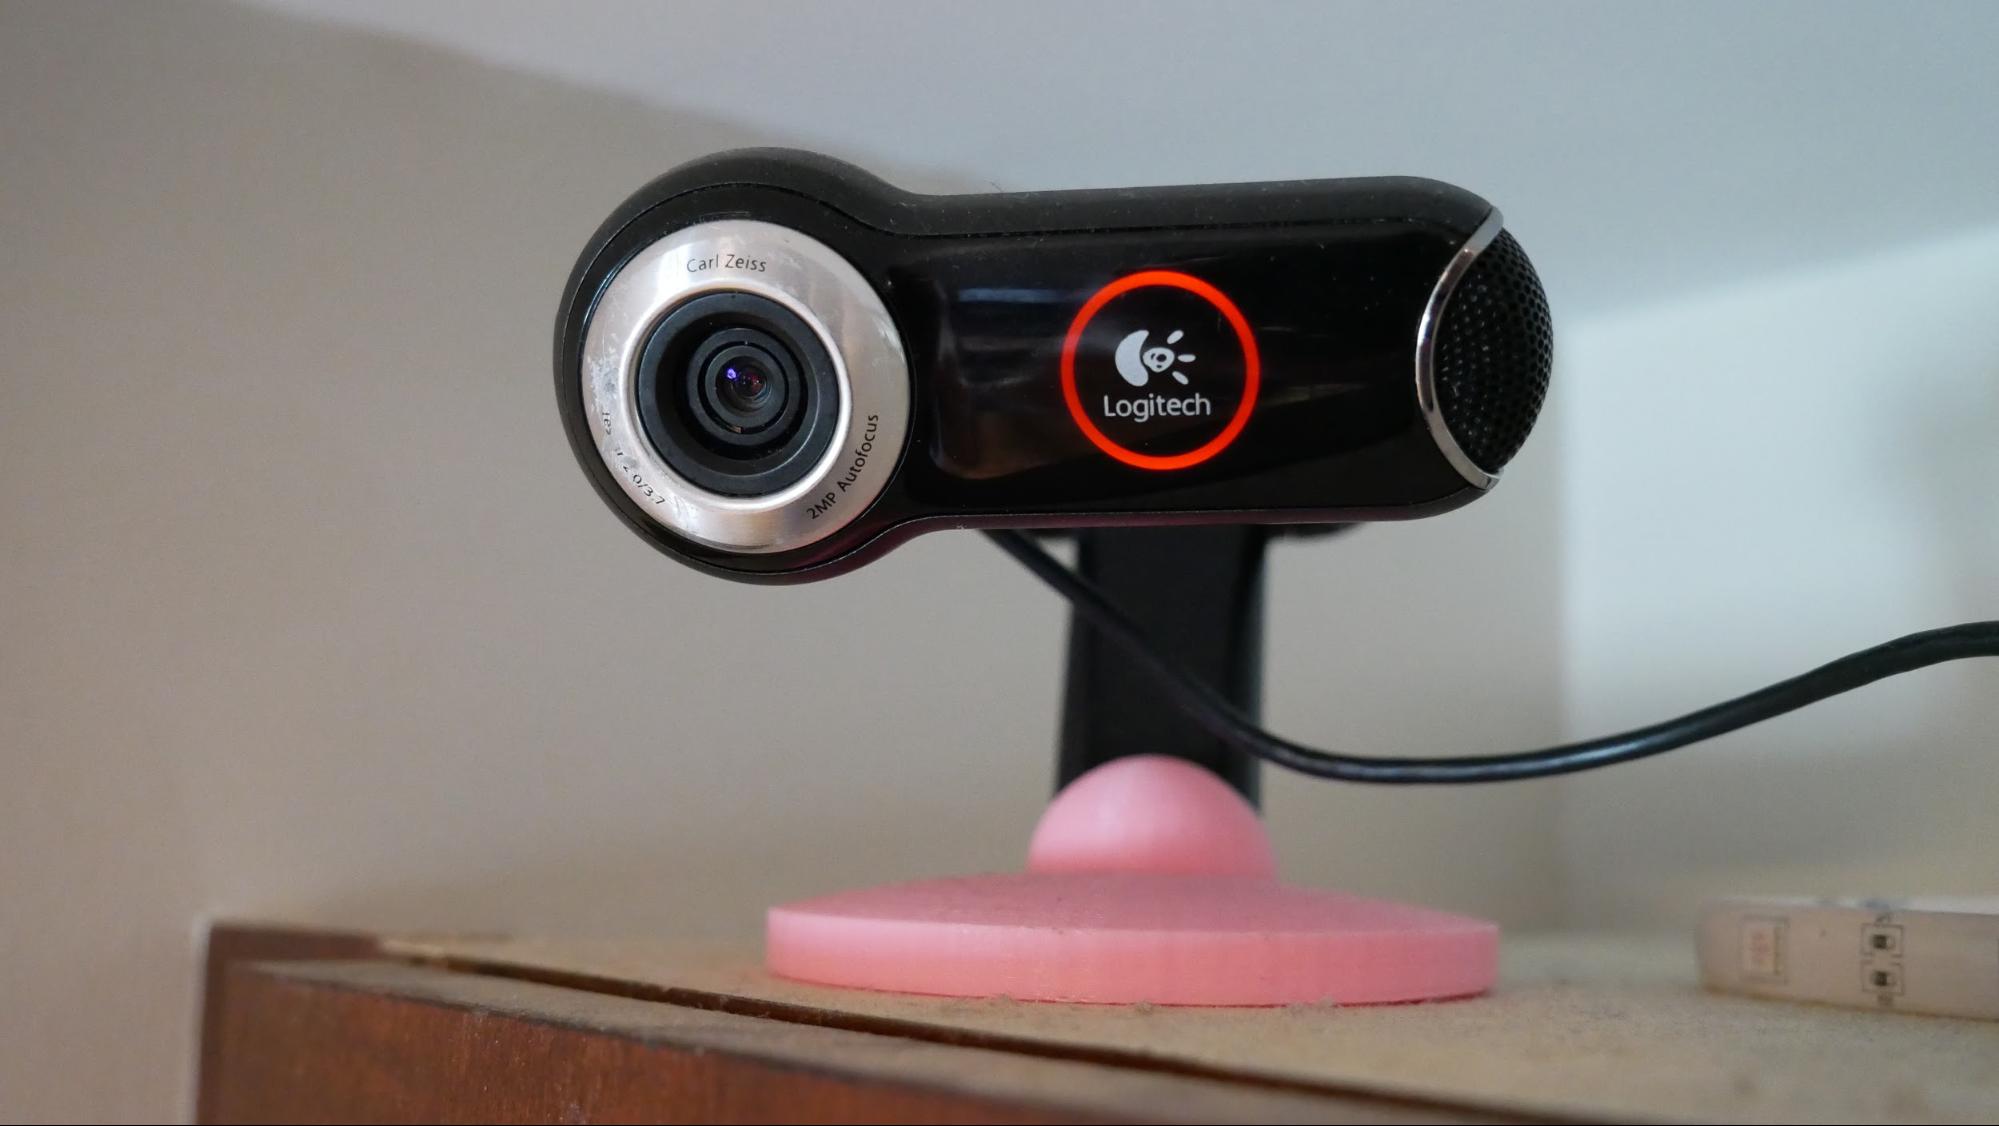
In most cases, the system will automatically stream from the attached camera. If no image comes up, the camera may be incompatible with the Raspberry Pi. For example, an HD webcam may be incompatible with the Raspberry Pi Zero, but will work with a Raspberry Pi 3. There may be some trial and error in this step. Interestingly, most older webcams (manufactured before the Pi) will work with Motioneye. Here’s an old Logitech Pro 9000 connected to a Pi Zero W with a 3D printed stand.
Configuring MotionEye for Raspberry Pi Security Camera
In this section, we will perform a basic configuration of Motioneye and view our Raspberry Pi security camera video stream.
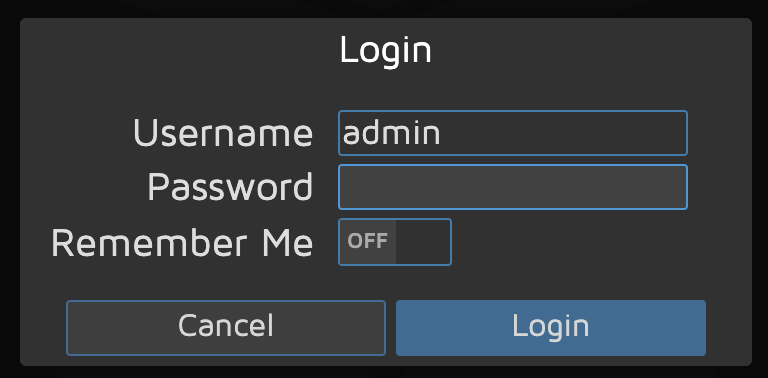
1. Click on the Profile icon near the top left within your browser menu to pull up the Login screen.
2. Log in using the default credentials. The username is admin, and the password field should be blank.
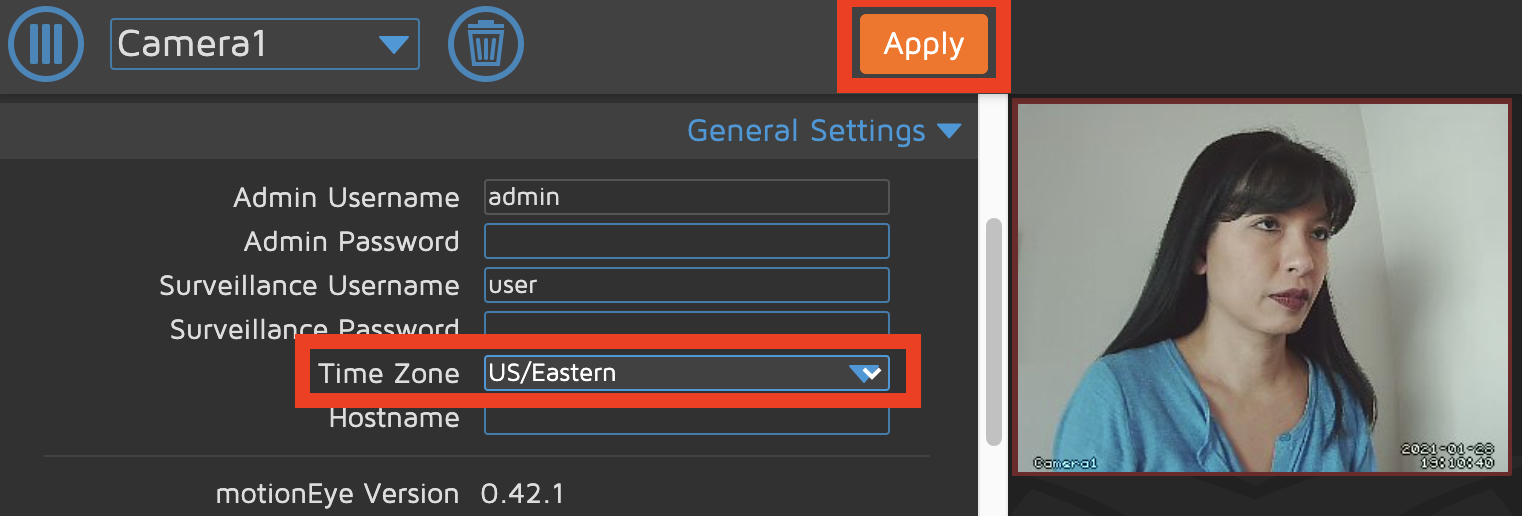
3. Select your Time Zone from the dropdown menu in “Time Zone.” Click Apply. Motioneye will reboot which will take a few minutes. This step is important as each photo and video is timestamped.
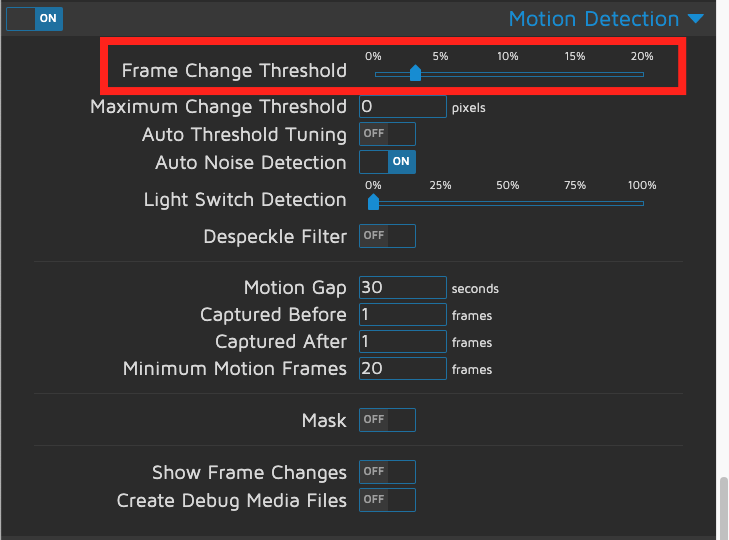
4. Motioneye detects motion when _% of frames change. The intent is to set your % low enough to pick up the movement you are tracking, but high enough to avoid recording a passing cloud. In most cases, this is achieved through trial and error. Start with your default 4% Frame Change Threshold and then move up until you reach your optimal setting.
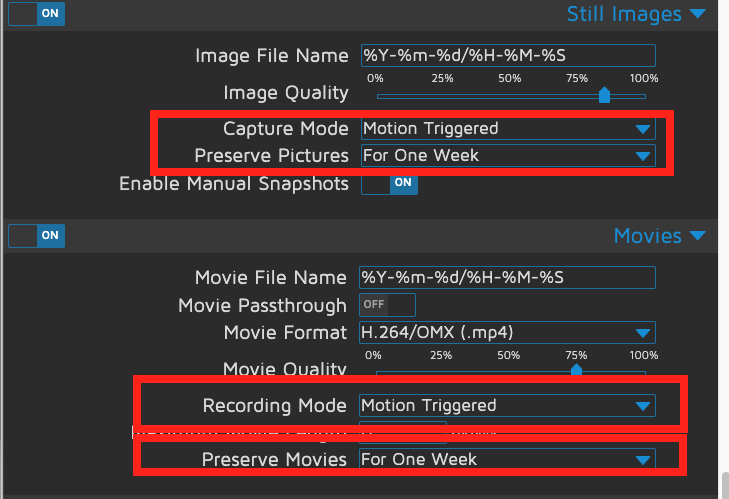
5. Click the down arrow to the right of “Still Images” to reveal the corresponding settings. Do the same for “Movies.” Set Capture Mode and Recording Mode to “Motion Triggered” and length of time to “Preserve Pictures” and “Movies.”
I have chosen “For One Week” since I’m only working with an 8GB microSD card. The photos saved locally will serve as a backup. You’ll save all of the photos to Google in a later step. Click Apply to save your changes.
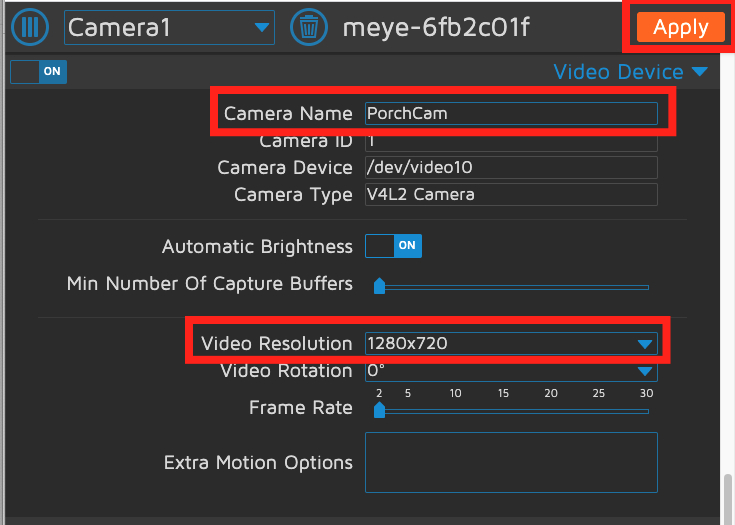
6. Set your Camera Name, Video Resolution, Frame Rate and other options in the “Video Device” section. Click Apply to save your changes.
Viewing Raspberry Pi Security Camera Images / Video Locally
If you don’t wish to upload images to a third-party service such as Google Drive, you can view the images and/or videos) captured locally on your Raspberry Pi security camera. If you choose this method, the images will never leave your local network.
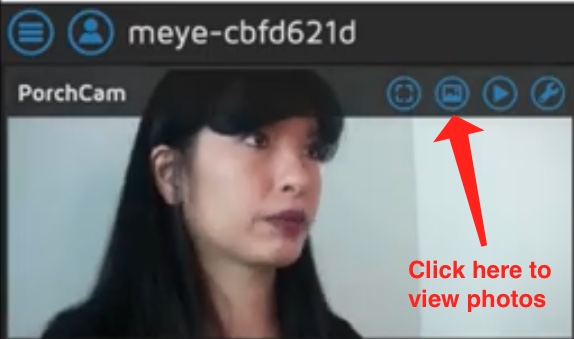
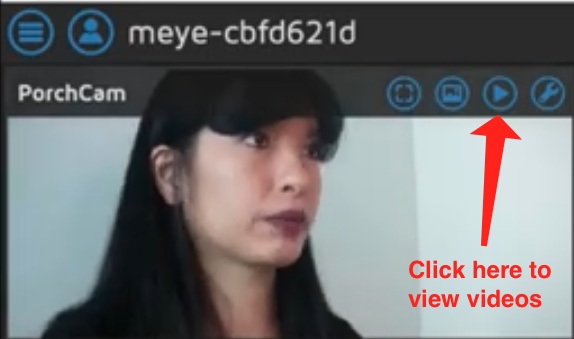
1. Click on the live camera feed and new icons will appear.
2. Click on the image icon to view images.
3. Or Click on the “Play”button icon to view movies.
Automatic Uploading to Google Drive (Optional)
In this step, we will configure our Raspberry Pi security camera to automatically upload all of the photos (and videos) taken to Google Drive. This method (with a couple of nuances) also works with Dropbox. Of course, you have to be comfortable with having your images in the cloud.
Most users create a separate Gmail account specifically for this purpose, to maximize free storage space from Google. Additionally, this will come in handy if you decide to enable email notifications in the next step.
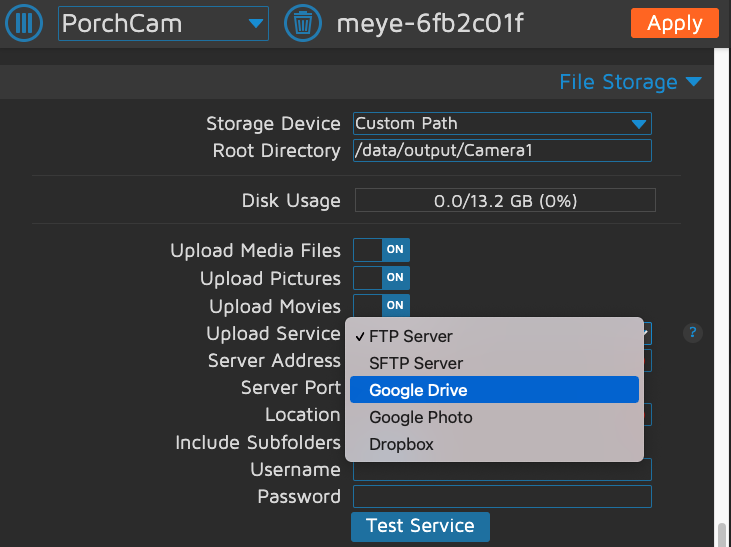
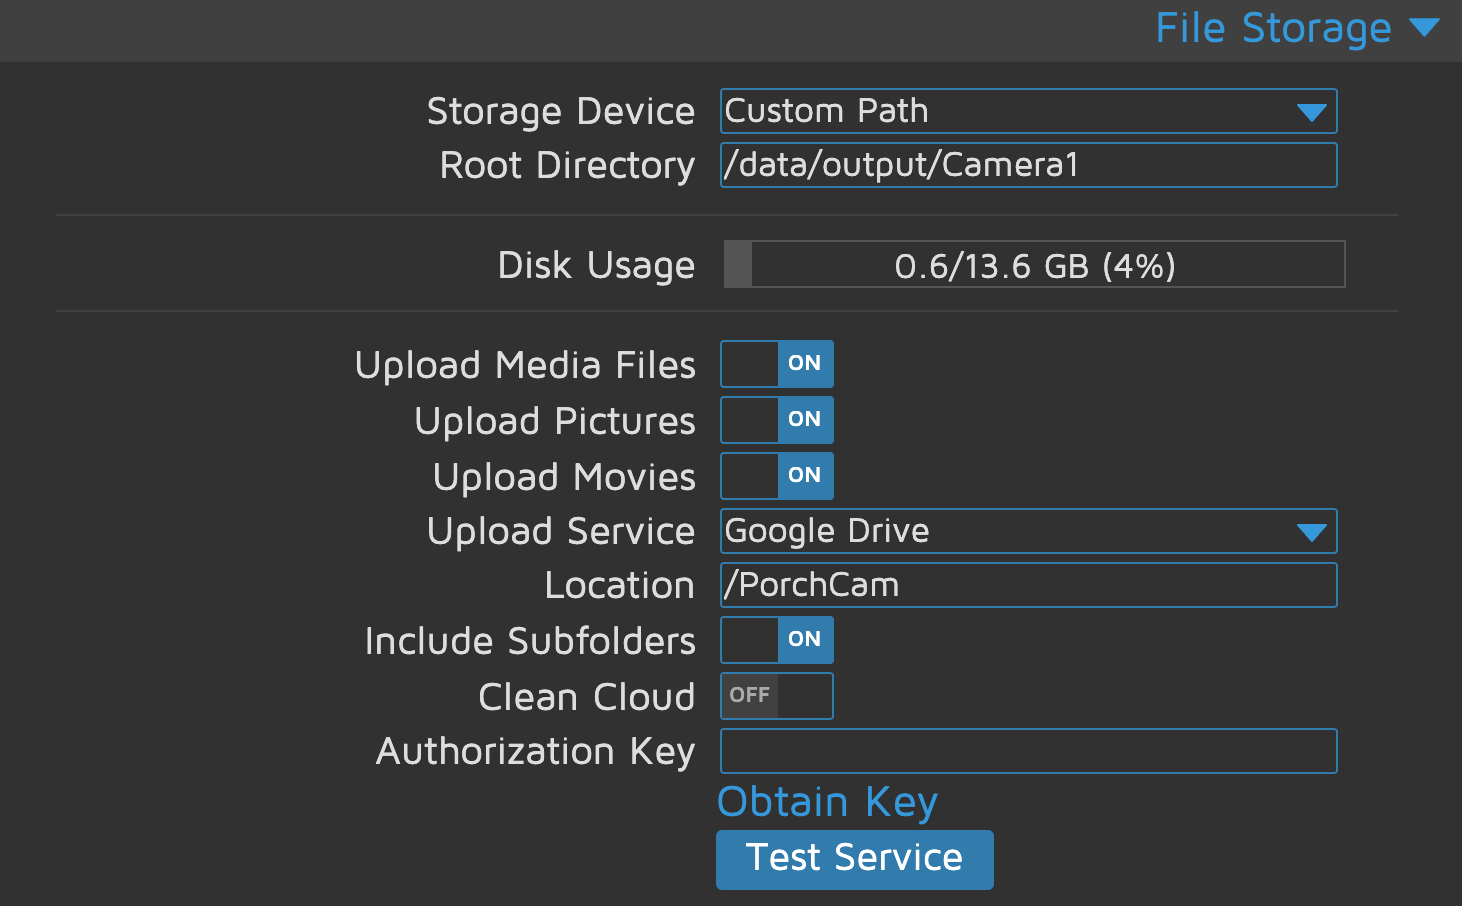
1. Click the down arrow corresponding to “File Storage” in the main admin menu.
2. Toggle “Upload Media Files” to ON. This should automatically toggle “Upload Pictures” and “Upload Movies” to ON, but if not, hit ON.
3. Select Google Drive from the “Upload Service” dropdown menu.
4. In your Google Drive, create a new folder for storing your photos and videos. I chose “PorchCam” for the name of my folder.
5. Enter “/” followed by your folder name for ‘Location.’
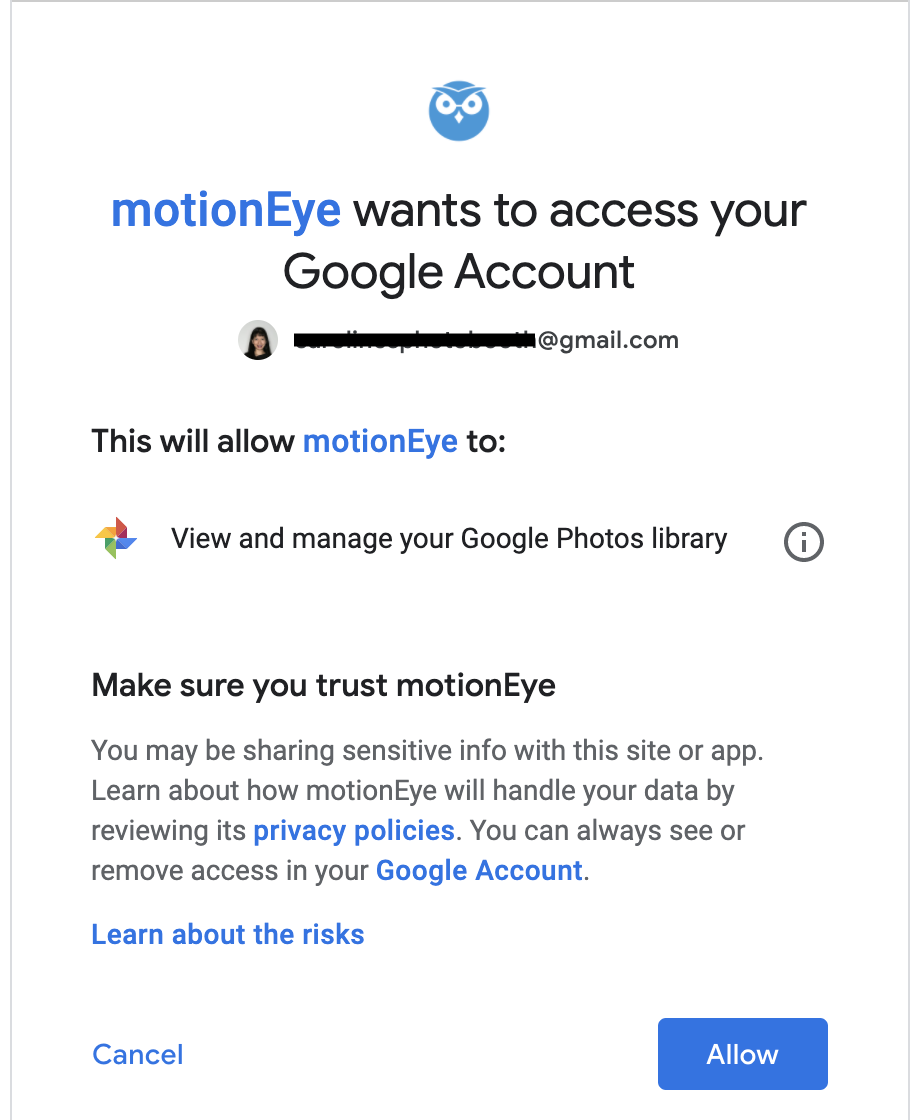
6. Click “Obtain Key” and accept associated permissions by clicking “Allow.”
7. Copy and paste the authorization code into your “Authorization Key” in Motioneye.
8. Click the “Test Service” button. If you don’t get an error message in Motioneye, then it was a success.
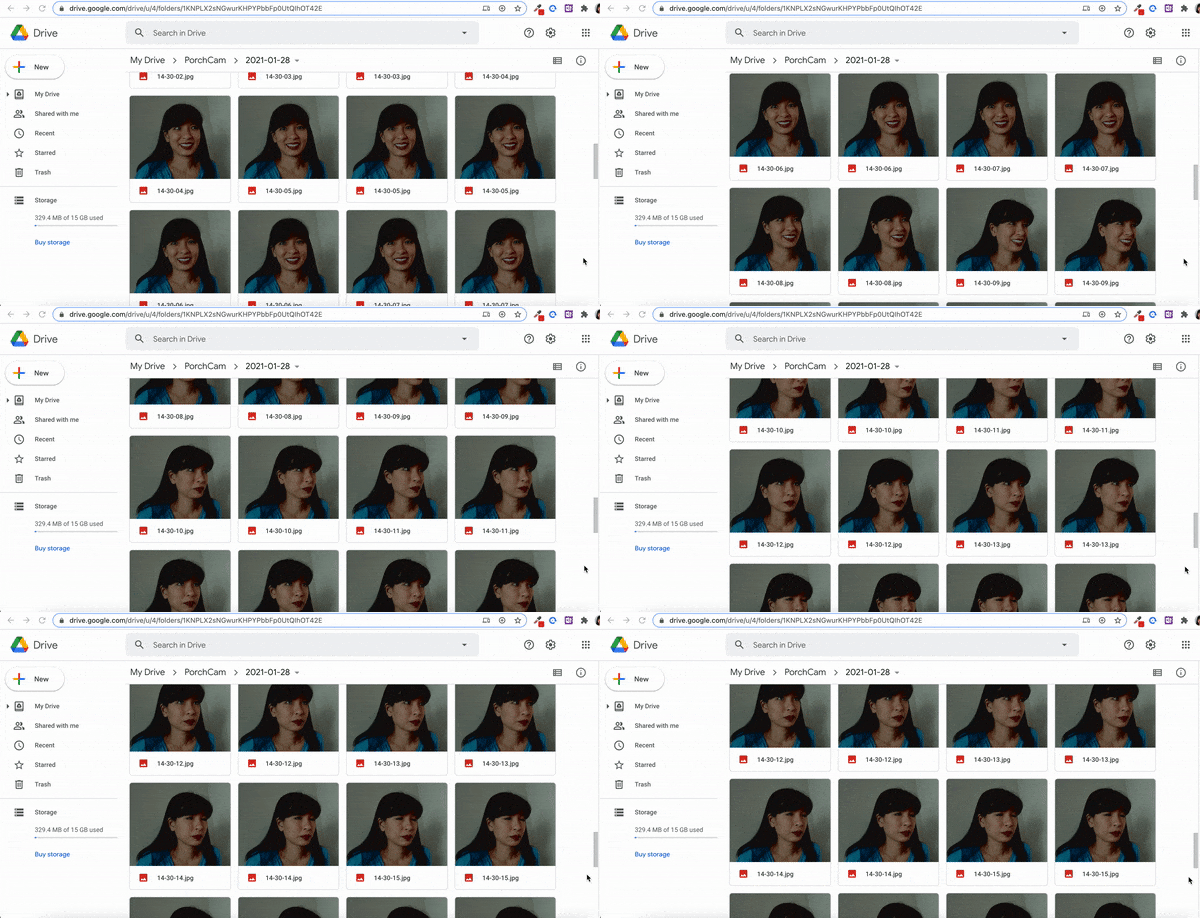
9. Go to your Google Drive folder and test your setup by pointing the camera at yourself and waving to the camera.
Configuring Automated Email Notifications (Optional)
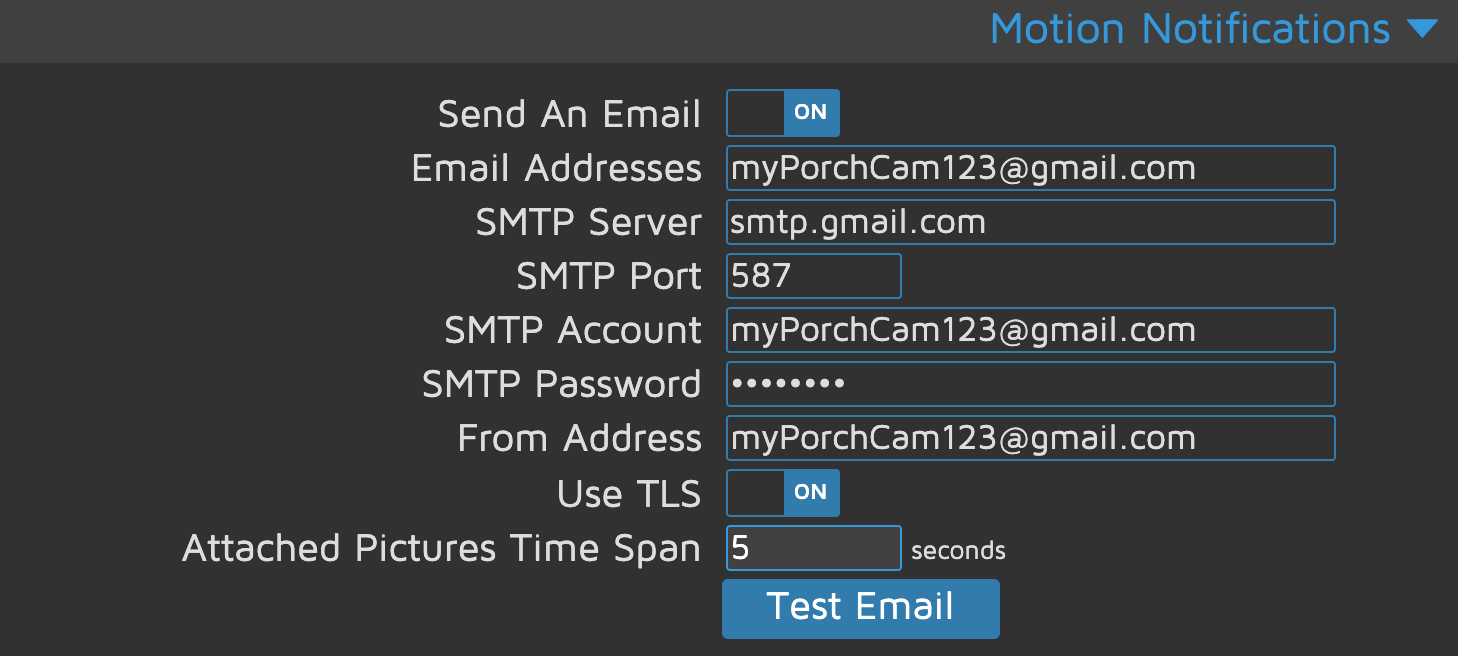
In this optional step, we will configure our MotionEye to automatically send us emails with attachments containing the photos our Raspberry Pi security camera has taken. It is highly recommended that you create a separate Gmail account specifically for this purpose. These instructions are specific to Gmail only.
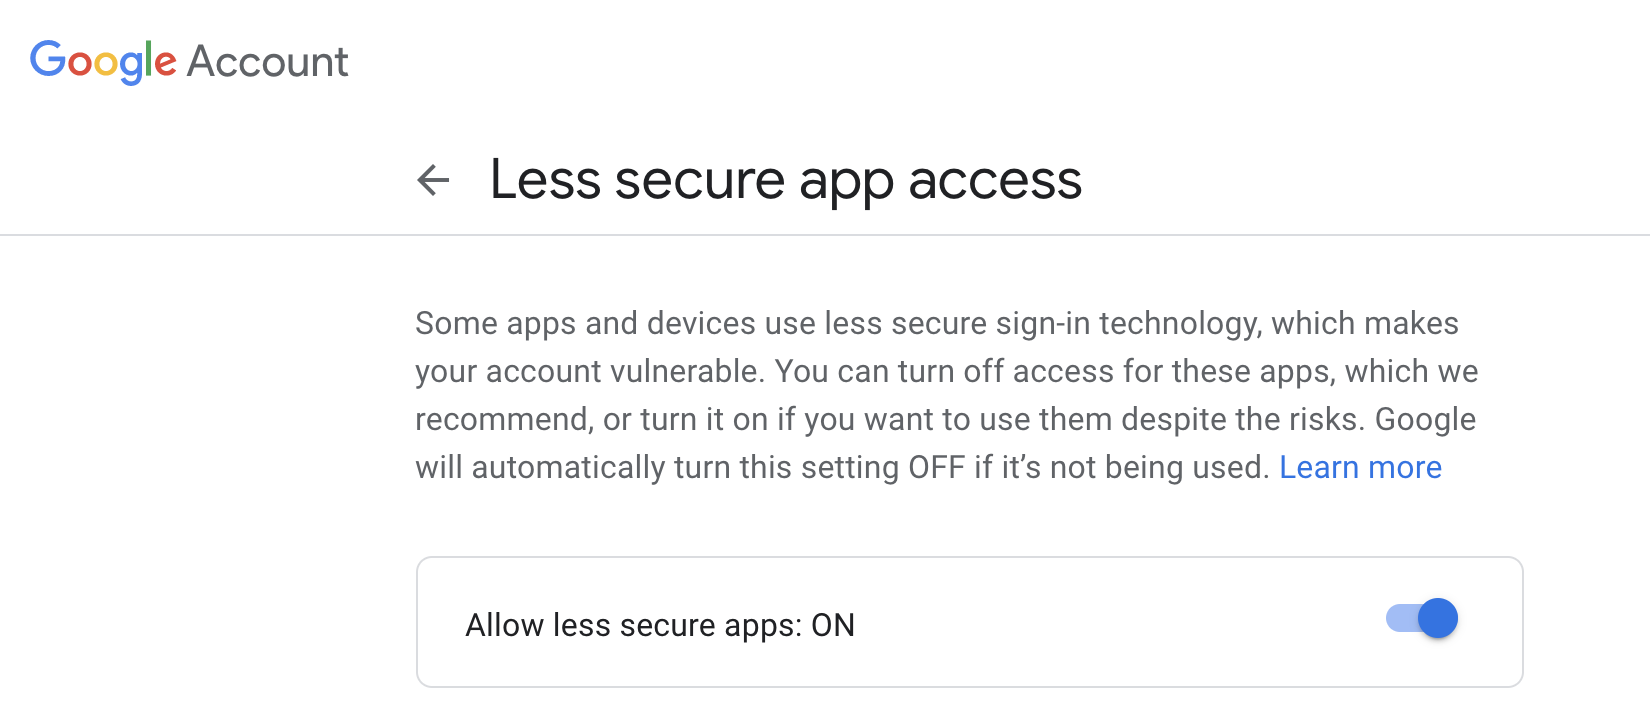
1. Enable “Less Secure Apps” in your Gmail account.
2. Expand “Motion Notifications” in Motioneye.
3. Toggle ON “Send An Email”
4. Enter your Email address, password.
SMTP Server = smtp.gmail.com
SMTP Port = 587
Use TLS - Toggle to On
Enter a value for “Attached Pictures Time Span”
5. Click the “Test Email” button.
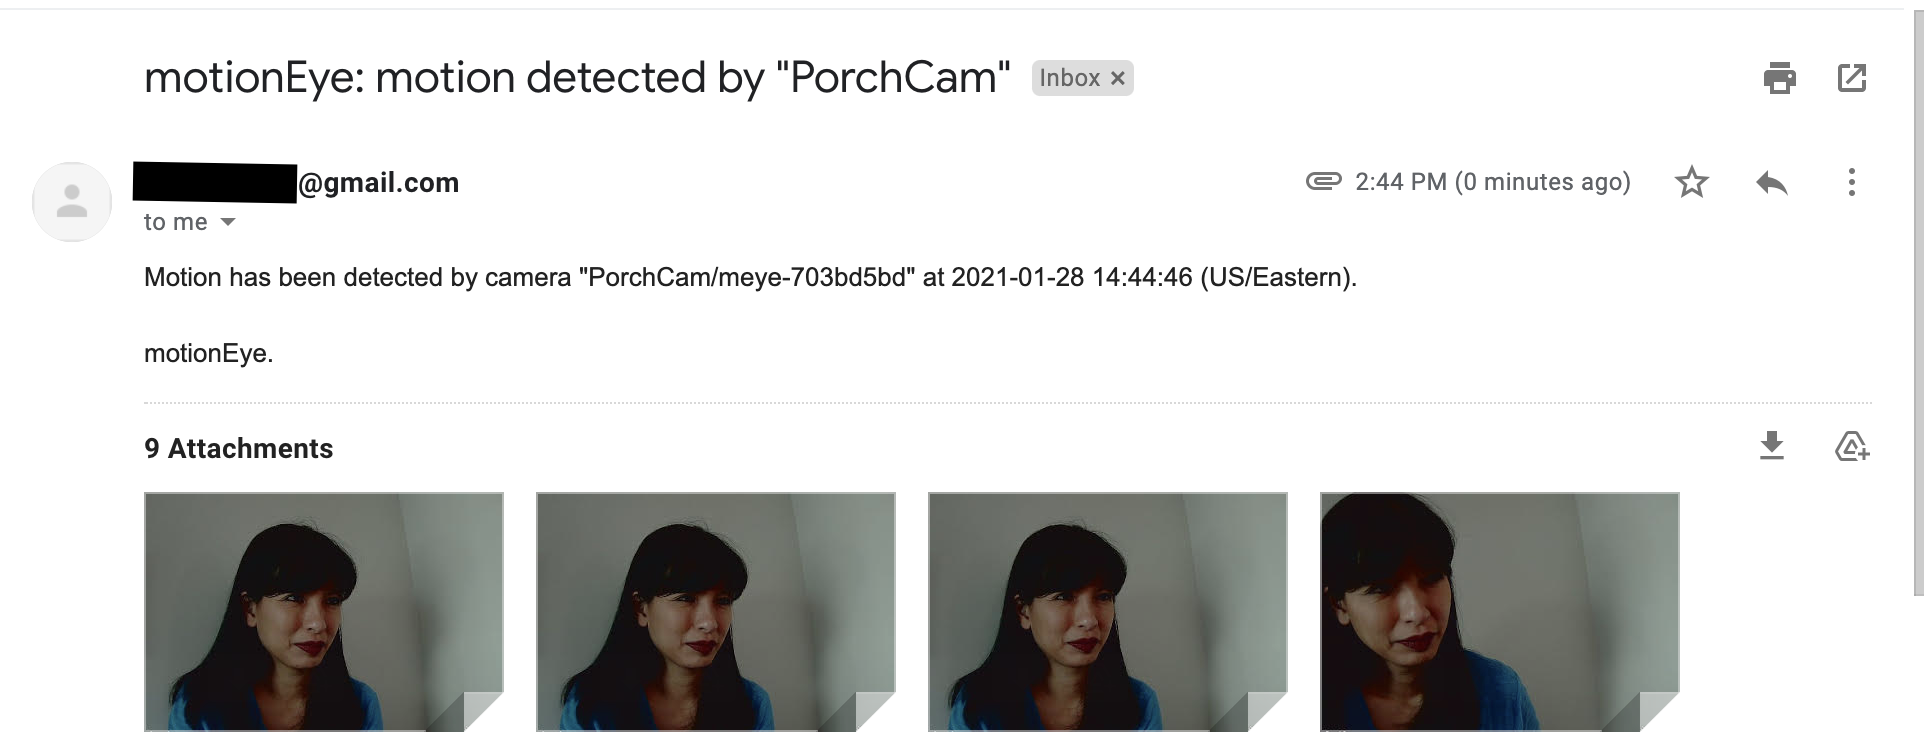
The first email is a text only email. Subsequent emails will contain attachments.
Mobile App Access to Raspberry Pi Security Camera
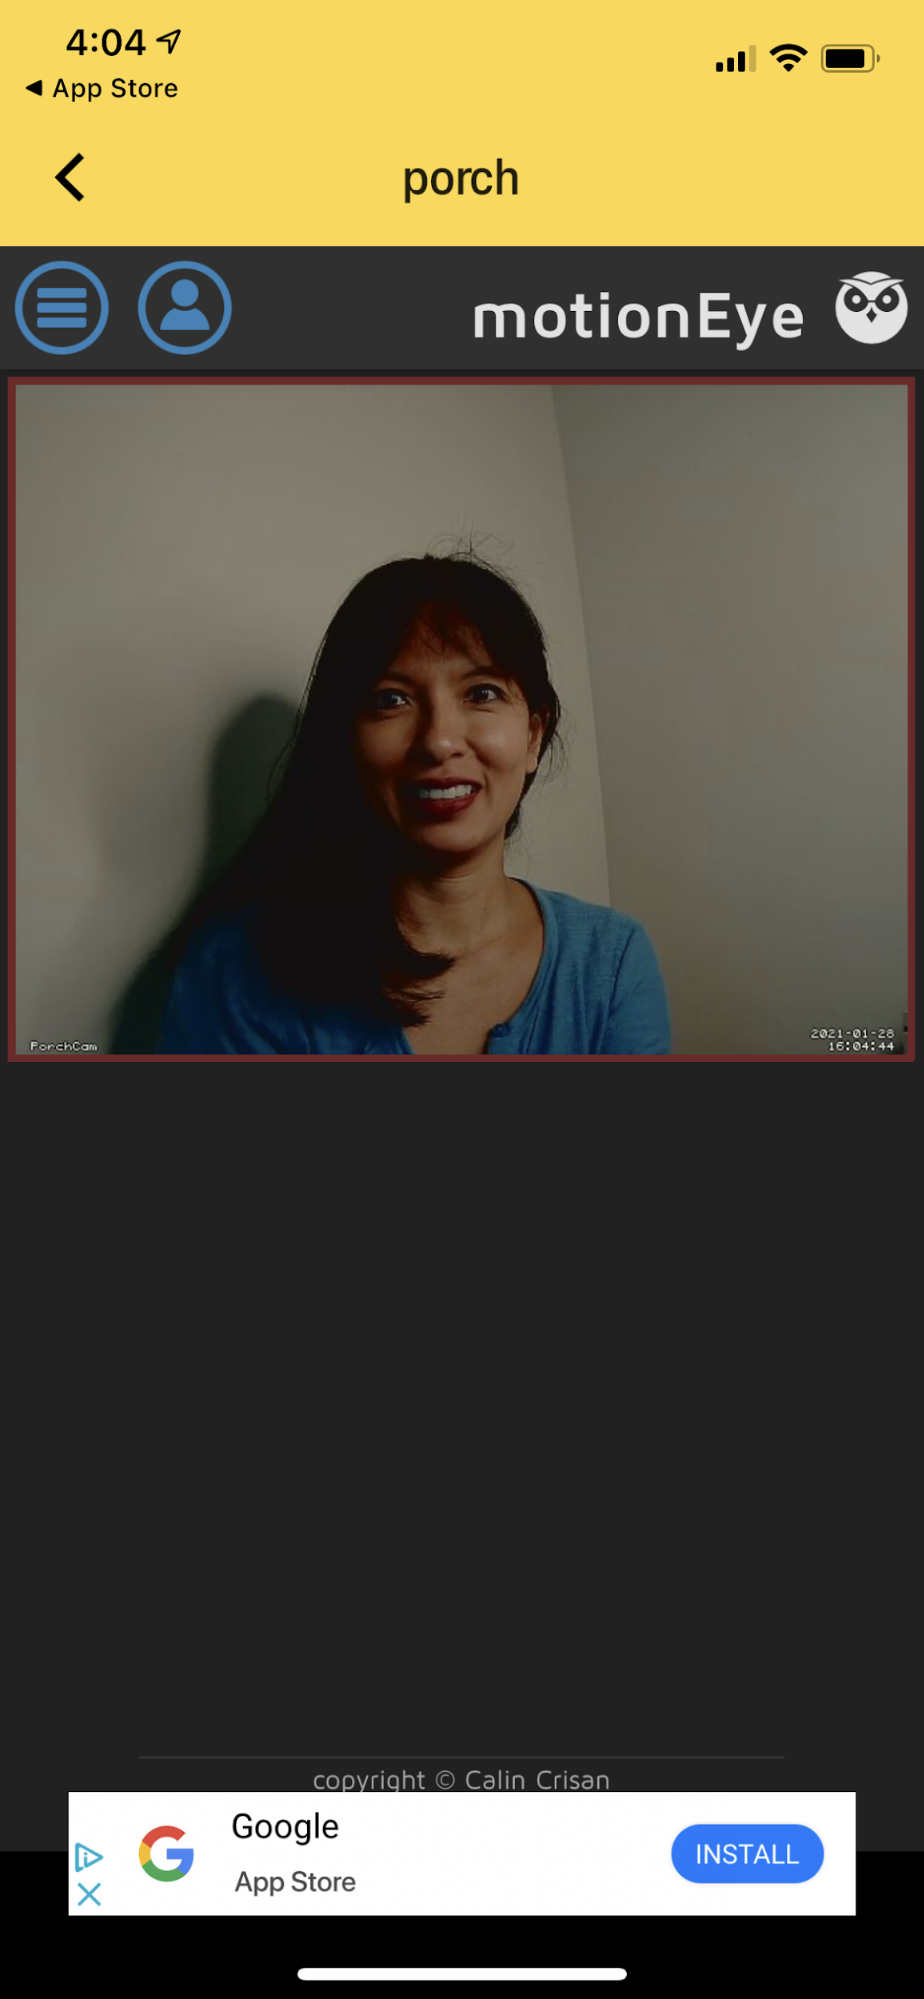
MotionEye also features a mobile app for iOS and Android / Google Play stores. Keep in mind that the app will only work while you are on the same network as your Raspberry Pi (unless you enable port forwarding, which is not encouraged for security reasons).
MotionEye iOS app - https://apps.apple.com/us/app/motioneyeos-client/id1485489242
Google Play app - https://play.google.com/store/apps/details?id=com.jairaj.janglegmail.motioneye&hl=en_US&gl=US
Caroline Dunn is a freelance writer for Tom's Hardware. Her expertise lies in covering Raspberry Pi projects, creating video tutorials, writing guides, and exploring other entertaining tech DIY initiatives.
-
jverner101 I'm stuck on Step 13. Find your internal IP address on the Pi screen. The attached shows what's on the screen. Any suggestions? TIAReply -
Matt_ogu812 Replyjverner101 said:I'm stuck on Step 13. Find your internal IP address on the Pi screen. The attached shows what's on the screen. Any suggestions? TIA
I see it's been a while since you posted this question which is rather unfortunate.
I'm exploring this, so if I can answer your question at a later time as I get into this, I'll be happy to help you. -
namnam4 dear all. we try to capture raw pictures with motioneye. therefor we wrote a script that works in the terminal but not when it is triggered by motioneeye. any suggestions. could it be done within the motioneye software itself?Reply
from picamera2 import Picamera2, Preview
from libcamera import controls
import subprocess
import time
from datetime import datetime
from datetime import date
subprocess.run("sudo", "systemctl", "stop", "motioneye"])
time.sleep(1)
print("now")
dt = datetime.now().strftime("%Y-%m-%d_%H-%M-00Z")
date= date.today()
print(str(dt))
picam2 = Picamera2()
camera_config = picam2.create_still_configuration(main={"size": (1920, 1080)}, lores={"size": (640, 480)}, display="lores")
picam2.configure(camera_config)
picam2.start_preview(Preview.NULL)
picam2.start()
picam2.set_controls({"AfMode": controls.AfModeEnum.Auto})
time.sleep(1)
picam2.capture_file("/home/pi/Desktop/cam1/"+str(date)+"/"+str(dt)+".jpg")
time.sleep(1)
subprocess.run("sudo", "systemctl", "start", "motioneye"])
quit() -
Jan12345678 I have tried all to allow for ftp access but still have error 550 Requested action not taken. File unavailable (e.g., file not found, no access).Reply
It works with other cams on same ftp address and location on the server.
What could still be wrong? -
alixcz Hi all,Reply
I have tricky problem
I downloaded the correct platform 20201026 image and after uploading it to SD, my RPIs does not boot. Led Error reports "kernel.img not found". It's on the SD card! I tried everything. Different RPi, different SD card, differet different img (older 2020XXXXimg), recording SW, turn off antivirus on the home machine.... Another raspi OS img boots normally.
Thanks for ideas.
HW RPi3B+ and RPi3A+ (all original)
SD Sandisk
RPi Imager 1.8.5 + Rufus 4.15
V.
