How to Set a Static IP Address on Raspberry Pi
Make sure your Pi has the same IP every time you boot.

Get Tom's Hardware's best news and in-depth reviews, straight to your inbox.
You are now subscribed
Your newsletter sign-up was successful
If you're trying to access a Raspberry Pi on your local network, there are times when you'll really need its IP address. Sure, you can usually SSH or VNC into a Pi by using its hostname, but for something like port forwarding on a router (which you'll use to create an externally-accessible Minecraft server or web server), an actual IP v4 address may be needed. The problem: every time you reboot your Pi, the IP address can change, based on what the router decides to assign at the moment.
Fortunately, there's a simple way to make sure that your Raspberry Pi always gets the same IP address on your local network or, at least, always tries to get the same address on your local network. It almost goes without saying that if, at the time it boots, another device that's powered on is already using the address in question, your Pi will either have no IP v4 address at all or (if you configured it as such) it will choose an alternative one. So keep that in mind.
Note that this tutorial assumes you already have a Raspberry Pi that's connected to your network. If not, please see our tutorials on how to set up a Raspberry Pi and how to set up a headless Raspberry Pi (no monitor required).
How to Assign a Static IP to a Raspberry Pi
1. Determine your Raspberry PI's current IP v4 address if you don't already know it. The easiest way to do this is by using the hostname -I command at the command prompt. If you know its hostname, you can also ping the Pi from a different computer on the network.
hostname -I 
2. Get your router's IP address if you don't already know it. The easiest way to do this is to use the command ip r and take the address that appears after "default via."
ip r 
3. Get the IP address of your DNS (domain name server) by enter the command below. This may or may not be the same as your router's IP.
grep "namesever" /etc/resolv.conf 
Now that you have the IP address your Pi is currently using, the router's IP address and the DNS IP address, you can edit the appropriate configuration file.
Get Tom's Hardware's best news and in-depth reviews, straight to your inbox.
4. Open /etc/dhcpcd.conf for editing in nano.
nano /etc/dhcpcd.conf5. Add the following lines to the bottom of the file. If such lines already exist and are not commented out, remove them.
Replace the comments in brackets in the box below with the correct information. Interface will be either wlan0 for Wi-Fi or eth0 for Ethernet.
interface [INTERFACE]
static_routers=[ROUTER IP]
static domain_name_servers=[DNS IP]
static ip_address=[STATIC IP ADDRESS YOU WANT]/24
In our case, it looked like this.
interface wlan0
static_routers=192.168.7.1
static domain_name_servers=192.168.1.1
static ip_address=192.168.7.121/24
You may wish to substitute "inform" for "static" on the last line. Using inform means that the Raspberry Pi will attempt to get the IP address you requested, but if it's not available, it will choose another. If you use static, it will have no IP v4 address at all if the requested one is in use.
6. Save the file by hitting CTRL + X and reboot.
From now on, upon each boot, the Pi will attempt to obtain the static ip address you requested.
Using the Raspberry Pi OS Guide to Set a Static IP
If you already have all the information about your router's IP and DNS IP, you can configure the static IP address using the Network Preferences menu instead of editing the dhcpcd.conf file.
1. Right click on the network status icon and select the Wireless & Wired Network Settings.

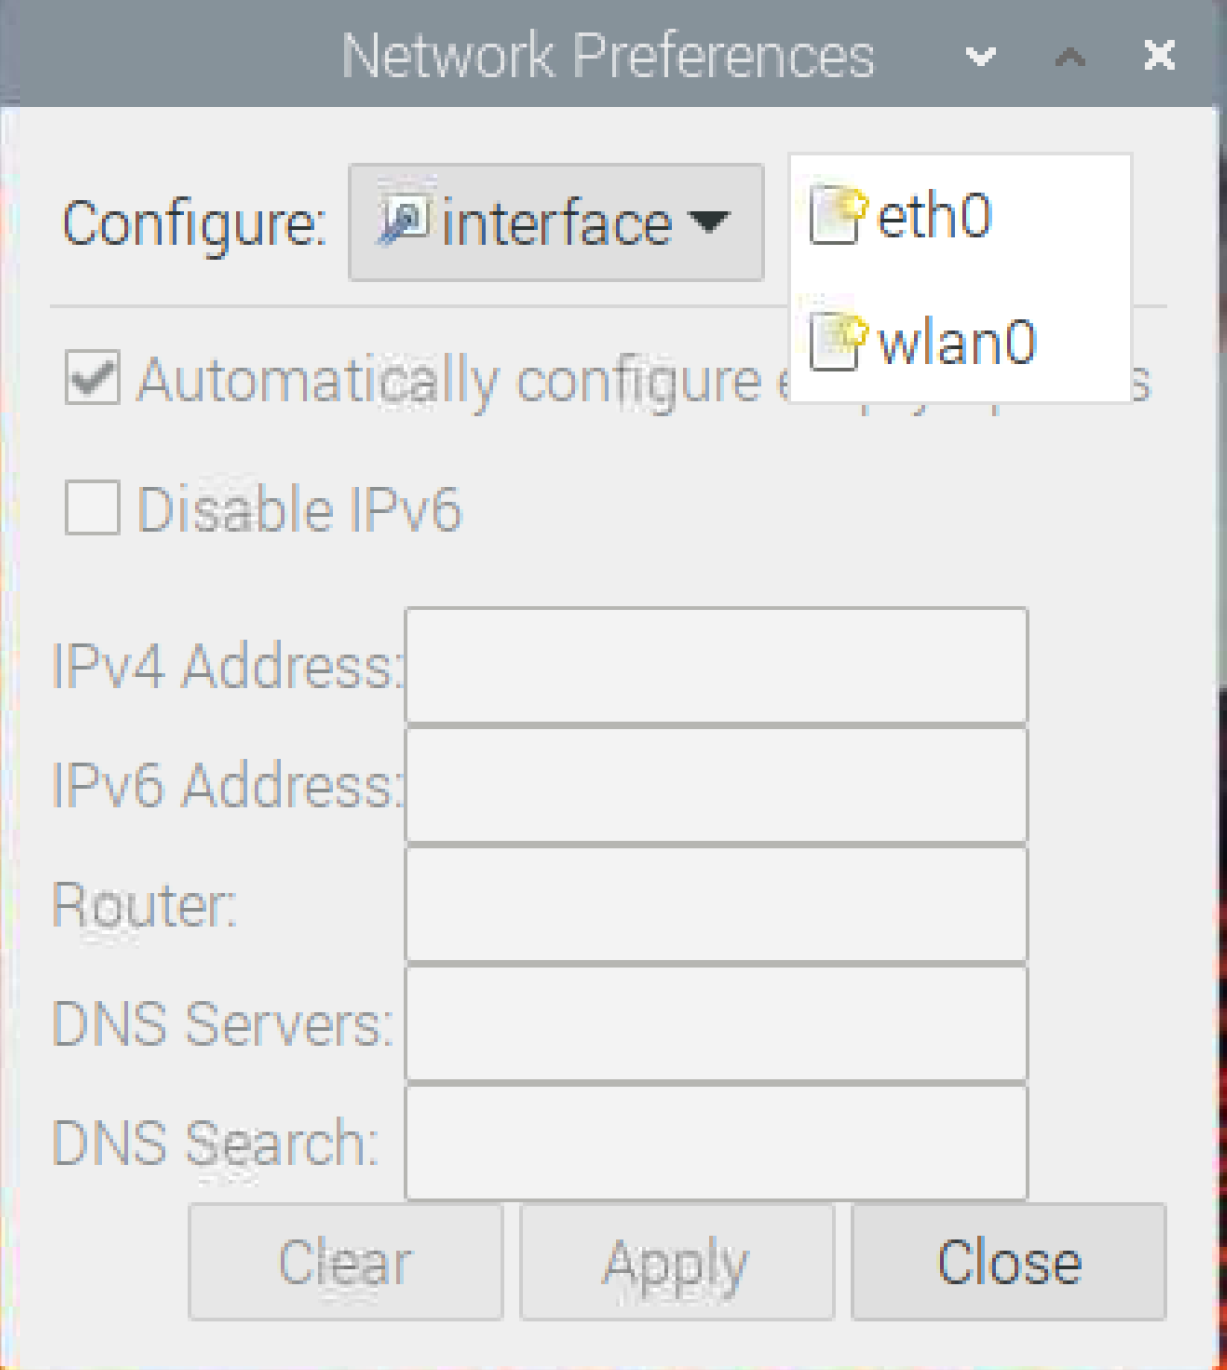
2. Select the appropriate interface. If you're configuring a static IP for Wi-FI, choose wlan0. For Ethernet, choose eth0.

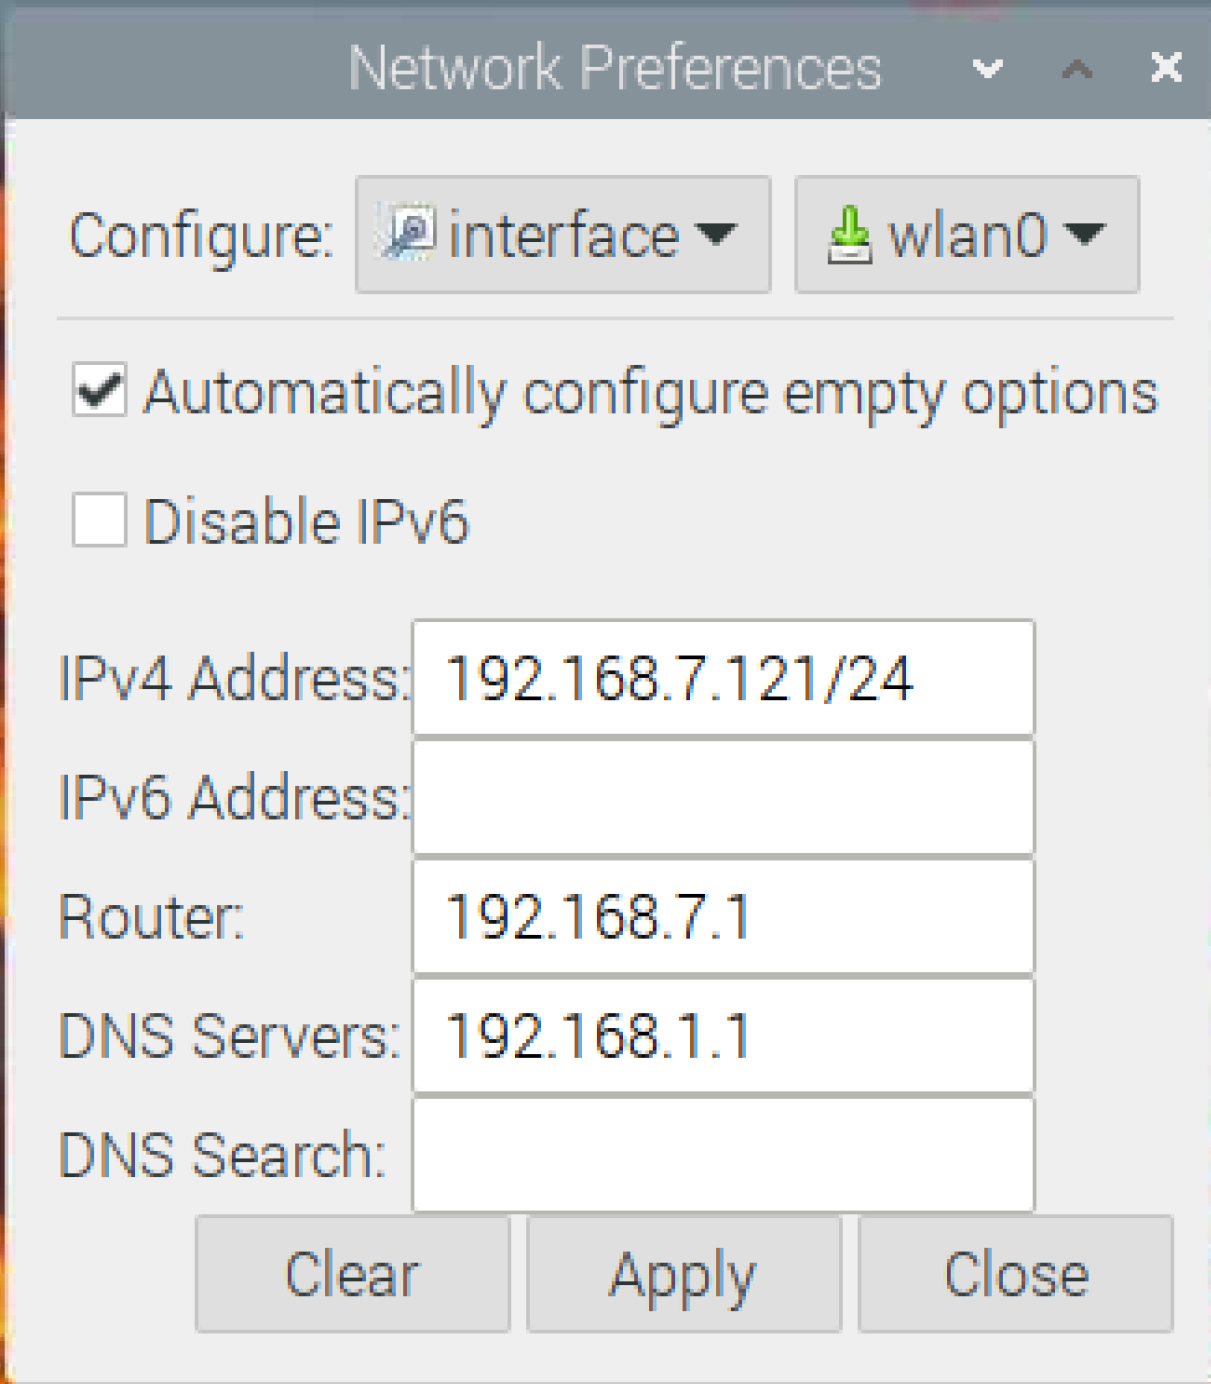
3. Enter the IP addresses into the relevant fields. Your desired IP address will be in the IPv4 field, followed by a /24. Your router's IP and DNS server's IP will be in the fields named after them.

4. Click Apply, close the window and reboot your Pi.
Your Pi will now attempt to use your desired IP address at each boot. However, the Network Preferences menu sets this as a preference, not an absolute. So, if the IP address you asked for is not available, it will use another.
Avram Piltch is Managing Editor: Special Projects. When he's not playing with the latest gadgets at work or putting on VR helmets at trade shows, you'll find him rooting his phone, taking apart his PC, or coding plugins. With his technical knowledge and passion for testing, Avram developed many real-world benchmarks, including our laptop battery test.
-
AusMatt Typo:Reply
grep "namesever" /etc/resolv.confShould read:
grep "namersever" /etc/resolv.conf -
alan tracey wootton With an Arduino that is serving a web page one can use mDns instead of keeping track of the local IP address.Reply
Add this to your Setup():
if (MDNS.begin("esp32"))
{
MDNS.setInstanceName("count server demo");
MDNS.addService("http", "tcp", 80);
MDNS.addServiceTxt("http","tcp","counter","true");
}Then that webpage is available locally in chrome and safari as:
http://esp32.local./I didn't test the other browsers.
I'm sure this works for a Pi also even though I haven't tried it yet. mDns might be on by default.
The url would be http://raspberrypi.local./To check, try this command:
dns-sd -B _http._tcpWhen I do that I find that both of my printers are serving http (a supply level page) in addition to the microcontroller. -
wl84 When I run the nameserver command I get two results back - 192.168.11.1 and 192.168.68.1. I tried both in the config and I can't connect to anythign with either. I'm trying to setup piholeReply
