How To Mine Ethereum Now
Building An Ethereum Mining Rig: Software Installation & Configuration
If you have leftover parts after an upgrade, you already know how to build and assemble a computer so I won't cover that aspect here. Just in case, you can checkout our handy guide on building PCs. A purpose-built mining rig requires some additional special attention, and we'll save that for a future installment of this series. For this particular build, the most important parts are the software installation and configuration.
OS Prep Work
Before you can install Lubuntu on your new mining rig, you'll need to get the installation media ready. If you already know how to install Linux, you can likely skip this section. This guide assumes you use a Windows computer for your prep work. First you'll need to make a Linux install media. Unless you're using an ancient motherboard that can only boot from an optical disc drive, USB installation is faster and easier. Note, you'll need another USB drive, separate from the one acting as the mining system's hard drive.
Head over to lubuntu.me and download the 16.04 LTS image. I went with the slightly older long-term support (LTS) version over the newer 17.04 just in case I ran into any compatibility issues. The ISO is only about 1GB. Once you have it, you need to make your installation media. If you're using an optical disc, Windows 10 has built-in image burning support (or you can use any other disc burning software you have).
To make a USB installer, it's not enough to simply put the ISO on the drive. You have to make the drive bootable. The easiest way to do that is with a utility, of which there are many. I use Win32 Disk Imager, available at SourceForge. Open the utility, point it to the image file (it will work with ISO and IMG files), tell it the drive letter of the destination USB drive, and click "write." It will write the ISO and make the proper partitions and boot records on your USB drive.
Next, prepare your "hard drive." Back up any files on the USB drive you intend to keep because they'll all get blown away. Linux and Windows don't recognize all the same drive formats. Just because your USB drive is readable to Windows doesn't mean Linux will see all of it. To make sure the drive is completely empty and recognizable to every system, I like to remove any partition and filesystem already on it first, so it's just raw unformatted space. This step isn't strictly necessary, but I find it helpful, or at least reassuring.
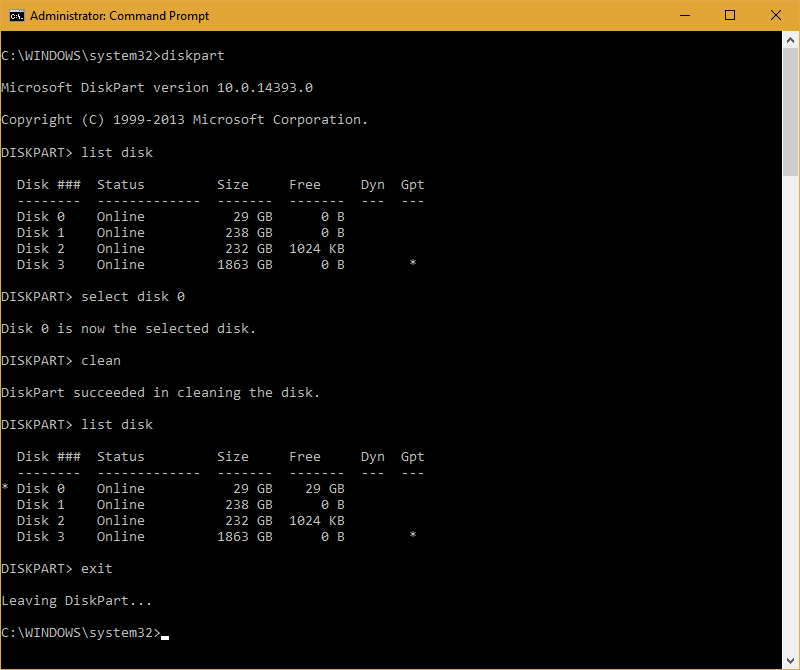
Plug in the USB "hard drive" and open up a command prompt in Admin mode (right-click on the Windows start button and it's listed there) and run "diskpart" (without the quotes). You're now in the disk partition manager, so be very careful what you do in here. Next run "list disk" to show all the disks connected to your system. Find the disk number that refers to your USB drive and run "select disk X" where X is the appropriate disk number. You should be able to identify it as the smallest capacity disk listed. It will likely be the lowest or highest numbered disk. When you're positive you have the right disk, run the "clean" command, then run "exit" to leave the disk partition manager. If for any reason you're unsure which disk is the correct one, simply do nothing and exit DISKPART.
UEFI Preparation
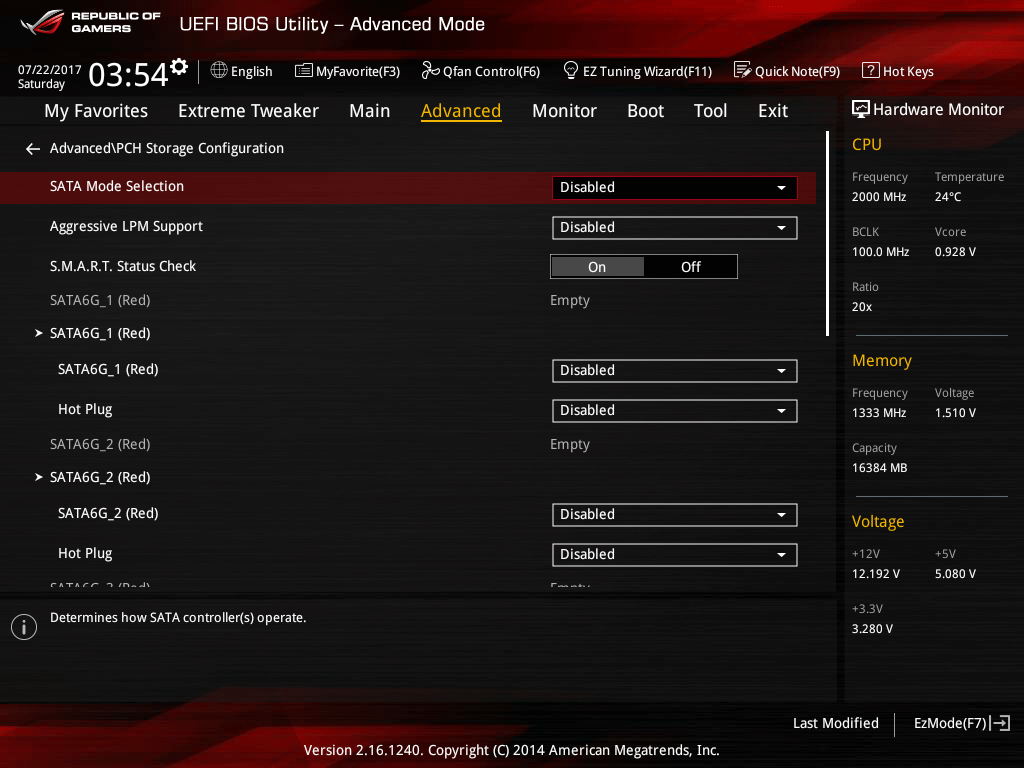
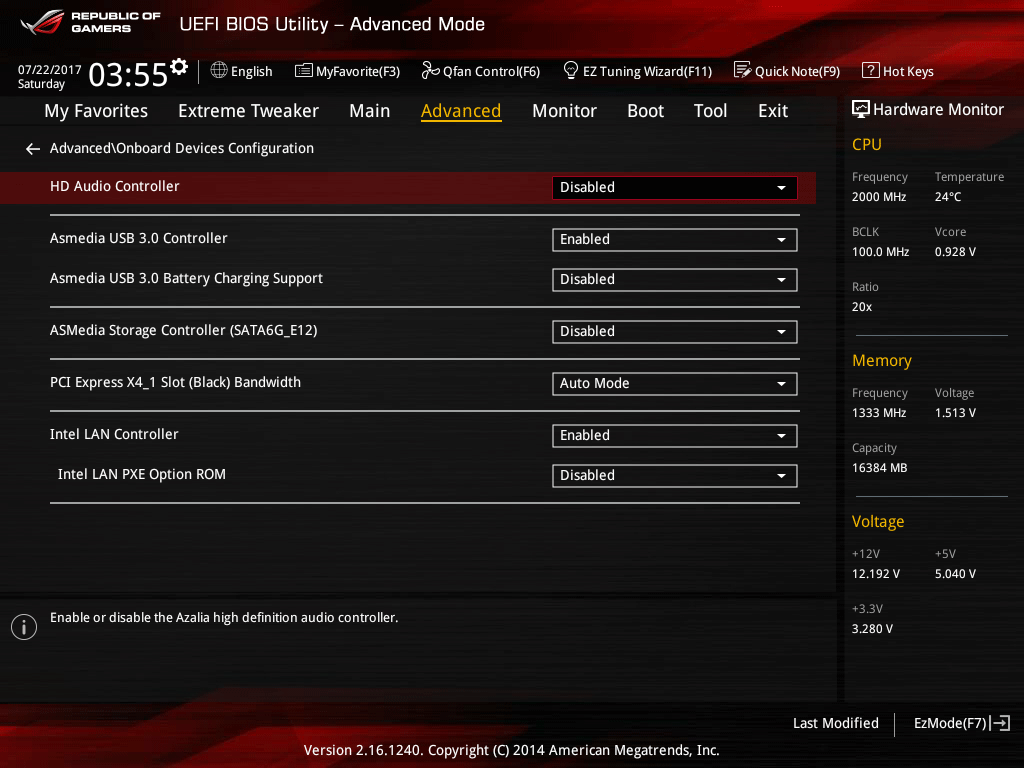
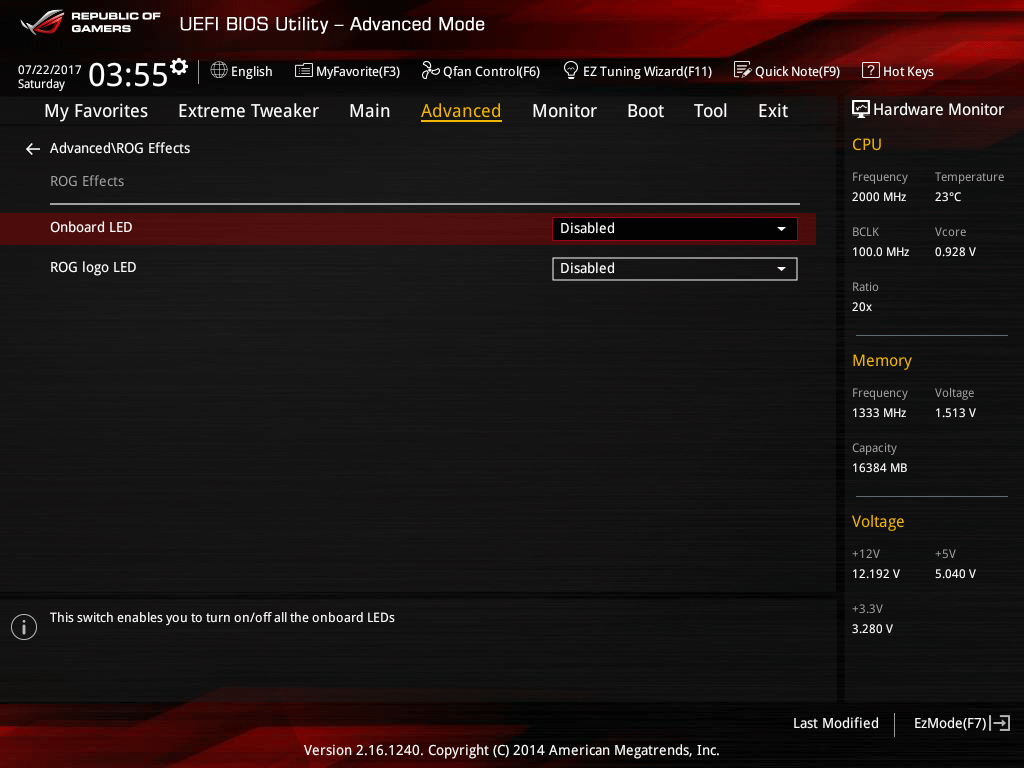
Next you need to prep your motherboard's UEFI for mining. First, you want to disable most of the devices on the board, since they won't be used. Your goal is to cut back on power consumption. Comb through the UEFI menus and enable every power saving feature you can find. At the same time, you can turn off or disable most performance enhancements. Disable any CPU turbos or boosts, automatic overclocks, and RAM XMP. Disable all storage ports, serial ports, and peripherals except those you absolutely need.
Get Tom's Hardware's best news and in-depth reviews, straight to your inbox.
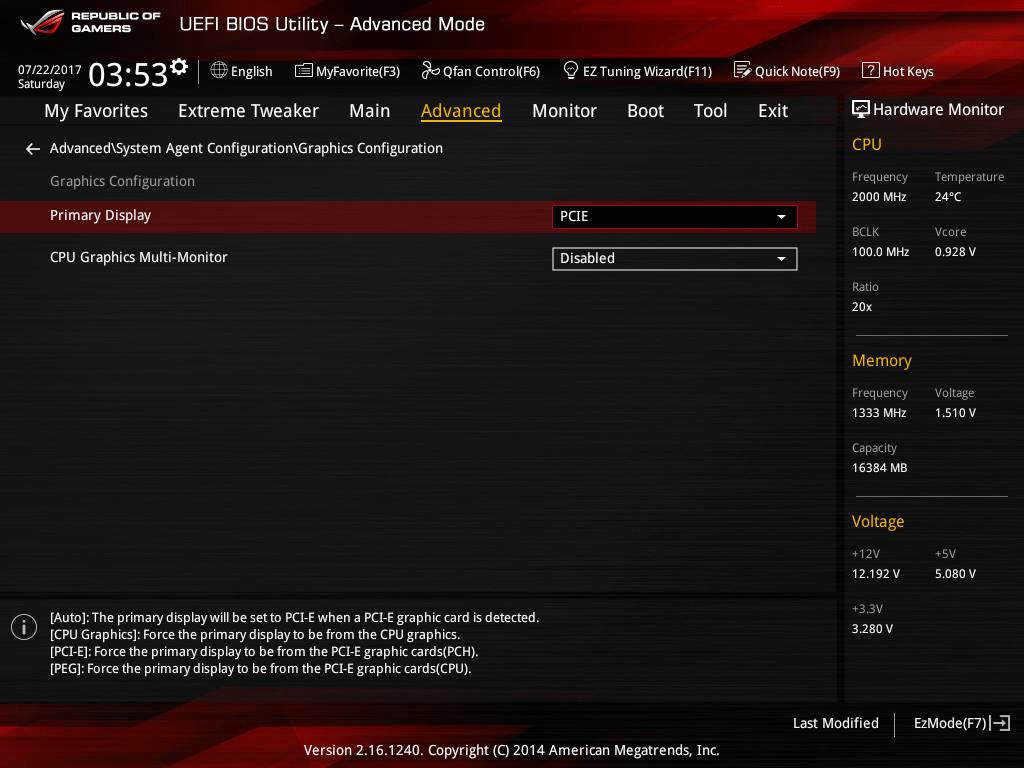
Second, Windows can be more forgiving of some firmware settings than Linux. If you have the option, set default display adapter to PCIe instead of the CPU's integrated GPU, or even the automatic setting. This may not affect everyone, but my system wouldn't boot correctly after installing the GPU drivers unless I changed this setting to explicitly use the PCIe as graphics and had my monitor hooked up to my primary GPU.
Finally, fan controls will depend on your setup and how much noise you can stand. You can probably leave your CPU cooler on the "silent" preset. Your case fan settings will depend on your own requirements and GPU cooling needs. For my setup I unplugged the two 140mm radiator fans, set the three 120mm fans to 65% duty cycle, and lowered the pump to 70% speed.
Installing Lubuntu
With both the installation USB and the destination USB ready, plug in just the install USB to your mining system and power it on. You'll be greeted by a menu asking your preferred language and then given the option of installing Lubuntu or trying it before you install. Both options will let you install the OS onto your flash media, but for the sake of this guide, pick the latter.
This loads basically a full—albeit temporary—version of Lubuntu that also has an OS installer. No changes you make here, be it system settings or file changes, will be recorded if you exit the OS or reboot the computer. However, this temporary session has two advantages. First, if something goes wrong with the Lubuntu install, the temporary OS stays loaded and lets you try again without rebooting. Second, you can configure your network settings to get internet access, if necessary. That way you can download updates while installing Lubuntu.
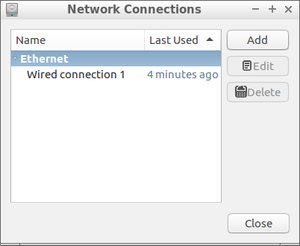
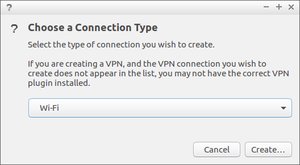
Lubuntu is good enough at automatically recognizing most network adapters and controllers. Wired connections should be fine without additional configuration. If you're using wireless, you'll need to set it up first. Click the Lubuntu menu and go to Preferences then Network Connections. Click "Add" to setup a new Wi-Fi configuration, or setup your wired connection if necessary.

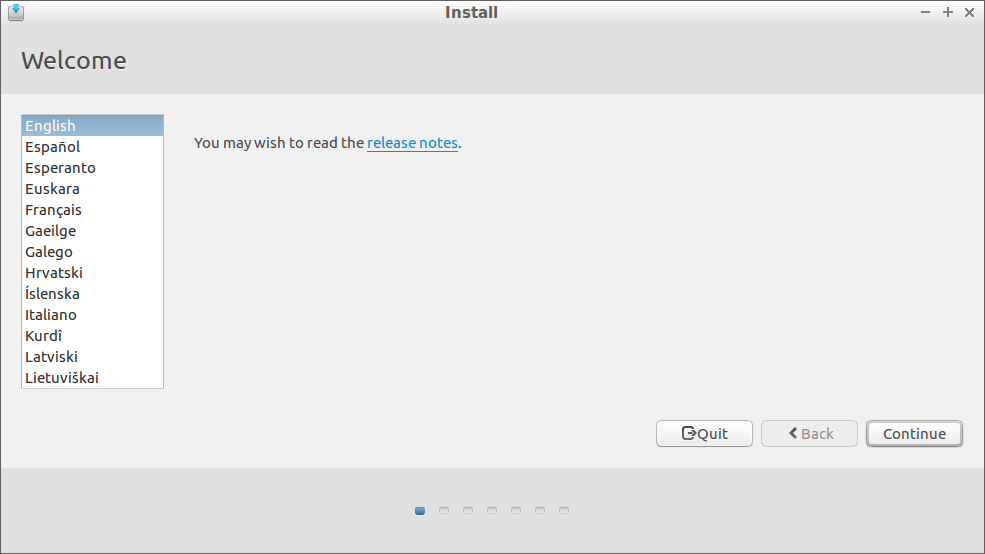
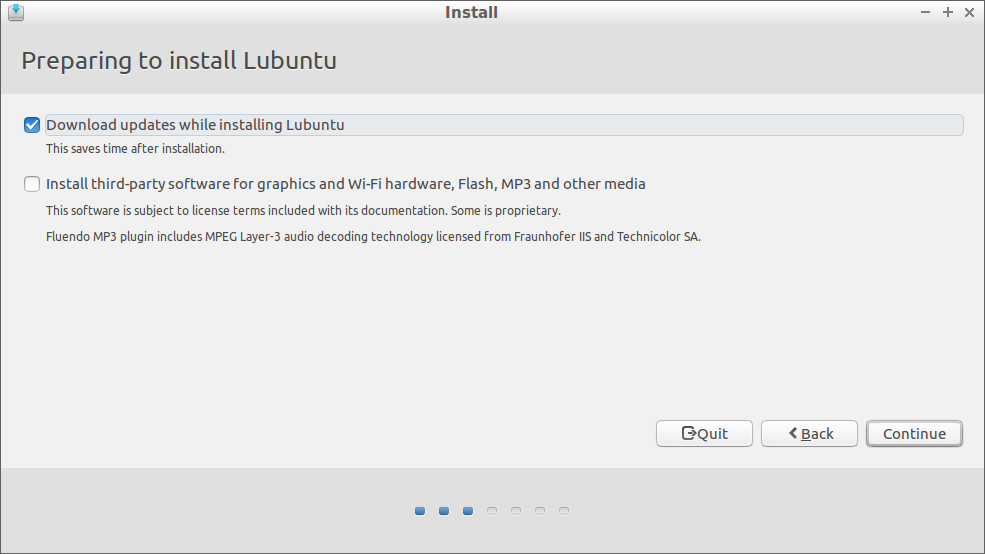
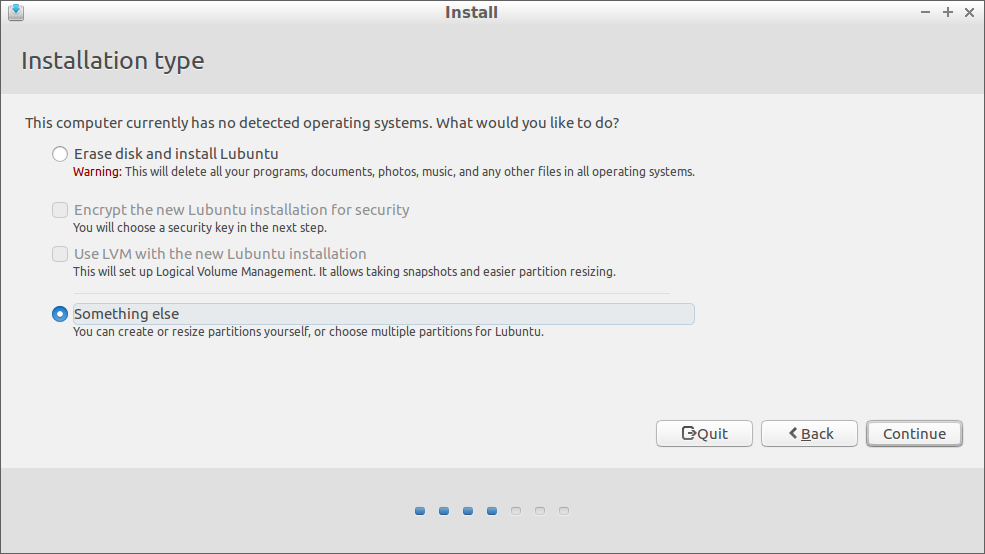
Once you have a network connection, plug in your USB that will act as the regular hard drive and double-click the Install Lubuntu shortcut on the desktop. This launches an installation wizard similar to many you've seen before. However there are a few differences you may not be aware of. Go ahead and pick your language, and check the box to download updates as you install. Don't check the third-party box, as it just wastes space on your drive with a lot of software you won't need. When you get to the Installation Type screen, you have a few options.
The top option of erasing and installing will complete the installation with all default settings. The downside is it also makes a swap partition, which is not only unnecessary for a simple mining setup, it also requires more space and increases disk writing, neither of which are good for small USB drives. However if you're experiencing problems starting the installation, this option may be helpful. To configure your installation with more precision, select "Something else."
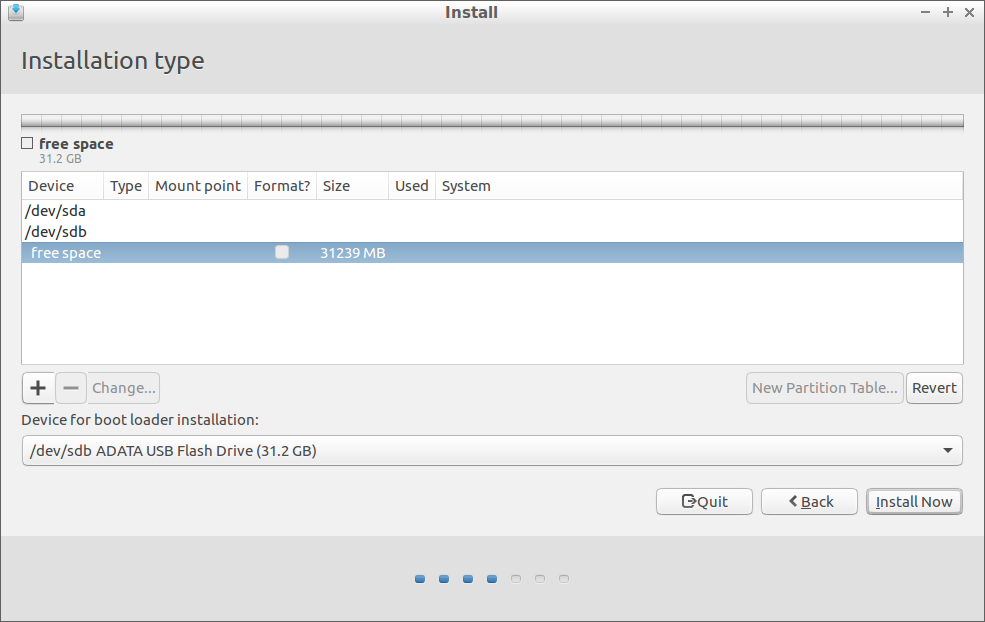
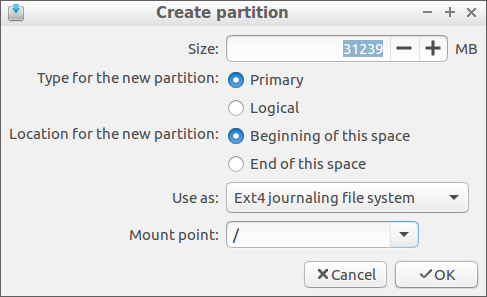
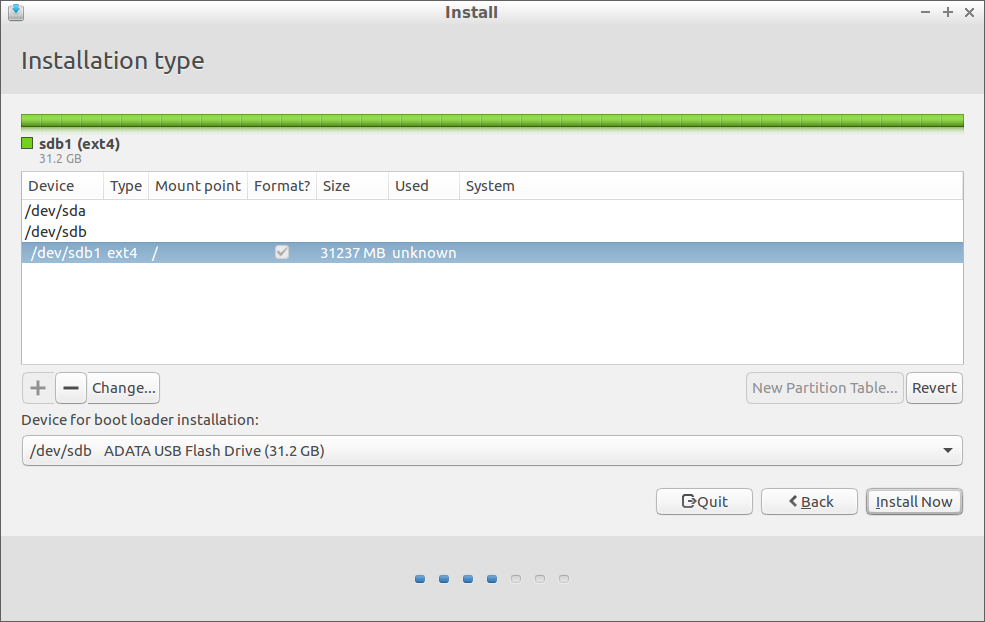
If you go the "Something else" route, you'll see a partition list menu that's a little different than you're probably used to. The /dev/sda device is the Lubuntu installation source drive, so you don't want that. The destination drive should be /dev/sdb, though the drop down menu at the bottom may help you identify which is which. If you used DISKPART to clean the drive, there should be no additional partitions indented under /dev/sdb, just free space. If you still have partitions and don't want to keep them, highlight them with the mouse and click the minus button. The Lubuntu installer won't make any actual changes yet, it just makes a list of actions to take and won't commit them until you see a pop-up warning that the action is irreversible.
Highlight "free space" under /dev/sdb (or whichever drive you want to install on) and hit the plus button to create a new partition. Total capacity should be at least 10GB to hold the OS, drivers, and mining software, but there's no reason you shouldn't simply use the entire USB drive. Mark the partition Primary, start it from the beginning of the space, use the EXT4 or EXT3 filesystem, and mount it to the root/directory. With the new partition created, select it from the list, make sure the bootloader is on the root part of the drive (sdb, not sdb1), and click Install Now. The system will give you a pop-up warning about not using a swap partition. Ignore that and proceed.
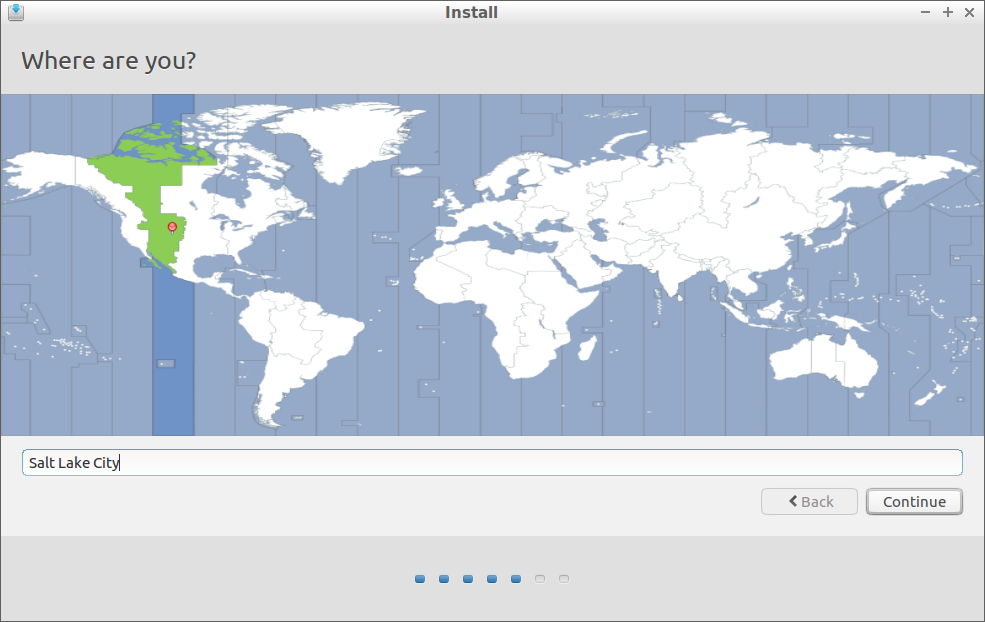
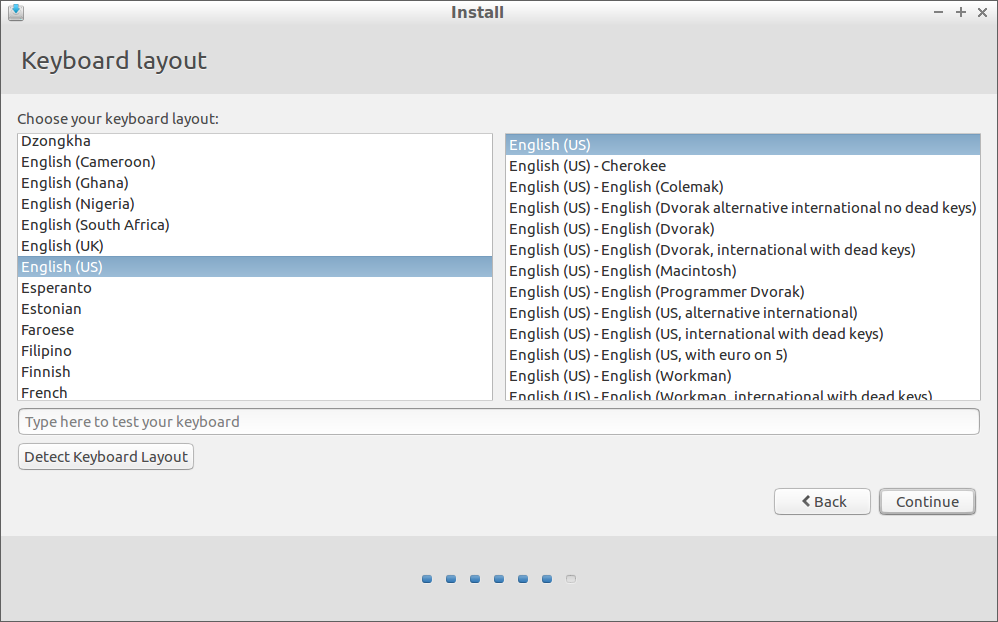
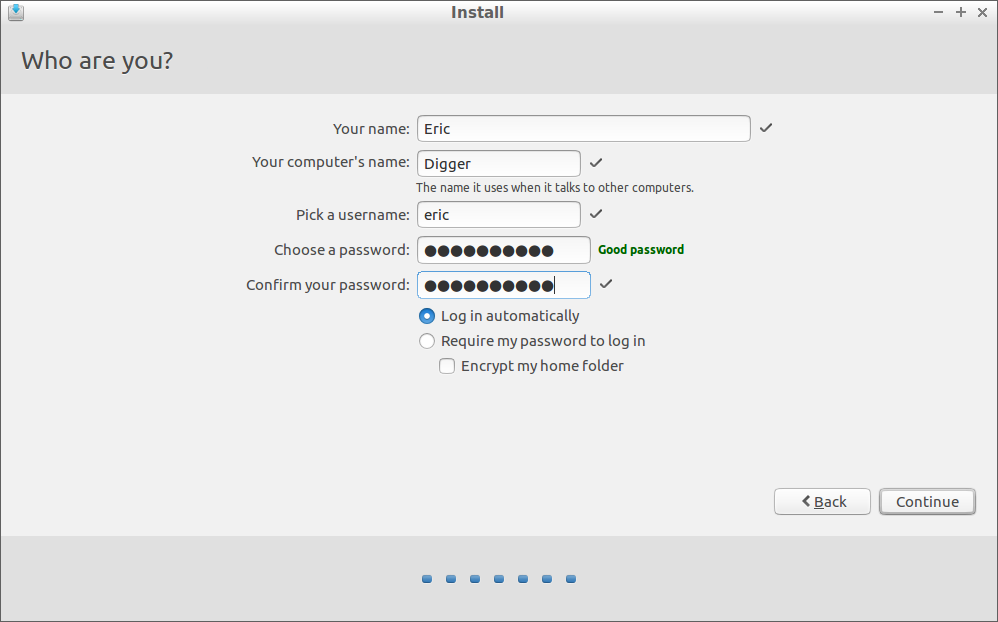
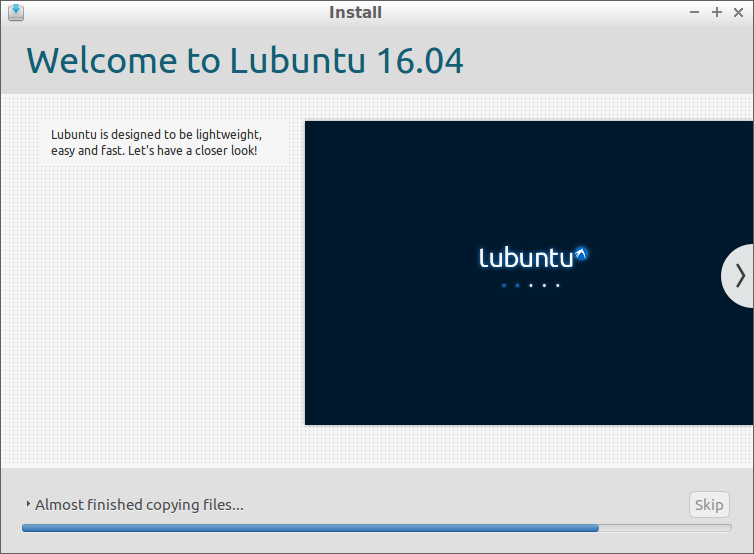
Finish the install by selecting your keyboard layout, entering your city to get the correct time code, and selecting a computer and user name along with a password. For simplicity, logging in automatically can get the machine going faster. Installation will take some time depending on how fast your USB drives are as well as your internet connection for downloading updates. When installation completes, the system will prompt you to either reboot the system or continue using the temporary OS. When you're ready to continue, reboot.
Lubuntu 101
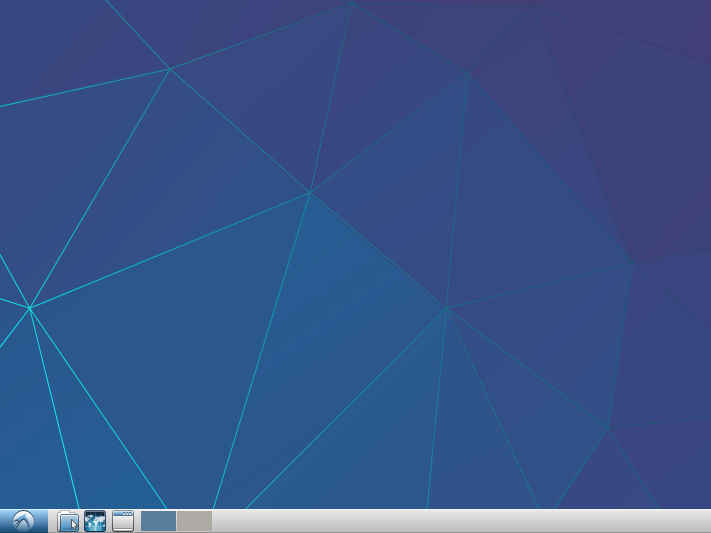
From here on out, we're strictly in Lubuntu. There's nothing to be worried about, Lubuntu operates similarly to Windows. The blue button in the very bottom left with the Lubuntu logo acts just like the Windows Start menu. The icons next to it are just like a Quick Launch menu. The button next to the Lubuntu menu opens the File Manager and the next icon opens the system default web browser (Firefox in this case). If you're making a new mining system with the help of this article, you'll find it easier by opening this article on the mining computer. The power symbol button in the bottom right corner brings up the user login and shutdown menu. Right-clicking on something will bring up a context menu most the time. Keep these in mind as we go through the rest of the setup process. Many keyboard shortcuts are often the same. If you're using a Windows keyboard, you can even use Windows key + E to open a file explorer.
However, while this guide sticks to GUI methods where available, tradition dies hard in the Linux crowd, and some things remain command line interface only. For those unfamiliar with Linux CLI, it's similar to what Windows—and DOS before it—call the Command Prompt. In Linux, it's Terminal. There are a few differences, but for our purposes they're the same. Many commands are the same between them, such as "cd" for change directory and "dir" to show the directory contents (or you can use "ls" too). One key difference is that Linux uses a forward slash "/" for sub-directories while Windows uses a backslash "\".
You will see many "sudo" and "apt" commands. Sudo is short for "super user do" and tells the OS to execute the following command with the highest permission available. It's not unlike running the command prompt in Windows in Admin mode, or disabling UAC. Every time you run a sudo command in a terminal window for the first time it will ask for your user password.
APT is an acronym for advanced package tool, a library of software available to install along with applicable updates. So a command such as "sudo apt-get" is telling the system to use admin rights to access the APT library and get/install a particular package.
One final note is that Linux CLI is case sensitive whereas the Windows command prompt usually isn't. Using "cd temp" and "cd Temp" are not equivalent ways to get to the temp directory. This is one reason the majority of directories and file names are lowercase in Linux.
OS Update
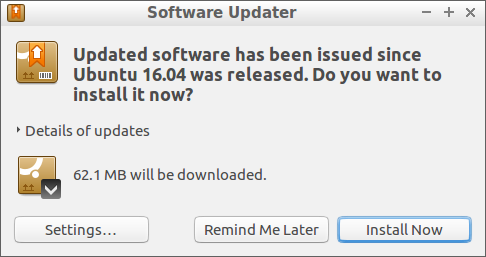
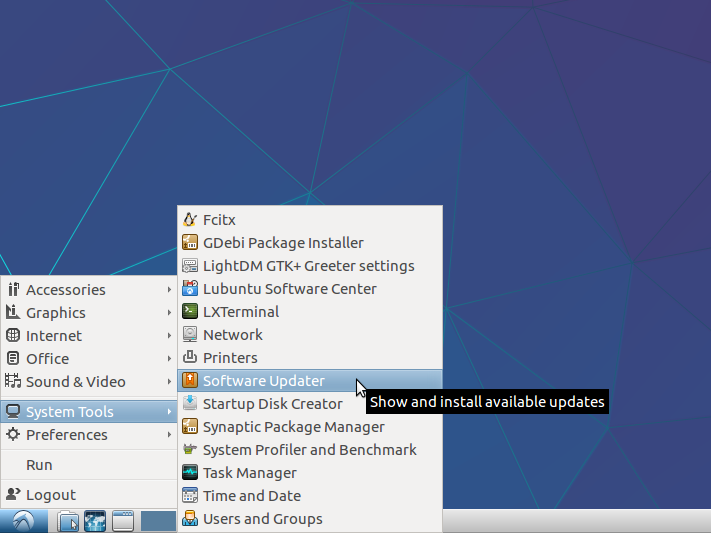
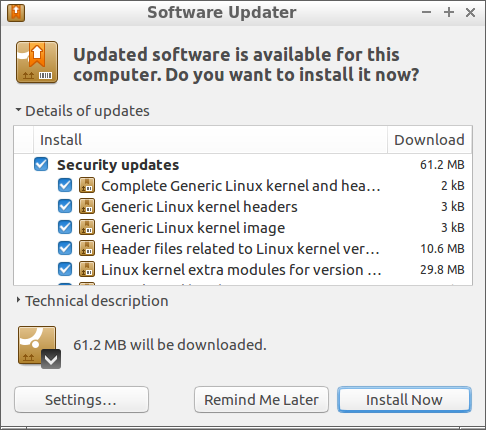
So, let's put this info to use. You need to update your new Lubuntu installation. Even though Lubuntu downloaded updates during installation it doesn't always get everything, so you need to run a system update. The first time you boot your system after installing Lubuntu (don't forget to remove the installation media), it will automatically check for updates and, if found, prompt you to install them. It's not unlike Windows Update. You can just click the Install Now button to take care of it. You can also check for updates under the System Tools section of the system menu. When the update is finished, reboot the system.
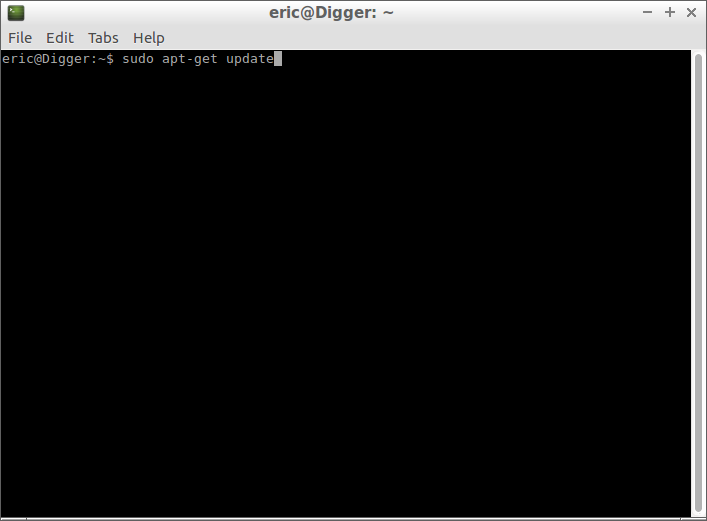
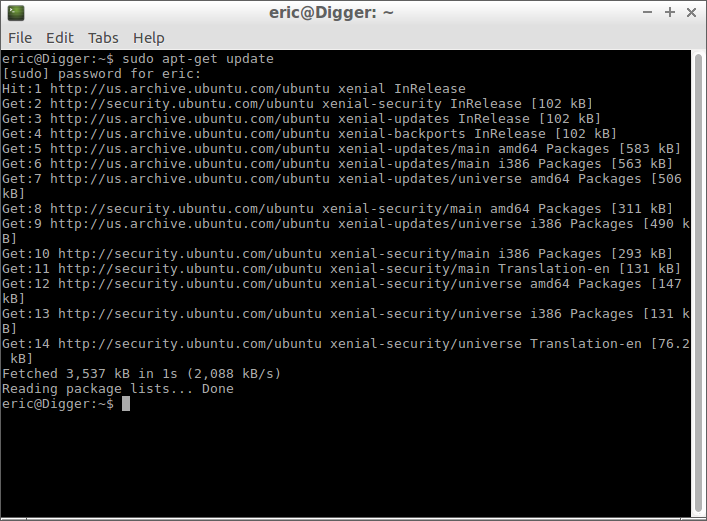
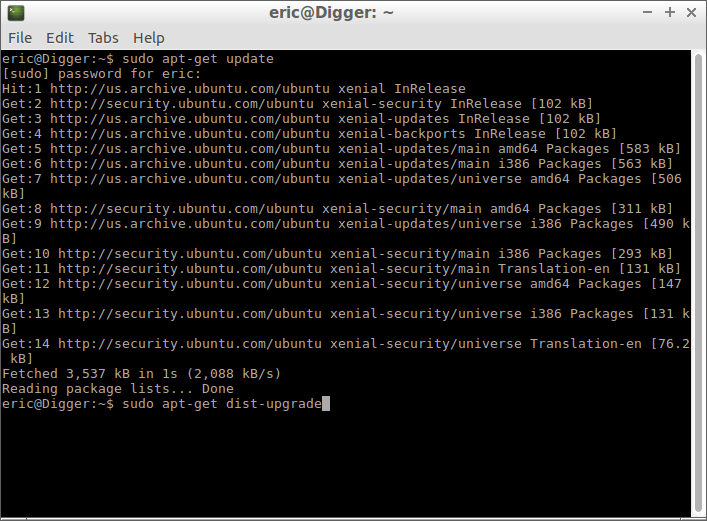
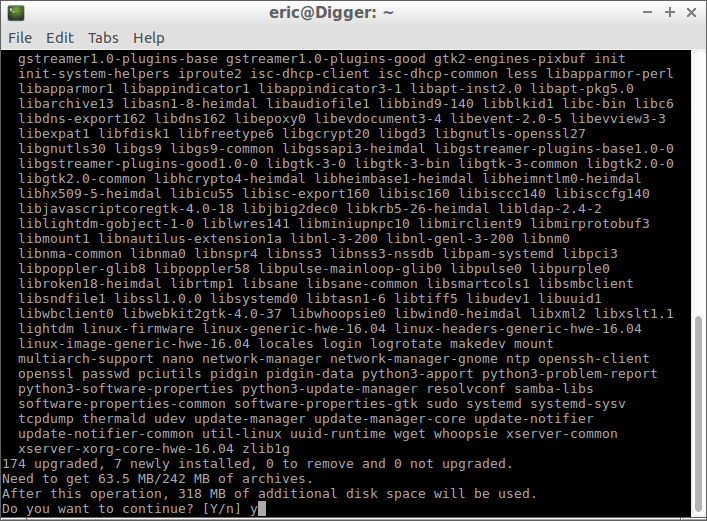
If you want to embrace your inner CLI geek, ignore the prompt and open terminal by pressing Ctrl + Alt + t. Run two commands — "sudo apt-get update" and "sudo apt-get dist-upgrade" — without the quotes. The first will update the list of available packages, the second will apply them, including working out dependencies and removing any outdated software. When it's done, reboot by running the "sudo reboot" command.
GPU Driver Installation
Open up a web browser and point it to either AMD's or Nvidia's site, depending on which one makes your GPU. You can even mix GPUs in a mining system, so maybe you need drivers for both.
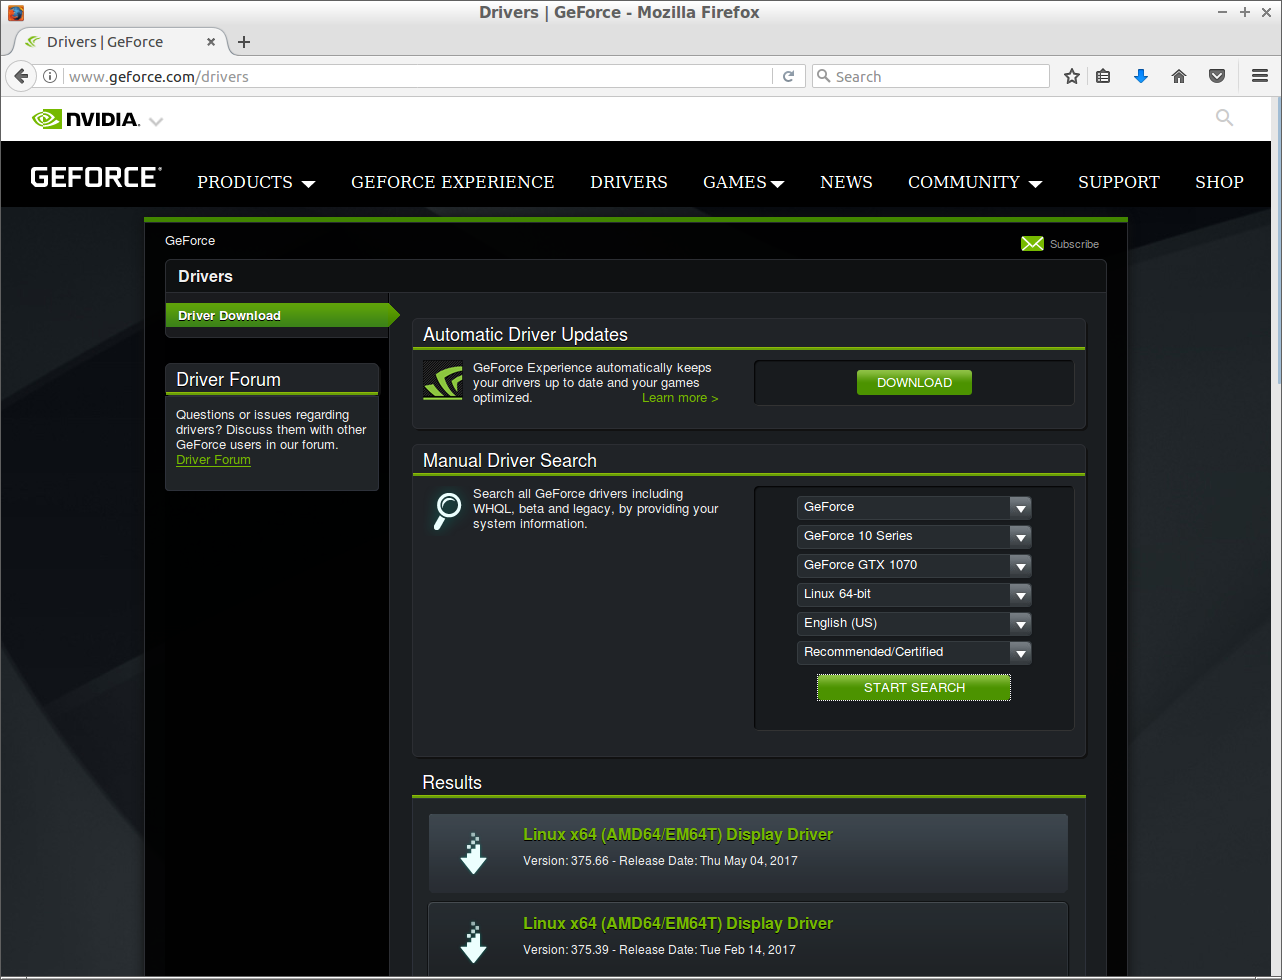
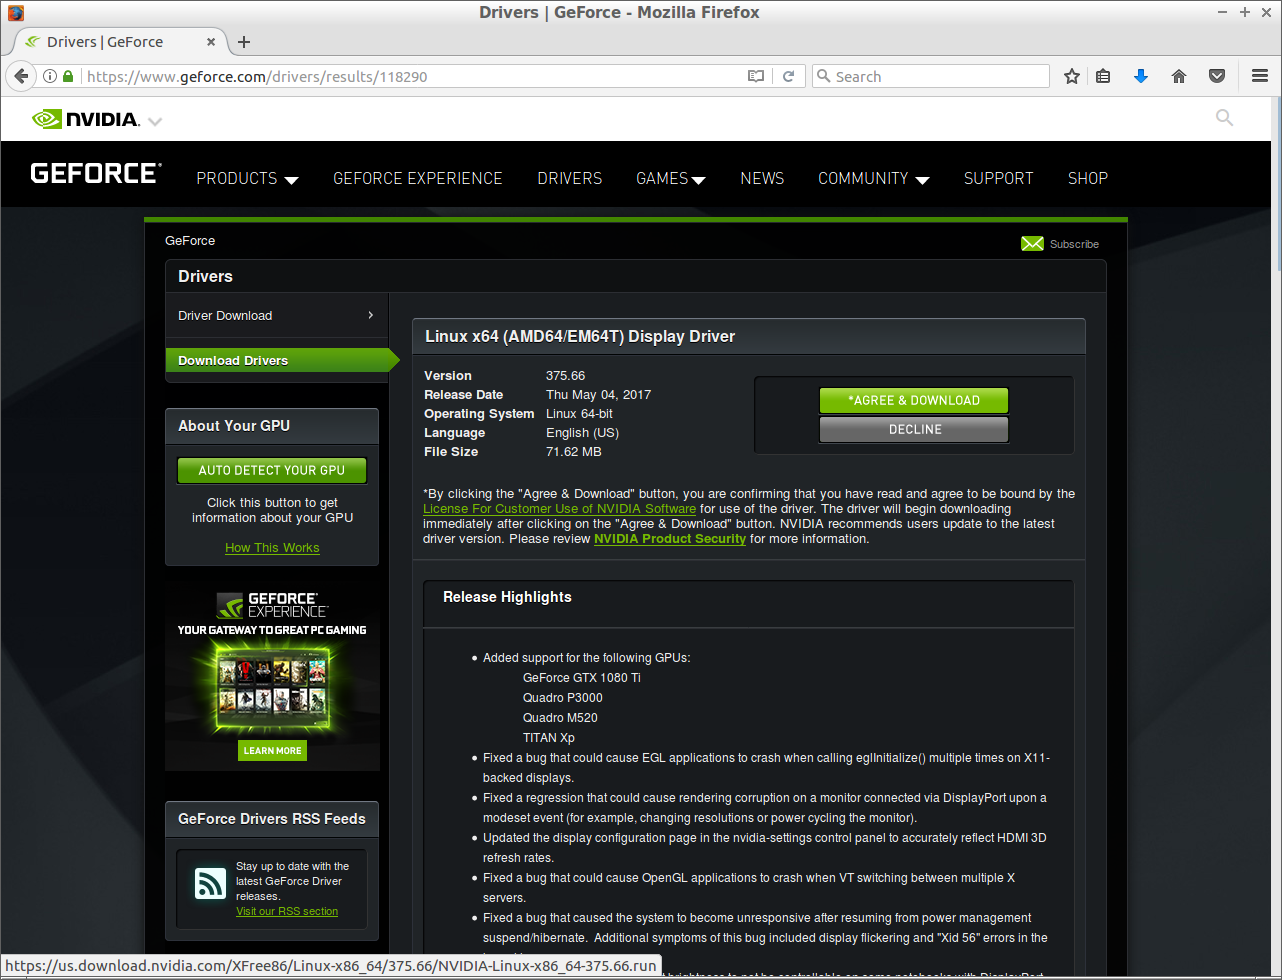
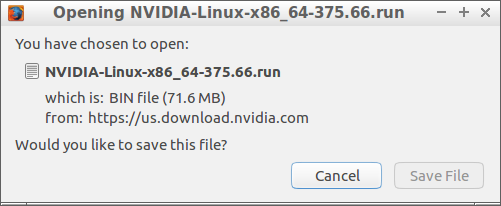
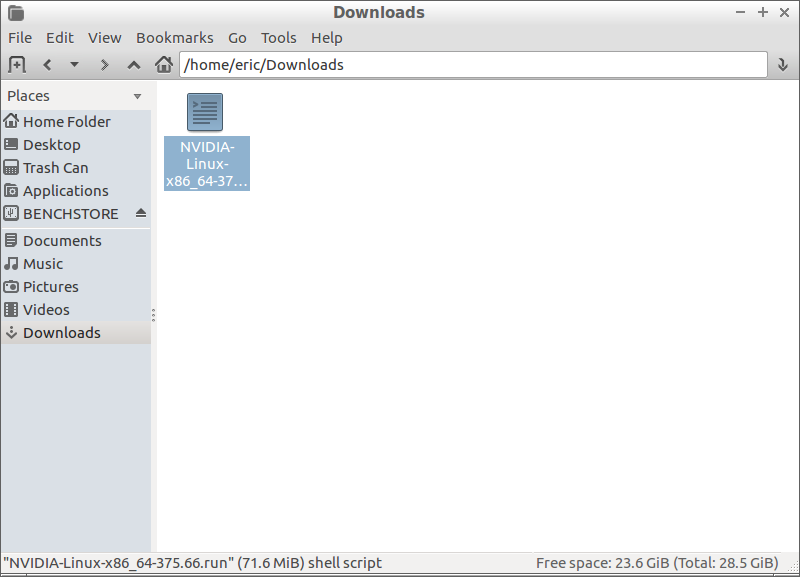
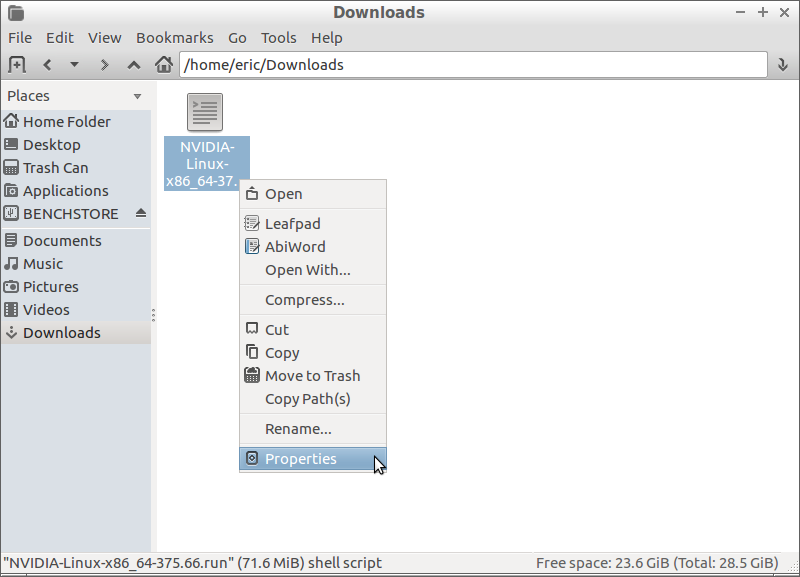
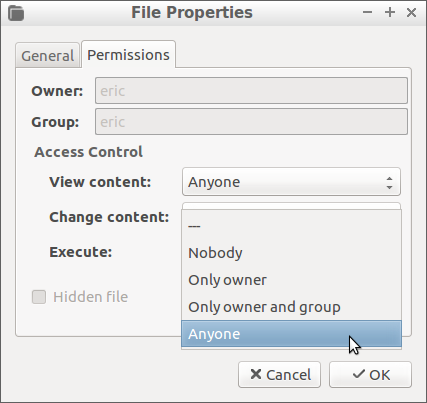
For Nvidia's drivers, search for Linux 64-bit versions on the company's site. As of this writing, version 384.59 is the latest Linux 64-bit driver for every Nvidia GPU going back to the 400 series cards. This doesn't download an actual driver, it downloads a script to build one. You'll find that's often the case in Linux. Save the script to disk and open a file manager. Navigate to the Downloads folder, right-click on the script, and select file properties. In the Permissions tab, set Execute to Anyone and then click OK. Now double-click the driver script. It will prompt you to open it in an editor or execute it. Choose to execute it in a terminal. It will open a new terminal and you can follow its progress. Once it's done, reboot the system.

For AMD cards, the process is a little more complicated. Go to AMD's Linux download page and find the 64-bit Ubuntu 16.04 driver link for your particular GPU. Nearly all GCN cards will use the AMD Pro drivers (version 17.30 as of right now). Oddly, Tahiti-based cards (7950, 7970, R9 280, R9 280X) use the older Crimson 15.12 Proprietary drivers, along with older cards. This is unfortunate considering how popular Tahiti cards were.
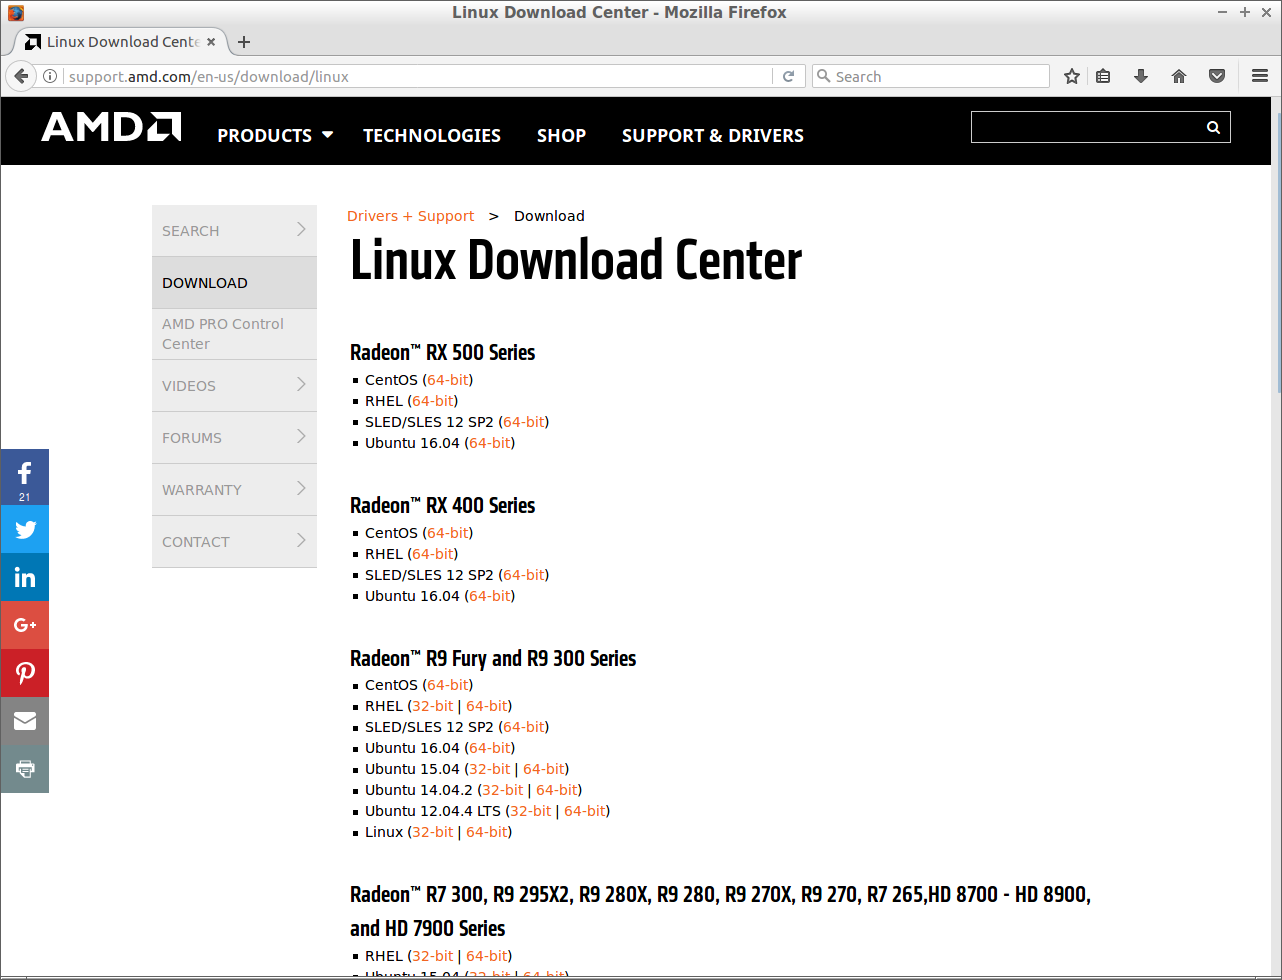
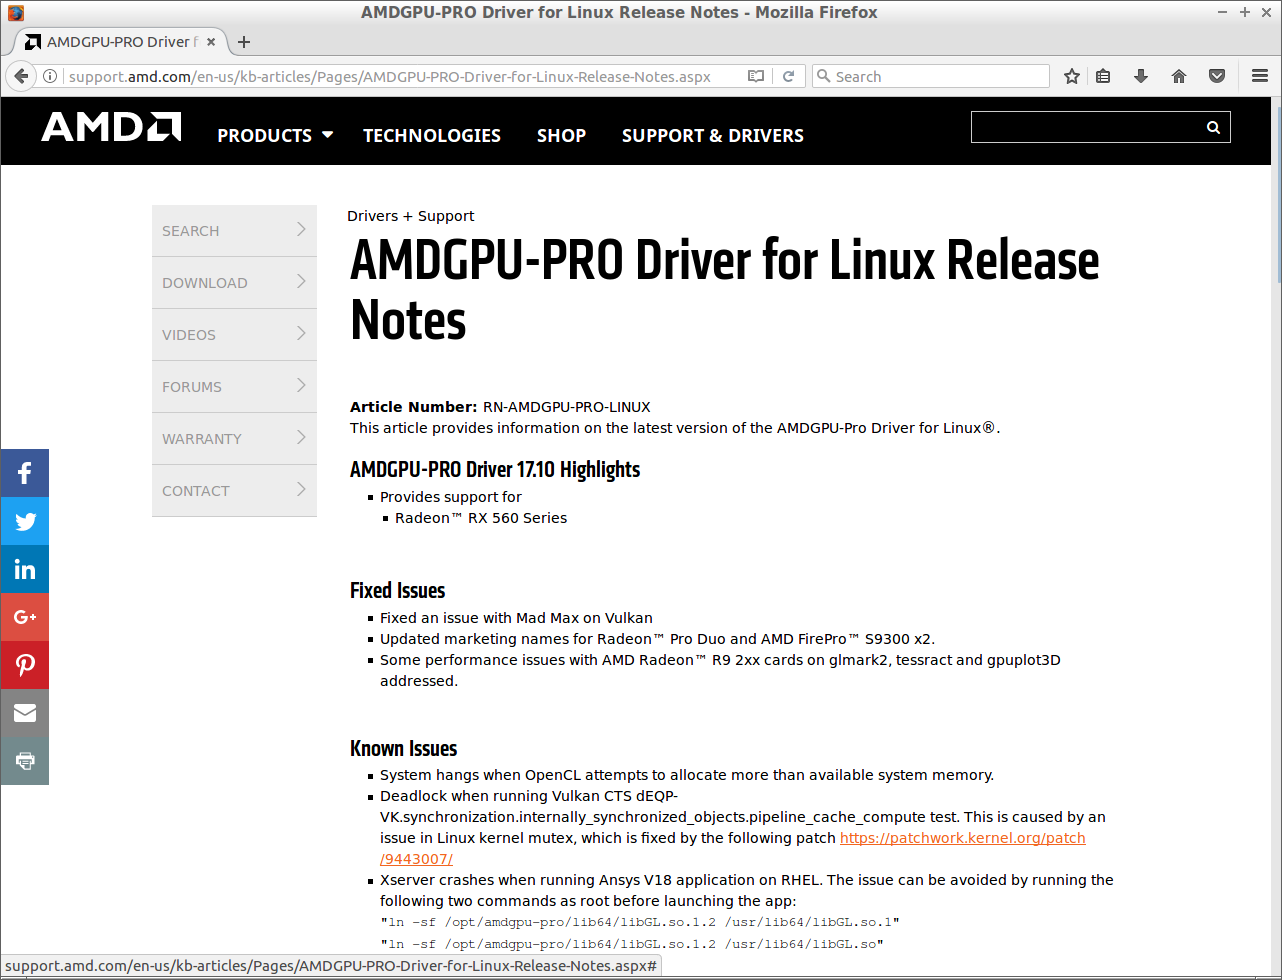
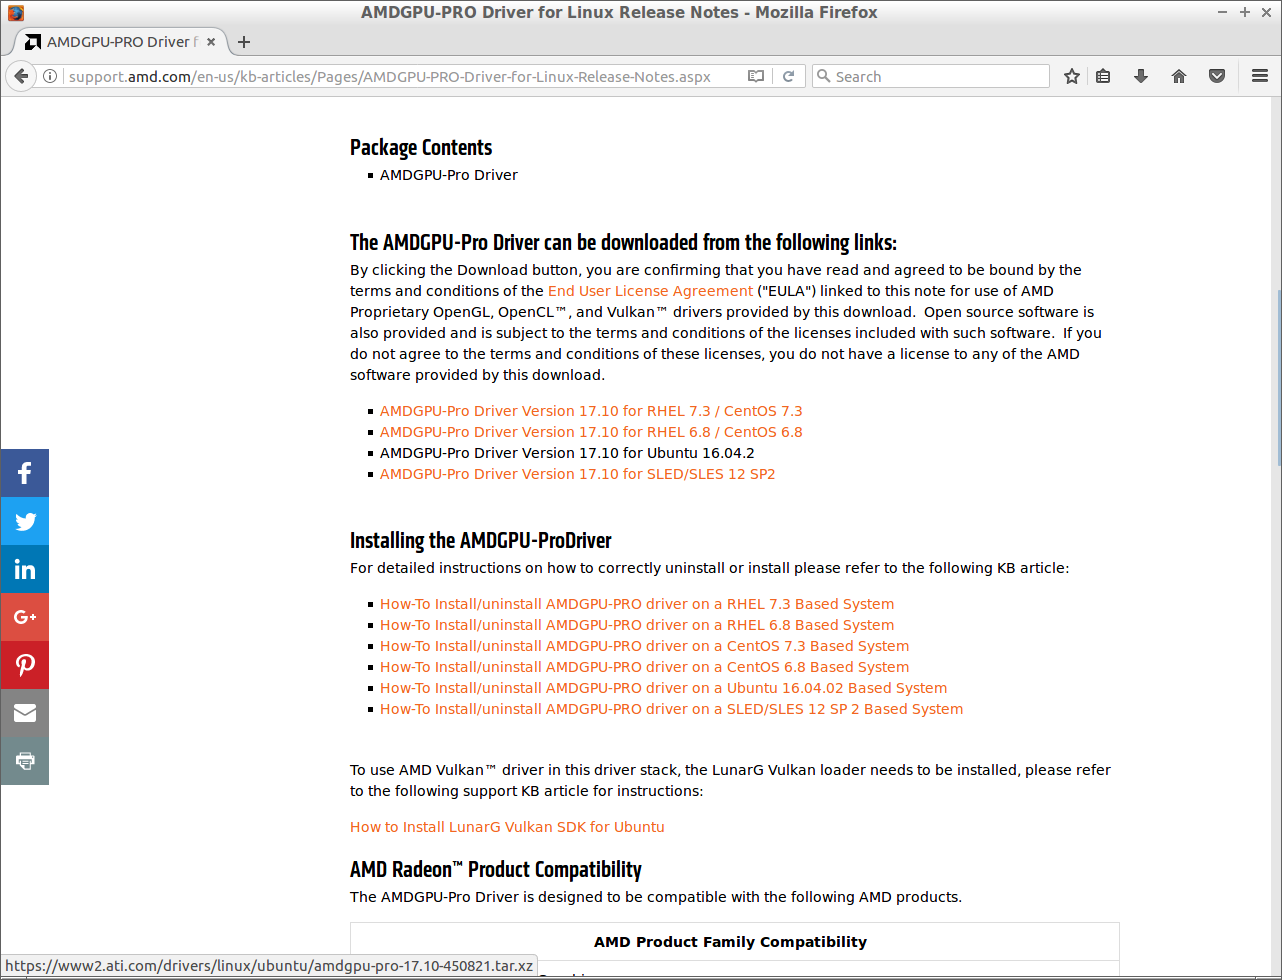
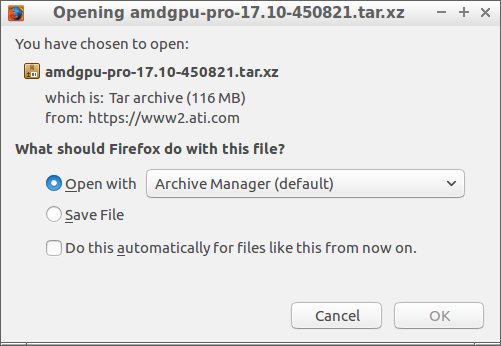
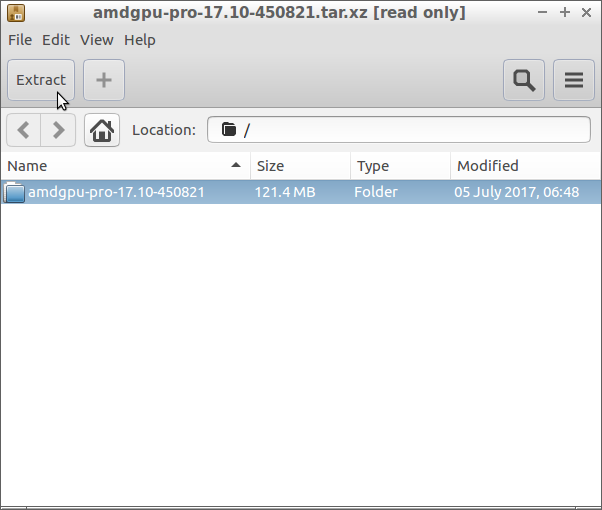
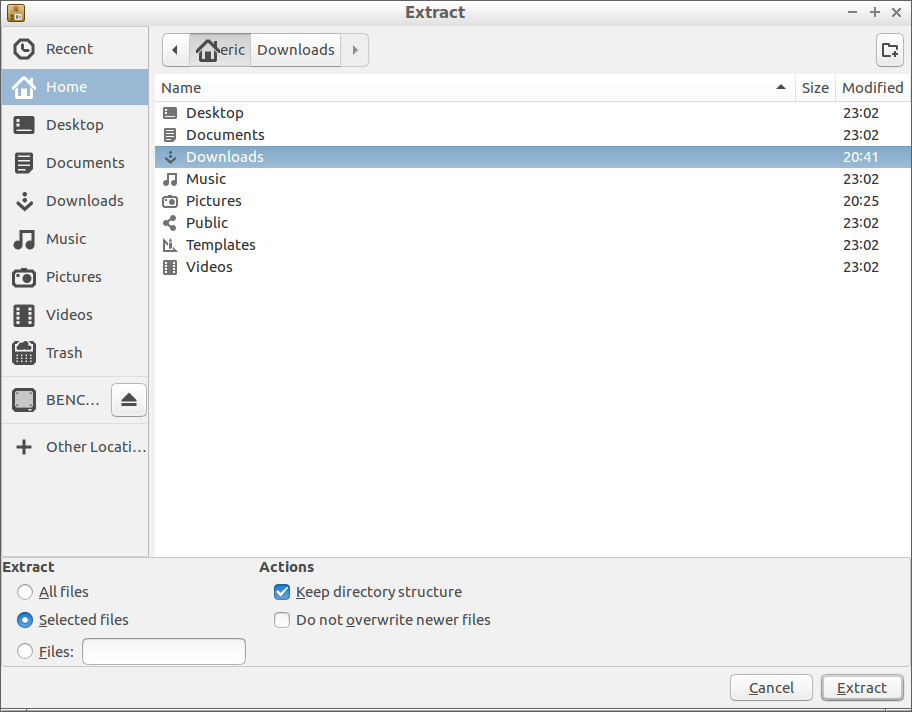

Like with the Nvidia drivers, download the appropriate one. However, the AMD downloads are compressed files and come as a full installation package, so open them with the archive manager instead of straight downloading them. Click on the folder inside the archive and extract it to the Downloads folder. For the Pro drivers, open a file explorer and navigate to the driver folder inside the Downloads directory, then double-click on the "amdgpu-pro-install" install script. It should execute from terminal so you can follow progress.
The Crimson drivers are more complex to install. You can follow AMD's instructions if you'd like. Ubuntu 16.04, and by extension Lubuntu, already contains an official AMD driver if you want to leave it at that. The Pro drivers basically give some extra capabilities and fine tune the bundled driver.
For AMD cards, when the driver package has finished installing, run the following command from a terminal (exactly as is, without the period at the end) and then reboot: sudo usermod -a -G video $LOGNAME.
MORE: The Ethereum Effect: Graphics Card Price Watch
MORE: Best Graphics Cards
MORE: Best PC Builds
Current page: Building An Ethereum Mining Rig: Software Installation & Configuration
Prev Page The Components You Need To Build A Low-Cost Ethereum Mining Rig Next Page Building An Ethereum Mining Rig: Digital Wallets & Mining Software-
rush21hit Us mere mortals wouldn't have an R9 290X level of card lying idle. Heck, suppose we do have unused GPU it would be something from 2 gen before it and a mainstream oran entry level card of its time at that, at the very least.Reply
That said, I do have HD7750 and HD6670 on a closet somewhere, only its from HIS with a common HIS problems; the fan.
So suppose anyone does have some mainstream or high level card at least the level of HD5850, as an example, they'd still faced with power bill issue, which in some case outweigh the profit. As we all know how much of a sucker old gens are compared to what we have now. That is assuming they are somehow emotionally attached to it and not decided to sell it, even after buying later gen.
This article still has a point. But a very unlikely one. -
Neuspeed This article didn't address the mining difficulty of Ethereum. At this point, is not a good idea to mine ethereum unless people have hash rates in the GH/s or at least MH/s. It's better to mine other alt coins such as: XMR, LTC, and many others. Overstock.com will now accept 40+ different Altcoins as form of payment. Won't be long before other companies do as well.Reply -
RedJaron Reply
I think you read this wrong. I didn't write this saying "These are the exact steps and parts list you need." It's simply saying, "Here's a basic idea you can possibly adapt to your own circumstances." No, not everyone has a 290X in storage. But a lot of people do. My current "leftover" GPU is an R9 280. That's plenty strong for some hobbyist mining.20050808 said:Us mere mortals wouldn't have an R9 290X level of card lying idle. Heck, suppose we do have unused GPU it would be something from 2 gen before it and a mainstream oran entry level card of its time at that, at the very least.
All of which I cover fairly extensively in the last page, or did you not bother reading the whole thing?20050808 said:So suppose anyone does have some mainstream or high level card at least the level of HD5850, as an example, they'd still faced with power bill issue, which in some case outweigh the profit.
You're attributing much too broad a brush to people. There are plenty of reasons to keep around leftover computer parts, other than sentimentality. You might want a backup incase your new hardware gets damages, is a lemon, etc. You might hang on to some stuff because you've got friends or family that might want it when they finally decide to ditch their current dinosaurs.20050808 said:As we all know how much of a sucker old gens are compared to what we have now. That is assuming they are somehow emotionally attached to it and not decided to sell it, even after buying later gen.
Never said it didn't have a few restrictions, was only saying it is possible.20050808 said:This article still has a point. But a very unlikely one.
Actually, I did talk quite a bit about the rising hash difficulty. Did you not read the last page? Did you not see on the front page where I talked about the ballooning DAG files making it harder to use older mainstream GPUs ( since most of them are 2GB VRAM or less )?20050892 said:This article didn't address the mining difficulty of Ethereum.
You don't need a GH/s rig to do it, as I've already demonstrated. It may not be hugely profitable, but you can make a little at it even using something as lowly as a 4GB 1050 Ti.20050892 said:At this point, is not a good idea to mine ethereum unless people have hash rates in the GH/s or at least MH/s.
Too true. Just ask Sylvester McMonkey McBean.20050951 said:As with every gold rush. The real profit lies in selling shovels. -
g-unit1111 Reply20050951 said:As with every gold rush. The real profit lies in selling shovels.
Yup those that got rich are the ones selling the mining equipment! :lol: -
10tacle As much as I despise miners and the very idea of cryptocurrency, I found this article interesting and a little enlightening why people are getting into it late in the game. Even if ETH crashes and burns tomorrow, eventually there will be another to take its place. I don't see this cycle changing anytime soon either unless governments get involved and start banning mining in their nations.Reply -
10tacle Oh and one more thing: not all is bad for we PC gamers. Those of us who have previous generation GPUs have enjoyed watching the values of said cards go up. A friend of mine sold his 8GB RX 470 for $320 on eBay last month, or nearly $100 more than he paid for it. I sold my SLI pair of GTX 970s for $420 or about $120 more than they were worth combined a few months ago. We both upgraded to a GTX 1080Ti with the spoils.Reply -
derekullo What about integrated graphics cards?Reply
From what I'm reading the Intel HD Graphics 630 can address up to 64 gigabytes of ram allowing you technically keep mining even after the Geforce 1070 is forced out when the DAG finally exceeds 8 gigabytes.
Or is there hash rate efficiency not high enough to offset the electricity used for the Intel HD Graphics 630?
My reason for asking is I have a lot of computers not being used but without graphics cards. -
Math Geek thanks for the article. i'll be pointing the 100 users a day in the forum asking about getting into mining toward this article. good basic info that can be easily adapted to individual users.Reply
