How to Build a Hardware Firewall with IPFire
Firewall your home with IPFire, a Linux distro dedicated to keeping your network ports safe.

IPFire is a dedicated Linux distro for firewalls or other network appliances. You don’t need any particularly special hardware to run a firewall; an old PC or a Raspberry Pi is fine (you can find ISOs on IPFire’s downloads page)., but note that at least two network adapters are required. Be that as it may, you can also run IPFire in a virtual machine (which you can add as many virtual ethernet adapters to as you like). On reasonable hardware and small networks this will perform just fine, although if the host machine can be compromised then so can the virtual firewall, so we lose some security points doing things this way.
If you want to use a VM for IPFire, you can use the 32-bit ISO from the IPFire/ directory on the disc.For a small installation, virtualization is unlikely to make any difference — memory requirements are low, but don’t try it for a larger and more complex setup. VPN traffic encryption/decryption requires a fair bit of CPU power, so if you’re planning on allowing lots of data-hungry access to your VPN, be aware of this. Incidentally, you’ll find instructions on how to set up cloud instances of IPFire on AWS and Hetzner cloud on the IPFire website.
You can route your entire home network through IPFire (by setting it as the default gateway on your home router and shifting settings) or, if other users don’t like the idea of sending all their traffic through the hardware firewall, you can just route selected machines through IPFire
Installing IPFire
Installation (be it real or virtual) is simple, but note that the whole target drive will be erased; the installer provides no means to dual boot from a single drive. Once the system is installed remove the installation media (unless it’s a Raspberry Pi, in which case you flashed the OS to a microSD card) and reboot to perform initial system setup. Everything is pretty standard — localisation, users and what have you— the important part is the final Network Setup.
As we mentioned, you need at least two network adapters. There is no way around this. If you’re running a VM you can add a second one with a few clicks and reboot to continue the set up. If you’re using a Raspberry Pi or other device with both wired and wireless networking, that will work fine (subject to you setting up an access point with hostapd).
Setting up Red and Green Networks on IPFire
For a two-adapter setup, we must assign one device the Green network and the other device the Red network. You can use up to four adapters with IPFire, and things get even more colorful if you do that. Use the first option if you need to set up more adapters, and use the second option to assign colors to network hardware.
Typically the Green network will be your private network and the Red network refers to the one connected to the Internet. In practice (if you’re not using IPFire on a machine which connects directly to your ISP) these will both connect via your home router ultimately, but your Green network interface will connect (either via crossover cable, wireless or another router switch) to the machines you want IPFire to protect. The idea is that traffic can flow from Green to Red, but not in the other direction.
Get Tom's Hardware's best news and in-depth reviews, straight to your inbox.
Configuring IP Addresses for IPFire
IP addresses must be set up for the network devices under IPFire’s control. In the configuration described above, where we have a secure network ‘underneath’ our home LAN, the Red interface ought to conform to the rest of the LAN with a likely IP address of form 192.168.0.x. The Green interface can technically be anything you want, but it’s sensible to use another designated-private IP address such as 10.0.0.1 or (192.168.1.1 if you prefer).
The Red interface (in this set up) can be set to receive a IP address via DHCP which offers the easiest set up, but you’ll probably want to configure a static IP later or you’ll be chasing your IPFire instance after a reboot. Static IP will require you to set the gateway to that of your home router. If you’re running IPFire virtually, then DHCP will use your hypervisor’s NAT network which should work fine.
Unless you want to mandate that everyone using your private network must use Static IP, the Green interface will need a DHCP server. Turn this on and use the following settings (or something like them):
Start address: 10.0.0.2
End address: 10.0.0.11
Primary DNS: 10.0.0.1????
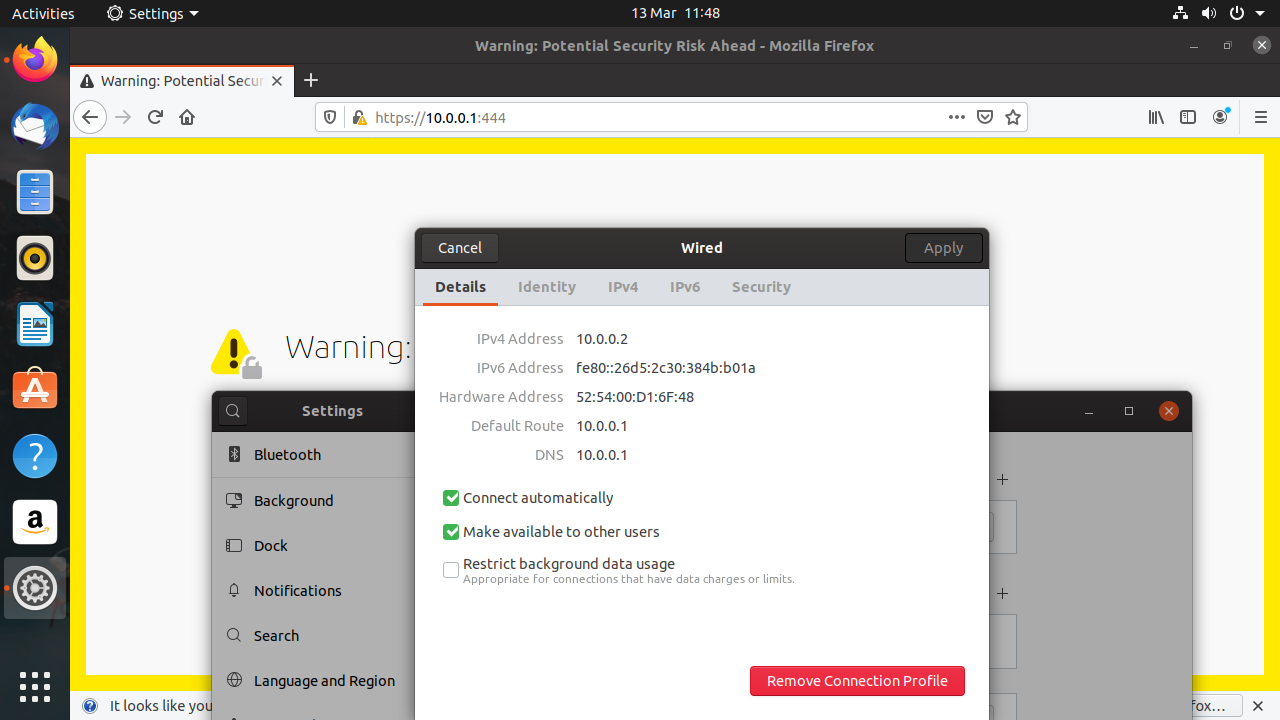
If you’re using libvirt or Virtualbox, this won’t work since the virtual NAT device has its own DHCP server which will get in the way. So you’ll have to set up Static IP addresses for the VMs you want IPFire to protect here. For desktop distros, this is most easily achieved by setting a static IP configuration in Network Manager. For a physical machine, you can connect to the Green interface IPFire host either by direct cable connection (older 100mbit cards require a crossover cable, gigabit ethernet cards do not) or via a switch.

Testing, Configuring DNS on IPFire
This should be all you need to complete the initial setup of the IPFire instance. You should be able to connect to IPFire by browsing to https://10.0.0.1:444 . The first thing you’ll see is a nasty security warning because IPFire uses a self-signed certificate. You can safely ignore this, we promise. The next thing you’ll see is a login box, into which you should identify yourself as admin using the password you set up earlier. Then you’ll be presented with IPFire’s intuitive web interface.
By default IPFire forwards DNS requests to the DNS server on the Red Interface, which is probably your ISP, via your home router. You may wish to use a public service for this, such as CloudFlare’s 1.1.1.1 or Google’s 8.8.8.8. This you can do, by heading to Network > Domain Name System. Uncheck the Use ISP-assigned DNS box, and click the Add button at the top. Only an IP address is required.
Creating Rules on IPFire
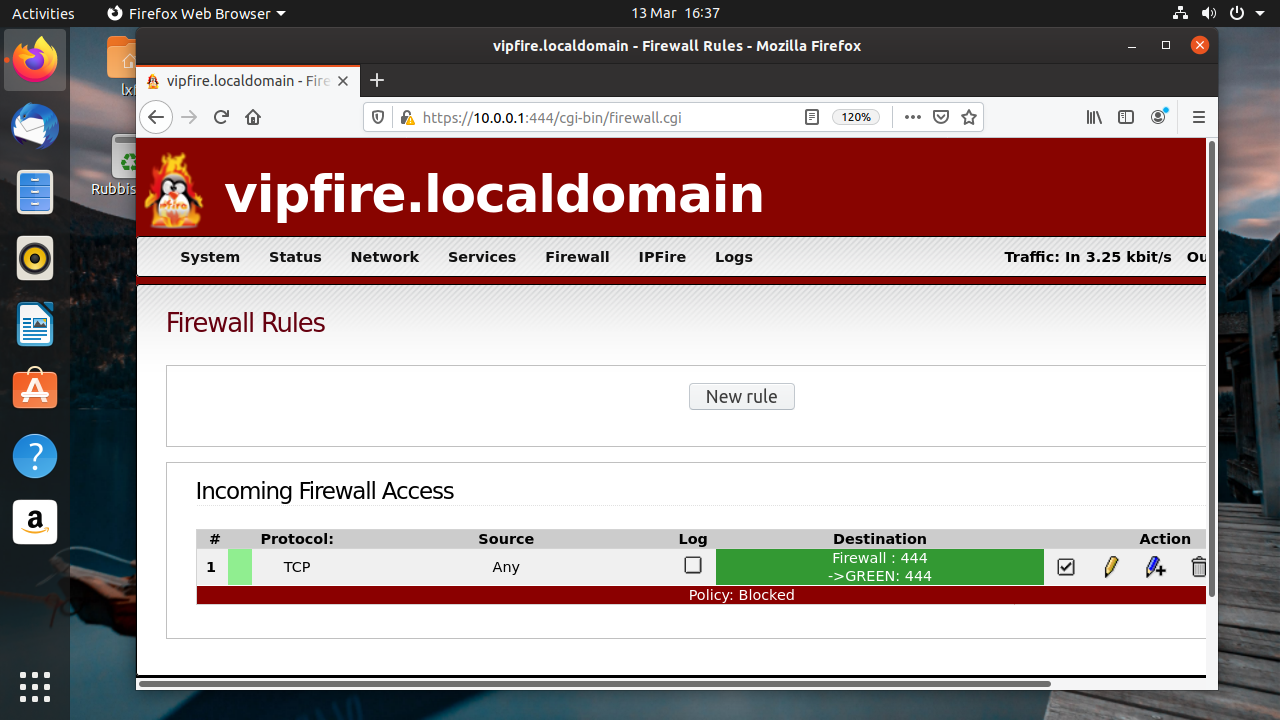
We’ll set up a simple rule to allow the Red network to access the web interface on the host. This is not something you’d want to do in real life, but it serves to show the procedure for adding rules. Go to Firewall > Firewall Rules and click the New rule button. In the Source section, select the Standard networks option and choose RED. Check the Use NAT box below and choose Destination NAT.
In the Destination section select the Firewall option and choose GREEN – 10.0.0.1. In the Protocol section choose TCPm select Any in the Standard networks drop down and in the Source section enter 444 in the External port box. In the Additional settings box, you can choose to log, limit, or rate limit these connections, but we won’t trouble ourselves with that, so just click Add. Click update and then you should be able to connect to IPFire’s web interface from anywhere on your LAN.

IPFire Add-ons
IPFire has everything you need and more to run an advanced firewall solution. But its functionality can be extended far beyond what’s in the box. For one thing, it’s its own distro with its own package manager (Pakfire) which can be used directly or behind the scenes to install extra functionality.
If you want a VPN, you can set it up via OpenVPN with just a few clicks. Two configurations are offered — the appropriately apocalyptic sounding Roadwarrior, and the more descriptive Net-to-Net. The former could have also been called client-to-net, and is just what’s required for you, a Roadwarrior far outside safe network connectivity, to encrypt your communications back to your trusted server.
You can easily set up Tor, often talked about in the same sentence as VPNs, on IPFire. You can set up your instance to access .onion nodes and route only your traffic (or only certain parts of it) through Tor. Or, if you have the spare bandwidth, you can set up a relay and benefit the whole Tor community. More conventionally, you can also add a Wireless Network (usually designated the BLUE interface) to your instance. We mentioned it was possible to do this on a Raspberry Pi (which has only two network interfaces), but doing it as a third interface saves you having to set up Hostapd yourself.
This article originally appeared in Linux Format Magazine Issue 262.
-
digitalgriffin So what's the advantage to alternatives likeReply
SOPHOS
Untangle
PFSense/OPNSense
Untangle is supposed to be easier, but I went with PFSense for the free plugins like CLAM and SNORT.
OPNSense will be the first to adopt Linus's integration of wireguard VPN protocol into the kernel
https://arstechnica.com/gadgets/2020/01/linus-torvalds-pulled-wireguard-vpn-into-the-5-6-kernel-source-tree/
It would be a good article to compare the alternatives. -
farnell121 I personally use a J3455 based Celeron box with PFSense and my network couldn't be happier.Reply
If you want to use encrypted services like VPN's with good throughput you want a CPU with AES-NI, encrypt/decrypt instruction set.
PFSense is FreeBSD based and has a solid network stack for these kind of tasks. I have my entire network ran through a VPN, firewalled everything but what I access, and have ad-blocking for most sites. Plus, not too hard to set up rules, like PS4 to bypass anonymous VPN.
I love ARM based systems but if you need more than basic, or looking to support lots of devices, I recommend at least a CPu with AES-NI no matter which OS you go with.