How To Get Wi-Fi, Internet on Raspberry Pi Pico
Get online from this microcontroller.
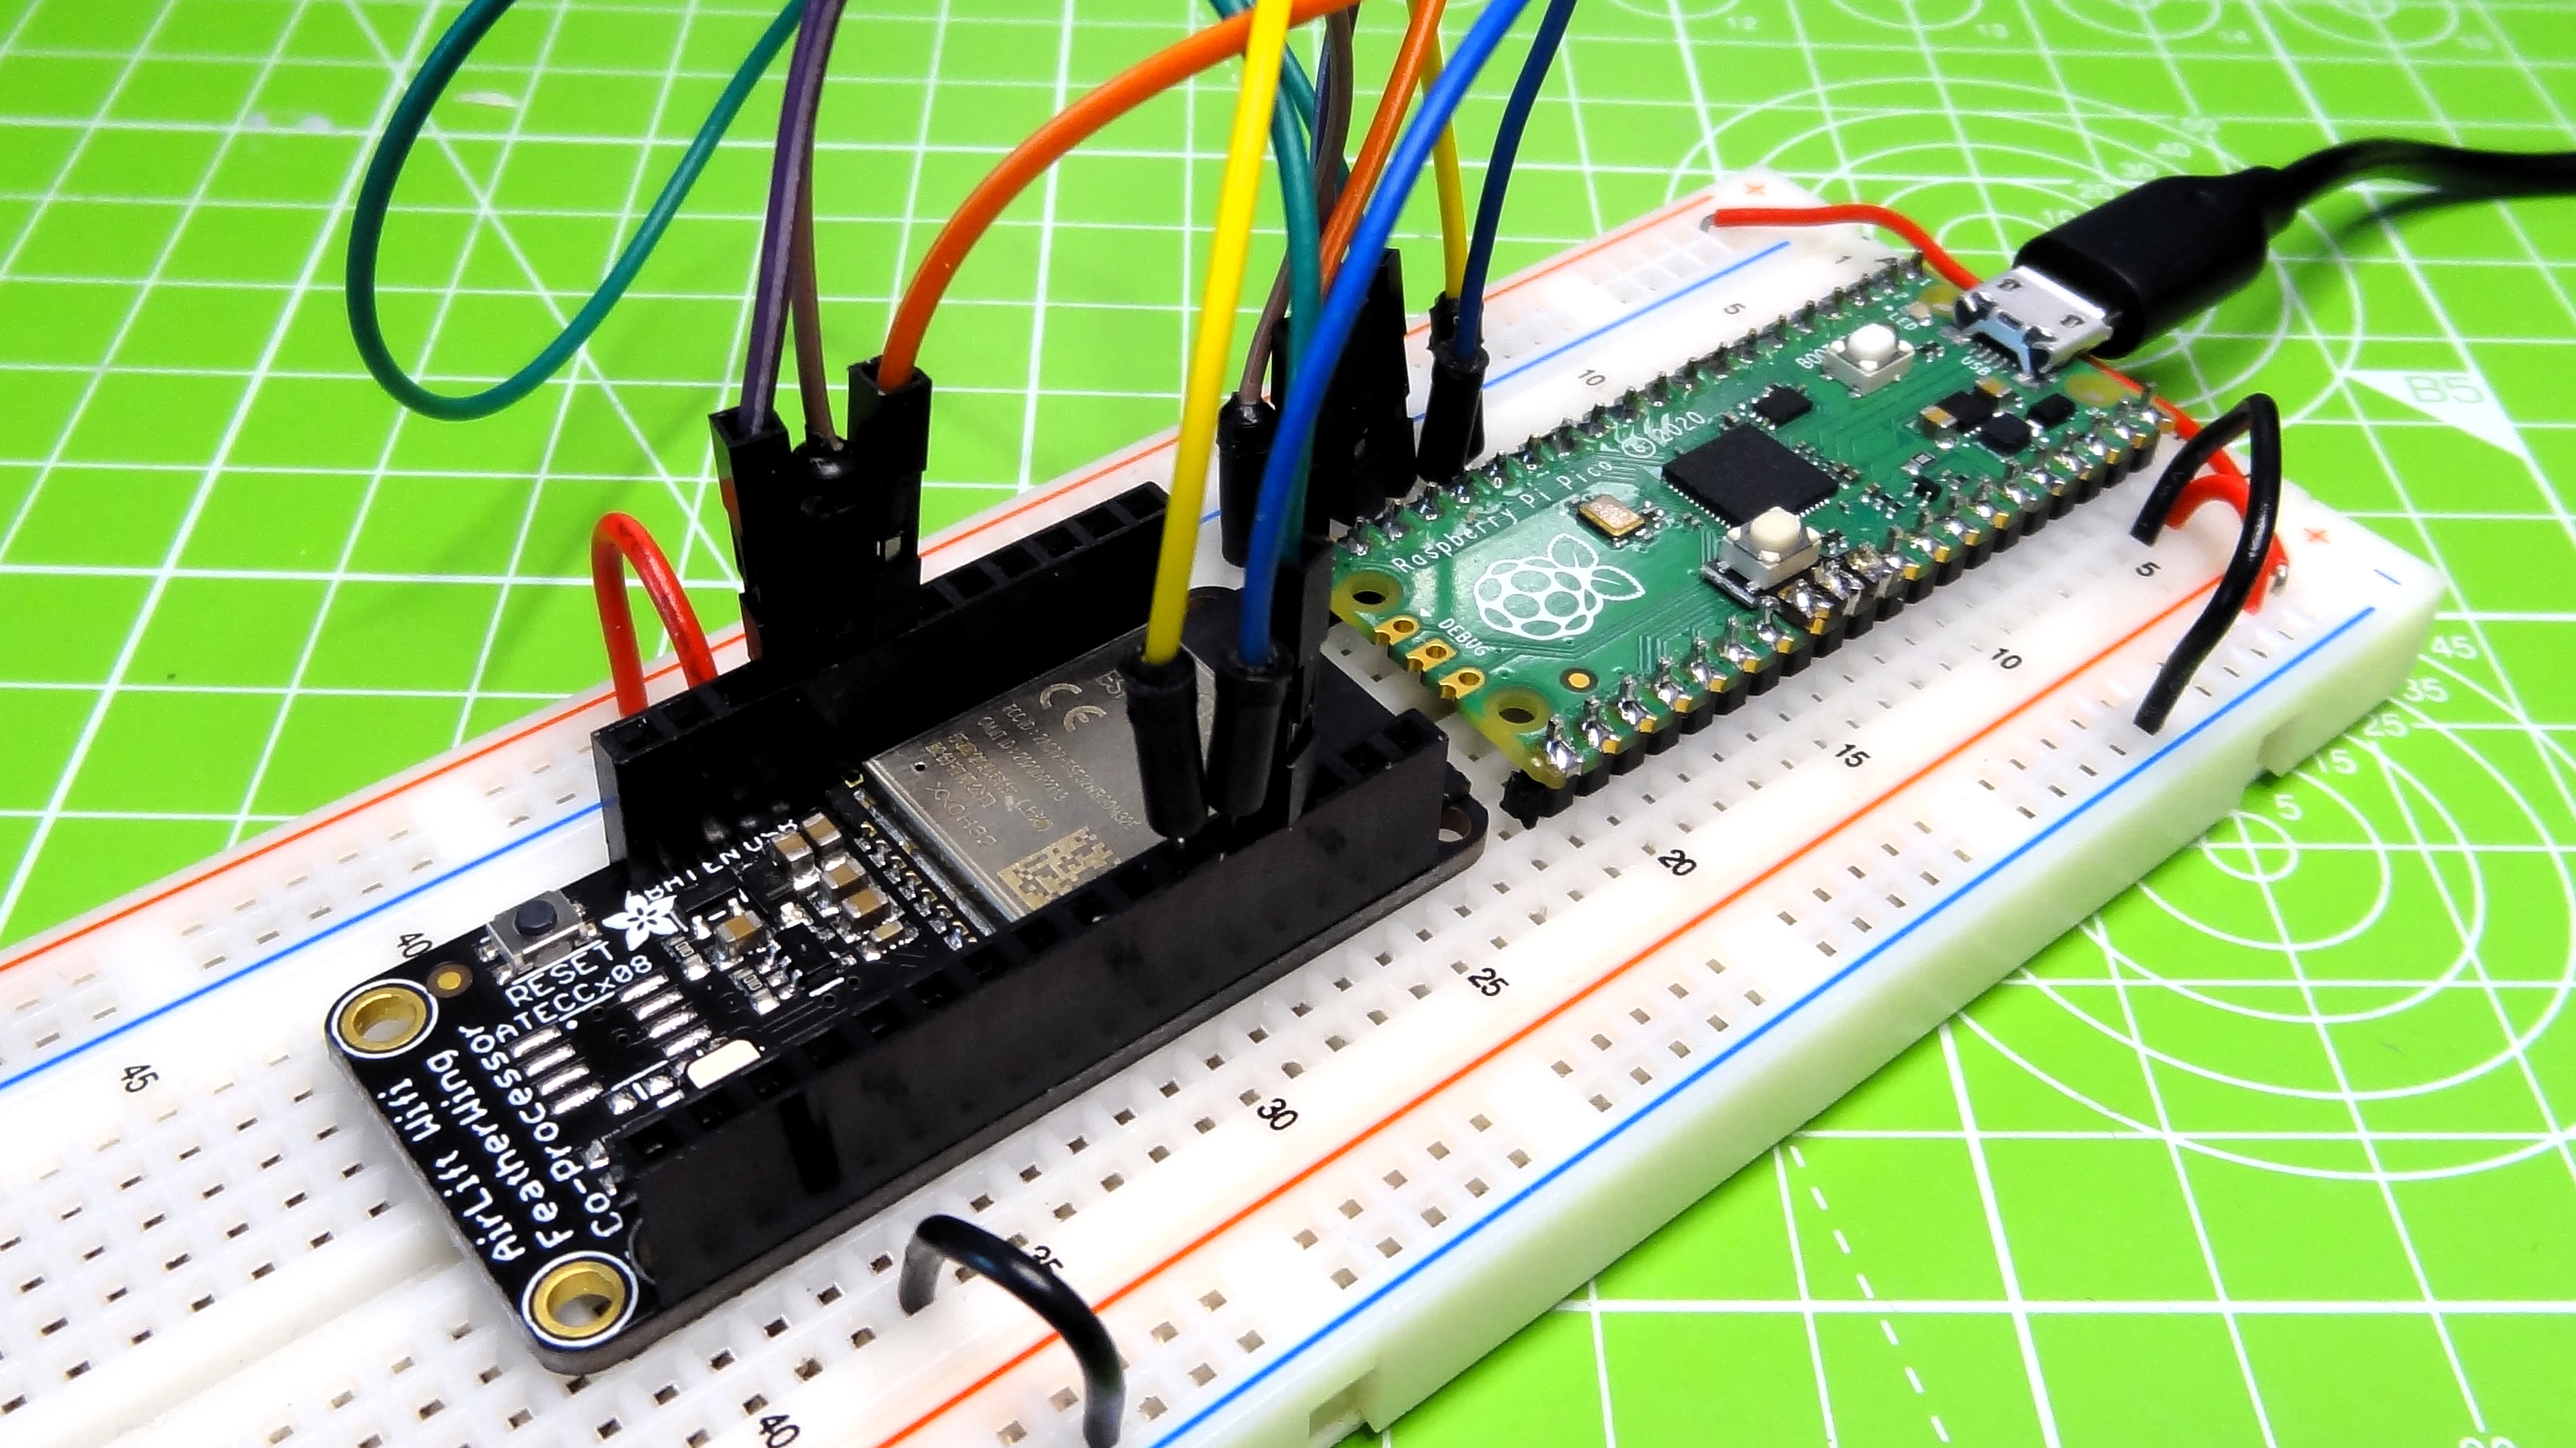
The Raspberry Pi Pico is a marvellous bit of kit, but it is missing one key feature, Wi-Fi! We first stumbled upon the idea of adding Wi-Fi to the Raspberry Pi Pico while reviewing the Cytron Maker Pi Pico, which provided an ESP-01 interface for an ESP8266 variant board. However this was rather limited.
After CircuitPython Lead Developer Scott Shawcroft appeared on The Pi Cast, our weekly Pi-themed show, we learned that Adafruit had an ESP32 based add-on board which provided basic Wi-Fi connectivity and so after a day of tinkering we created this tutorial that shows how to get your Raspberry Pi Pico online.
To get Wi-Fi on Raspberry Pi Pico, you will need:
- A Raspberry Pi Pico
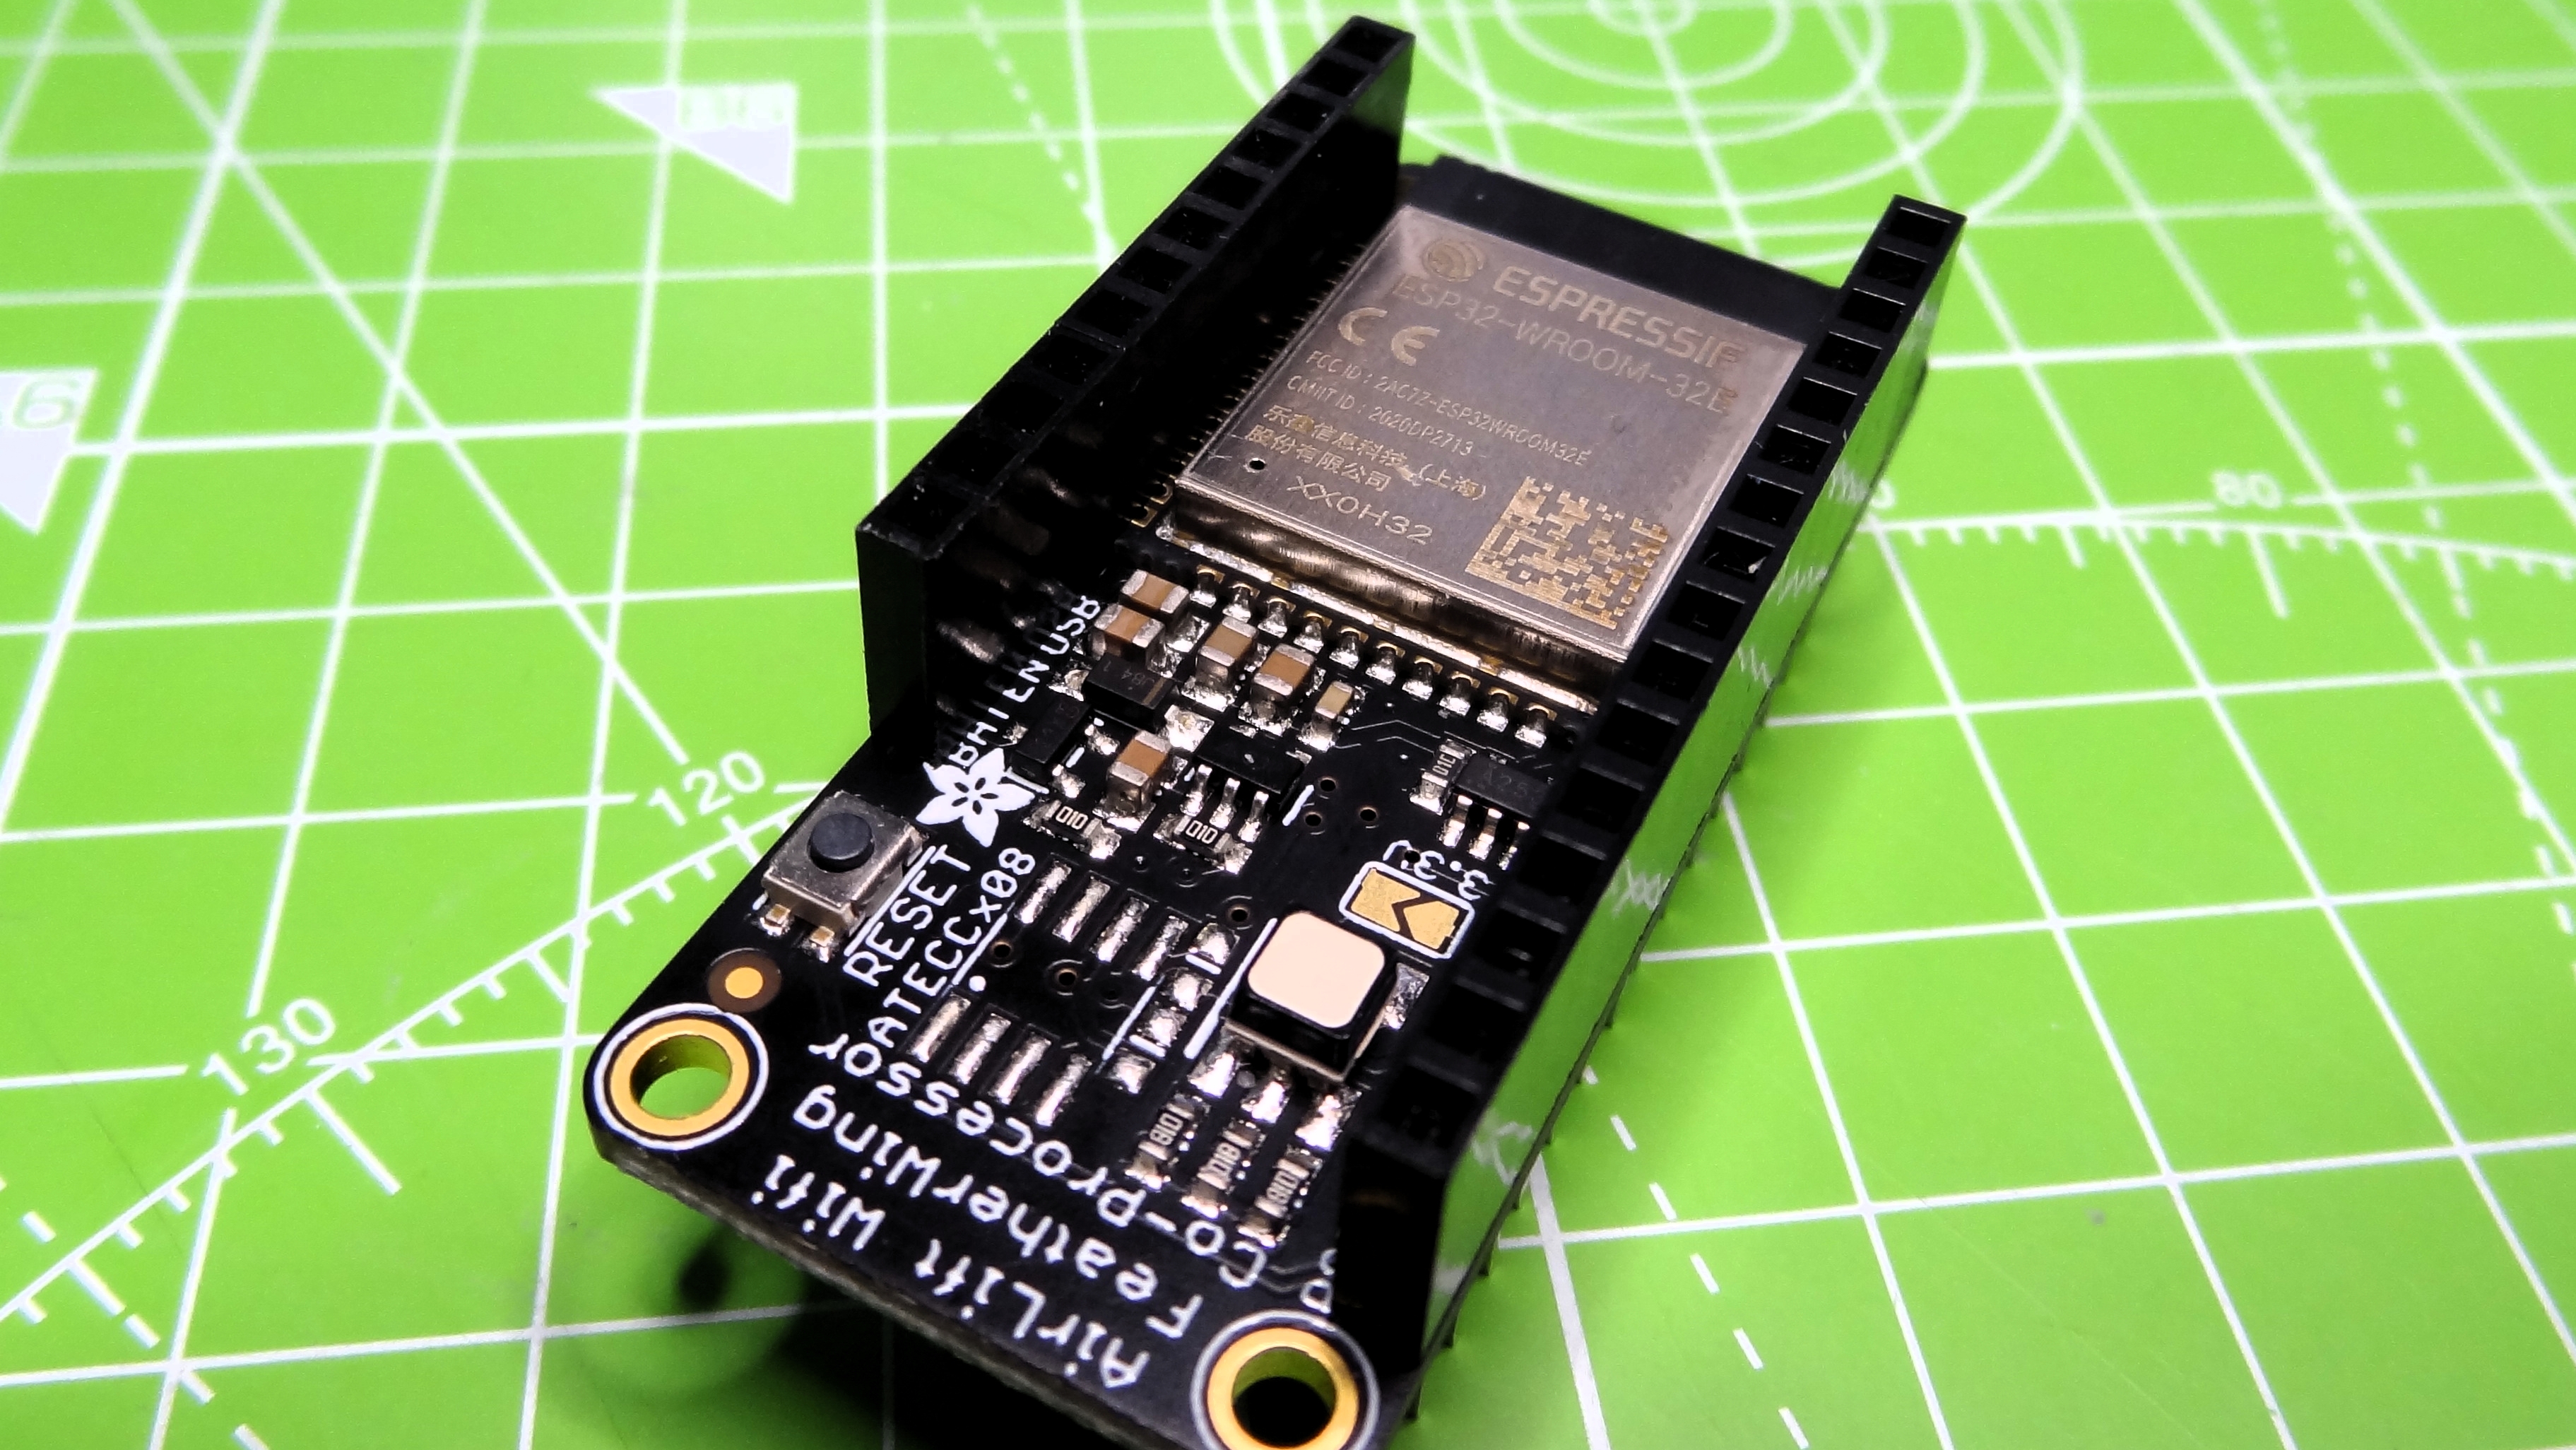
- Adafruit Airlift WiFi Featherwing Co-Processor
- 8 x Male to Male jumper wires
- Breadboard
The goal of this tutorial is to get our Raspberry Pi Pico connected to the Internet via Wi-Fi, to access the OpenWeather service API and get the weather for our chosen location. This raw data is sent to the Python shell, but it could be easily sent to an OLED screen, LCD or used to trigger a sequence of events to occur.
Wiring the Raspberry Pi Pico for Wi-Fi
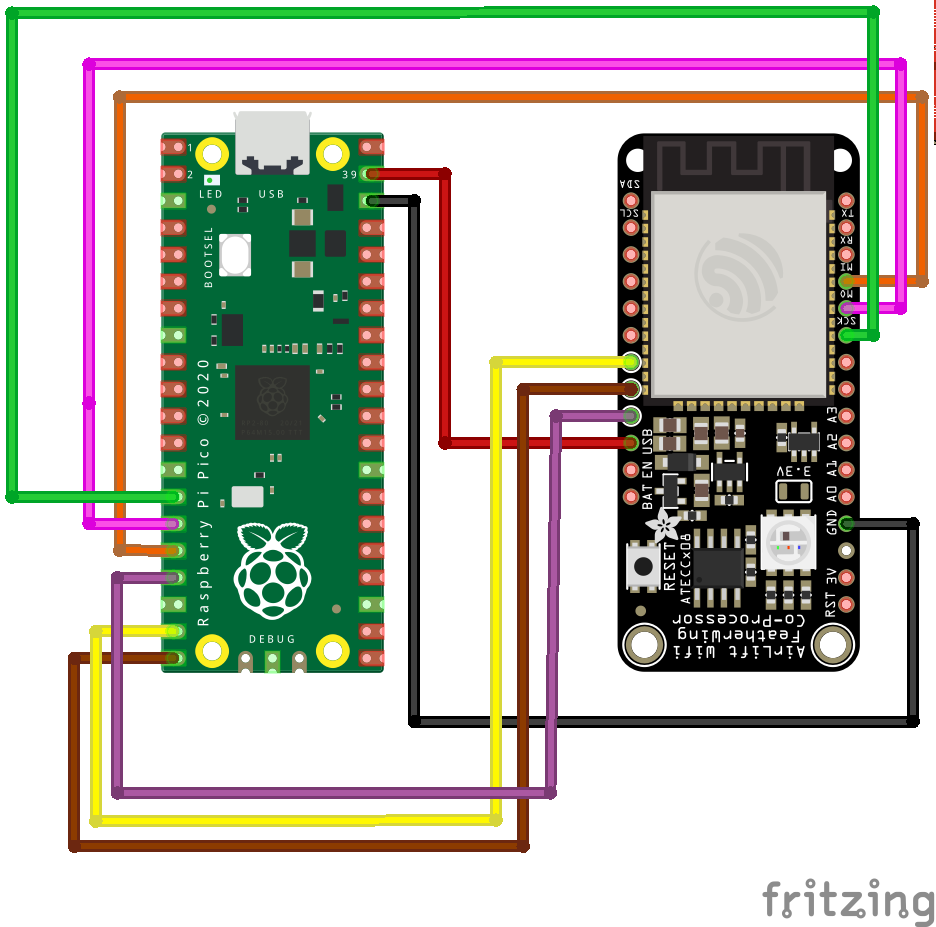
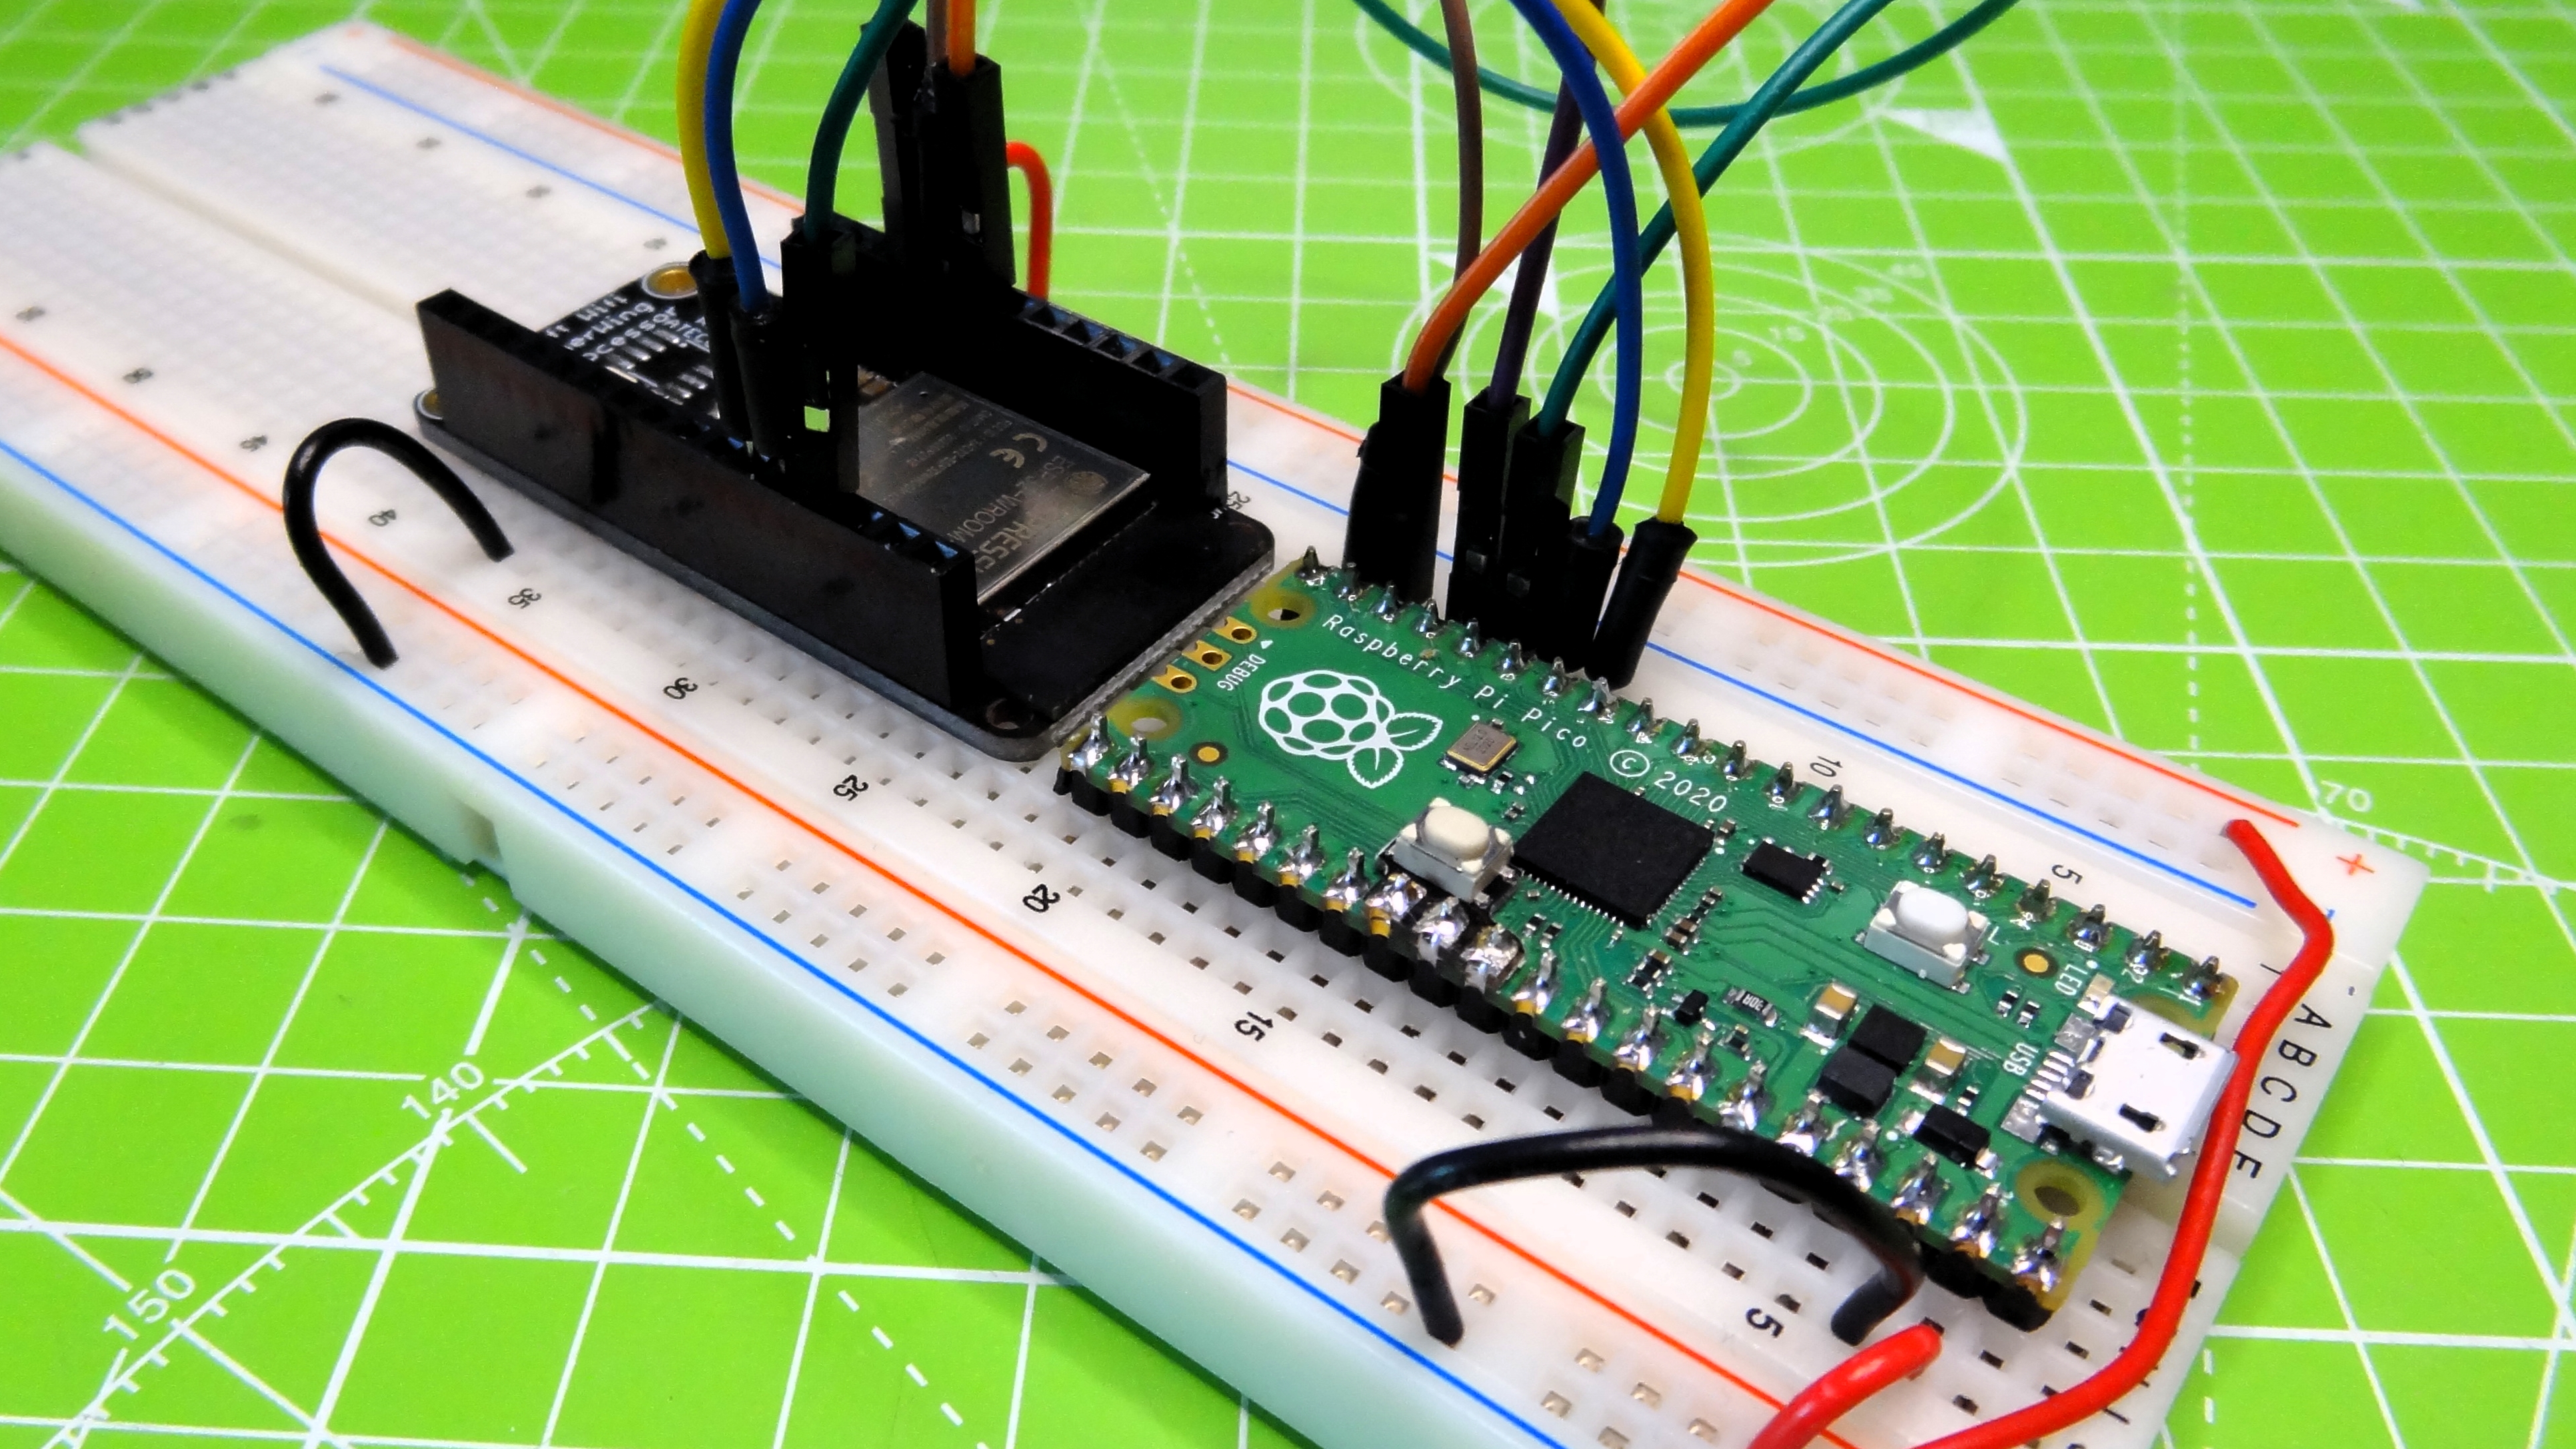
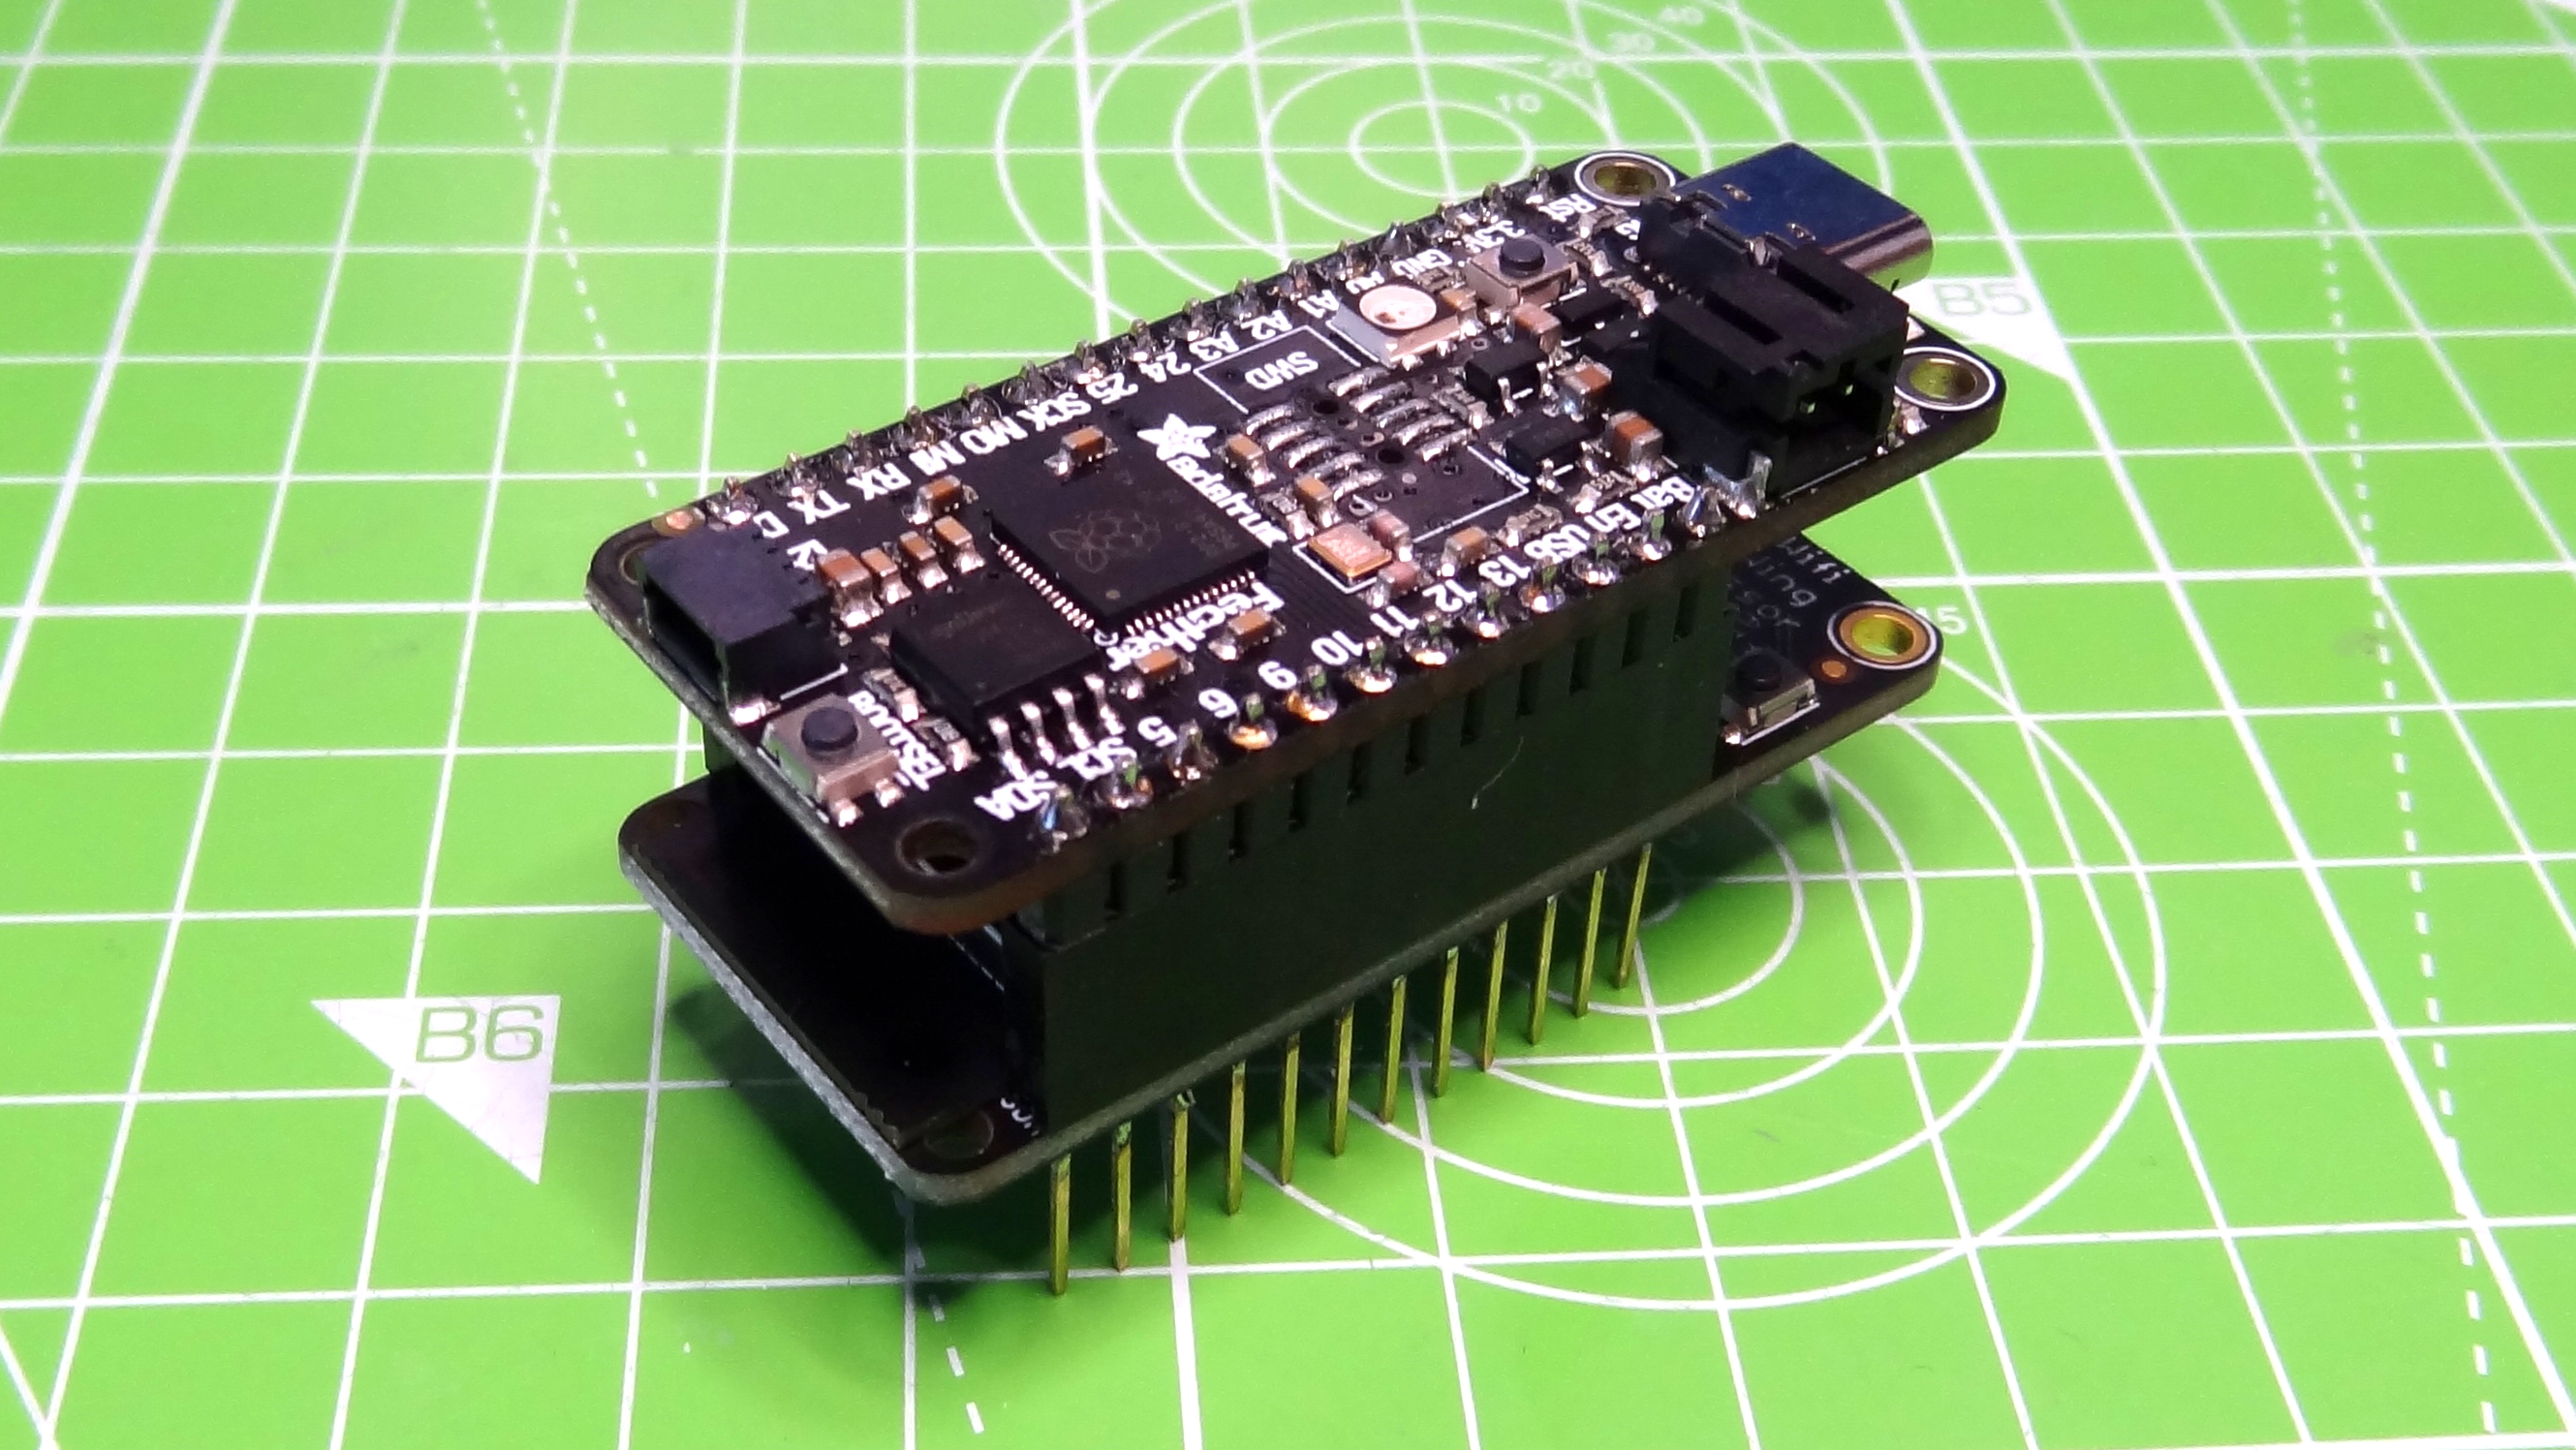
For this tutorial we will need header pins soldered to the Raspberry Pi Pico and to the Featherwing Airlift. As we are using both boards in a breadboard, the included male headers will suffice. If you intend to use the Featherwing with an Adafruit Feather board, such as the Feather RP2040 then ensure that you’ll need to have female headers soldered to the top of the microcontroller. Please note that in the diagram the positions of MISO, MOSI and SCK on the Featherwing are correct; ensure that you identify these pins and don’t rely on counting pins as on the real board there is an extra GPIO pin on the Featherwing.
Pin Mapping
| Raspberry Pi Pico | Adafruit Airlift WiFi Featherwing Co-Processor |
| VSYS | USB |
| GND | Any GND pin |
| GPIO 10 | SCK |
| GPIO 11 | MOSI |
| GPIO 12 | MISO |
| GPIO 13 | ESPCS |
| GPIO 14 | ESPBUSY |
| GPIO 15 | ESPRST |
Installing CircuitPython on Raspberry Pi Pico
Flashing CircuitPython to the Raspberry Pi Pico is simple.
- Download the latest version of CircuitPython for the Pico.
- Press and hold the BOOTSEL button on the Pico and insert a USB cable into the Pico and your computer.
- Copy the CircuitPython UF2 file to the RPI-RP2 drive. The drive will unmount and disappear while flashing the code. A new drive CIRCUITPY will appear, confirming that the flash was a success.
- Download the libraries archive for the version of CircuitPython that you have downloaded. In our case we downloaded 6.2.0 so we need to download Bundle Version 6.
- Extract the contents of the download to a folder.
- Copy the following files / folders to the lib folder on the CIRCUITPY drive.
adafruit_bus_device
adafruit_minimqtt
adafruit_io
adafruit_esp32_spi
Adafruit_requests
Get Tom's Hardware's best news and in-depth reviews, straight to your inbox.
Creating an OpenWeather Account
For this tutorial we will be using the OpenWeather API to get the weather data for any location across the world. To use the API we need to sign up for a free account.
- Create an account on the OpenWeather site and log in.
- Navigate to My APi Keys, found in the dropdown menu for your username.
- Under Create Key, type TomsHardware and click GENERATE.
- Keep this page open as will need the API key later.
Writing CircuitPython Code
CircuitPython has the same syntax and feel as Python and MicroPython but we have a choice of editor, unlike MicroPython which restricts us to just Thonny. With CircuitPython we can use Thonny, Mu or, for advanced users, Visual Studio Code. For this part of the tutorial we used Visual Studio Code, but it really doesn’t matter as we are just editing a text file.
1. Open code.py, found in CIRCUITPY, delete any text in the file.
2. Import a series of CircuitPython libraries necessary for this project to work. The board, busio and digitalio libraries handle communication with the GPIO, for example the SPI interface. Requests, sockets and esp32spi handle network connectivity via the ESP32. The last library, secrets, doesn’t yet exist. We shall create that later.
import board
import busio
from digitalio import DigitalInOut
import adafruit_requests as requests
import adafruit_esp32spi.adafruit_esp32spi_socket as socket
from adafruit_esp32spi import adafruit_esp32spi
from secrets import secrets
3. Add a line to print a message to the Python Shell, this simply states what the project will do.
print("Raspberry Pi Pico WiFi Weather Station")
4. Create a new object, JSON_URL. This object will store a URL that contains the location that we wish to search for, and an OpenWeather API key that we generated earlier. Replace the LOCATION with the town / city and API KEY with your OpenWeather API key.
JSON_URL = "http://api.openweathermap.org/data/2.5/weather?q=LOCATION&appid=API KEY&units=metric"
5. Create three objects, used for ESP32 connectivity via the SPI interface. Chip Select (CS), ready and reset are used to enable and read the ready state of the ESP32 co-processor.
esp32_cs = DigitalInOut(board.GP13)
esp32_ready = DigitalInOut(board.GP14)
esp32_reset = DigitalInOut(board.GP15)
6. Create an object, spi, which tells our code where to find the SPI interface on the Pico.
spi = busio.SPI(board.GP10, board.GP11, board.GP12)
7. Create the object, esp, which we use to tell our code where to find the ESP32 on the SPI and the pins necessary to control the ESP32.
esp = adafruit_esp32spi.ESP_SPIcontrol(spi, esp32_cs, esp32_ready, esp32_reset)
8. Set up the code to use sockets, a means to connect two devices on a network, in our case to connect the Raspberry Pi Pico to the Airlift WiFi Featherwing.
requests.set_socket(socket, esp)
9. Create a loop for connecting to Wi-Fi. The next six lines handle connecting to our WiFi AP. The loop works by checking the ESP32 for a connection. While there is not a connection, the loop will keep looping until a connection is made. Inside this loop is an exception handler that tries to connect to our WiFi using the SSID and password found in the secrets library, something we shall create later. If a connection is not made, an error is presented.
while not esp.is_connected:
    try:
        esp.connect_AP(secrets["ssid"], secrets["password"])
    except RuntimeError as e:
        print("could not connect to AP, retrying: ", e)
        continue
10. Add three lines. The first will print a message informing us that the code is fetching the weather data, the second line creates an object, r, that stores the returned data from the OpenWeather API call and the third line prints the HTTP status code for debug purposes. A 200 code means that everything is working, but a code in the 400 range means that there is a problem with the API.
print("Fetching weather data")
r = requests.get(JSON_URL)
print(r.status_code)
11. Add a line to print the minus character, -, forty times, creating a separator on the Python output.
print("-" * 40)
12. Use a print function to print the temperature data found in the returned JSON object. Using r.json() we can look inside the data for two keywords, ‘main’ and ‘temp_max’ and directly place them in the print function. At the end of the line we add the ‘C’ as the returned temperature data is in Celsius.
print("The current temperature is",r.json()['main']['temp_max'],"C")
13. Add these final two lines to print another separator line before closing the requests object.
print("-" * 40)
r.close()
14. Save the code as code.py to the root of the CIRCUITPY drive.
Complete Code for Wi-Fi on Raspberry Pi Pico
import board
import busio
from digitalio import DigitalInOut
import adafruit_requests as requests
import adafruit_esp32spi.adafruit_esp32spi_socket as socket
from adafruit_esp32spi import adafruit_esp32spi
from secrets import secrets

print("Raspberry Pi Pico WiFi Weather Station")
JSON_URL = "http://api.openweathermap.org/data/2.5/weather?q=LOCATIONl&appid=APIKEY&units=metric"

esp32_cs = DigitalInOut(board.GP13)
esp32_ready = DigitalInOut(board.GP14)
esp32_reset = DigitalInOut(board.GP15)

spi = busio.SPI(board.GP10, board.GP11, board.GP12)
esp = adafruit_esp32spi.ESP_SPIcontrol(spi, esp32_cs, esp32_ready, esp32_reset)

requests.set_socket(socket, esp)

while not esp.is_connected:
    try:
        esp.connect_AP(secrets["ssid"], secrets["password"])
    except RuntimeError as e:
        print("could not connect to AP, retrying: ", e)
        continue
print("Fetching weather data")
r = requests.get(JSON_URL)
print(r.status_code)
print("-" * 40)
print("The current temperature is",r.json()['main']['temp_max'],"C")
print("-" * 40)
r.close()
Creating a Secrets File for Wi-Fi Login
The secrets.py file is where we can store our Wi-Fi SSID, username and password. In our main code, it acts in the same manner as a Python library, because we import the library and then call the dictionary containing the SSID and password. Before any of this can happen, we need to create the secrets.py file.
1. Create a new file in your text editor.
2. Create a dictionary, secrets, that contains your SSID and password for your router. Set the timezone to match your location.
secrets = {
   'ssid' : 'YOUR WIFI AP',
   'password' : 'YOUR PASSWORD',
   'timezone' : 'Europe/London', # http://worldtimeapi.org/timezones
   }
3. Save the file as secrets.py in the same location as code.py.
Running the code for Wi-Fi on Raspberry Pi Pico
The code will autorun but we can only see the output when connected to the Python Shell. The easiest way to achieve this is using a terminal emulator such as PuTTY.
1. Download PuTTY and install.
2. Connect your Pico to the computer (if it isn’t already connected).
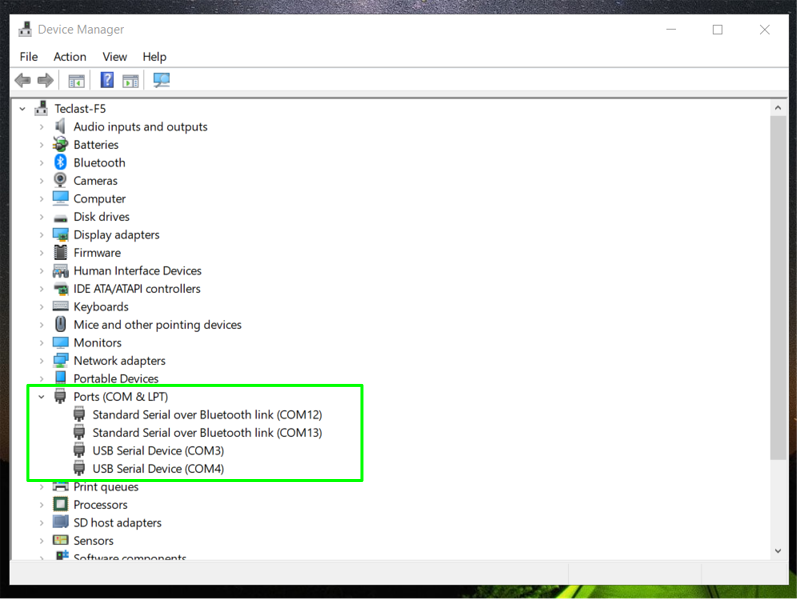
3. Find the COM port number for your Pico. In Windows, you do this by opening the Device Manager, looking for Ports, clicking on the drop down menu and locating the entry for your Pico (it’s not clearly marked so you may need to plug and unplug to see which disappears). Ours was on COM4.
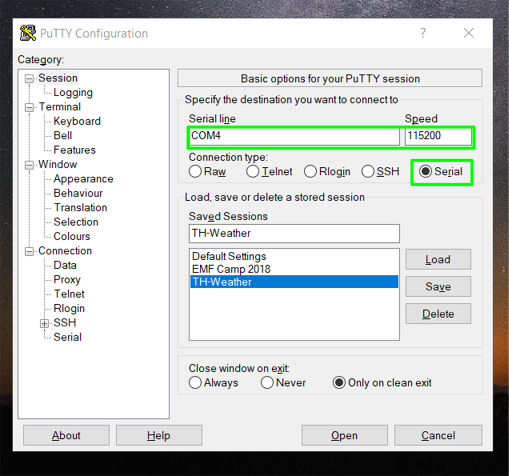
4. Open PuTTY, click on Serial and then set the serial line to match the COM port found in Device Manager. Set the Speed to 115200 and then click Open.
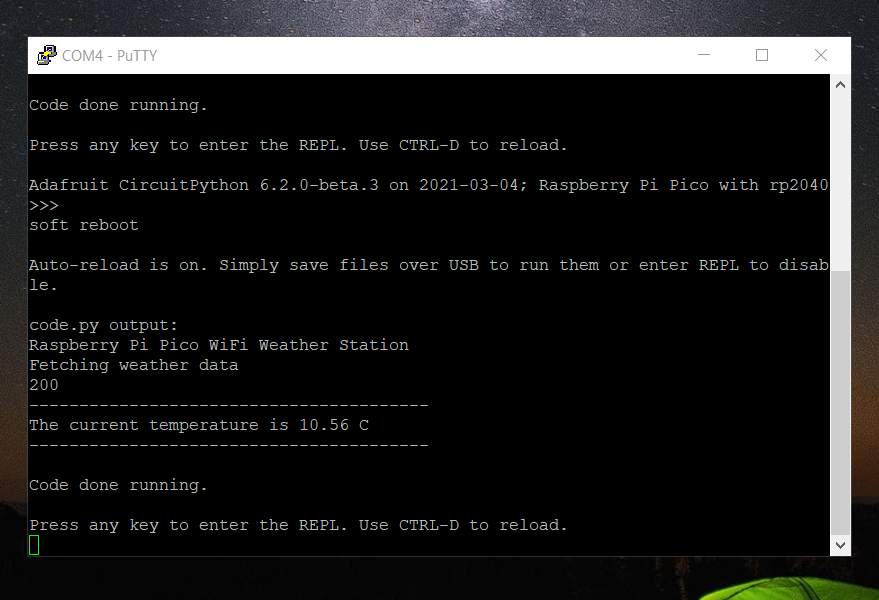
PuTTY will connect and show the Python Shell
5. Press CTRL+D to restart the shell and run the code. After a few seconds, the latest weather for your location will be displayed.

Les Pounder is an associate editor at Tom's Hardware. He is a creative technologist and for seven years has created projects to educate and inspire minds both young and old. He has worked with the Raspberry Pi Foundation to write and deliver their teacher training program "Picademy".
