Learn How to Archive Files in Linux with TAR
Work with TAR archives via the Linux terminal

Compressing files is a quick and easy way to archive and group files. There are many occasions where archives are useful, a driver download, file backup or Linux distro download. In this how-to we’ll look at various commands to create and extract data from compressed and uncompressed archive files.
Whilst you become accustomed to these commands it’s good to work with example test files and directories and you should take extra care to ensure you are carefully following the instructions.
All the commands in this how-to will work on most Linux machines. We’ve used an Ubuntu LTS install but you could run this how-to on a Raspberry Pi. All of the how-to is performed via the Terminal. You can open a terminal window on most Linux machines by pressing ctrl, alt and t.
Working with TAR archives
When using Linux systems you are likely to come across tar archives as well as ZIP archives. It’s useful to practice creating .tar archives and also how to extract from a tar archive. Also of note is that sometimes TAR archives are referred to as tarballs. Tar archives in their standard form have the .tar suffix but these archives are not compressed. Compression is added using different tar compression tools which is why you will see tar archives with extra suffixes such as .tar.xz or .tar.gz.
To create or extract from these compressed archives you need additional arguments added to the tar command. We’re going to use two of the most popular compression methods, gzip and bzip2 along with a tar archive that has no compression.
Using a TAR archive
1. Open a new terminal window. This will open to our home directory.
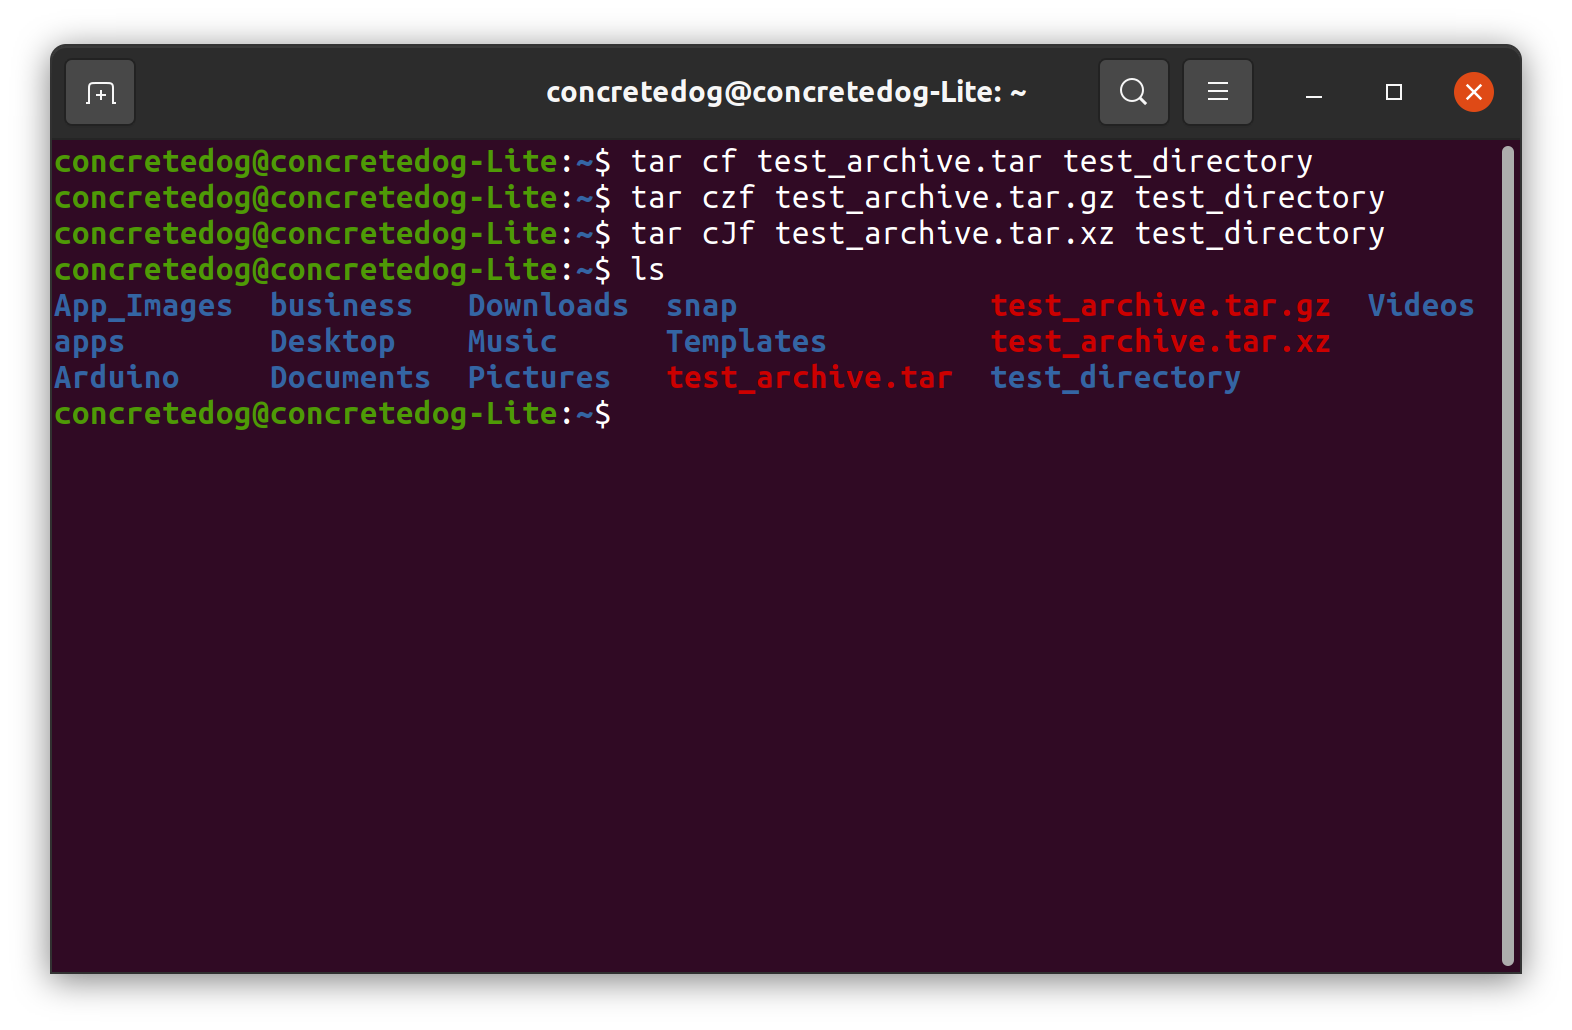
2. Create a .tar file. Using test_directory as a target we’ll make a standard uncompressed .tar archive. This kind of archive is useful to group small files, such as logs into a single archive.
Get Tom's Hardware's best news and in-depth reviews, straight to your inbox.
$tar cf test_archive.tar test_directory
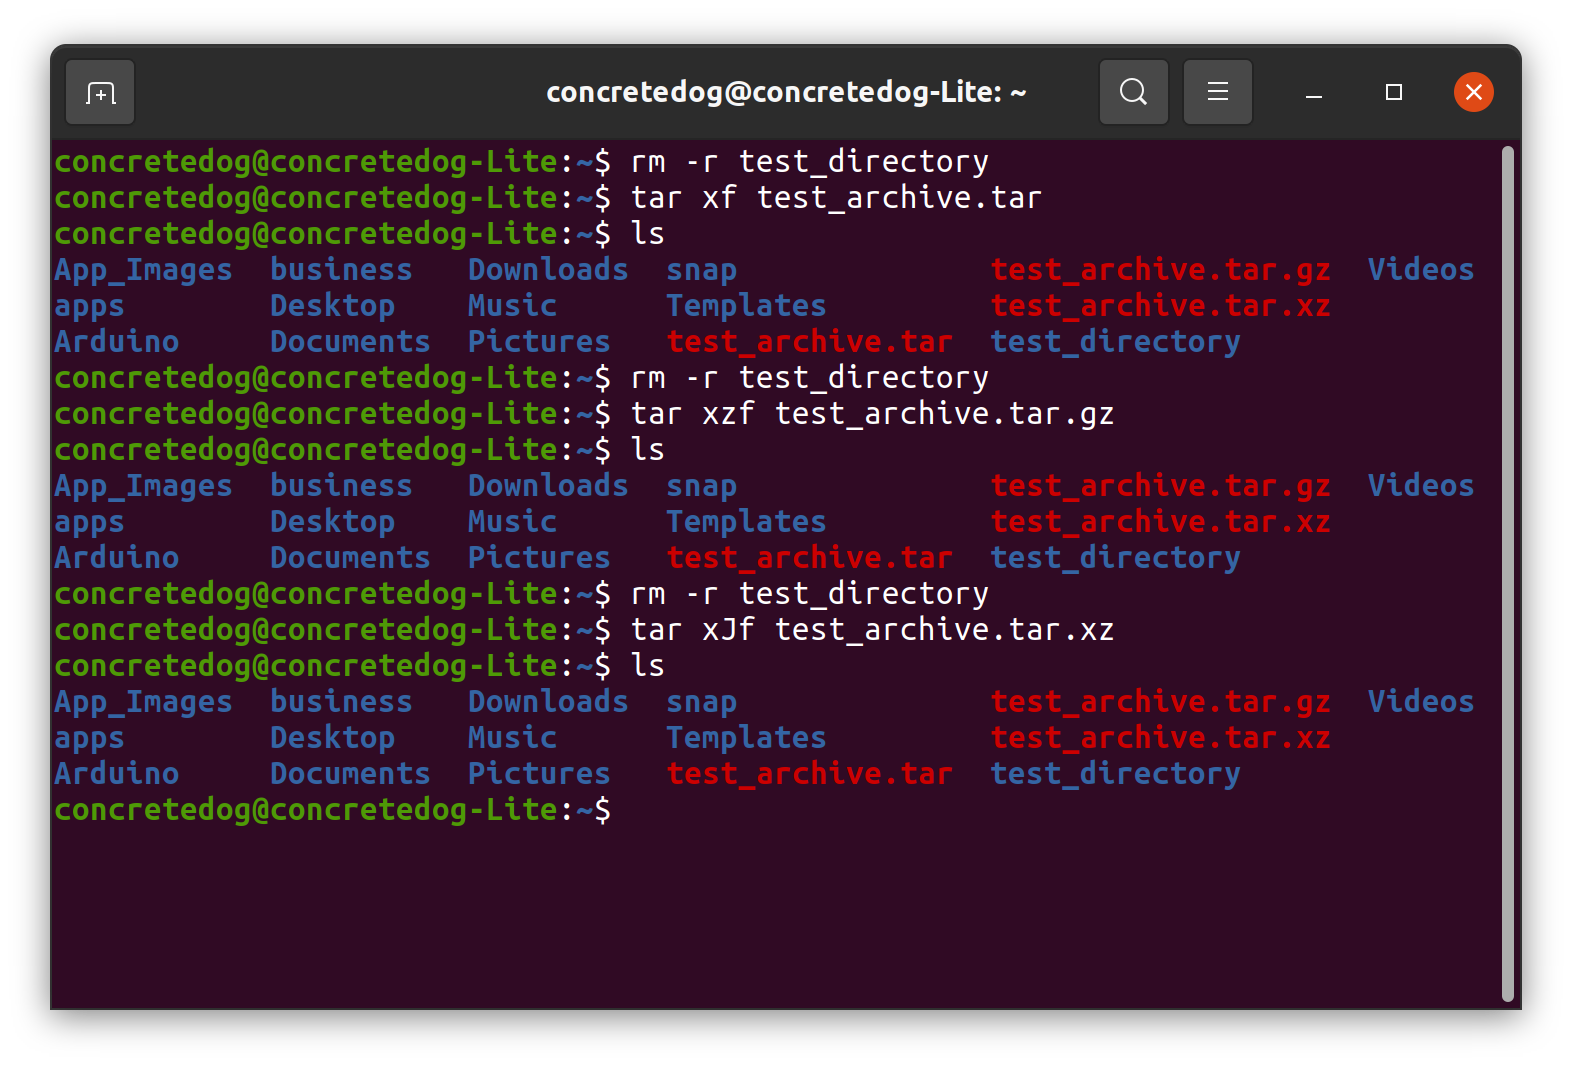
Extracting TAR archives is straightforward. Instead of adding the c argument to create an archive we replace it with the x argument. We again need to add arguments that respond to the type of compression tool the archive was created with. When we extract from our 3 archives we would be creating duplicates of the test_directory contents so we will delete this directory each time we extract the next archive.
1. Delete the test_directory folder.
rm -r test_directory
2. Extract the standard .tar archive. After extracting the archive use ls to check the archive has been extracted.
tar xf test_archive.tar
ls
Using Gzip Compressed TAR Files
A gzip compressed tar archive (tar.gz) is one of many popular compression tools for TAR archives and it is common to find a .
1. Create a gzip archive by adding the z argument to the tar command.
tar czf test_archive.tar.gz test_directory
To extract a gzip compressed tar archive we need to add the z argument to identify that the archive uses the gzip compression method.
2. Delete the test_directory folder.
rm -r test_directory
3. Extract the gzip compressed tar archive using the z argument. Then list the directory contents to show that test_directory has been created.
tar xzf test_archive.tar.gz
ls
Using Bzip2 Compressed TAR Files
Another alternative compression method for a tar archive is bzip2, which is invoked using the j argument. Archives typically end with either a tar.bz2 or tbz suffix.
1. Create a bzip2 archive by adding the j argument to the tar command.
tar cjf test_archive.tar.bzip2 test_directory
To extract a bzip2 compressed tar archive we need to add the z argument to identify that the archive uses the gzip compression method.
2. Delete the test_directory folder.
rm -r test_directory3. Extract the bzip2 compressed tar archive.
tar xf test_archive.tar.bzip2
ls
rm -r test_directory
Extract TAR Archives to a Specific Location
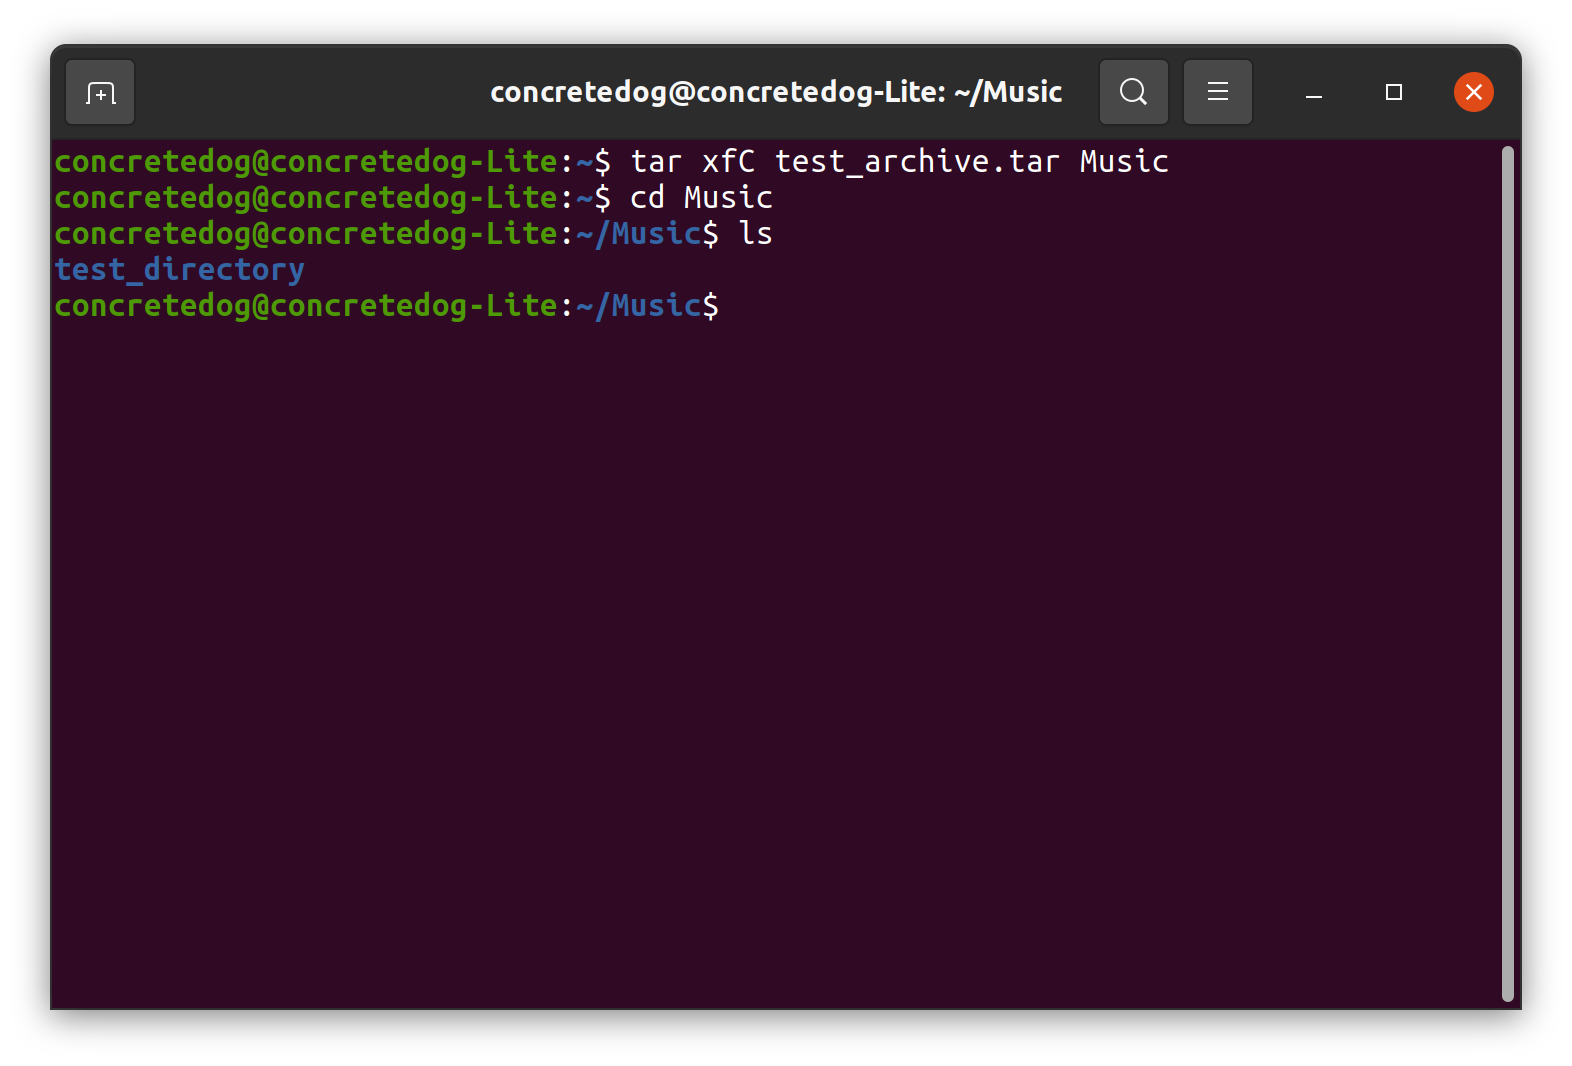
If we wish to extract an archive to a specific location we can use the C argument with the tar command and then specify the location. The location can be a relative or absolute path. So we can extract the archive to a sub directory inside a current directory, or we can specify the full path to another location in the file system.
Extract test_archive.tar into the Music directory. Here we are in the Home directory, and most Linux distributions feature a Music directory which we can extract the archive to.
tar xfC test_archive.tar Music
cd Music
ls
To extract to another location in the file system it is best practice to use an absolute path.
Extract test_archive.tar to your desktop directory. Specify the full path, tab completion can be used to auto-complete directory names. Remember to change to match your own.
tar xfC test_archive.tar /home/<YOUR USERNAME>/Desktop/
cd /home/<YOUR USERNAME>/Desktop/
ls
Armed with these few examples you are now capable of extracting most common archives on the command line. Whilst GUI tool options exist for some archives, often when dealing with a compressed .tar archives, these terminal commands are much quicker and easier to perform.
Jo Hinchliffe is a UK-based freelance writer for Tom's Hardware US. His writing is focused on tutorials for the Linux command line.


