






How to Breadboard Electronics Projects with Raspberry Pi Pico
Sketch your electronics circuits with this easy to use and low cost tool.

Chances are that you have worked with the insides of some electronics. It may have been in school, or some tinkering at home so it is highly likely you will understand the basics. But have you ever prototyped your own electronic circuit? This is where breadboards become immensely useful.
Breadboards are affordable and temporary devices that offer a simple approach to making electronic circuits. Just as an artist will draw a sketch before creating a work of art, breadboards are used to “sketch out” a circuit. Components are placed into the breadboard and we use the holes of the breadboard to create temporary connections between components. We can even insert microcontrollers such as the Raspberry Pi Pico into the breadboard and use them to create a circuit.
So let's take a breadboard apart, learn how it works and use one to design a quick project using the Raspberry Pi Pico.
What Does a Breadboard Do?

The idea of a breadboard is quite simple. The breadboard is covered with small holes arranged into rows and columns that are connected together electrically and this means we can insert components into them and make connections.
What Types of Breadboards Are There?

There are many different sizes and shapes of breadboard available with different arrangements of connected holes.
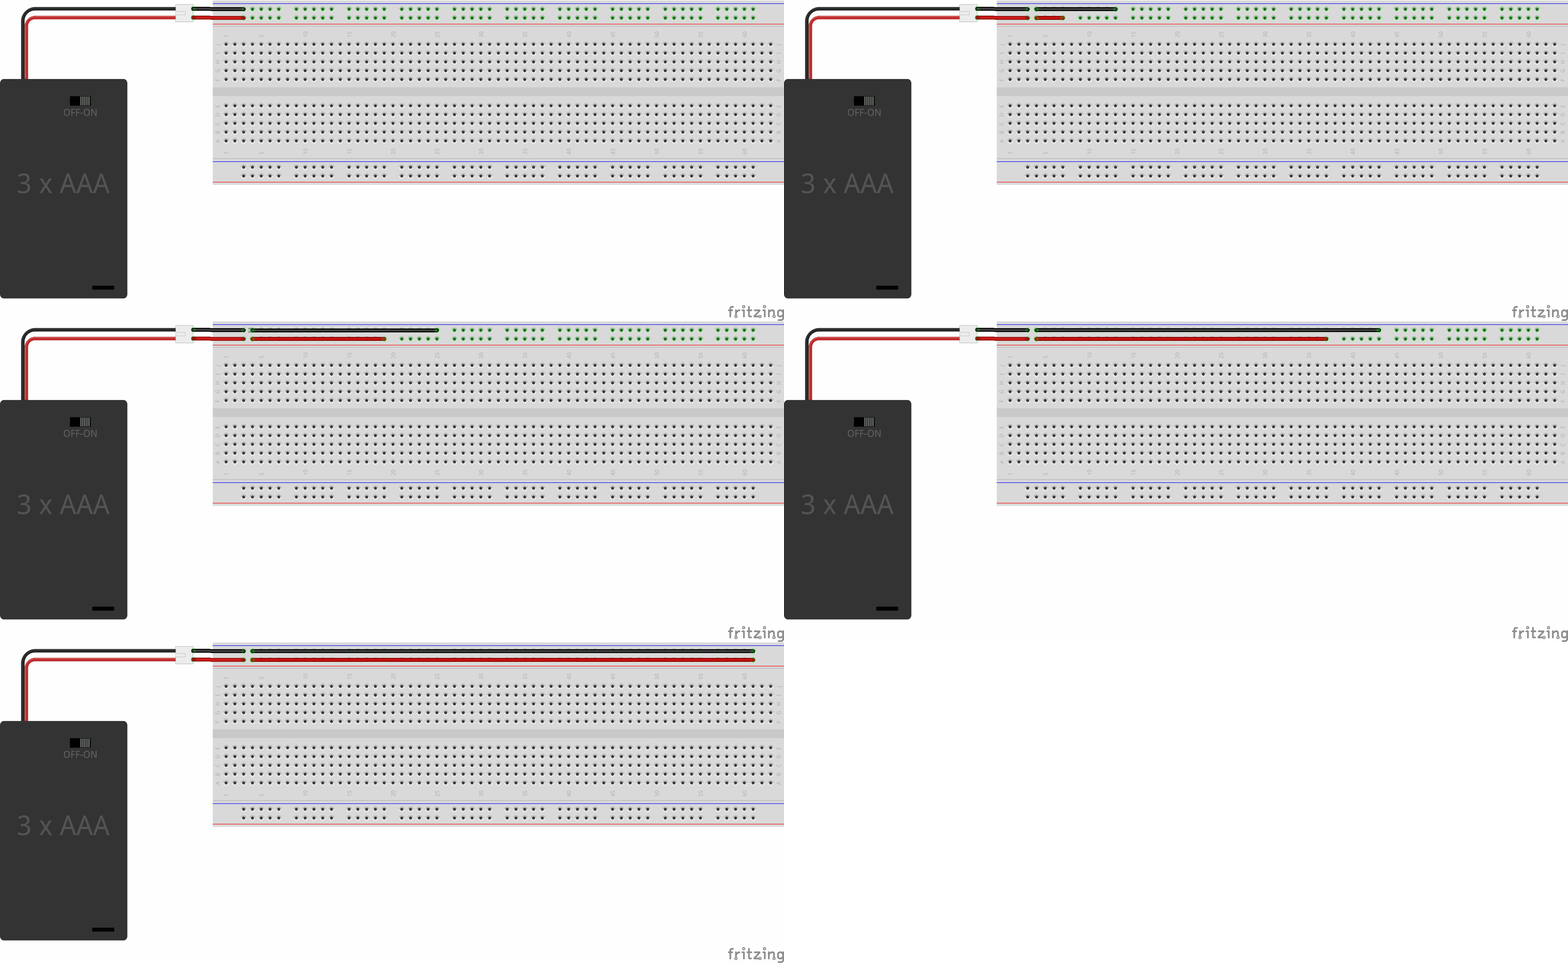
A common, and useful type of breadboard has connected columns along its long edges that are often marked with a red line and a black line. These are called rails and are intended to be your connections to voltage (most likely 3 to 5V when working with Raspberry Pi or Arduino) and a connection to GND. Once we connect power and ground from a power supply, all of the pins in the corresponding rail become the corresponding voltage/GND pins. This type of breadboard is often quite long, but you can purchase a half breadboard which offers the same features in a much smaller package.

Other types of breadboard, such as mini breadboards do not have any rails but still retain the rows and columns structure.
Get Tom's Hardware's best news and in-depth reviews, straight to your inbox.

All of the pins in a breadboard are arranged in a row and column configuration. Columns are marked with a letter, rows are numbered. So A1 would be the top left of the board, and in the graphic above, J1 is the top right.
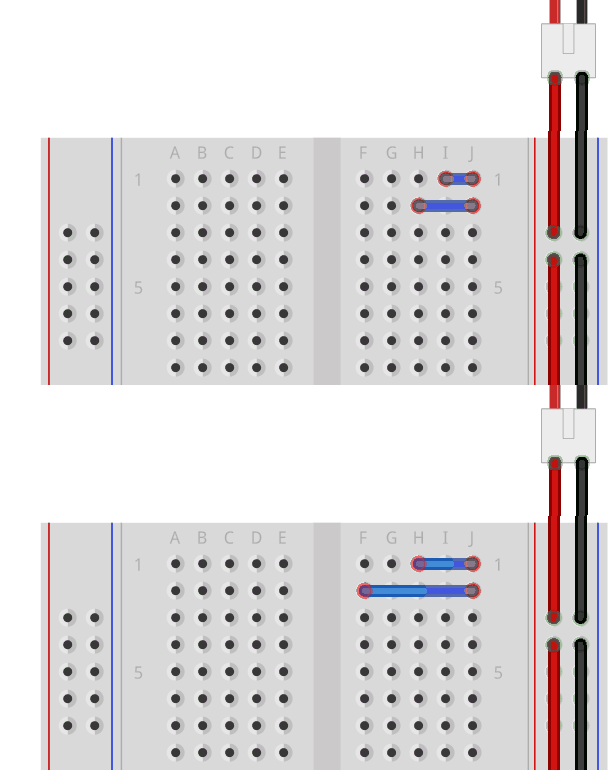
Rows are connected together, so if we were to use a wire from the GND rail to a row, all of the pins in that row are connected.
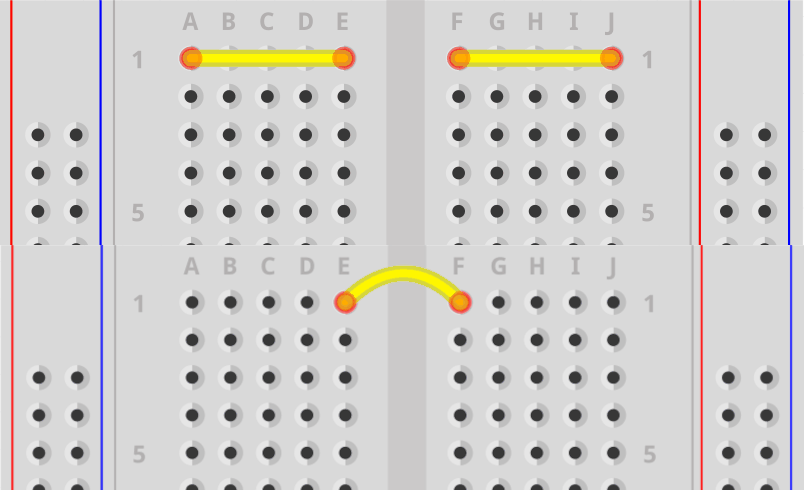
But, on the breadboard, there is a break in a row. In the center of the board is a channel, a cut which divides the left and right sides of the board. The break gives us more space to prototype projects but should we need to bridge the channel we can use a jumper wire to connect the two rows together.
How Does a Breadboard Work?

Inside the breadboard,each of the rows are connected via a small conductive metal strip.

The strip is folded into a U shape and acts to slightly grip any wire, pin or component leg that is inserted through the plastic holes into the breadboard. This means any items inserted into the same strip are electrically connected.
Blinking an LED with a Breadboard
In this project the goal is to understand how breadboards work and practice creating a small circuit on a breadboard. We will use a Raspberry Pi Pico to blink an external LED.
For this project you will need
- Half or full size breadboard
- 3x Male to male jumper wires
- An LED
- 330 Ohm resistor (Orange-Orange-Brown-Gold)
1. Insert a Raspberry Pi Pico into the breadboard. Take care to align the pins and check that no pins are being bent or crushed. Ensure that the Pico pins are on either side of the gap down the middle of the breadboard so the opposite pins are not connected. Many breadboards have each row of pin holes numbered which can help later to keep track of connections. Another useful approach is to place the Pico so that the first pins on the pico use the first hole row on the breadboard allowing you to keep track of or count the pins with ease.

2. Connect a wire from the Raspberry Pi Pico’s GND to the negative rails. When the USB lead is connected to the Pico and the unit is powered up, anything connected to this rail is now connected to the negative or ground connection. Note that if you need more connections you can use more jumper wires to connect the power rails on one side of the breadboard to the ones on the other side to expand them.

3. Insert the LED with the two component leads on separate rows. LEDs need to be connected in a specific way. The positive leg (connected to the LED’s anode) is always the longer lead. The shorter lead, connected to the LED’s cathode is the negative (GND) connection.

4. Connect the LED to the ground rail. Using a jumper wire, connect the negative lead of the LED to the ground rail we connected to the Pico earlier.

5. Connect the LED to Pin 28 via the 330 Ohm resistor. Connect either leg of the resistor to the breadboard row connected to the positive lead on the LED. Insert the other leg at the other end of the resistor into a previously unused breadboard row. Use another jumper wire to connect the resistor to pin 28 on the Raspberry Pi Pico.

Controlling the LED with Code
1. Download and install Thonny for your operating system.
2. Connect your Raspberry Pi Pico to your computer using a microUSB cable.
3. Open Thonny and click on Tools >> Options.

4. Click on the Interpreter tab and ensure that the interpreter is set to MicroPython (Raspberry Pi Pico) and that you can see the USB serial device (the Pico). Click Ok to return to the editor. You can find the COM port of your Pico using the Device Manager, or via this useful tool.

5. In the editor, import two MicroPython libraries for working with the GPIO (machine) and time (utime).
from machine import Pin
import utime
6. Create an object, led which we use to set GPIO 28 to be an output. Pins can be inputs or outputs. When a pin is an output, we can send current to an attached component, in this case the LED.
led = Pin(28, machine.Pin.OUT)7. Ensure that the LED is turned off.
led.low()8. Create a loop to continually run the test code.
while True:9. Use the toggle function to turn the LED on or off each time the loop iterates. Toggle will set the LED state to the opposite of what it currently is. So on becomes off, and off becomes on. It is a useful function to save a line of code.
led.toggle()10. Add a two second pause to the code. This causes the LED to turn on and off for two seconds each time.
utime.sleep(2)11. Click on Save, and save the code to the Raspberry Pi Pico as blink.py.

12. Click on the Run button to start the code. The LED should now appear to blink. If there is an error, read the error message to determine where the error occurred. If your Pico appears to be disconnected, click on Stop to re-connect.

Complete Code Listing
from machine import Pin
import utime
led = Pin(28, machine.Pin.OUT)
led.low()
while True:
   led.toggle()
utime.sleep(2)
Having learned how to make connections on the breadboard it is now simple for you to create and experiment with circuits in a non permanent and reconfigurable way. Breadboards are widely available and affordable so it’s not uncommon to end up with a small collection of them so you can work on multiple projects at the same time, or leave a working prototype on the breadboard whilst you assemble a second version.
Related Tutorials

Jo Hinchliffe is a UK-based freelance writer for Tom's Hardware US. His writing is focused on tutorials for the Linux command line. From PCBs to rowing boats to rockets, Jo tries wherever possible to integrate open source hardware and software into his projects. As such he is a keen Linux user, has authored a book on FreeCAD the open source 3D modeling software, and has published designs and tutorials across a wide range of makes.