


Tom's Hardware Verdict
A first for Raspberry Pi, the Pico microcontroller provides an affordable and simple way to control lights, motors, sensors and other electronic components.
Pros
- +
Low cost
- +
Small size
- +
Ease of use
- +
Built-in ADC
Cons
- -
C workflow is tricky
- -
No built-in wireless
- -
No 5V output
Why you can trust Tom's Hardware Our expert reviewers spend hours testing and comparing products and services so you can choose the best for you. Find out more about how we test.
Raspberry Pi has a history of disrupting the status quo. In 2012, the first $35 Raspberry Pi offered a low cost entry into a market of single-board computers that was dominated by boards costing in excess of $100+. The Raspberry Pi Pico, the latest board in the range, disrupts a different part of the electronics market, taking on microcontroller boards like Arduino.

Available for an MSRP of just $4, the Pico is powered by Raspberry Pi’s own custom silicon, the RP2040 SoC, which features an Arm Cortex M0+ processor running at up to 133 MHz, with 264K of SRAM and 2MB of onboard storage. A great choice for robots, weather stations or other electronics projects, the board doesn’t run a full operating system, but instead launches programs you write in either MicroPython or C on a host computer (that could be a PC, a Mac or a regular Pi) and upload to it.
Perhaps even more important than the Pico itself is Raspberry Pi Foundation’s first foray into making its own silicon. We wanted to learn more about the RP2040 so we asked James Adams, Chief Operating Officer at Raspberry Pi Trading to tell us how “Pi Silicon” was created.
“We couldn’t see a way to offer something differentiated in the microcontroller space using existing third-party silicon, so we set out to build our own,” Adams said. “The RP2040 chip has been a long time in the making - we started initial work at the back end of 2016, we had some test silicon in our hands in September 2018 which we then reworked into the final device we use on the Raspberry Pi Pico board. The device has evolved substantially since those early days. We learned a lot from our first test silicon and I think, although it has taken a while, what we've ended up with is very exciting (in terms the architecture and performance per $) - it's a superb bit of engineering. The RP2040 chips are fabricated at TSMC on their 40nm process.”
Adams outlined some of the advantages of the custom silicon.
“We are offering some really unique features with the RP2040 chip - a dual core device (I’m not aware of other dual core microcontrollers at this price point) coupled to a high-performance bus matrix, meaning you can get full performance on both cores concurrently, and plenty of high-bandwidth RAM,” he said. As well as the usual fixed peripherals (UARTs, I2C, SPI etc.) we also have a special bit of hardware called the PIO (Programmable I/O) unit, which is basically a very small, specialised, programmable state machine that can do high-speed, cycle accurate “bit banging” of I/O – this block can be used to offload many kinds of timing-critical pin-waggling tasks from the CPU(s) – we’ve had it emulating interfaces such as SD card, VGA and driving WS2812B LEDs. We’ve also added other goodies like optimised floating-point libraries to the boot ROM, and a USB core which can be used in either master or slave mode.”
Could the Raspberry Pi Pico be the start of a new range of boards based upon the RP2040? Adams said the Foundation is waiting to see how things go with the first board.
Raspberry Pi Pico Hardware Specifications

| System on Chip | RP2040 microcontroller chip designed by Raspberry Pi in the United Kingdom. Dual-core Arm Cortex M0+ processor, flexible clock running up to 133 MHz. 264KB of SRAM, and 2MB of on-board Flash memory | Row 0 - Cell 2 |
| GPIO | 26 × multi-function 3.3V GPIO pins 2 × SPI, 2 × I2C, 2 × UART, 3 × 12-bit ADC, 16 × controllable PWM channels 8 × Programmable I/O (PIO) state machines for custom peripheral support. Castellated module allows soldering directly to carrier boards. | Row 1 - Cell 2 |
| Row 2 - Cell 0 | Row 2 - Cell 1 | Row 2 - Cell 2 |
On paper the Raspberry Pi Pico is not even a rival for the Raspberry Pi Zero, which itself costs only $5, , but the key difference between the two is that the Pico is not a Linux computer, rather it is a microcontroller like Arduino and is better for many projects. It could even work in conjunction with a regular Pi. Just like the larger Raspberry Pis and newer Arduino boards, the Pico uses a 3.3V GPIO. This could be seen as a con, but many components can be used with 3V and 5V voltages, and those designed for 5V can still be used with 3V via a voltage divider or a logic level converter board.
The Raspberry Pi Pico is an efficient board for embedded projects. Compared to a typical Raspberry Pi, the Pico consumes much less current, granted it is a microcontroller with none of the overheads that a computer brings. In our test we powered a Raspberry Pi Pico running 12 Neopixel LEDS at full brightness from a 5V power supply. We recorded 140mA current draw, 0.7W! This is remarkable, a Raspberry Pi 4 running idle with nothing connected would run at 4-5W. So compared to Raspberry Pi, the Pico sips power!
Talking of power, we can power the Raspberry Pi Pico via the micro USB port, or we can use the VSYS GPIO pin to provide power between a range of 1.8V to 5.5V. There is no battery charging available via the Pico, so an external circuit would need to be used, page 18 of the Raspberry Pi Pico Datasheet goes into great detail on how to achieve this.
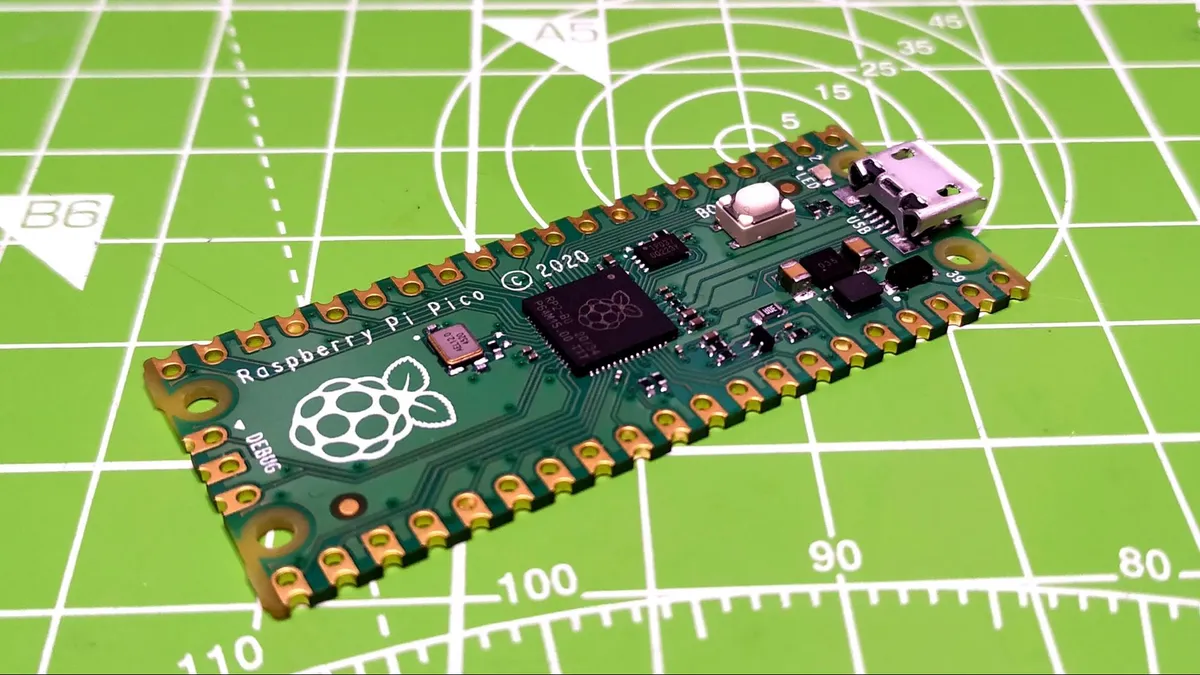
Design of the Raspberry Pi Pico


What strikes us at first glance is that the Raspberry Pi Pico resembles a newer Arduino microcontroller, an Adafruit Feather or a Teensy board. The Pico is not your typical Raspberry Pi as it eschews from the design and user experience of a typical Pi. It looks and behaves like a typical microcontroller. Measuring 2 x 0.8 inches (51 x 21mm) the Raspberry Pi Pico is smaller than the Raspberry Pi Zero.


Designed for use with breadboards and surface mount carrier boards, the 40 pins of the Raspberry Pi Pico come unsoldered and so for use we need to break out the soldering iron. We can solder our own header pins to the Pico, or if we intend to embed the Pico into a project we can choose to solder the casellations to pads on the carrier board.
Using the Raspberry Pi Pico with a breadboard requires a half size or larger breadboard, so those mini breadboards are not much use.
James Adams tells us more about the Raspberry Pi Pico design. “The Pico has been designed to be as small and low cost as possible while still being very flexible and friendly to beginners. The board is the same length and one 0.1” pitch wider than a standard 40 pin DIP (Dual Inline Package), and we see it as a component in itself (as it can be soldered down as an SMT module using the castellated edge pads), as well as a development board.
Could the Pico bring about its own add on standard, in a similar vein to the Raspberry Pi HAT or Arduino Shield standards? It seems likely that the Pico is most likely to be integrated into carrier boards,one of which is already in use internally at Raspberry Pi and others are currently in development with third parties, these carrier boards would provide extra functionality dependant on their intended use.
Using the Raspberry Pi Pico

With no USB ports, HDMI or other ports to speak of, the Raspberry Pi Pico needs a computer in order to be useful. The Raspberry Pi Pico is platform agnostic and it will work with Windows, Mac and Linux machines. In our tests we used Windows 10 and followed the official documentation to get started.
The documentation is split into two languages, C and MicroPython. We first tested MicroPython, a version of Python 3 developed by Damien George for microcontrollers.As we explain in our detailed tutorial how to up a Raspberry Pi Co, iInstallation of MicroPython requires a UF2 file to be copied to the Pico. By pressing the BOOTSEL button as we insert the micro USB cable to the computer we see a drive pop up. After copying the file we can then access the Raspberry Pi Pico as a serial device which provides access to the Python Shell.
To write code and save files to the Pico we needed an editor and for the official choice for beginners is Thonny. Installation was a breeze and we were soon writing code to flash an LED and react to input from a PIR sensor.
Two features that are new to the Raspberry Pi world are Programmable IO (PIO) and analog inputs. PIO is a versatile hardware interface that can be used to create interfaces such as I2C, SPI, I2S and even VGA / DPI if you are feeling adventurous and know your electronics.
We tested a number of the official examples including a PIO project to control a chain of Neopixels which saw us create a decorator and function which was used to communicate with WS2812 “Neopixels” to create an animation sequence. The creation of the decorator and function requires the knowledge of how Neopixels work, and if we are going to use PIO then we would ultimately need to understand how our intended configuration would work. PIO can be as easy or as difficult as we require, but the Neopixel example illustrated the concept quite well and it was easy to wire up our test project. There are three analog inputs, which share the same GPIO pins as digital pins but using the ADC class from the machine library we can configure them to read the voltage of those pins. Analog inputs are useful for certain types of electronics such as potentiometers, joysticks and temperature sensors.
So how is C on the Raspberry Pi Pico? Well the best way to describe right now is “tricky”. Following the official user guide, we jumped through a number of hoops to install the applications, libraries and fixes in order to flash an LED and to send text to the serial console.
While this worked and we were pleased with the results, it required much more time to reach this stage, something that we fear may put some off. To use C we need to go hands on at the command line, or use Microsoft’s Visual Studio Code. Both of these approaches have their pros and cons, but our top tip is to read chapter six of the Getting started with Raspberry Pi Pico and follow the steps to the letter. If not, then you will waste a lot of time. We’ll revisit the C workflow once the board is officially released when we hope the process is refined and simplified.
Adams said that MicroPython is the “preferred” language, but pointed out that C is the language for low-level embedded chips. He also noted that one could use the Arm assembler.
Use Cases for the Raspberry Pi Pico

The Raspberry Pi Pico is made to be embedded into a project. The price, size and design of this board lend make it a viable Arduino alternative . Robots, Neopixel powered light displays and learning electronics are all made possible with the Pico.
While a full-fledged Raspberry Pi like the Zero is more powerful, there are many reasons why you’d want the Pico for certain projects. It boots quickly and doesn’t require a safe shutdown when powering off so you can just turn it on and go. It uses considerably less power than a Raspberry Pi and it has on-board analog-to-digital conversion, something all other Pis lack.
Where the Pico falls short is wireless connectivity. There is a complete lack of WiFi / Bluetooth with the Pico and this limits what can be achieved. Sure we can add wireless connectivity via an external component, but that would require a little more knowledge to get working. The ESP32 and ESP8266 run at a similar price point and they feature WiFi, so if we really need WiFi, perhaps they are still the boards to look to, for now.
Bottom Line
The Raspberry Pi Pico is an interesting piece of kit. It is more Arduino than Raspberry Pi and so the lines are a little blurry. If you need a Raspberry Pi in a small space with Wi-Fi / Bluetooth, buy a Raspberry Pi Zero W. If you want to embed a control board into a project and have it work quickly and reliably then the Pico is for you.
For an official and well supported entry into Arm Cortex M0+ boards, the Raspberry Pi Pico is hard to beat.
