How to Add a Printer in Windows 11 or 10
Bridge the gap between your PC and your printer
Get Tom's Hardware's best news and in-depth reviews, straight to your inbox.
You are now subscribed
Your newsletter sign-up was successful
Anyone who’s had to set up a printer before knows it can be an infuriating process. There’s a reason why the printer-smashing scene in “Office Space” still resonates with so many people even though that movie came out in 1999—it doesn’t feel like the experience has improved much in the intervening decades. Microsoft has done what it can to make adding a printer as straightforward as possible in Windows 11, though, so at least we have that going for us.
This guide won’t cover every aspect of setting up a printer. The category is simply too broad in terms of available features, underlying technologies, and manufacturer-specific quirks to go into that much detail. Instead we’re going to explain how to add a printer to Windows 11 after it’s already been configured. We’ll still have to generalize somewhat because the process can vary from device to device, but the primary aspects of the process should be pretty similar.
How to add a printer in Windows 11 with a wired connection
Here’s the part that feels like magic: Windows 11 can handle printers connected via USB or Ethernet like a champ. This is more about confirming that the printer’s been added than anything.
1. Connect your printer to your PC. The available physical connections will vary by printer. We used an HP DeskJet 3630 All-in-One for our tests and it only supports a USB 2.0 Type-B connection on the printer side and a USB 2.0 Type-A on the PC side. Other printers will vary, so make sure you have the appropriate cable and corresponding port on your system before you commit to relying on a physical connection between the devices.
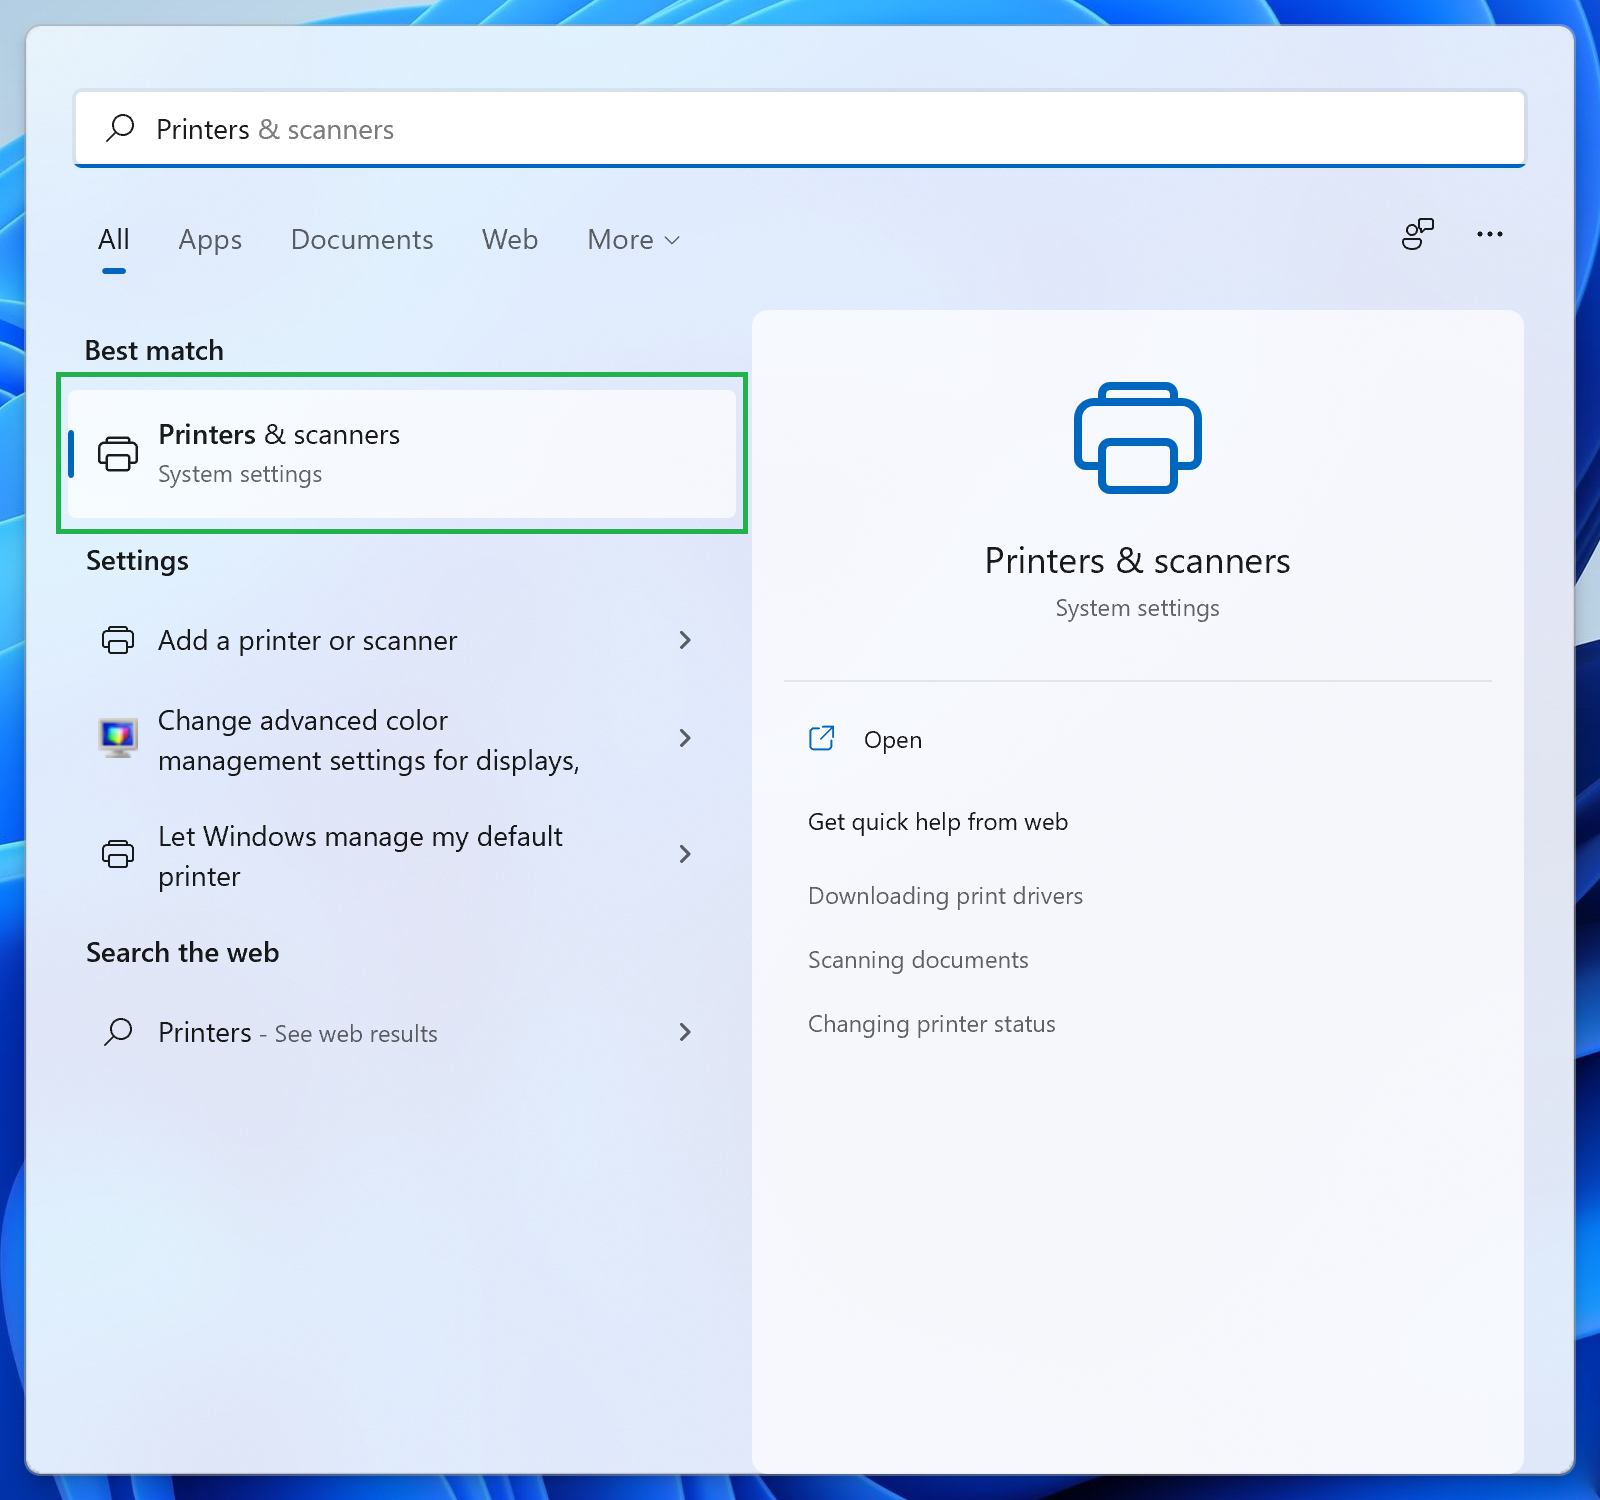
2. Open the ‘Printers & scanners’ page in Settings. The quickest way to do this is to open the Start menu, search for “Printers” and select “Printers & scanners” from the results. You can also open the Settings app, select “Bluetooth & devices” from the sidebar, and then click “Printers & scanners” from the list of options. Either works.
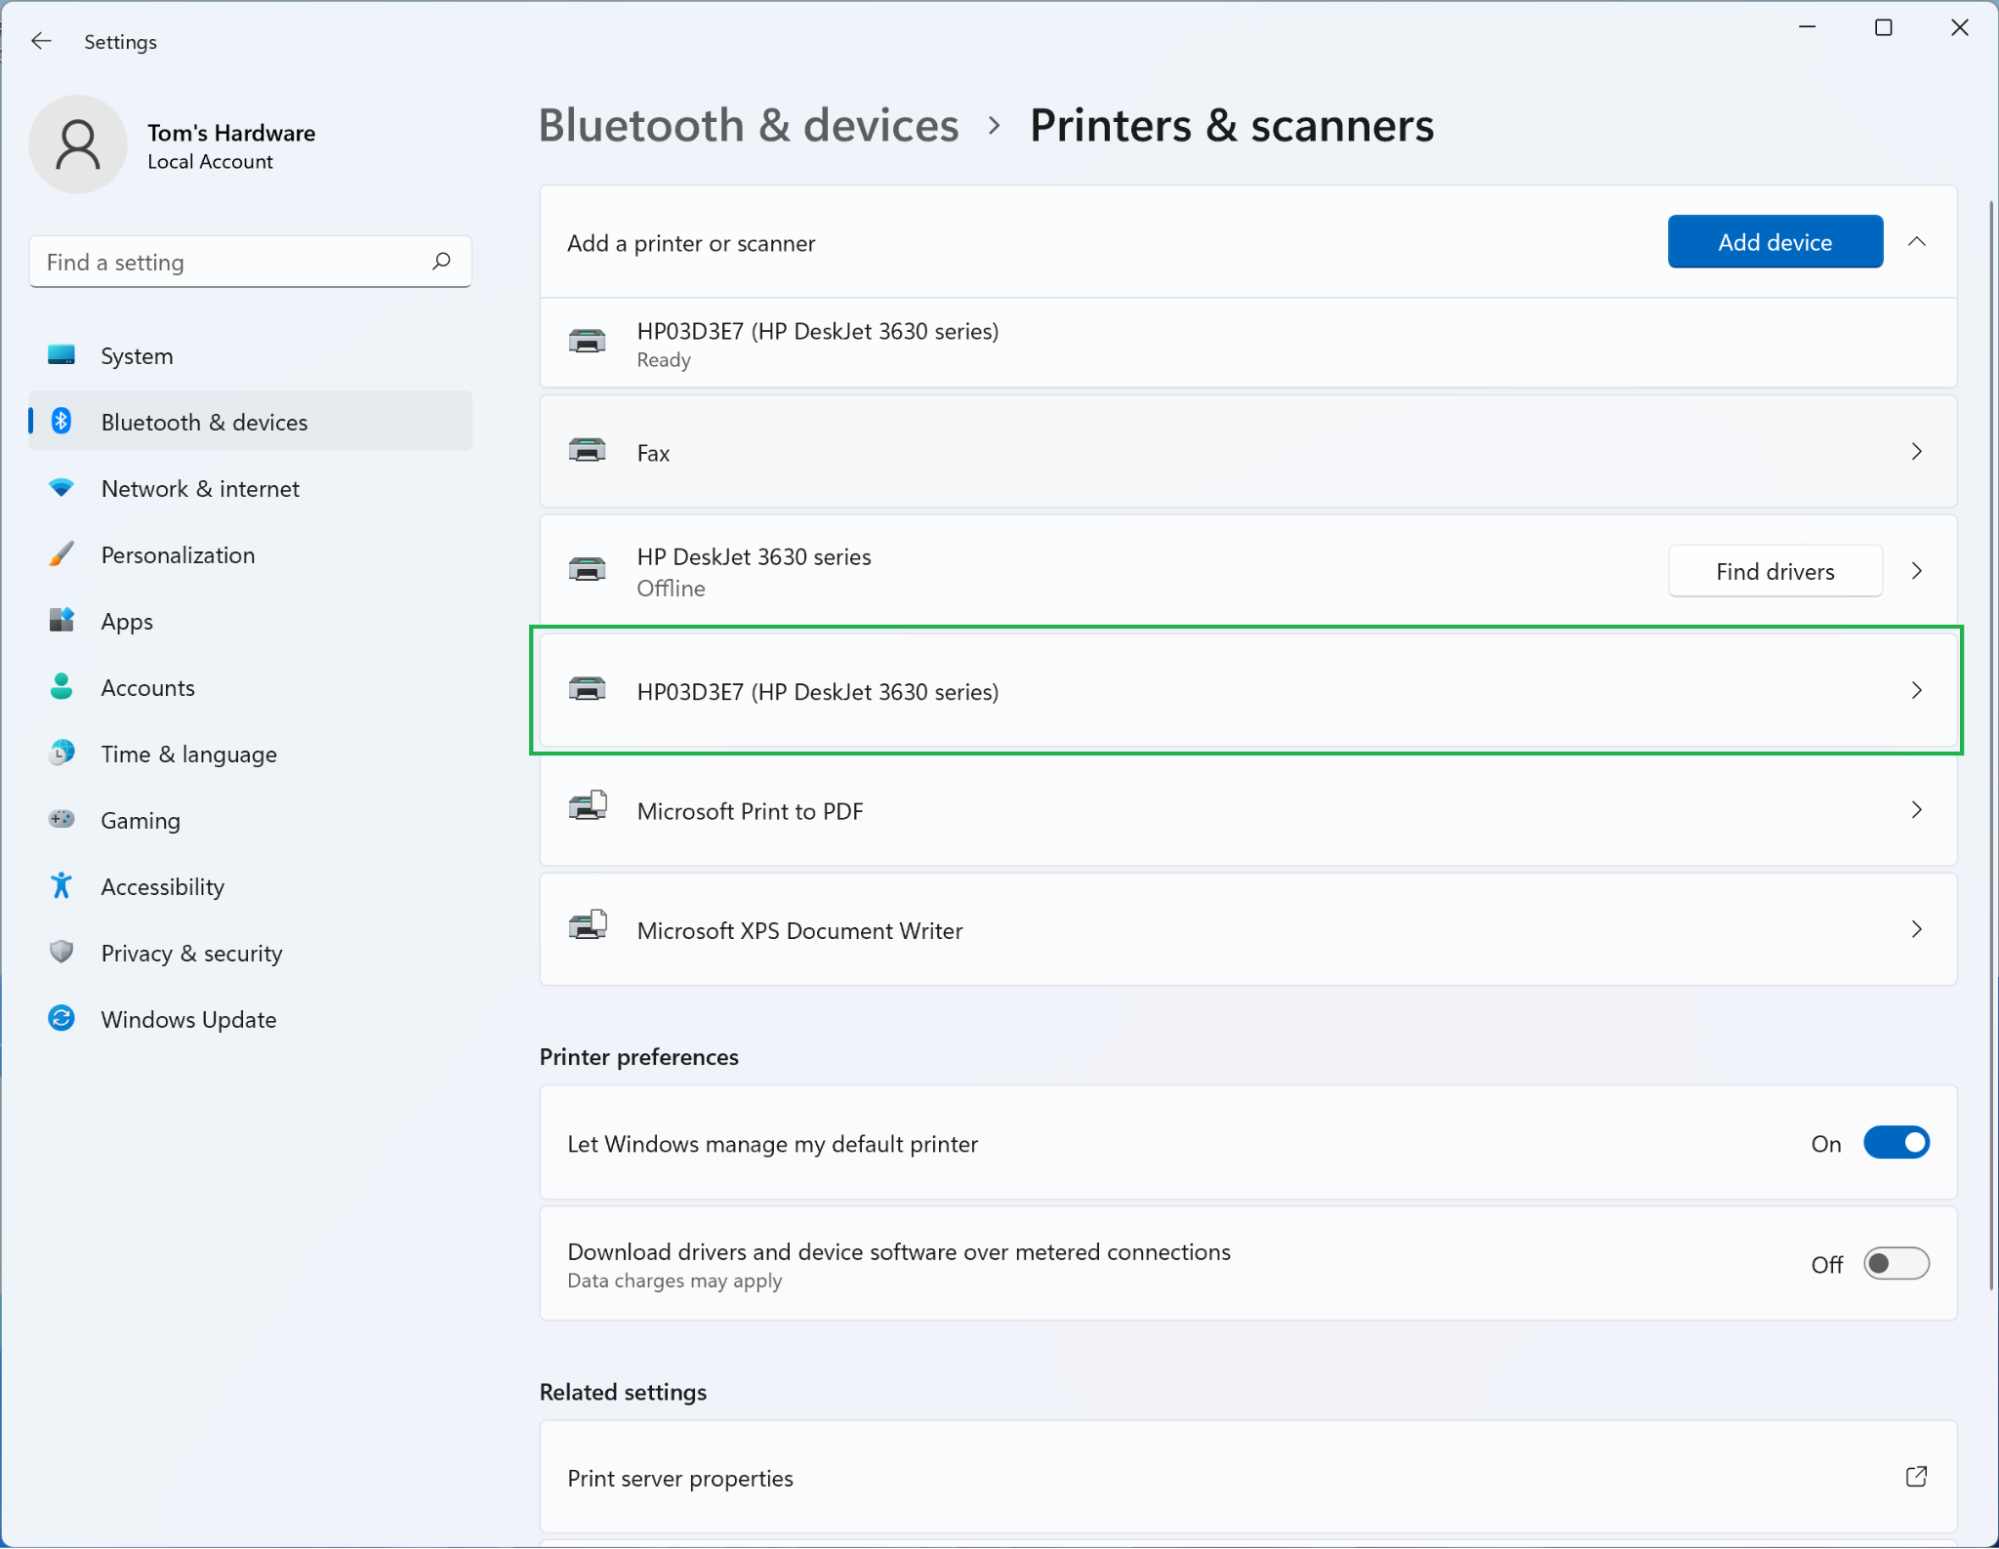
3. Locate your printer. In our case it appeared as “HP DeskJet 3630 Series” right away. Windows 11 automatically identified the device and connected to it.
Once your printer appears here it should be available as a print destination across Windows as long as nothing happens to the cable that’s connecting your devices.
Get Tom's Hardware's best news and in-depth reviews, straight to your inbox.
How to add a printer in Windows 11 via wireless protocols
Who wants a cable running from their printer to their PC? It’s a lot more convenient to have a wireless connection. (At least when the network itself is working properly… if not a wired connection is best.) Just note that both your printer and PC will need to support compatible versions of Bluetooth or Wi-Fi for this to work; setting all of that up is outside the scope of this guide. We’re going to focus on Wi-Fi, but the steps are similar for Bluetooth-capable printers.
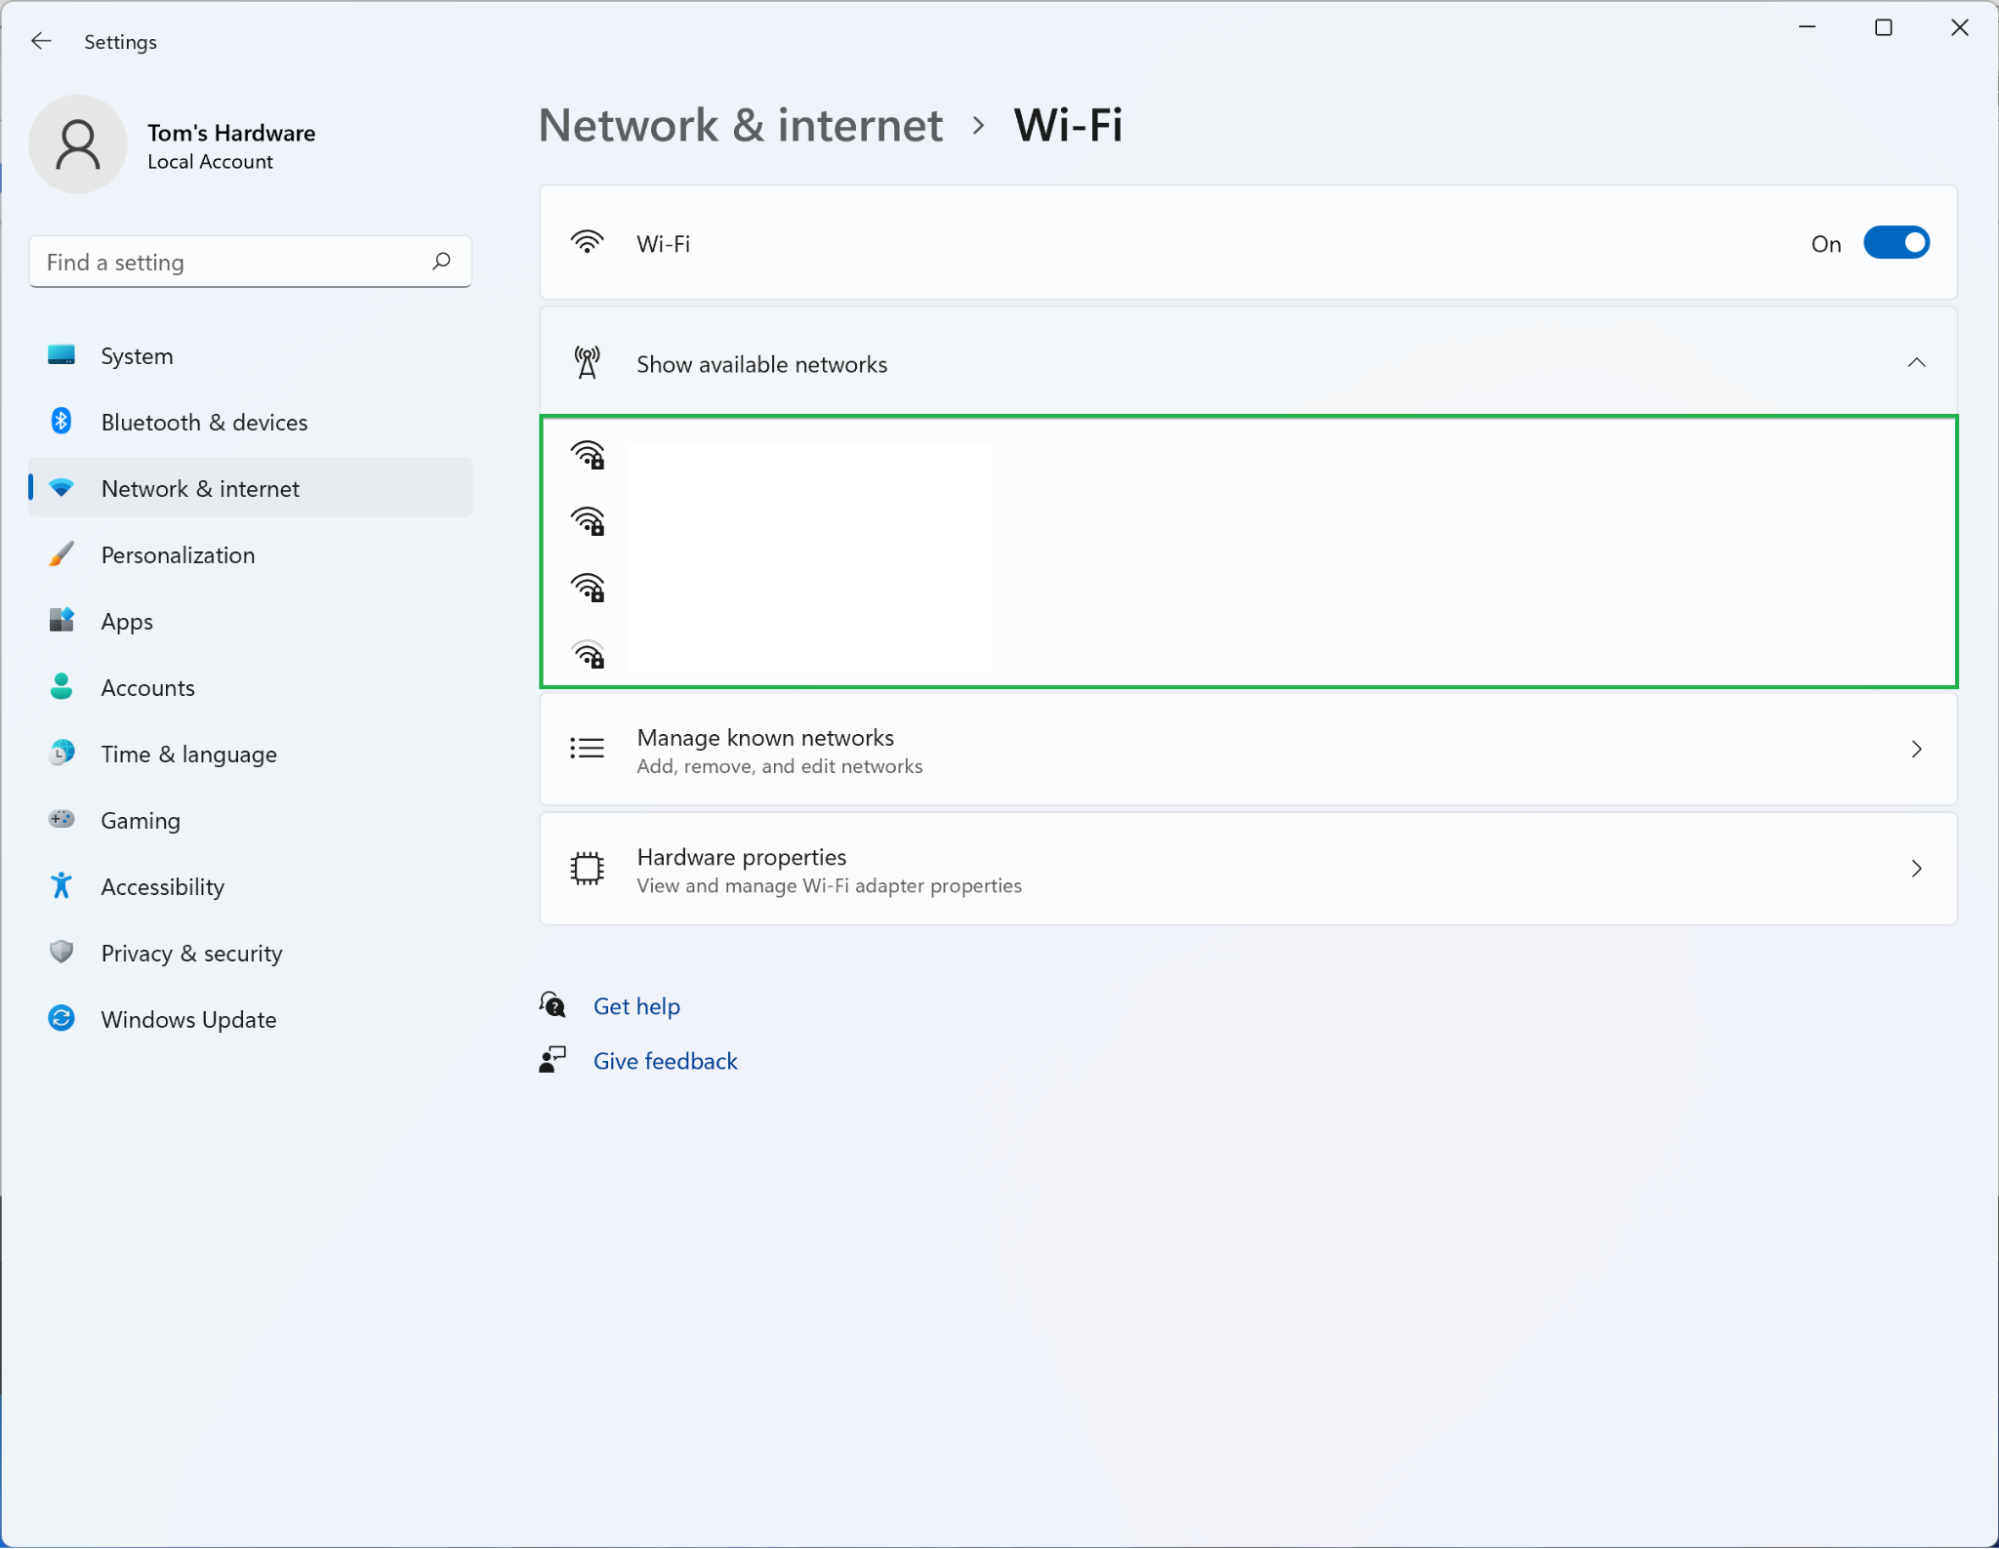
1. (Wi-FI) Make sure your devices are on the same network. There’s nothing quite like troubleshooting printer errors only to discover the only problem was that the printer was connected to the “Tom’s Hardware Rules” network and the PC was connected to the “Tom’s Hardware Rocks” network. It’s much easier to check that first.
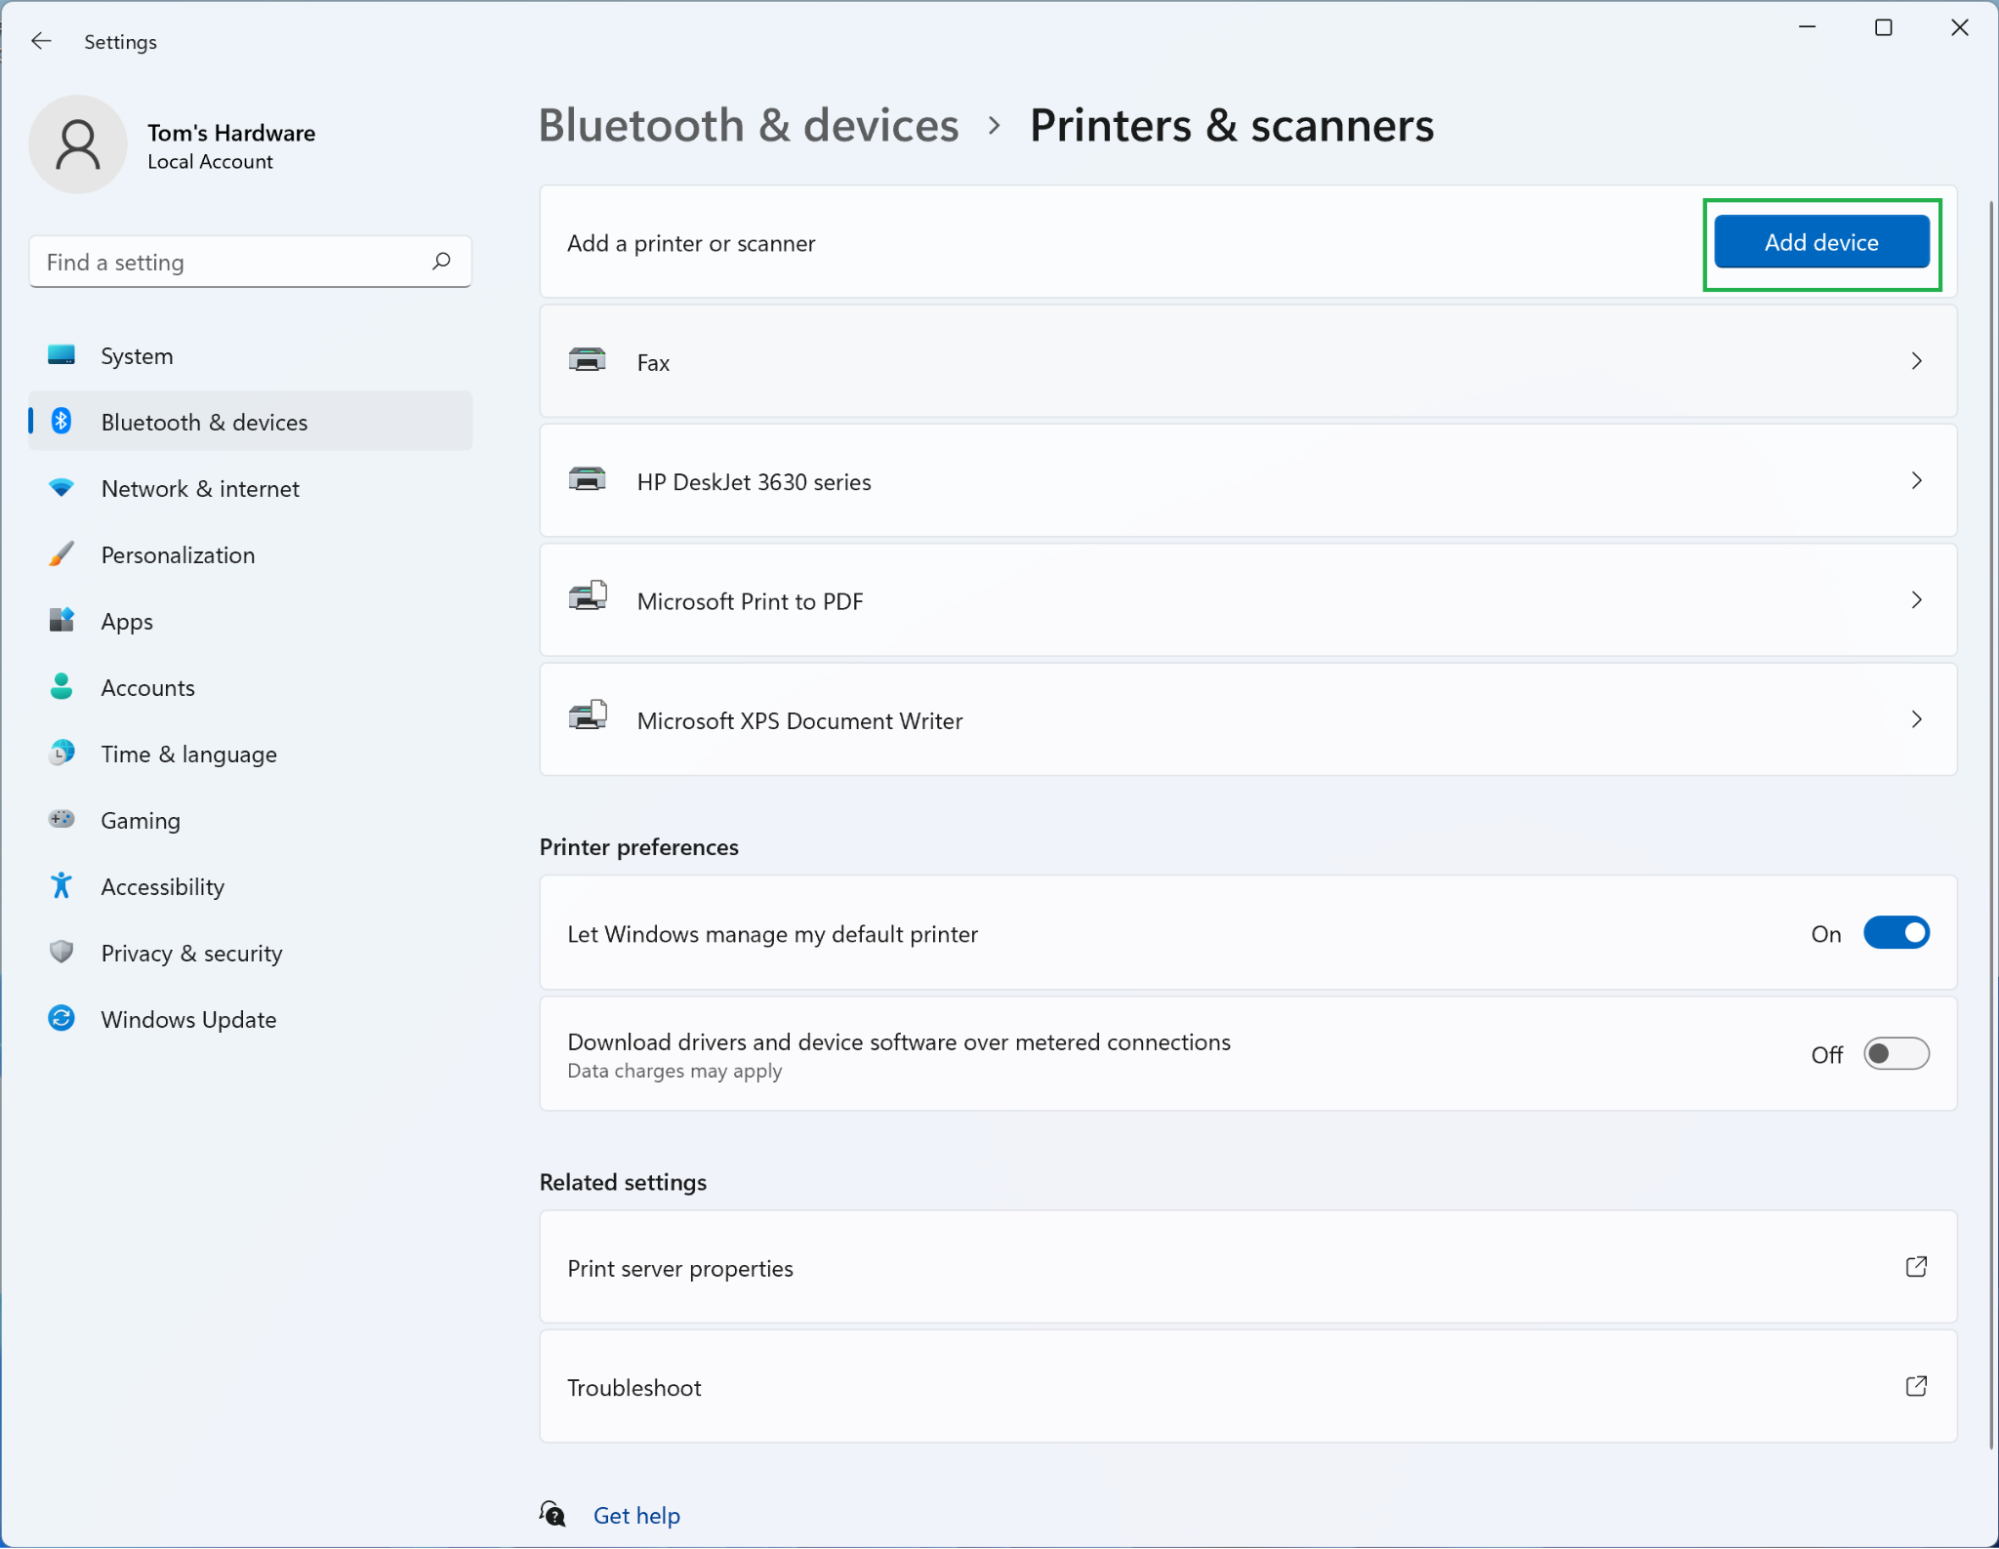
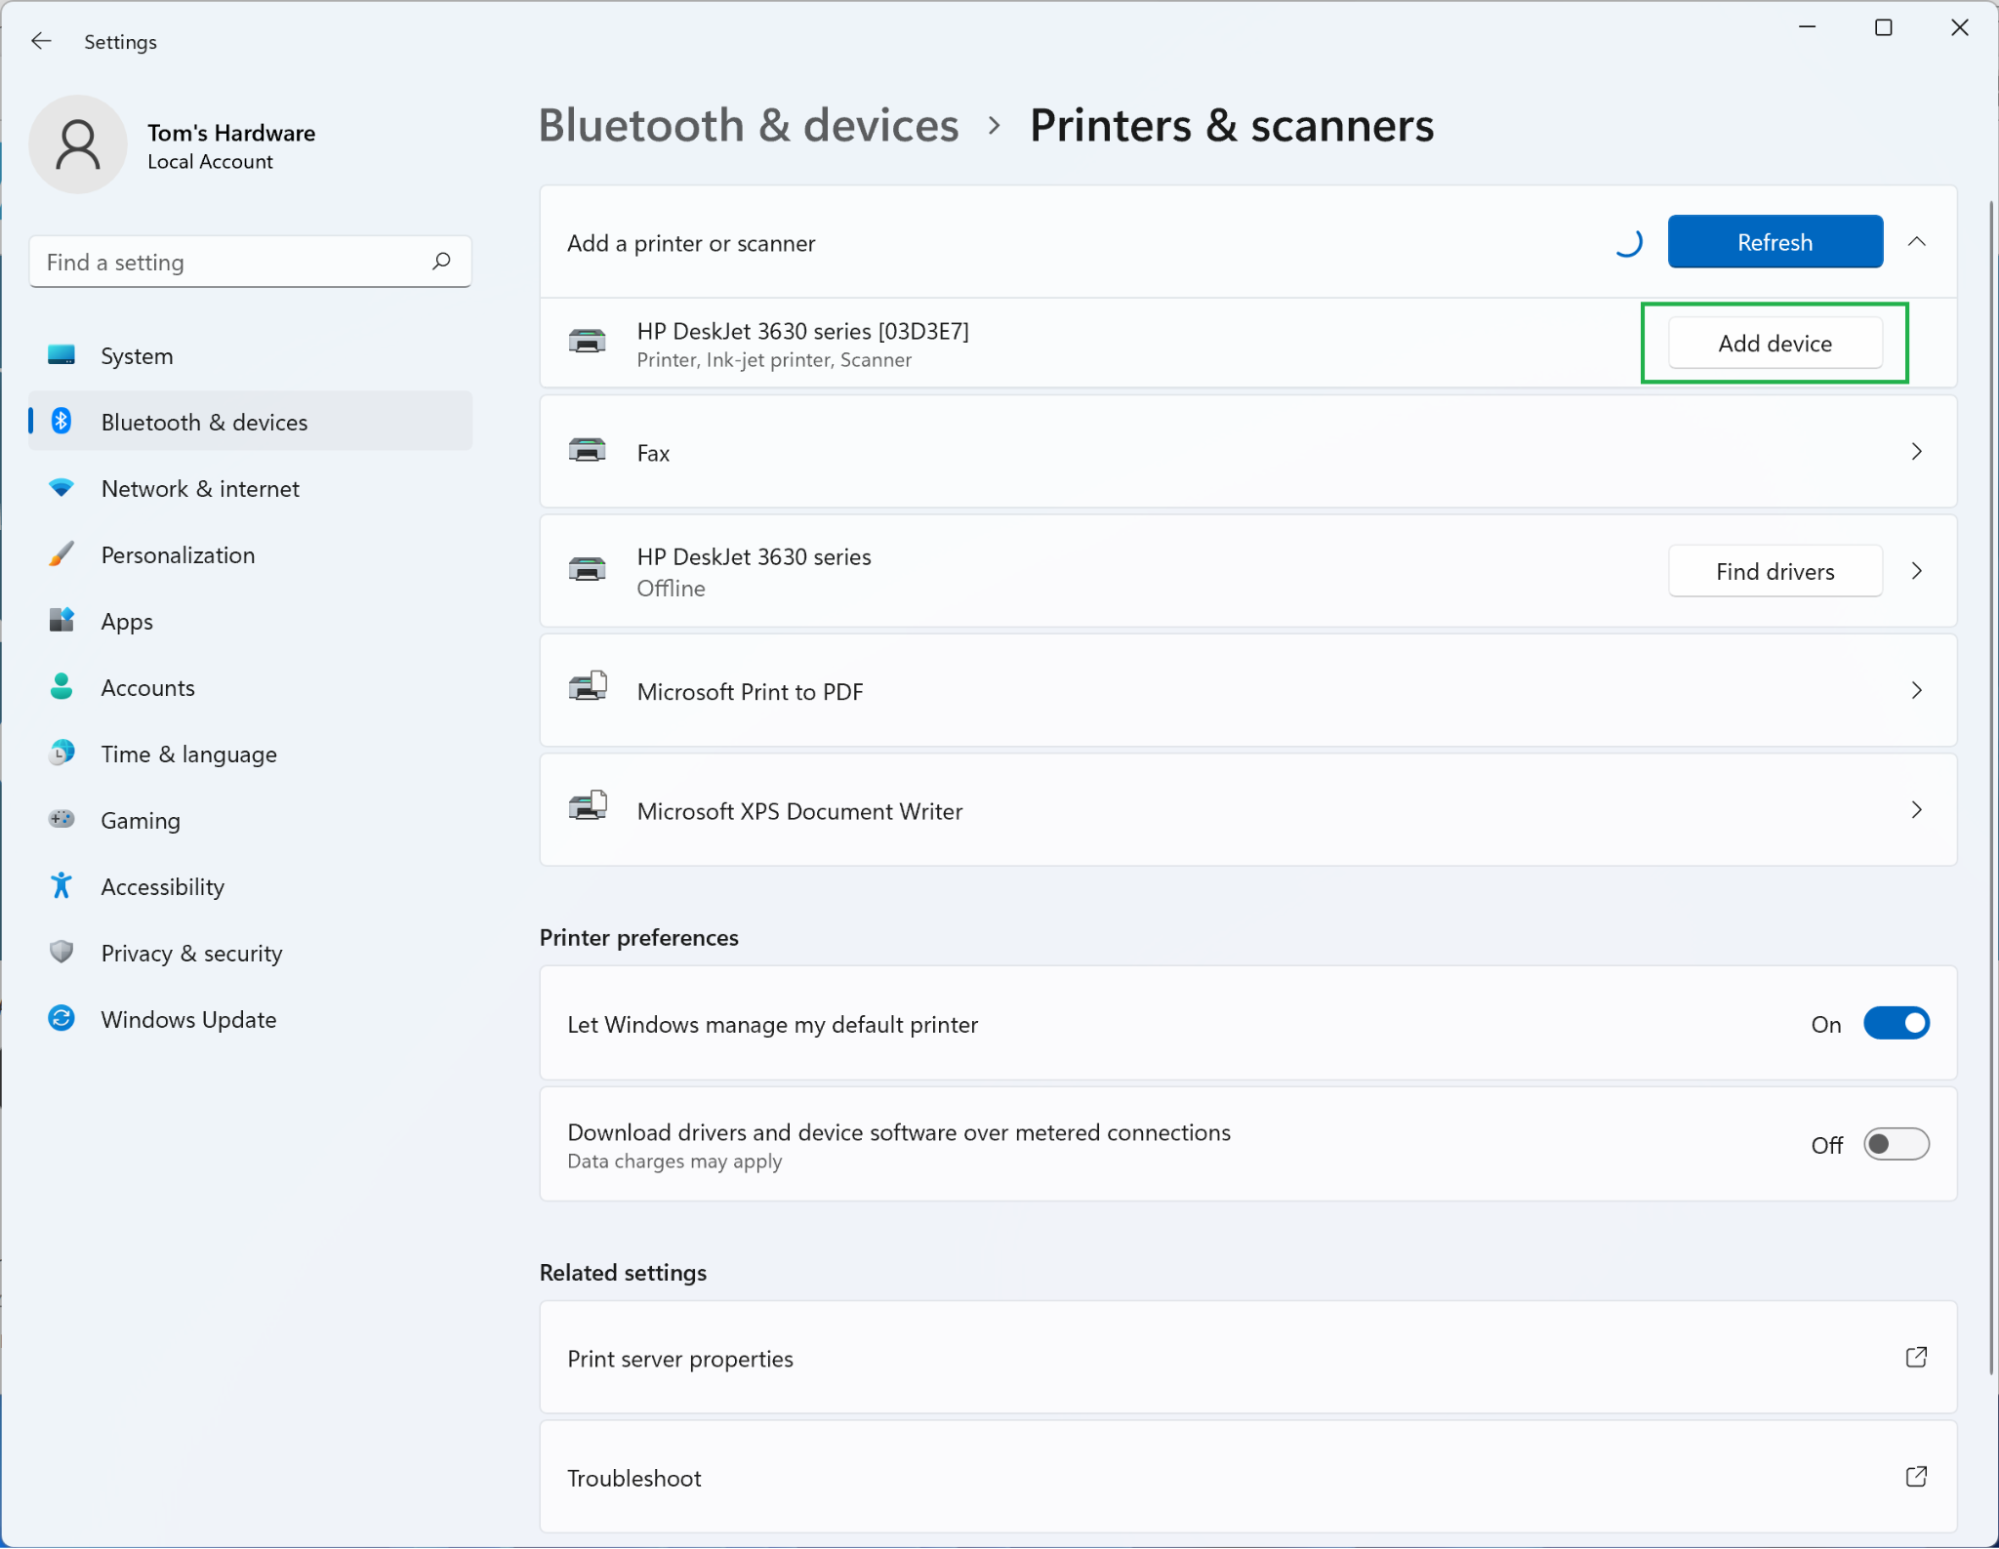
2. Click ‘Add device’ from the ‘Printers & scanners’ page in Settings. This button should appear directly above the list of currently available printers, scanners, and fax machines. Clicking it will make a progress indicator and drop-down menu appear.
3. Click the ‘Add device’ button next to your printer’s name. The original “Add device” button you clicked to discover this printer should be replaced by a “Refresh” button. If your printer was found (and it should be if you’re on the same network) you can now click the new “Add device” button that appears next to it in the list of discovered devices.
4. Enter a password, PIN, or other authentication method if prompted. Some printers will require authentication before they’ll connect to devices on the same Wi-Fi network. The default information usually appears somewhere on the printer’s box, case, or a test sheet printed when it’s first set up. In our case we weren’t prompted for anything.
5. Confirm your printer has been added. It should now appear in the list of devices on the “Printers & scanners” page in Settings. Our particular model uses different names for printing via wired or wireless connections so it’s easy to distinguish between the two.
Now your printer should be available as a print destination as long as both devices are connected to the same network. Windows 11 can also detect if a manufacturer has made a management app available via the Microsoft Store, and if it has, it will say “App available for this device” and show a button leading to the right page in the marketplace.
How to add a printer in Windows 11 via Wi-Fi Direct… potentially
Not all printers have to be connected to an existing Wi-Fi network to enable wireless printing via the protocol. Many also support Wi-Fi Direct, which enables peer-to-peer connections between devices, and this option can be useful if you don’t want to have a printer available to everyone on a network but don’t feel like configuring it to prevent that kind of accessibility.
1. Enable Wi-Fi Direct pairing on your printer. Again, this is the kind of thing that varies from manufacturer to manufacturer and model to model, so you’ll have to refer to your user manual. But this is often a distinct option (and button) from general Wi-Fi access.
2. Click ‘Add device’ from the ‘Printers & scanners’ page in Settings. This step is the same as when we connected via an existing Wi-Fi network, but we’re looking for something new.
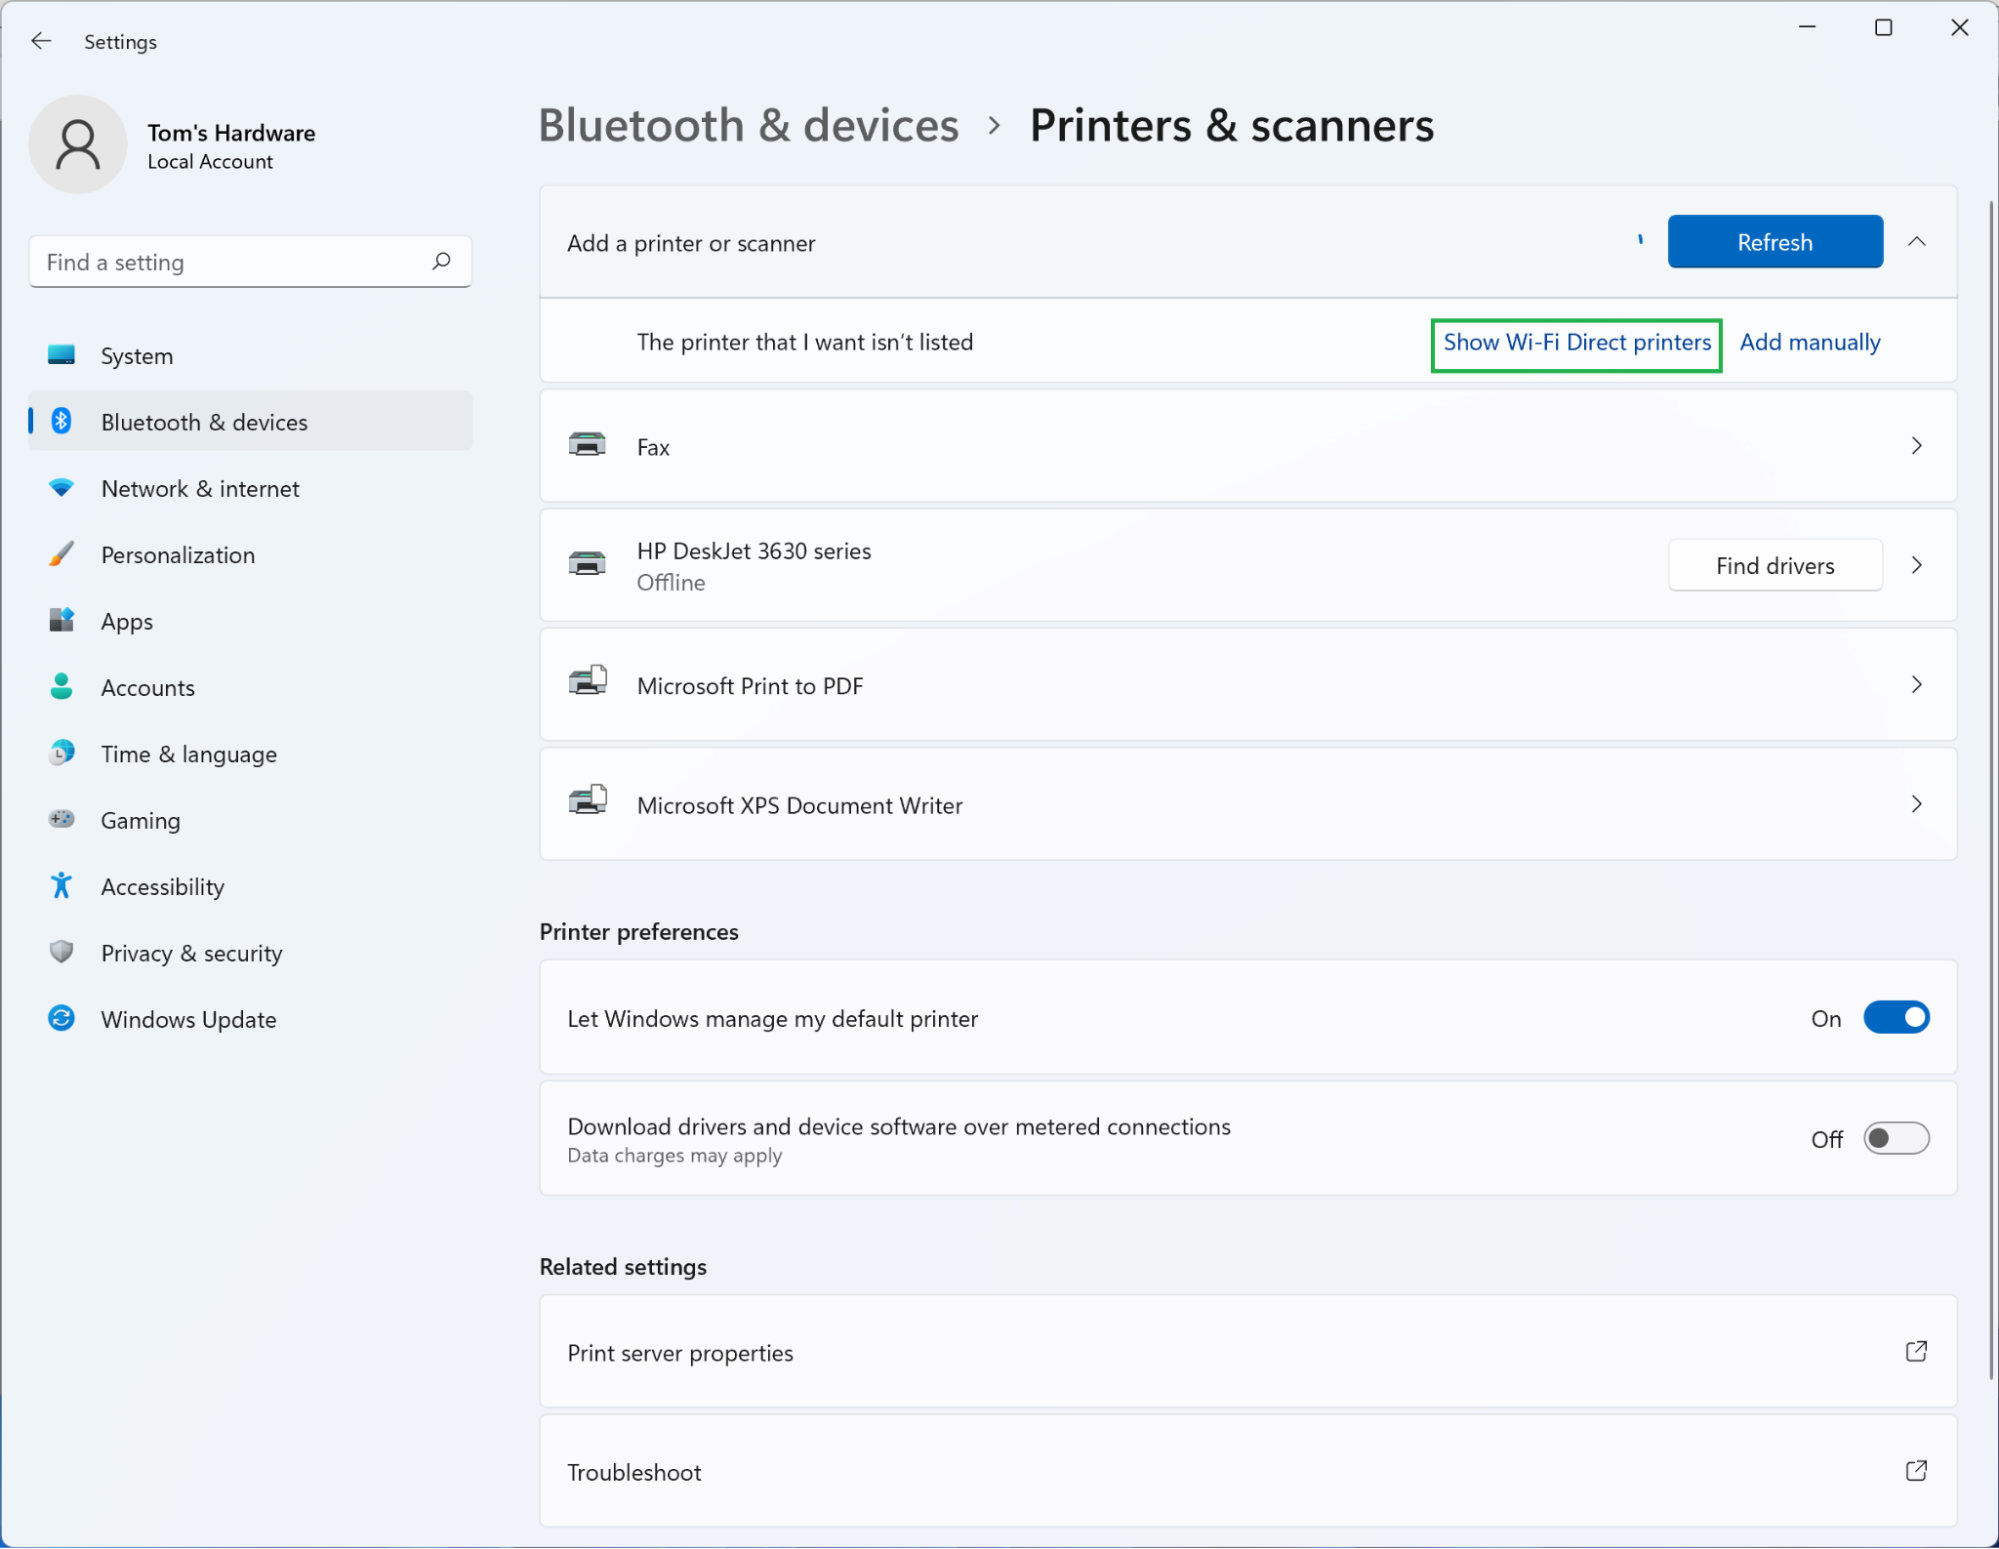
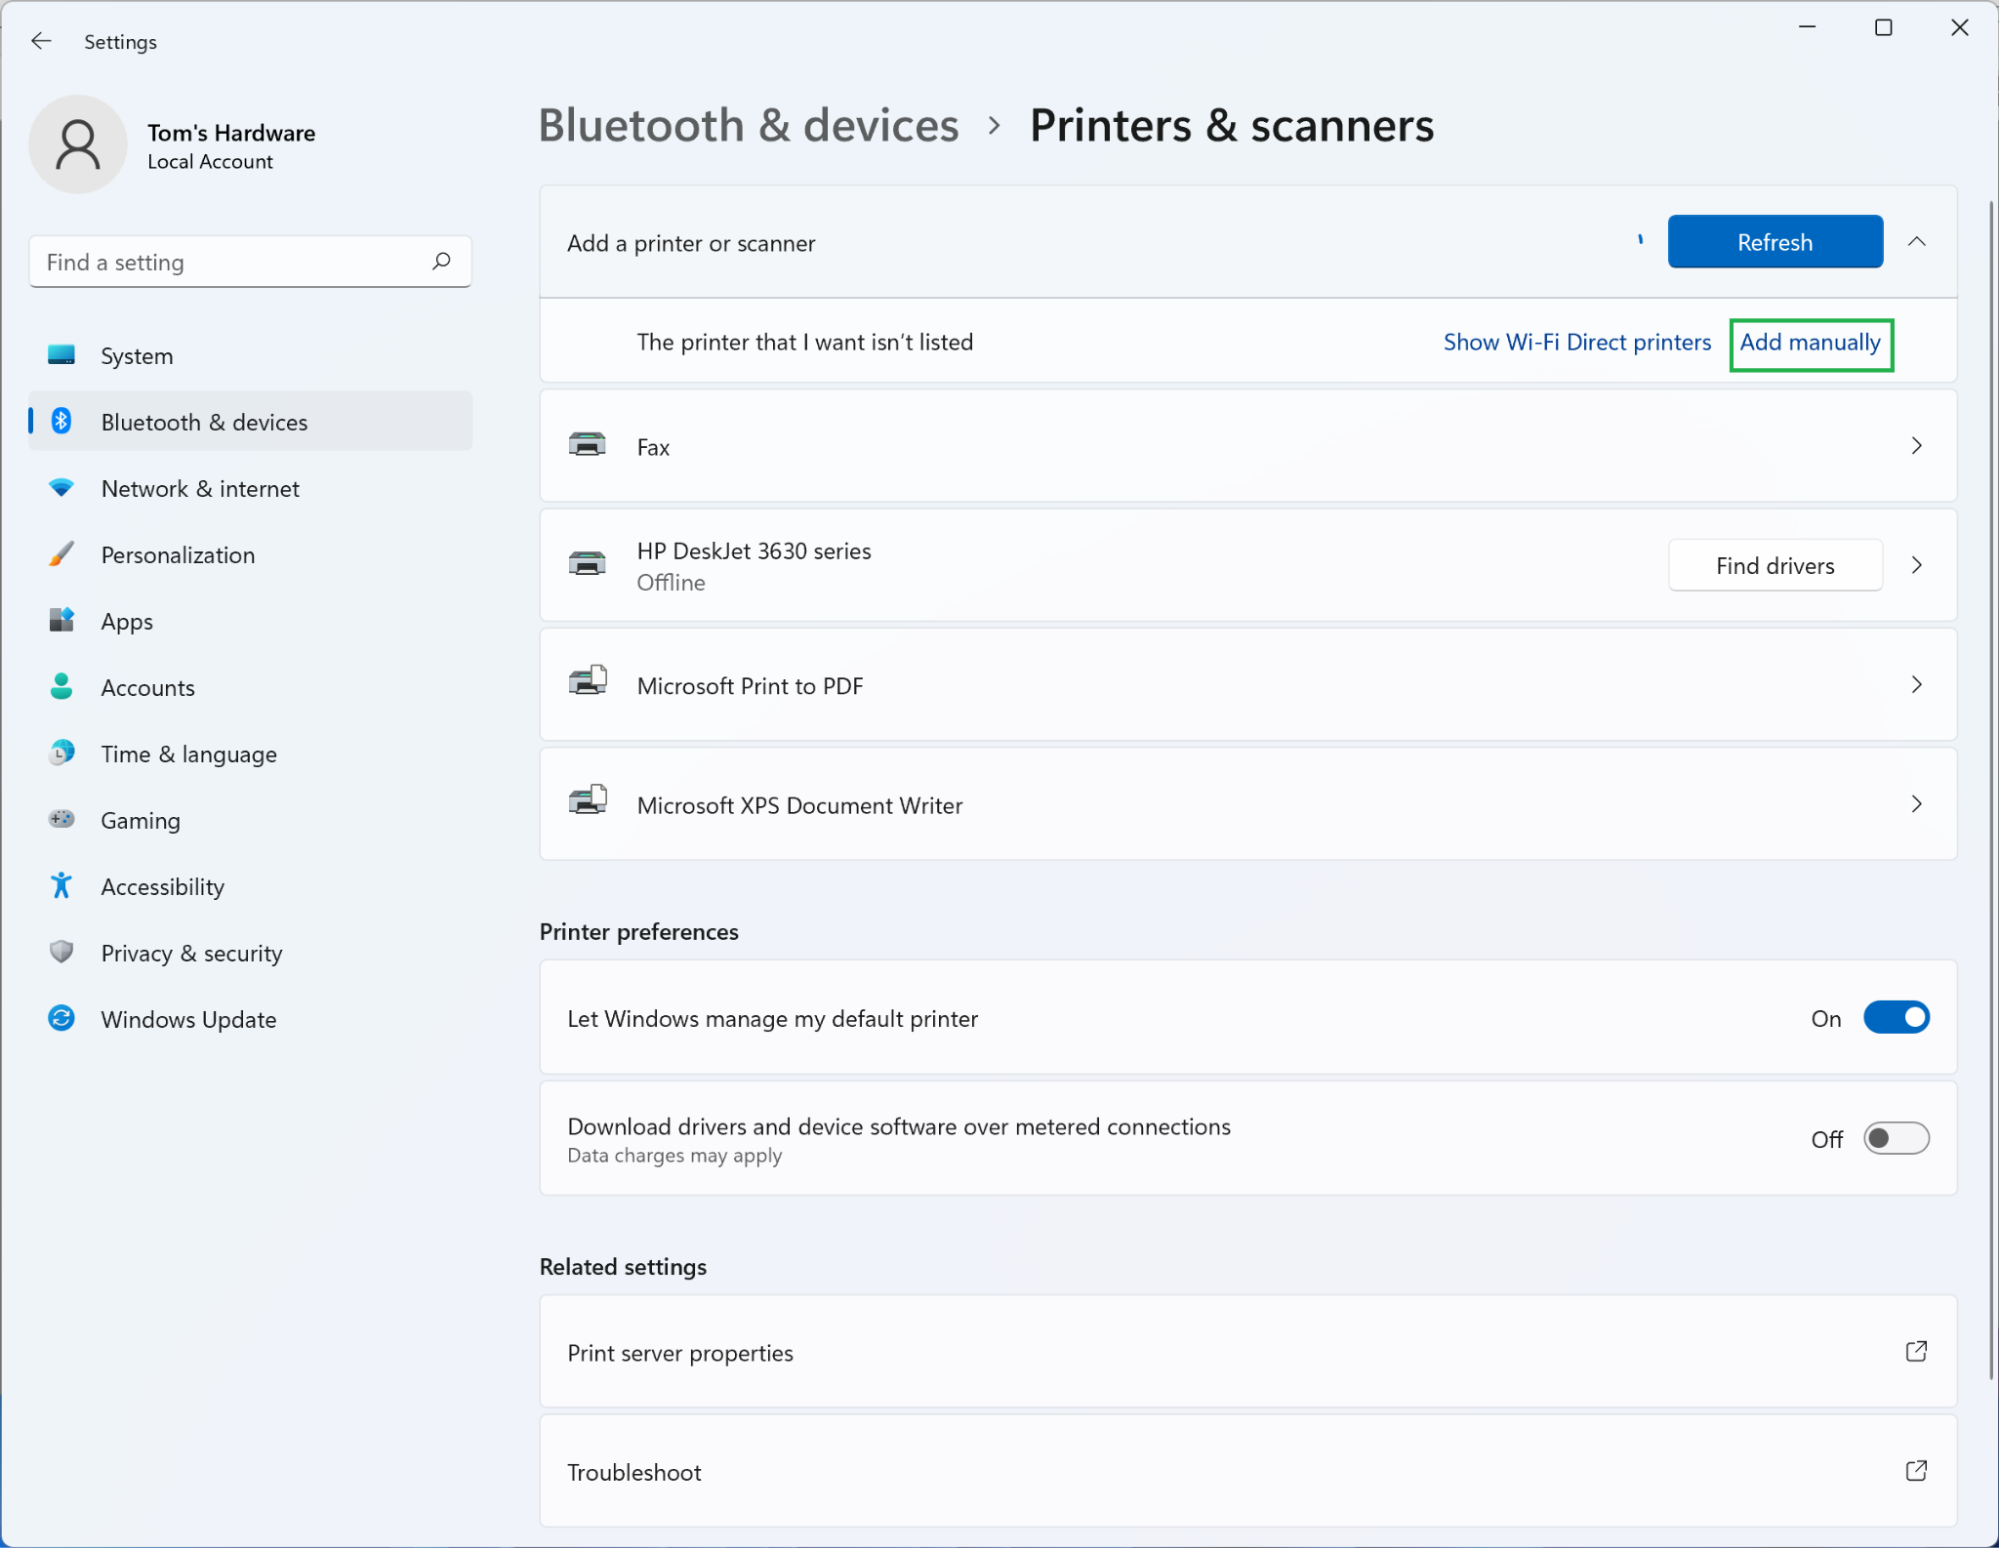
3. Click ‘Show Wi-Fi Direct printers’ in the drop-down menu. This option only appears if there are Wi-Fi Direct printers available; otherwise there’s only an “Add manually” button. To learn about that, skip to step 7.
4. Click ‘Add device’ next to your printer.
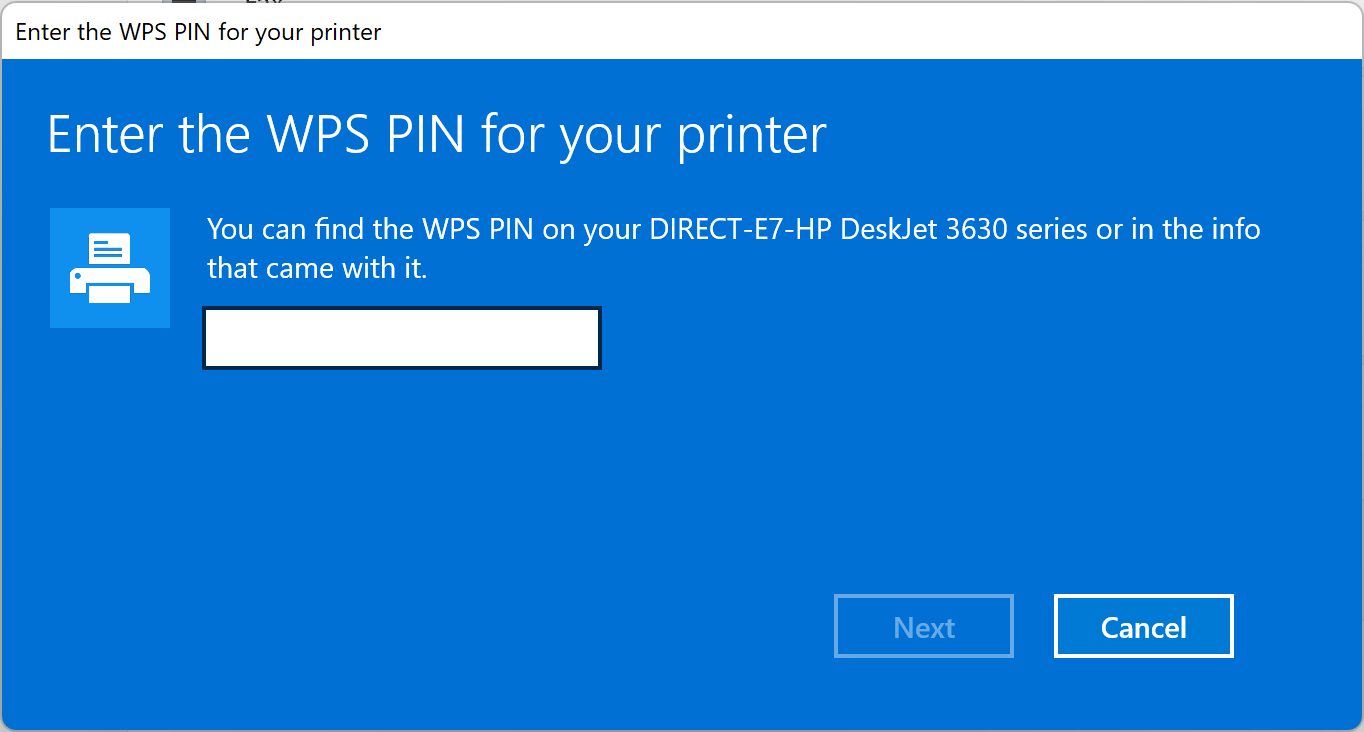
5. Enter any requested credentials. In our case a window appeared asking for a WPS PIN. You’ll have to find yours somewhere on the printer, its packaging, or potentially the test sheet we mentioned before. Once you have it, enter it.
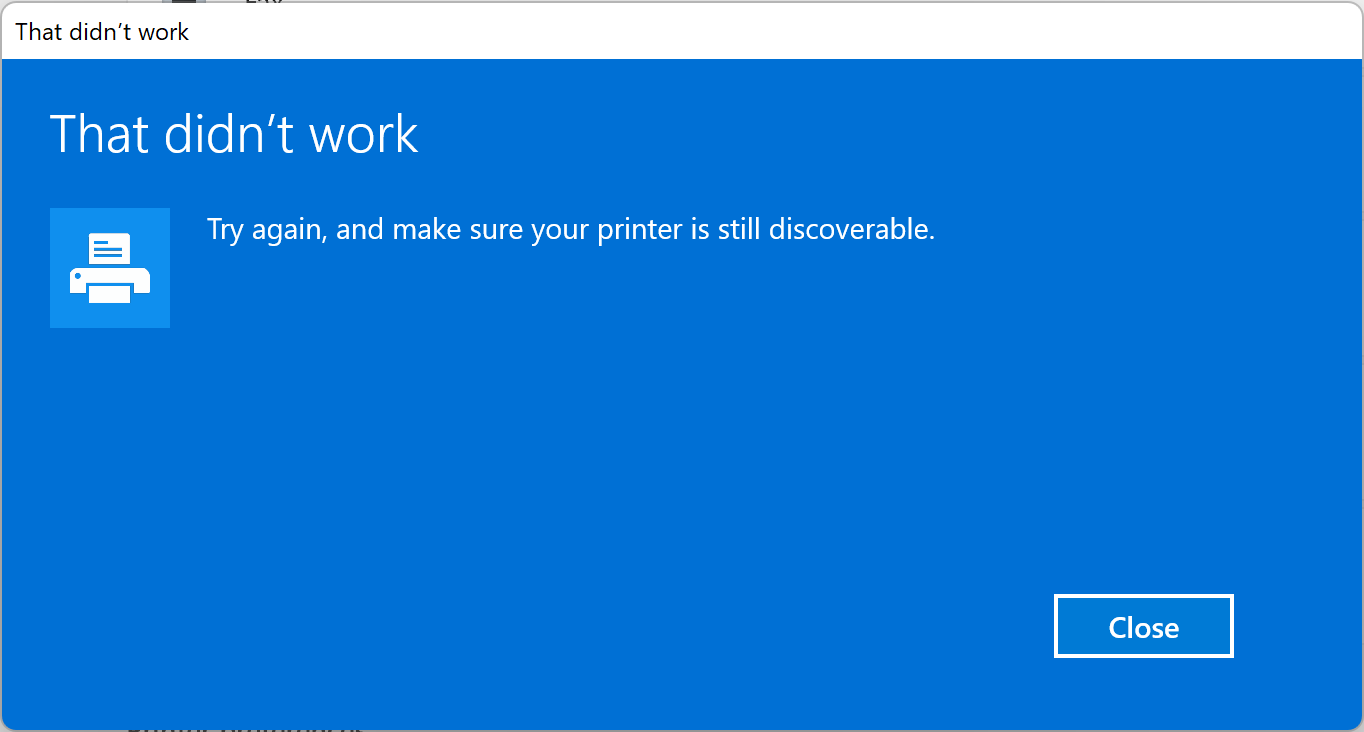
6. Rejoice or keep going to the next step. Ah, printers. Maybe it’s a problem with our hardware, perhaps it’s a pre-release bug in Windows 11, but entering the correct WPS PIN still prompted Windows to display the error message shown below. But we don’t have to reach for a bat yet—this is where the manual option comes in.
7. Click the ‘Add manually’ button from the drop-down menu. You know the whole “two roads diverged in the woods…” line? We’re going to pick the other one. Follow the first two steps in this section and then click the “Add manually” button.
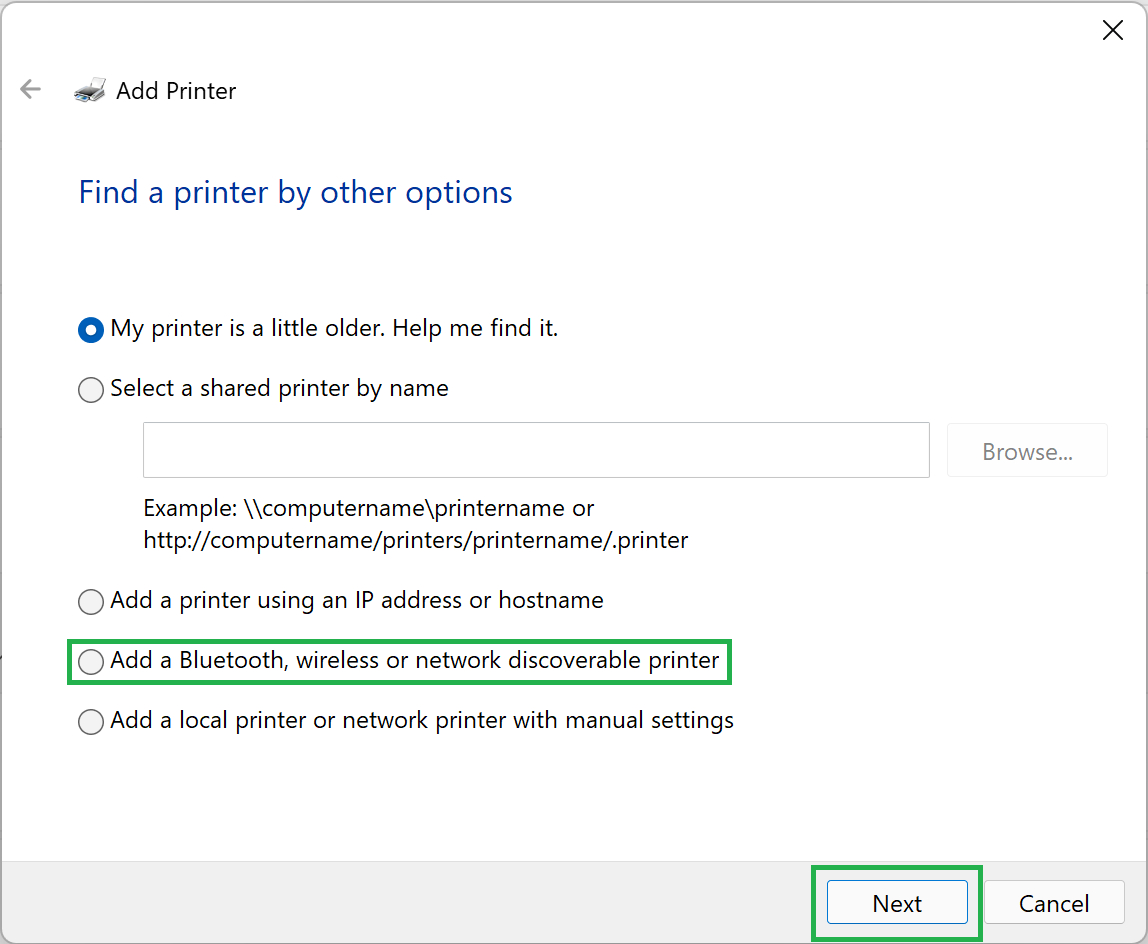
8. Select ‘Add a Bluetooth, wireless or network discoverable printer’ and then click the ‘Next’ button. There are a variety of options presented here, but we’re interested in this one, so select it and then hit “Next” to move forward.
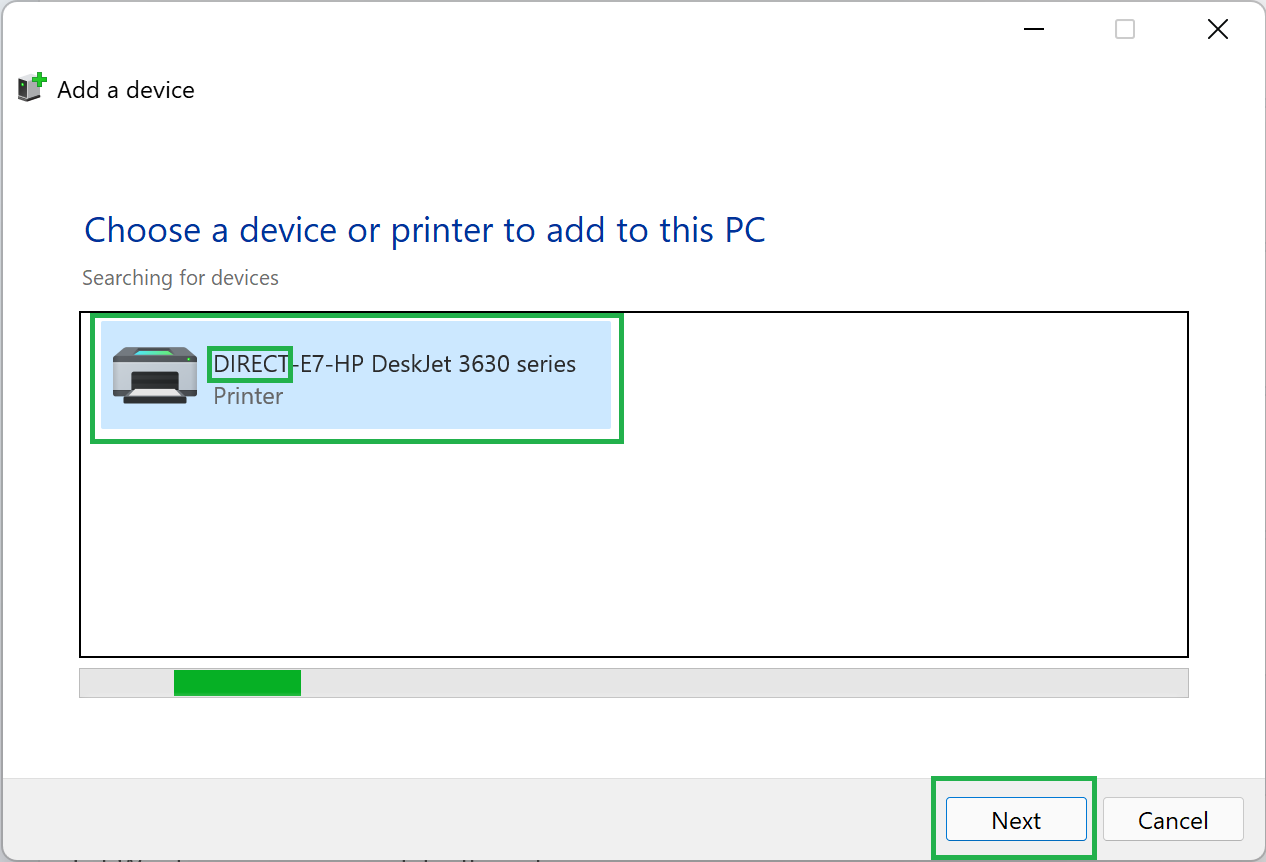
9. Select your printer. A window called “Add a device” should appear with a progress bar and the results of its search for available devices. If your printer is listed, select it and then click the “Next” button. (Note that in our example it specifically lists DIRECT-E7-HP DeskJet 3630 Series, which is going to be relevant soon.)
10. Rejoice or accept your fate.
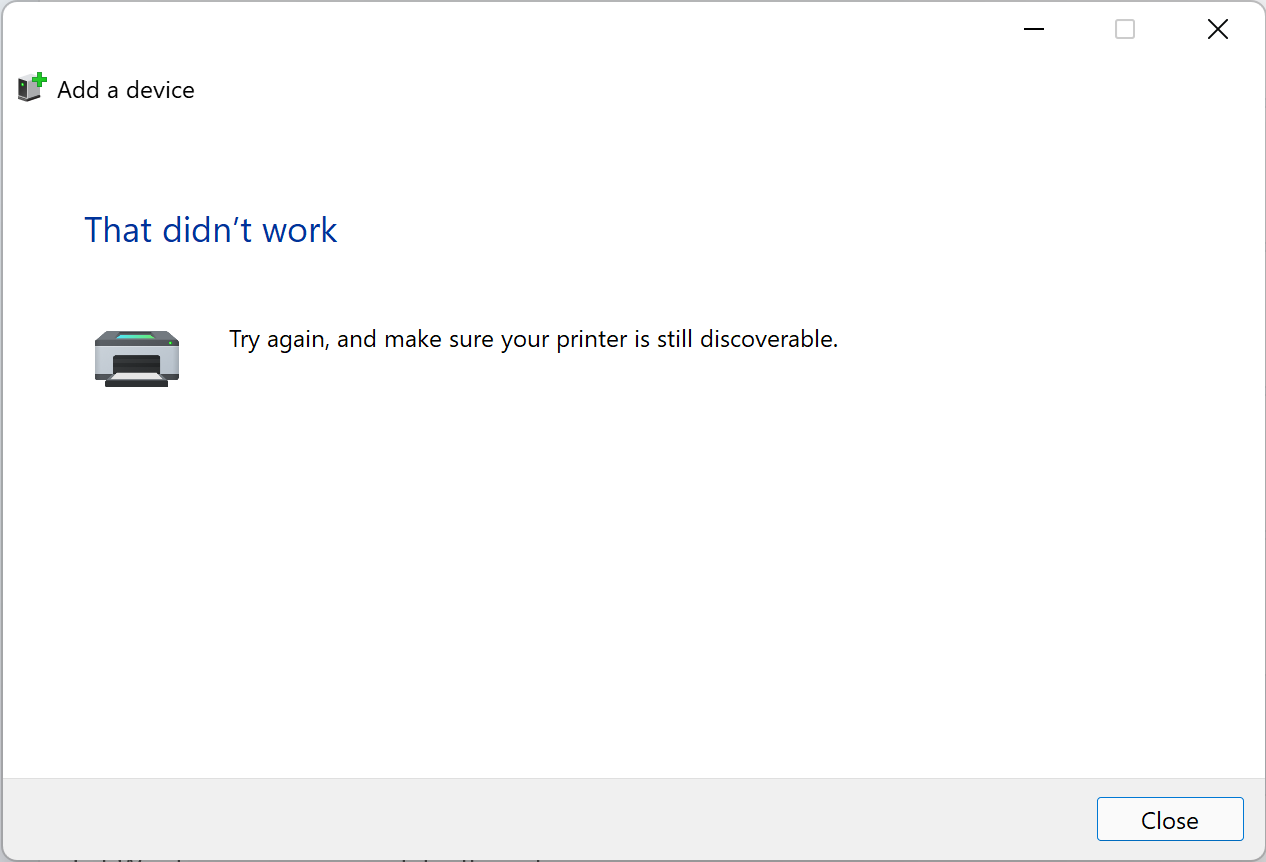
We tried this process multiple times after removing the non-direct Wi-Fi-connected iteration of our printer. The first time we were greeted by a notification that Windows was installing necessary files, and it appeared the installation was successful, but DIRECT-E7-HP DeskJet 3630 Series wasn’t listed. Its non-direct counterpart was. Here are those screenshots:
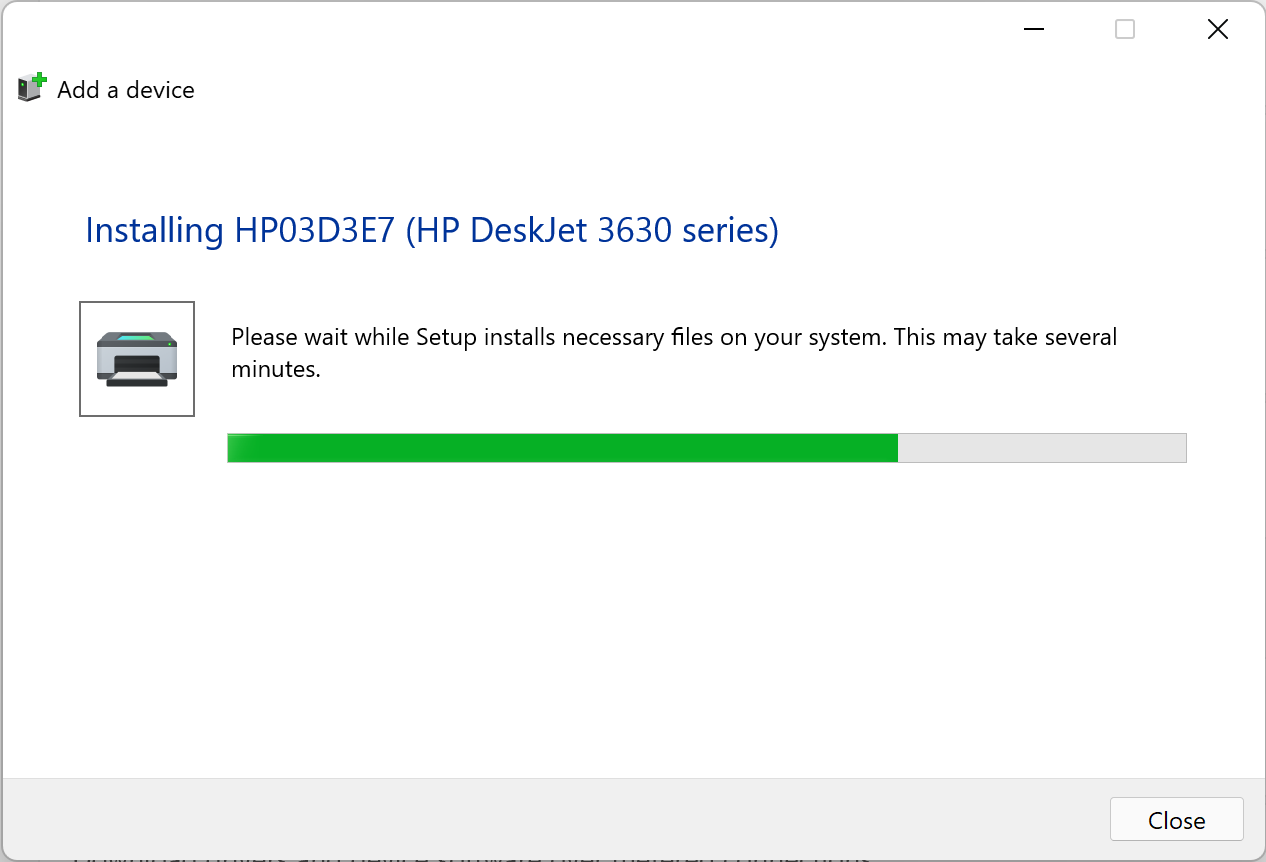
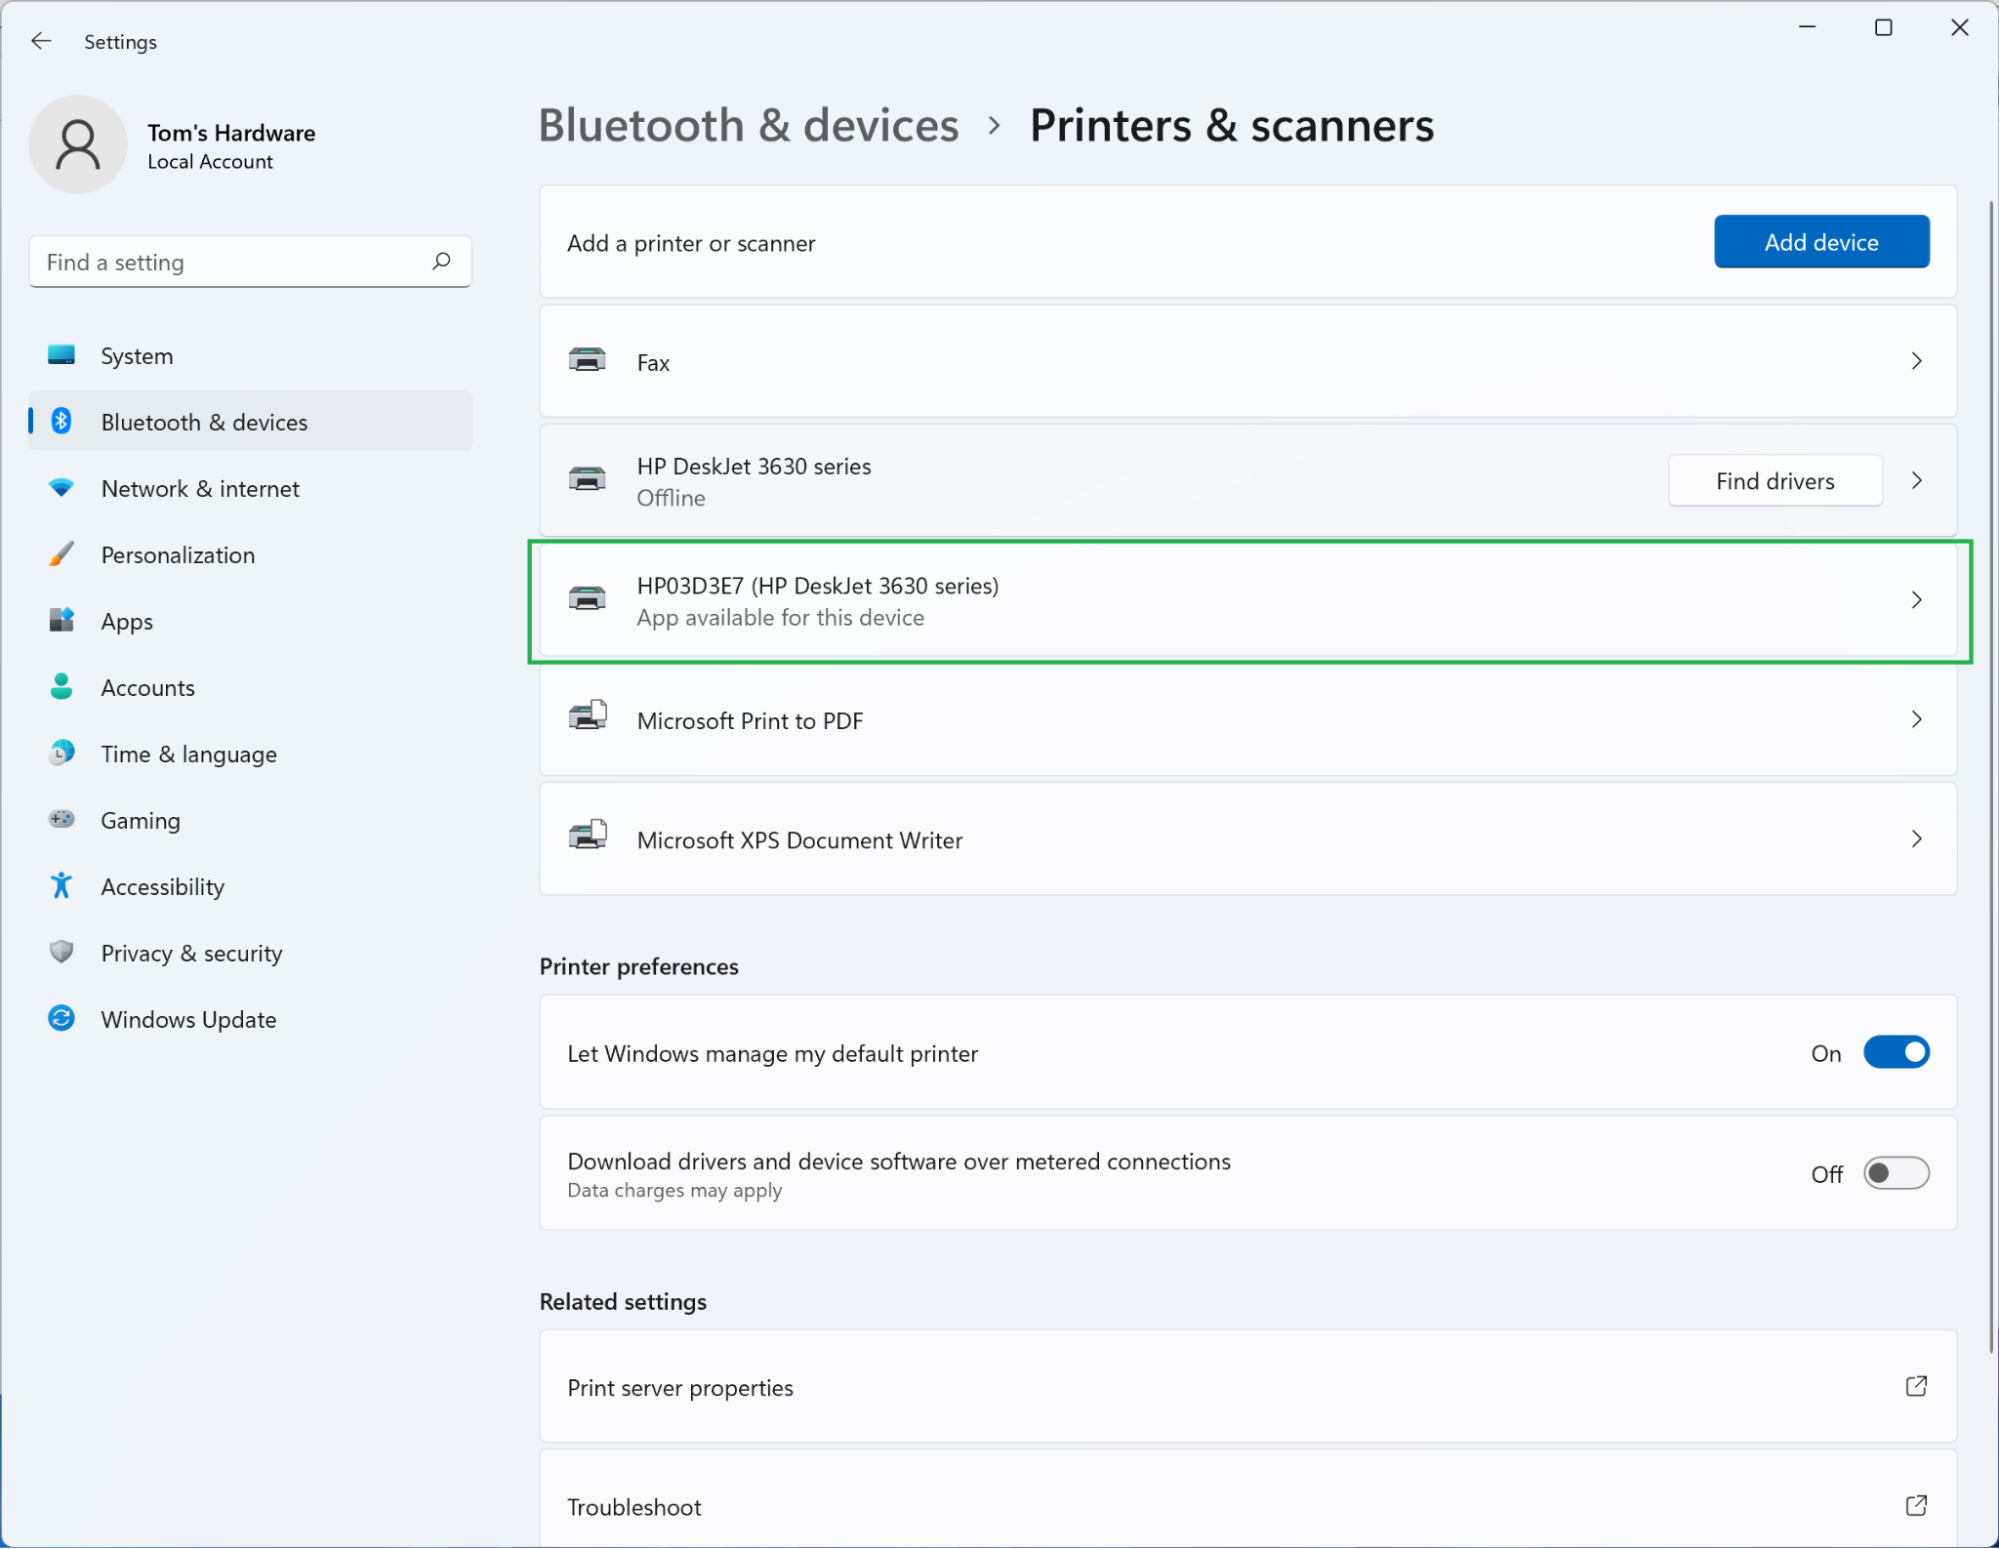
And the result of our second attempt:
Again, this could be a hardware problem, but it seems that adding a Wi-Fi Direct printer is hit or miss. (And yes, we modified various settings, power cycled both devices, double-checked our info, etc. before we ascribed these issues to anything other than user error.) Hopefully it works better for you. Otherwise, using the regular Wi-Fi option is preferable.
More Windows 11 Tutorials:

Nathaniel Mott is a freelance news and features writer for Tom's Hardware US, covering breaking news, security, and the silliest aspects of the tech industry.
-
bigdragon Anyone else get this ambiguous "driver unavailable" error with regards to Windows printers? Adding a network printer seems to be no big deal. Keeping it connected after a few weeks is an issue. A static IP address doesn't fix the problem. Removing and re-adding the printer works. Maybe it's just an Epson problem.Reply -
LuckiDog Getting that with a canon right now. I can only print when I join the computer to the DIRECT network, but of course I can't do anything else from there.Reply
