How To Check Your Disk Usage in Linux
Monitoring your disks is just a command away

Get Tom's Hardware's best news and in-depth reviews, straight to your inbox.
You are now subscribed
Your newsletter sign-up was successful
No matter how high-capacity your storage drive is, you always need to see how much space you have used and what files are using it. While there are ways to do this from the GUI in Linux, as always, you get more detail by using the terminal command line. Terminal tools are especially useful for users who are monitoring remote systems, for example busy system administrators connecting over a secure shell connection. In this tutorial, we’ll look at various ways of using the terminal to check disk usage enabling us to see what storage space is left on our system no matter where we may be.
All the commands in this how-to will work on most Linux machines. We’ve used an Ubuntu LTS install but you could run this how-to on a Raspberry Pi. All of the how-to is performed via the Terminal. You can open a terminal window on most Linux machines by pressing ctrl, alt and t.
Using df to Check Disk Usage in Linux
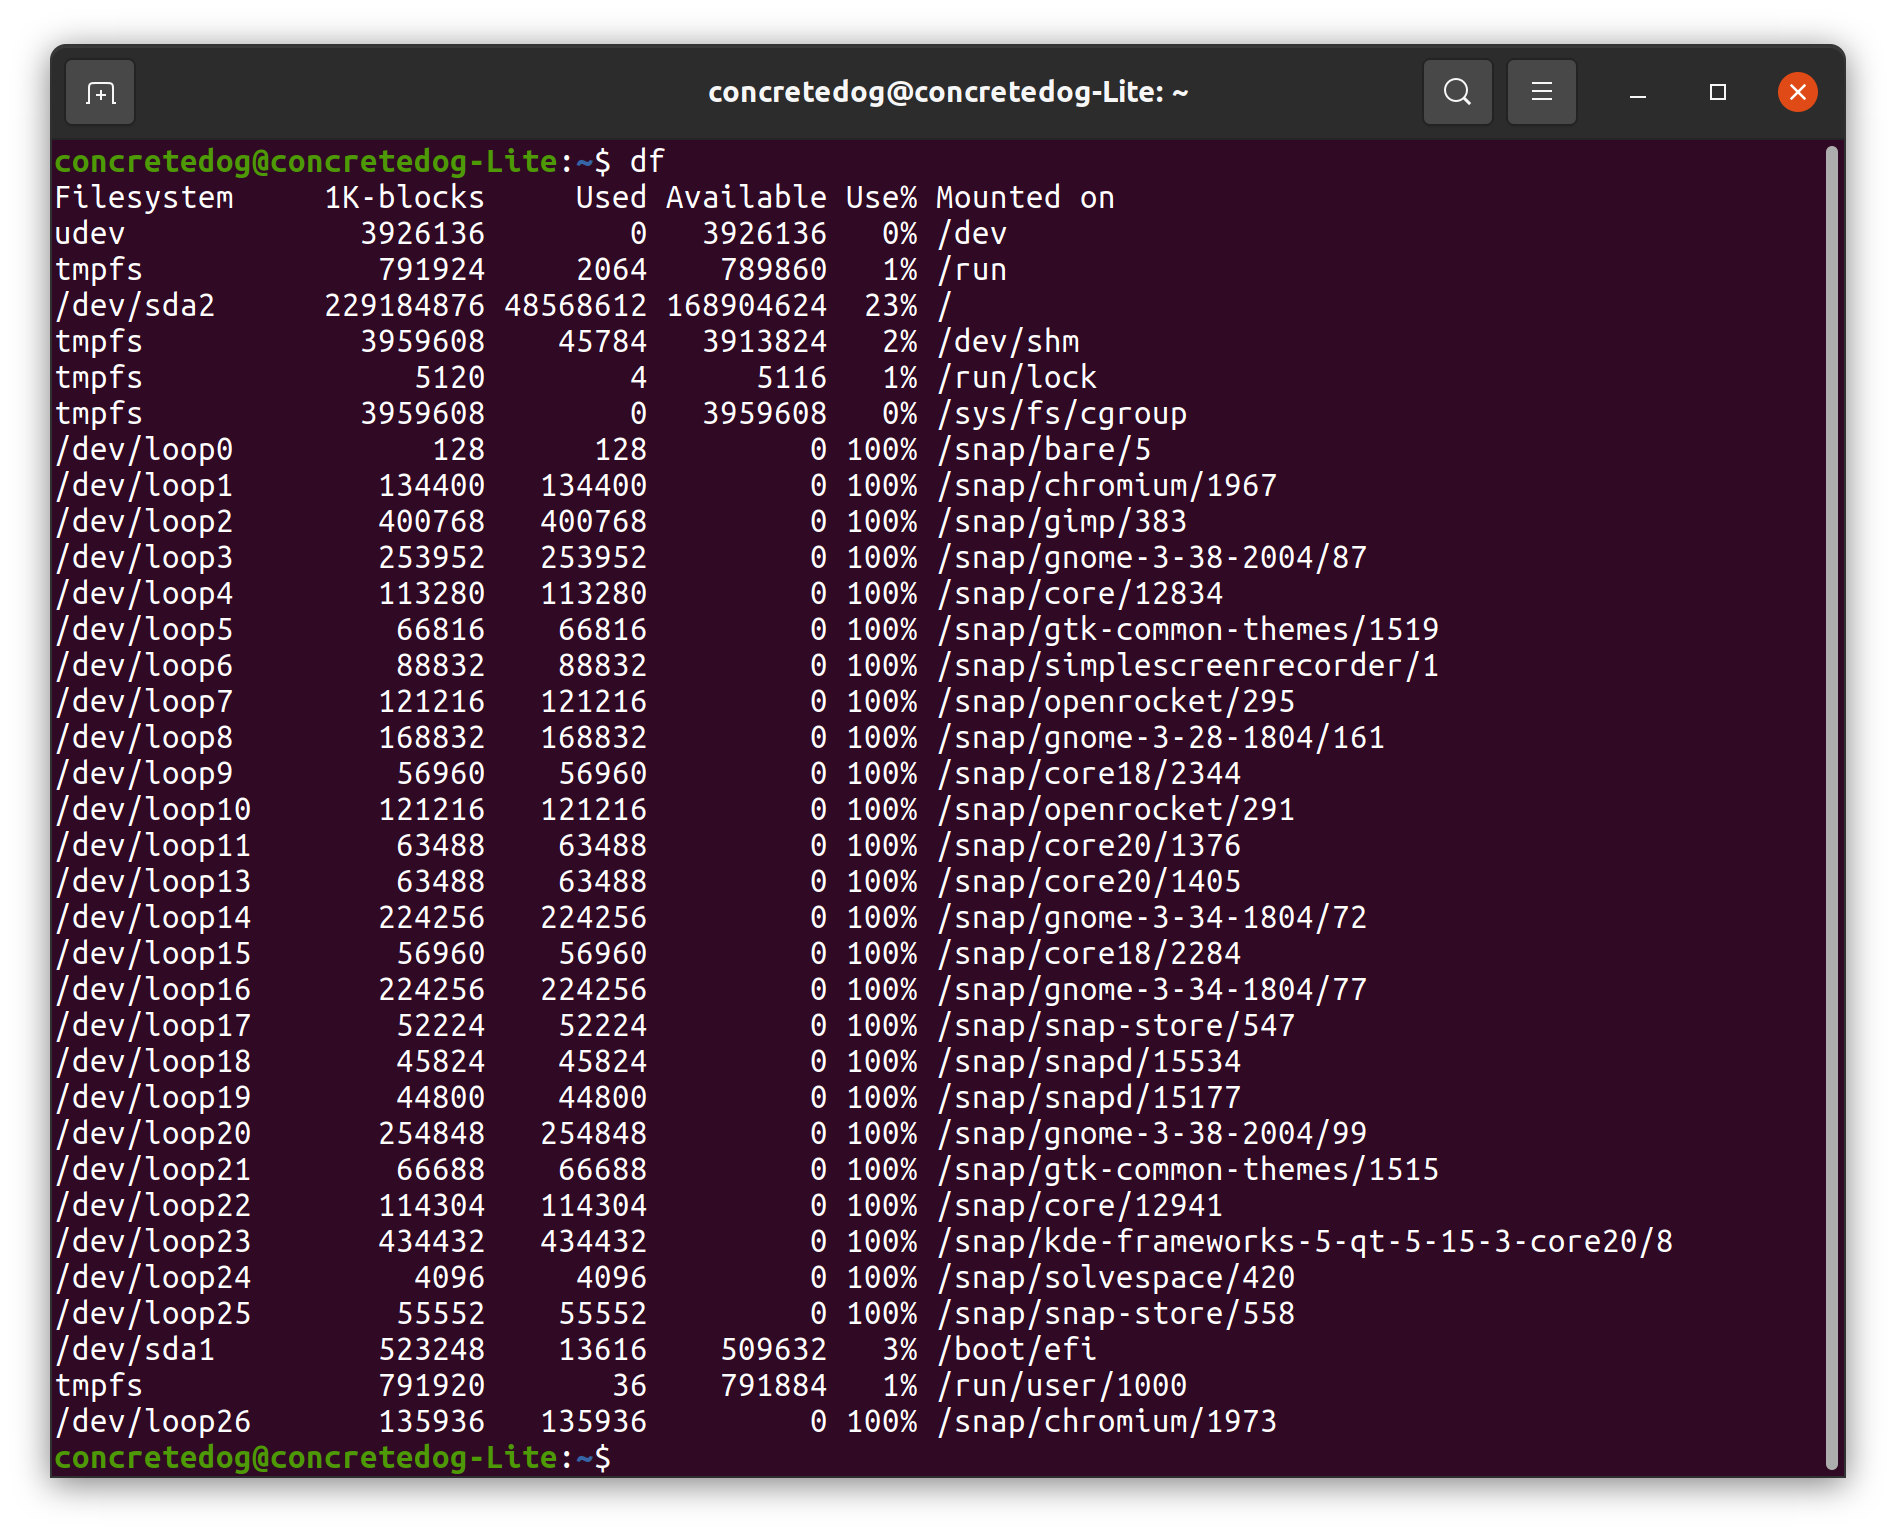
A simple approach to check all disk usage on a system is to simply issue the df command from the home directory in a terminal window.
dfYou should see a long output list. This list of items includes not only the physical best hard drive connected to your system but also any separate drive partitions, as well as virtual drives and temporary drives on your system.
To spot physical drives or partitions on physical drives look out for listings that begin with /dev/ such as /dev/sda1/. In this case dev stands for device and indicates that the item following it is a physical drive or a partition on a physical drive. Finally, you’ll notice that by default the df command outputs the size of the drive or partition in kilobytes.
Making the df Command Simpler to Read

The raw output generated by the df command can be overwhelming. We can add some simple arguments to the df command to make the output a little easier to read and understand.
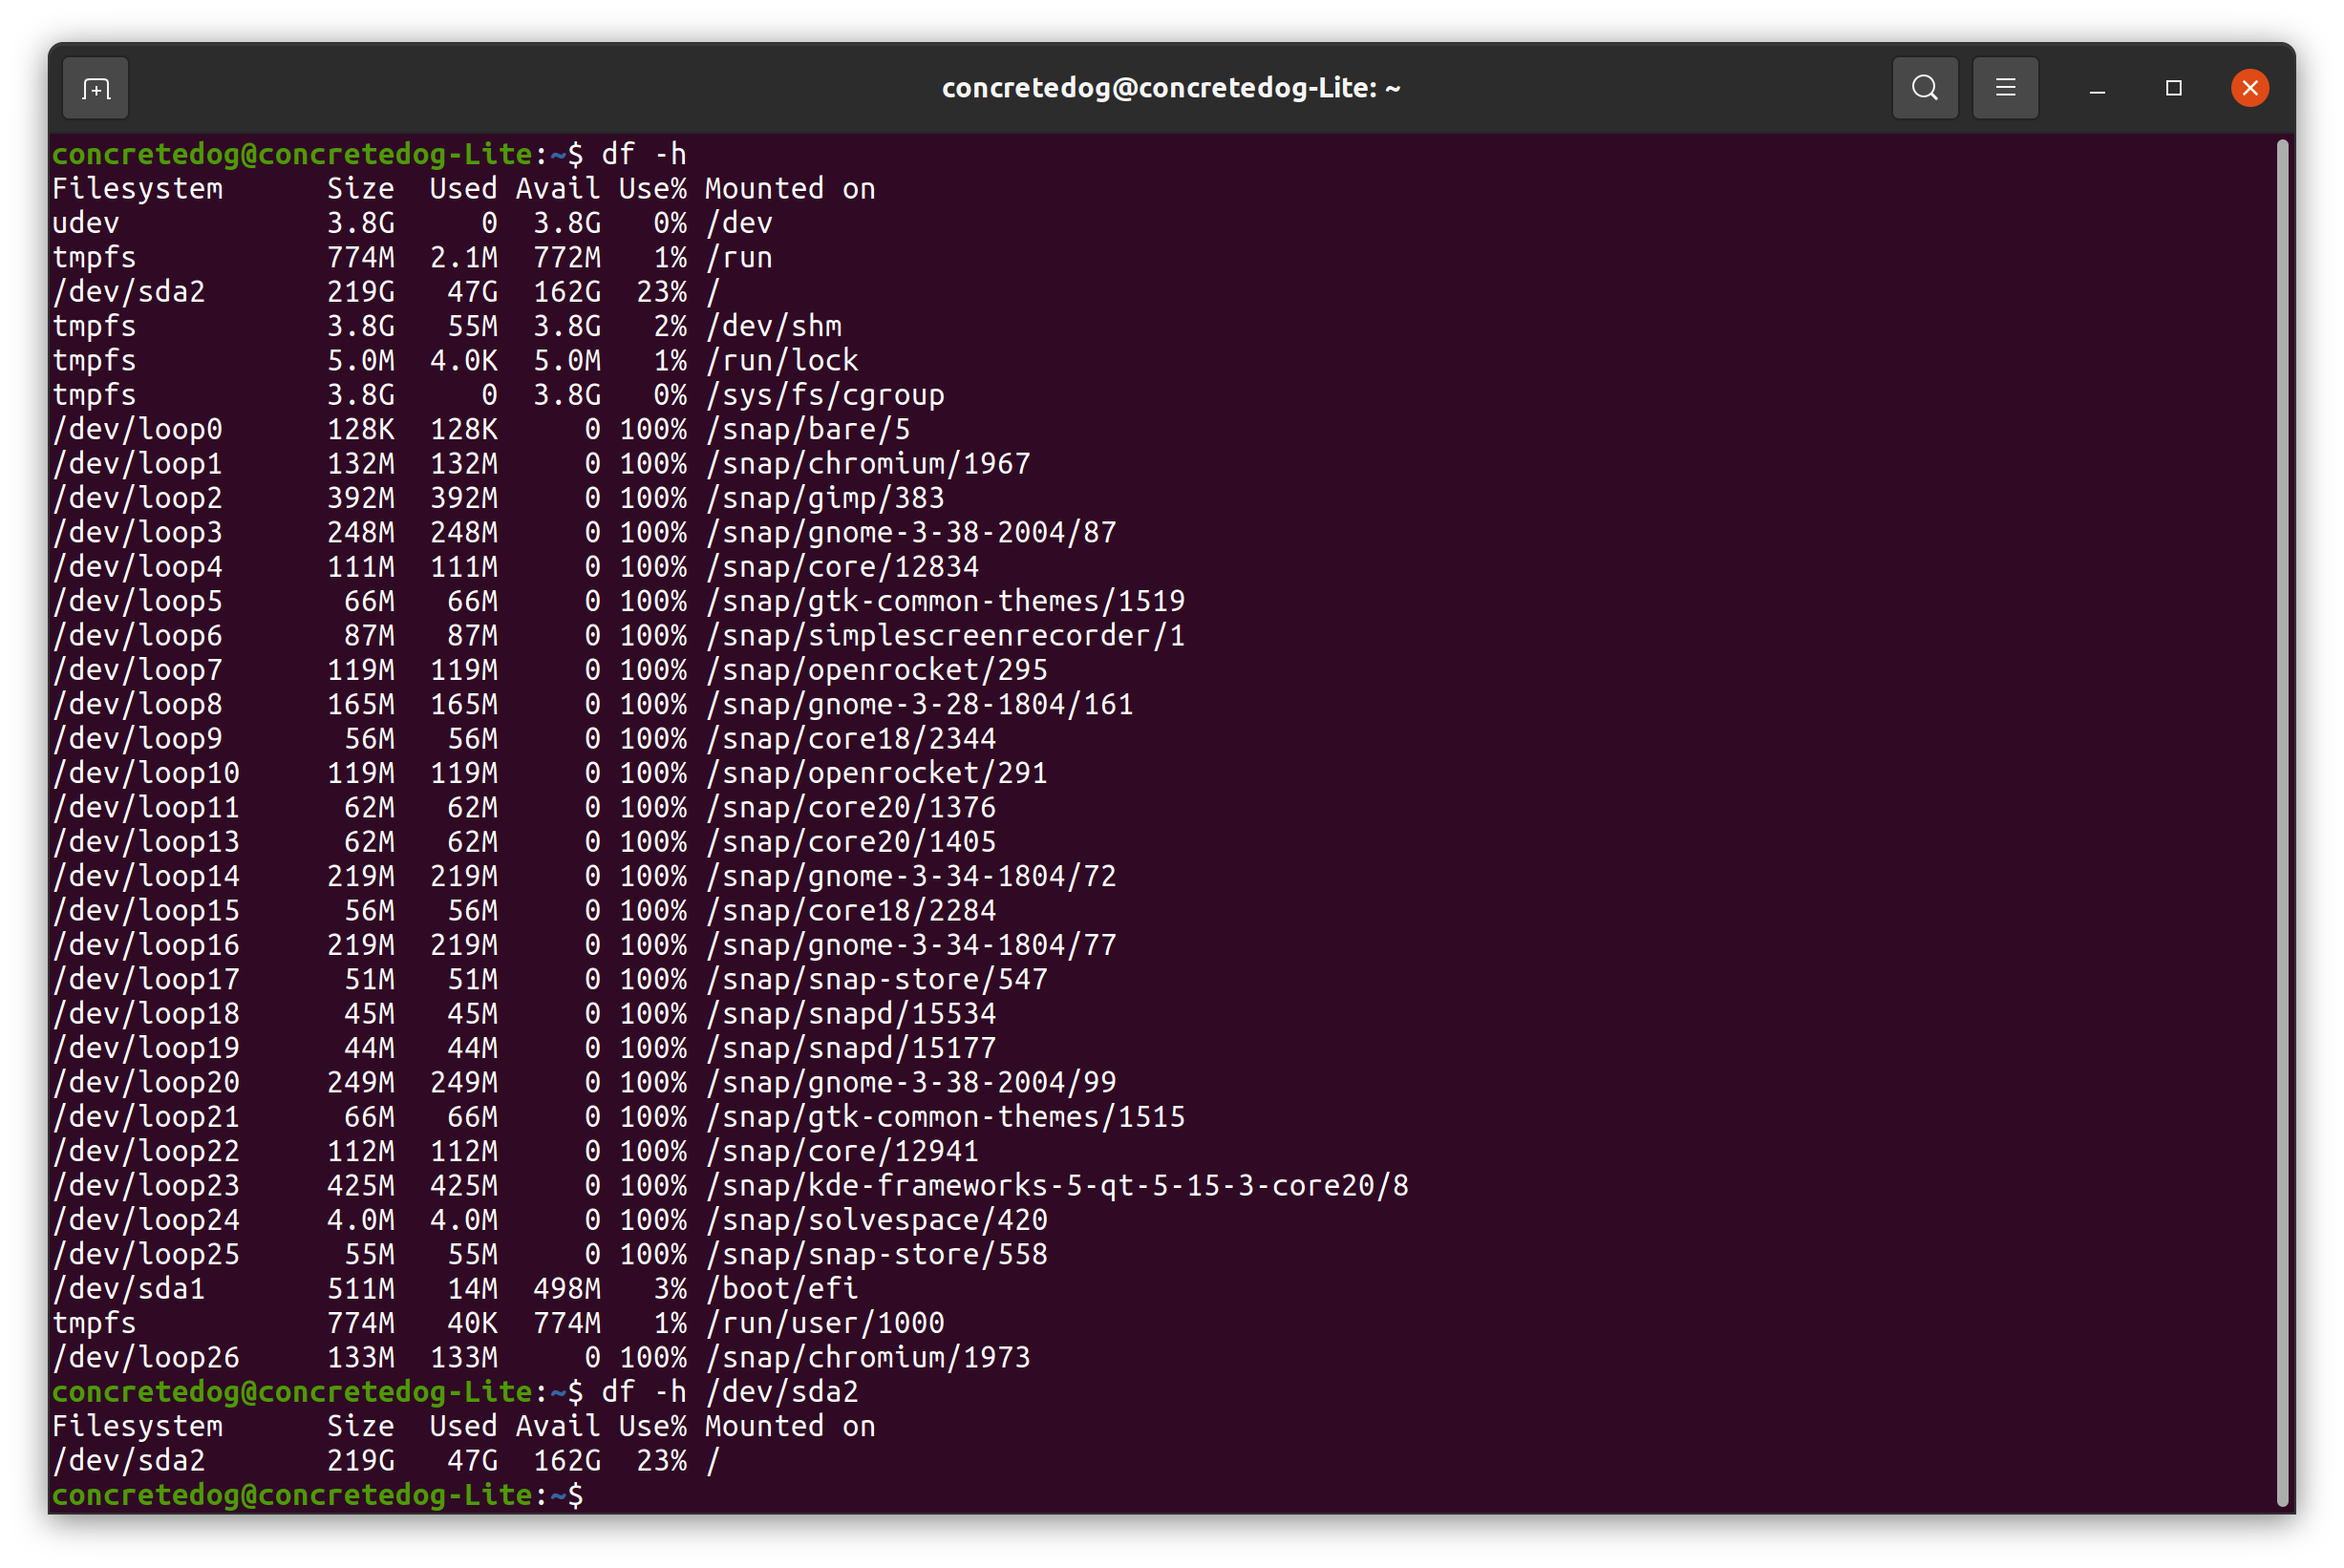
1. Use the -h argument to display the sizes and usage in megabytes and gigabytes. The -h argument refers to “human readable”.
Get Tom's Hardware's best news and in-depth reviews, straight to your inbox.
df -h2. Use df -h / to see a broad overview of disk usage. This command will show the disk usage for the main filesystem (/)
df -h /3. Pass df -h plus the location of a drive to see information on that drive only. On our machine our main physical drive is mounted at /dev/sda2/ which is common but may be different on your system.
df -h /dev/sda2/On another test system our NVMe drive was located at /dev/nvme0n1p6 Adding a location to df allows us to explore just one area of a file system or one specific drive making the output more focussed and readable.
Specify df Results by File System Type
Using the -t argument in combination with other arguments we can return results only for a specific type of file system. For example FAT, NTFS, ext etc.
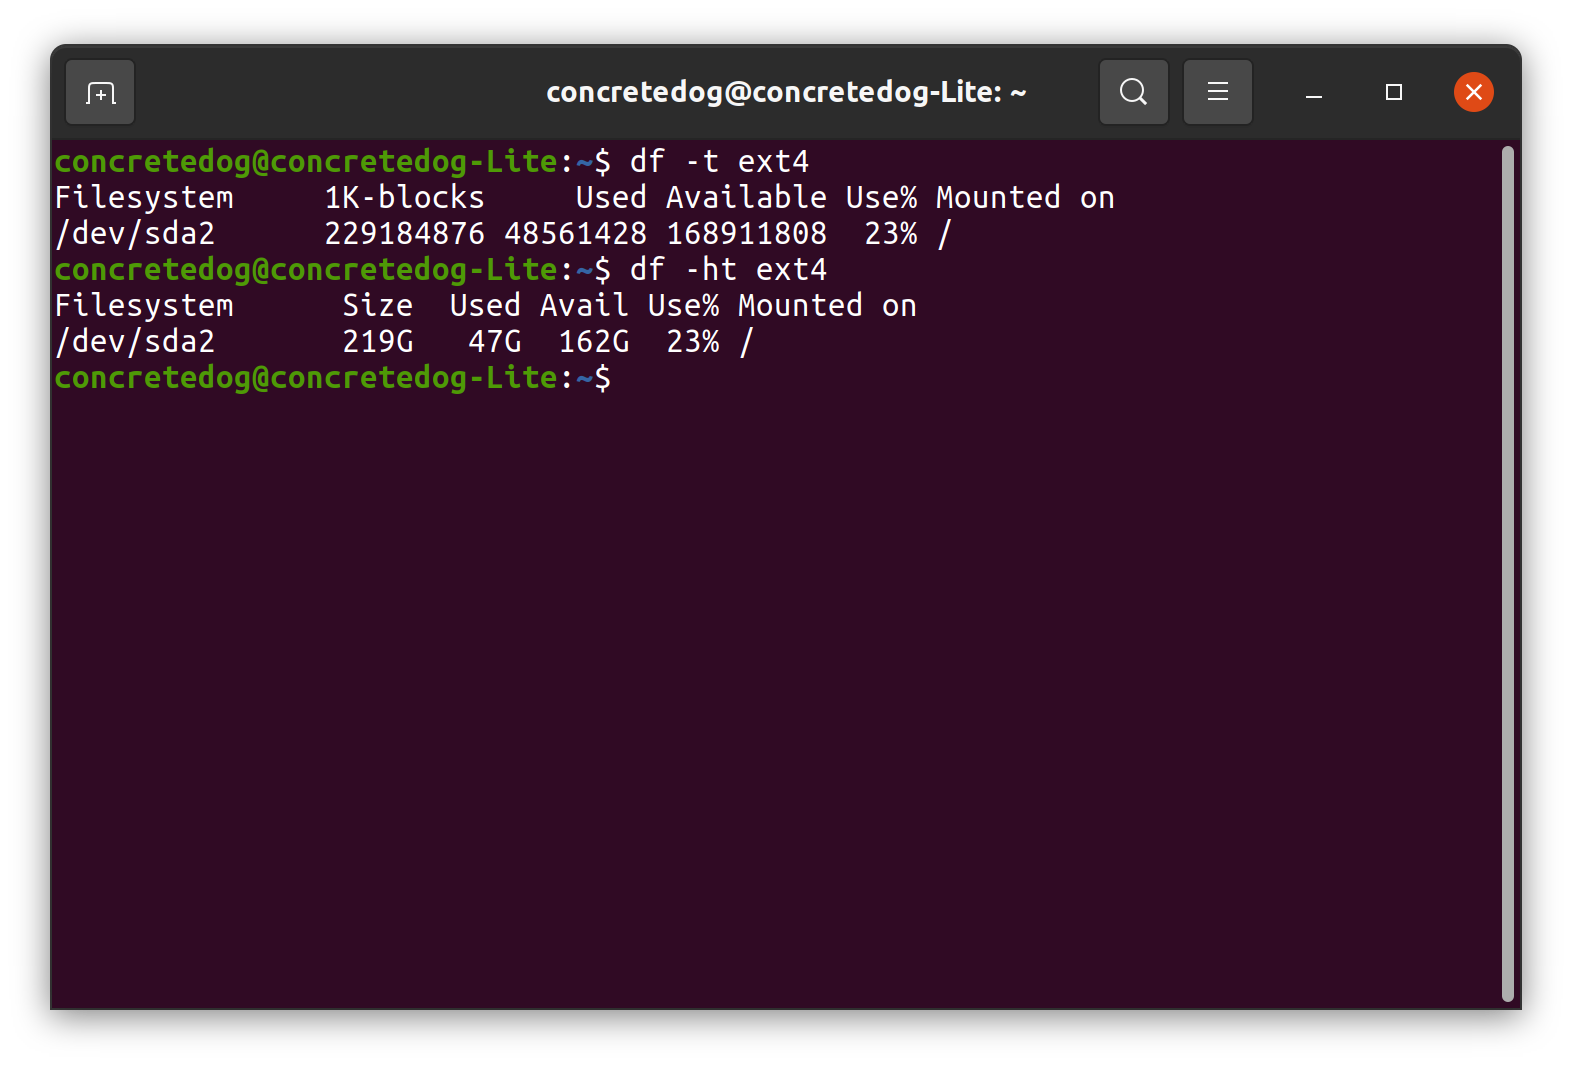
1. List results of df command but only for ext4 type filesystems.
df -t ext4On our example system our main physical drive filesystem is ext4, but you can use any filesystem name you may have on your own system such as, FAT, exFAT, ext3, ext2 etc.
2. Re-run the command adding the -h argument. It’s important that the t argument is placed at the end of the argument list as the t argument expects to be followed by a filesystem type. If for example you want to add the -h argument you must add it before the t as shown below.
df -ht ext4Exploring Linux Disk Usage with the du Command
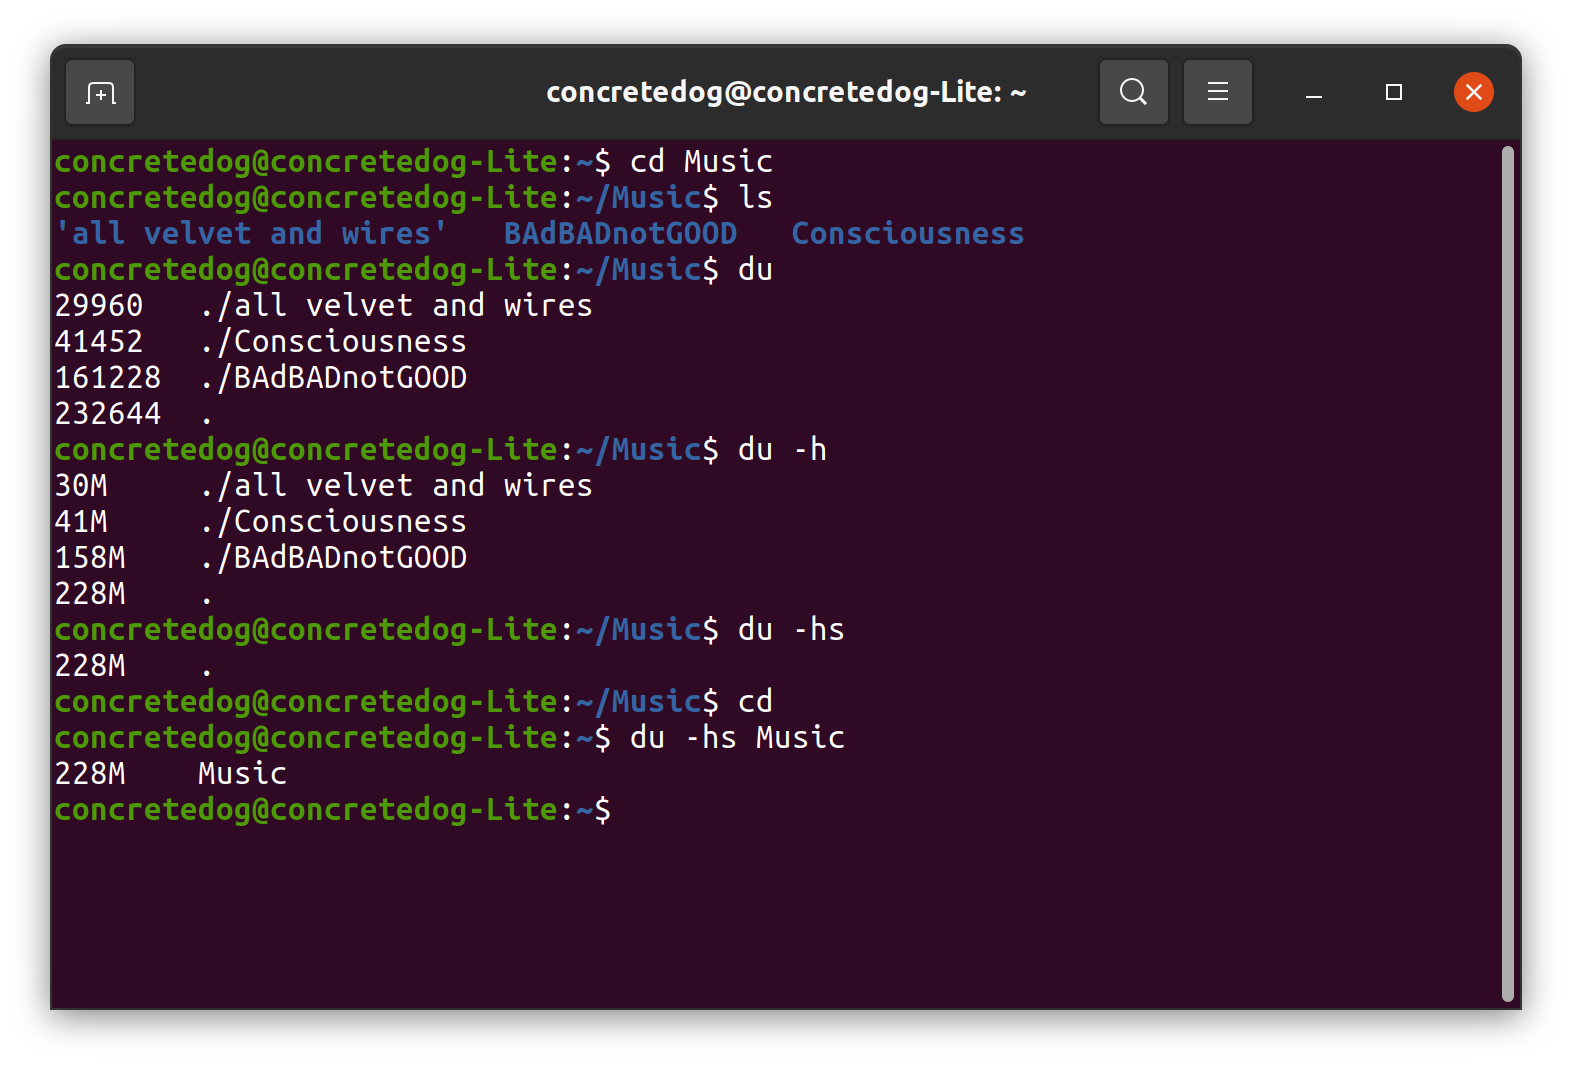
Often we might simply want to check how much room a file or directory is using. The du command is useful for this and works in a similar way to the df command we looked at earlier. In the following examples we have used our Music directory which contains 3 subdirectories containing mp3’s. You can use any directory with contents on your system to try these commands.
1. Move to a directory, list its contents and then check disk usage.
cd Music
ls
du
Note that similar to the df command, in its standard form the du command returns values in kilobytes. The output of this command is quite straightforward: it lists the size of each sub directory and then the name and then finally on the last line returns the sum of all the subdirectory sizes to give the directory disk usage.
2. Add the -h argument to make du return results in megabytes and gigabytes.
du -h3. Simplify the output to just show the total directory size. If we just want to know the total size of the directory and its subdirectories, adding -s as an argument will return just the total.
du -hs
4. Specify a location for the du command.
cd
du -hs Music
Similar to other linux commands we don’t always need to run the du command from within the target directory, rather we can specify a path to a target directory. This can be a relative path, from our current location, or an absolute path.
The df and du commands are deceptively simple but immensely powerful. No matter if you are a relative newcomer or a seasoned sysadmin, both commands are absolutely essential for the smooth running of your Linux machines. At the basic level, each command gives you the information that you need. With the addition of our suggested arguments, these commands are ready to to be part of your sysadmin toolkit.
Jo Hinchliffe is a UK-based freelance writer for Tom's Hardware US. His writing is focused on tutorials for the Linux command line.


