How to Enable or Disable Bitlocker Encryption in Windows
Protect your drive, even if someone pulls it out of your PC.
Get Tom's Hardware's best news and in-depth reviews, straight to your inbox.
You are now subscribed
Your newsletter sign-up was successful
Bitlocker is a feature of certain versions of Windows that encrypts your hard drive’s contents. Without the right decryption key, it’s virtually impossible to crack this protection. So, even if someone were to physically open your PC, take your internal drive out and attach it to another computer, they could not read the data without that key. If it’s your drive and you lost the encryption key, see our article on how to find a BitLocker key.
What You’ll Need
Only some computers and some editions of Microsoft Windows can use the BitLocker feature. If you’re using any of the “Home” versions of Windows, you’re out of luck. Only Pro, Enterprise, and Education licenses are eligible.
There are some hardware requirements too, such as having a TPM 1.2 or better (Trusted Platform Module) chip in your system. If your computer does not have the required TPM, you’ll have to use a USB drive that will be formatted with your encryption key to start up and run the computer. Your C drive must also be set as your first boot device, and not (for example) your USB or optical drives.
Don’t worry too much about the requirements, since if your computer isn’t ready for BitLocker, you won’t find the option to enable it. If you’re worried about the possibility that you could lose your files if you encrypt with BitLocker, first read our guide on how to find a BitLocker key and recover files from encrypted drives.
With that said, let's look at how to turn BitLocker on.
How To Turn BitLocker On in Windows
Assuming that your computer complies with the requirements, here’s how to activate BitLocker on your Windows PC. We’re using Windows 11 here, but the same steps apply to Windows 10:
1. Sign into Windows with an Administrator account. If this is your personal computer and you’re the only user, you’re most likely already the administrator. If not, you’ll have to ask the administrator to activate BitLocker for you. On a work computer, this is almost certainly someone from the IT department.
Get Tom's Hardware's best news and in-depth reviews, straight to your inbox.
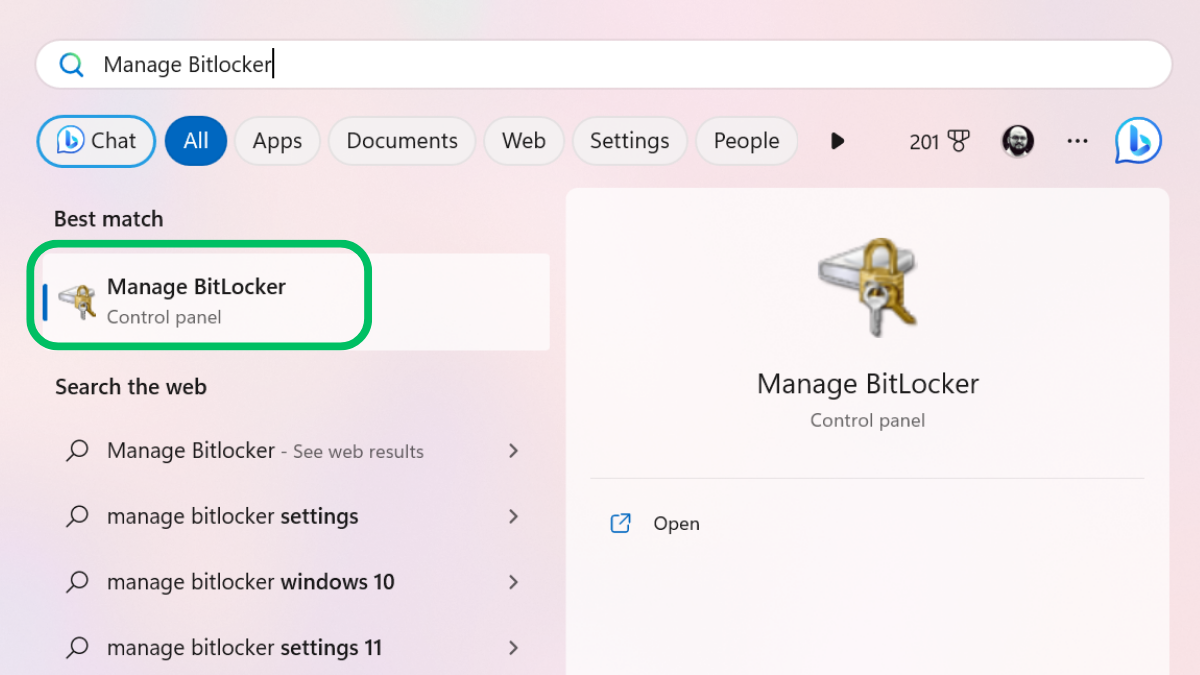
2. Open the Start Menu and search for “Manage Bitlocker” then click on it.
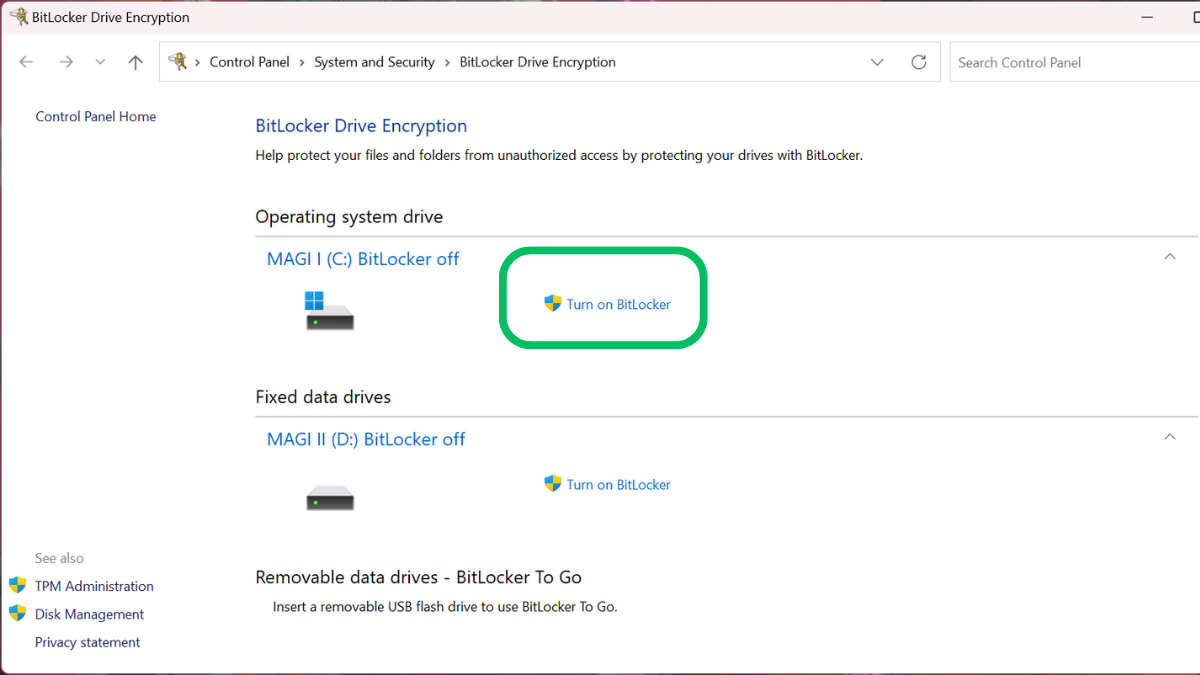
3. Select ‘Turn on BitLocker’. BitLocker is individually applied to each one of your drives. So if you have more than one drive, ensure that you turn it on for all of them, assuming you want all of them protected by encryption. Also, bear in mind that if you copy a file from your encrypted drive to a non-encrypted drive, the file will no longer be protected!
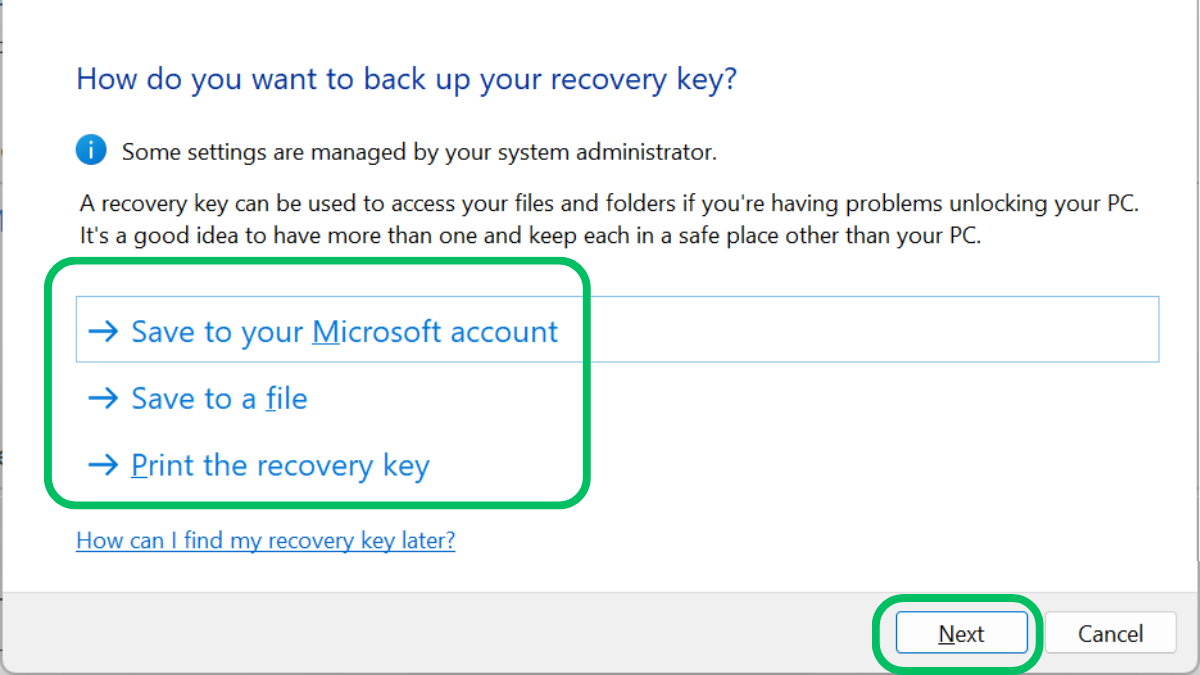
4. Select your backup key method and click Next. The backup key will let you decrypt the drive in case you forget your passcode. There are three options here and you can choose more than one. Since we’ve signed in with our Microsoft Account, we’ll choose that as the backup method here, since that means the key can be recovered from Microsoft’s servers.
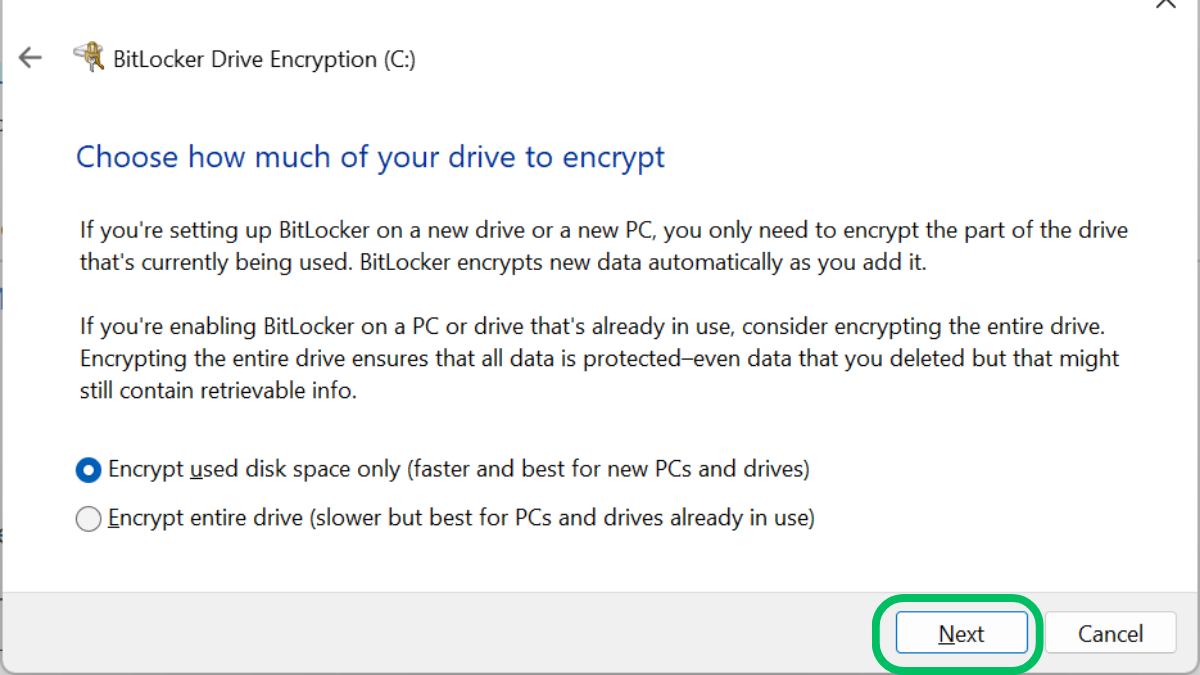
5. Choose how much of the drive to encrypt and click next. Simply choose the method that matches your circumstances. If this is a new PC, choose the first option. If it’s a PC that’s been in use, choose the second.
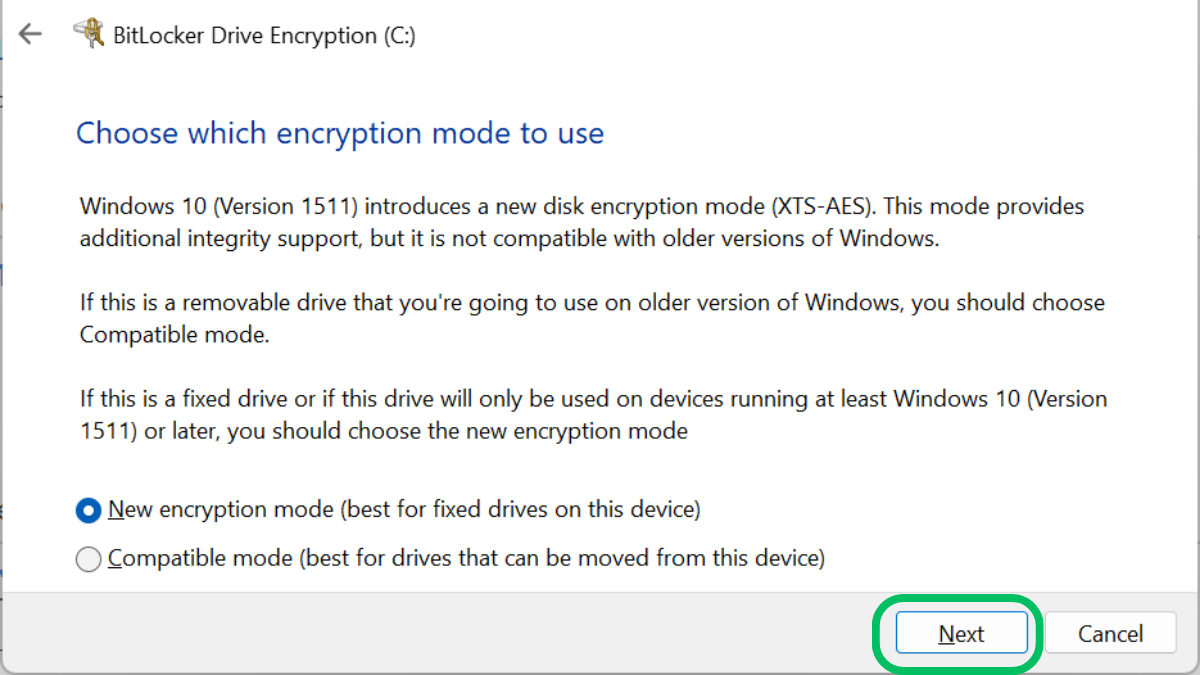
6. Choose your encryption mode and click next. Choose the first mode for fixed drives, and the second for drives that will be used with other PCs.
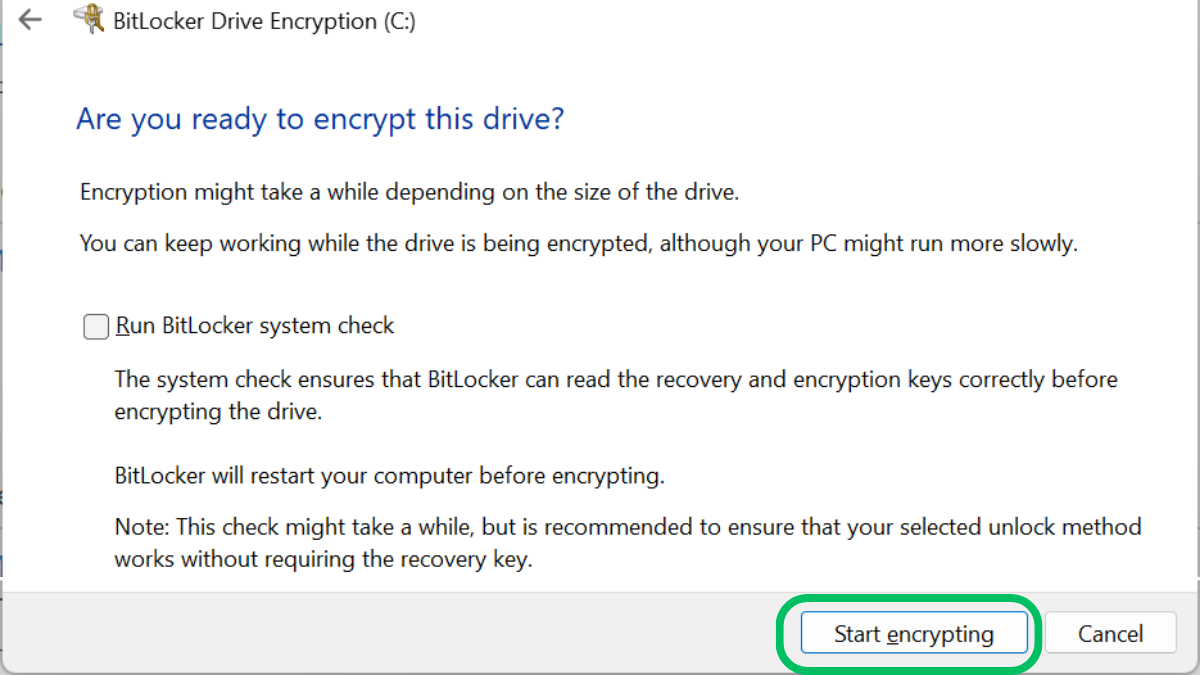
7. (Optional) Tick the system check box. This makes sure that your encryption keys are readable. We recommend doing this, even though it’s not strictly necessary.
8. Click ‘Start Encrypting.’
9. Restart your computer.
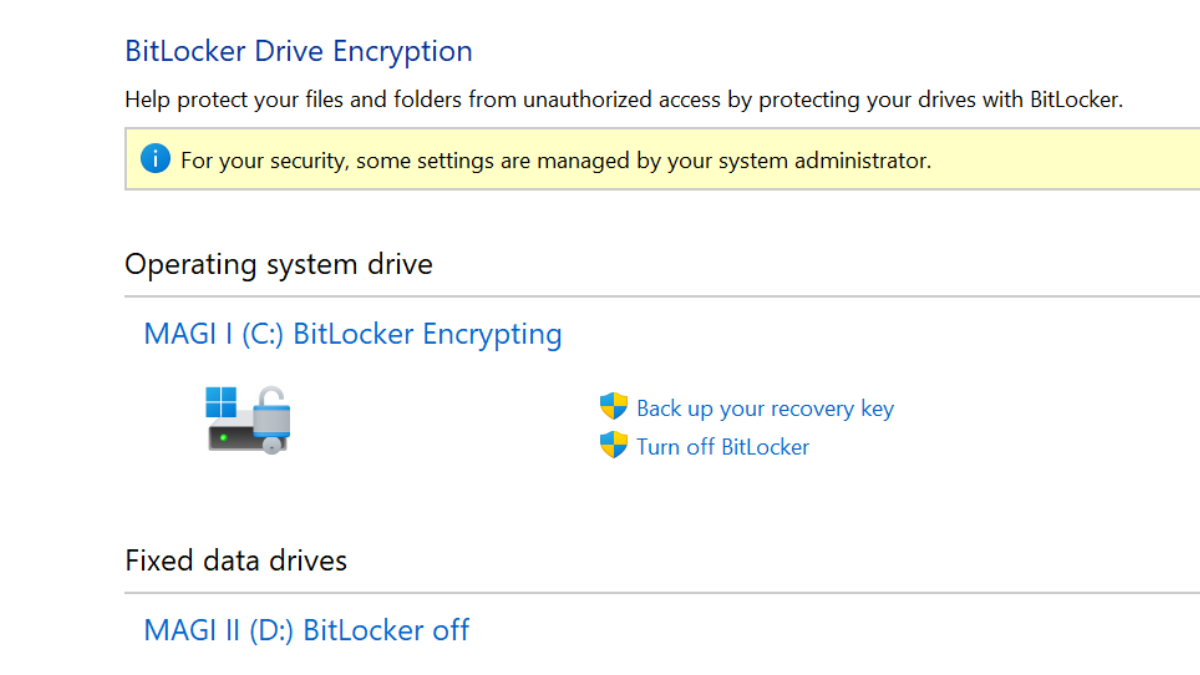
10. Open BitLocker Management again. Follow steps 1 to 3 again, and now you’ll see a message that the drive is being encrypted. You can keep using your PC, but you might notice worse performance until the process is done.
That’s it; once encryption is done, your PC’s drive is now protected, and even if someone got their hands on it and plugged it into their own computer, it’s impossible to decrypt the data without the key, or some sort of quantum supercomputer that doesn’t exist yet.
How To Turn BitLocker Off in Windows
If you no longer want to have your drive encrypted, you can turn BitLocker off as easily as you turned it on. However, do note that you don’t have to decrypt your drive before formatting it. Formatting will erase all data on the drive, whether encrypted or not. To turn off BitLocker, do the following:
1. Repeat steps 1 to 3 above. This will take you back to the BitLocker Management Window.
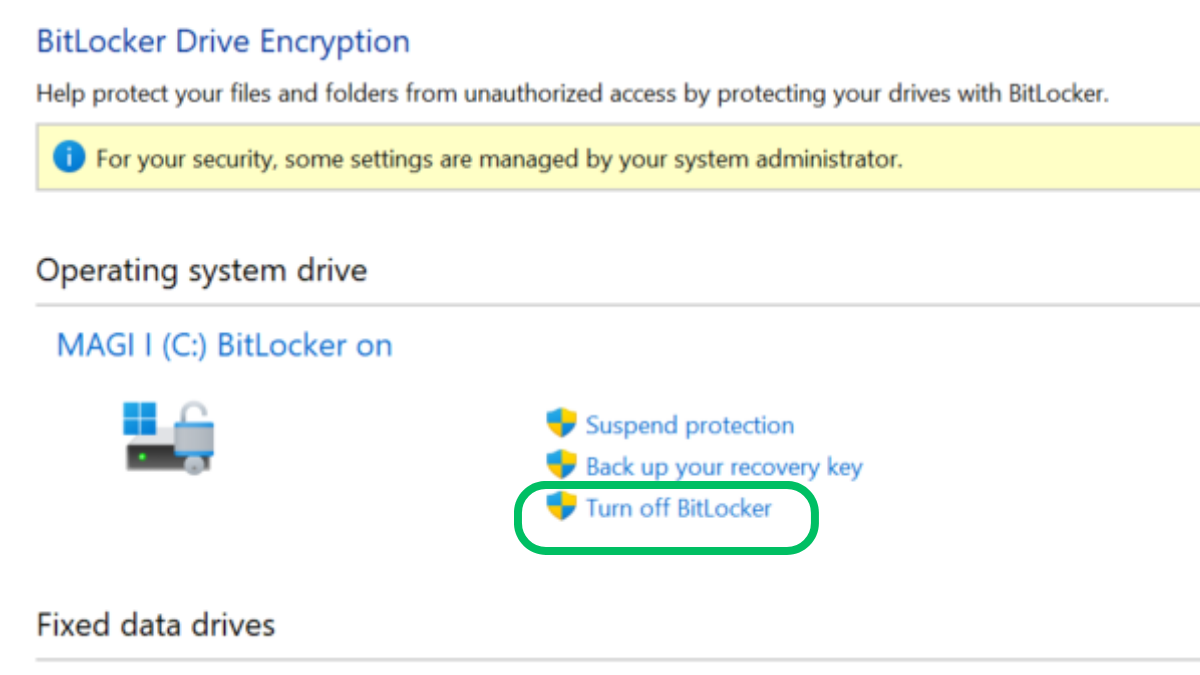
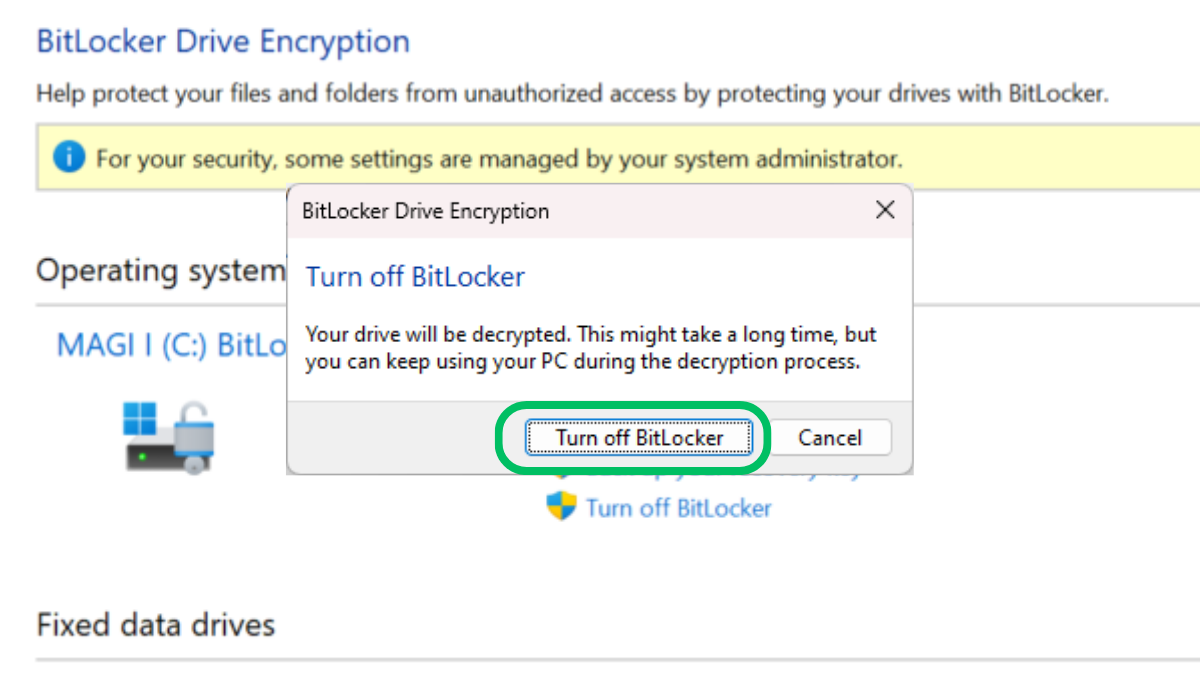
2. Click ‘Turn Off Bitlocker” next to the drive in question.
3. Click ‘Turn Off Bitlocker’ again in the confirmation window that pops up.
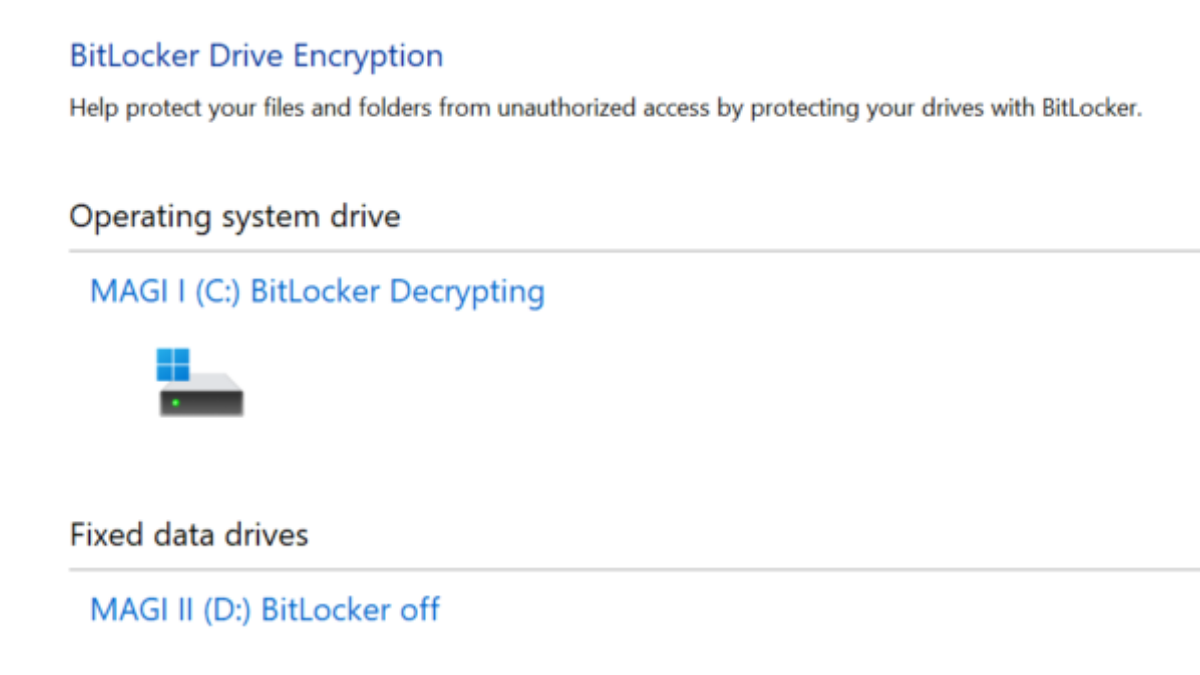
The drive is now decrypting.
Just as when you encrypted the drive, this process will take a while to complete, but you can keep using your computer as normal with the possibility of slightly worse performance. Most modern computers should have no noticeable performance differences with BitLocker switched on, so there’s little downside to using the feature unless you lose your recovery key, but then your most important data should always be backed up in more than one location, such as cloud storage.
Sydner Butler is a freelance writer for Tom's Hardware. He is a PC technician with decades of experience in system building. He covers a wide range of topics from PC hardware troubleshooting, software guides, to VR gaming.
