How to Set Up RetroPie on Raspberry Pi 4 (Updated)
Turn your Raspberry Pi 4 (or 3 or Zero) into a retro gaming rig with RetroPie.
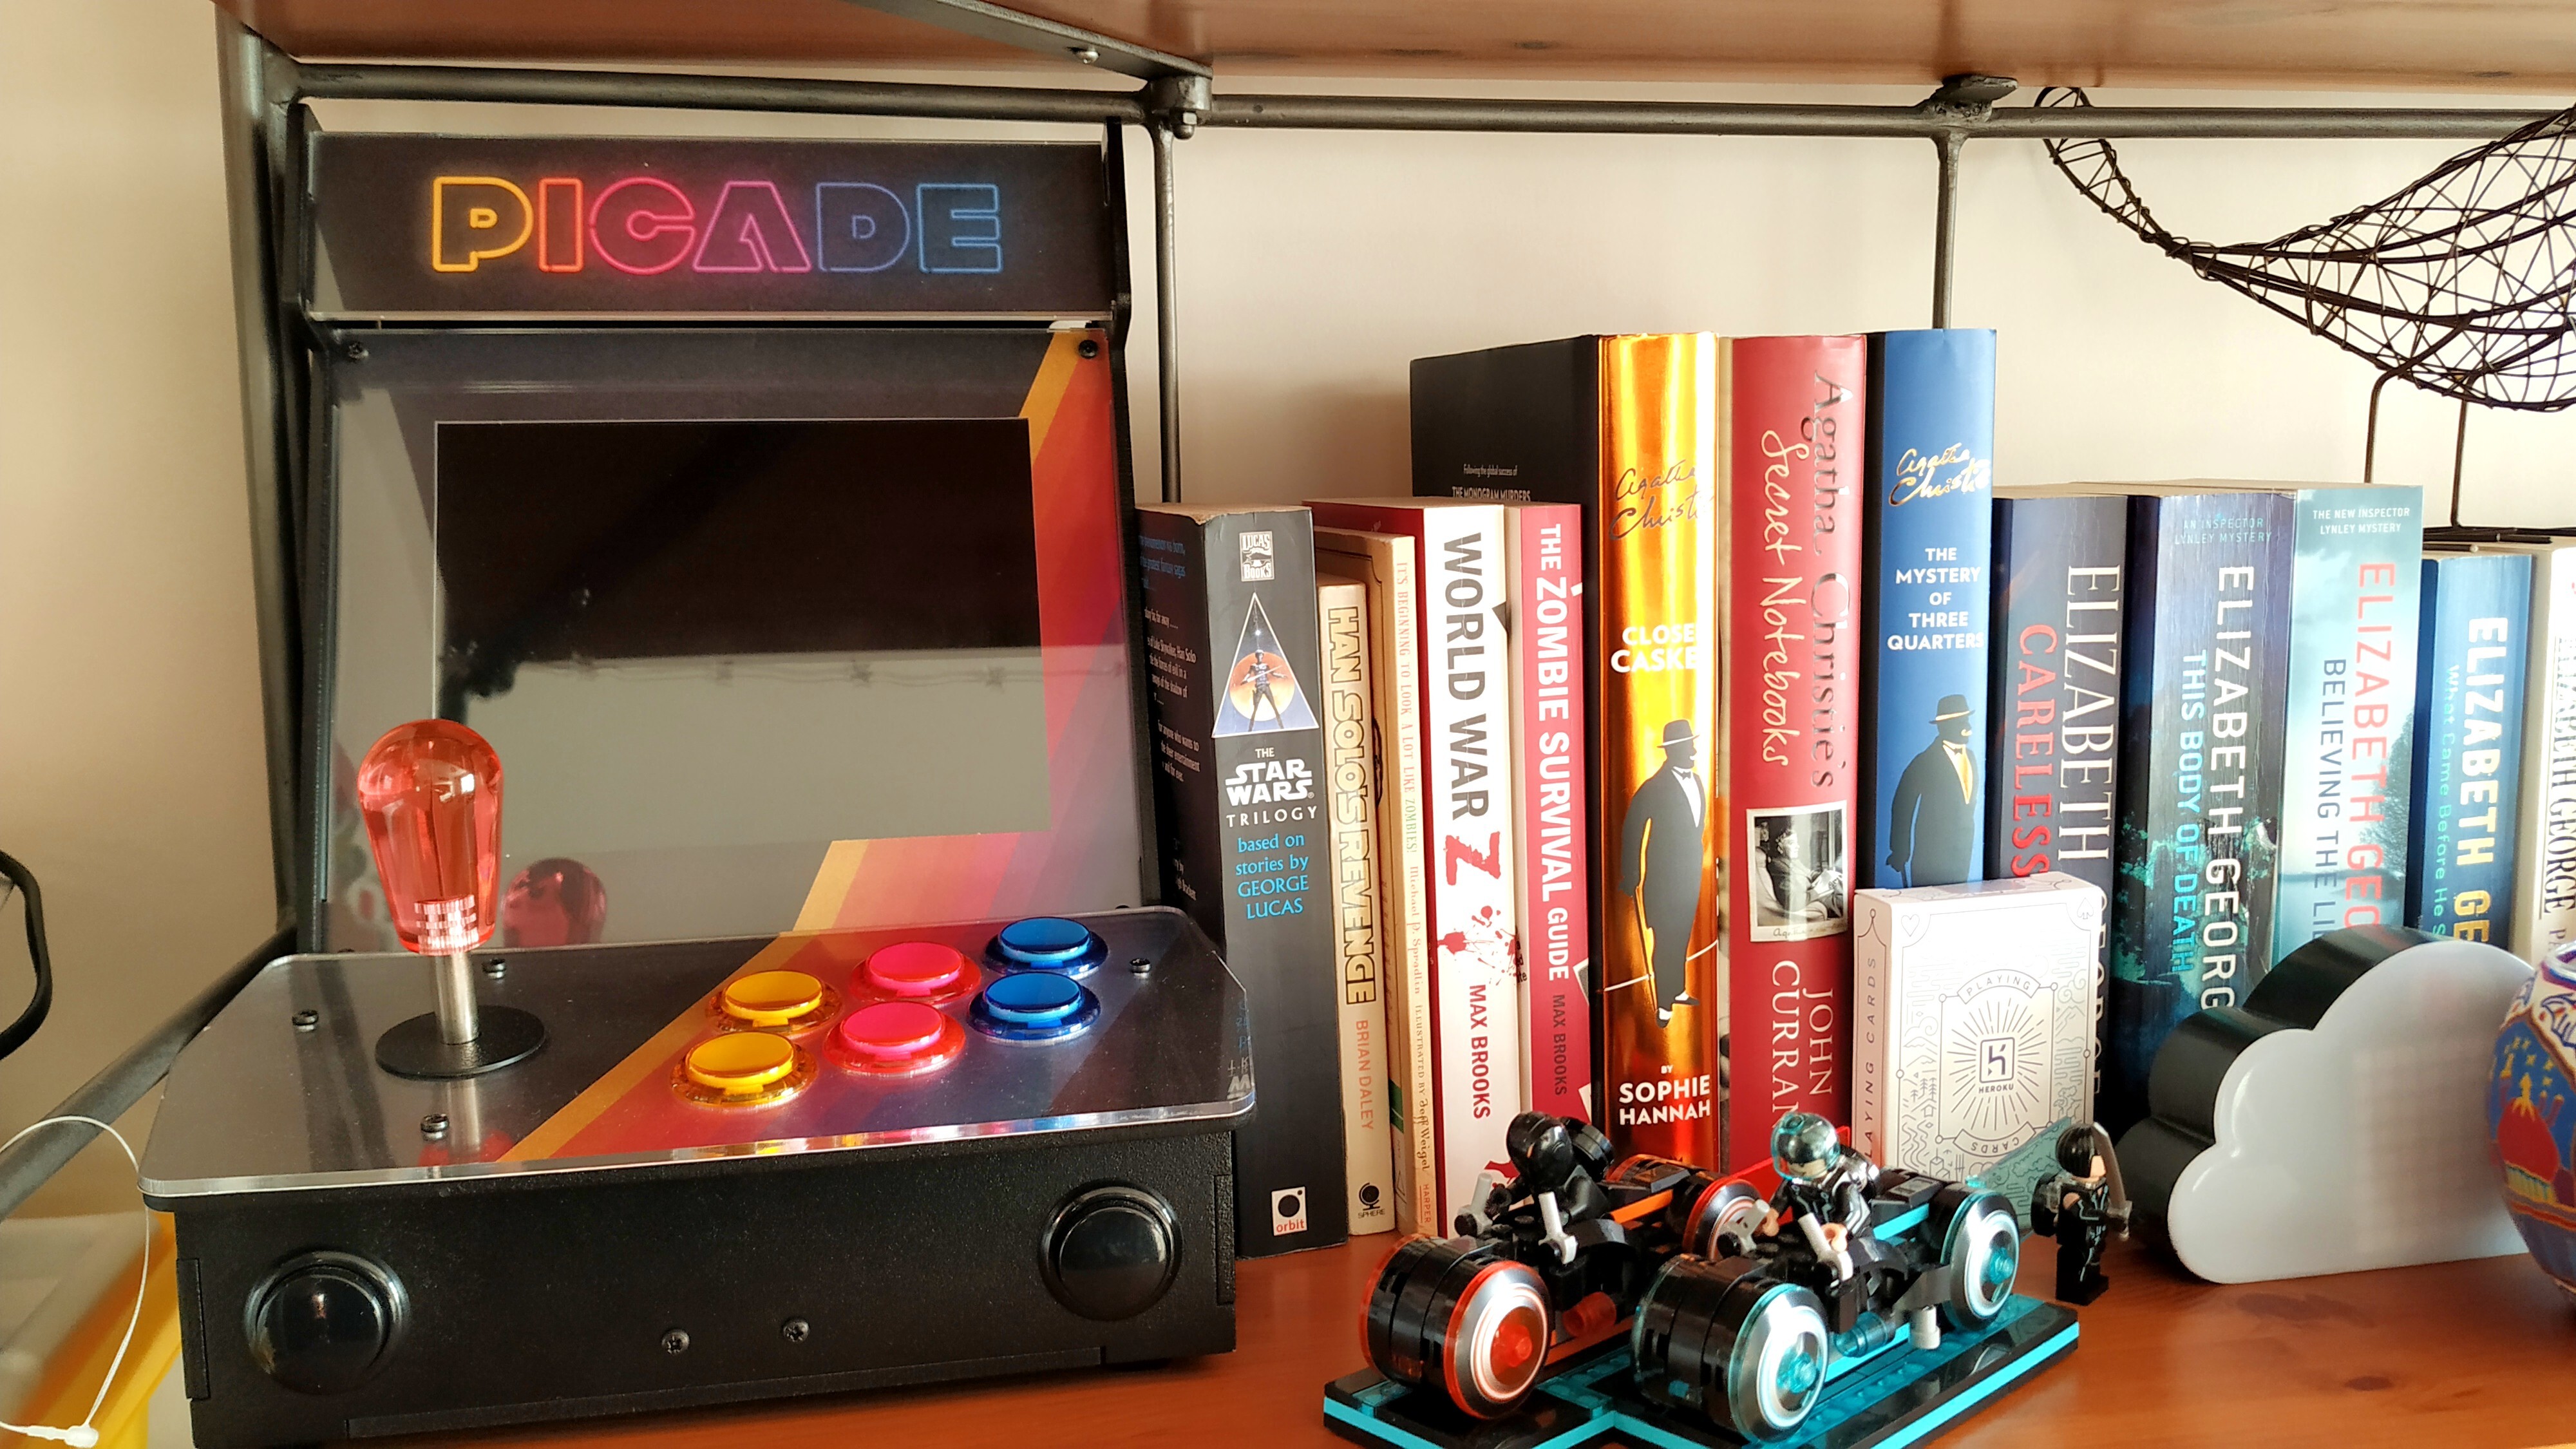
In the 1980s and 1990s, the arcades were the place to be. The latest games ate our quarters as we pursued ever higher scores. Those days are now sadly behind us but retro gaming has seen massive growth in the past decade.
Using a Raspberry Pi, you can run a variety of emulators that allow you to play not only old-time arcade games, but also your favorite titles from tons of old consoles, including the Atari 2600, NES, Nintendo 64, Sega Genesis and Gameboy. There are a number of emulation platforms available, but RetroPie is by far the most popular and arguably the best.
Up until recently, installing RetroPie on a Raspberry Pi 4 was a pain in the butt. Even though Raspberry Pi 4 came out in June 2019, RetroPie didn’t officially support it for nearly a year and there were some manual steps you needed to take to make it work. Now, not only can you install RetroPie on a Raspberry Pi 4, but you can do it using the Raspberry Pi imager. It couldn’t be easier.
In this how-to we guide you through setting up your own RetroPie setup, show how to copy ROMs (your games) to the Pi via USB and network shares, connect a controller via Bluetooth, and finally create our own custom boot splash screen.
What You Need
- Raspberry Pi, choose a Pi 4 for best performance
- A computer with a card reader
- Raspberry Pi Imager from https://www.raspberrypi.org/downloads/ installed
- A micro SD card, ideally one of best microSD cards for Raspberry Pi
- A USB flash drive
- USB or wireless controller
How to Install RetroPie on Raspberry Pi 4 (or earlier)
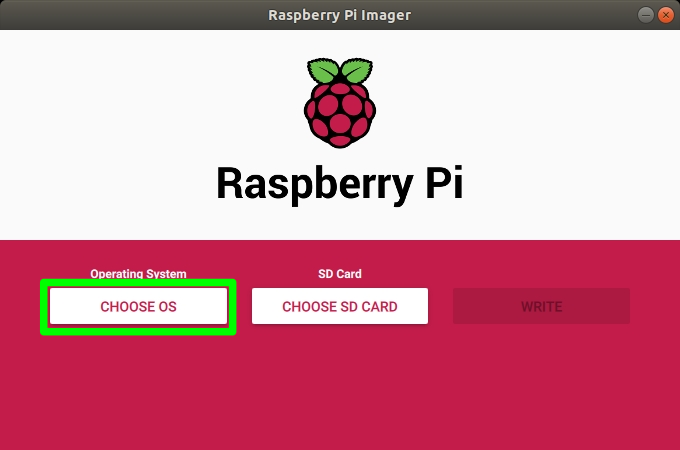
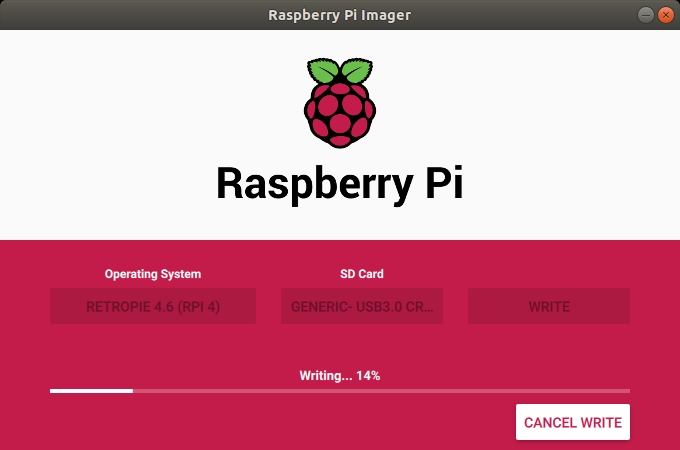
1. Open Raspberry Pi Imager on your PC and click on CHOOSE OS.
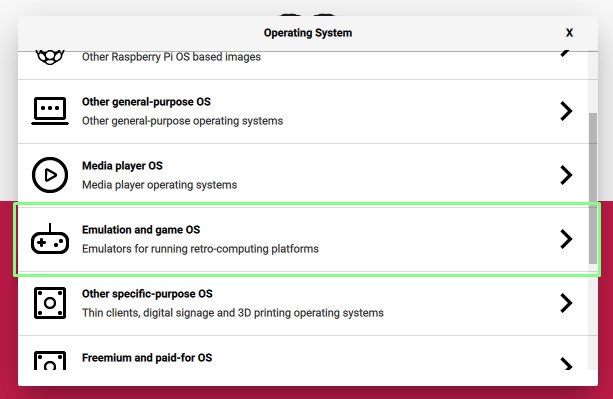
2. Select Emulation and game OS. Raspberry Pi Imager groups operating systems by their use. For example there are sections for media players, 3D printing and general purpose OS.
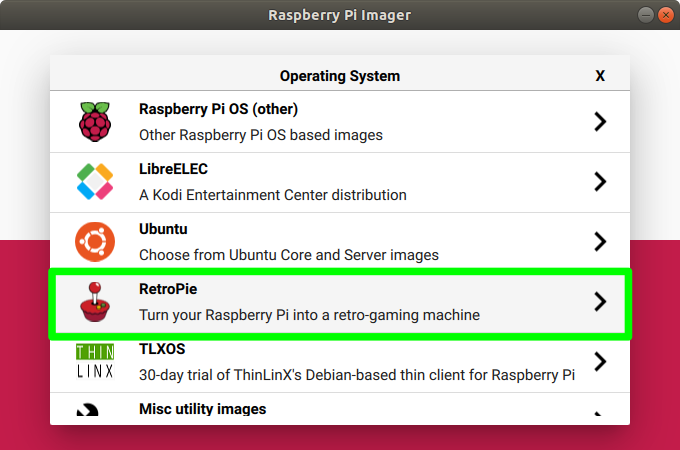
3. Select RetroPie.
Get Tom's Hardware's best news and in-depth reviews, straight to your inbox.
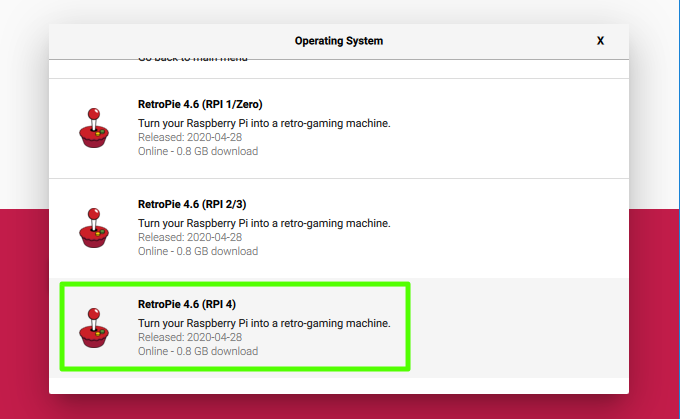
4. Select the version of RetroPie for your model (ex: RetroPie 4.6 (RPi4)).
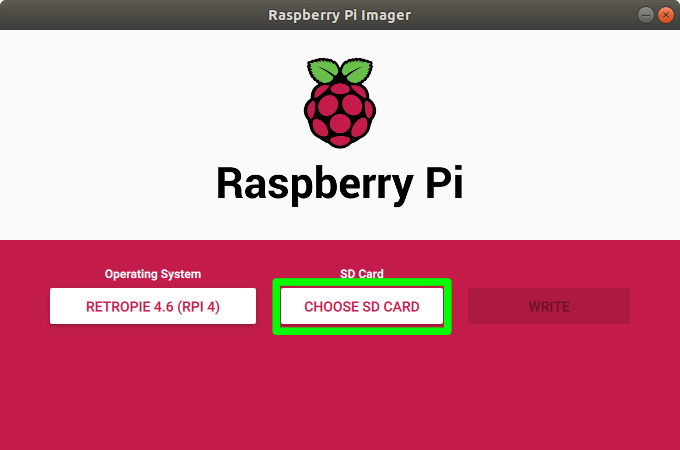
5. Insert your microSD card and click on CHOOSE SD CARD.
6. Click on WRITE to write RetroPie to the microSD card.
7. Eject the microSD card and insert it into your Raspberry Pi 4. Plug in a controller. XBox One and Playstation 4 pads are compatible with RetroPie via Bluetooth, but require a USB connection until Bluetooth is configured.
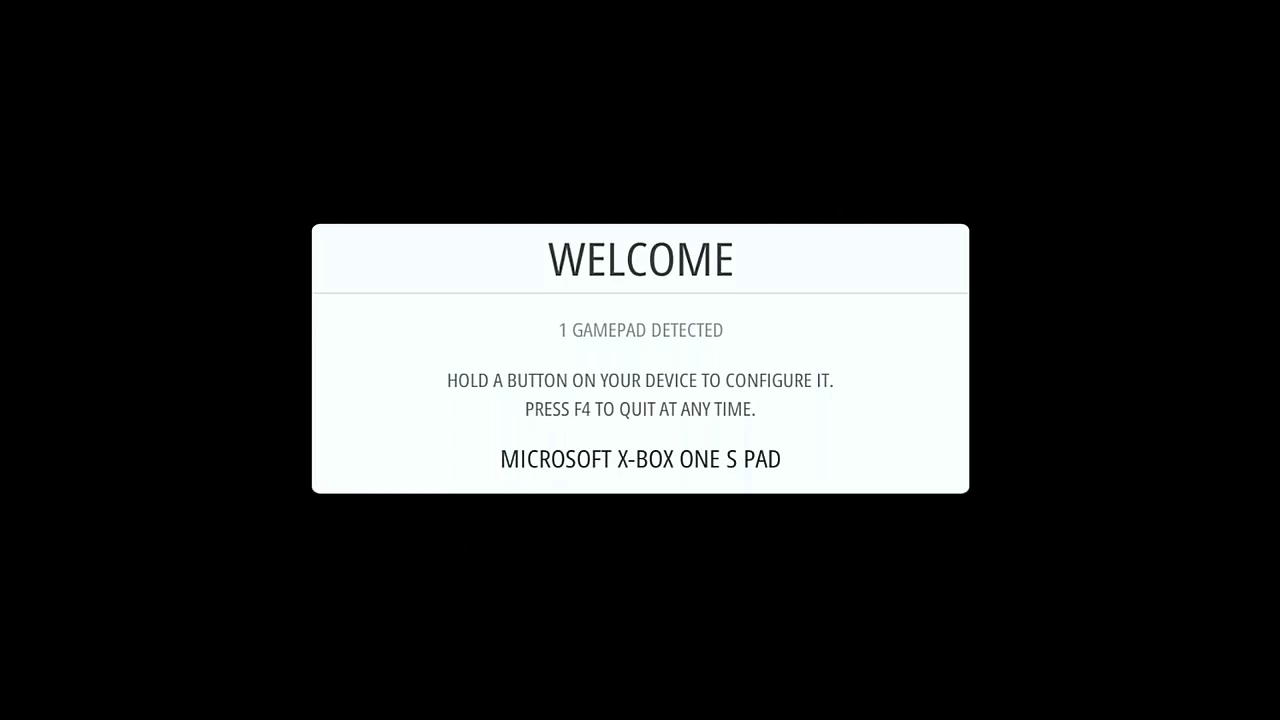
8. Power on the Raspberry Pi and wait for your controller to be detected.
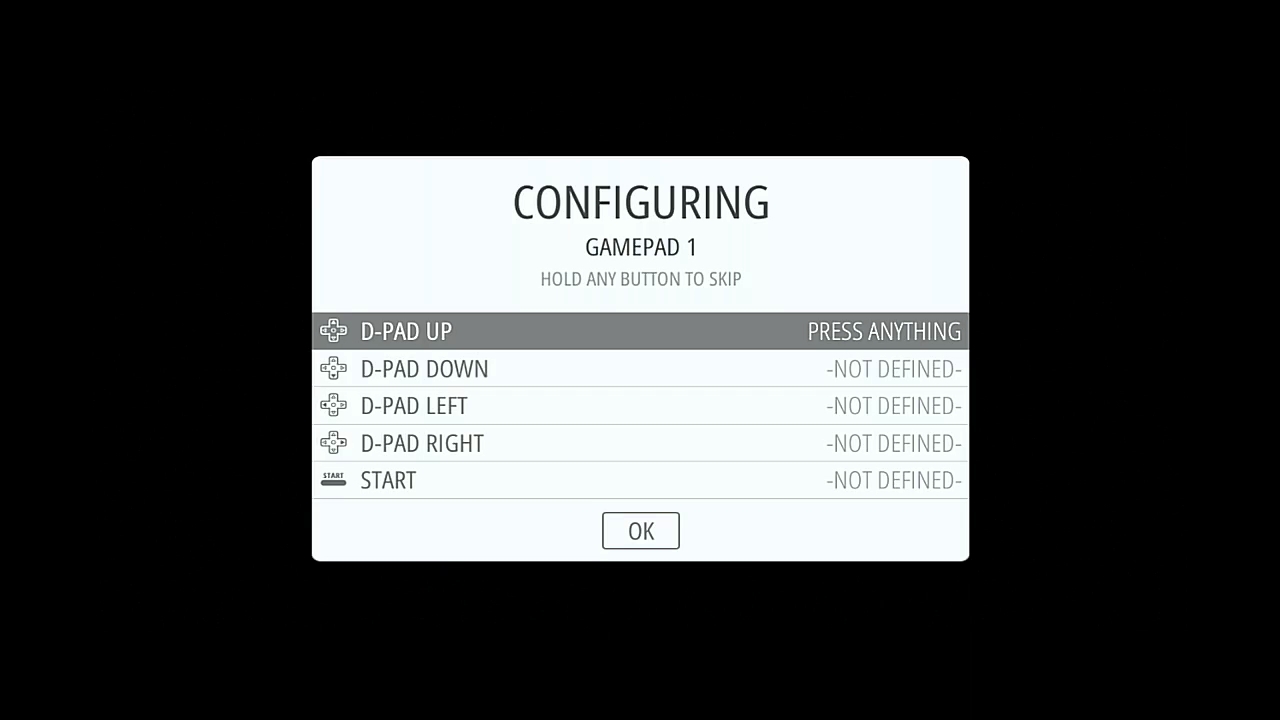
9. Configure your controller.
Note that you probably will have fewer buttons on your controller than RetroPie asks you to configure. Just hold down a button that you've already configured to skip past any options you don't need.
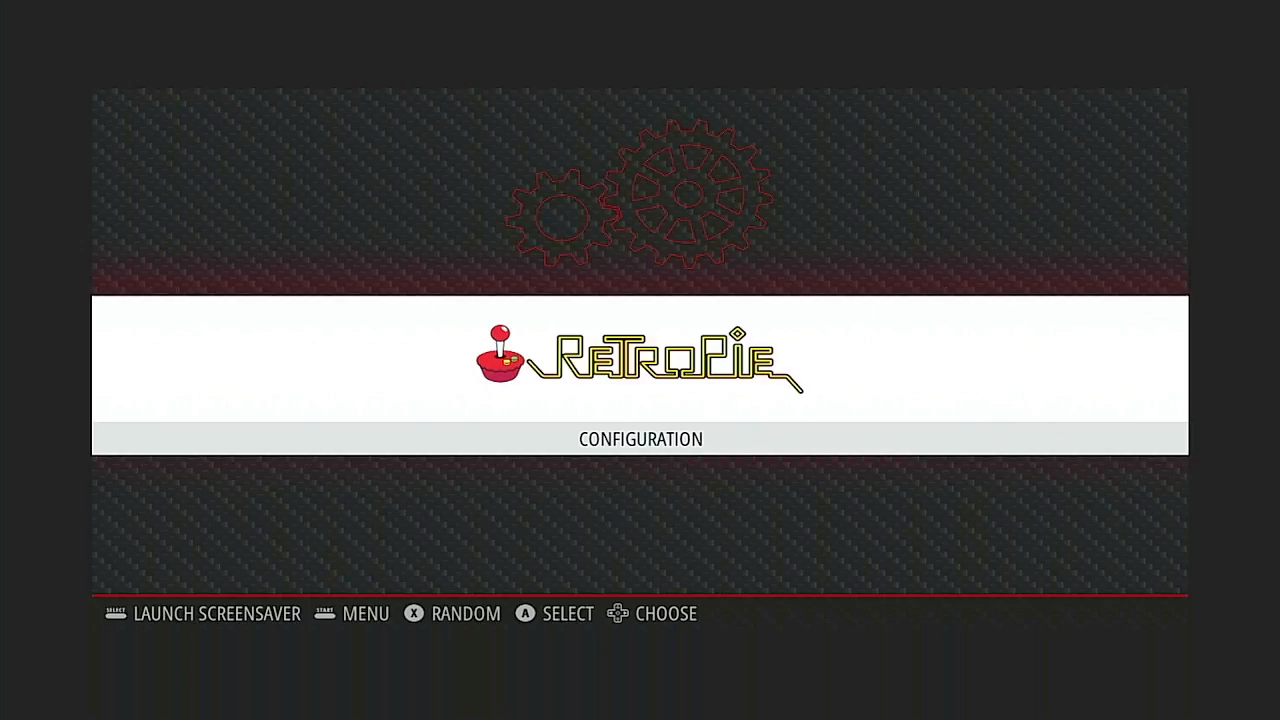
10. Press the A button on your controller to close the configurations menu and open the main menu.
Adding Games To RetroPie
All the games exist as files called ROMs, which are dumps of real boards / cartridges. The easiest method to add games is to use a USB stick to transfer the files from your computer to your Raspberry Pi. But note that games from retro consoles are under copyright no matter their age. If you don’t personally own the cartridge / board and rip a copy of your own, downloading and distributing these ROMs may violate laws in your country so proceed at your own risk.
1. On your computer create a folder called retropie on a FAT32 / exFAT formatted USB flash drive.
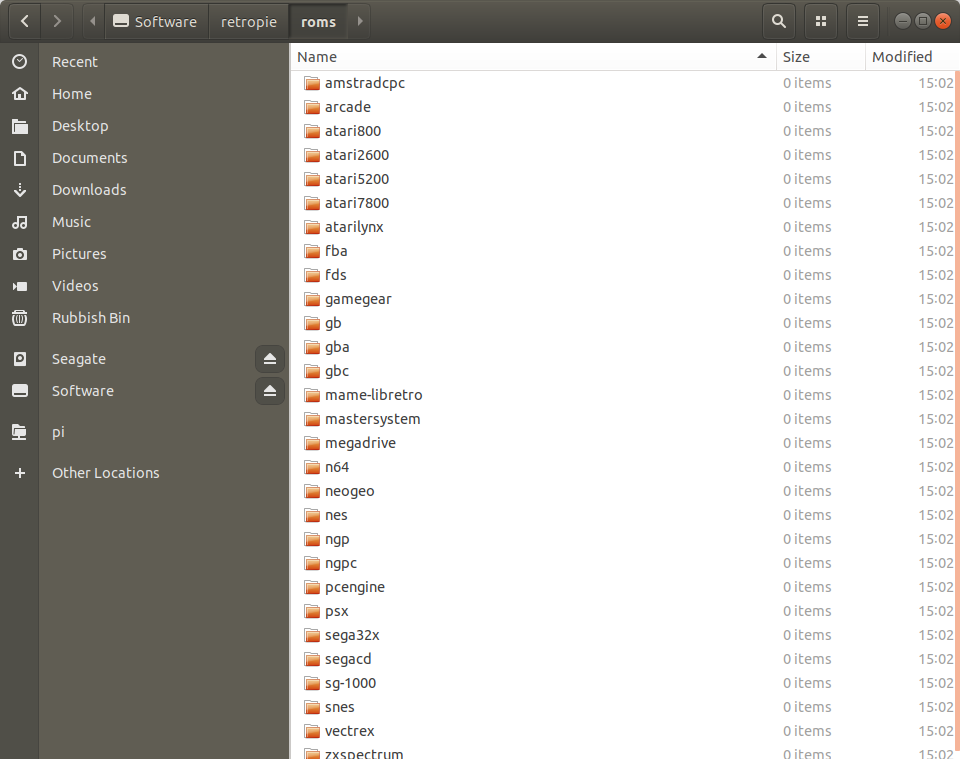
2. Plug the USB flash drive into the Raspberry Pi 4 and RetroPie will create a folder structure inside the retropie folder on the stick.
3. Remove the flash drive and insert it into your computer.
4. Copy your games to the correct system / console folder in retropie/roms/. For example, put atari 2600 games in the /atari2600 folder.
5. Eject the flash drive from your computer and place it back into a USB port of the Raspberry Pi 4. The time that this will take depends on how many games are transferred over. This could take minutes for a few games, or hours if transferring a large amount.
6. When complete, remove the USB flash drive and press START and from the menu select Restart Emulationstation / Restart System. The games list will now update and show the available computers / consoles for which there are now games.
Adding Games via SMB (Samba)
Adding games via a network share is a convenient and laughably simple task thanks to RetroPie automatically configuring an SMB (Samba) share. ROM transfer times will vary greatly depending on your connection (Ethernet being the preference) and the amount of ROMs and their size.
1. On your Windows machine, open the file manager.
2. In the address bar type in the following address and press Enter.
//RETROPIE 
3. Copy your ROMs into the relevant system via the roms folder. The RetroPie network share has four folders, bios, configs, roms and splash screens.
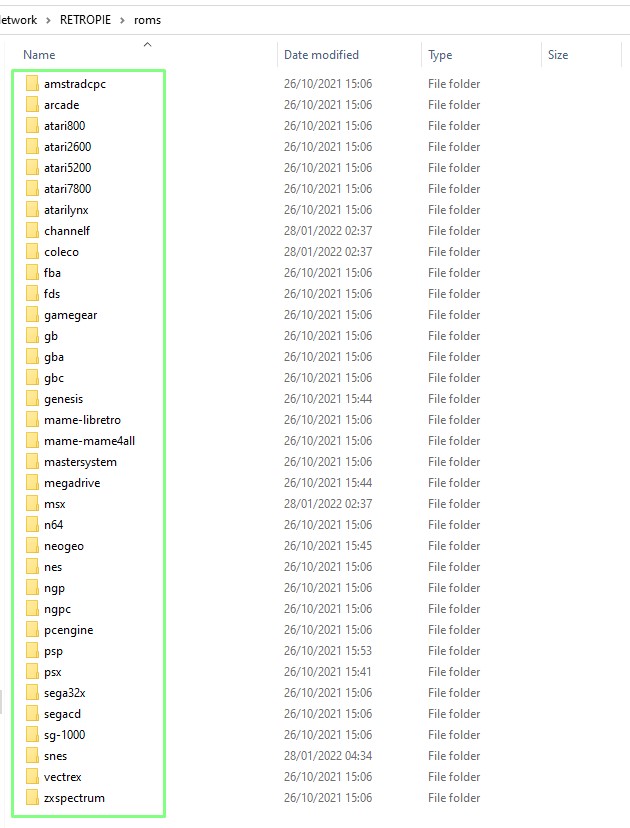
Please keep in mind that, when it comes to playing retro arcade games from actual arcade machines, not all ROMs are compatible with all emulators. Retropie can run with ten different versions of MAME (Multiple Arcade Machine Emulator), the most popular arcade emulator, and some ROMs will run on some versions of MAME and others will work on others. RetroPie maintains a handy chart, but if your arcade games don’t load in one MAME, try another.
Adding Bluetooth Controllers
Sitting back and relaxing while we game used to mean a tangle of wires. But with Bluetooth you can easily connect our favorite games controller and play in comfort. RetroPie has an easy to follow wizard that steps you through the process.
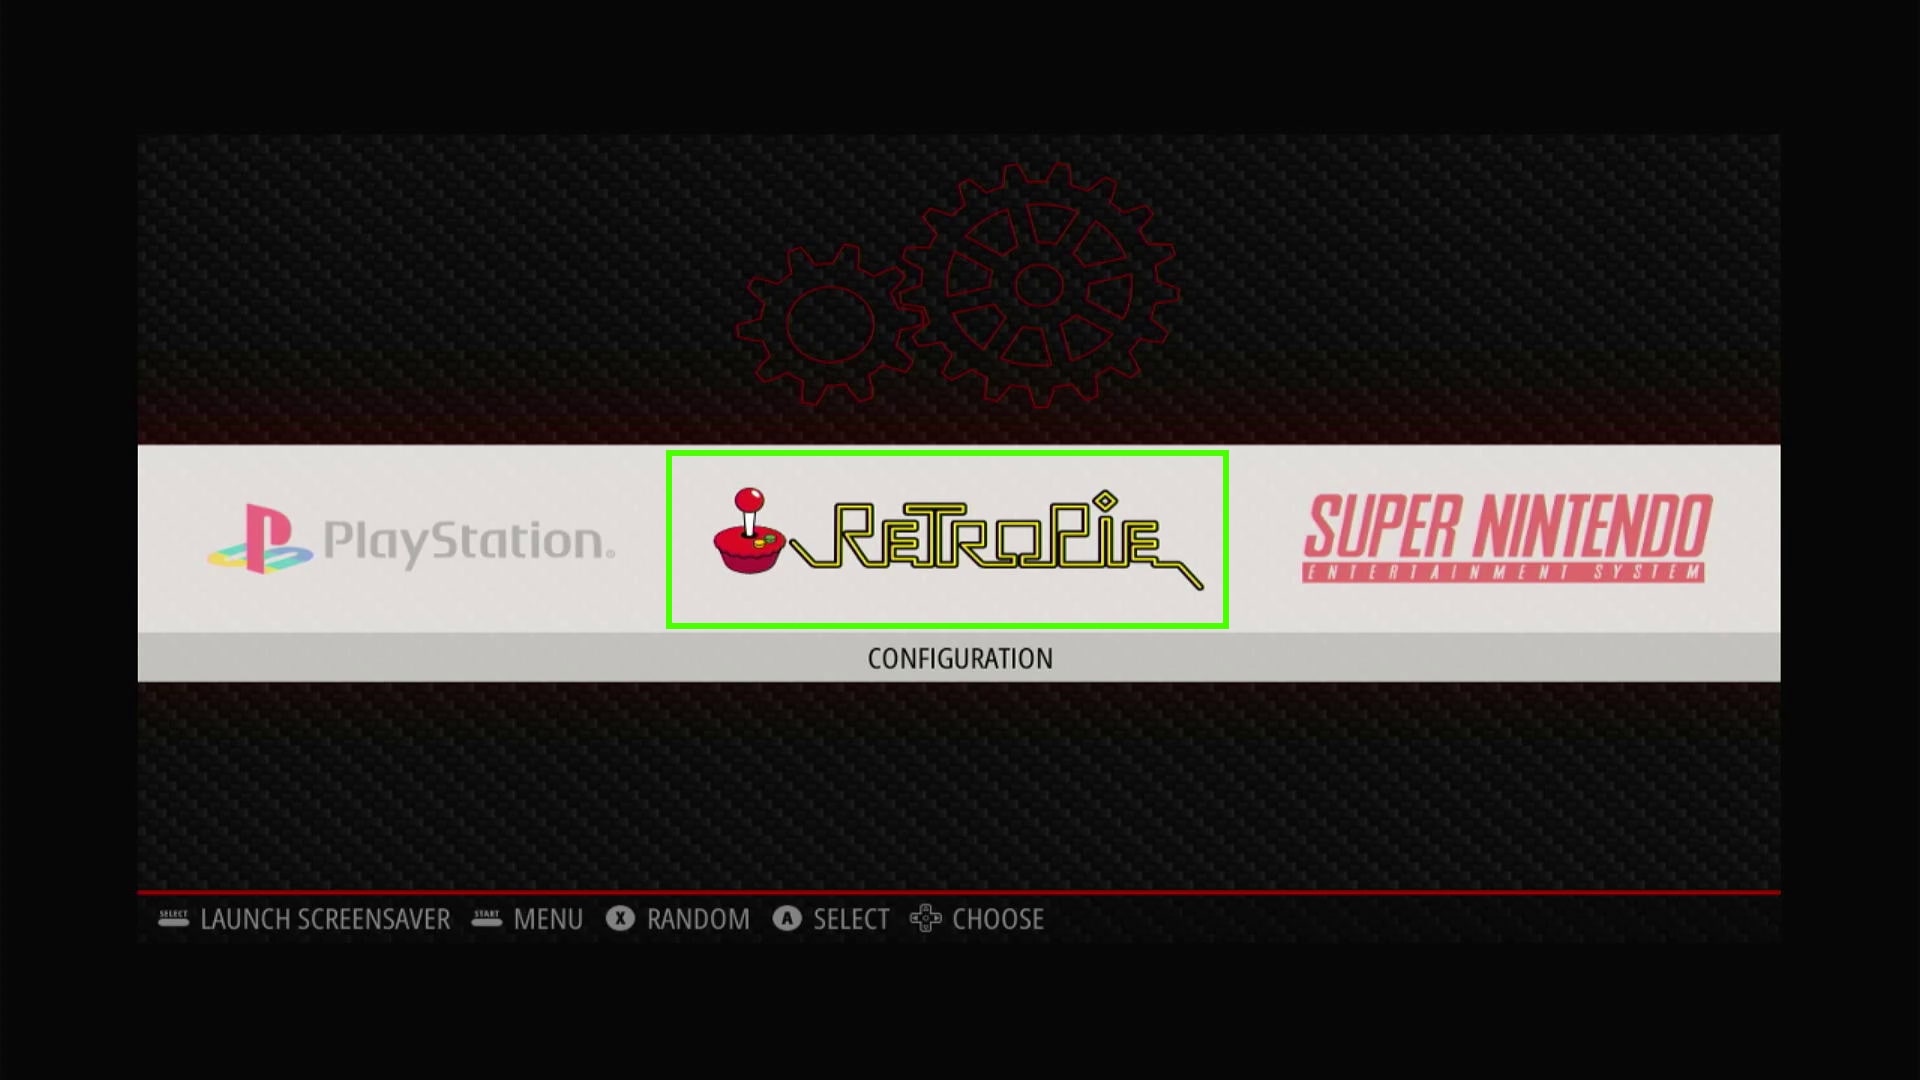
1. Select the RetroPie menu.
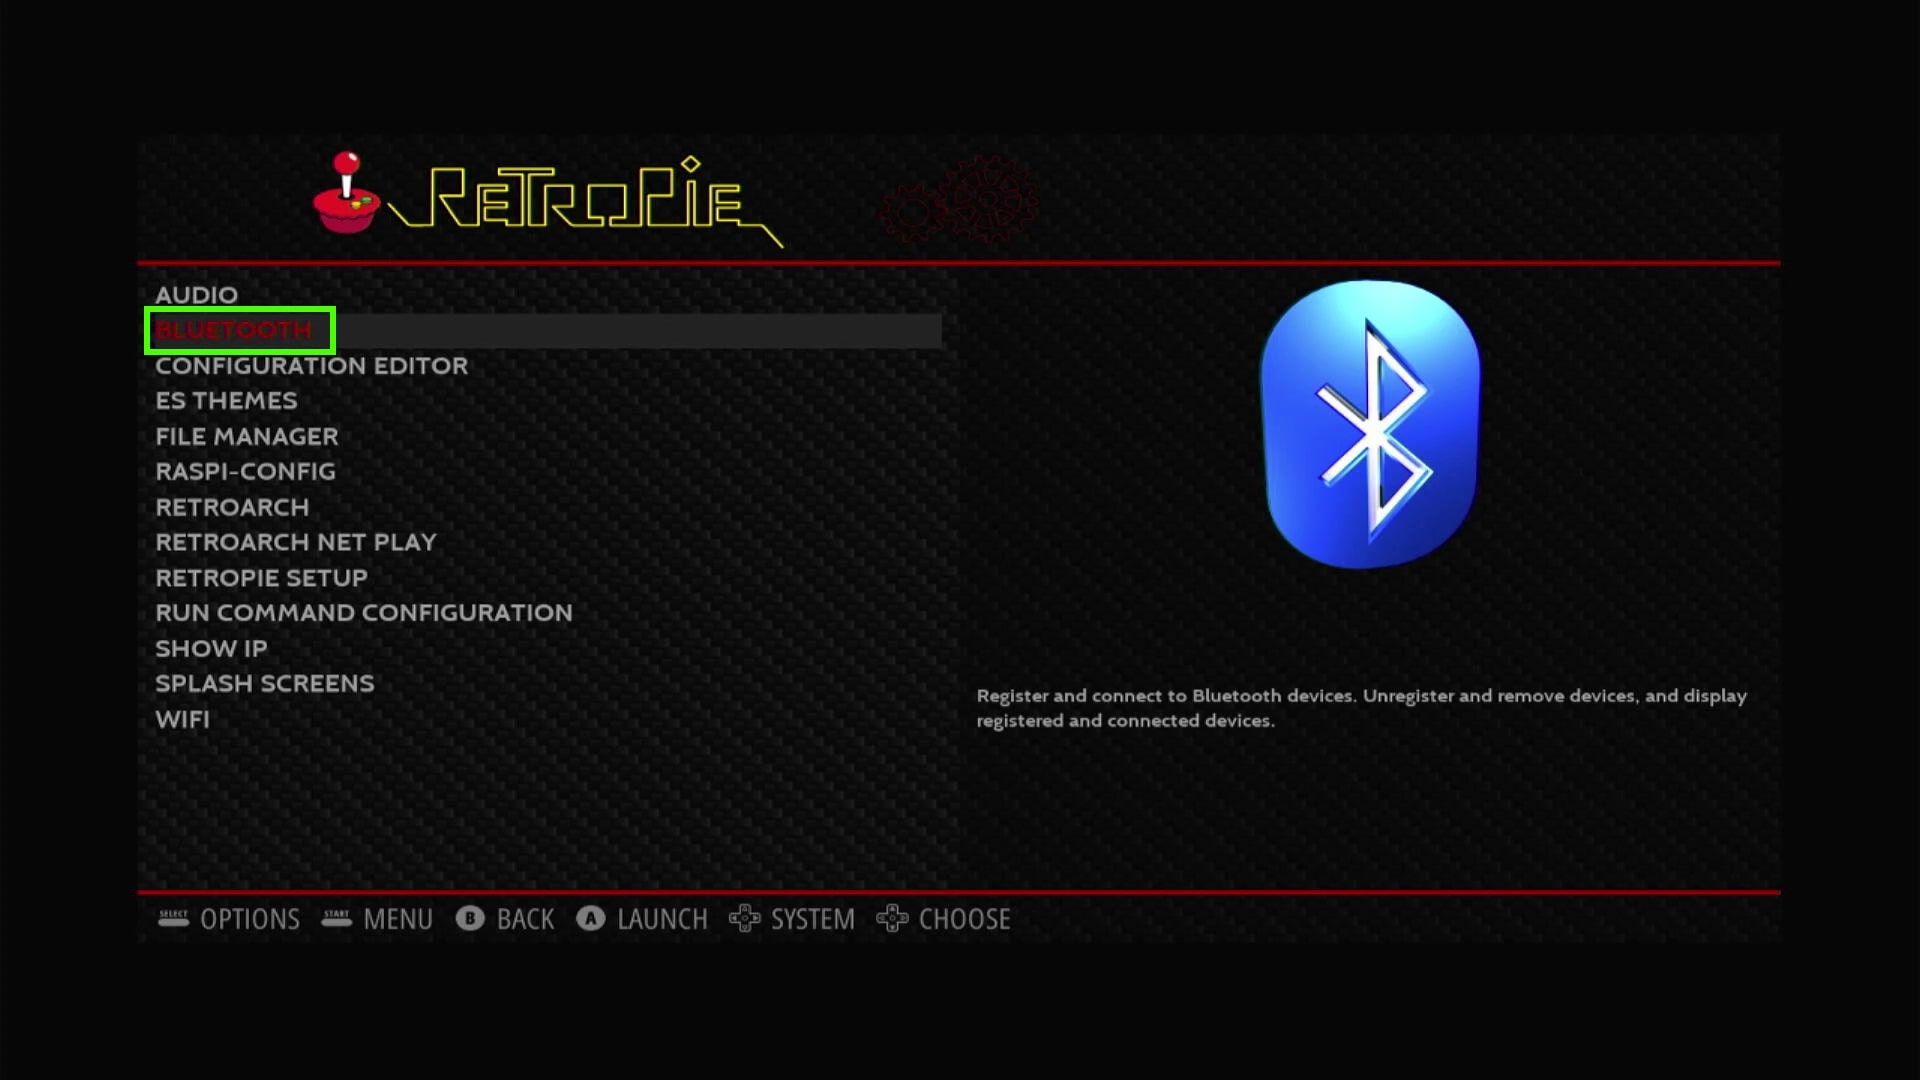
2. Scroll down and select Bluetooth.
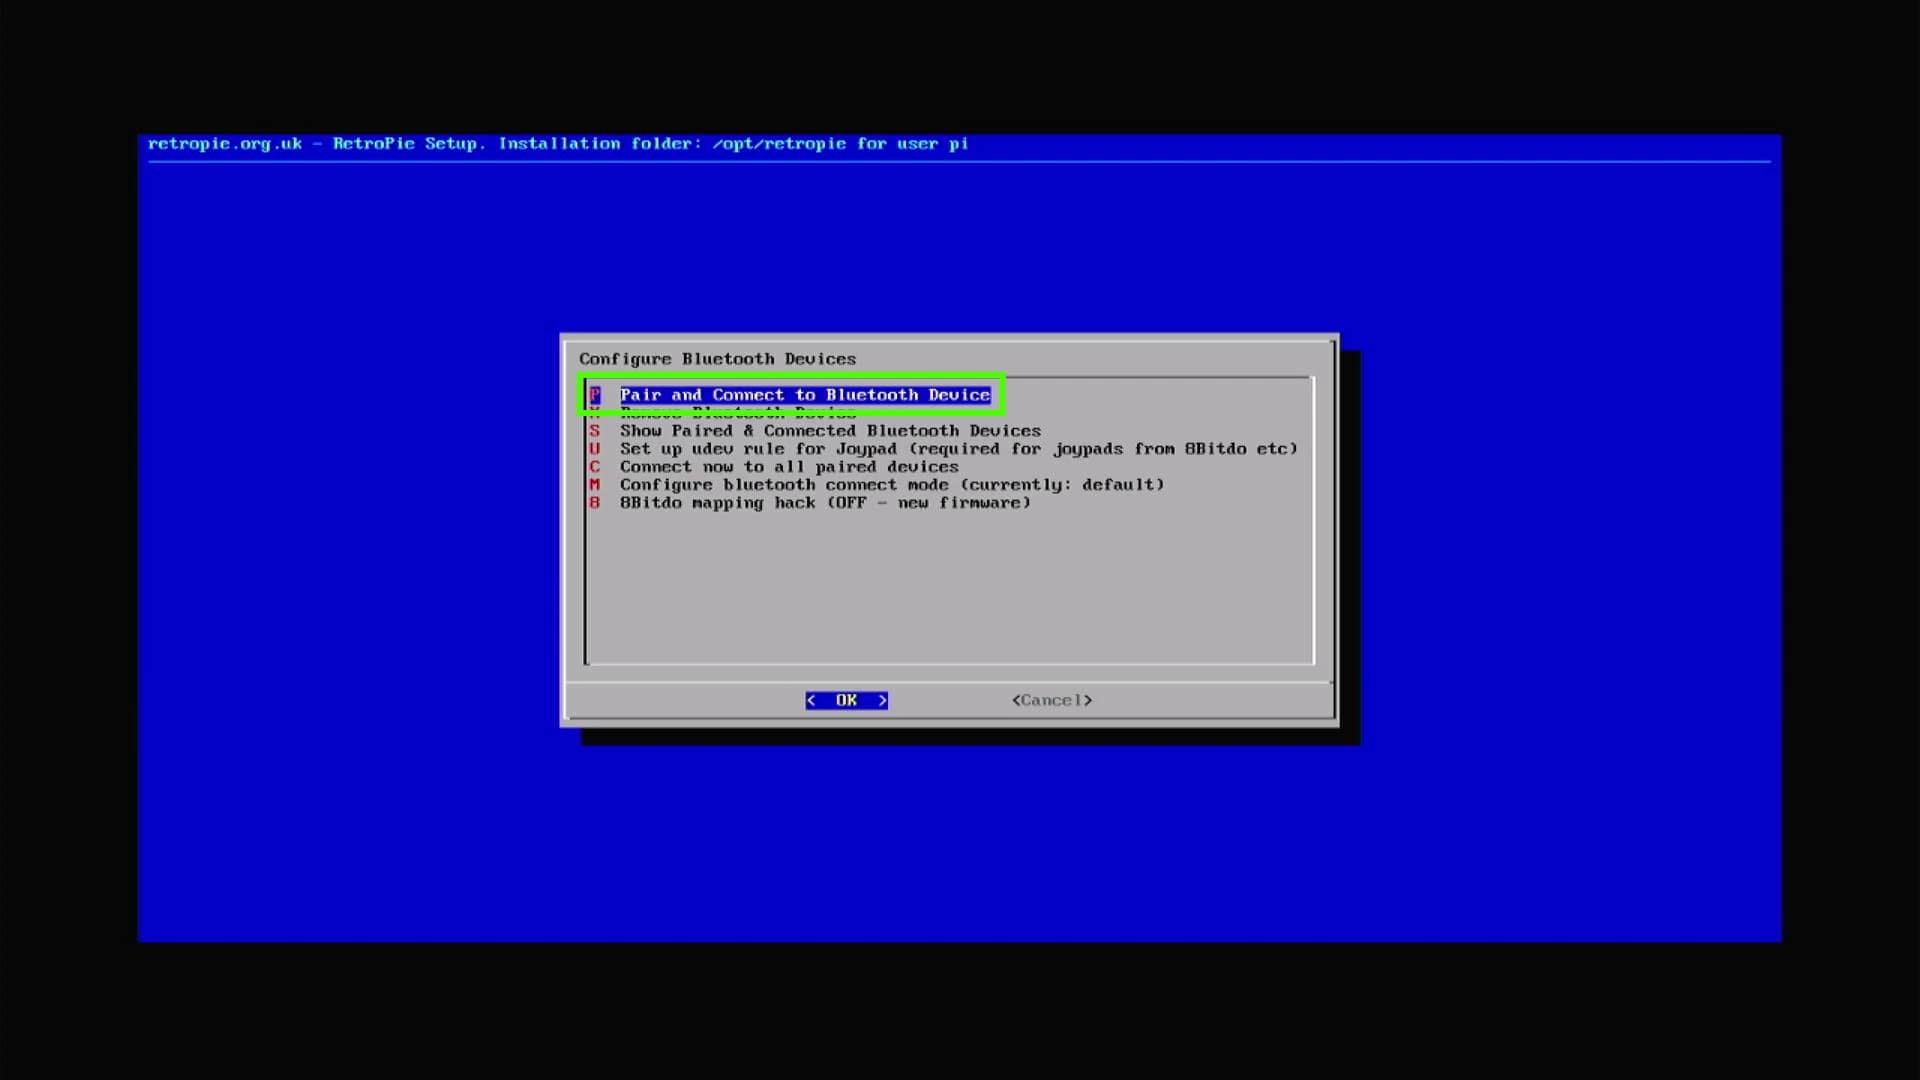
3. In the new menu select Pair and Connect Bluetooth Device.
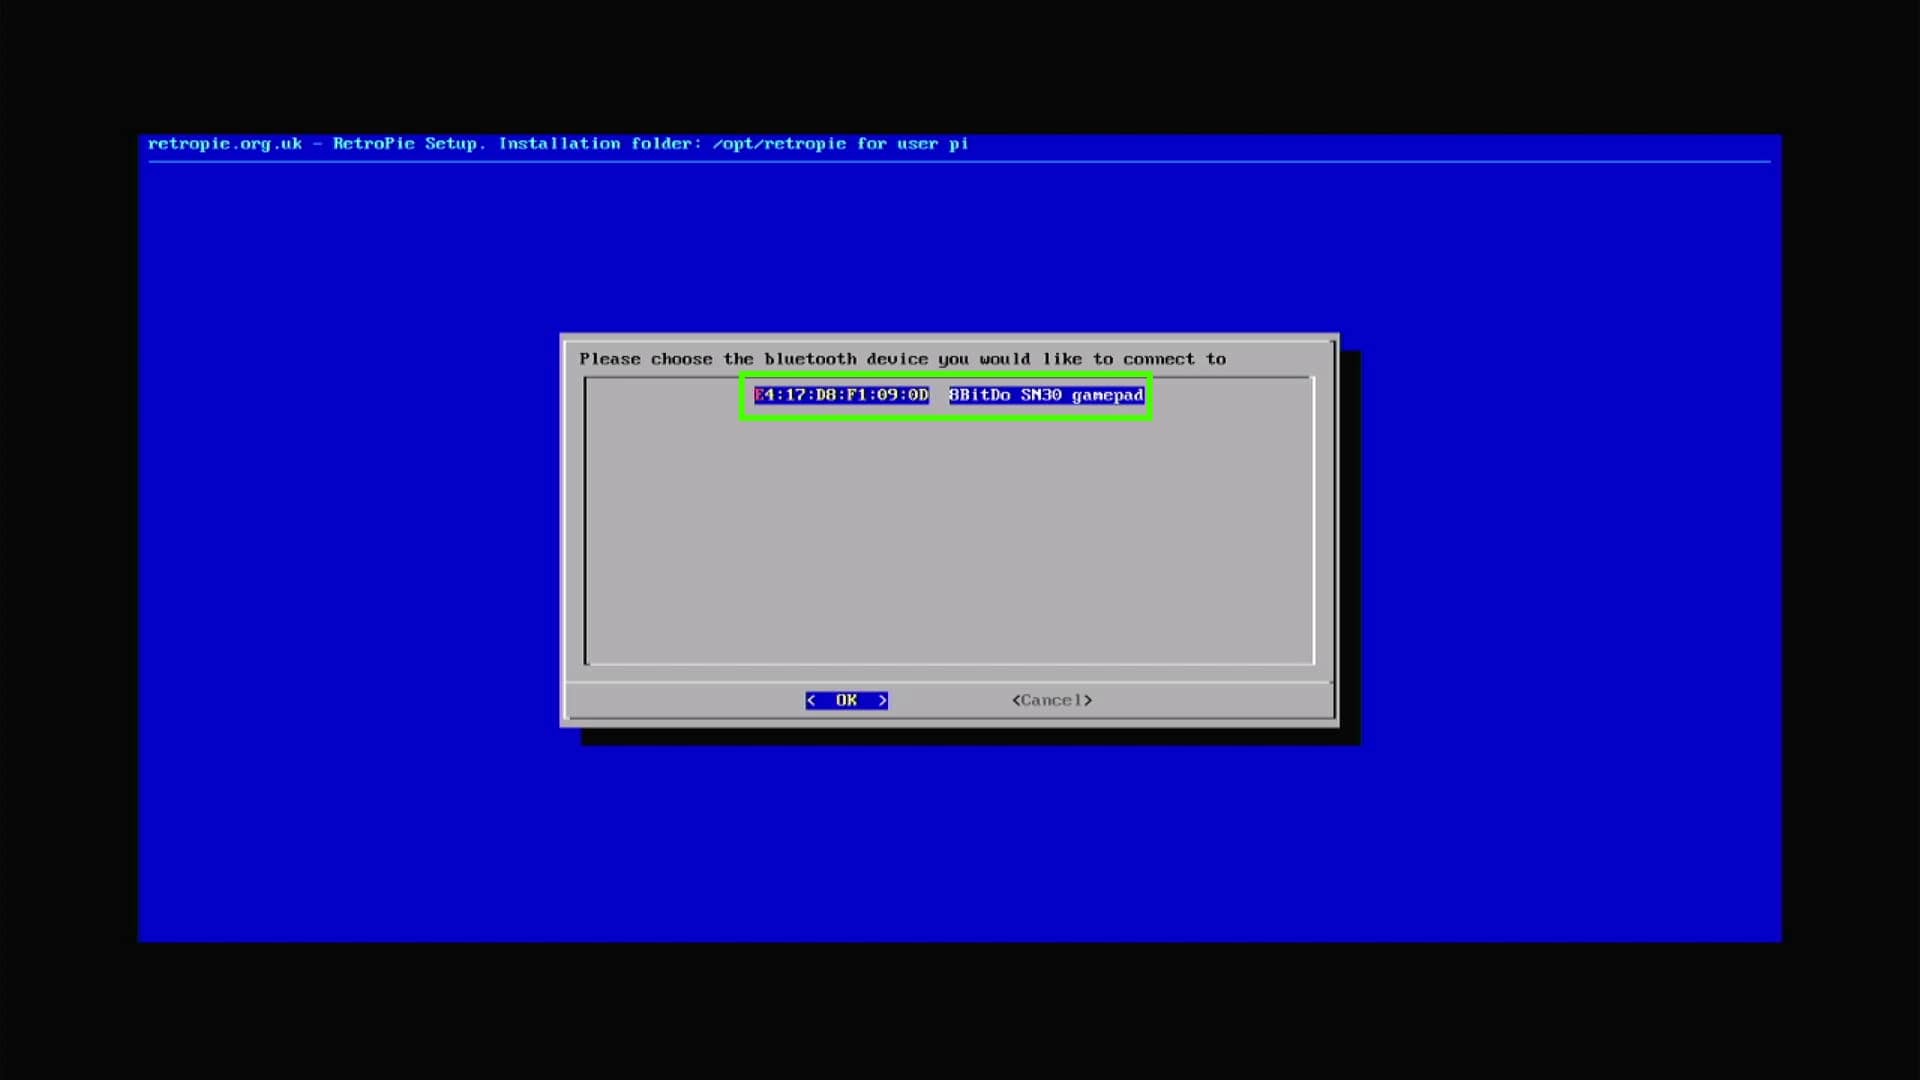
4. Select your device from the list. Devices are listed by their Bluetooth MAC address, which is typically printed on your controller.
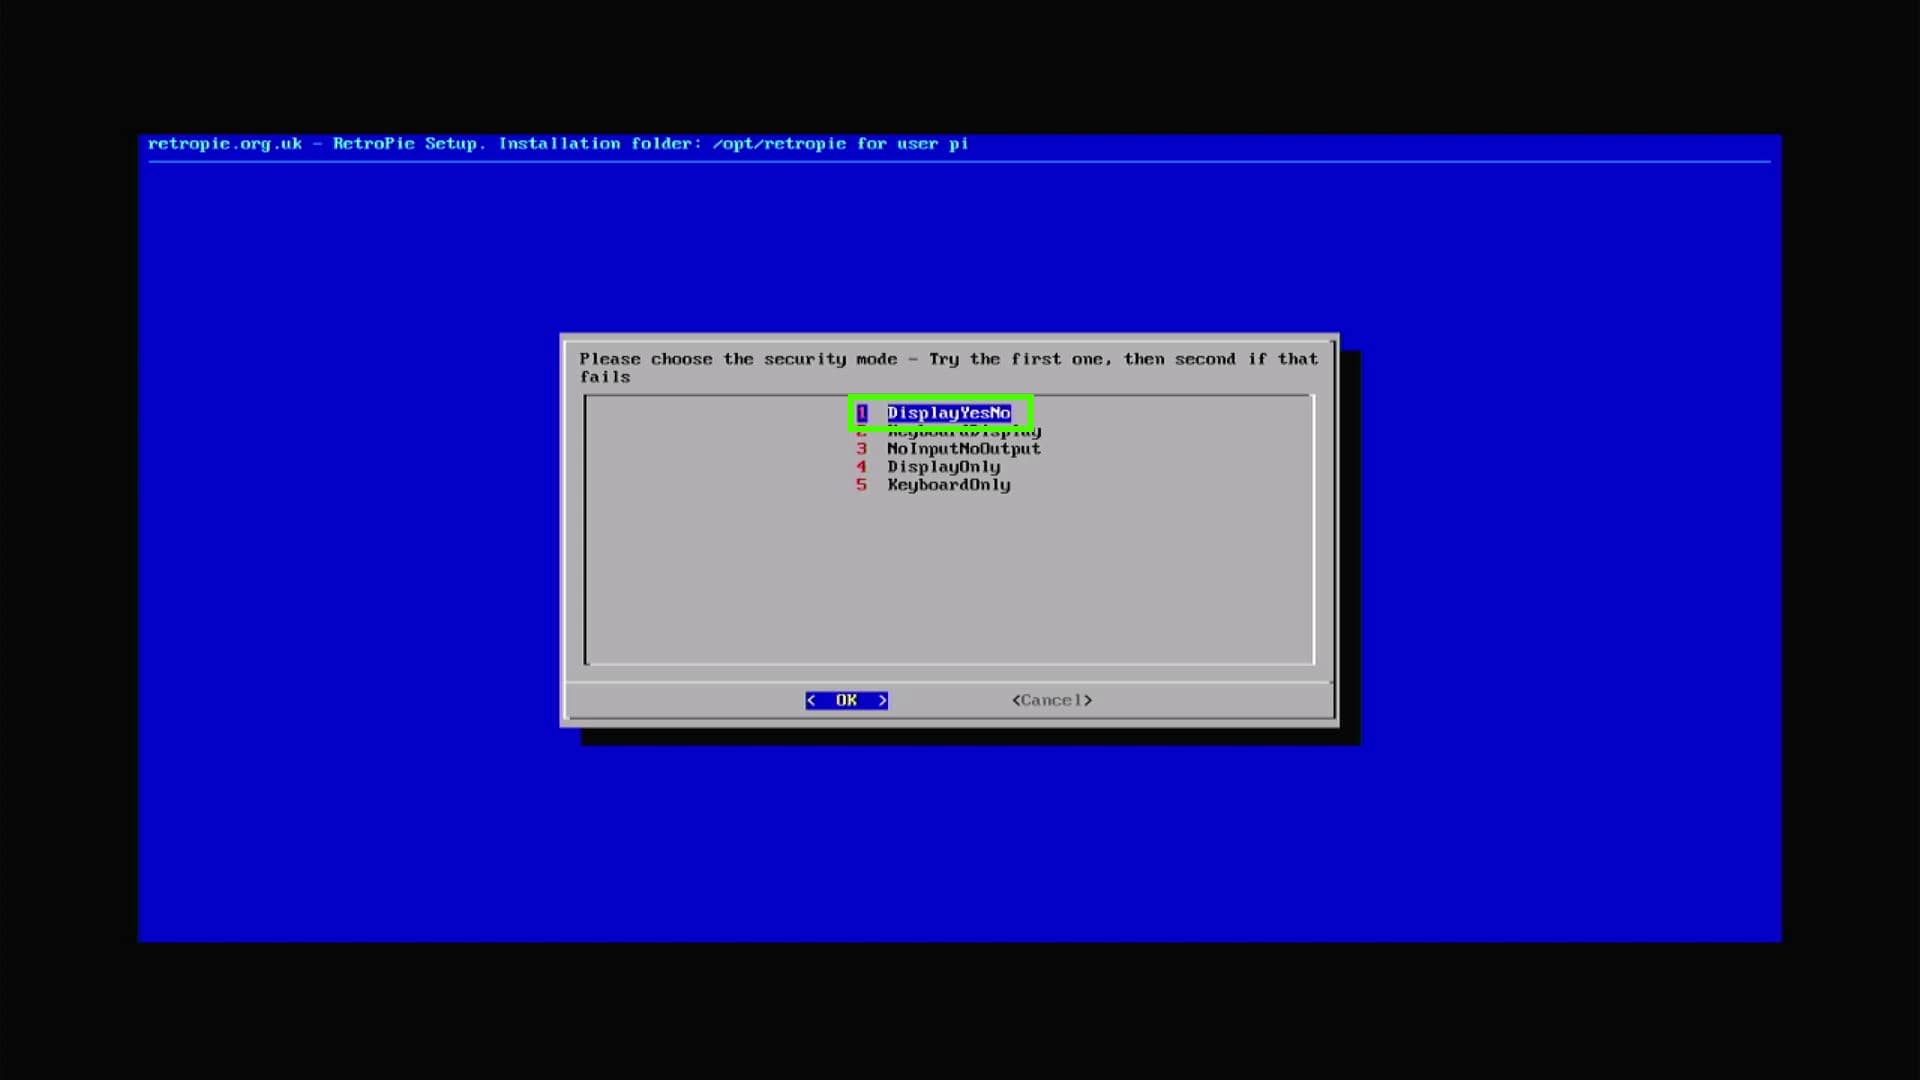
5. Validate the connection using a security mode. This will confirm that your Raspberry Pi is connected to the correct controller. If the first security mode does not work, try the next in line.
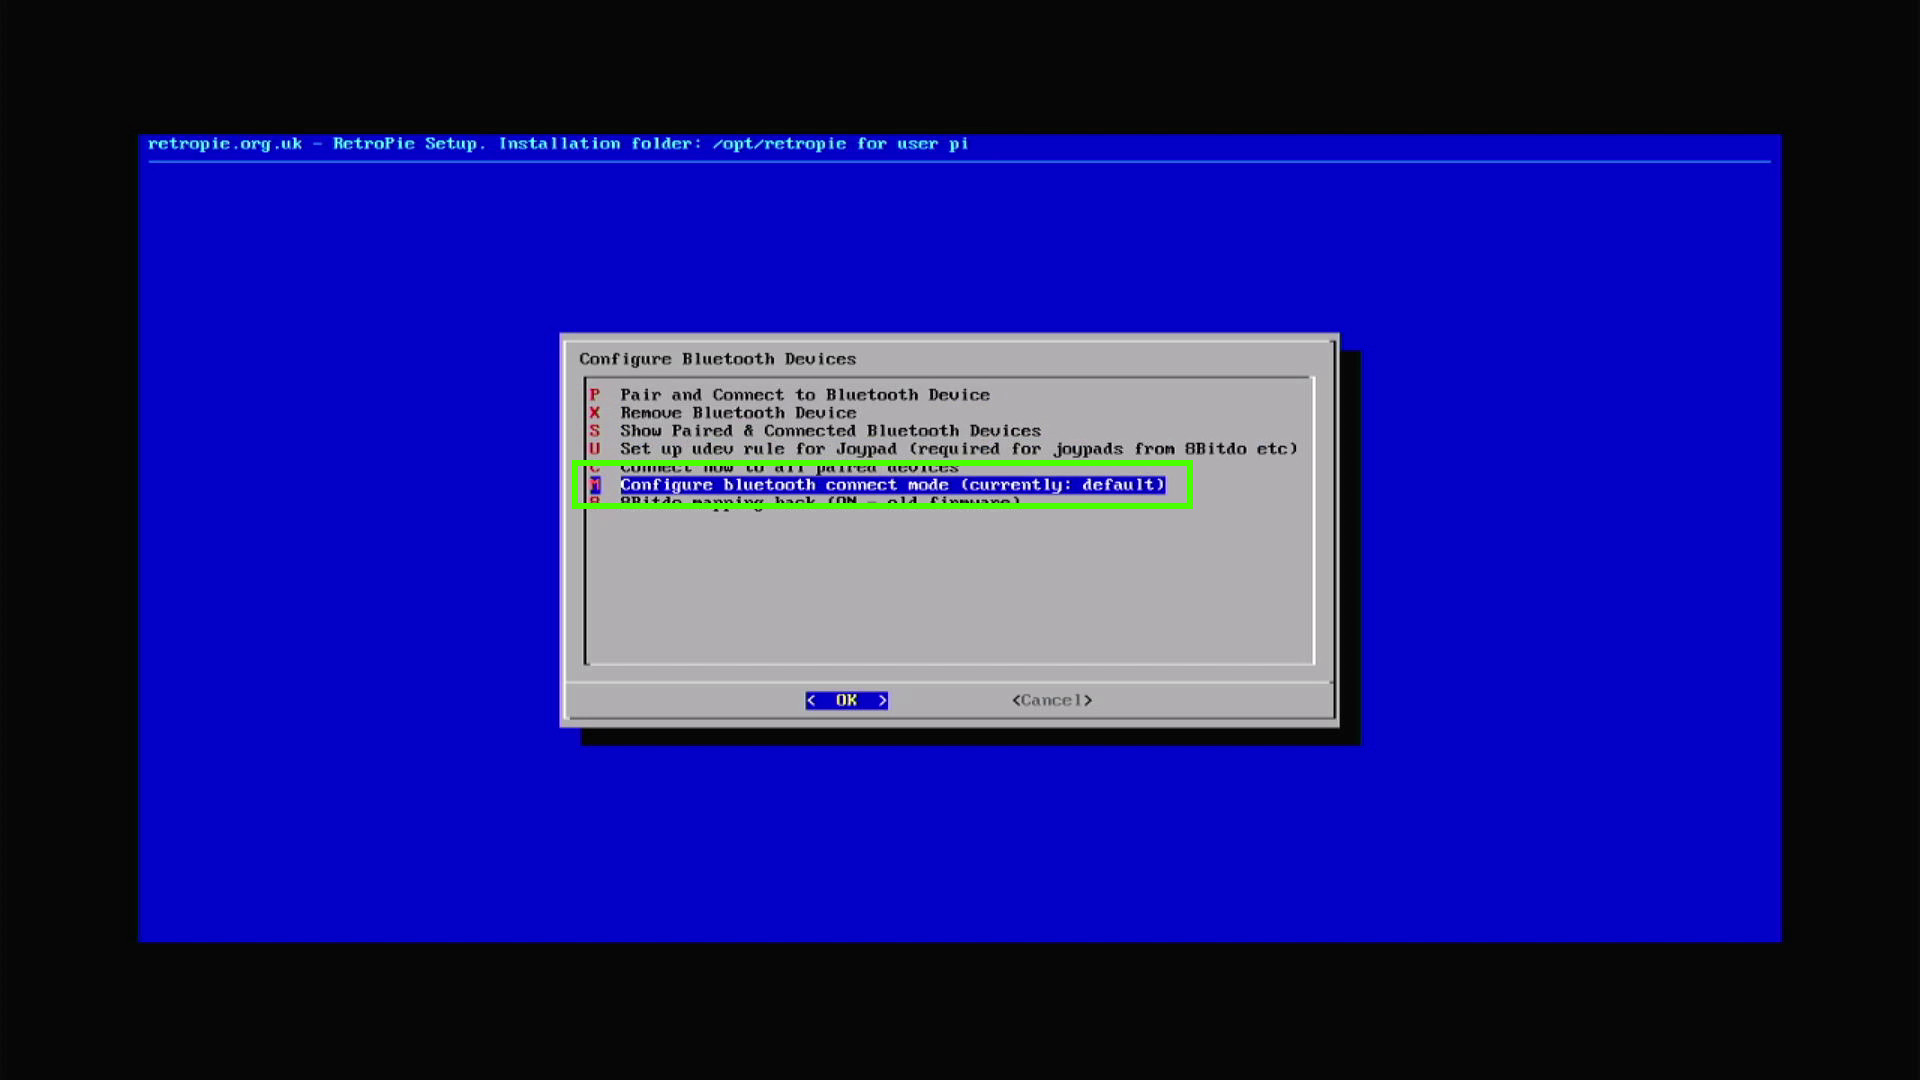
6. Select Configure bluetooth connect mode. This will set up how Bluetooth connects to our controller.
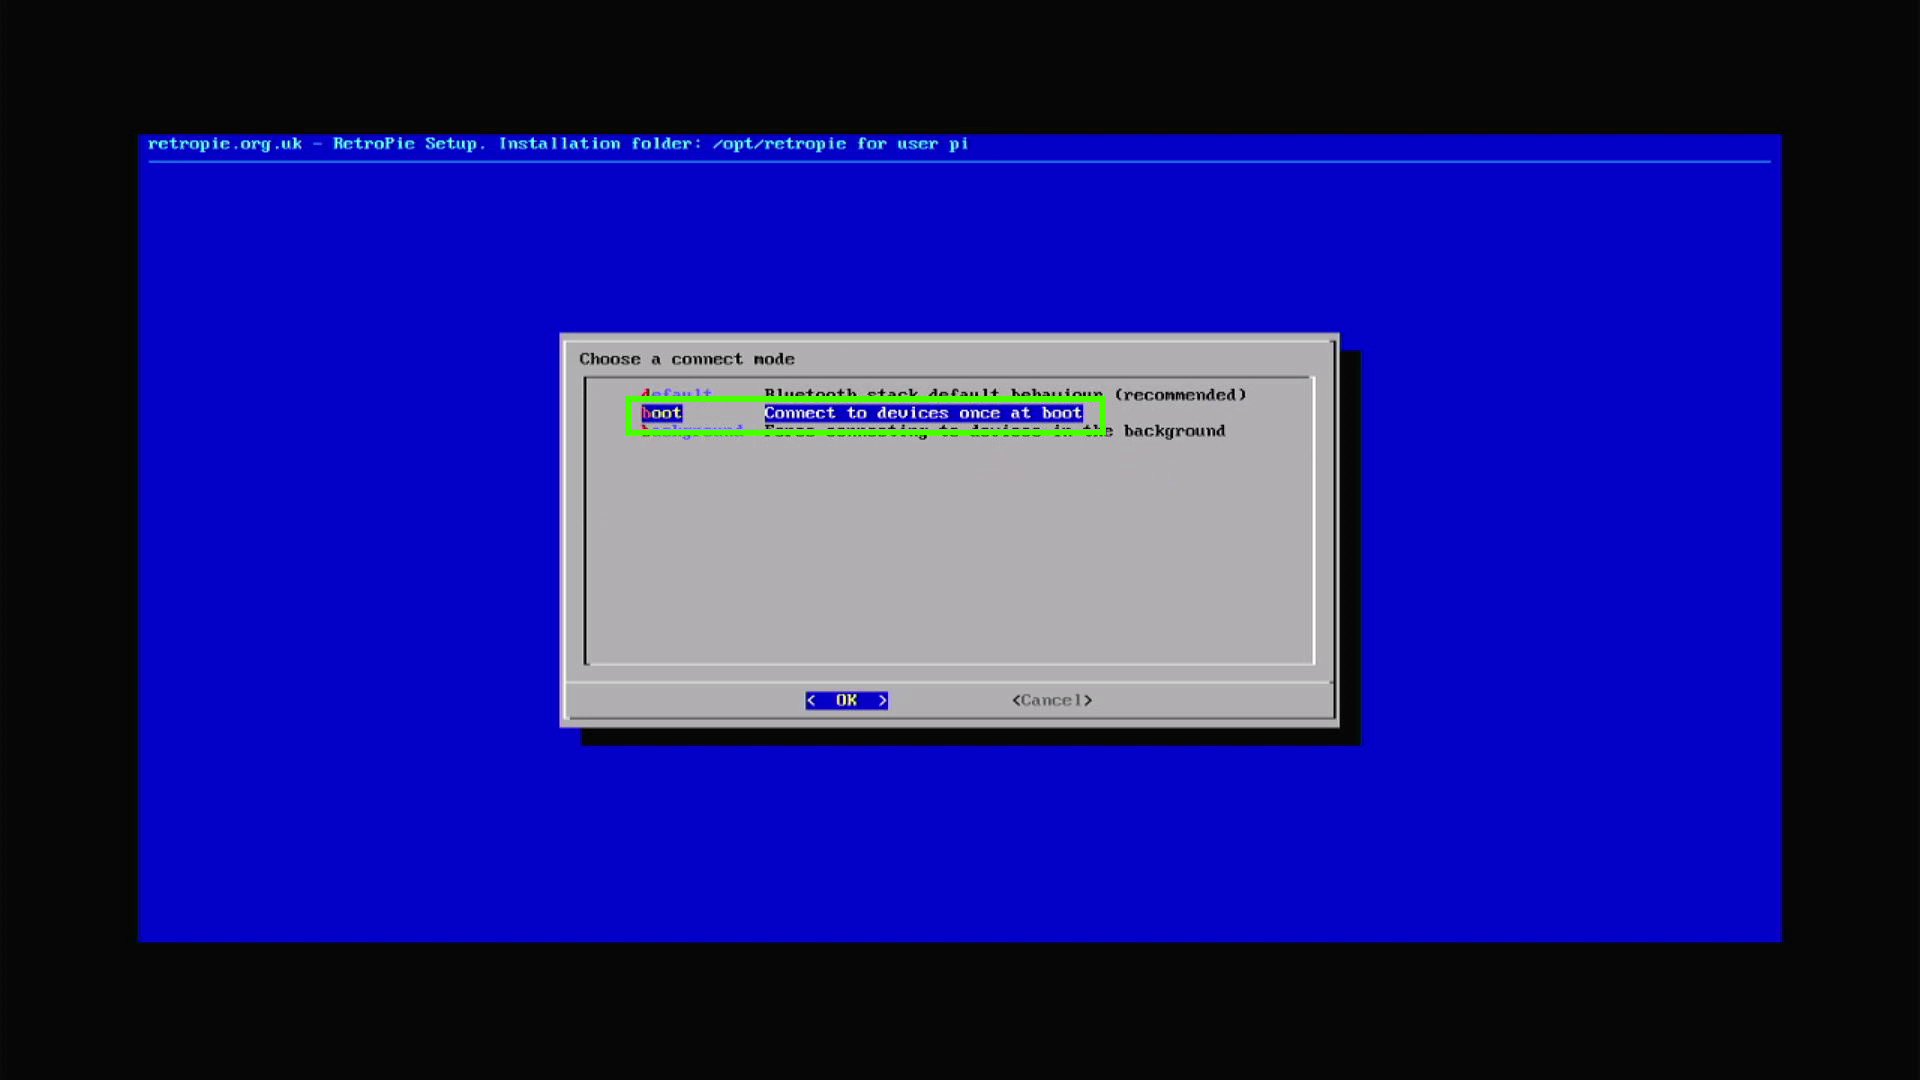
7. Set the connection to happen at boot. This forces RetroPie to connect to our controller as soon as the system is ready.
The controller is now connected and ready for use with RetroPie. Note that some emulators may require additional tweaks for specific layouts.Most Bluetooth controllers will work straight away, but some, such as those from 8bitdo, require additional steps to get working.
Adding a Splash Screen
The default RetroPie splash screen, the screen that appears when the Raspberry Pi is powered up, is perfectly fine, but what if you could add our own? Well, you can. RetroPie has a simple menu where you can add your own images for use at startup.
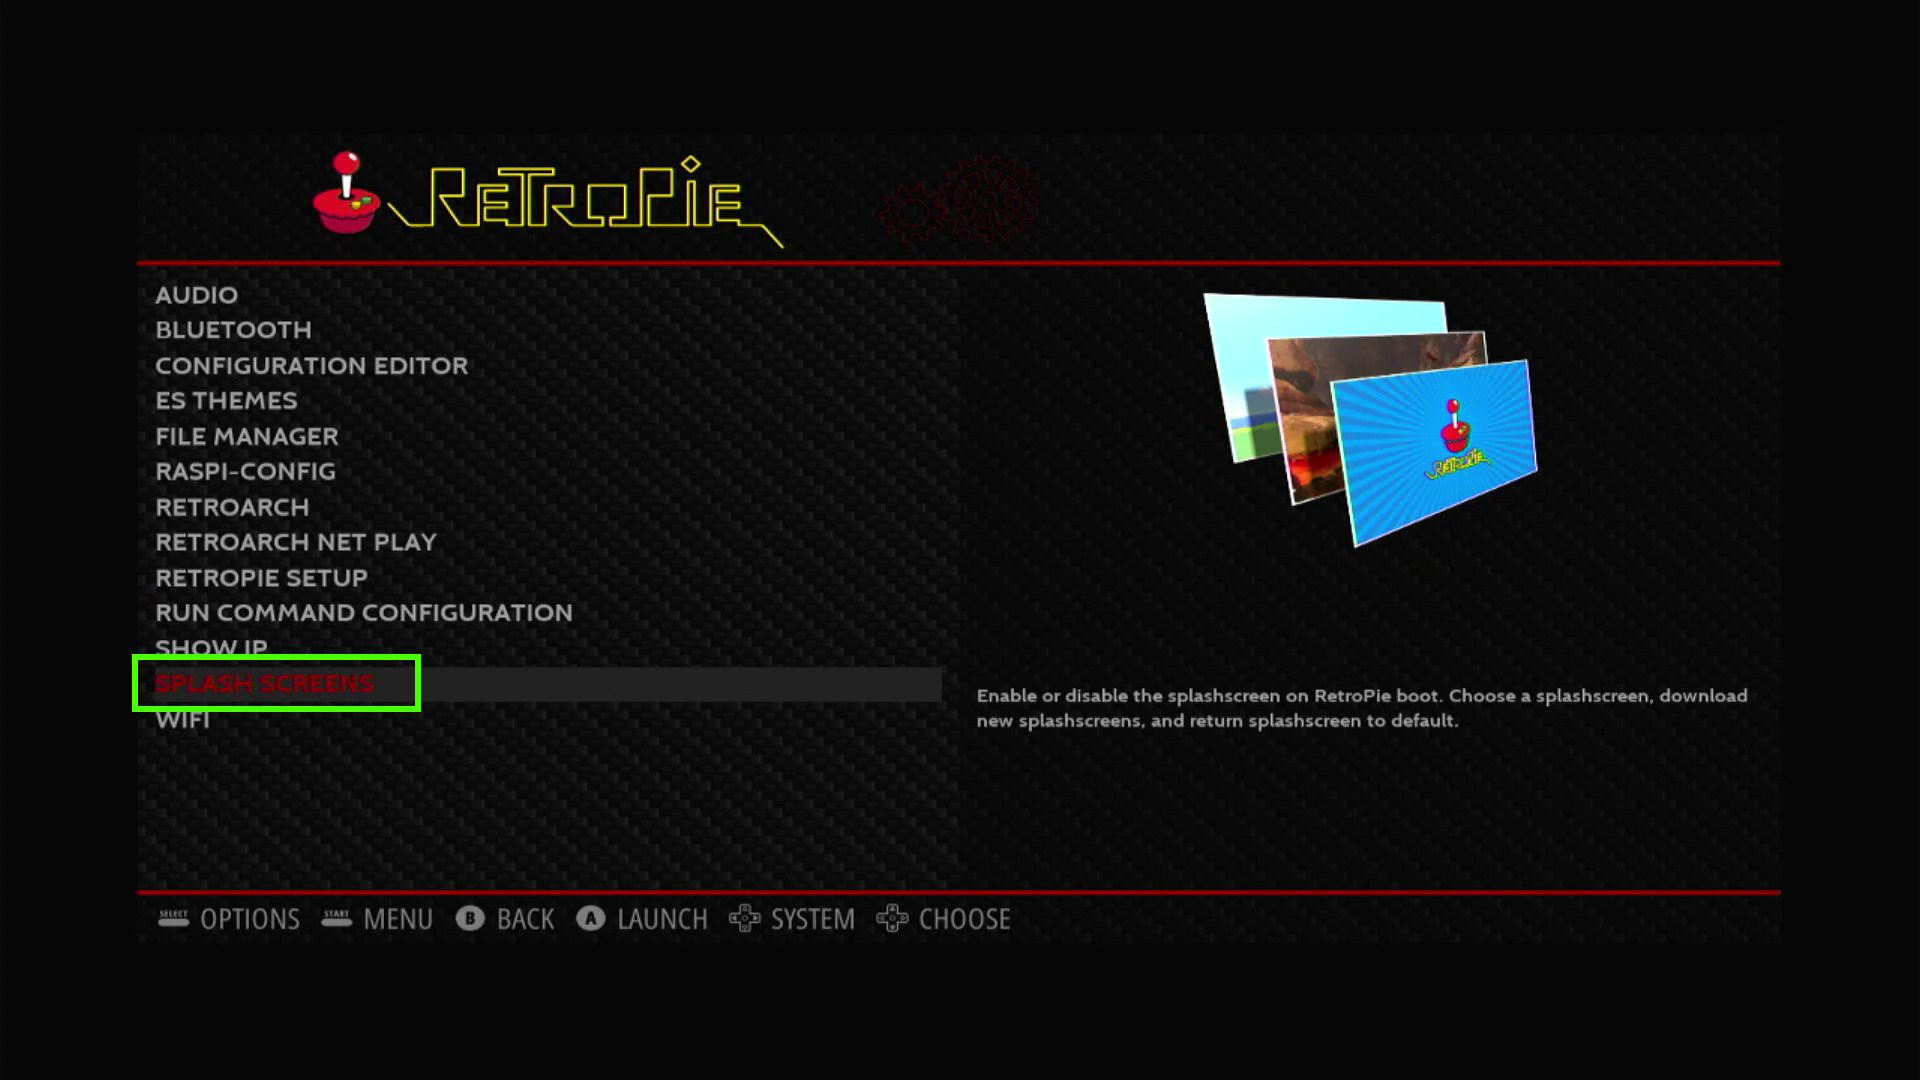
1. Select the RetroPie menu.
2. Select Splash Screens.
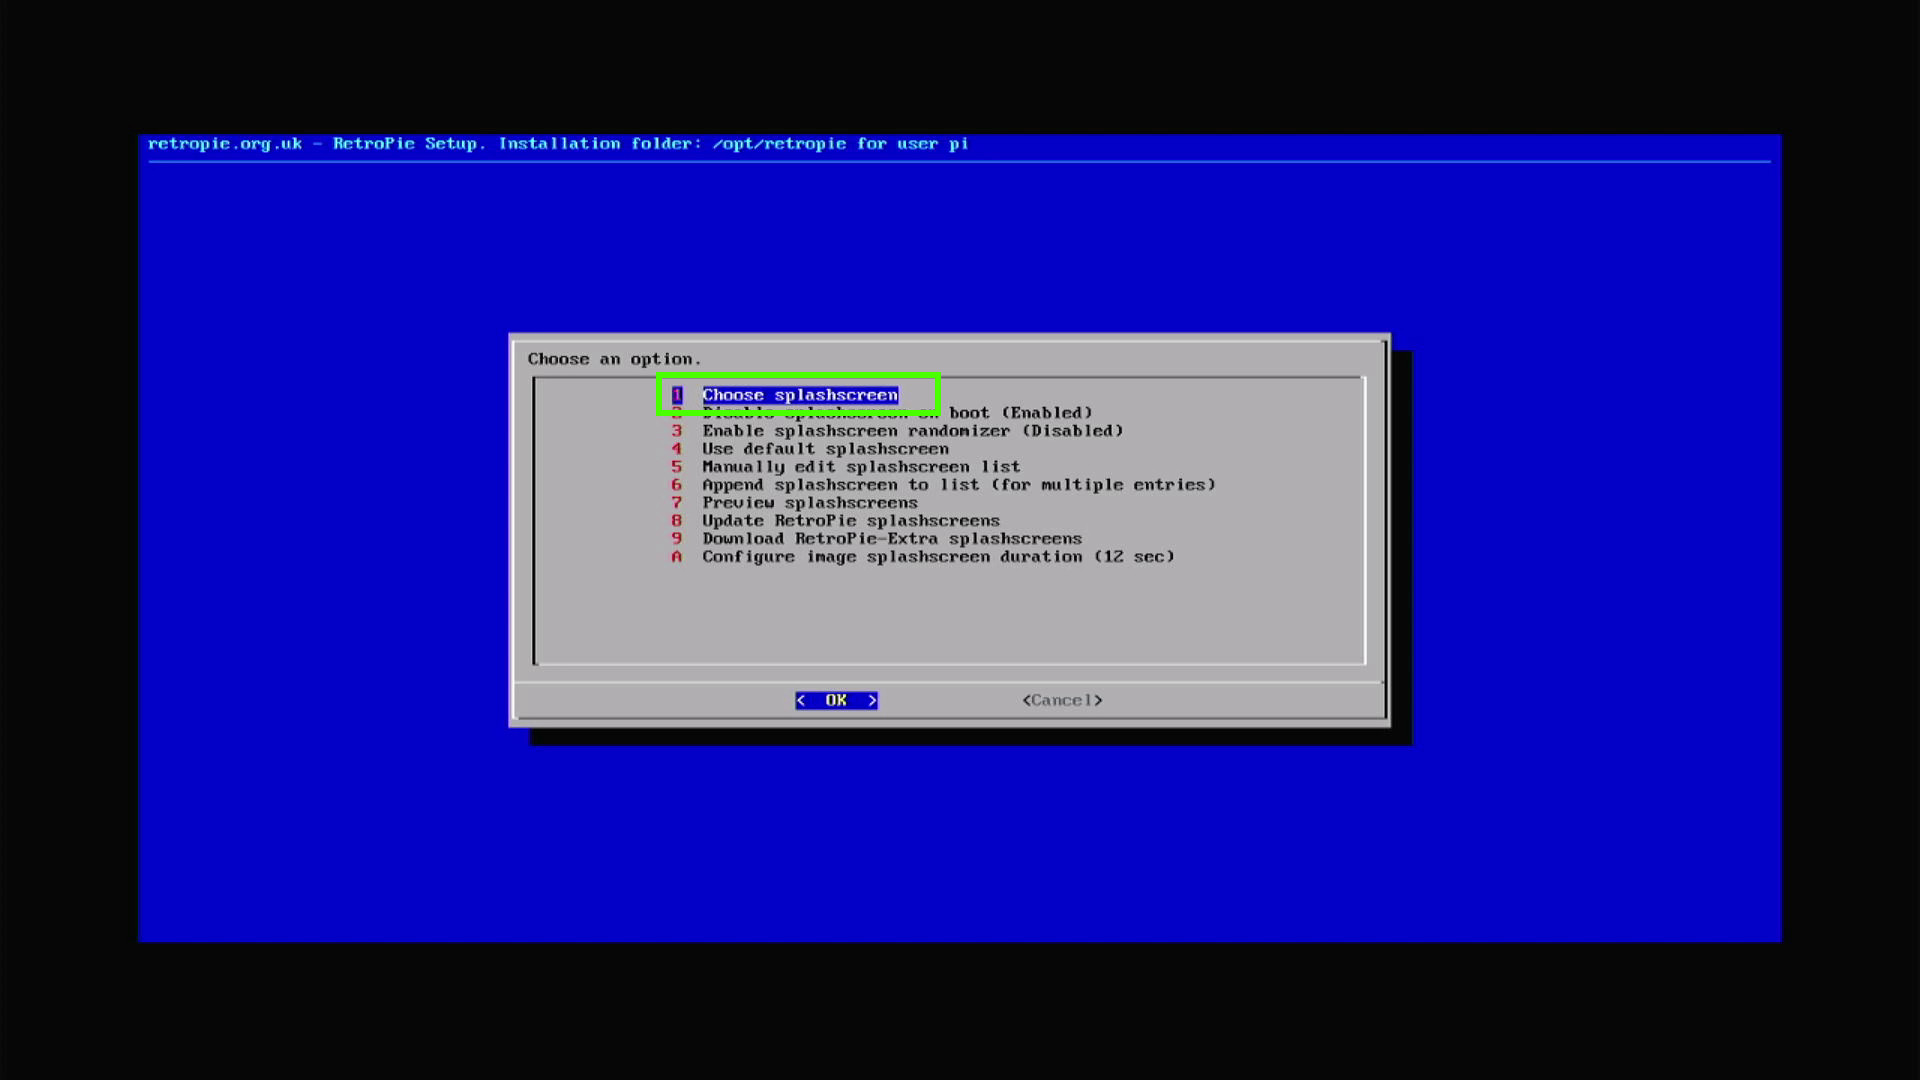
3. Select Choose splashscreen.
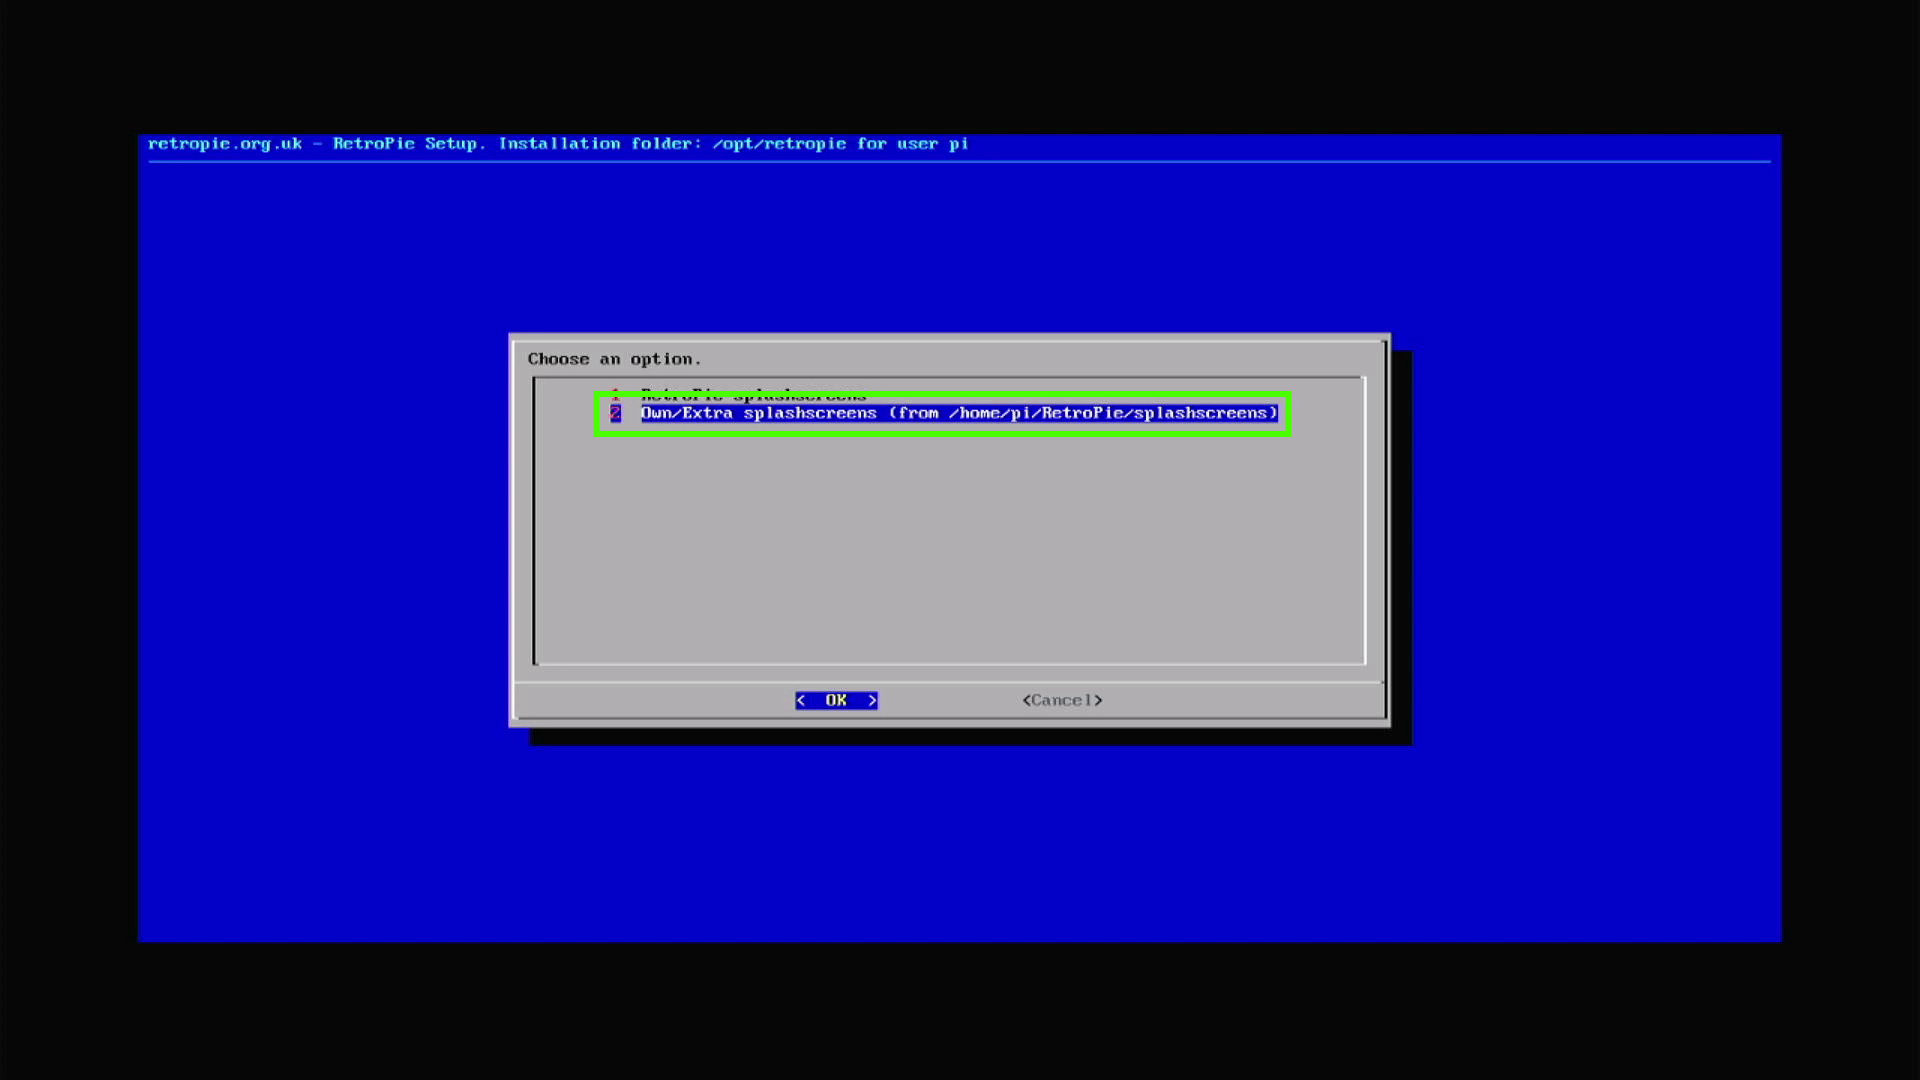
4. Select Own / Extra Splashscreens. This will produce an error as the folder does not yet exist. By doing this we create the folder where the images can be stored.
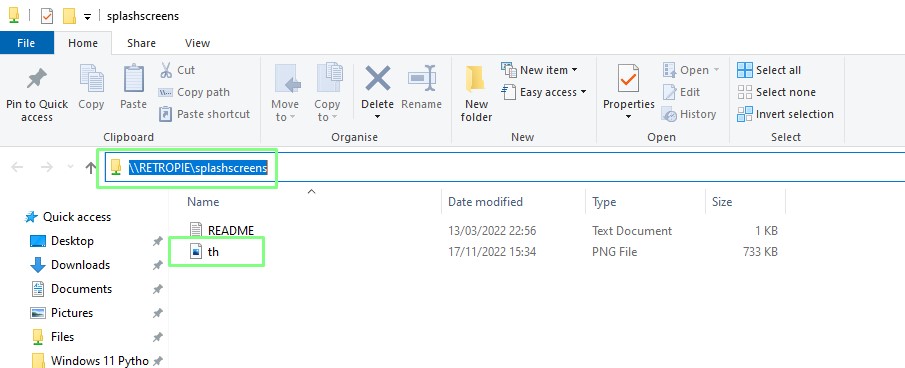
5. On your Windows PC, open the SMB share \\RETROPIE\splashscreens and copy the image that you wish to use. We used a 1920 x 1080p PNG of the Tom’s Hardware logo.
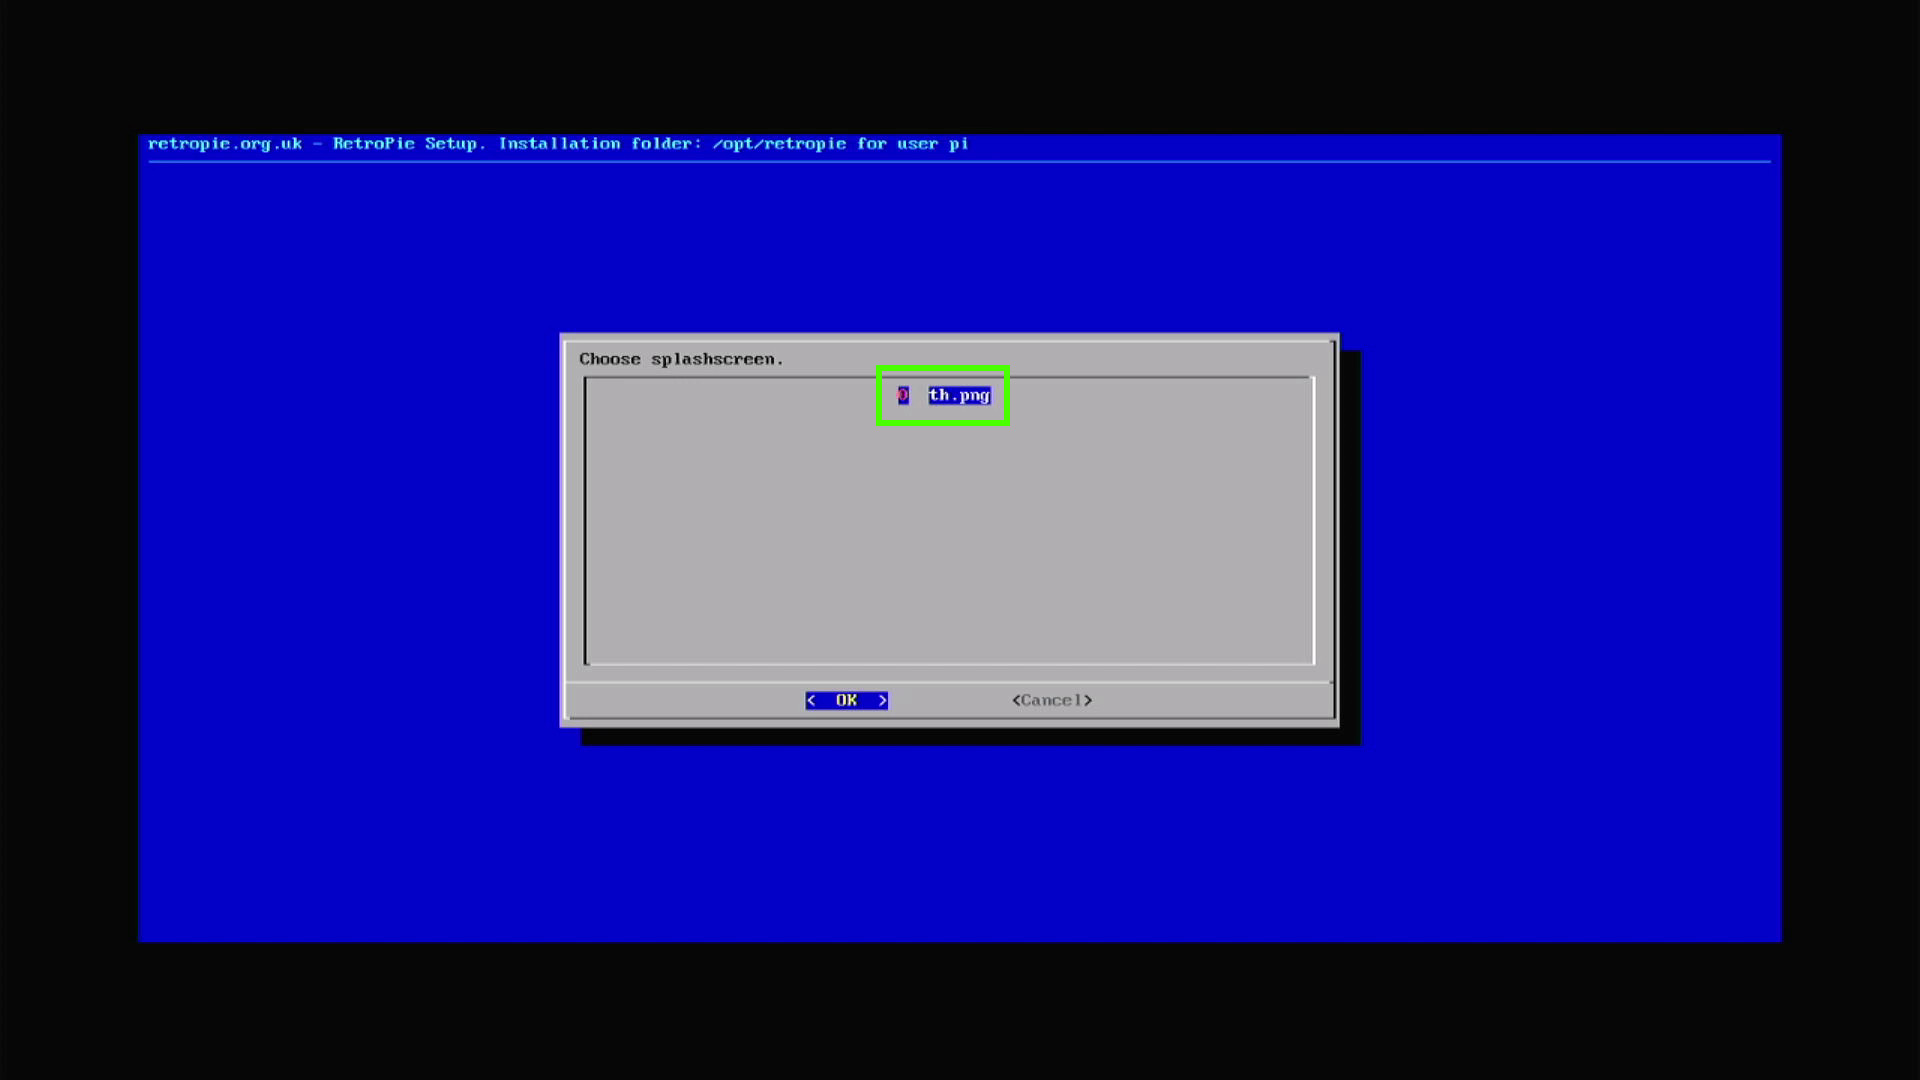
6. Repeat steps 1 to 4. You will see the image that was copied to the folder. Select the image.
7. Reboot the Raspberry Pi and your new splash screen will be displayed.


Les Pounder is an associate editor at Tom's Hardware. He is a creative technologist and for seven years has created projects to educate and inspire minds both young and old. He has worked with the Raspberry Pi Foundation to write and deliver their teacher training program "Picademy".
-
Luk_as Is it possible to install RetroPie alongside other already existing applications on my Raspbian?Reply -
TerryLaze Reply
It's just a fancy front-end for retroarch so if you already have a running OS you can install that.Luk_as said:Is it possible to install RetroPie alongside other already existing applications on my Raspbian?
Retropie standalone might be using less resources though enabling more games to be able to run.
