 Join Tom’s Hardware today


3D printing exploded in popularity during the great PPE shortage of 2020 while creating fire hazards for new hobbyists. Though few and far between, there have been documented instances of unattended 3D printers creating electrical fires. More commonly, we find botched print jobs where the print has lifted from the build surface and is now traveling as a huge glob of filament tangle attached to your hot end. With many 3D prints averaging 4 hours, it is almost humanly impossible to monitor each print from start to finish, but you can have a Raspberry Pi do the work for you and alert you if something goes wrong.
In this tutorial, we’ll set up OctoPrint on Raspberry Pi 3, sending print jobs from Cura, and The Spaghetti Detective plugin to monitor our prints from anywhere in the world.

What is OctoPrint?
OctoPrint is an open-source web interface for controlling and monitoring 3D printers. OctoPrint allows users to control their 3D printer from within their local home network. OctoPrint is maintained by Gina Häußge, the original creator.
To securely monitor 3D prints from outside of a local network, we have chosen 3rd party plugin, The Spaghetti Detective for its AI (deep learning) and security capabilities. The Spaghetti Detective was created by and is currently maintained by Kenneth Jiang.

This article provides step-by-step instructions to:
- Set up OctoPrint on a Raspberry Pi 3.
- Send print jobs from Cura to your 3D printer over WiFi.
- Configure The Spaghetti Detective plugin to monitor our prints from outside your local network.
- Smart Home Integration: Automatically turn off your 3D printer after a print job completes, and the hot end has cooled to an acceptable temperature.
Which 3D printers work with OctoPrint?
While there is no official list of supported 3D printers, OctoPrint users can post their experiences with various printer brands in the community forum here. Personally, both of my printers, Anet A8 and Tronxy D01, worked seamlessly with OctoPrint. If your 3D printer can print via USB printer cable, it will likely allow you to use OctoPrint on Raspberry Pi.
What’s the Catch?
3D printers with resume print power failure capabilities work by reading gcode from a physical microSD card. In the event of a power failure during a print job running from OctoPrint, your print will stop, and it will take heroic efforts to resume your print job. The simple solution is to plug your 3D printer and Raspberry Pi running OctoPrint to a UPS Battery Backup.
What You’ll Need for this Project
- Raspberry Pi 3
- 8 GB (or larger) microSD card (see best Raspberry Pi microSD cards)
- Power supply/Keyboard/Mouse/Monitor/HDMI Cable (for your Raspberry Pi)
- 3D Printer
- USB cable to connect to your 3D printer (This cable is usually included with most 3D printers.)
- USB Webcam or Raspberry Pi Camera
- Optional: UPS Battery Backup (Although my 3D printer has resume print power failure capabilities, my Raspberry Pi does not.)
Optional: TP-Link Smart Plug
Basic OctoPrint Setup
In this section, we will set up a base OctoPrint web interface where you can monitor your prints from within your local network.

2. Scroll down and click Download which should take you to https://octoprint.org/download/
3. Click Download OctoPi. At the time of the writing of this article, the latest release is 0.17.0

4. If you haven’t done so already, download and install Raspberry Pi Imager on your computer from https://www.raspberrypi.org/downloads/

5. Launch Raspberry Pi Imager.

6. Click ‘CHOOSE OS’ under Operating System and select, ‘Use custom’

7. Select the image you just downloaded from Octoprint.org and click Open.
8. Insert your microSD card into your computer and click ‘CHOOSE SD CARD.’ Select your microSD card from the menu.
9. From the Raspberry Pi Imager, click WRITE.

You may be prompted to enter an admin password for your computer to proceed with the process of flashing your microSD card. Please note that your entire microSD card will be erased during this process and it will take a few minutes.

10. Physically remove your microSD card from your computer and reinsert. The Raspberry Pi Imager automatically ejects your microSD card when the write is successful, but we need to perform one more step before we move forward.
11. Open your File Manager and navigate to your microSD card. The name of your microSD card is usually ‘boot.’
12. Open the file octopi-wpa-supplicant.txt with a source code editor of your choice, such as Atom. Wordpad and Textedit are NOT recommended.
13. Uncomment and edit octopi-wpa-supplicant.txt with your WiFi information and country.

14. Save octopi-wpa-supplicant.txt and eject your microSD card.
15. Insert your microSD card into your Raspberry Pi.
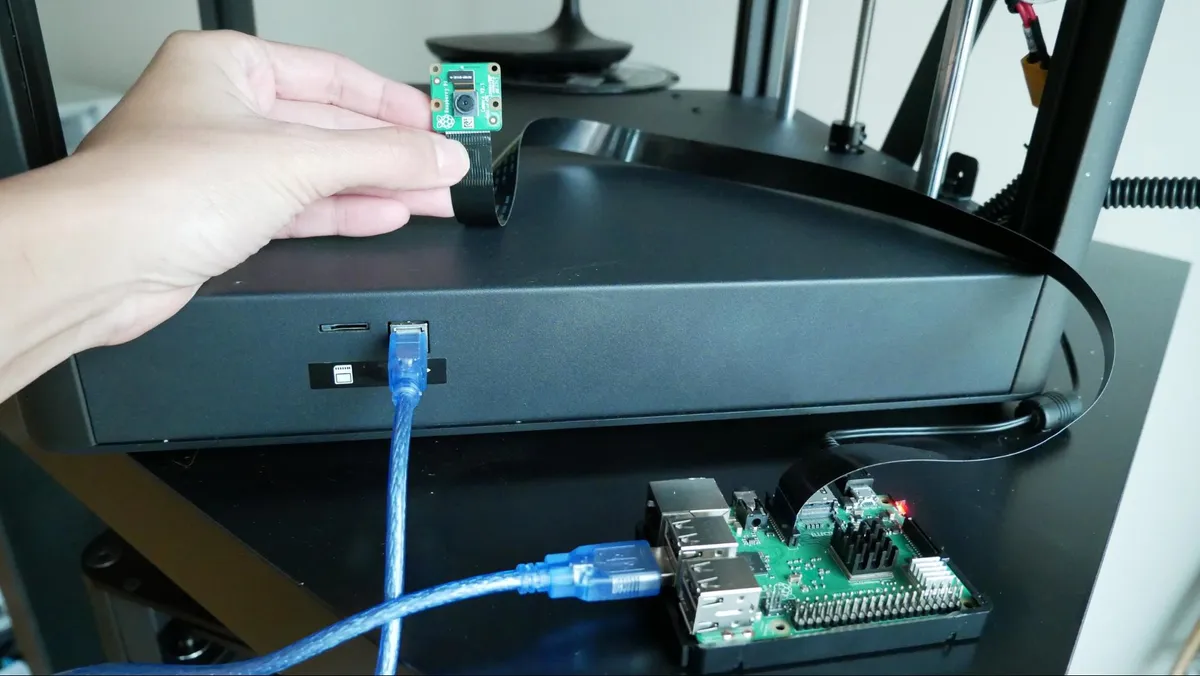
16. Connect your USB webcam or Raspberry Pi camera to your Raspberry Pi.
17. Connect your Raspberry Pi to your 3D printer via USB printer cable.
18. Boot your Pi. This make take a couple of minutes .
19. Navigate to http://octopi.local from your PC. Remember that you must be on the same network as the Pi.
At this point, you should see the OctoPrint Setup Wizard. If you do not, connect a monitor to your Raspberry Pi to verify that it is correctly running OctoPrint and to obtain the internal IP address for your Raspberry Pi. You can enter the IP address (i.e. 10.0.0.199) in your browser instead of http://octopi.local

20. Click Next and follow the prompts to create your internal login and password for OctoPrint. At this point, you will only be able to access OctoPrint from your local network. Select your Preferences and set your printer profile.

After you successfully complete the OctoPrint Setup Wizard, you’ll see the OctoPrint web interface.

21. Turn on your 3D printer and click “Connect” in OctoPrint.
22. If you connected a camera to your Pi, check if your webcam feed is working by clicking on the Control tab. Hint: This would be a good time to adjust the placement of your camera. Check Thingiverse for camera mounts that you can print for optimal viewing of your 3D print.

23. From the Control tab, try pressing the X/Y and Z motor controls.
24. From the Temperature tab try setting the temperature of your hot end and your print bed.

And that’s a basic OctoPrint setup. You can now monitor 3D prints from within your local network. Next, we will eliminate the step of saving gcode files to a microSD card and physically inserting the card into our 3D printer.
How to Send Print Jobs from your PC to OctoPrint on Raspberry Pi
In this section, we will download Cura to send print jobs to our 3D printer via OctoPrint on Raspberry Pi. Cura is a free slicing software from Ultimaker.

2. Install Cura on your PC.
3. Once you have set up your 3D printer profile, in Cura, click Marketplace (near the top right) to see a menu of plugins.
4. Install the OctoPrint Connection plug-in.

5. In Cura, from the Settings menu, select Manage Printers. your printer, and Connect OctoPrint.
6. You’ll be prompted to enter your API key from OctoPrint.
7. From your OctoPrint dashboard, click the wrench icon and select API from the menu on the left.
8. Copy and Paste the API key from OctoPrint to Cura.
9. Click Connect in Cura.
This step enables you to send print jobs wirelessly from your PC to your 3D printer via OctoPrint on your Raspberry Pi. Next, we will set up a third-party plugin to securely access our 3D printer from outside of our local network.
How to Monitor your 3D Print Jobs from Outside of Your Network
Thus far in this tutorial, we have set up OctoPrint on our Raspberry Pi, we can print wirelessly from our PC to our 3D printer, and monitor our prints from within our local network. Now let’s set up The Spaghetti Detective to monitor our prints from outside of our network.
Disclaimer: Your 3D printer operates at temperatures that are capable of igniting a fire under the wrong circumstances. While we do not encourage leaving your 3D printer unattended during an active print job, in many cases it may be necessary to do so.
What is The Spaghetti Detective?
The Spaghetti Detective is a secure plugin for OctoPrint that watches your print jobs for “spaghetti” and utilizes AI / Deep Learning camera images to spot prints gone awry. When The Spaghetti Detective detects a possible print failure, it can pause your print and send a text message to alert you. From anywhere in the world, you can view your live print job and decide to resume the print, or cool down your hot end.

Why use The Spaghetti Detective?
While it may be tempting to simply port forward your OctoPrint setup, it also creates a huge security risk with a device that can generate enough heat to start an electrical fire. A hacker could easily ignite a fire in your home with your port-forwarded OctoPrint. The Spaghetti Detective has been deemed a Safe Remote Access method for OctoPrint. A basic account for The Spaghetti Detective is free.
How to Set Up The Spaghetti Detective
1. From your OctoPrint web interface, click on the wrench icon in the menu near the top of the screen.
2. Select Plugin Manager from the menu on the left.
3. In the plugin page, scroll down and click the button for Get more…

4. Search for The Spaghetti Detective and click Install.

5. You will be prompted to restart OctoPrint after successfully installing The Spaghetti Detective. Click Restart now.

6. After restarting OctoPrint, you will be presented with The Spaghetti Detective Setup Wizard. Follow the prompts to set up your account with The Spaghetti Detective.

7. Copy and paste your secret token to OctoPrint. Click Test.

8. Click Finish.
By default, The Spaghetti Detective will record a timelapse video of each of your prints, send you an email when your print job successfully completes, or send a text if it detects a possible failure. You can modify your settings anytime in User Preferences under your Profile.

Bonus: Automatically Turn-off Your 3D Printer After Your Print Job
This step combines smart home tech with OctoPrint to save electricity by turning off your 3D printer after a print job completes AND the hot end has reached a reasonable temperature, i.e. 90°C.
For this step, you’ll need a TP-Link smart plug configured on the same local network as your Raspberry Pi running OctoPrint, and an assigned internal IP for your smart plug. We will utilize the OctoPrint Shutdown Printer plugin for this step which requires a TP-Link brand Smart Plug. We have not tested this plugin on other brands of smart plugs.
1. Plug in your TP-Link Smart Plug to your UPS Battery Backup. Your Raspberry Pi should also be plugged into your UPS.
2. Plug in your 3D printer into your TP-Link smart plug.

3. From your OctoPrint Plugin Manager, install TP-Link Smart Plug and Shutdown Printer plugins.
4. You will be prompted to restart OctoPrint after successfully installing your plugins. Click Restart now.


5. After OctoPrint restarts, click on the wrench icon and select TP-Link Smartplug from the left menu. A settings menu should appear, click on the Pencil icon and enter the assigned IP address for your smart plug.

6. Next, click Shutdown Printer from the left menu and enable the checkbox for Mode API. Enter your OctoPrint API key.
Plugin ID : tplinksmartplug
Port : 5000
JSON : {"command": "turnOff", "ip": "192.168.1.43" } Replace 192.168.1.43 with your reserved IP address.

7. Within Shutdown Printer options, scroll down and click the checkbox for Enable temperature target. Then enter the Temperature to the level that you would like your hot end to reach before automatically turning off your printer.
We recommend setting the temperature to 90°C. The reason we do this is to run the fan to cool our hot end to an acceptable temperature before turning off the printer. Without this setting, the printer would automatically turn off the fan that cools your hot end immediately.

8. Click Save.
In this tutorial, we have set up OctoPrint on Raspberry Pi, enabled remote monitoring via The Spaghetti Detective, and enabled sending print jobs wirelessly from Cura. From here, you can continue to customize your OctoPrint setup with hundreds of 3rd party plugins. Most importantly, stay safe with your 3D printer by keeping the hardware and firmware maintained.