How to Change Your Raspberry Pi's Hostname
Out of the box, every Raspberry Pi is listed as ‘raspberrypi.’ Change the Raspberry Pi hostname to rename your device.
By default, any Raspberry Pi that uses Raspberry Pi OS, the official OS, has “raspberrypi” as its hostname. So, whether you’re trying to use your Raspberry Pi as a web server or set up a headless Raspberry Pi that you access remotely, your board will always be listed as “raspberrypi” on your network. That’s not very helpful when you have multiple Raspberry Pi devices and can’t tell one from the other.
Fortunately, it’s very easy to rename your Raspberry Pi in Raspberry Pi OS.There are three main ways to change the Raspberry Pi’s hostname and, which one you choose, really depends on your preference for command line or desktop environment. Note that your Raspberry Pi hostname can have numbers, letters, capital letters and hyphens (as long as the first character isn’t a hyphen) but it can’t have special characters.
This how to will work with every model of Raspberry Pi, including the latest Raspberry Pi 5.
Change Raspberry Pi Hostname at Command Prompt
1. Launch raspi-config by typing:
sudo raspi-configThe Raspberry Pi Configuration tool launches.
2. Select Network Options.
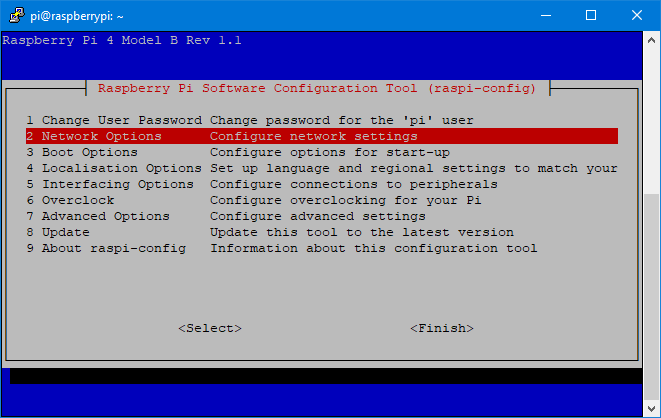
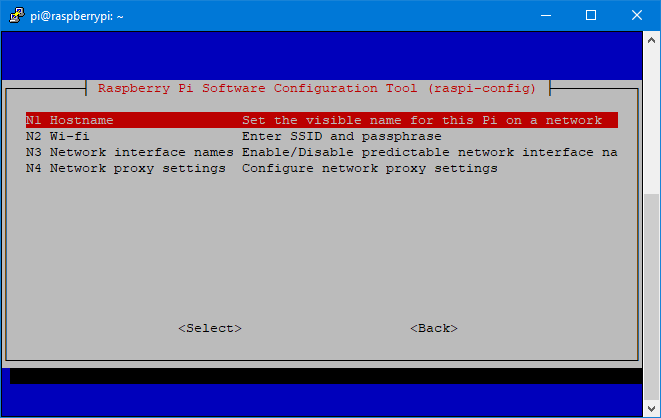
3. Select Hostname and hit Enter or select Ok if you receive a warning telling you not to use special characters in Raspberry Pi’s hostname.
Get Tom's Hardware's best news and in-depth reviews, straight to your inbox.
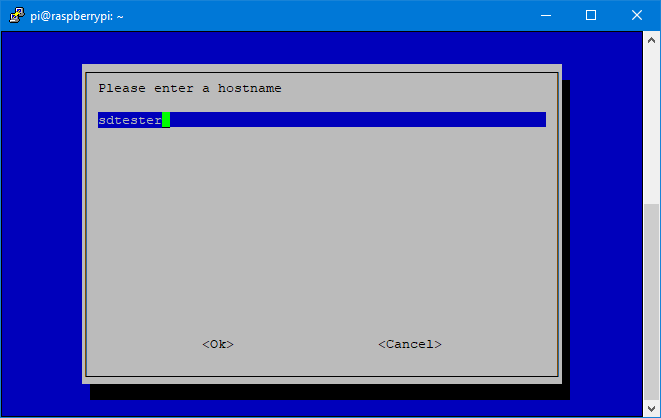
4. Enter a new hostname and hit Enter.
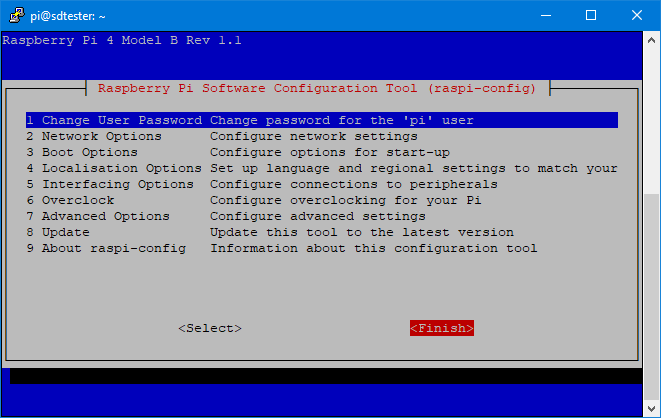
5. Click Finish to exit raspi-config. You can get to the Finish button by hitting Tab.
6. Select Yes when asked if you’d like to reboot. If you select No then you’ll need to reboot manually for your change to take effect.
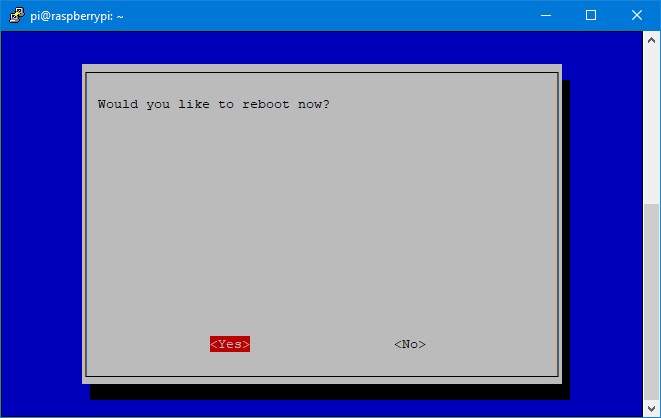
When your Raspberry Pi reboots, it should have the new hostname.
Change Raspberry Pi Hostname in Desktop Mode
There’s no need to go to a terminal window to rename your device. If you’re on the desktop, changing your Raspberry Pi’s hostname is just as easy.
1. Launch Raspberry Pi Configuration from the Preference menu.
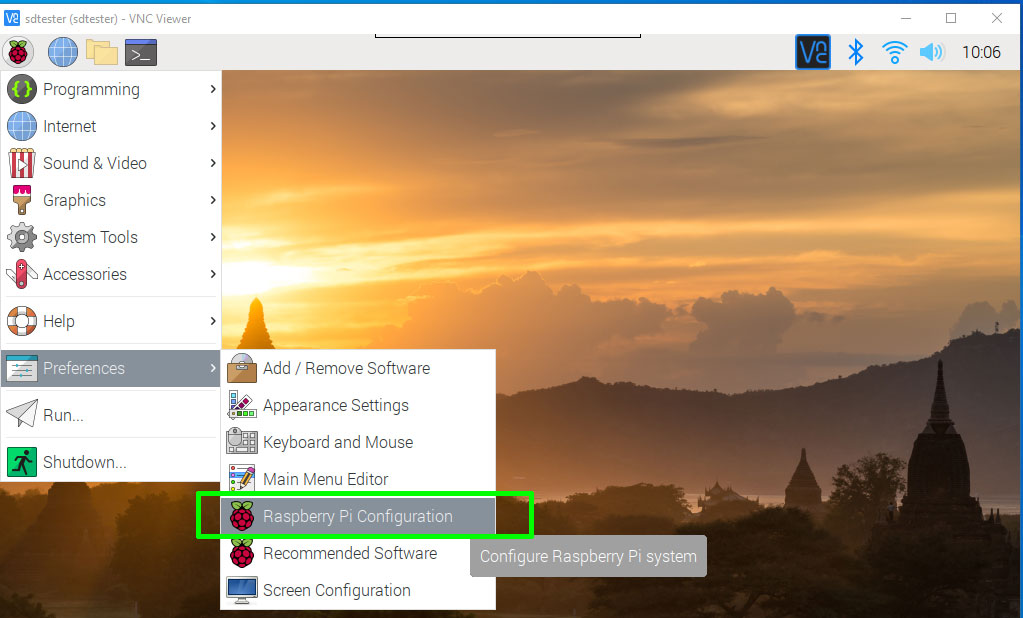
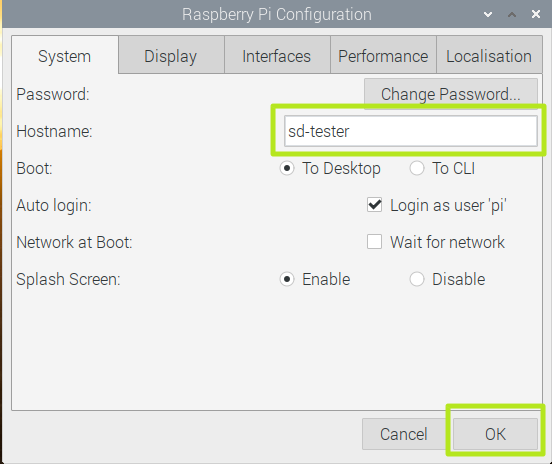
2. Enter a new name in the hostname field and click Ok.
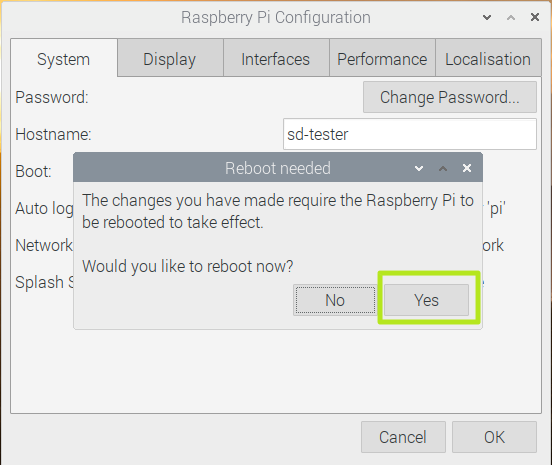
3. Click Yes when prompted to reboot.
Change Raspberry Pi Hostname by Editing Config Files
If you’re the kind of person who prefers to get their hands dirty going into text files and changing settings there, you can edit the relevant hosts files directly. The easiest way to get there is from the command line.
1. Open the /etc/hosts file for editing.
sudo nano /etc/hosts2. Change the old Raspberry Pi hostname to your new one and save. In nano, you save by hitting CTRL+X and then Y for yes.
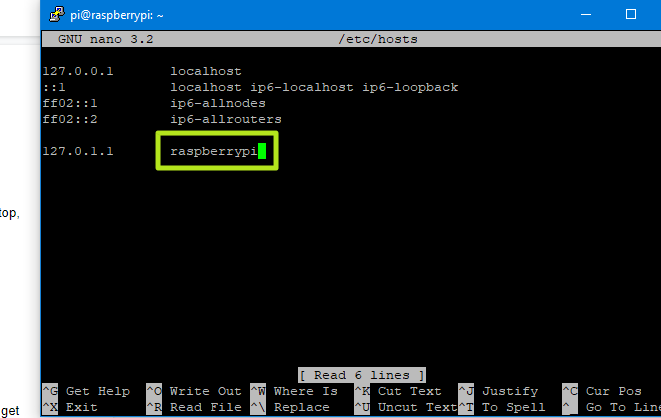
3. Open /etc/hostname for editing.
sudo nano /etc/hostname4. Change the hostname there and save.
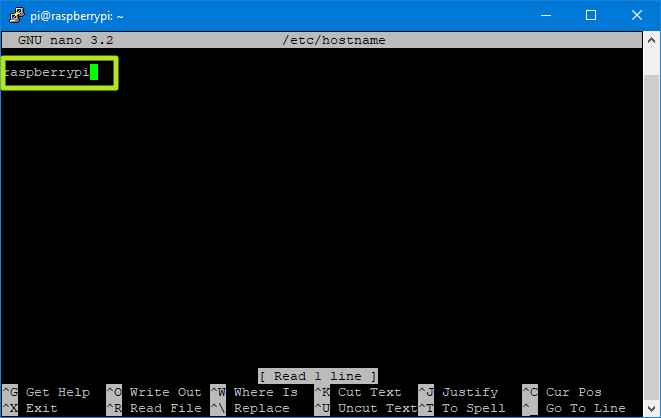
5. Reboot your Raspberry Pi for the changes to take effect. At the command prompt, you can type the following to reboot.
sudo rebootAvram Piltch is Managing Editor: Special Projects. When he's not playing with the latest gadgets at work or putting on VR helmets at trade shows, you'll find him rooting his phone, taking apart his PC, or coding plugins. With his technical knowledge and passion for testing, Avram developed many real-world benchmarks, including our laptop battery test.
-
k9gardner I've just discovered that the methods outlined are not equivalent. I used the system Preferences GUI method, which seems equivalent to editing raspi-config, and it also affects /etc/hostname. However, after making this change, the value in /etc/hosts remains unchanged. This will cause errors when trying to elevate a command (sudo) as the new identity is not defined in the place where the system is looking for it. You'll get an "unable to resolve host" error each time. Editing the /etc/hosts value should correct this situation. Or so I hope. I'm about to do it.Reply
