How to Build a Raspberry Pi-Powered Multi-Room Audio System
Get your Raspberry Pis in sync, audibly throughout your home.
Multi-room audio systems can cost a pretty penny, with Sono’s two-speaker system starting at $379. But who needs to buy an expensive set of wireless speakers when you can use some Raspberry Pis and any 3.5mm wired speakers you have handy to achieve the same effect?
In this tutorial, we will use our Raspberry Pi 4s and speakers / receivers (with 3.5mm audio inputs) to play music from our favorite streaming service perfectly in sync via Bluetooth from our phone, tablet, or computer. We’ll show you how to do this with a single speaker and Raspberry Pi and then explain how to replicate it in additional rooms.
Instead of Raspberry Pi OS, we will use BalenaSoundOS to make the bluetooth connection visible (to our other devices) and eliminate the need for a monitor, keyboard, and mouse for our Raspberry Pi.
What You’ll Need
- Raspberry Pi 4, or Raspberry Pi 400:one unit per room..
- 8 GB (or larger) microSD card, U3 cards recommended (see best Raspberry Pi microSD cards). One per room.
- 3.5 mm audio cables
- Speakers with 3.5mm audio input and/or receivers with 3.5mm audio input.
- Power Supplies for your Raspberry Pis
- Windows, Mac or Chromebook
- Optional: Smartphone or tablet
Notes
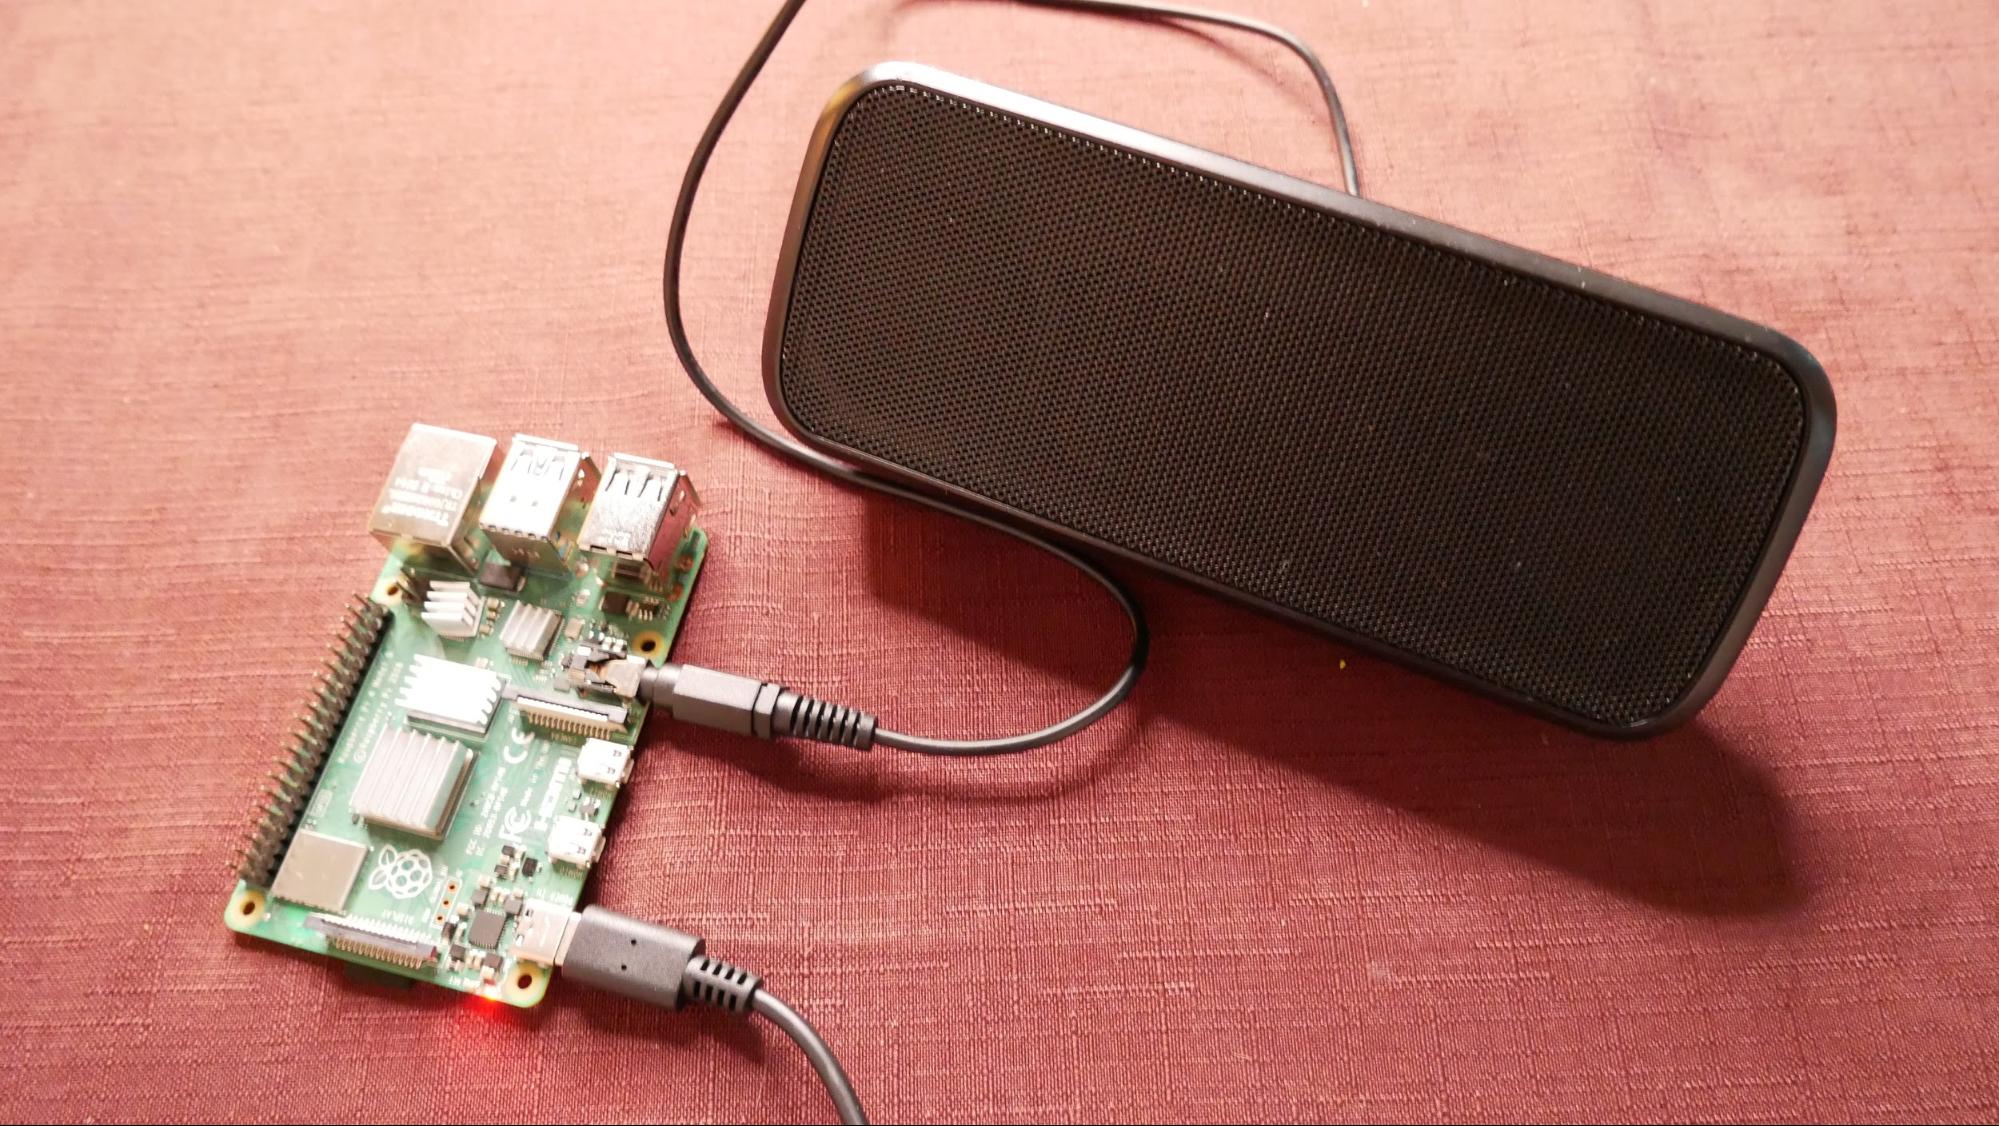
- During the writing of this article, we found the Raspberry Pi 4 with a 3.5 mm audio input to be the best hardware setup. The Pi 400 requires a USB speaker since it does not have an audio jack output.
- We tested with multiple Raspberry Pi 3B+ devices, but were unable to find the bluetooth signal during testing for this project.
- You do NOT need a monitor, mouse, or keyboard for your Raspberry Pi in this project.
- Timing: Please plan for an hour to complete this project.
- This is an excellent project for repurposing old receivers. If you have a non-bluetooth receiver with a 3.5mm jack input, you can connect your speakers to your receiver and your receiver to your Raspberry Pi.
Set Up Balena Sound
Instead of the standard Raspberry Pi OS, we will flash BalenaSoundOS to our microSD card. BalenaSound is pre-built with a lite client for music streaming via the Pi’s Bluetooth and eliminates the need for attaching a monitor, mouse, and keyboard to our Raspberry Pi.
1. Create a free BalenaCloud account here. If you already have a BalenaCloud account, login to BalenaCloud.
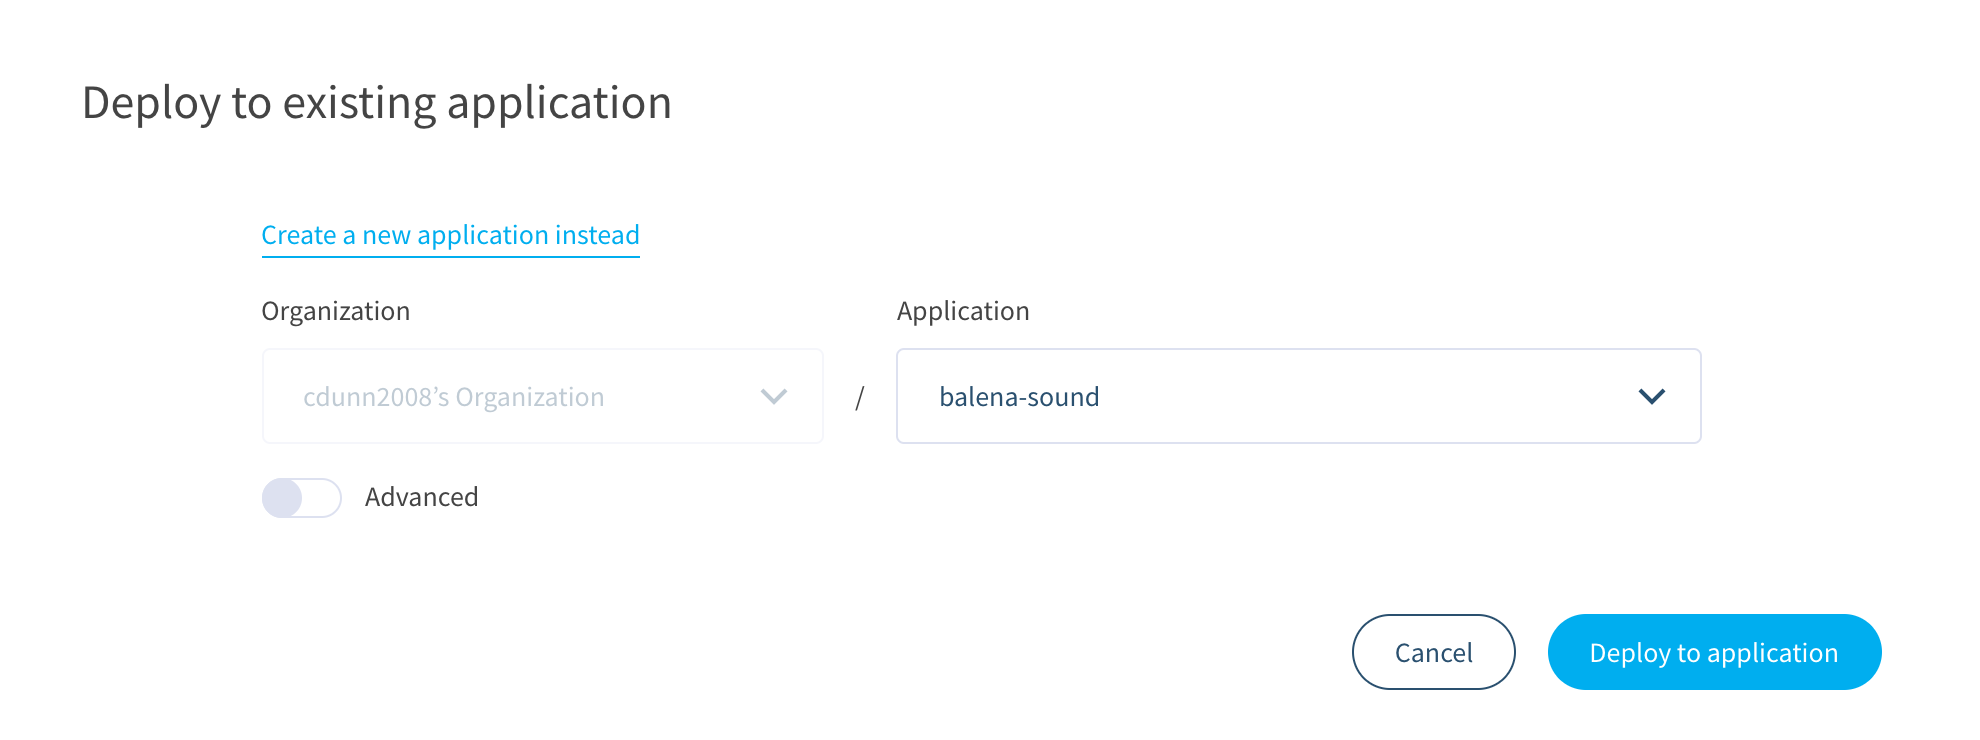
2. Deploy a balena-sound application. Note: You must already be logged into your Balena account for this to automatically direct you to creating a balena-sound application.
3. Click “Deploy to Application.”
Get Tom's Hardware's best news and in-depth reviews, straight to your inbox.
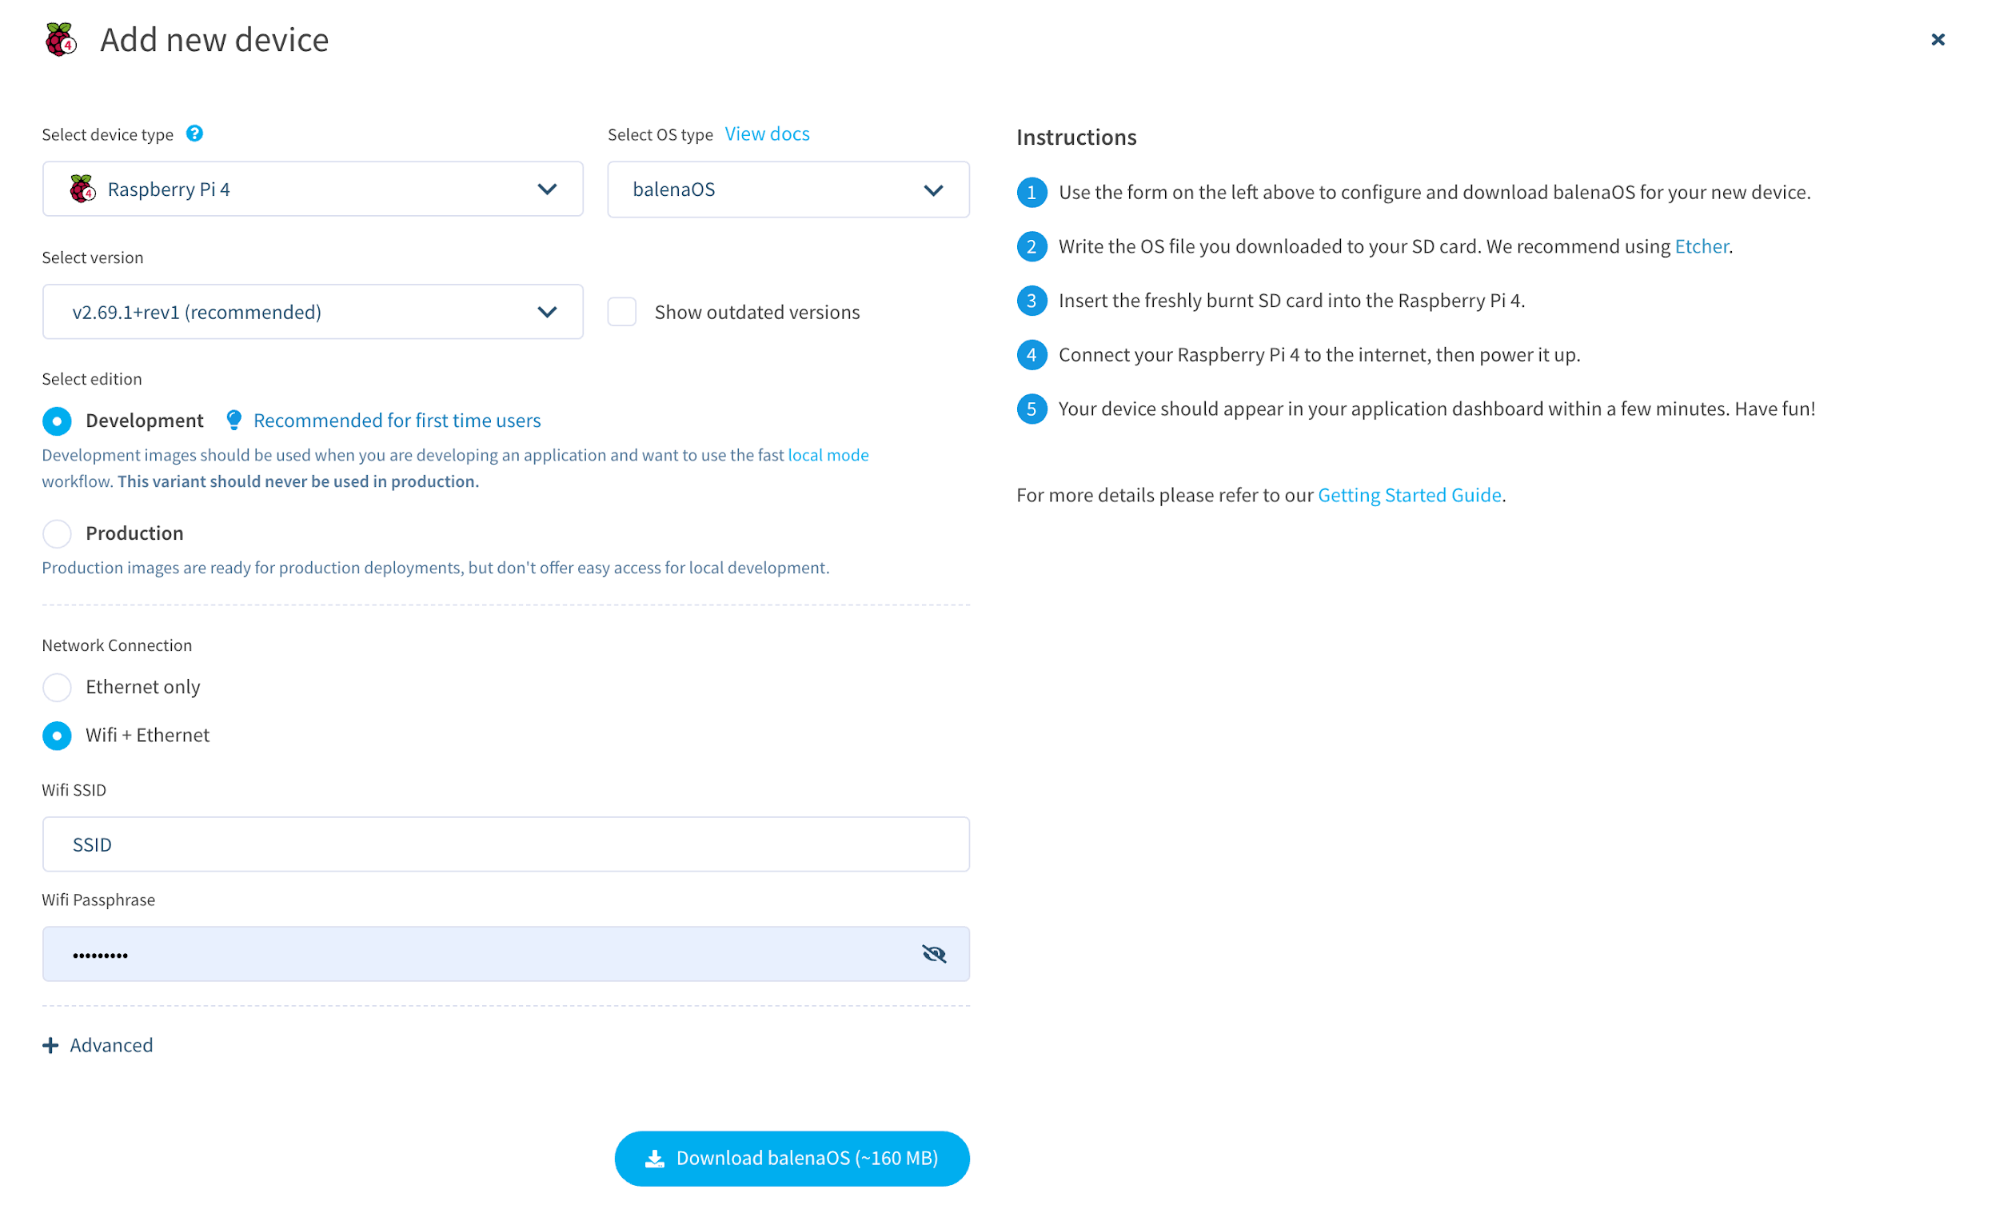
4. Select "Devices" from the left column menu in your Balena-Sound Dashboard, and click "Add device."
5. Select your Device type, (Raspberry Pi 4, Raspberry Pi 400, or Raspberry Pi 3).
6. Select the radio button for Development.
7. If using Wifi, select the radio button for "Wifi + Ethernet" and enter your Wifi credentials.
8. Click "Download balenaOS" and a zip file will start downloading.
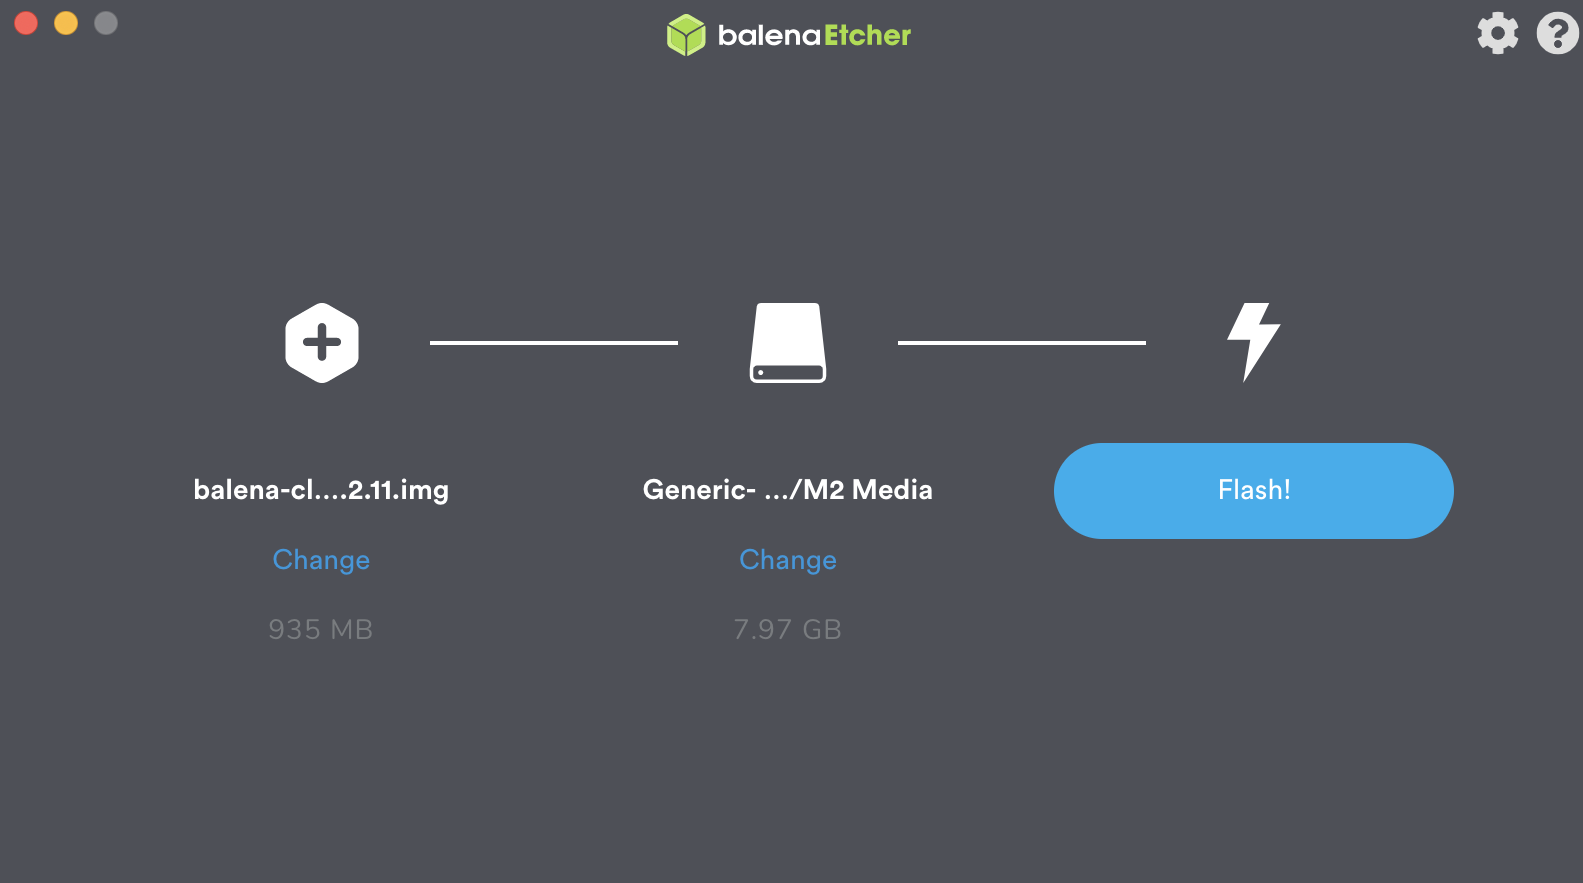
9. Download, install, and open the Balena Etcher app to your desktop (if you don’t already have it installed). Raspberry Pi Imager also works, but Balena Etcher is preferred since we are flashing the BalenaOS.
10. Insert your microSD card into your computer.
11. Select your recently-downloaded BalenaOS image and flash it to your microSD card. Please note that all data will be erased from your microSD card.
Connect the Hardware and Update BalenaOS
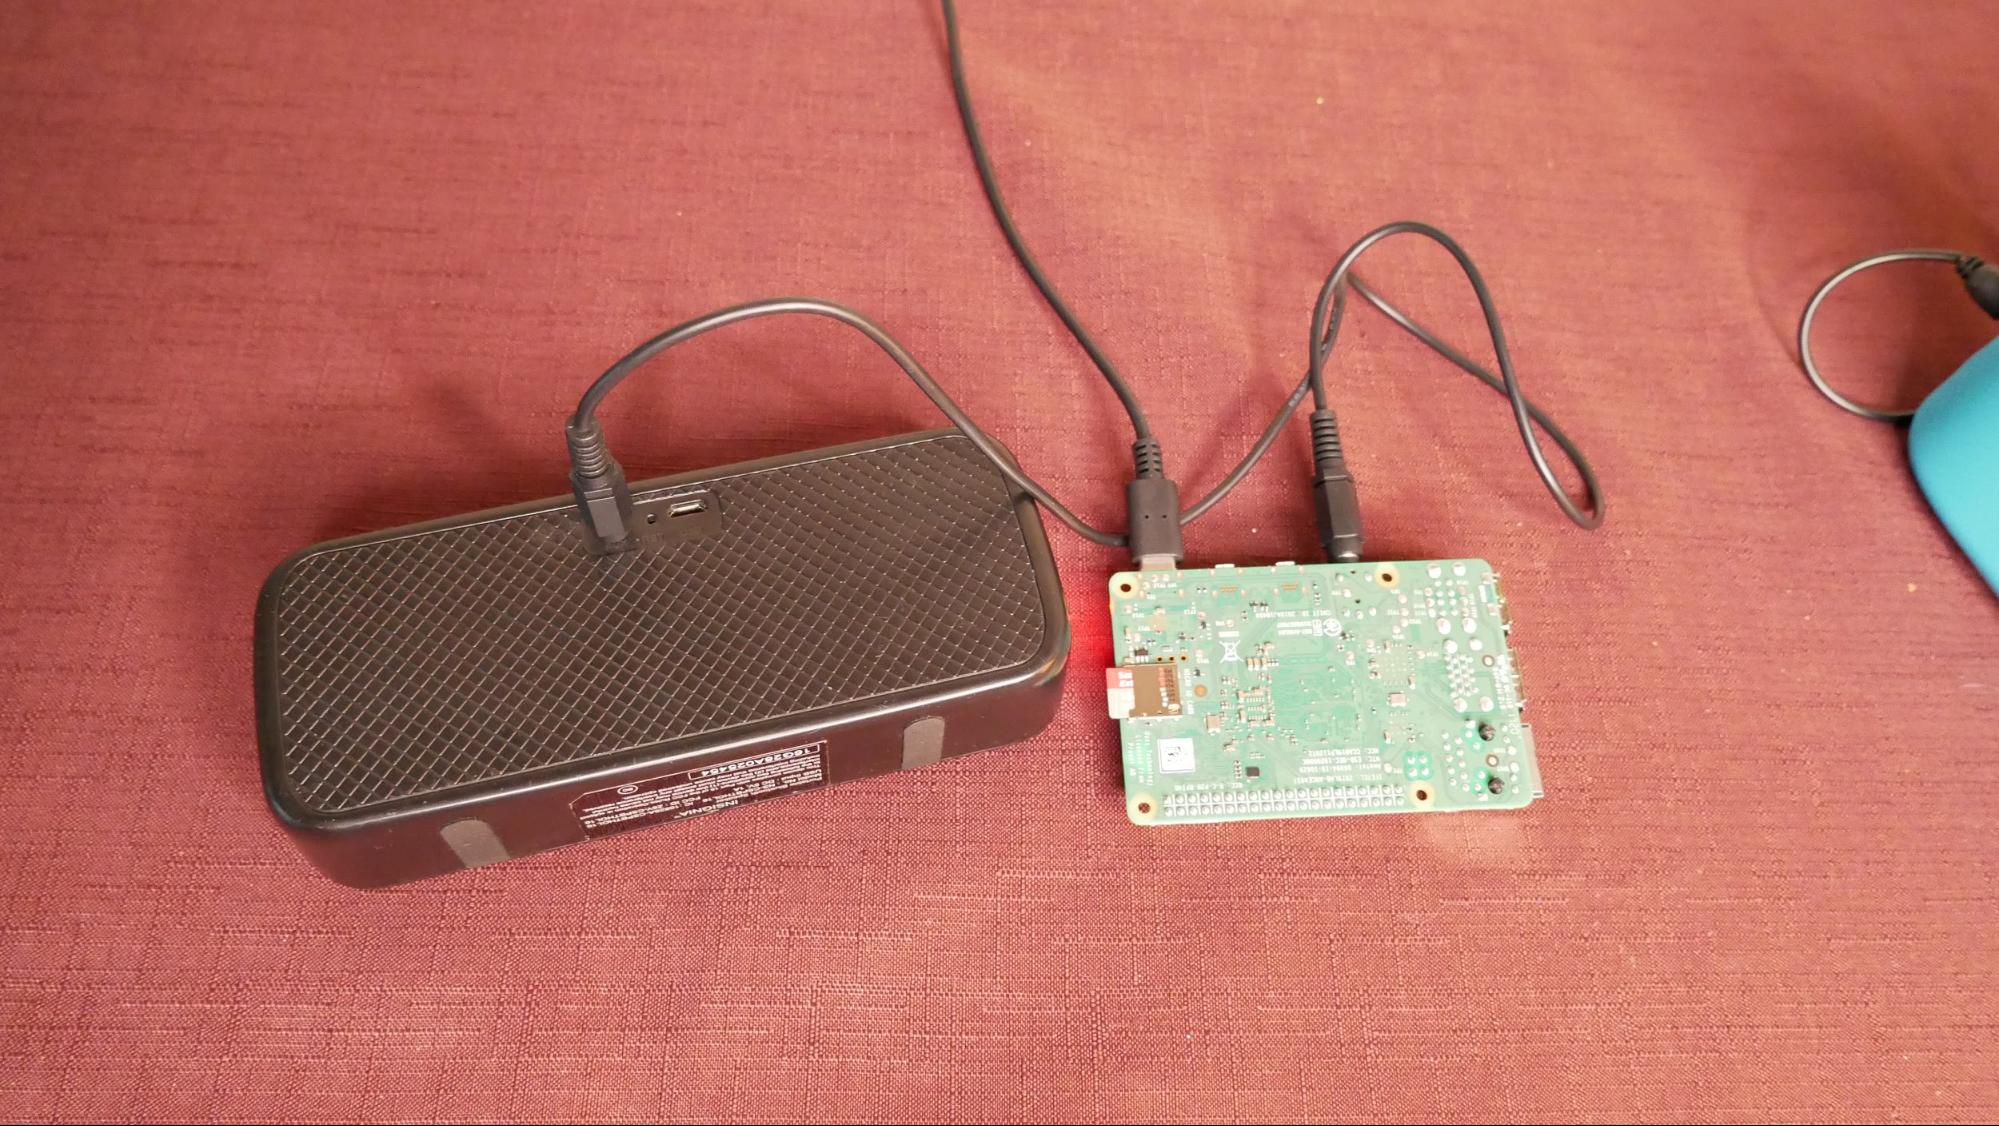
12. Remove the microSD card from your computer and insert into your Raspberry Pi.
13. Connect the speaker to your Pi via 3.5 mm audio cable.
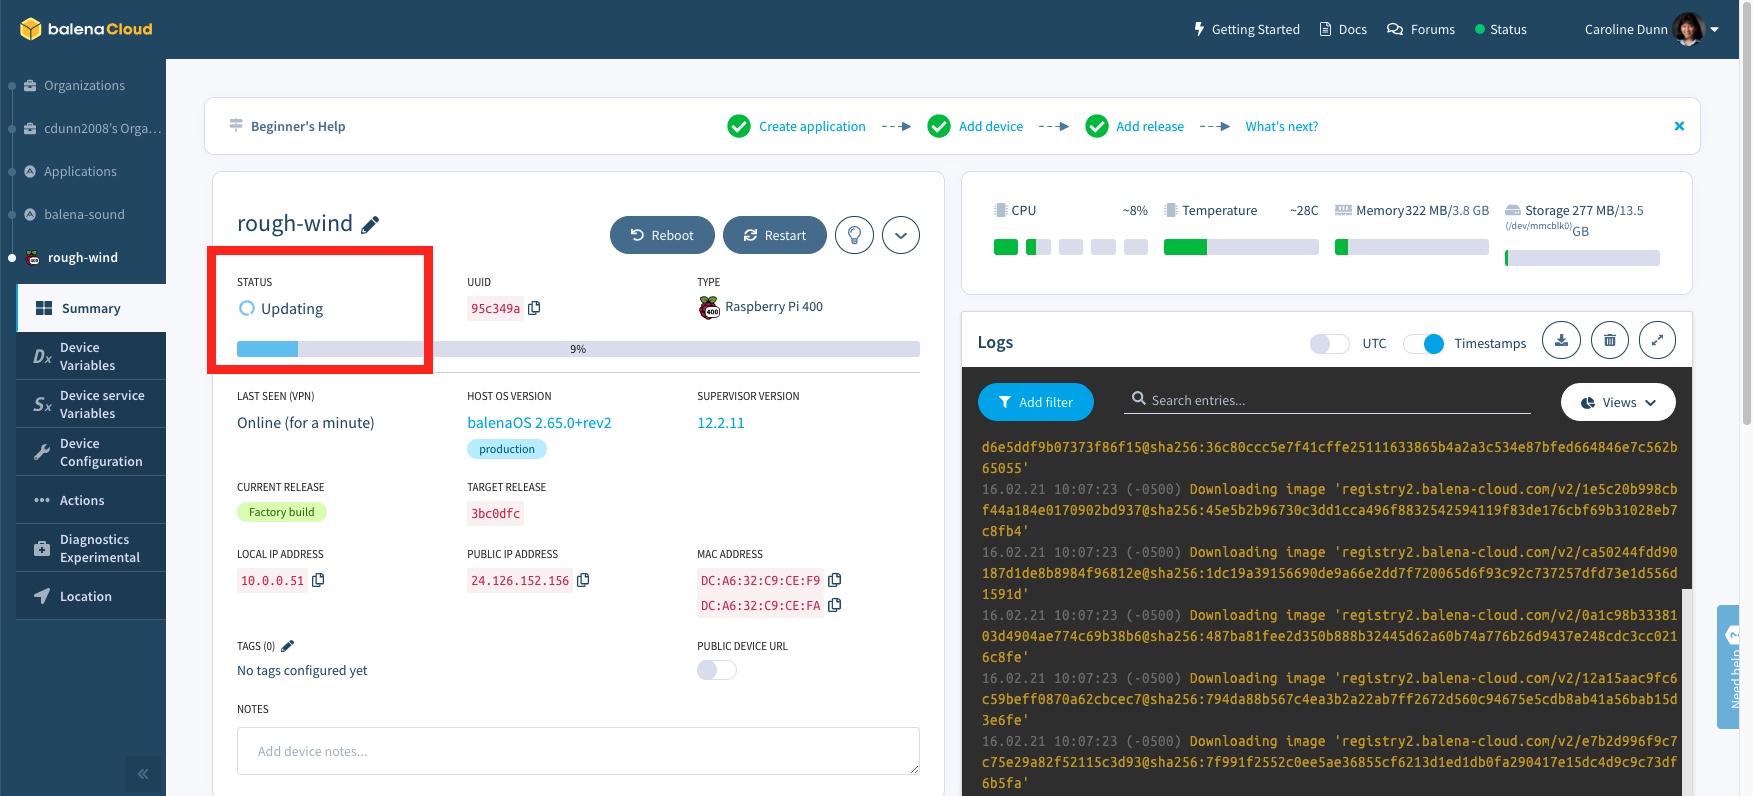
14. Power up your Pi. Allow 15 minutes for your Pi to boot up and BalenaOS to update. Only the initial boot requires the long update. You can check the status of your Pi Balena Sound OS in your BalenaCloud dashboard.
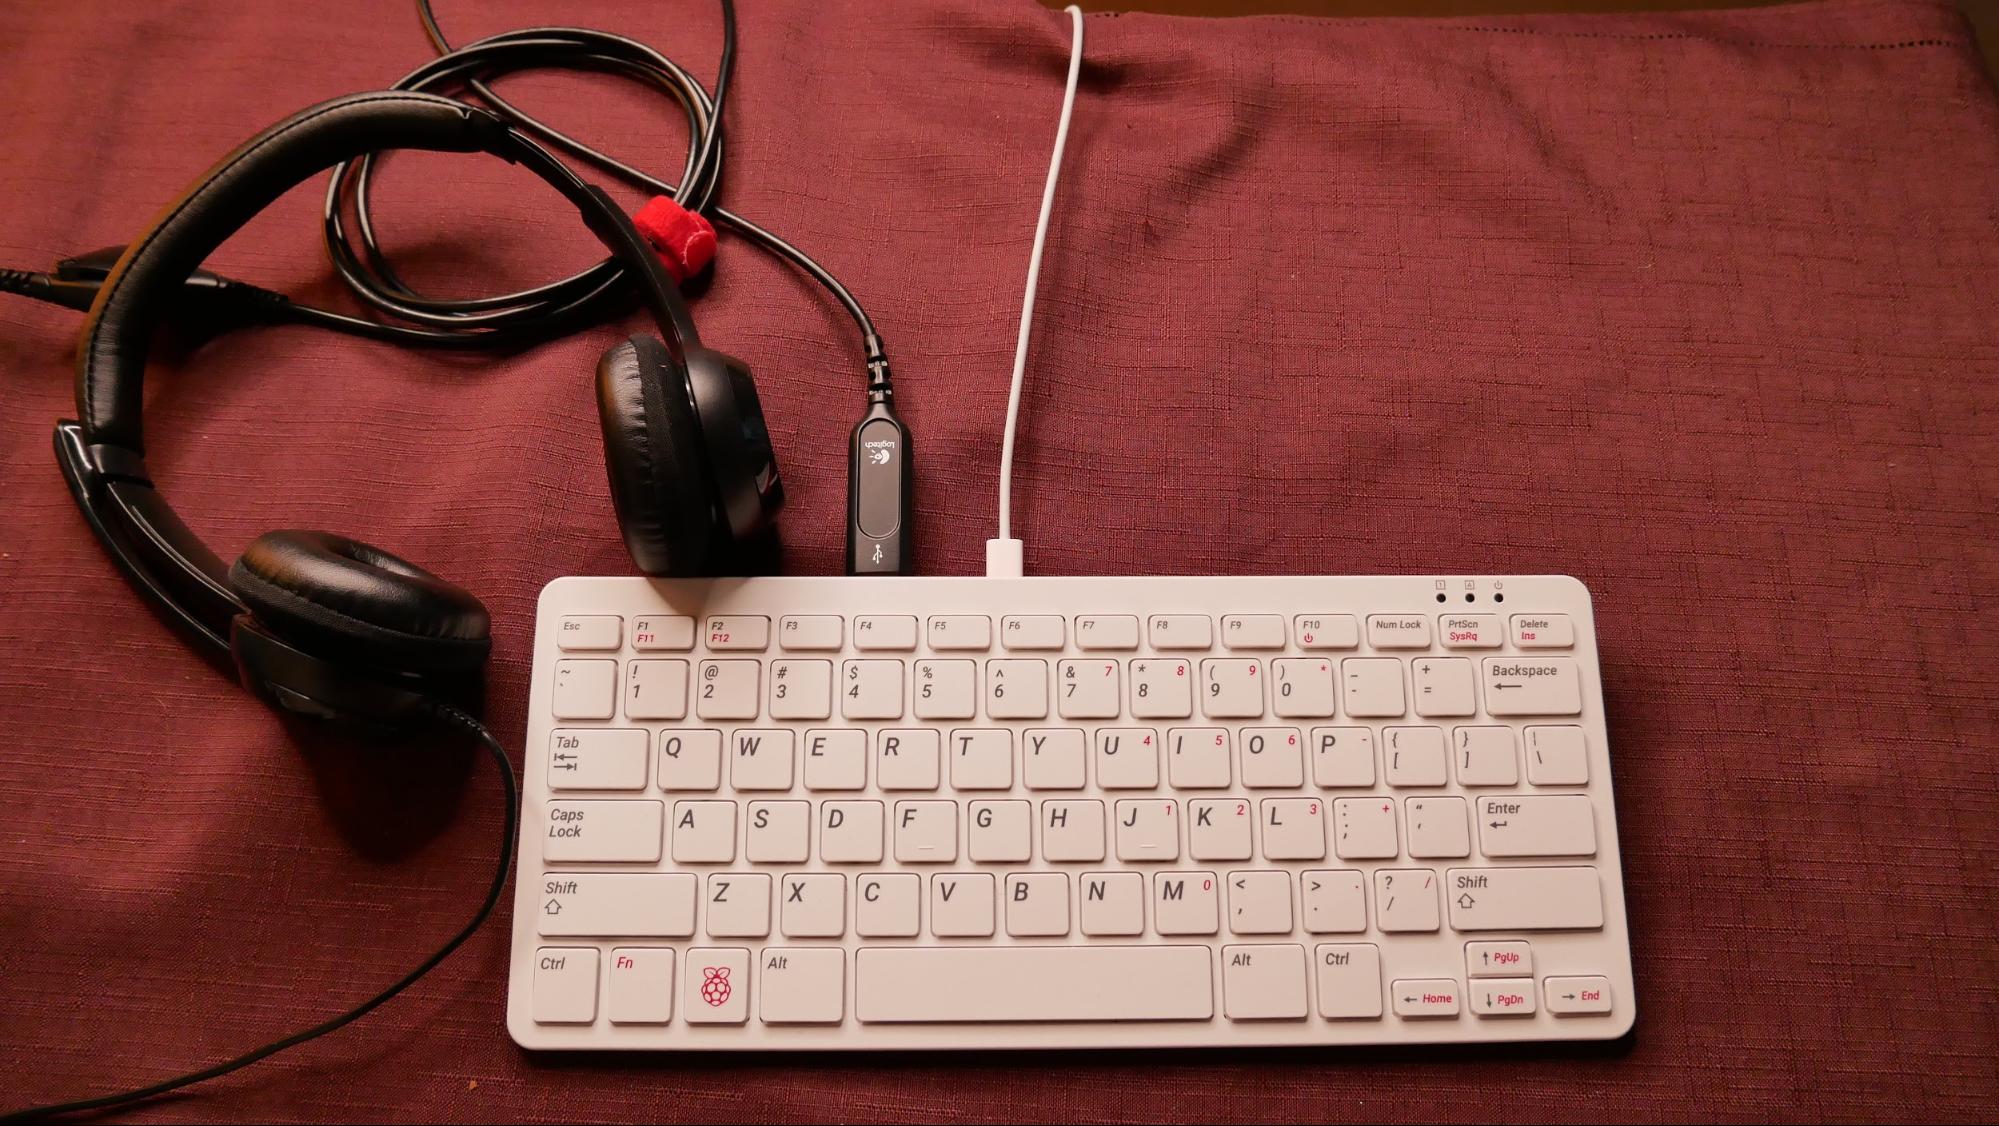
If you are using a Raspberry Pi 400, connect a USB speaker instead of the 3.5mm audio jack. (I did not have a USB speaker handy; instead I tested with USB headphones.)
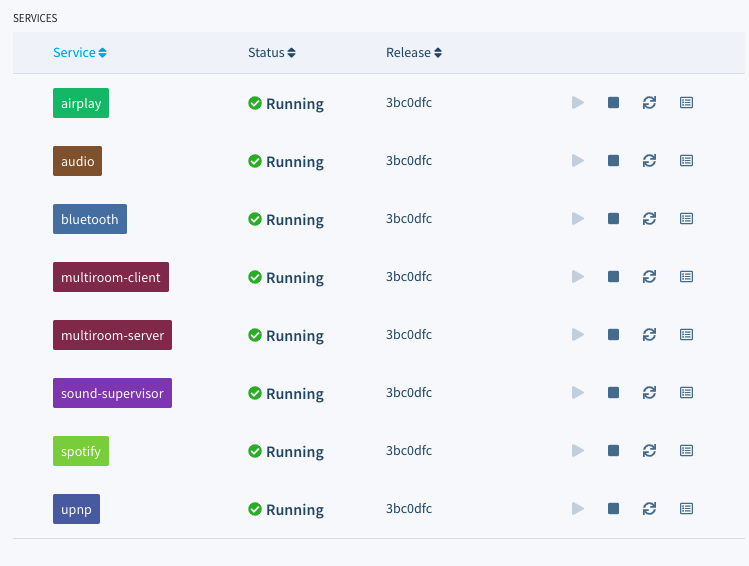
15. Wait for your Raspberry Pi BalenaOS update and confirm all systems are running.
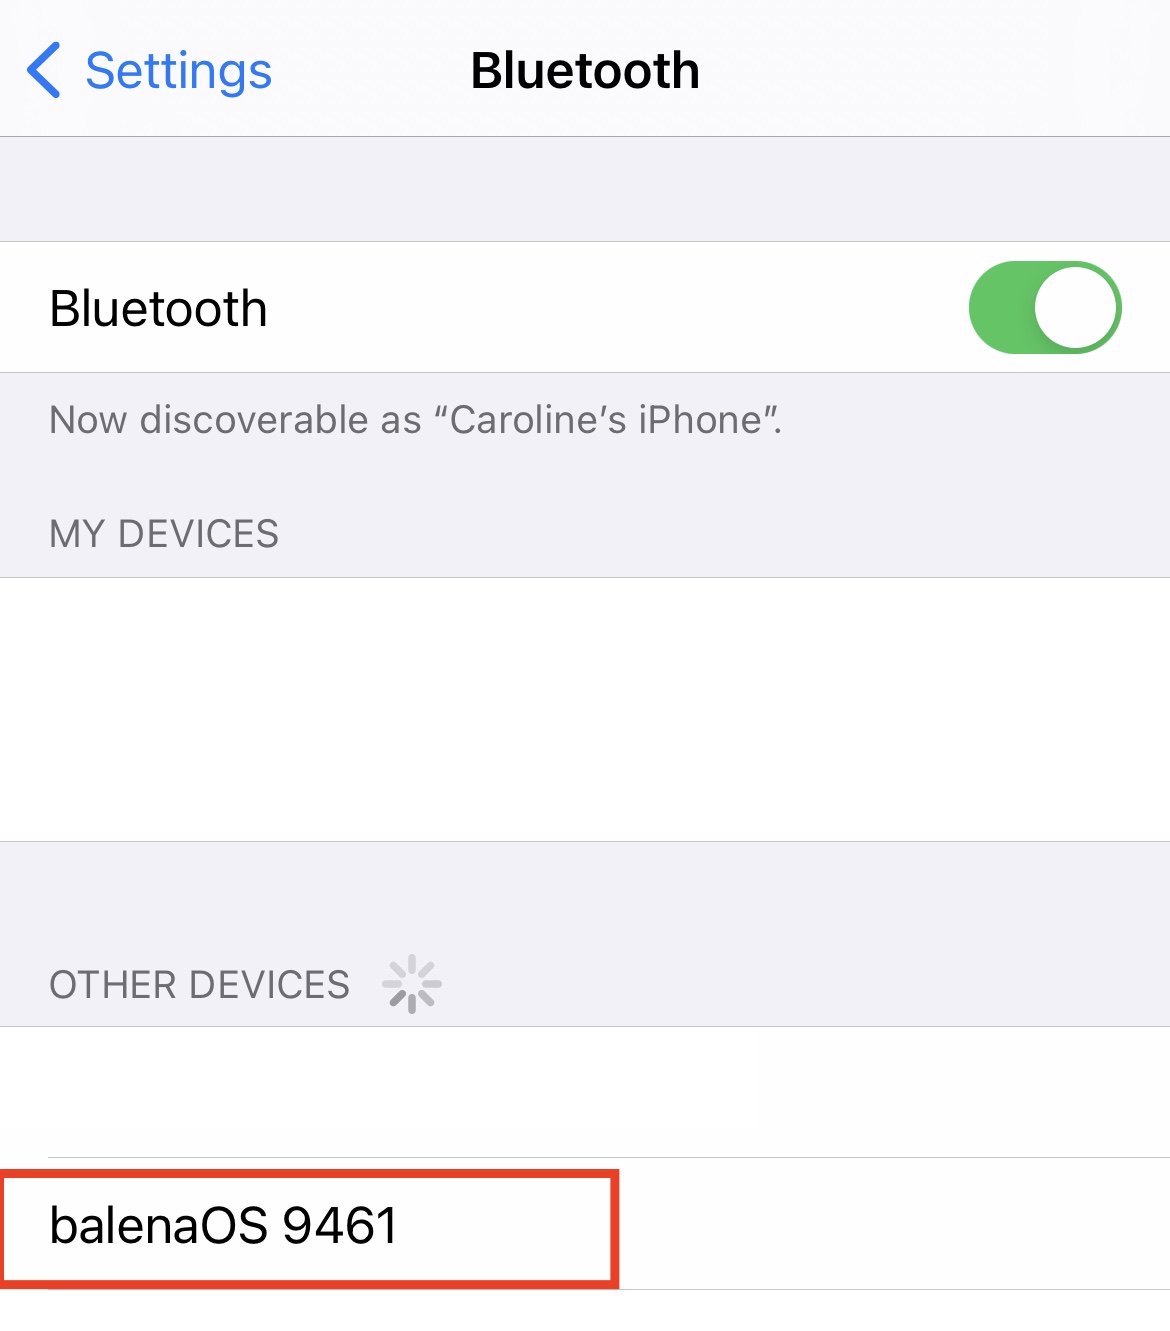
16. From your smartphone, tablet, or computer, navigate to your Bluetooth settings and look for BalenaOS XXXX and pair it to your device.
17. Connect the device as the sound output for your smartphone, tablet or computer.
18. Go to your streaming service and play a song. The music should stream via Bluetooth to your Raspberry Pi and play from the attached speaker.
We tested on Amazon Music and Spotify and all worked flawlessly.
Multi-Device / Multi-Room Sync
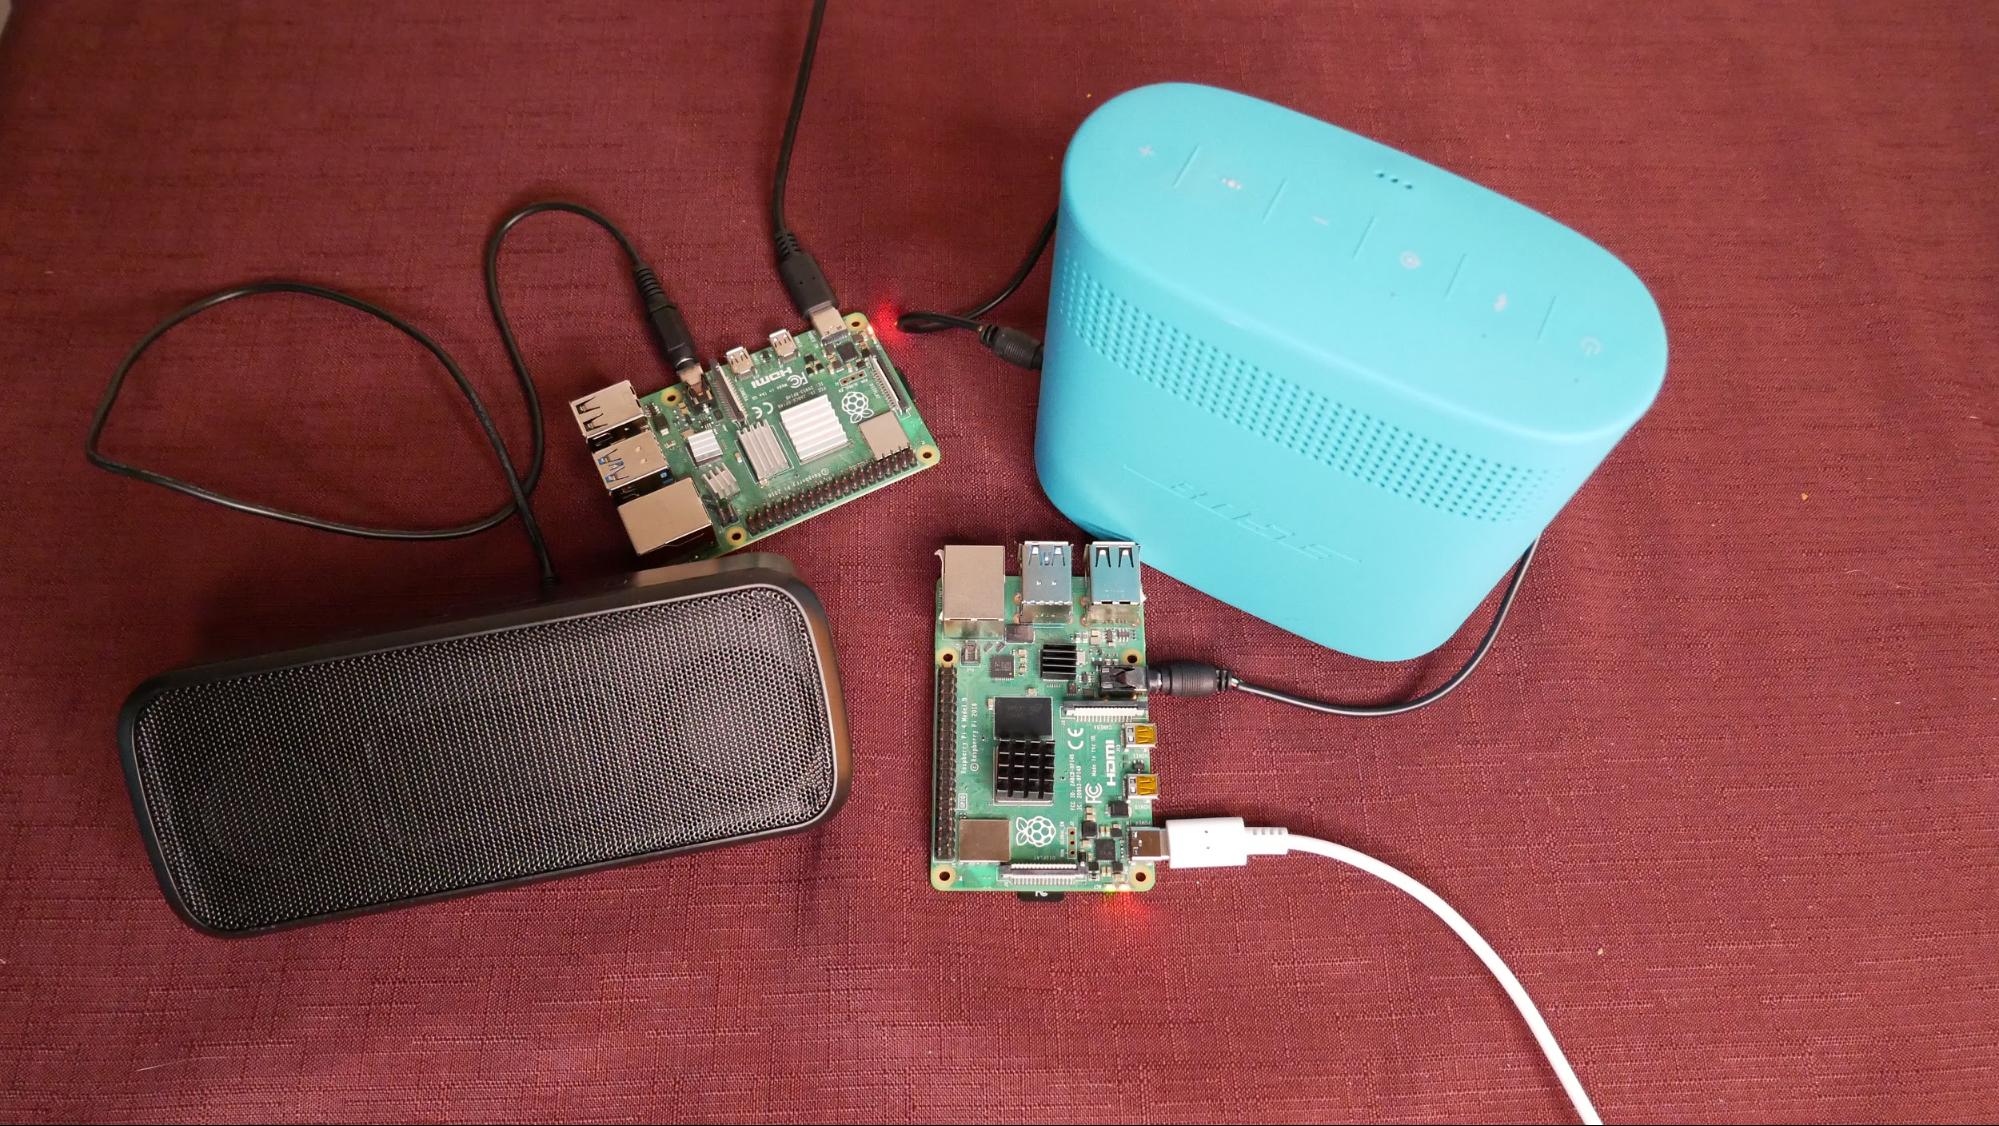
19. For multi-device sync, repeat steps 4-15 to set up more Raspberry Pi devices with speakers (or your receiver). You can flash the same image from step 9 if you are using the same model Raspberry Pi. For example, if you set up a Pi 4, and you have a 2nd Pi 4, flash the same image. If you have a Pi 400, then repeat steps 4-8 to create a new device image.
20. With the same bluetooth device connected as in step 17, music can now stream to all Raspberry Pis and their connected speakers. You will only need to connect one Raspberry Pi via bluetooth to your phone, tablet, or computer to stream to all Raspberry Pi Balena Sound speakers.
That’s it! You can now create multi-room / multi-device sound experiences in your home with your Raspberry Pi devices while DJing from your smartphone, tablet, or computer.
Caroline Dunn is a freelance writer for Tom's Hardware. Her expertise lies in covering Raspberry Pi projects, creating video tutorials, writing guides, and exploring other entertaining tech DIY initiatives.
-
Glock24 Is it possible to connect the phone/tablet/pc to the RPi trough network instead of BT?Reply -
deesider Reply
If you use Spotify it's relatively easy to setup the Pi as a Spotify Connect player. This allows you to select it as a playback device from the Spotify App when both devices are on the same network. That way the music is streamed directly from Spotify to the Pi and it doesn't drain your phone battery like Bluetooth does. Also, no issue with range since it will keep playing your selected playlist even when your phone leaves the network.Glock24 said:Is it possible to connect the phone/tablet/pc to the RPi trough network instead of BT? -
DrFrog Hi, I ask myself if the person, who wrote this article ever tried this setup. Comparing the audio jack from a pi with a sonos is just a joke. Of course there is a possibility to use the pi for this, but not with its audio jack.Reply
the raspberry pi audio jack is a pwm driven output, no real DAC behind it. It sounds simply AWFUL. There is nothing else to say, look at measurements. If someone does not hear this, go to a doctor. The sound is smeared and sounds very harsh and digital.
Buying an inexpensive DAC board for the pi is the way to go if you want to compare it to the sonos for example. There are PCM5122 based sound boards for about 20$ and this increases the pi sound quality VERY much.
Using the 3,5 jack and talking about sound is like driving a 40 years old fiat panda and comparing it to a new ferrari. At least both have 4 wheels, i know.
Please investigate first, before writing such nonsense. There are people who read this here and get very disappointed by the sound if they try this setup.
Sound quality is often determined by total harmonic distortion. A sonos you want to compare with has a THD of about 0,03% at 10kHz. A raspberry Pi DAC board about 0,08% at 10kHz. The audio jack has a THD of 10% at 10kHz. This is garbage, not sound. Also the high frequencies are not reproduced at all. The normal hearable audio range depending on your age is between 20hz and 20.000hz. All DAC boards and the sonos reproduce this range. The pi audio jack stops at 15.000hz, because of the high pass filter and PWM limitations.
Even with a DAC board the raspberry pi4 is a bad choice for audio reproduction. Its high frequency CPU induces so much electro magnetical interference, that you either need to underclock it a bit or at best take the raspberry pi3b. Its EMI numbers are much better and do not disturb the amplifiers speakers so much. Faster is not always better. The Pi3b has all the features needed here too, like Wifi and BT.
Please write articles about somethink you know about, this is just waste of webspace, sorry. Its also misleading people by comparing it to entry level hifi systems like the sonos. People reading this here, who buy a pi4 for this purpose are just wasting money and should know, that at least a DAC board is needed to make this here work. Even then you are not at sonos level of quality and by far not in hifi territory, but this wasnt intended, i know.
Please write this into your article or delete it, dont mislead people with bad investigated knowledge. -
deesider Reply
This is true, the default audio out of the Pi is fairly low quality. I use a HifiBerry Dac on a Pi Zero W and it works great. Although the Zero of course doesn't have an audio out, so a hat is compulsory anyway.DrFrog said:Buying an inexpensive DAC board for the pi is the way to go if you want to compare it to the sonos for example. There are PCM5122 based sound boards for about 20$ and this increases the pi sound quality VERY much.
Yeah, not sure what you're talking about here. The pi4 does have a higher clock than the pi3, but they are both in the GHz. It's not clear how that change in frequency could induce audio interference?DrFrog said:Even with a DAC board the raspberry pi4 is a bad choice for audio reproduction. Its high frequency CPU induces so much electro magnetical interference, that you either need to underclock it a bit or at best take the raspberry pi3b. Its EMI numbers are much better and do not disturb the amplifiers speakers so much. Faster is not always better. The Pi3b has all the features needed here too, like Wifi and BT. -
DrFrog The EMI differences are just my own and some friends observations. Same setups, same PSUs and DACs and the pi4 induces a high frequency interference, the pi3b did not. We found two methods to fight this. Either you under clock the pi4 by 200mhz, then the hiss goes away or just put it in a metal enclosure, preferably tied to ground.Reply -
DonCosta Hi!Reply
First of all sorry for my poor english. In few words I can write my experience how I realised a multiroom audio system with a few RPi-s.
I used piCorePlayer as operating system. It starts (boot) in less then 1 minute. Very small program I used 4GB sd cards but
My music configuration consists of the following:
1 piece of RPi1 modell B as an LMS server
5 pieces of RPi1 modell A as music player in different rooms, terrace, garage, etc. (RP1A was cheaper then other RPi-s that's why I choose it, you can choose other RPi-s if you like)
5pieces of wifi dongle (type TP-Link) because RPi1A do not have nor wired, nor wifi network possibility.
different audio systems like HDMI capable sound bar, mini hifi stereo with 3,5 jack, etc )
mobile phones, tablet or PC for remote control the music
Where the audio system is better I used Cirrus Logic HD Audio Card connected to RPi for better sound, or HDMI output, other places simple 3,5 jack. But everyone can decide what quality is enough for him. In piCorePlayer there are a lot of output option. The best part is that you can expand and upgrade your system on the fly.
You can install different plugins like Spotify, YouTube, TuneIn Radio etc for music source or you can connect a local USB HDD or NAS, it depends on where are your music stored. And of course you can mix them.
I use "Squeezer" on my android mobile phone for remote control the music (my 8 years old child can use as well). It is free and you can switch between the players (rooms), you can make groups to play same music or different as well.
If you are interested in you can read more (and with good english, not like me :) ) on this page: https://docs.picoreplayer.org/getting-started/
I hope you find this useful. It proven to me, I've been using it for years.
