How to Create a Raspberry Pi Security Camera with Motion Alerts
A quick, cheap and easy security system.
Get Tom's Hardware's best news and in-depth reviews, straight to your inbox.
You are now subscribed
Your newsletter sign-up was successful
It's easy enough to use your Raspberry Pi as a webcam or as a security camera that you look at in real-time, but what if you just want to be notified when your Pi sees motion? You can attach a passive infrared sensor (PIR) to act as a motion detector and then program your Raspberry Pi to send an alert to IFTTT (If This Then That), a web service that gets inputs from devices and acts on them.
This message to IFTTT will trigger an output and image to be sent to a Telegram account that will send an alert to your mobile device. So, if an intruder walks by the sensor and you're not home, you will be notified.
What You Need
- Any Raspberry Pi
- A Raspberry Pi Camera Module.
- PIR Sensor such as this one.
- 3x Female to Female Jumper Wires
Setting up the Raspberry Pi and Hardware
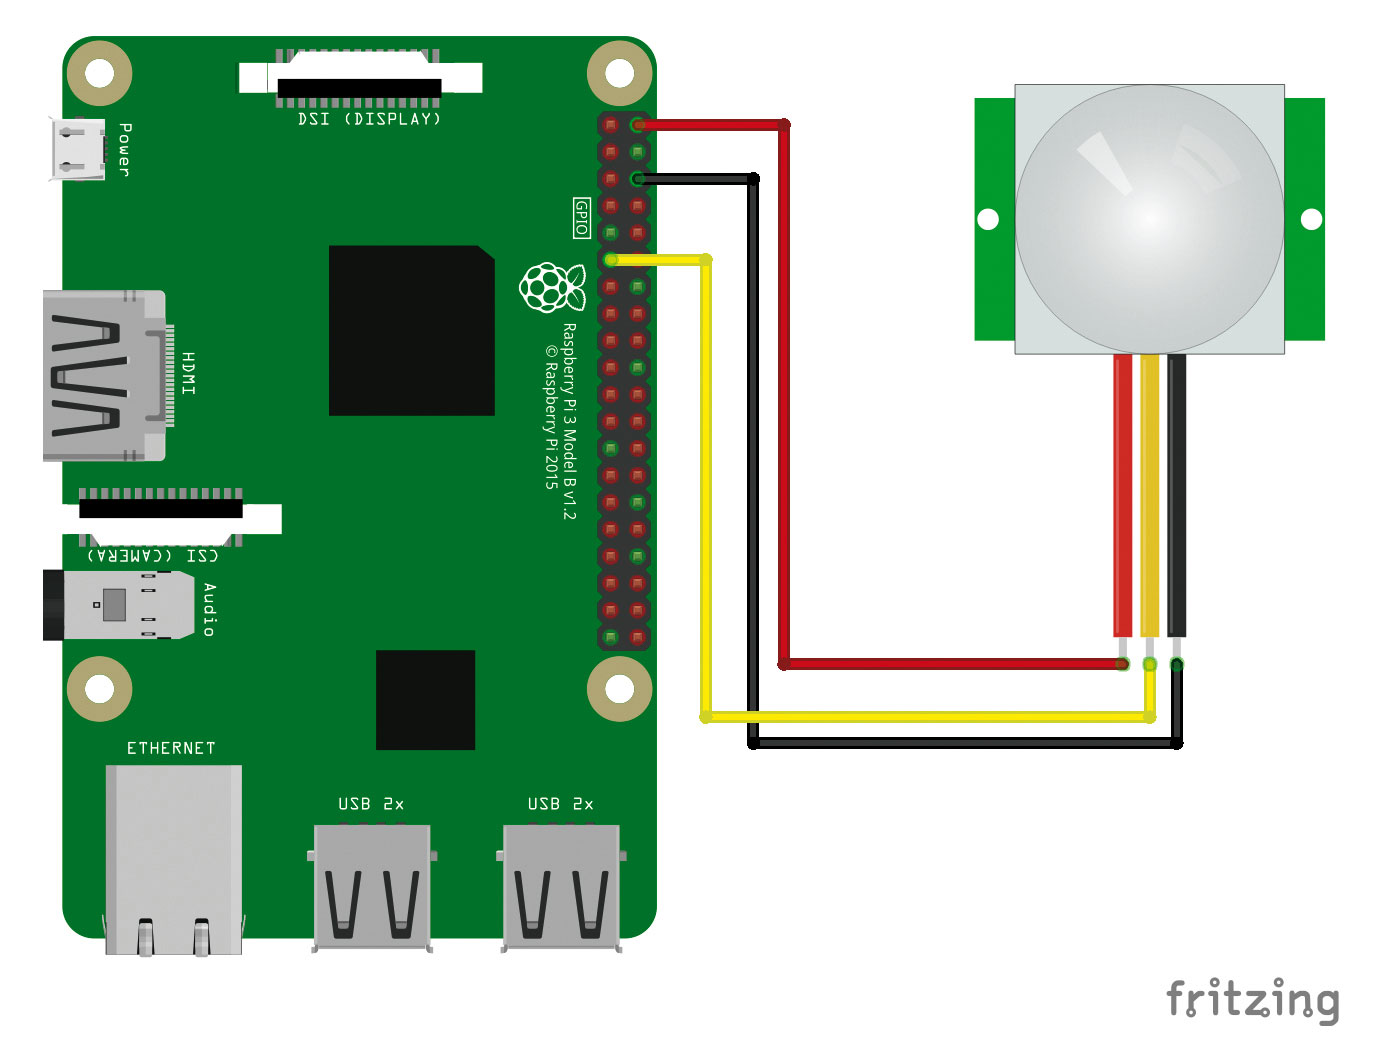
1. With the Raspberry Pi powered off, connect the PIR sensor to the GPIO using the three jumper wires. Connect GND to GND, VCC to the 5V pin of the Raspberry Pi. Lastly, connect the output pin of the sensor to GPIO17 of the Raspberry Pi.
2. Connect the camera to the CSI port, just next to the Ethernet/USB ports. You will need to gently lift the plastic clip and slide the cable in with the blue tab facing the USB ports. Then secure the cable with the plastic clip. Ensure that the camera does not touch the Pi at any time as it may cause a short circuit.
3. Enable camera support in Raspbian if it's not already on. Power up your Pi and from the main desktop go to Preferences > Raspberry Pi Configuration and once there click on the Interfaces tab and enable the Pi Camera interface. When prompted reboot and wait for the Pi to return to the desktop.
Software Setup
1. Sign up for a Telegram account, which you must do via the service's Android or iOS app. Then download and install the Telegram desktop app on your PC or Mac and keep it running. You will need it to make the connection work with IFTTT.
2. Visit https://ifttt.com and sign up for a free account. IFTTT stands for IF This, Then That, and it is used to trigger actions based on inputs. In this project we will create a webhook, a real-time link from our code to the web that will trigger a message on Telegram that alerts us about an intruder. Leave the browser window open.
Get Tom's Hardware's best news and in-depth reviews, straight to your inbox.
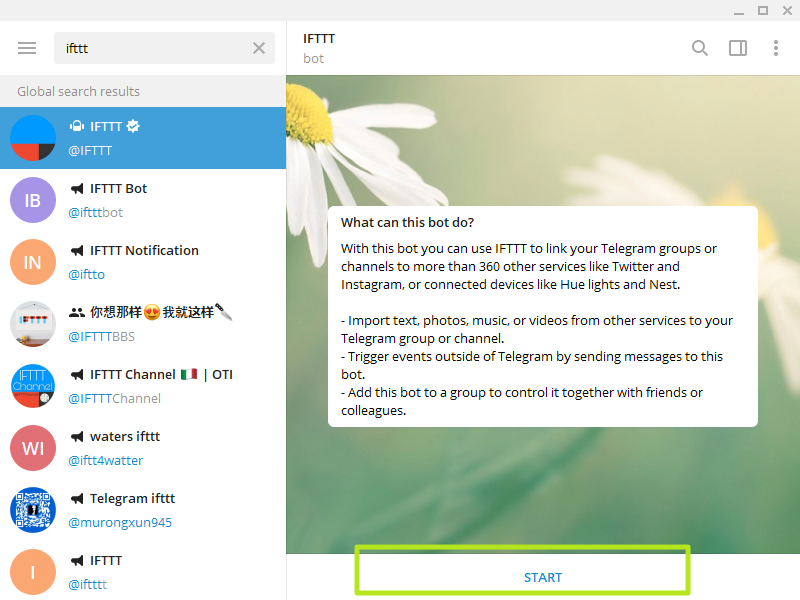
3. Connect your Telegram account to your IFTTT account. In Telegram desktop app, search for IFTTT and select it.
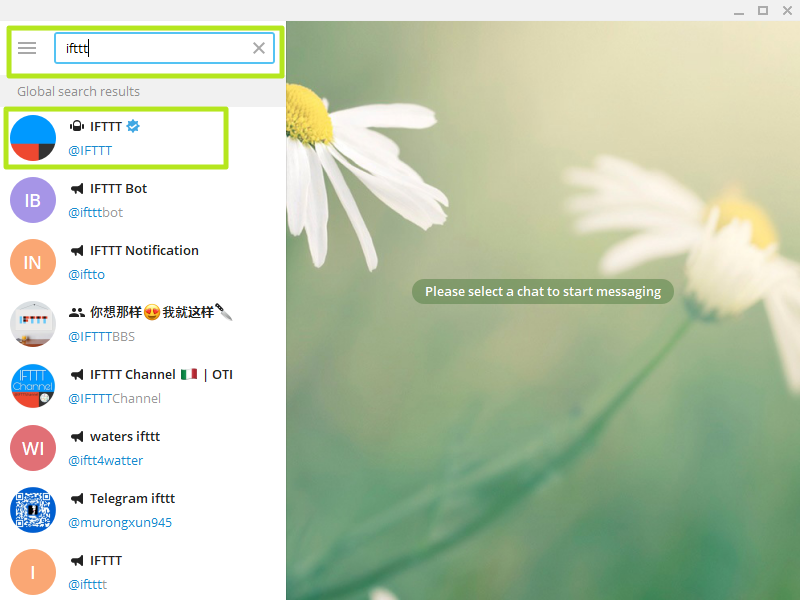
4. Click the Start button.
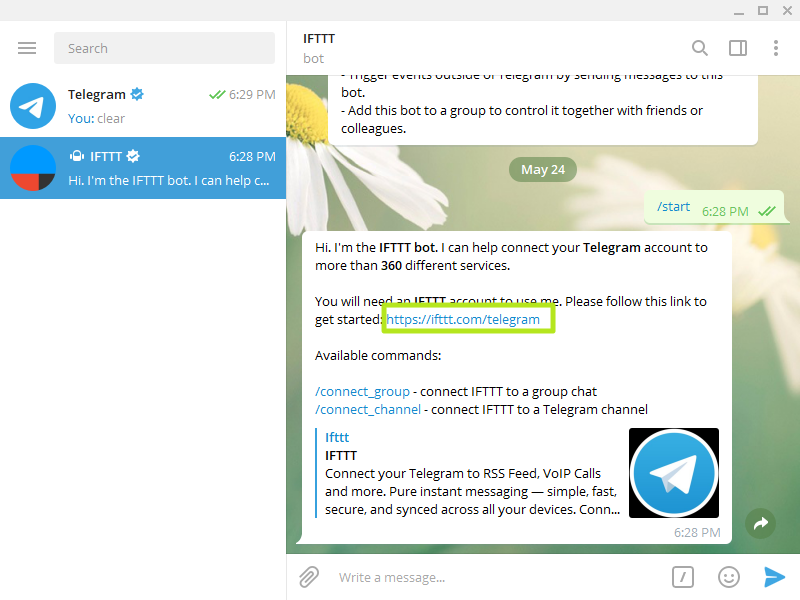
5. Then click the https://iftttt.com/telegram link in Telegram which will open your browser to the Telegram page on IFTTT.
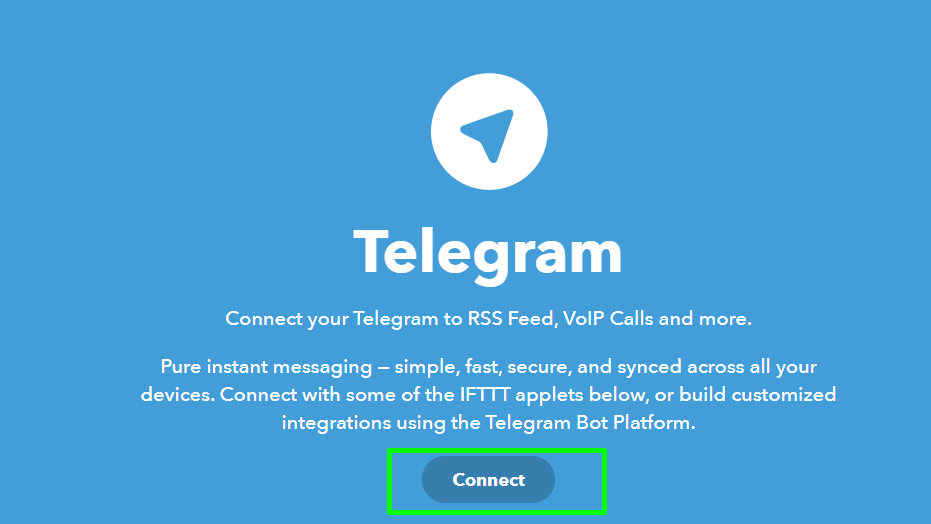
6. Click Connect.
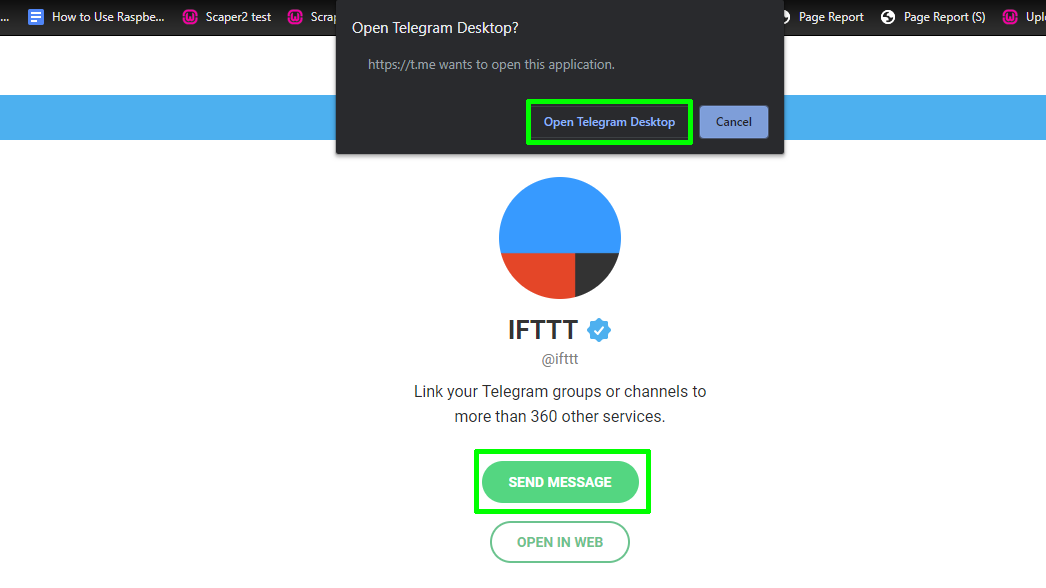
7. Then click Send Message and allow your browser to Open Telegram Desktop.
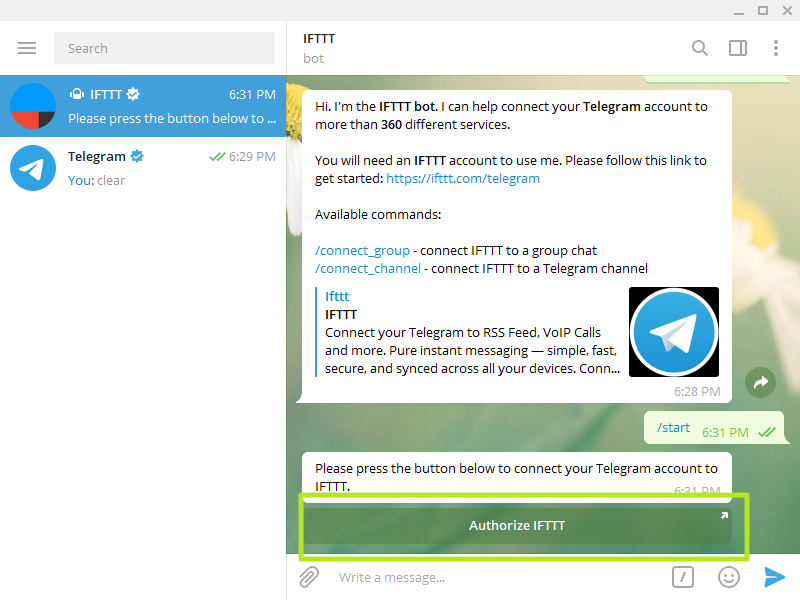
8. In Telegram desktop, click "Authorize IFTTT."
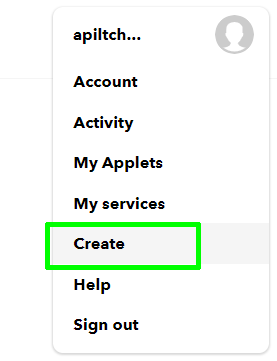
9. Create the trigger in IFTTT by clicking on your account avatar icon in the top right of the screen, then select Create.
10. Now click on If +.
11. Type in webhook and click on the blue icon.
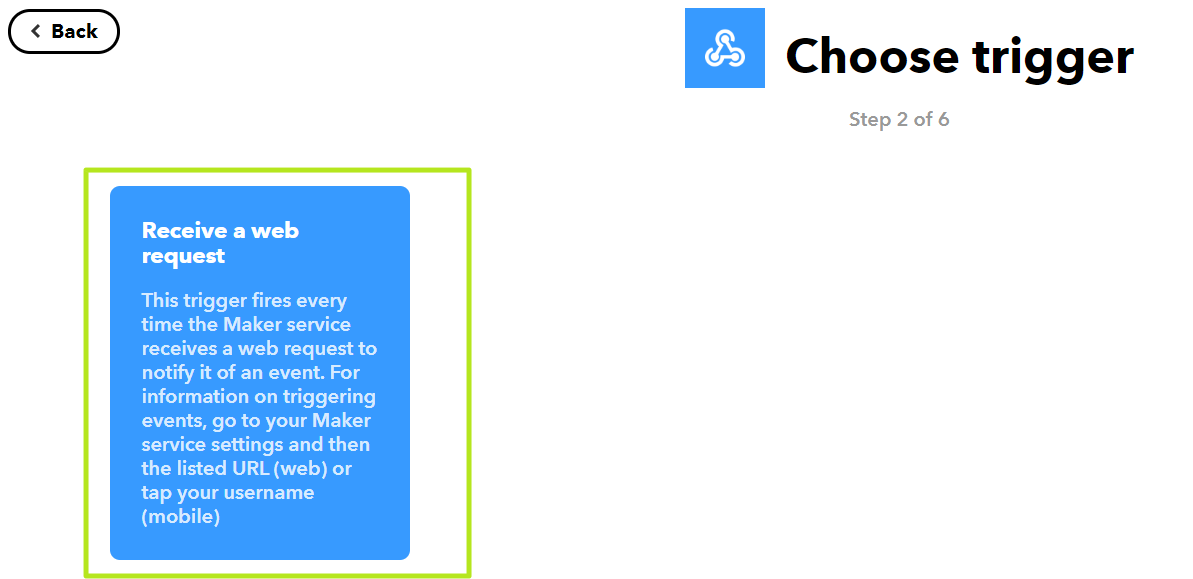
12. On the next screen, click on Receive A Web Request.
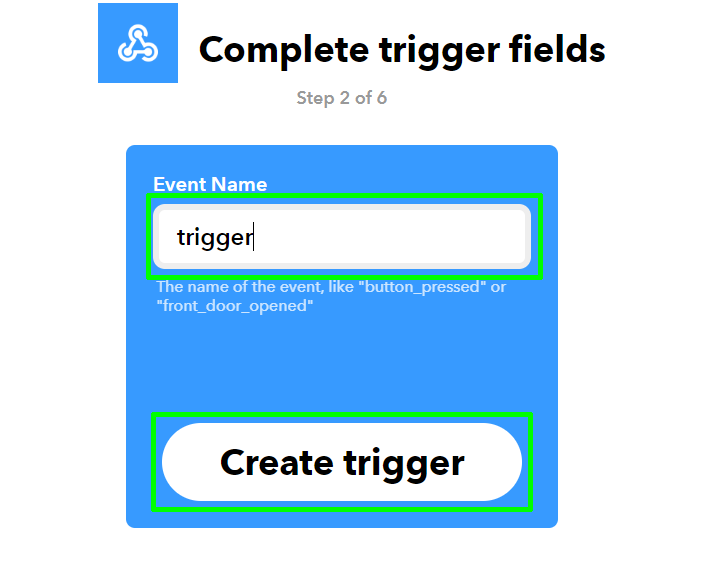
13. Name the event “trigger”, without the quotation marks and click Create trigger.
14. Click on Then +.

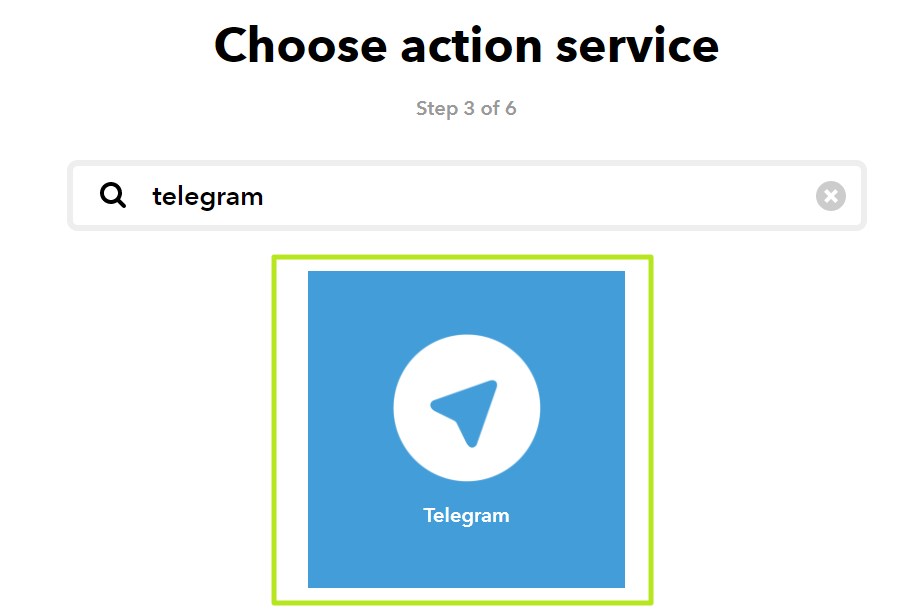
15. Search for Telegram then select it.
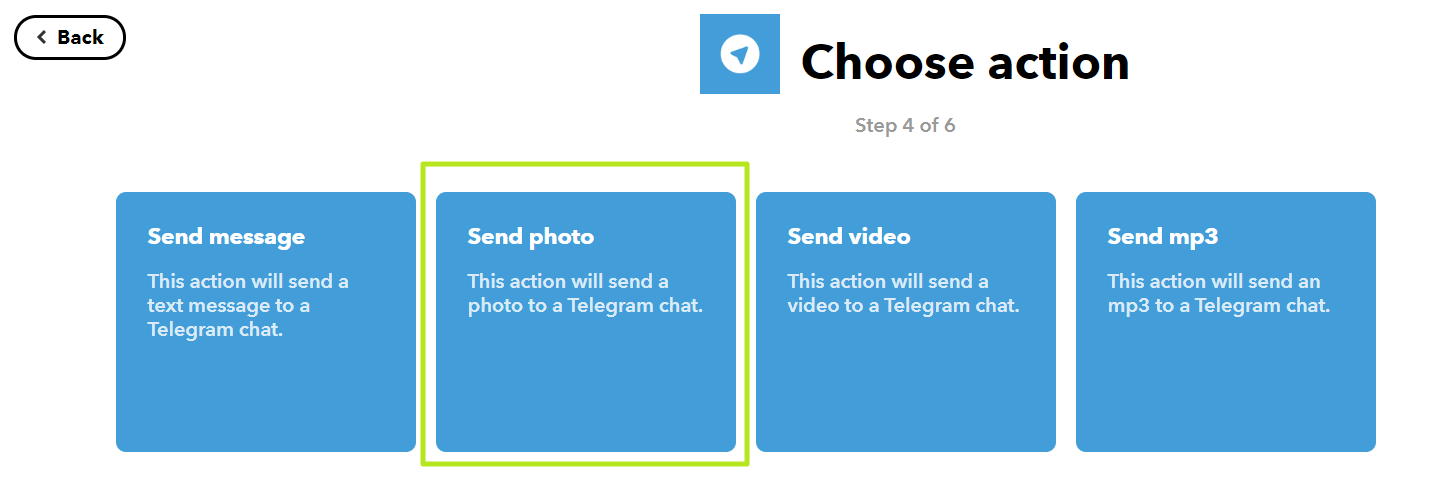
16. Click on Send Photo as the action.
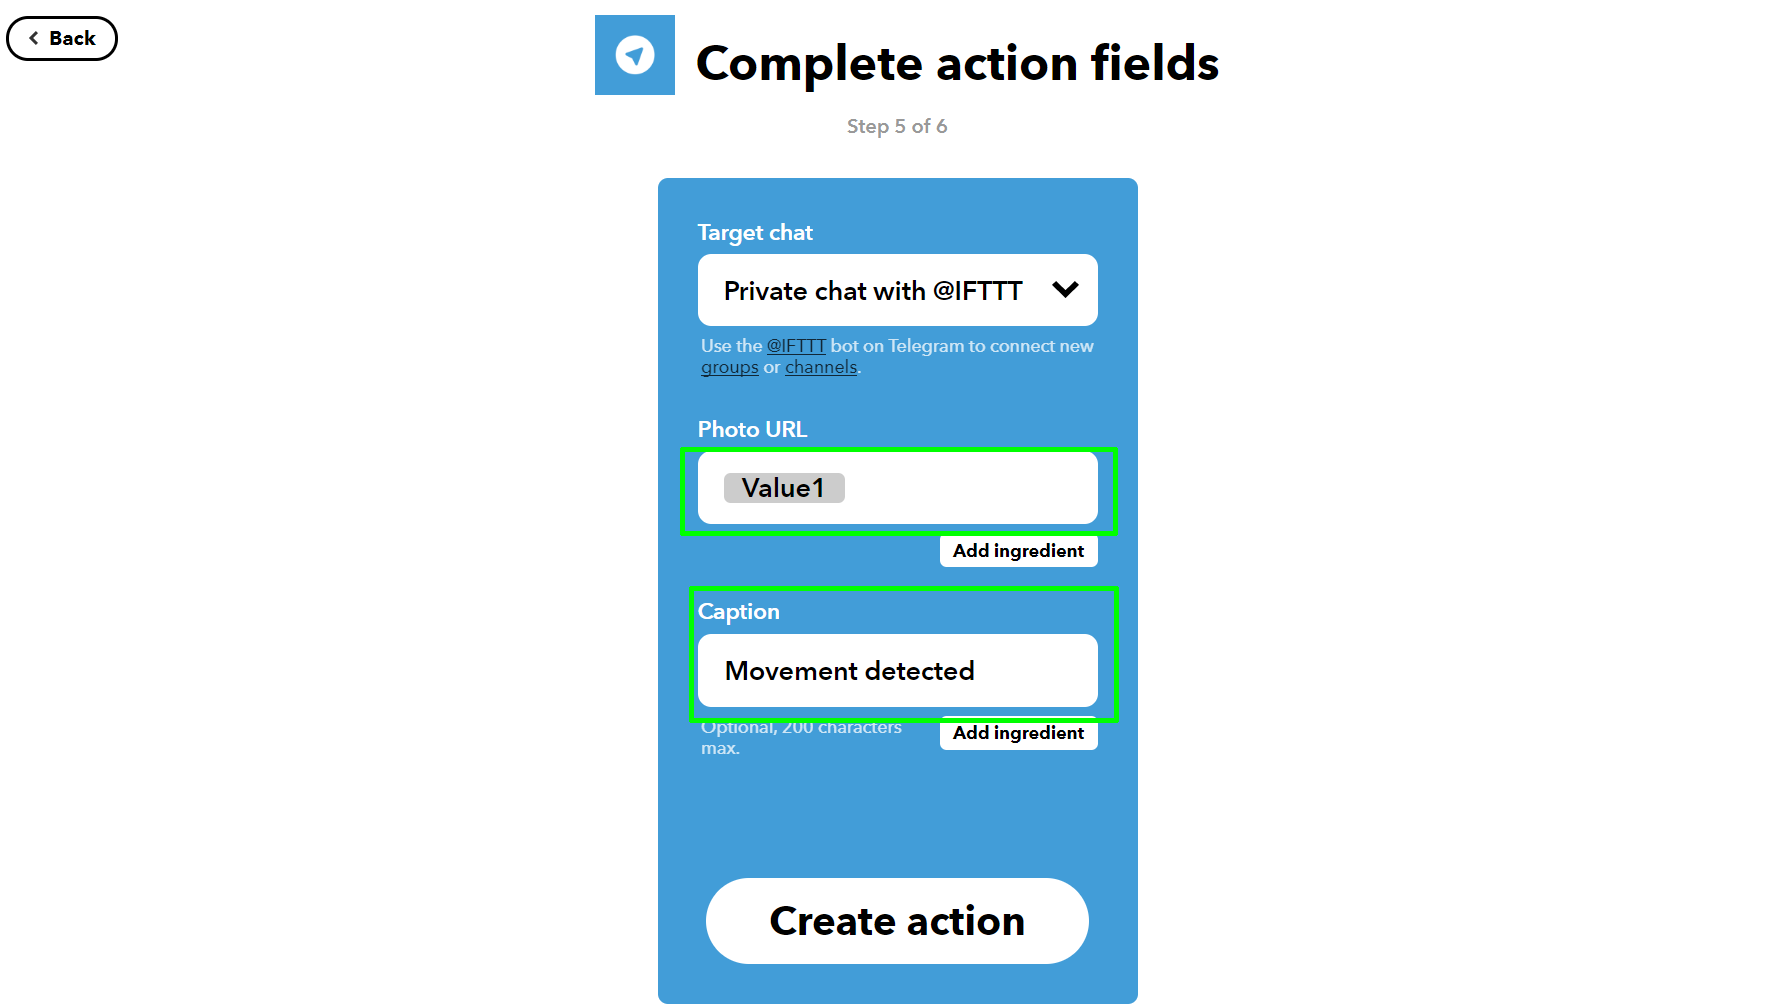
17. On the next screen, the set target chat to "Private chat with @IFTTT" if it's not set to that already. In the Photo URL section click on Add Ingredient and select Value1. Ensure that Value1 has a capital V. In the Caption section, change the caption to “Movement detected” and then click Create Action.
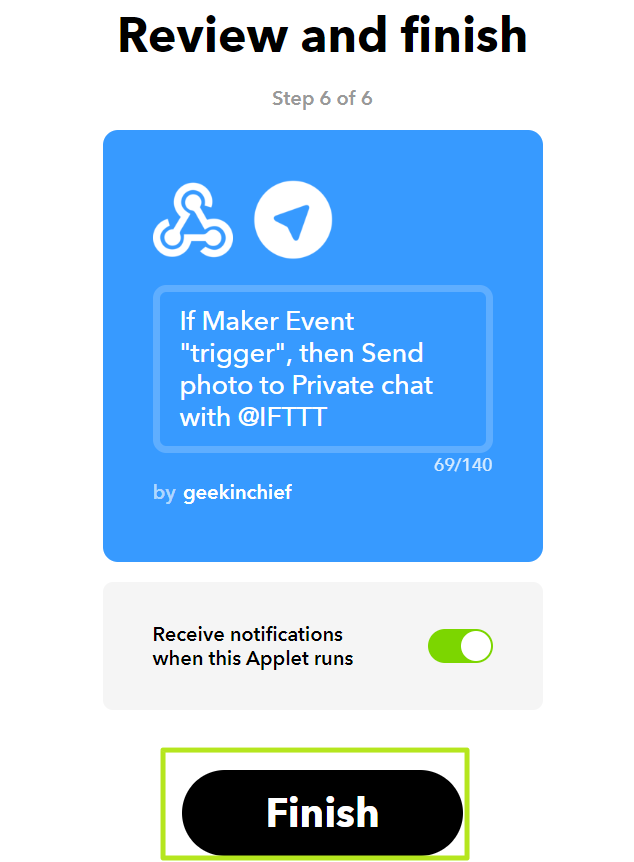
18. Click Finish to create and start the service.
19. Now click on Home, and then click Webhooks .
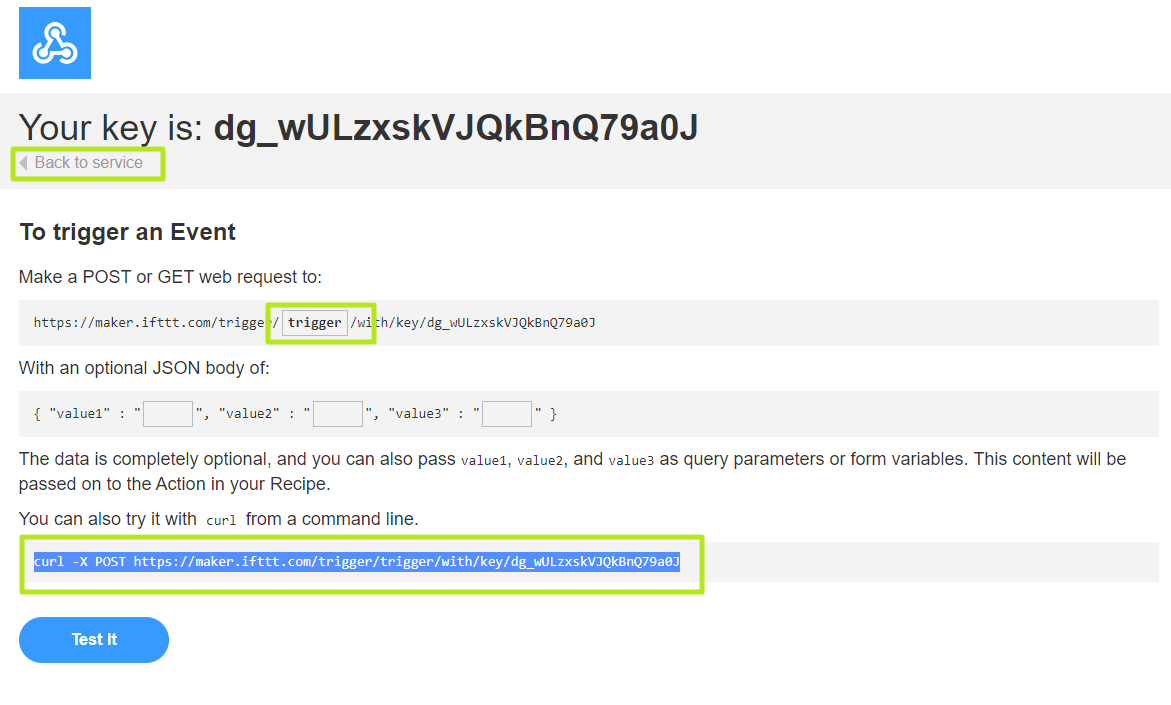
20. On the next screen, click Documentation and you will see how the webhook is constructed.
21. In the Make a POST or GET section, click on {event} and change it to trigger. Now, on the bottom line, which starts curl -X POST, select from https to the end of the line, then copy the link and save it in a notepad for later use. When you’re done, click < Back to service.
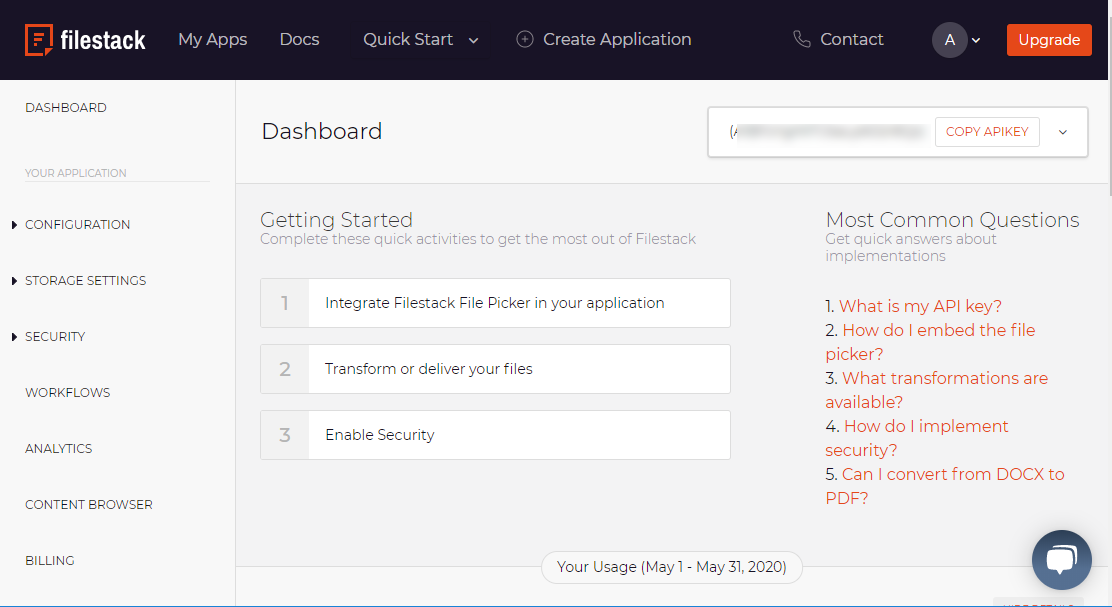
22. Create an account with www.filestack.com, which will be used to store images uploaded from the Pi. These images are then attached to the Telegram message. Sign up for a free account, and when logged in to the Dashboard your API key will be in the top right corner. We will need this later.
23. Install the filestack library. To use filestack with Python we need to install the library. In a terminal type the following and then press Enter to run:
sudo pip3 install filestack-pythonCoding the Motion Detection Project
1. To write the Python code for this project, choose your favorite Python 3 editor – we used Thonny – and create a new file called trigger.py. Remember to save very regularly.
The first block of code consists of the imports for the libraries that will make up the project. Requests is used to send a webhook to IFTTT. The gpiozero library is used to interface with the PIR sensor. The picamera library is for the camera, pause from signal is used to stop the project closing after it runs. Lastly, filestack is used to send camera images to the service.
import requests
from gpiozero import MotionSensor
from picamera import PiCamera
from signal import pause
from filestack import Client
2. Next, we will need to create an object called client, which will contain a link to Filestack, including our API Key.
client = Client(“YOUR API KEY HERE”)3. We now create an object to work with PiCamera, and then set the resolution of the camera to 1920x1080.
camera = PiCamera()
camera.resolution = (1920, 1080)
4. The next step is to create a function called send_alert, which will contain all of the steps necessary to send an image via webhooks to IFTTT and then to Telegram. When the function is called, the first step is to take a picture and save it as image.jpg, which is then uploaded to Filestack as a new_filelink. This is then printed to the Python shell for debugging.
def send_alert():
       camera.capture(“image.jpg”)
       new_filelink = client.upload(filepath=”image.jpg”)
       print(new_filelink.url)
5. To send the image to IFTTT, we need to use the requests library to post it to the webhook address that we made a note of earlier. This link contains our trigger word, trigger and our API key for IFTTT, but it also contains a small section of JSON, which contains the key “value1” that IFTTT expects as the URL for the photo. So the value attached to that key is the new_ filelink.url object, the URL for the image on Filestack.
r = requests.post(“https://maker.ifttt.com/trigger/ trigger/with/key/YOUR API KEY HERE”, json={“value1” : new_filelink.url}) 6. To handle any errors when sending the image we use the requests status code feature to query the returned code. If it is 200, then all is well, while anything else will trigger an error.
if r.status_code == 200:
   print(“Alert Sent”)
else:
   print(“Error”)
7. The function is now complete and here are the final three lines of the project. We create an object called pir, and in there, we tell Python where our PIR sensor is connected, GPIO17. Then we tell the code that when motion is detected, it should load the send_alert function that we have just created.
Lastly, the code should pause and wait for the next trigger to set off the alarm.
pir = MotionSensor(17)
pir.when_motion = send_alert
pause()
8. With the code completed, save and run.
You should now be able to set off the sensor by moving your hand across it. Please note that it is very sensitive, so point it away from yourself for testing. Each time the sensor is triggered, the camera will take a picture and post it to Telegram – no matter where you are in the world, you will be alerted!
This article originally appeared in issue 262 of Linux Format Magazine.

Les Pounder is an associate editor at Tom's Hardware. He is a creative technologist and for seven years has created projects to educate and inspire minds both young and old. He has worked with the Raspberry Pi Foundation to write and deliver their teacher training program "Picademy".
-
JanRob Many thanks for this article. I've been looking for something similar for a while, so am excited to get this going.Reply
However, I'm getting an error from the 'r = requests.post' line which reads:
NameError: name 'new_filelink' is not defined
The Pi is sensing motion, taking an image, and uploading to Filestack. IFTTT is sending a post to Telegram but the image is not coming through (getting a 'file not found' image).
If I replace new_filelink.url in the r = requests.post line with "https://cdn.filestackcontent.com/theimageurl" then the image gets posted to Telegram, so the IFTTT to Telegram connection is working.
It seems that there is an issue with the IFTTT post picking up the new_filelink.url.
Please can you help!?
Also the camera seems to be only triggering for the first motion sensor, and doesn't continue. Any ideas?
Thanks for your help!
Jan -
bit_user Reply
I'm not familiar with any of this, but the bottom of the article says it was first published in issue 262 of Linux Format Magazine.JanRob said:Thanks for your help!
Maybe they have some forums where the same issue was already discussed (262 appears to be last month's issue).
Also, that page has a link to the source code, so you can also review it to see if the article missed anything. -
JanRob Reply
Thanks @bit_user! I did check online versions and it looks the same. Can't find any forums on this unfortunately. :(bit_user said:I'm not familiar with any of this, but the bottom of the article says it was first published in issue 262 of Linux Format Magazine.
Maybe they have some forums where the same issue was already discussed (262 appears to be last month's issue).
Also, that page has a link to the source code, so you can also review it to see if the article missed anything. -
biglesp Reply
Hello!JanRob said:Thanks @bit_user! I did check online versions and it looks the same. Can't find any forums on this unfortunately. :(
I wrote this code for Linux Format, so I hope that we can fix this.
Firstly can you try out this code on your system, adding your API keys where necessary
https://github.com/lesp/LXF262If that fixes the issue, then there was a typo, and trust me when I wrote this I made quite a few errors!
new_filelink.url should return the url of the image on filestack. What does print(new_filelink.url) (Line 13) return in the Python shell?
IIRC I had an issue like this where the URL was wrong and IFTTT was sending duff URLs to Telegram.
If you can share your code (No API keys :) ) via a Gist or or Pastebin, then that would help me to diagnose the issue.
Happy to help and best of luck!
Les -
nachobiz13 Hello, Thank you for writing this. I am also getting an error when I run the file. The motion detection is working because every time I move in front of the camera, a web address shows up in terminal and then 'Error' on a new line. Like this:Reply
https://cdn.filestackcontent.com/qm98PXufQKGbeqi93F09Error
I am not sure what is going wrong but it seems to be with the send alert part of the code. I had to edit the file because, for some reason, it didn't like the quotes you had in there. I had to go through and replace them with new quotes. It kept giving me invalid character errors. Who knows? The edits fixed that but now I am running into this problem. Please let me know if you have any ideas. Also, if you know of a way to have it take a short video instead of a still upon motion detected, that would be cool to know. Thank you! : )
