
Here at Tom’s Hardware, we’re big fans of the Raspberry Pi. The SBC has a thriving community that makes it easy to jump in, create, and explore tons of tech-oriented avenues. Today, we’re excited to share a close-up look at exactly how the latest model, the Raspberry Pi 4 B, is created thanks to maker and YouTuber Jeff Geerling. Geerling recently had the opportunity to explore the factory that makes Raspberry Pis, known as the Sony Tech Center in Pencoed, Wales UK.
If that name sounds familiar, it should. Geerling has led the way on Raspberry Pi content for years thanks to his popular YouTube channel. We’ve had the opportunity to interview him a few times on our Raspberry Pi-themed Pi Cast show. From Pi Clusters and SSDs, to experimenting with connecting GPUs to a Pi, Geerling has seemingly done it all.


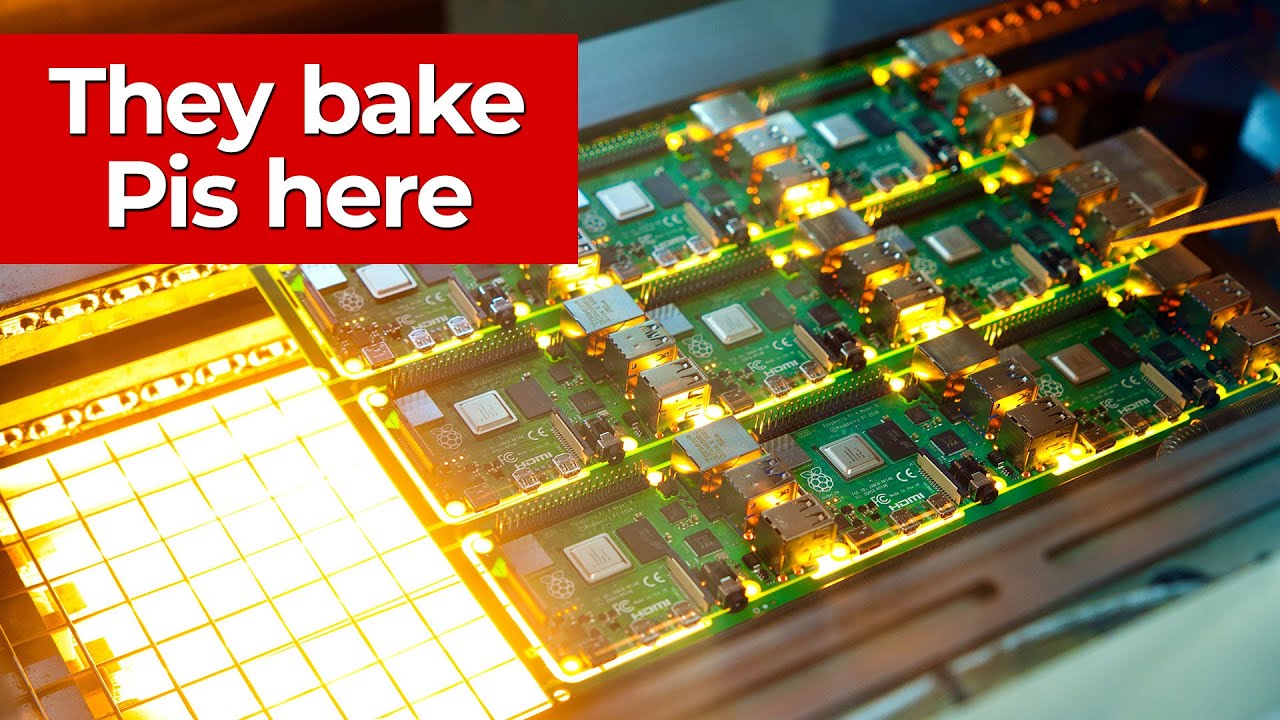
To create a Raspberry Pi, you must first invent the universe. Once that’s taken care of, a machine creates a 9-panel PCB that starts as a base that will become 9 individual Raspberry Pi 4 Bs. A screen printer applies solder paste before passing the sheet over a machine that attaches the surface-mounted components one by one. It adds the smallest pieces first before moving on to the larger ones.
Once the SMCs are added, the PCB is placed in a reflow oven to bake. The next segment used to be handled by humans, but now it's done by really impressive robotic arms that attach large components like the Ethernet ports, GPIO and USB ports. Humans are still needed for quality control, andthis is where Geerling got the opportunity to chip in and help attach a few components.
Finally, the boards are tested using unique machines that automatically plug into the external ports to ensure they’re all functional. Once a Pi passes inspection, it’s moved on to packaging. This part is fairly straightforward, as the Pis are placed into the familiar red and white boxes. They’re also weighed to make sure nothing is missing. If the weight is off, the Pi is rejected and inspected for quality control.
Before you put together your next Raspberry Pi project, be sure to check out Geerling's latest tour video to see exactly how that board you’re using was put together.
