Tom's Hardware Verdict
At roughly $1,200, you should expect the best, and you get the best with the MEG Z89Godlike Max. From the TB4 ports and seven M.2 sockets to the overkill power delivery and premium aesthetic, there’s a lot to like here if you have the money to spend.
Pros
- +
Seven M.2 sockets
- +
Flagship-class audio
- +
10 GbE and Wi-Fi 7
- +
M-Vision Dashboard
- +
Thunderbolt 4
Cons
- -
HUGE E-ATX board
- -
Ungodly price
Why you can trust Tom's Hardware
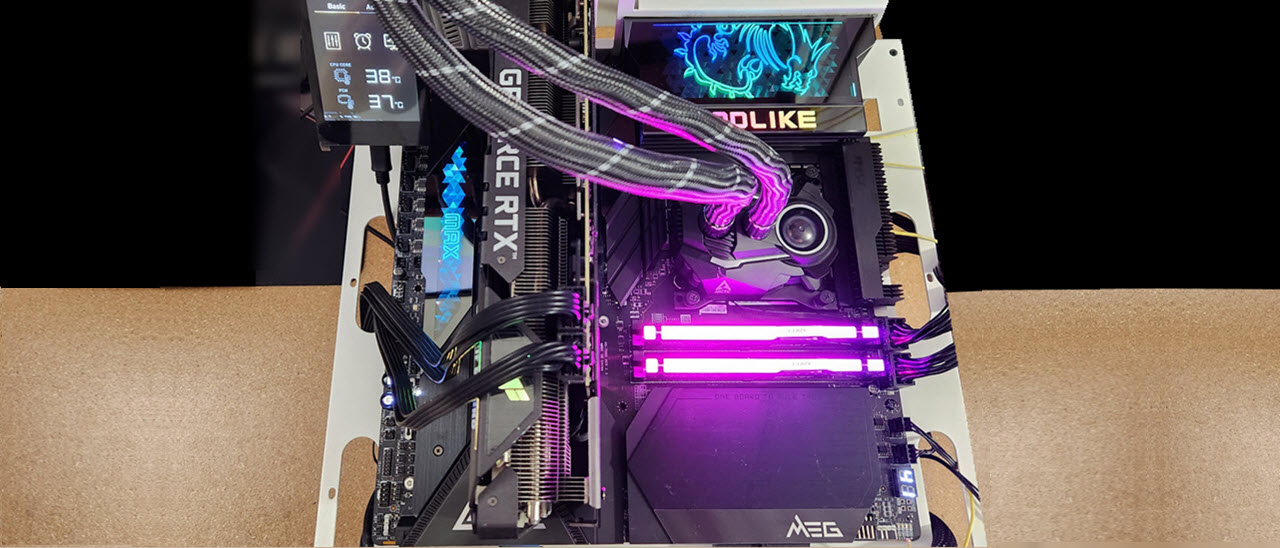
On the testbench this week is MSI’s Halo product for Z790 motherboards, the boldly-named Godlike MAX. This massive E-ATX (12 x 12.2-inch) board presents the best hardware money offers on a desktop-class SKU. For about $1,200, you get the best the platform has to offer, including a class-leading seven M.2 sockets (one PCIe 5.0), a high-end audio solution with integrated AMP/DAC, Thunderbolt 4 (40 Gbps) ports, fast networking with a 10 GbE port and Wi-Fi 7, and of course, a premium appearance (including RGBs) fit for a top-of-the-line offering.
MSI has released several refresh boards, including our Godlike MAX ($1,299 MSRP), a Carbon MAX Wi-Fi ($499), Edge Ti MAX Wi-Fi ($399.99), the Tomahawk MAX Wi-Fi ($299.99), the budget Pro Z790-A MAX Wi-Fi ($279) and the Z790 Ace MAX ($699.99) we recently reviewed. Plenty of refresh boards are available in the MSI Z790 product stack, though the company is missing updated Micro ATX and Mini-ITX offerings.
The updated Godlike MAX brings native 14th Gen CPU support out of the box and Wi-Fi 7 on top of all the features. Power-wise, the VRMs are among the most robust for the platform. Along with the overkill cooling capability, it can easily handle processors like the Intel Core i9-14900K, no matter what cooling method. In addition to the hardware updates, MSI also refreshed the appearance a bit with a “…crystal cut pattern within black mirrors…” and more RGB lighting on the rear IO and along the bottom M.2 heatsink. It is an improvement as it’s all tastefully implemented. Outside of that, it isn’t much different than the original Z790 Godlike and is more of an iterative refresh than what we’d truly consider ‘new.’
Below, we’ll dig into the details of the board and see how it performs with the new Intel Core i9-14900K processor and against a few other new Z790 motherboards. Does it have a chance of making our best motherboard list? Read on to figure that out, but before we get into that, we’ll start by listing the specifications from the MSI website.
Specifications: MSI MEG Z790 Godlike MAX
| Socket | LGA1700 |
| Chipset | Z790 |
| Form Factor | E-ATX (12.2 x 12-inches) |
| Voltage Regulator | 28 Phase (26x 105A SPS MOSFETs for Vcore) |
| Video Ports | (2) Thunderbolt 4 Type-C |
| Row 5 - Cell 0 | (2) Mini DisplayPort (input ofr TB passthrough) |
| USB Ports | (1) USB 3.2 Gen 2x2 Type-C (20 Gbps) |
| Row 7 - Cell 0 | (4) USB 3.2 Gen 2 (10 Gbps) |
| Row 8 - Cell 0 | (3) USB 3.2 Gen 1 (5 Gbps) |
| Row 9 - Cell 0 | (2) USB 2.0 (480 Mbps) |
| Network Jacks | (1) 2.5 GbE |
| Row 11 - Cell 0 | (1) 10 GbE |
| Audio Jacks | (5) Analog + SPDIF |
| Legacy Ports/Jacks | ✗ |
| Other Ports/Jack | ✗ |
| PCIe x16 | (1) v5.0 x16 |
| Row 16 - Cell 0 | (1) v5.0 x8 (disabled when M.2_4 in use) |
| PCIe x8 | ✗ |
| PCIe x4 | ✗ |
| PCIe x1 | ✗ |
| CrossFire/SLI | AMD Multi-GPU support |
| DIMM Slots | (4) DDR5 7800+(OC), 192GB Capacity |
| Row 22 - Cell 0 | 1DPC 1R Max speed up to 7800+ MHz |
| Row 23 - Cell 0 | 1DPC 2R Max speed up to 6800+ MHz |
| Row 24 - Cell 0 | 2DPC 1R Max speed up to 6400+ MHz |
| Row 25 - Cell 0 | 2DPC 2R Max speed up to 6000+ MHz |
| M.2 Sockets | (1) PCIe 5.0 x4 (128 Gbps) / PCIe (up to 110mm) |
| Row 27 - Cell 0 | (3) PCIe 4.0 x4 (64 Gbps) / PCIe (up to 80mm) |
| Row 28 - Cell 0 | (2) PCIe 4.0 x4 (64 Gbps) / PCIe + SATA (up to 80mm) |
| Row 29 - Cell 0 | (1) PCIe 4.0 x4 (64 Gbps) / PCIe (up to 110mm) |
| Row 30 - Cell 0 | Supports RAID 0/1/5/10 |
| SATA Ports | (6) SATA3 6 Gbps (Supports RAID 0/1/5/10) |
| USB Headers | (1) USB v3.2 Gen 2x2, Type-C (20 Gbps) |
| Row 33 - Cell 0 | (2) USB v3.2 Gen 1 (5 Gbps) |
| Row 34 - Cell 0 | (2) USB v2.0 (480 Mbps) |
| Fan/Pump Headers | (10) 4-Pin (CPU, Pump, System fans) |
| RGB Headers | (3) aRGB (3-pin) |
| Row 37 - Cell 0 | (1) RGB (4-pin) |
| Row 38 - Cell 0 | (1) ARGB+FAN |
| Diagnostics Panel | (1) Debug LED, |
| Row 40 - Cell 0 | (1) EZ Debug LED (4 LEDs) |
| Internal Button/Switch | Power and Reset buttons |
| SATA Controllers | ✗ |
| Ethernet Controller(s) | (1) Marvell AQC113CS-B1-C (10 GbE) |
| Row 44 - Cell 0 | (1) Intel 2.5 GBps |
| Wi-Fi / Bluetooth | Wi-Fi 7 (2x2 be, MU-MIMO, MLO 2.4/5/6 GHz, 320 MHz, BT 5.4) |
| USB Controllers | Genyses Logic GL3590, GL3523, GL850 |
| Row 47 - Cell 0 | Intel JHL8540 |
| HD Audio Codec | Realtek ALC4082 + ESS ES9280AQ Combo DAC/HPA |
| DDL/DTS | ✗ / ✗ |
| Warranty | 3 Years |
Inside the Box of the MEG Z790 Godlike MAX
Along with the motherboard, MSI includes a ton of accessories. Not only do you get the basics (SATA cables, Wi-Fi antenna, and EZ M.2 clips), but the board also comes with the cool and useful M-Vision Dashboard - a 4.5-inch full-color IPS LCD panel device that connects via USB Type-C port and is used to monitor system operations (tuning, power/reset), system information (hardware monitor, etc.). It also displays the weather, a system clock, is a media controller, and allows hot-key customization. It’s one of the more unique and useful add-ons if you like to tweak and monitor your PC but don’t want to take up valuable space on your main display. Below is a complete list of the included accessories.
- Quick install guide
- Shout out flyer
- Cable stickers
- (4) EZ M.2 clips
- (2) Thermistor cables
- EX Front panel cable
- (2) DP to Mini-DP
- ARGB & Fan extension Y-cable
- 1 to 2 RGB LED extension Y-cable
- 1 to 3 ARGB Gen2 extension cable
- Rainbow RGB LED extension cable
- (6) SATA cables
- M-Vision Cable
Design of the Godlike MAX
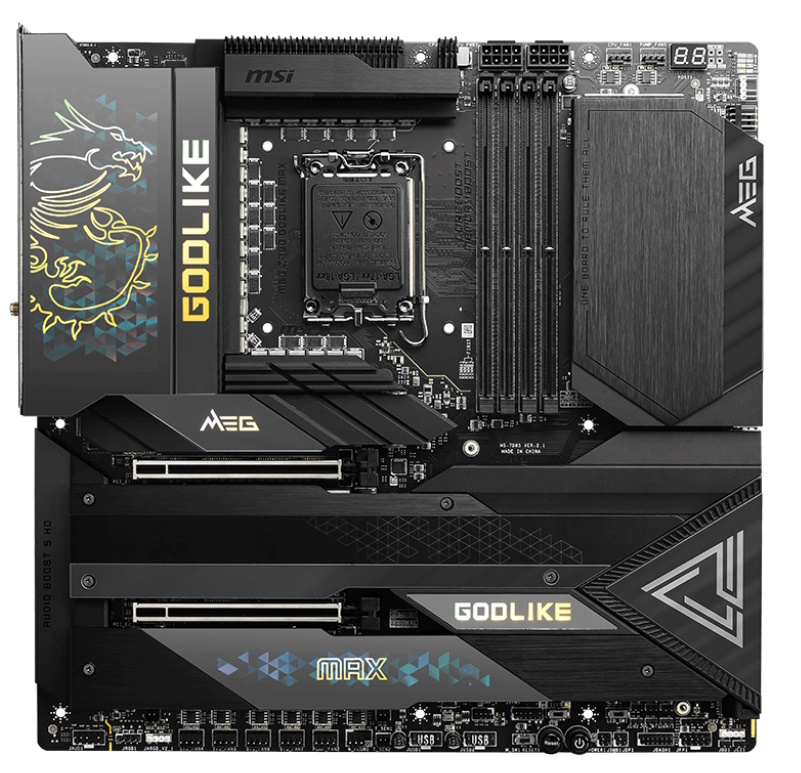
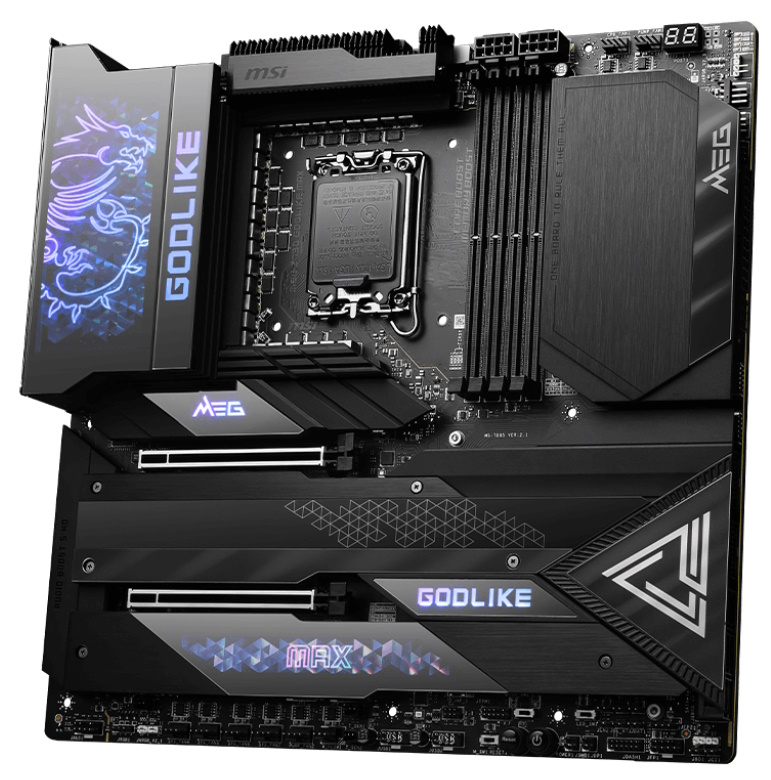
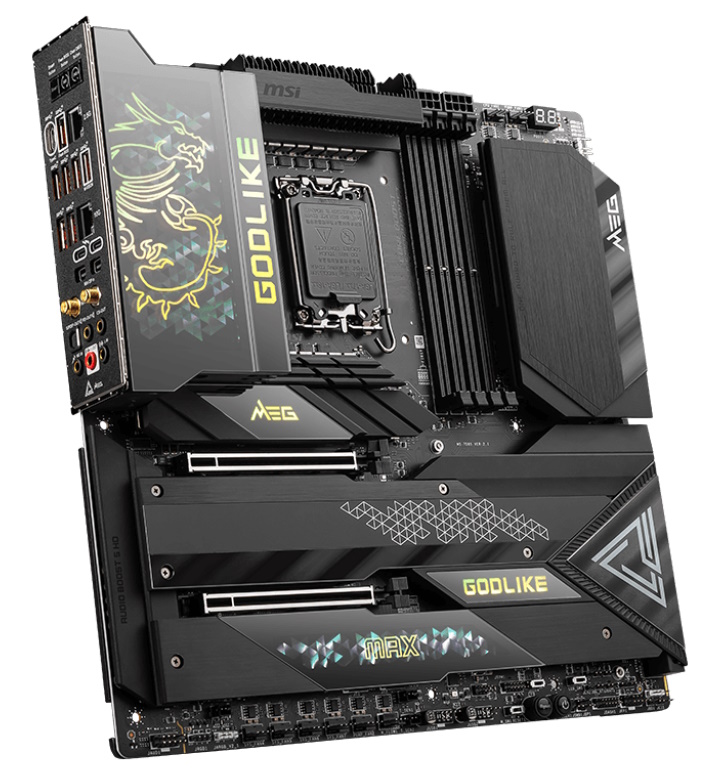
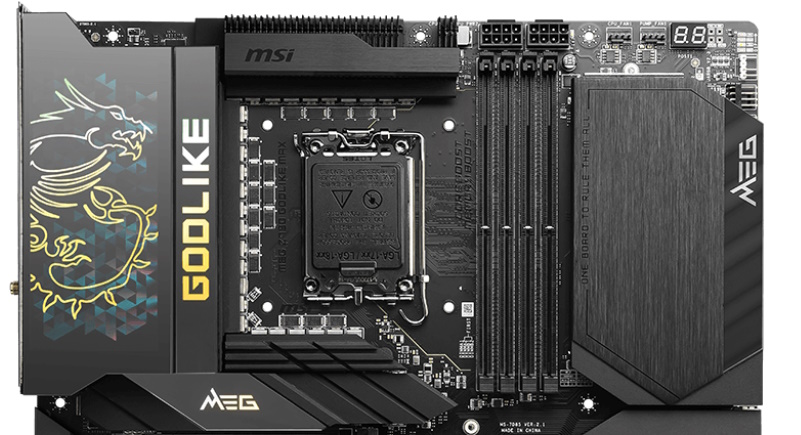
The design of the Z790 Godlike MAX is similar to the non-Max. It’s still a huge ATX-size board that measures no less than 12 inches on each side. It’s a bit bigger than other flagship boards (around 11 inches wide), so make sure your chassis has room for it and any potential cable management concerns that can arise. Outside of that, the 8-layer PCB still sports the black-on-black design but changes the accents with the crystal cutting pattern on the rear IO bottom M.2 heatsinks, illuminated by the RGB LEDs hidden below. The updated appearance is an improvement on an already good-looking design.
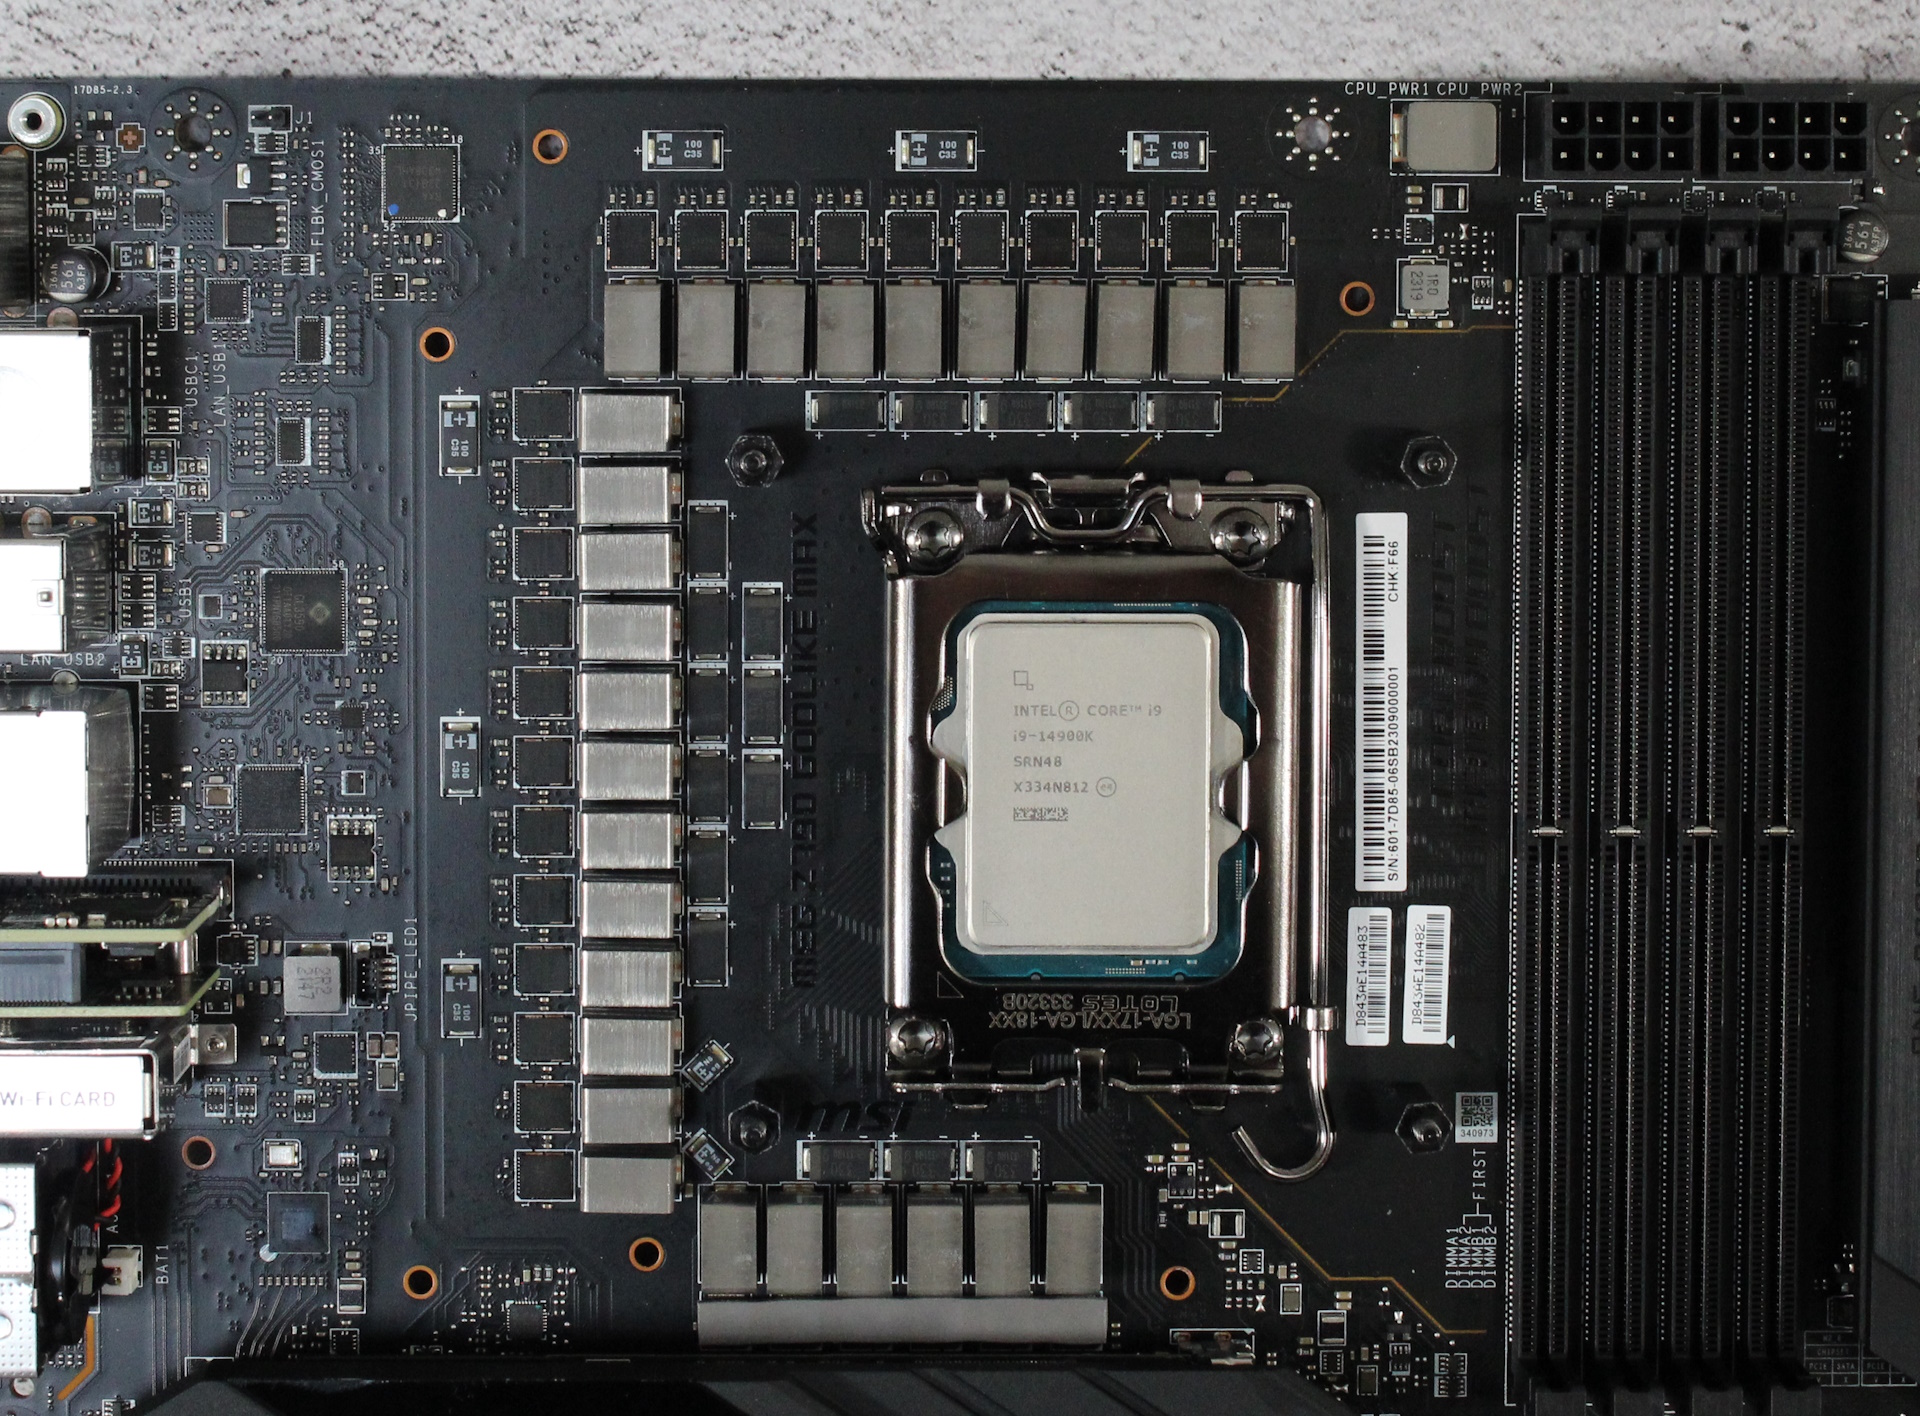
Starting in the top left corner, we’d normally start with the 8-pin EPS connectors. They aren’t located here, but are over to the right, above the DRAM sockets. Here, we get a better look at the oversized aluminum VRM heatsinks hidden under the RGB feature. The top VRM heatsink, utilizing MSI’s Wavy Fin design, connects to the larger heatsink through a sizeable direct touch heatpipe. Together, it keeps the impressive power delivery below running well within spec under any normal situation.
Get Tom's Hardware's best news and in-depth reviews, straight to your inbox.
Moving past the clean socket area, we run into four unreinforced DRAM slots with their locking mechanism on the bottom. I like to see these on top so it’s easier to swap RAM with a video card installed, but most won’t find this to be a problem. MSI lists support up to DDR5-7800 and capacity up to 192 GB. The speed is the same as the original Z790 Godlike. On this board, we couldn’t run out of the DDR5-8000 kit (expected), nor our DDR5-7200 kit. While neither was on the list, I was hopeful the DDR5-7200 kit would work, but it’s not on the QVL list either and didn’t pass stress tests. Ultimately, only our DDR5-6000 kit worked by just setting the XMP profile. Stick with MSI’s QVL list for assured support.
Utilizing the increased size of ATX and then some, we run into the first two (of SEVEN!) M.2 sockets hiding under the heatsink. These two sockets support up to 80mm devices with speeds up to PCIe 4.0 x4 (64 Gbps). Along the top edge, above these two M.2 sockets, are the first two (of 11) total 4-pin fan/pump headers. We find the remainder of the headers along the right and bottom edges of the board. Each header supports PWM and DC-controlled devices with the CPU and System fans default to auto, while the pump headers default to PWM control. Power output varies on the ports, but there’s a lot of it. CPU_FAN1 and SYS_FAN1-7 output 2A/24W, while the two pump headers (PUMP_FAN1-2) provides 3A/36W. In short, there are plenty of headers and power to support whatever cooling solution you choose.
Next are the 2-character debug LEDs and the EZ debug LEDs in the corner. Both of these provide information during the POST process. If there’s a problem, one displays a detailed code while the problem area (CPU, VGA, RAM, Boot) remains lit on the EZ debug feature but lacks details. Combined, these should provide enough information for troubleshooting POST/Boot problems.
Crawling down the right edge are several additional headers and connectors, all sticking out horizontally and helping with cable management. Working our way down, we first run into a 3-pin ARGB header. You’ll find two more along the bottom edge and a 4-pin ARGB header. Control over these devices is managed through the Mystic Light application, which you can get through the MSI Center application. Next, we run into three more 4-pin fan headers, the 24-pin ATX power lead, a 6-pin PCIe power connector to enable 60W PD charging capability, and finally, two front panel Type-C ports, both running at 20 Gbps speeds. The top connector of these two (JUSB6) is the 60W-capable port.
Power delivery on the Z790 Godlike MAX is the same as the non-MAX version. Power travels down from the EPS connector(s) onto a Renesas RAA229131 controller to the 26x 105A Renesas RAA22010540 SPS MOSFETs in a teamed configuration. The 2,730A available for the CPU is still the most I can recall seeing on a motherboard and surely won’t get in the way of any type of overclocking, including using LN2 (liquid nitrogen).
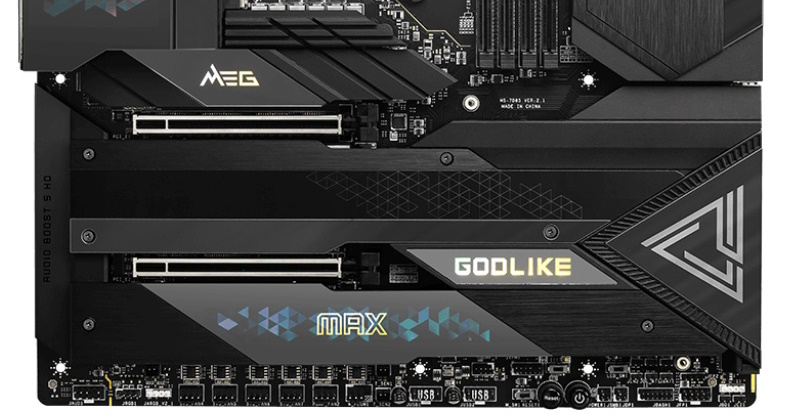
The bottom half of the board is where most of the M.2 sockets reside, along with tons of headers, connectors, and even a few switches. The audio section on the left houses a Realtek ALC4082 codec and ESS ES9280AQ combo DAC/HPA. This is the flagship codec for the platform and is still one of the better audio implementations available on a motherboard.
Moving on to the M.2 sockets, five are hidden below the heatsinks in this area. For details on their bandwidth, see the specifications above. What’s worth mentioning here is how these break down. When the M2_4 (the PCIe 5.0 x4 socket) is populated, PCI_E2 (the second PCIe slot) is unavailable. If you’re using a SATA- or PCIe-based drive in M2_5, SATA ports 5-8 are unavailable, leaving you with just two functioning SATA ports available. The PCIe slots mixed in among the M.2 sockets are simple. Both use reinforcement and PCIe 5.0. The top slot supports up to x16 speeds, but both run at PCIe 5.0 x8 speeds when the second slot gets populated. The only concern with this configuration is a lack of slots for multiple expansion cards. Last, along the right edge, are two USB 3.2 Gen 1 (10 Gbps) headers and six SATA ports.
Across the bottom of the board are several exposed headers, all vertical. You’ll find the usual and quite a bit more: additional USB ports, RGB headers, fan headers, custom water cooling headers (for flow and temperatures), power/reset buttons, and more. Below is a complete list from left to right.
- Front panel audio
- 4-pin RGB
- 3-pin ARGB
- (6) 4-pin fan/pump headers
- (2) 2-pin temperature headers
- (2) USB 2.0 headers
- Power/Reset buttons
- BIOS/LED/M switches
- M-Vision connector
- Front panel
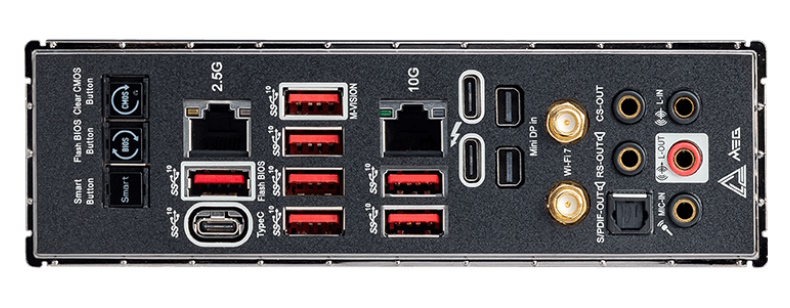
The rear IO plate on the Z790 Godlike comes preinstalled to the motherboard. It has a black background with light-grey labels on the ports, making them relatively easy to read. There are a total of 10 USB ports: two Thunderbolt 4 Type-C (40 Gbps, passes video as well), seven 3.2 Gen 2 (10 Gbps, one Type-C) ports, and one USB 3.2 Gen 2 (10 Gbps) Type-C port. On the left are three buttons: Clear CMOS, BIOS Flash, and the Smart button. The latter is programmable, letting you use it to do things like reset the PC, boot into Safe Mode, control fans and lighting, etc. Around the USB ports are the Marvell 10 GbE and Intel 2.5 GbE ports. Off to the right are the two Thunderbolt 4 Type-C ports and the Mini-DisplayPort inputs for video. Last but not least are the Wi-Fi antenna connections and the five-plug plus SPDIF audio stack.
MORE: Best Motherboards
MORE: How To Choose A Motherboard
MORE: All Motherboard Content

Joe Shields is a staff writer at Tom’s Hardware. He reviews motherboards and PC components.
-
Alvar "Miles" Udell You forgot to list that SATA 3-8 will be disabled if you use M.2 slots 3 and 5 as well, because Intel, like AMD, does not equip consumer grade processors with enough PCIe capabilities, likely to prevent cannibalizing their higher margin HEDT parts.Reply
*PCI_E2 slot will be unavailable when installing M.2 SSD in the M2_4 slot.
**SATA3~4 will be unavailable when installing M.2 PCIe/ SATA SSD in the M2_3 slot.
***SATA5~8 will be unavailable when installing M.2 PCIe SSD in the M2_5 slot.
****SATA7~8 will be unavailable when installing M.2 SATA SSD in the M2_5 slot.
