 Join Tom’s Hardware today


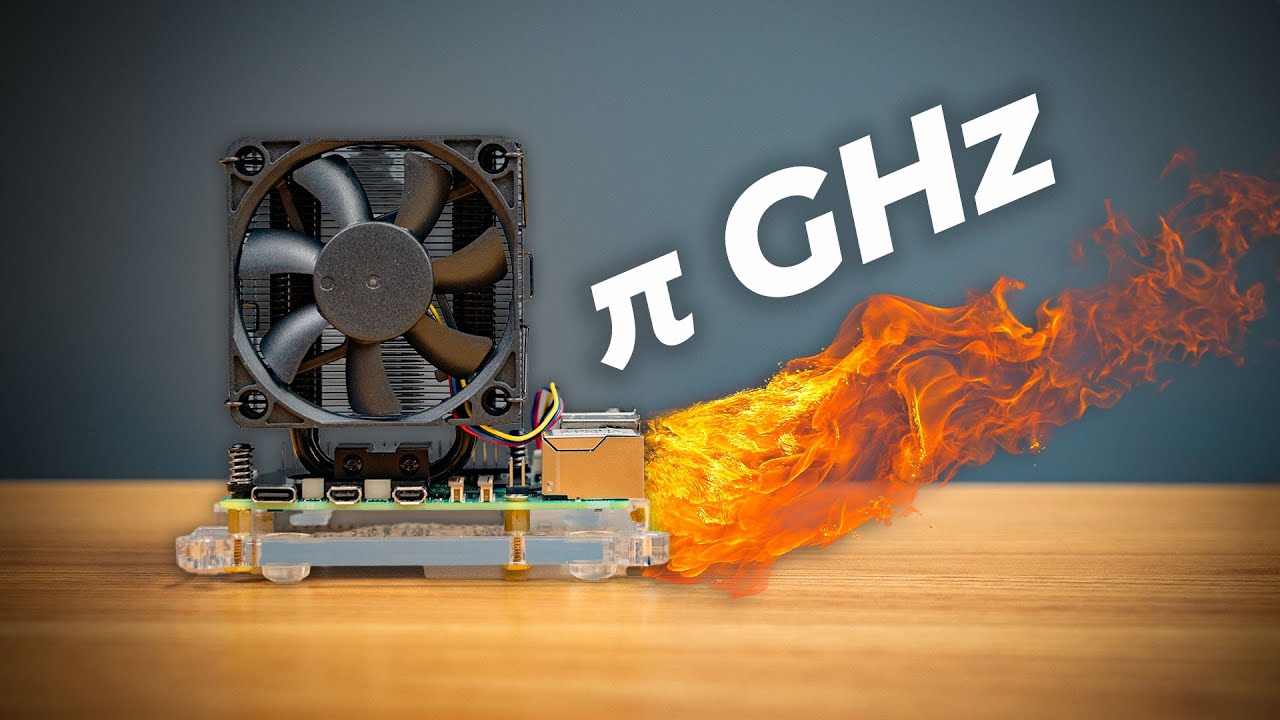
How to overclock the Raspberry Pi 5 beyond 3 GHz!
Yes, it is now possible to go beyond 3 GHz!

The Raspberry Pi 5 is well known to be the fastest Raspberry Pi, it is the new flagship after all.Originally we managed to overclock the Raspberry Pi 5 to 3 GHz, a great boost over the 2.4 GHz stock speed. Many alleged that they overclocked to much higher speeds, but we confirmed with Raspberry Pi that 3 GHz was the limit.
Well it was, but a new firmware seems to break that speed limit. Can we push the Raspberry Pi faster? We can, but how fast is in the hands of the silicon gods so your mileage may vary.
In our tests we managed a safe and stable overclock of 3.1 GHz. Hitting 3.2 GHz we encountered instability issues when running a Geekbench test. Going further to 3.3 GHz and the system crashed more times than it worked.
YouTuber and Raspberry Pi Expert Jeff Geerling managed 3.14 GHz, but anything over that speed was met with failure.
How fast can your Raspberry Pi 5 go? If you are willing to give it a go know this, if you break it, you bought it.
For this project you will need
- Raspberry Pi 5
- Active cooling solution
- Latest Raspberry Pi OS on a micro SD card
- Spare micro SD card
- Computer running Windows, MacOS or Linux
Before we make any overclock attempts, we need a good cooling system. At the very least you will need the official Raspberry Pi Active Cooler, Argon’s THRML Active cooler, or a passive cooler such as those from EDATEC. Do not attempt this process without a form of cooling as it may damage your Raspberry Pi. Tom’s Hardware cannot be held responsible if you break your Raspberry Pi 5.
We’ve chosen the Argon THRML 60-RC as a cooler, simply because it is $20 and it is a beast of a cooler. You could purchase the 52Pi water cooling kit, but at $120 it only provides a few degrees extra cooler for the $100 difference.
Get Tom's Hardware's best news and in-depth reviews, straight to your inbox.
1. On your Windows / Apple / Linux PC, download this experimental firmware. Note, as per Raspberry Pi’s Alasdair Allan message on Mastodon this is not recommended firmware and you do so at your own risk.
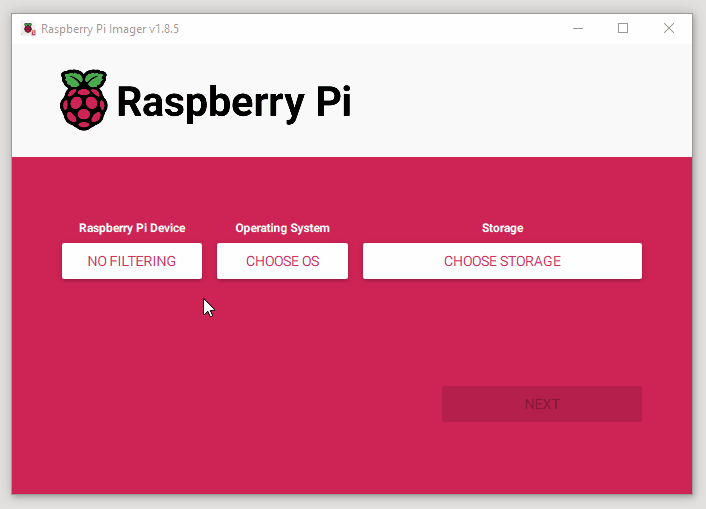
2. Download, install and open Raspberry Pi Imager.
3. For Raspberry Pi Device select “No Filtering”, and then for Operating System select “Use Custom”. Then for Storage select your micro SD card and click Next to start the write process.
4. Eject the card when prompted, and insert it into a Raspberry Pi 5. Make sure that your Raspberry Pi 5 is powered off, and that it has a keyboard, mouse and screen attached.
5. Power up the Raspberry Pi 5, wait for the screen to go green, then power off and remove the micro SD card.
6. Insert your Raspberry Pi OS micro SD card and power on the Pi to the desktop. You’ll need the best Raspberry Pi microSD card to give your Pi an added speed boost.
7. Update the available repositories and then upgrade your Raspberry Pi 5. This will ensure we have the latest software available. It isn’t essential, but it is always prudent to keep your Raspberry Pi up to date.
sudo apt update && sudo apt dist-upgrade8. Open config.txt for editing. It’s found in the /boot directory.
sudo nano /boot/config.txt9. At the bottom of the file make a new line and add these lines to overclock the CPU to 3.1 GHz.
arm_freq=310010. An optional step. Use force turbo to run the CPU and GPU to run at maximum speed. This overrides any scaling governors and makes the CPU and GPU run at 100%. Active cooling is essential for this to work correctly.
force_turbo=111. Add another line to add a little more voltage to the CPU. This replaces over_voltage=X for providing extra voltage to the Pi. The delta method adds voltage on top of the current level, here we use 50000 to add 0.05V. The older over_voltage method has been deprecated for the Raspberry Pi 5.
over_voltage_delta=5000012. Save the file by pressing CTRL + X, Y then ENTER.
13. Reboot the Raspberry Pi 5. If the Raspberry Pi fails to boot, power off the Raspberry Pi. Press and hold the Spacebar. This will bypass the overclocking config and boot the Pi with a default configuration.
14. Open a new terminal and use this command to see the current CPU speed of the Pi. Press CTRL + C to stop reading the CPU speed.
watch -n 1 vcgencmd measure_clock armYour Raspberry Pi has now been turbo-charged to 3.1 GHz! If you are brave enough to push it further, we salute you and don’t forget to post a Geekbench score! Give our stress test benchmark tool a try, it logs your CPU temperature to a CSV which can be used to graph your Pi 5.

Les Pounder is an associate editor at Tom's Hardware. He is a creative technologist and for seven years has created projects to educate and inspire minds both young and old. He has worked with the Raspberry Pi Foundation to write and deliver their teacher training program "Picademy".
-
Pierce2623 Realistically, 3GHz to 3.2GHz on an a76 core will produce results inside the margin of error.Reply -
oofthebeatenpath "YouTuber and Raspberry Pi Expert Jeff Geerling managed 3.14 GHz"Reply
A Raspberry Pi reaching a speed of 3.14GHz. Will it get to 3.14159GHz ? -
bit_user Reply
That reminds me of how NTSC relied on a chroma subcarrier that was specified at exactly 3.579545 MHz. Receivers could sync to a frequency slightly different than that, but the standard really does specify it down to the Hz!oofthebeatenpath said:A Raspberry Pi reaching a speed of 3.14GHz. Will it get to 3.14159GHz ? -
abufrejoval I've finally fallen to the temptation of buying an RP5.Reply
Much better than the RP4 for the CPU, pretty near the top Jasper Lake N6005 Atom in CPU, but much worse for iGPU and I/O.
I got a passive case for €12 which adds some heft but not size yet cools the RP5 even at the max 2900MHz my RP5 permits without overheating or throttling. My metal passive RP4 case gets just as hot, but the combo delivers only 1/3 of the compute power.
So I got an Orange PI 5+ for comparison, unfortunately I could only get the 16GB model. And no passive case yet even the Noctua 5V fan is annoying, I'm experimenting with larger finned coolers to see how they are holding up. I don't like the complete lack of fan control, but at least the OP5 throttles as nicely as a Ryzen and only synthetic loads get it there.
The OP5 is very nearly the same in CPU as both the RP5 and N6005, but also very near the N6005 (32EU) in terms of iGPU and media performance at somewhat less power: the RP5 simply hasn't kept up with the competition there.
To clarify: on my 4k screens, both the Intel N6005 and the OP5 deliver very good Youtube performance without stutter or dropped frames. Youtube will slightly reduce resolution to 3k on the OP5, but it's delivered on-sceen without dropped frames or stutter. My eyes can't see much difference between 4k and 3k on video.
The quality is quite obviously much worse and even annoying on the RP5: Youtube scales down to 720p yet painting the video on the 4k screen stutters with the VPU, even overclocked to 1000Mhz (CPU at 2900 MHz). No throttling etc., I monitored carefully, just not enough VPU horsepower.
Google Maps 3D globe view on Jasper Lake and OP5 are also quite impressive at 4k, while the RP5 is usable but not nearly as smooth there: I don't see a large improvement to the RP4 for GPU/VPU.
Storage is vastly better on the OP5: my Samsung 970 Evo+ just sings 3.3Gbyte/s on the OP, NVMe on RP5 is nonsense, unless it's left over and marginal on Jasper Lake (only 2 lanes). For desktop and light server, the OP5 feels much snappier.
Avoid µ-SD on all platforms: yes, it's so cute, but it's a dog!
I went with ARMbian on the OP5 which installs super easy: just use Balena ether to write an image on the NVMe drive via a USB adapter on the host, mount that on the OP5 and boot: voilà!
It has good OpenGL ES support, Wayland is working, but Vulkan is still missing.
In short, don't waste your time on overclock, buy the right hardware if you need extra speed!
And with prices, availability and software improving on the Rockchip RK3588 front, there is a new gang of contenders just slightly above the Raspberry's price point you may want to look at.
Neither the RP5 nor the OP5 get cool on idle; they easily use more power then than a top smartphone SoC at maximum load... where it beats both of them into a pulp in terms of performance: that's just the sad reality of the leading ARM edge vs. cheap SBC chips...
I'll just keep them both and am working on live migrating VMs or containers between them: Proxmox support is in the works! -
bit_user Reply
Thanks, again, for taking the time to post your thoughts and experiences!abufrejoval said:I've finally fallen to the temptation of buying an RP5.
For how long did you test it, though? I presume you ran it until it reached a steady state?abufrejoval said:I got a passive case for €12 which adds some heft but not size yet cools the RP5 even at the max 2900MHz my RP5 permits without overheating or throttling.
Yeah, that's one thing about the true Raspberry Pi machines - they have far & away the widest selection of cases. With other boards, you're lucky if you find one good aftermarket case for them. KKSB made a nice aluminum case for my ODROID-N2, but I'm glad I bought it when I did, because I don't fancy the revised version.abufrejoval said:I got an Orange PI 5+ for comparison, unfortunately I could only get the 16GB model. And no passive case yet
The Orange Pi 5 is made on Samsung 8 nm, IIRC, while I believe the Raspberry Pi 5 is made on something in the range of 14 nm to 20 nm? It does seem the Raspberry Pi folks keep plowing most of their transistor budget into bigger, better CPU cores, rather than GPU. Since they tend to use trailing nodes, they don't have as much transistor budget as their main competitors. For instance, the Amlogic SoC in my ODROID-N2 came out in like 2019 and is made on a 12 nm node, IIRC. Meanwhile, RP4 launched around the same time, using 28 nm.abufrejoval said:the OP5 throttles as nicely as a Ryzen and only synthetic loads get it there.
The OP5 is very nearly the same in CPU as both the RP5 and N6005, but also very near the N6005 (32EU) in terms of iGPU and media performance at somewhat less power: the RP5 simply hasn't kept up with the competition there.
How sure are you it's using the full hardware codec? What's the CPU utilization, during playback? If it's not negligible, then what about if you use mplayer with the null video output device?abufrejoval said:on my 4k screens, both the Intel N6005 and the OP5 deliver very good Youtube performance without stutter or dropped frames.
Do you know if it's even using the hardware codec? Are you sure?abufrejoval said:The quality is quite obviously much worse and even annoying on the RP5: Youtube scales down to 720p yet painting the video on the 4k screen stutters with the VPU, even overclocked to 1000Mhz (CPU at 2900 MHz). No throttling etc., I monitored carefully, just not enough VPU horsepower.
Are you aware of specs on their GPUs (i.e. how many shader pipelines, GFLOPS, etc.)?abufrejoval said:Google Maps 3D globe view on Jasper Lake and OP5 are also quite impressive at 4k, while the RP5 is usable but not nearly as smooth there: I don't see a large improvement to the RP4 for GPU/VPU.
Eh, but there are other reasons to buy the Raspberry Pi. I tend to agree about overclocking and never do it myself, as I value stability more than a few % more performance. However, if someone has a Raspberry Pi 5, for whatever reason, and they need a little more juice out of it, I guess it's nice to have the option.abufrejoval said:In short, don't waste your time on overclock, buy the right hardware if you need extra speed!
That's a shame. My ODROID-N2+ stays pretty cool. Right now, the SoC is idling at 29 C and the DRAM is idling at 31 C. Those are steady state temps, as I tend to leave that machine turned on. The cooling setup isn't even ideal, as the SoC is bottom-mounted and the case I have provides some air circulation but definitely less than if you just had the bare board sitting on a table.abufrejoval said:Neither the RP5 nor the OP5 get cool on idle; -
abufrejoval Reply
You're welcome!bit_user said:Thanks, again, for taking the time to post your thoughts and experiences!
I am generally measuring the SoC via s-tui on an SSH session to minimize the impact of the measurement itself. s-tui will give you clocks, temperatures and loads to the degree that's available on the SoC. Unfortunately the degree of instrumentation available varies widely among the devices, x86 generally expose more data.bit_user said:
For how long did you test it, though? I presume you ran it until it reached a steady state?
I've been trying several CPU hogs like stress and stress-ng, and I like running Justins WASM Web benchmark on Firefox, too, which is fantastically cross-platform and easy to use, while it also reliably loads all CPU cores at least on Firefox: Chromium based browsers don't scale quite as far on high-core-count CPUs like Xeons.
When temperatures remained several degrees below the throttling point of around 80°C on the RP5, I didn't let it run for an hour, just to see if that would change over time.
On the OP5 you can see the clocks dropping in relatively small increments when it gets too hot and the WASM benchmark continusly reports 'megarads', so it gives a good feel about the effectiveness of passive cooling. So far I've tried to keep enough space for the fan in side the case and hope there was an easy way to control it via the GPIO, but that doesn't seem to be there. I've got a bigger heat-sink on order that would eliminate that space but move the throttle point a little further. It is already at several minutes of true 100% load and then it doesn't drop below 2GHz past that, so I'm inclined to leave it at that. My only worry would be for the Samsung NVMe drive, as flash doesn't really like high temperatures.
With the fan mounted to the outside of the case and the large heatsink I get 40-50°C at peak load on the OP5+, but an ugly duckling, too. Could be fine where it sits, we'll see.
As with my x86 NUCs, I'm ok with throttling vs. noisy fans when it's finely regulated and it only occurs on synthetic workloads I won't be doing in normal operations anyway.
I was also thinking that process advantage for OP5 (8 vs 16nm) would give it a large lead either in energy consumption. I haven't really measured it at the wall, because I'd first need to buy a better meter: the one I have was better suited for the workstation wattage range...bit_user said:The Orange Pi 5 is made on Samsung 8 nm, IIRC, while I believe the Raspberry Pi 5 is made on something in the range of 14 nm to 20 nm? It does seem the Raspberry Pi folks keep plowing most of their transistor budget into bigger, better CPU cores, rather than GPU. Since they tend to use trailing nodes, they don't have as much transistor budget as their main competitors. For instance, the Amlogic SoC in my ODROID-N2 came out in like 2019 and is made on a 12 nm node, IIRC. Meanwhile, RP4 launched around the same time, using 28 nm.
Without the ability to measure energy consumption with enough precision, the generated heat was the only indicator for efficiency and I was quite surprised that overclocking the RP5 didn't overwhelm the passive case.
The OP5 really only runs at 2.252 GHz (2.4 GHz is a rather generous rounding) and cannot be overclocked, but without a fan and only a somewhat larger heatsink it can reach 90°C and will throttle to avoid going higher.
Right now I'd put them at similar wattage and the main advantage of the OP5 would be far more GPU and I/O power out of similar numbers. The extra four A55 cores on the OP5 manage to just about close the frequency gap between the RP5 2.9 and OP5 2.252 GHz on the WASM benchmark, on their own they are somewhere between a Snapdragon 800 and 820; I used numactl to control which cluster was used by firefox.
s-tui can't access GPU utilization details like HWinfo would, but it will show low (~50%) CPU utilization, while the 'nerd info box' on Youtube will provide additional details on codecs, rates, buffers and dropped frames.bit_user said:How sure are you it's using the full hardware codec? What's the CPU utilization, during playback? If it's not negligible, then what about if you use mplayer with the null video output device?
Pretty much, yes, otherwise CPU utlization would max out immediately. And you need quite a big more CPU power than any of these can deliver to decode and draw even 1080p material, let alone 4k with any modern codec.bit_user said:
Do you know if it's even using the hardware codec? Are you sure?
The 'nerd info box' will give you the codec that Youtube chose, which is AVC or H.265 on the RP5 and VP9 on the OP5. I've also tried AV1 with Kodi on the OP5, which works with the 1080p media I encoded myself via Handbrake scaled to 4k.
I don't have AV1 4k media available for testing, but according to the RK3588 spec sheet AV1 is supported at 4k on the OP5.
The RP5 tops out at H.265, the newer VP9 and AV1 are not supported at all and its CPU wouldn't be able to handle them on its own.
AFAIK the RP5 VPU is a very distinct architecture and not at all a classic GPU, more of a DSP design extended to deal with graphics and media. I fear that it was a super smart choice for the original Raspberry PI, but struggles to scale with multiplying transistor budgets, while maintaining backward software compatibility.bit_user said:Are you aware of specs on their GPUs (i.e. how many shader pipelines, GFLOPS, etc.)?
The MALI GPUs aren't publically documented to very high details either, which is why on both platforms developers are busy retro-engineering both of them.
So far I've only been spending a few days with them and my focus was more on making sure that things were generally usable and working, before any mail-order return window expired. I'll do more benchmarking when I find the time and the tools to do it.
We completely agree here. With the Raspberries overclocking has generally turned out to be quite stable, once you've found the limits of your personal piece of silicon. On my RP4 2GHz is rock solid, on the RP5 it's 2.9GHz for mine, without fiddling the voltage (heat!): at 3GHz things go haywire in a nicely binary manner that precludes further exploration. Perhaps with overvoltage mine would go higher, but then it would surely overwhelm the passive case.bit_user said:Eh, but there are other reasons to buy the Raspberry Pi. I tend to agree about overclocking and never do it myself, as I value stability more than a few % more performance. However, if someone has a Raspberry Pi 5, for whatever reason, and they need a little more juice out of it, I guess it's nice to have the option.
On x86 all sane overclocking potential is typically already explored and consumed by the vendors themselves, so I no longer bother to try.... apart for some initial and 'purely scientific' stability testing.
I really need to get some precise measurement tool for the 0.5-20 Watt range at the socket...bit_user said:That's a shame. My ODROID-N2+ stays pretty cool. Right now, the SoC is idling at 29 C and the DRAM is idling at 31 C. Those are steady state temps, as I tend to leave that machine turned on. The cooling setup isn't even ideal, as the SoC is bottom-mounted and the case I have provides some air circulation but definitely less than if you just had the bare board sitting on a table.
I don't mind the temperatures, but I'm wary as to what it implies: heat means power.
I don't mind chips running at 90°C internally, but an SBC like these heating a hefty metal case on idle points to a power consumption that is far above a smartphone without delivering extra value, while those even tend to perform better staying completely cool.
My RP5 is definitely warmer than my body on idle while it stays well below burning on maximum load. To me that implies power management below expectations.
That you may have to pay the lower purchase price of a Raspberry in electricity has something of a constant over the last generations and doesn't seem to have changed much on the RP5.
With the fan on the OP5 running a constant speed and without a power meter, I simply can't tell yet for the OP5.
My interest in ARM is doing more with less, and idle is a significant part of that if you're not running a cloud selling excess capacity. -
bit_user Reply
I like stress-ng, due to the diversity of different methods it has. Hardkernel used the following, in their thermal testing of the N2:abufrejoval said:I've been trying several CPU hogs like stress and stress-ng,
stress-ng –cpu 6 –cpu-method matrixprod && glmark2-es2-fbdev –off-screen –run-forever
https://www.hardkernel.com/shop/odroid-n2-with-4gbyte-ram-2/
IIRC, there's like a 3D matrix product that is more stressful on some CPUs, but I really haven't spent a ton of time exploring its different options.
For a more real-world workload, I find that povray is an easy option.
Where do your source heat sinks? I've found it difficult to locate good quality copper heatsinks of any substantial size. For my Gemini Lake, I found a guy selling some ancient server heatsinks on ebay that fit with a custom hold-down I rigged. But, I've generally been disappointed with the selection of heatsinks I could find either on ebay or even some electronics component suppliers.abufrejoval said:I've got a bigger heat-sink on order that would eliminate that space but move the throttle point a little further.
If the Alder-N board I end up getting has enough space, I might try one of the server heatsinks with a vapor chamber.
I got some SK Hynix P31 Gold M.2 drives to use on SBCs, due to their excellent power efficiency. However, I take your point that the real issue might not be the amount of heat generated by the drive, but rather how much it picks up from the CPU.abufrejoval said:My only worry would be for the Samsung NVMe drive, as flash doesn't really like high temperatures.
True. I would tend to use power limits to avoid throttling, however.abufrejoval said:As with my x86 NUCs, I'm ok with throttling vs. noisy fans when it's finely regulated and it only occurs on synthetic workloads I won't be doing in normal operations anyway.
taskset is what I use on the Alder Lake i9 that I use at work. I forget if I've tried it on the ODROID N2...abufrejoval said:I used numactl to control which cluster was used by firefox.
That's not great info, since only part of it could be accelerated, or perhaps they're using the GPU's shader array instead of its hardware codec engine.abufrejoval said:Pretty much, yes, otherwise CPU utlization would max out immediately. And you need quite a big more CPU power than any of these can deliver to decode and draw even 1080p material, let alone 4k with any modern codec.
Why would they need to maintain backward compatibility? You know there are different drivers for the VideoCore IV and VI, right? The GPU in Pi 1 to 3 is handled in the vc4 driver, while Pi 4 and 5's GPU is handled in the v3d driver.abufrejoval said:AFAIK the RP5 VPU is a very distinct architecture and not at all a classic GPU, more of a DSP design extended to deal with graphics and media. I fear that it was a super smart choice for the original Raspberry PI, but struggles to scale with multiplying transistor budgets, while maintaining backward software compatibility.
They tend to at least publish the base specs, though!abufrejoval said:The MALI GPUs aren't publically documented to very high details either, which is why on both platforms developers are busy retro-engineering both of them.
While I don't overclock x86, I have started fiddling with power limits, after discovering that you can raise them even on non-K Intel CPUs. I now run my "65 W" work PC at a limit (i.e. PL1) of 80 W, which its thermal solution can keep below throttling temperatures in the air conditioned room where it resides. This not only gives me better performance after Tau expires, but also gives me a longer Tau (i.e. boost window). I haven't had to change PL2, since I've never seen it reach the stock limit of 202 W.abufrejoval said:On x86 all sane overclocking potential is typically already explored and consumed by the vendors themselves, so I no longer bother to try.... apart for some initial and 'purely scientific' stability testing.
This one seems pretty good, but I haven't tried to independently verify what it's reporting:abufrejoval said:I really need to get some precise measurement tool for the 0.5-20 Watt range at the socket...
https://www.amazon.com/Suraielec-Calculator-Protection-Electricity-Electrical/dp/B08GSPLZBN/
This used to be above the point where Intel CPUs would throttle... I don't love the idea of such high temps. I normally like to keep die temps below 80 C.abufrejoval said:I don't mind chips running at 90°C internally,
IIRC, my Pi v3 I think would would start to soft-throttle around 80 C, but I've seen it go as high as 83 or 84 C.
Smartphones are engineered to minimize idle power, though. They really try very hard, since idle power consumption is inversely-proportional to battery life.abufrejoval said:an SBC like these heating a hefty metal case on idle points to a power consumption that is far above a smartphone without delivering extra value, while those even tend to perform better staying completely cool. -
abufrejoval Reply
Agreed, it's one giant chest filled with benchmarking tools, something for nearly everyone.bit_user said:I like stress-ng, due to the diversity of different methods it has. Hardkernel used the following, in their thermal testing of the N2:
What's a little harder to tell (without looking deeper than I've done so far) is how deeply it can go into modern ISA extensions, which a) allow incredible speedups for some use cases b) often need to be hard-coded in assembly, because compilers can't handle them.
But then I'm far from using these SBC for the supercomputing workloads I run on the bigger stuff in the lab, so it's perfectly ok to just run generic stuff.
I haven't tried compiling prime95 on AARCH64, while I know it's got plenty of hand-crafted assembly code for x86. That I like it mostly for the ability to test the memory subsystem as well and catch instabilities that ordinary benchmarks wouldn't expose.
Anything visual has the advantage of potentially catching invalid data, which in my case is much worse than crashes.bit_user said:
For a more real-world workload, I find that povray is an easy option.
For the four passive N5005 Atoms, they came with a heatsink installed. I just made sure the chassis had enough airflow, too. But they are mostly from a generation of Atoms that still stuck with the 10 Watt max TDP.bit_user said:Where do your source heat sinks? I've found it difficult to locate good quality copper heatsinks of any substantial size. For my Gemini Lake, I found a guy selling some ancient server heatsinks on ebay that fit with a custom hold-down I rigged. But, I've generally been disappointed with the selection of heatsinks I could find either on ebay or even some electronics component suppliers.
My Jasper Lake is a NUC and as such comes with a fan. But I play with PL1/PL2 and TAU on my six NUCs to ensure they never bother.
For the RP5 and OP5 I just take a few of what's offered on Amazon and test them: all of them are too cheap to be worth returning.
I was a bit worried about heat initially, but as far as I can tell the RP5 just won't throttle with the €12 passive case and the OP5 throttles very nicely with a pretty small passive aluminum heatsink that's barely bigger than the SoC itsself and about 20mm in height, so it will just fit in the case.
Under constant max load that has it go from 2.252 to 2.1 GHz while staying near 80°C, which I consider perfectly ok. Throttling used to be terrible, a screeching halt, a dysfunctional system or nearly so.
Today variable peak clocks are perfectly normal for whatever reason and overheating SoCs behave very gracefully, to the point where the OP5+ runs fine (albeit slowly) even without a heat sink. So it's mostly about pushing cooling to the point where it's 'good enough' for the SBC's use case.
Copper and vapor chambers are for stuff that burns 200-400 Watts and I guess it's fluid cooling after that.bit_user said:If the Alder-N board I end up getting has enough space, I might try one of the server heatsinks with a vapor chamber.
The first 24x7 system I was concerned about in terms of noise was my firewall: when the passive Atoms were overwhelmed with the fat packet inspection ruleset I ran on my pfSense on my Gbit uplink, I got an i7-7700T, a 35 Wattt Kaby Lake on a Mini-ITX board with 6 Intel Gbit NICs that would only fit a low-profile Noctua NH-L9i into the chassis. That fan is relatively weak while the heat-sink is astonishingly massive and it turned out a perfect combination that remains inaudible 1m away in a direct visual line. It only needs cleaning every couple of years: dust stopping fans is the main cost of active cooling, and mostly a problem if you just happen to be away when Murphy strikes...
Today it's clearly a candidate for replacement with an i3-N305 offering 2.5Gbit links (should I decide to upgrade the broadband), but so far it's been doing just fine for nearly 8 years.
Even the N305 should stay below that i7-7700T in terms of cooling requirements, while fully passive cooling beyond 15 Watts has near exponential heatsink size implications and just hits a wall before three digit Wattage no matter what.
NVMe for an SBC seemed excessive for a long time, but the only option cheaper today is used hardware: I'm happy to have some use for sticks that are still perfectly good but much harder to recycle than SATA-SSDs, which I can put into JBODs very cheaply and easily.bit_user said:I got some SK Hynix P31 Gold M.2 drives to use on SBCs, due to their excellent power efficiency. However, I take your point that the real issue might not be the amount of heat generated by the drive, but rather how much it picks up from the CPU.
Those Samsung sticks still reported 100% spare capacity when I relegated them to 2nd rank after 4TB PCIe v4 sticks pushed them out of the workstations mostly for capacity reasons. But I like taking care of my stuff and not burn it for fun, while storage is for safe-keeping, after all.
I lack experience with just how badly NVMe sticks will deteriorate under heat, but I don't get paid to find out either. So I try to make sure they stay below 60°C under normal operations. If that requires some glued-on heat sink, I'd slightly prefer that over active cooling, but I don't mind what I don't hear.
They are very nearly the same these days, just a different input to trigger the same action and no longer a survival mechanism that crashes the system. I use the power limits to limit the noise and don't worry about the temperature, at least on the SoC. True, there are measurable differences in longevity which my former colleagues at Bull loved to tell me about, but those are measurable in HPC systems with tens of thousands of active components, kept running as near to peak 24x7 as possible.bit_user said:True. I would tend to use power limits to avoid throttling, however.
I bought Project Lasso only to be told that I should use the free taskset... but I found both rather more confusing than helpful. Since 'work' is always on Linux and cpuctl comes included there, I've given up on managing E vs. P on Windows, especially since I then use 'perf' to measure the results.bit_user said:taskset is what I use on the Alder Lake i9 that I use at work. I forget if I've tried it on the ODROID N2...
Sadly the ARM SoCs are missing the sensors and counters 'perf' uses on x86 s and even the instrumentation for 'perf' on AMD seems to be quite below the level of detail the hardware supports: Intel hardware only measures a summary value for the P and the E core clusters, not for every individual core, which AMD seems able to do, as per HWinfo (Windows), but won't on Linux evidently because it requires an NDA.
There is simply no VP9 or AV1 codec support on the Raspberries and without a dedicated IP block those formats are just a no-go on <10 Watt hardware, especially at today's resolutions. Most streaming services will just adapt and transform their content on the fly using their fantastic dedicated video transcoding hardware, so if Raspberries only support X.265 that should be fine for years to come.bit_user said:That's not great info, since only part of it could be accelerated, or perhaps they're using the GPU's shader array instead of its hardware codec engine.
But if you're trying to consolidate your own material on the most modern and compact codec available, you'd have to look elsewhere.
That's from what they said in interviews. But it's also from what I know about the market.bit_user said:Why would they need to maintain backward compatibility? You know there are different drivers for the VideoCore IV and VI, right? The GPU in Pi 1 to 3 is handled in the vc4 driver, while Pi 4 and 5's GPU is handled in the v3d driver.
First of all, GPU architectures don't come for free. Not only are they costly to develop in hardware and software, they are also a minefield full of somebody else's patents. And those elephants are very unforgiving in defending what they consider their home turf. One of the main reasons why GPU drivers so often weren't made available in source was that it would give the opposition so much more clues about technical solutions both had developed pretty much independently, while only one could win the patent battle. You could come up with a brilliant clean-room design for a new GPU architecture today, yet hundreds of lawyers would shut you down before you'd ever get a test chip from a fab.
It's an area where China doesn't care in its quest for AI sovereignty if not supremeacy, but is still careful not to sell their home-grown GPUs outside either, because that's when they'd get shot down. ARM is using AMD/ATI technology and patents and between team red and green, only team blue has enough money to afford a patent firewall and teams big enough to do both, hardware and software GPU design.
For the Raspberry PI foundation the cost of doing something fundamentally new, would have been prohibitive, while the cost of using a vendor off-the-shelve GPU ip block like Mali, could have easily doubled the licensing cost... for the GPU alone, not including the media codec blocks.
I understand that the RP VPU evolution is a Broadcom/RP co-design using a technical base that is safely different enough from what the big guys are doing, but should they try to come close to their turf, they'd have to pay up big, one way or another.
Same here, except that I only care about the noise and consider temperature as just another input that slows the clocks. While the NUCs will set some boundaries, they are typically way to high for my noise tolerance so I play with TAU and PL1 to keep things at bay, while PL2 typically stays far beyond what you'd expect from a -U class SoC.bit_user said:While I don't overclock x86, I have started fiddling with power limits, after discovering that you can raise them even on non-K Intel CPUs. I now run my "65 W" work PC at a limit (i.e. PL1) of 80 W, which its thermal solution can keep below throttling temperatures in the air conditioned room where it resides. This not only gives me better performance after Tau expires, but also gives me a longer Tau (i.e. boost window). I haven't had to change PL2, since I've never seen it reach the stock limit of 202 W.
On an Erying that uses an -H class SoC on a mini-ITX mainboard for what is essentially a desktop, I've actually raised PL2 to 120 Watts and PL1 to 90, after carefully tuning the cooling and replacing the vendor's filling material on the naked die with liquid metal: it's my fastest Alder-Lake by far.
Thanks, but that won't fit into my 230V mains, I'm afraid... we don't run 'sad faced' power sockets here :-)bit_user said:This one seems pretty good, but I haven't tried to independently verify what it's reporting:
https://www.amazon.com/Suraielec-Calculator-Protection-Electricity-Electrical/dp/B08GSPLZBN/
I'm under the impression you still think of throttling as a self-destruct protection mechanism, while these days we have SoCs transplanted from laptops to desktop throttling just because they are afraid to be 'unfomfortably hot' to human skin (AMD 8700G teething issue).bit_user said:
This used to be above the point where Intel CPUs would throttle... I don't love the idea of such high temps. I normally like to keep die temps below 80 C.
IIRC, my Pi v3 I think would would start to soft-throttle around 80 C, but I've seen it go as high as 83 or 84 C.
Throttling is really just a lowering of the top clocks to fit an operational envelope, that include temperature as one of many meters, which also happens to be related to Wattage.
And while it's obviously a waste of money to buy a 3 GHz chip that only ever runs at 800MHz without cooling, I'm no longer worrying about a system that drops to 90% of top clocks, if it's being hit by a power virus or some runaway workload that is extremely atypical.
Sure, but while most of my systems aren't running on a battery, they run on €0.3/kW/h, so I'd like even my cheap systems to go easy on the juice, especially since they aren't heavily used. But since they run typically in a high-availability cluster, shutting them down isn't really an option, either. It's one reason I'm interested in these mixed low- and high-power cores and having 7 out of 8 sleeping when there is nothing going on.bit_user said:Smartphones are engineered to minimize idle power, though. They really try very hard, since idle power consumption is inversely-proportional to battery life. -
bit_user Reply
Yeah, I think you should just be able to use a profiling tool to see if it's using SIMD extensions. Depending on the code & compiler options used, it's not always necessary to have hand-coded assembly language for decent vector utilization. Compiling with -Ofast implies lossy floating point optimizations, which are sometimes necessary for the compiler to really vectorize something like how you'd expect.abufrejoval said:Agreed, it's one giant chest filled with benchmarking tools, something for nearly everyone.
What's a little harder to tell (without looking deeper than I've done so far) is how deeply it can go into modern ISA extensions, which a) allow incredible speedups for some use cases b) often need to be hard-coded in assembly, because compilers can't handle them.
We need in-band ECC to become more popular.abufrejoval said:Anything visual has the advantage of potentially catching invalid data, which in my case is much worse than crashes.
I think it has more to do with the board than the SoC. My consumer-grade Apollo Lake J4205 mini-ITX board will easily use 25 W, if I set its BIOS to "performance" mode.abufrejoval said:For the four passive N5005 Atoms, they came with a heatsink installed. I just made sure the chassis had enough airflow, too. But they are mostly from a generation of Atoms that still stuck with the 10 Watt max TDP.
https://www.asrock.com/mb/Intel/J4205-ITX/index.us.asp
I got a Corsair PSU with iCUE, last year. I've been meaning to set it up and do some detailed power measurements of that and ma Gemini Lake Refresh board.
That's great to hear, especially since it's said to use more power than the Pi 4 and that had throttling problems.abufrejoval said:I was a bit worried about heat initially, but as far as I can tell the RP5 just won't throttle with the €12 passive case
I had a situation with my Pi 3 where I found a good aluminum heatsink and a not so good copper heatsink. They performed similarly, although multi-core workloads very quickly throttled with either. Hence, my frustration. If the copper heatsink had been designed to the same standard as the aluminum one, I'm sure it'd have performed noticeably better.abufrejoval said:the OP5 throttles very nicely with a pretty small passive aluminum heatsink that's barely bigger than the SoC itsself and about 20mm in height, so it will just fit in the case.
The first vapor chamber server CPU heatsinks I found came in the Sandybridge era, when the hottest Xeons probably didn't exceed 165 W, if that. They're not limited to those models, though. I'm sure they were also used on CPU models even near 100 W.abufrejoval said:Copper and vapor chambers are for stuff that burns 200-400 Watts and I guess it's fluid cooling after that.
Yeah, I bought a Samsung PM9A3 110 mm M.2 drive for a fileserver machine. It's dual-sided and has no heatsink. I think I found some datasheet indicating typical power usage that caused me to worry about cooling. That sent me on a quest for decent, aftermarket 110 mm M.2 heatsinks, but there's virtually nothing out there which provides adequate coverage of both sides! The best thing I could find was this:abufrejoval said:I lack experience with just how badly NVMe sticks will deteriorate under heat, but I don't get paid to find out either. So I try to make sure they stay below 60°C under normal operations. If that requires some glued-on heat sink, I'd slightly prefer that over active cooling,
https://www.ebay.com/itm/155880372217
It's a bit flimsy and I wonder how well it will really conduct heat away from the underside, but I'm sure it's better than nothing! I plan to smear heatsink compound along the mating surfaces where the top and bottom half overlap.
True, but fans do burn power. And there's dust, as you mentioned.abufrejoval said:but I don't mind what I don't hear.
I'm talking about Linux, so I don't know if Project Lasso is available for it, or if Windows also has something called taskset. On Linux, the only confusing thing about taskset was figuring out which core IDs corresponded to which cores & threads. I think the syntax was also a little weird, but I basically just put my main use cases in shell aliases and now I don't even think about which tool I'm using, anymore. I recently had to check, in fact!abufrejoval said:I bought Project Lasso only to be told that I should use the free taskset... but I found both rather more confusing than helpful. Since 'work' is always on Linux and cpuctl comes included there, I've given up on managing E vs. P on Windows, especially since I then use 'perf' to measure the results.
How do you know? And how can companies like AMLogic and Rockchip afford not only to license that IP, but also use better fab nodes and still hit price points close to the Raspberry Pi?abufrejoval said:For the Raspberry PI foundation ... the cost of using a vendor off-the-shelve GPU ip block like Mali, could have easily doubled the licensing cost... for the GPU alone, not including the media codec blocks. -
abufrejoval Reply
ARM licensing is under NDAs so those who really know, can't tell.bit_user said:How do you know? And how can companies like AMLogic and Rockchip afford not only to license that IP, but also use better fab nodes and still hit price points close to the Raspberry Pi?
But I've been able to gather points, at least how they were applied in the past.
Generally in ARM licensing, small cores are a lot cheaper than big cores, especially if you already licenced a big core. Also additional CPU cores are much cheaper than the first. There have been smartphone SoCs for the Chinese domestic market in the past, which used as many 10 small cores to take advantage of that (and deal with those unhinged apps in China, that would just monopolise a core and suck the battery dry).
So generally going with mid-range cores, only, licensing becomes much cheaper and that's what a lot of set-top boxes are doing. And it seems similar with GPUs, if you use a previous gen mid-range GPU, license costs drop significantly. But where additional CPU cores seem to cost next to nothing, after you've licensed the first, the bigger GPU build-outs (MPn) may be more linear, while there are quickly diminishing returns, too.
With the fabs the story isn't that different, you can a) get capacity much more easily on nodes that are no longer leading edge, b) production fees can be much lower, as the equipment is mostly depreciated and special offers can be made to load the production lines. Of course, that's not a guarantee as we've seen during Covid, when these older nodes were actually in unexpected demand and chips that had been designed to take advantage of lower fab spot prices were simply not produced at all or much later.
Fabbing is already a complex business and the 28nm SoC on the RP5 isn't automatically a chip more than 2x as bad (or as power hungry) as an RK3588 just because it officially sails under a 12nm flag. Contracting fab volumes over time and with variability in volume (and packaging) adds so many variables to the equation, that comparing their impact on product price becomes very difficult indeed. Scale certainly helps and the RK3588 might outsell the RP5 by far, because it's in so many more product classes: E.g. I can't imagine the Raspberries even sell much in China, while settop boxes based on AMLogic and Rockchip may be produced and sold in vastly bigger numbers there.
The RP5 isn't really designed to deliver the best possible price/performance point like those other more industrial SoCs. It's designed to get the most out of a given price point and be as usable as possible with a classroom that includes older PIs. My RP5 and my RP4 boot just fine off the very same (SATA-SSD class) USB3 stick and that is a giant plus in education but also in hobby use, much less in a closed function appliance.
Colleages of mine had their own ARM SoC produced by TMSC with fortified physical security and higher USB2 power loads for payment terminals perhaps 10 years ago. They contracted a single run and I believe they still have plenty of chips left over. Getting a few thousand extra chips was negligible cost, potentially having to do a 2nd run, would have been way more expensive. There eyes still lit up with pride many years later ("we made our own chip at TMSC!"), btw.